Tag: diy accessories (page 3 of 4)

Merry Christmas and Happy New Year

Merry Christmas and Happy New Year

Merry Christmas and Happy new year to all  my wonderful followers. Because of you I have had a wonderful, fun year and I am excited for next year!

Hello Everyone!

As this year comes to a close I wanted to take a moment and say thank you for making this year pretty great. I had so much fun creating new thing and making tutorials for you enjoy.

I think every blogger says this, but in my case it is true, but I have the best followers! You guys are fun and supportive! Whether you follow me here on the blog or on my other social platforms you guys are just the best!

I will close this year with a pic of a collage that I have on my desk. I love this quote from Curly Girl (if you don’t know who that is  you have to follow her. Her designs are wonderful, I love them! You can find her here: Curly Girl Designs)

I took this quote from a planner, “We must take every opportunity to make the most of our very remarkable life,” and made a quick collage. I love having it near my work area as a perfect reminder that this is all pretty remarkable.

Have a safe holiday season and I will see you in the new year with new projects, ideas, and tutorials, and a You Tube Channel! Yikes, yes I am going to start a You Tube Channel to help demo even more things. (I will admit I am a little nervous about this, but it will be fun!)

So many new things for the new year! It is going to be amazing!

See you in 2017!

Linda


Easy DIY Gift Ideas

Easy DIY Gift Ideas

Need a last minute gift? Here is a list of easy DIY gift ideas that will help you check everyone off your list.

Hello Everyone!

Are you at a loss as to what to get or make some of the people on your list? I have the same problem, I get craft-blocked (kinda like writer’s block, but for crafting, haha) when it comes time to make a gift.

So I thought I would go back through my posts and compile and easy list for you reference, easy gift ideas at your finger tips. These gift are great not only for Christmas but for Birthdays, Easter, Weddings, House warming, and almost any occasion.

Just click on the link and it will take you the post with all the details you need to make your own DIY gifts.

  1. Button Magnets. Vintage buttons glued on a magnet make a really cute gift.
  2. Wood Burn Coaster. This gift is fun to personalize with initials or something they like. Just burn in the design, seal it and add felt and you have a gift that will be treasured.
  3. Gift Bag Art. There are a lot of wonderful gift bags at the Dollar Store. Just cut to size and frame and you have a gift that can fit almost any occasion
  4. Vases. Empty jars and beverage containers make wonderful gifts when they are all decorated with raffia, jute, flowers, and rhinestones. 
  5. Christmas Mason Jars. These jars are a very versatile gift just by changing out the flower on top, add candy to the jar and you are good to go. 
  6. Agate Coasters. These coasters are a beautiful addition to any home and are super easy. Just paint on the edge with a paint pen and add felt the bottom. 

The post Easy DIY Gift Ideas appeared first on Take Time To Create.

DIY Christmas Tree Earrings

DIY Wire Christmas Tree Earrings

Make the holidays merry with these easy DIY wire Christmas Tree earrings.

Hello Everyone

Do you ever dream about crafts, or is that just me? The other night I was dreaming about making wire Christmas Tree earrings, I know a little random but since I dreamt it I just had to try to make them.

Now the funny thing is is that I have never made anything like this before. I don’t usually work with wire, but I found that I love this technique and I have more ideas to make more jewelry.

Christmas tree earrings

I just love how my Christmas tree earrings turned out

Materials

  • Thin Wire- You can find it on Amazon here: Artistic Wire
  • French Hooks- You can find it on Amazon here: French Hooks
  • Star beads- I found mine at Oriental Trading- link here: Star bead, but the local craft stores might have something similar
  • Pliers and clippers and round objects in various sizes (this is to wrap the wire around)

Instructions:

You need to have a variety of round objects in various sizes. I started with a large marker and started wrapping, then I went to smaller marker then a pencil

Starting to wrap my Christmas tree earrings

I am starting to wrap my Christmas tree earrings

A smaller wrap for my Christmas tree earrings

Switching to a smaller wrap

The whole idea is to make the tree get smaller as you wrap it around. I wrapped it around each object about 3 times.  The wire I used was a bit thin, but it is a nice dainty look, but next time I think I will use a wire that is a bit heavier duty. This wire likes to bend a bit too easily for my liking. but I did like how it turned out.

Once I finished wrapping I added a french hook. Then I spent some time adjusting the wire to make sure it looked like a tree. I hind sight I probably should have used green wire, but I didn’t have that in my stash, so gold it is, lol.

When I looked at it I thought it was a bit too plain, so I thought I would add a star bead to the top.

I think the star bead is just what the trees needed! These earrings will be perfect the holiday parties this year.

Christmas tree earrings

The finished Christmas tree earrings


If you enjoyed this post, make sure you Follow Take Time To Create so you don’t miss out on other great posts.

Follow Take Time To Create on WordPress.com


This post contains affiliate links. Thank you for your support.

This post DIY Christmas Tree Earrings appeared first on Take Time To Create

diy-pillows-burlap-coffee-sacks

Sewing Craft Project Burlap Pillows

Used burlap coffee sacks make for a great sewing craft project… they also make make great pillows. They are fun and unique and perfect for any decor.

Hello Everyone!

sewing craft project burlap pillow case

Finished burlap pillow case

Today is a cold, wintry day and I am inclined to stay inside all day (I do have to go to work, but when I get home I am going to snuggle down and say warm) anyway, as I think about staying home I am reminded of this sewing craft project I did where I made pillows from Burlap sacks. I did this a while ago, but I still love them so much. I think they are perfect for my decor. 

Materials:

  • You will need the used burlap sacks that is used for coffee. I originally purchased mine on eBay, but I did find some on Amazon. You can use this link: Burlap Coffee Sacks.  There are a lot of vendors for these sacks so you have your pick! But they usually come with random patterns, I don’t think you are able to pick your pattern. So keep that in mind when purchasing. 
  • Pillow form. I found mine at Ikea, they have the best prices for pillow forms
  • Needle and thread, or sewing machine. 
burlap sacks

This sewing craft project starts with burlap bags

Instructions:

Cut your sack to the dimensions of your pillow form. If you want the pillow to look more full then cut the sack a bit smaller. (I have to be honest here, I didn’t actually sew these pillows. My fabulous mom sewed them for me. haha, I don’t know what I would do without her.)

Once it is cut, pin the right sides together and sew the right sides together. Leave a little hole so you have room to put your pillow form in. 

Stuff your pillow and stitch the hole. 

finished sewing craft project

Here is another finished pillow

That is it, very easy to make a custom pillow for your home. You can use this technique for almost any fabric.  I love how easy it is to update your decor, and reusing items that might otherwise land in the landfill is a double awesome!

BTW if you are wondering how I painted my couch green you can check out this old post: Painted Couch

burlap-pillows-3

This post DIY Pillows from Burlap Coffee Sacks appeared first on Take Time To Create


If you enjoyed this post, make sure you Follow Take Time To Create so you don’t miss out on other great posts.

Follow Take Time To Create on WordPress.com


This post contains affiliate links.


Painted Christmas Houses

Painted Christmas Houses

You can find these really cute ceramic houses just about anywhere, with just a little paint and glitter they are ready to be put on display. 

My finished Christmas houses on display

Hello Everyone!

December is rolling along and it is time for me to think about decorating. The tree is up, and if you follow me on Instagram you probably have seen our tree by now. (@taketimetocreate).

With any holiday I always feel the need to create some new items. This year I made some painted Christmas houses.  I found the unfinished ceramic houses at our creative reuse center Who Gives A Scrap (I love that place!) With a little paint and glitter they were ready to go.

Materials:

  • Ceramic House (You can get these at a creative reuse center, craft stores, and sometimes the thrift stores will have some unfortunutally painted ones that need an update)
  • Paint and glitter found at the craft store. I really liked this paint, it was white with a little pearl look to it. Perfect for Christmas.

paint-and-glitter

Instructions:

Take your plain ceramic house and paint on a layer of white paint. You can always spray paint the houses, but I just decided to hand paint instead.  This is what it looks like before the paint.

(btw, The houses did come with detailed instructions to paint the house in all the colors, but I did not want to take the time to do any detailed painting. haha. So white paint here I come. )

Painted Christmas houses before glitter

My Painted Christmas houses before glitter

Add the paint. This is what it looks like with the paint. Go over everything, all the little details. Don’t forget the inside of the windows.  Touch up where ever you forgot.

Painted Christmas houses before glitter

My Painted Christmas houses before glitter

Then I decided to add some glitter detail to the snow and trees. Just pick a clear holographic glitter that goes with your paint. I put a layer of mod podge on then sprinkled it with glitter.

add glitter painted Christmas houses

Adding Glitter to the painted Christmas houses

Once they are dry they are ready to be put on display.

I think they turned out really cute. You can put lights in the bottom, but I didn’t have any. So this weekend I will pick up some and then they will look even better!

painted Christmas houses on the mantle

Close-up of the painted Christmas houses on the mantle

painted Christmas houses

Here are the finished painted Christmas houses


Subscribe via WordPress


The Take Time To Create Crafting Blog RSS Feed

Subscribe via Email

Enter your email address to subscribe to this blog and receive notifications of new posts by email.


Other Ways To Follow


The Take Time To Create Crafting Blog RSS Feed

Subscribe to my RSS feed

The Take Time to Create Crafting Blog Facebook Page

Follow me as Facebook

The Take Time to Create Crafting Blog Etsy Shop

Check out my my Etsy Shop

The Take Time To Create Crafting Blog Pinterest Board

Visit my Pinterest Board

Other Ways To Follow


The Take Time To Create Crafting Blog Instagram

Follow me on Instagram

The Take Time To Create Crafting Blog Twitter Feed

Follow me on Twitter

The Take Time To Create Crafting Blog Email

Send Me an Email


DIY Ornaments from Magic Towels!

Hello Everyone! With the holidays right around the corner it is time to start thinking about decorating. And since we are on a crafting blog, this post is about DIY Ornaments. This is an easy project that takes magic towels and turns them into ornaments and it is fun to do with the kids. 

DIY Ornaments - Dory

My Finished Dory DIY Ornament

I hope you had a wonderful relaxing Thanksgiving holiday. We had a great time, we went to Florida for the week and it was perfect. Stay tuned, I will do a travel journal about the resort we stayed at.

With Christmas right around the corner I thought I would start doing some holiday crafts and today’s is a DIY ornament.

Materials for your DIY Ornaments:

  • Magic Towels (I used a Dory one and an Avengers one, and I got both from the dollar store)
DIY Ornaments - Magic Towel

We start with a simple magic towel.

  • Ribbon
  • Stuffing
  • Hot glue gun and glue sticks

Instructions:

Cut around the shape that you want to make into an ornament. And cut out that same shape in a plain colored wash cloth.


Cut out magic towel

Next, we cut out the parts we want to turn into ornaments.

Then you start gluing. Glue the pom-pom ribbon ) around the edge and then glue the black ribbon to the top.  I used hot glue for all my gluing, but if you are doing this with kids then you might wan to use fabric glue. You can also sew these together, but me and my sewing machine are not getting along right now, so my hot glue gun came to the rescue.

Then glue the plain wash cloth to the back, but make sure you leave a little gap so you can add stuffing. Add a little stuffing and glue the gap closed.

The ornament's backing

Then, add ribbon and glue together.


And that is it. These are great for kids and easy to do. Kids will like having their favorite characters on the tree.

Avengers ornaments

Here are the finished ornaments.

This post DIY Ornaments from Magic Towels appeared first on Take Time To Create


Subscribe via WordPress


The Take Time To Create Crafting Blog RSS Feed

Subscribe via Email

Enter your email address to subscribe to this blog and receive notifications of new posts by email.


Other Ways To Follow


The Take Time To Create Crafting Blog RSS Feed

Subscribe to my RSS feed

The Take Time to Create Crafting Blog Facebook Page

Follow me as Facebook

The Take Time to Create Crafting Blog Etsy Shop

Check out my my Etsy Shop

The Take Time To Create Crafting Blog Pinterest Board

Visit my Pinterest Board

Other Ways To Follow


The Take Time To Create Crafting Blog Instagram

Follow me on Instagram

The Take Time To Create Crafting Blog Twitter Feed

Follow me on Twitter

The Take Time To Create Crafting Blog Email

Send Me an Email


Mixed Media Canvas Celebrating Family

Mixed Media Canvas Celebrating Family

Hello Everyone!

Today I have another mixed media tutorial. I love making mixed media art, it relaxes me and soothes my soul. This is another Finnibair inspired canvas. I love her work, she inspires me so much and I learn a ton from her techniques.

family-mixed-media

This canvas celebrates family. Family is so important and I wanted that to be the focus of this canvas.

I have made other mixed media canvas and you can visit them here:

Frozen Mixed Media

Dragon Mixed Media

Angel Mixed Media

Materials:

  • Canvas, black gesso, brushes
  • Mica powder, spray bottles, stencils, modeling paste, acrylic paint, spray clear coat
  • Flowers, letters, beads, cheese cloth and anything else you want to put on your canvas.

Instructions:

First you add all  your flowers and letters and doo-dad on a canvas. I put black gesso on my canvas before I started. Then I went to town. Add stencils, cheese cloth, flowers, letters, beads, buttons, and broken jewelry. Anything to add interest and texture. I didn’t really care about the colors, just texture because I knew it would all be covered up.

layer-the-pieces-on-the-canvas

Once you have everything secured with modeling paste then cover it all with black gesso. Cover all the ins and outs and little spots,  you want it all black with nothing showing. This will take a while, but it is worth it to take your time and do it right.

add-black-gesso-to-everything

Once it is all dried it is time for the fun part. I added piles of mica powder all over the canvas. Then I took a spray bottle and sprayed water to spread the mica powder and create a shimmery, metallic look.  I did this a few times and once I was done with how it looked I dry brushed acrylic paint on the canvas. I just highlighted the tips of the flowers and the Family letters, The dry brushing was just to add some more detail to the canvas.

add-mica-powder-to-canvas

spray-the-mica-powder

After the paints dried I added some metal flowers to add detail. It was the missing piece to bring it all together.

family-up-close

up-close-detail

I really like how it turned out, what do you think? These are so much fun, I can’t wait to show you the next mixed media project I am working on.

family-canvas-mixed-media

Transforming Your Old Figurines

Hello Everyone!

Meet Issac. He is my new friend that sits on my desk at work. It was a simple task of transforming an old figurine from a golden owl into something amazing. Why is his name Issac? No particular reason except I asked my son what his name should be and Issac as suggest, and the name stuck. Perfect name for an owl.

issac-on-my-desk

Now, I will admit I particularly like birds, especially Owls. But, when I saw this disguised looking owl at Goodwill I knew that he had to come home with me.

owl-in-all-its-golden-glory

I just love how professional he looks with his suit and tie, He looks so serious. And the fact that he is a bust of an owl just cracked me up.  But he was gold. I didn’t think he really liked being a 70s fantastic golden owl, so I decided to help him out.  As I looked him over I noticed that he was white under his label so my thought is that he was originally white, which would be really cute as well.

But he needed to be Oil Rubbed Bronze.

spray-paint-your-owl

Protect your work space and spray in light, even coats, repeating as necessary. When he is completely covered let him dry. Once he is dried he is ready for display and he is ready to impart his wisdom.

finished-owl

I love covering my thrift finds with spray paint. I painted this Candle Holder,  and these Porch Lights, and these lanterns.  You never know what I will paint next. 

DIY Halloween Erasers

Hello Everyone!

Update: Check it out this post has been added to Fun Family Crafts!!!

One of the best ways to spruce up your desk is to add some custom DIY erasers.  They are so easy to do and they look so cute on your desk at work or school. They also make perfect gifts, or they would be tons of fun to make at a party.

diy-halloween-erasers

Materials:

There are affiliate links below

  • Eraser Clay (I found this one on line at Amazon, but there are different brands, so pick one that works for you)

ceatibles-diy-eraser-kit

  • Molds (I used ice cube trays from the Dollar Store, or you can free form your designs)

mold-trays-for-eraser

  • Oven

Instructions:

The first thing you do is knead your clay. You want to warm it up and make it pliable and easy to work with.

knead-the-eraser-clay

Once the clay is easy to work with then press it into a mold you like. ( I used a mold because shaping things out of clay is not the easiest thing for me. Molds just made the process a lot easier) You can make almost anything out of the clay. It is really easy to work with.

press-clay-into-mold

Once you have your design pop it out of the mold. I just put a little on the bottom of the mold then I popped it out and added a layer on the bottom of the design to smooth out the bottom. You can also add enough clay to fill the whole mold. It does make a larger eraser, but it looks really cool. You can layer colors or mix them to make a new color. There are so many possibilites.

diy-erasers

Bake the erasers according to the directions and let them fully cool before using.

bake-according-to-directions

They actually work. When I first got this product I thought they might be a little gimmicky and not work well, but I was pleasantly mistaken they actually work really well!

diy-erasers-actually-work

They turned out so cute I think I might need to make more for every holiday!


halloween-erasers

The Post DIY Halloween Erasers appeared first on Take Time To Create.


DIY Cell Phone Case From Old Tie

Hello Everyone!

I found this fantastic store in town, it is call Who Gives A Scrap. (BTW I love the name!) Anyway, this store is so awesome it has all kinds of craft supply donations that are up for sale. The stock is always changing so you never know what you will find. If you follow me on Instagram you already saw my haul, but this what I scored yesterday for about $25! The item I am most excited about is the bead loom. I have tons of pins on Pinterest for the bead loom and now that I have one I am excited to learn how to use it. Does anyone have any experience or tips on how to use a bead loom? Please share if you do.

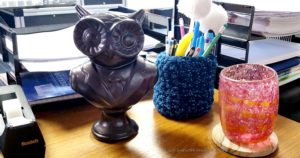
So many new things to play with and to use for my crafts and DIY projects. Even our cat, Starlight, approves. haha.

DIY Cell Phone Case From Old Tie


The other day my sister and I were having a Craftersation on Pinterest. (A Craftersation  is a craft conversation between pinners on Pinterest.) She has the best Pinterest boards and I think she has pinned just about everything on the internet, haha. You can follow her here.

Anyway she pinned this really cute cell phone case made from an old tie so I pinned a different version of the same thing. And on it went for while. We have a lot of Craftersations, it is a fun way to stay connected and see what each other is interested in even though we live almost a thousand miles apart.

When I was at Who Gives a Scrap I saw that they had some old ties that would be perfect to make a cell phone case out of. After I got home yesterday I made my version of what I saw on Pinterest.

Here it is all done. I am in love with it!

DIY Cell Phone Case From Old Tie

Materials:

~Old Tie

~ Needle and thread, or sewing machine

~ Button or snap

Instructions:

This is one of the ties that I picked up yesterday. Isn’t it wonderful? I fell in love with it on the spot. For this project the wider the tie the better. Skinny ties from the 80s won’t work, but those ties can be use for different projects.

DIY Cell Phone Case From Old Tie

Next just measure how much space you need for your phone. The pointed part will be the flap, so factor that in. You will have to pick out the stitched that keep the flaps together so you can slide your phone in.

DIY Cell Phone Case From Old Tie

For this step I glued the ends together and the center flap closed using Fabric Fusion. I used clothes pins to hold it together while the glue dried. The glue worked just fine, but when I do this project again I think I will sew it all instead of using glue, I think it will be stronger and it will look better. You can hand stitch or use a machine.


DIY Cell Phone Case From Old Tie      DIY Cell Phone Case From Old Tie

Next I hand stitched on these buttons I had in my stash. They are so cute, I got them from Patterns of Time. They have so many great items on their website, when I ordered last it was hard to narrow down the items in my shopping cart to a reasonable amount, haha.

DIY Cell Phone Case From Old Tie

The case was all complete I thought it was very cute just the way it was but I decided that it should become a purse instead of just a case. This Tie Purse is perfect for me when I go out for an evening and my skirt doesn’t have pockets and I need to carry a phone and my ID and a credit card and some cash, it will all fit into this cute purse.

To add the straps all you do is hand sew the remaining part of the tie onto the sides of the case. And that is it.

DIY Cell Phone Case From Old Tie

Have you made one of these before? I would love to see it if you have. Stay tuned for more projects made from items I got from Who Gives A Scrap, that place rocks!!

DIY Cell Phone Case From Old TieDIY Cell Phone Case From Old Tie

There are no affiliate links in this post. All opinions are my own.

« Older posts Newer posts »

© 2024 Take Time To Create

Theme by Anders NorenUp ↑

Follow

Get the latest posts delivered to your mailbox:

%d bloggers like this: