Category: Halloween

DIY Skeleton Jewelry and Hair Clips

Hello Everyone!

Another day in Oct and another Halloween Craft. This time it is some DIY jewelry.  This is perfect for people who want to celebrate Halloween without going for the full blown costume. You can wear this at work or school without going over the top and it is easy to take off if needed.

Skeleton Jewerly

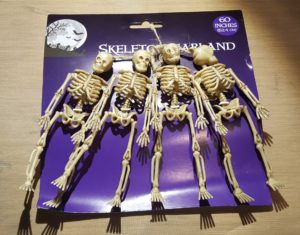
This is an easy project that looks so cute when you are done. First find some plastic Skeleton Garland. I found mine at the Dollar Store.

Skeleton garland

Then take it apart. I used different piece for different types jewelry and hair clips.

take the garland apart

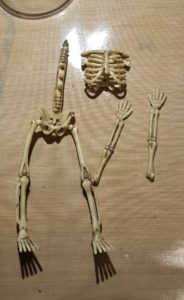
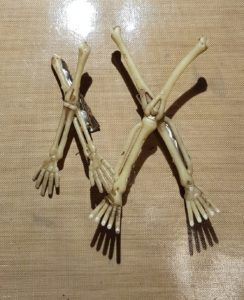
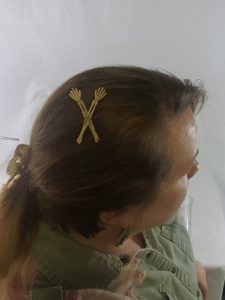
I used the arms and legs from 1 skeleton to make hair clips. Just cut off the arms and legs and hot glue them to an alligator clip.

hair clips

arm bones hair clip

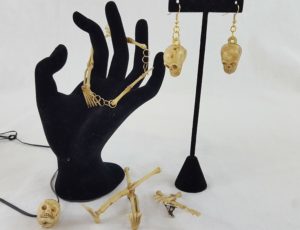
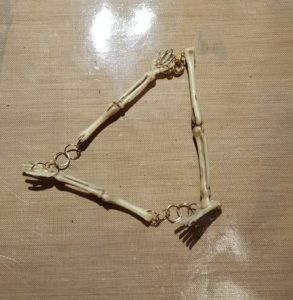
For the bracelet cut off some arms and legs, then punch a hole near the top. I used a needle punch, then I added jump rings to connect the pieces. Add a clasp and you are done.

punch a hole

bracelet

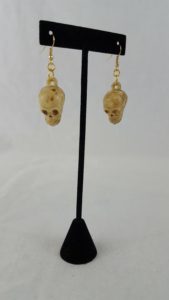
I make a pair of skull earrings by adding jump rings and a french hook. Easy to do, and so cute when completed.

skull earrings

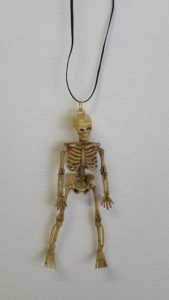
For the necklace I just added a jump ring to the top of a whole skeleton. I also made a necklace out of just the head.

skeleton necklace

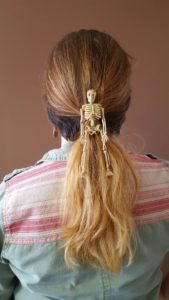
I also made a hair clip out of a whole skeleton. This one was fun to wear.

skeleton hair clip

The skeletons made great jewelry and hair clips, they were fun to take apart and reassemble in new ways. And since they are light weight they are easy to wear for long periods of time.  These are great for almost anyone to celebrate Halloween or for anytime when they want to wear skulls and skeletons.

The post DIY Skeleton Jewelry and Hair Clips appeared first on Take Time To Create

DIY Halloween Erasers

Hello Everyone!

Update: Check it out this post has been added to Fun Family Crafts!!!

One of the best ways to spruce up your desk is to add some custom DIY erasers.  They are so easy to do and they look so cute on your desk at work or school. They also make perfect gifts, or they would be tons of fun to make at a party.

diy-halloween-erasers

Materials:

There are affiliate links below

  • Eraser Clay (I found this one on line at Amazon, but there are different brands, so pick one that works for you)

ceatibles-diy-eraser-kit

  • Molds (I used ice cube trays from the Dollar Store, or you can free form your designs)

mold-trays-for-eraser

  • Oven

Instructions:

The first thing you do is knead your clay. You want to warm it up and make it pliable and easy to work with.

knead-the-eraser-clay

Once the clay is easy to work with then press it into a mold you like. ( I used a mold because shaping things out of clay is not the easiest thing for me. Molds just made the process a lot easier) You can make almost anything out of the clay. It is really easy to work with.

press-clay-into-mold

Once you have your design pop it out of the mold. I just put a little on the bottom of the mold then I popped it out and added a layer on the bottom of the design to smooth out the bottom. You can also add enough clay to fill the whole mold. It does make a larger eraser, but it looks really cool. You can layer colors or mix them to make a new color. There are so many possibilites.

diy-erasers

Bake the erasers according to the directions and let them fully cool before using.

bake-according-to-directions

They actually work. When I first got this product I thought they might be a little gimmicky and not work well, but I was pleasantly mistaken they actually work really well!

diy-erasers-actually-work

They turned out so cute I think I might need to make more for every holiday!


halloween-erasers

The Post DIY Halloween Erasers appeared first on Take Time To Create.


DIY Faux Stone Pumpkins

Hello Everyone!

I hope your October is going well! I can’t believe how fast it is flying by! In fact the whole year is going too fast.

To celebrate everything pumpkin I made this easy, diy faux stone pumpkins.

finished-faux-stone-pumpkins

Materials:

  • Pumpkins ( I used ceramic ones from the dollar store, but almost any pumpkin will work)
  • stone-pumpkins-before-pic
  • Spray Paint Primer
  • Rust-oleum stone spray paint

Instructions:

After cleaning your pumpkin and protecting your work surface spray a coat of primer on all the pumpkins on all sides

add-a-layer-of-primer

Now it is time to paint. Have you seen this faux stone spray paint? It is awesome! I have a feeling that everything will become faux stone. The texture and look changes the closed you get to your project. It is a versatile tool that I have a feeling I will be using a lot in the future.

spray-paint

For 1 pumpkin I wanted to to use the darker color so I sprayed a base of oil rubbed bronze before the stone.

add-a-layer-of-oil-rubber-bronze

Then go to town painting the pumpkins. I did add a layer of the lighter color to the darker pumpkin because it was not matching well. But just keep going and paint layers according to the directions until you are happy with the results.  I am thrilled with how they turned out! So very cute

start-adding-the-faux-stone-spray-paint

If you want you can spray a  sealer over the top to protect them.  I think these would look really cute outside as part of your outdoor decorations. Just be sure to protect them first.

completed-pumpkins

And here they are as part of my DIY Painted Halloween Village display.  I think they added a nice touch to the display.

finished-houses-in-my-home

DIY Painted Halloween Village

Hello Everyone!

Halloween is fast approaching, and of course I get it in my head that I want to do some new Halloween decor.  At least this year I am getting it done before Halloween and not after, haha.

I saw a Halloween Village at the Dollar Store and thought it would be perfect to paint for Halloween

finished-village

Materials:

  • Ceramic houses (I found mine at the Dollar Store, but there are a lot of options out there. You could even use Christmas houses)
  • Metallic Paint
  • Gesso
  • Brushes, Stucco, Beads

Instructions:

When I saw these houses I thought that they were very cute, but the colors were not great. I didn’t think that they went together very well and the figurines were terrible.

before-house-2

before-houses

before-up-close

Before the painting fun I had to prep the houses. I cleaned them then added a layer of Stucco to the roofs and anywhere there needed to be a rough detail. Then I added some beads to the grass area.


stucco-and-beads

add-stucco-and-micro-beads

After the texture was dry I added a layer of black gesso. This gave me a blank canvas to work on. I did have to go back and touch up areas that I missed.

add-gesso

After the gesso was dry it was time for the fun painting! I used metallic acrylic paint and I mixed some Mica Powder with soft gloss gel for the green. I just dry brushed the colors onto the housed, adding and blending as I went. Once I was happy with the look I went on to the next house, until I was finished with the project.

paint-colors

keep-painting

start-painting

Here is an up close picture of the detail of one of the houses and the bridge.

up-close-detail

And here it is on display in my home. I really liked this project, it was fun to watch the housed change right before my eyes. Good thing I bought more houses from the Dollar Store, now I can create even more villages, haha

finished-houses-in-my-home


© 2024 Take Time To Create

Theme by Anders NorenUp ↑

Follow

Get the latest posts delivered to your mailbox:

%d bloggers like this: