Tag: diy accessories (page 2 of 4)

DIY Cactus Outdoor Mat

Hello Everyone!

This post contains affiliate links

I am loving summer! The long, hot days, endless sunshine. We have been spending a lot of time on our back porch, and I noticed that we needed a new outdoor mat in front of our door.

So I gathered some materials and created this DIY cactus outdoor mat.

Here is the video tutorial:

Materials:

Instructions:

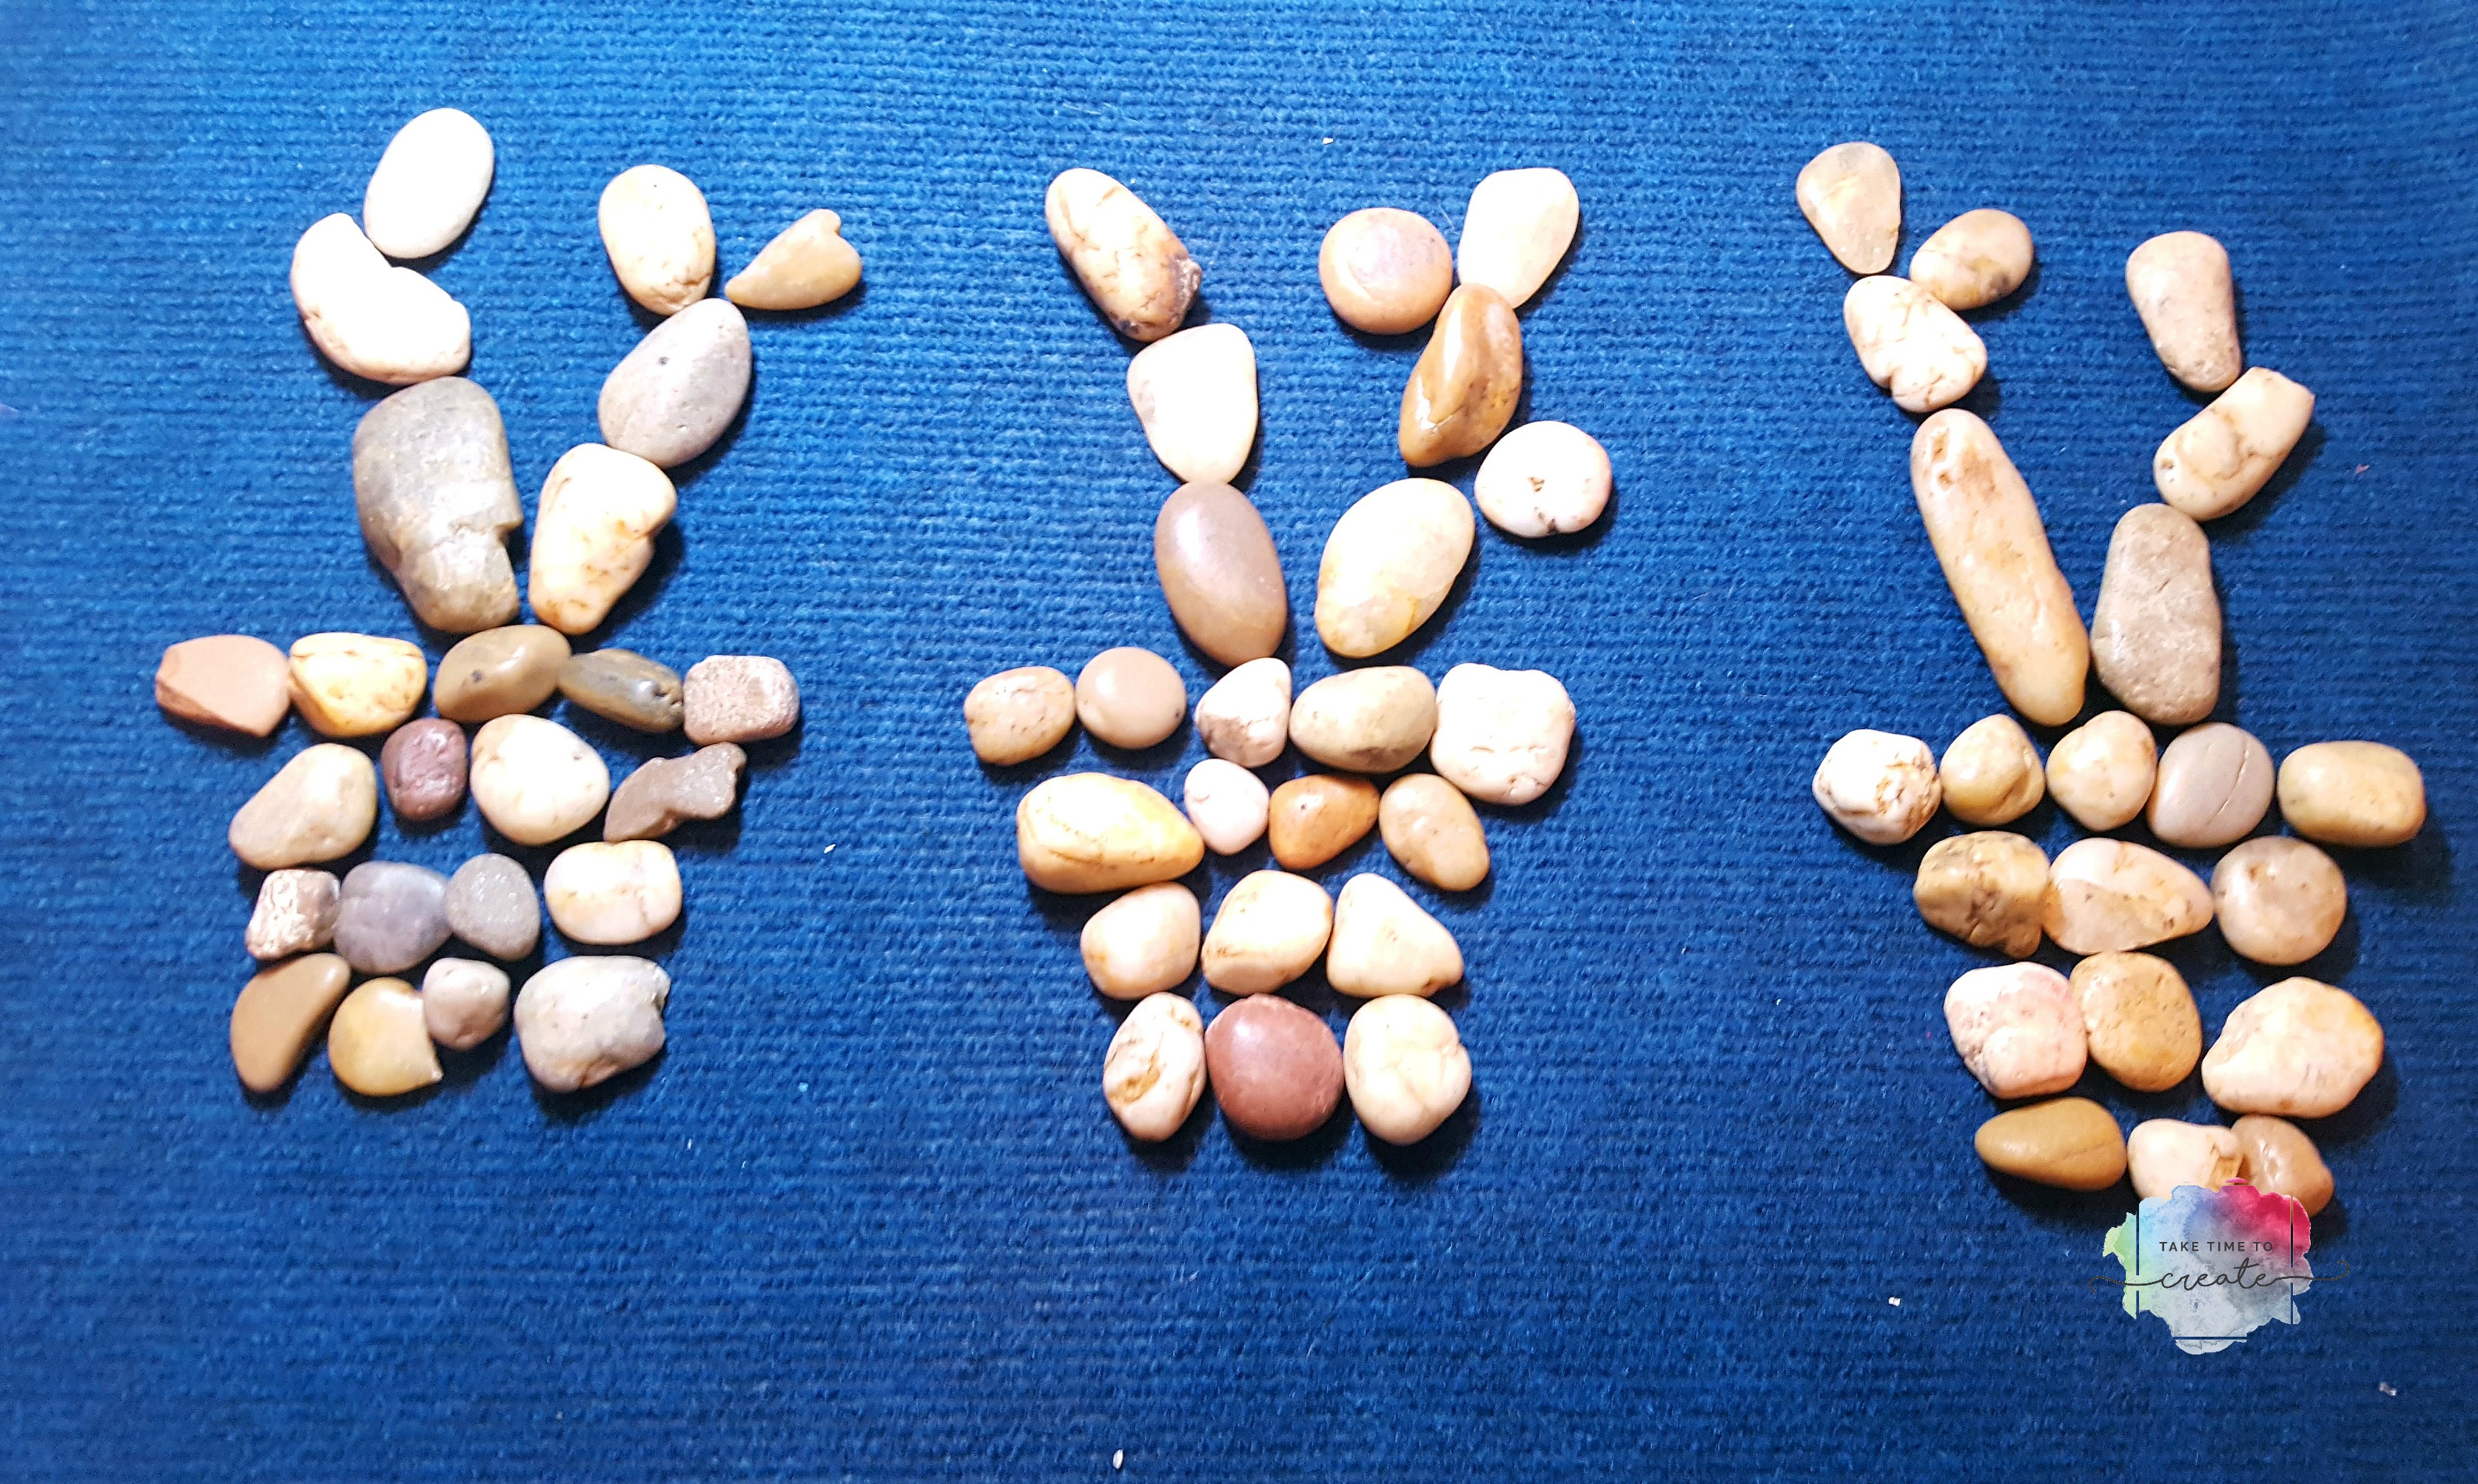
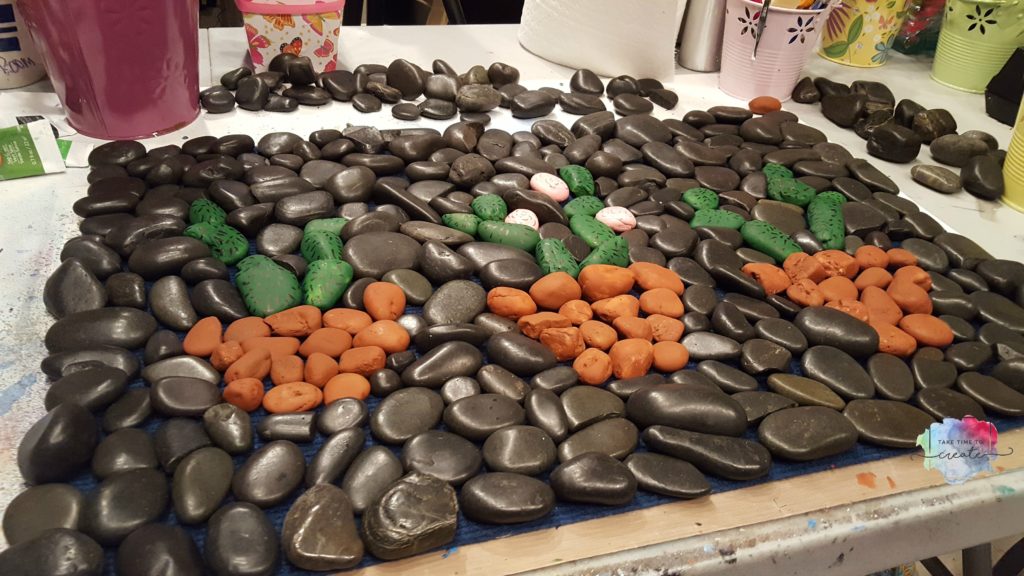
The first thing you do is grab an outdoor mat ( I found mine at the dollar store) and some rocks (Dollar store, lol) and start arranging them. I made some rough cactus shapes to start.

DIY Cactus Outdoor Mat

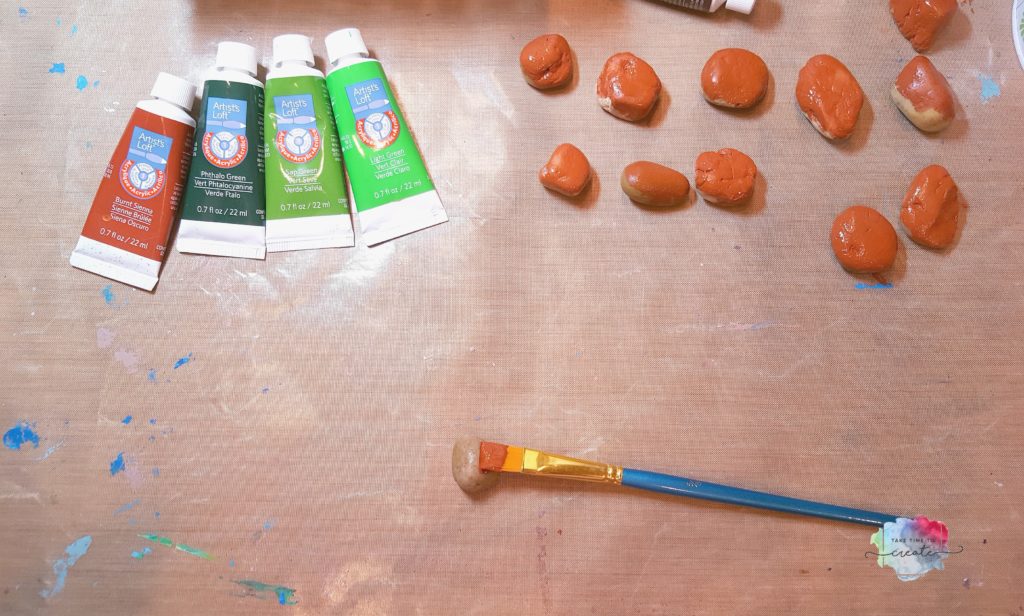
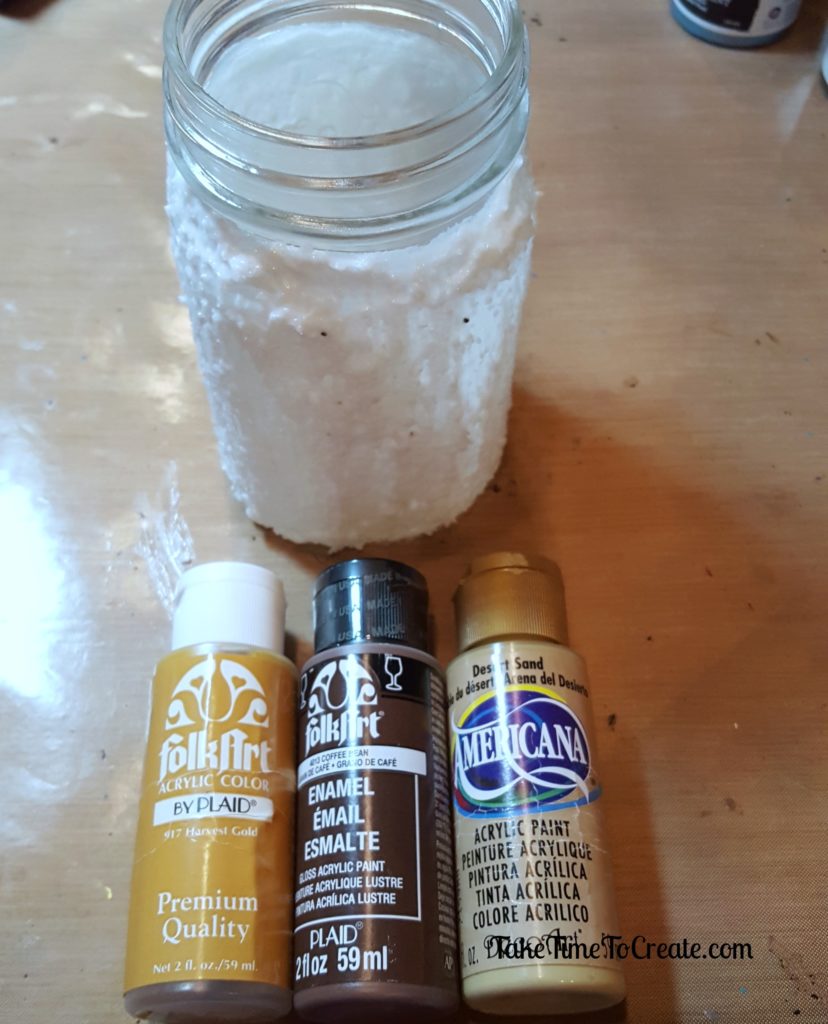
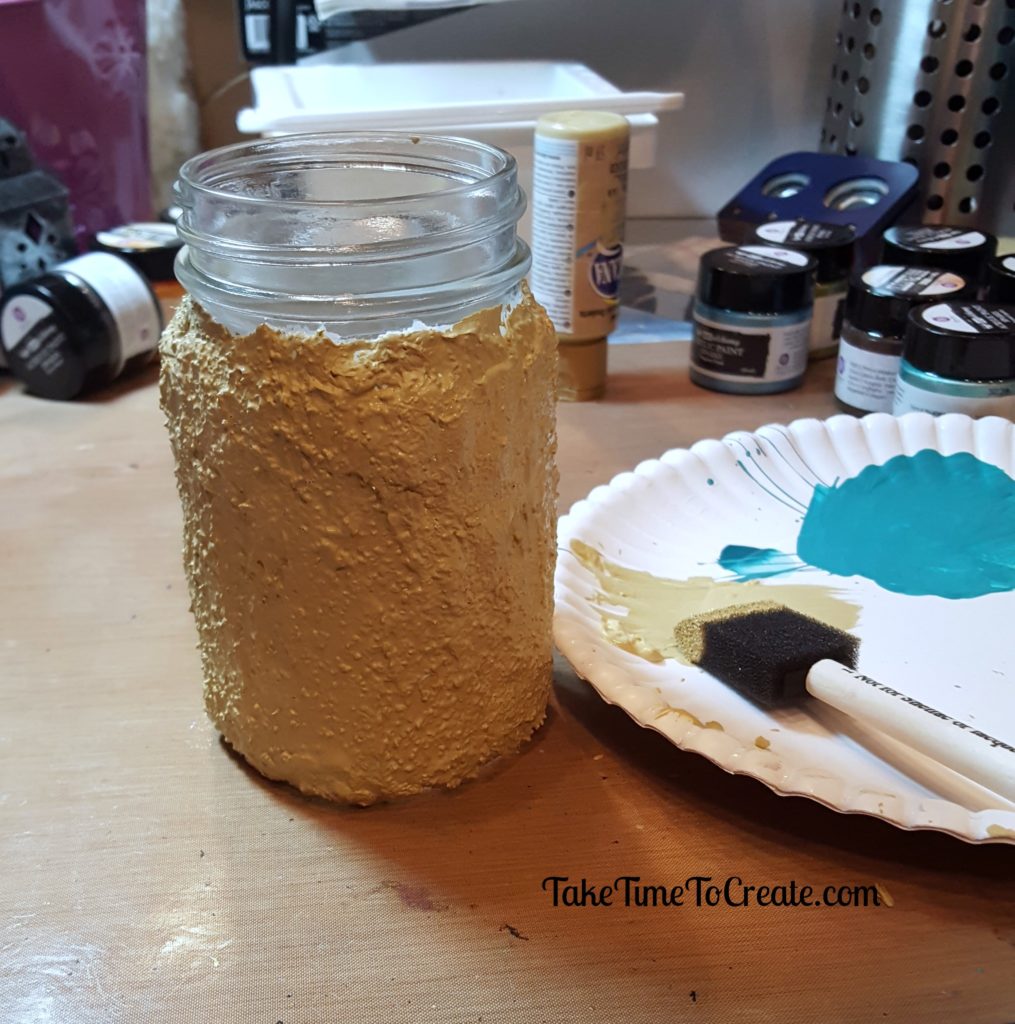
Once I had a good idea what it would look like I started painting the cactuses. I used acrylic paint (Artists Loft) and painted the cactus green and the pot brown.

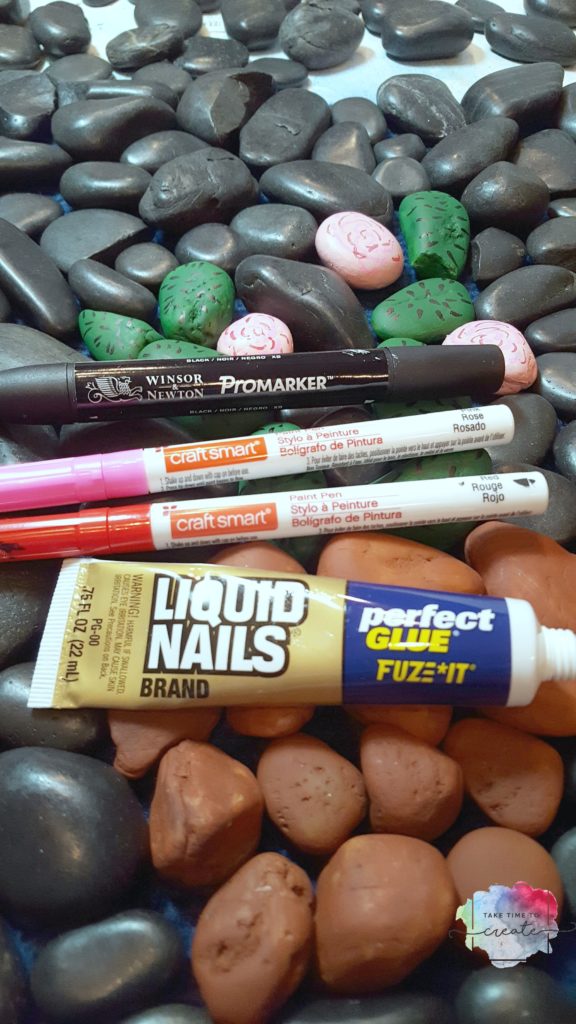
For the pink flowers I painted some swirl details with a paint pen.

To glue the rocks to the mat I used Liquid Nails.

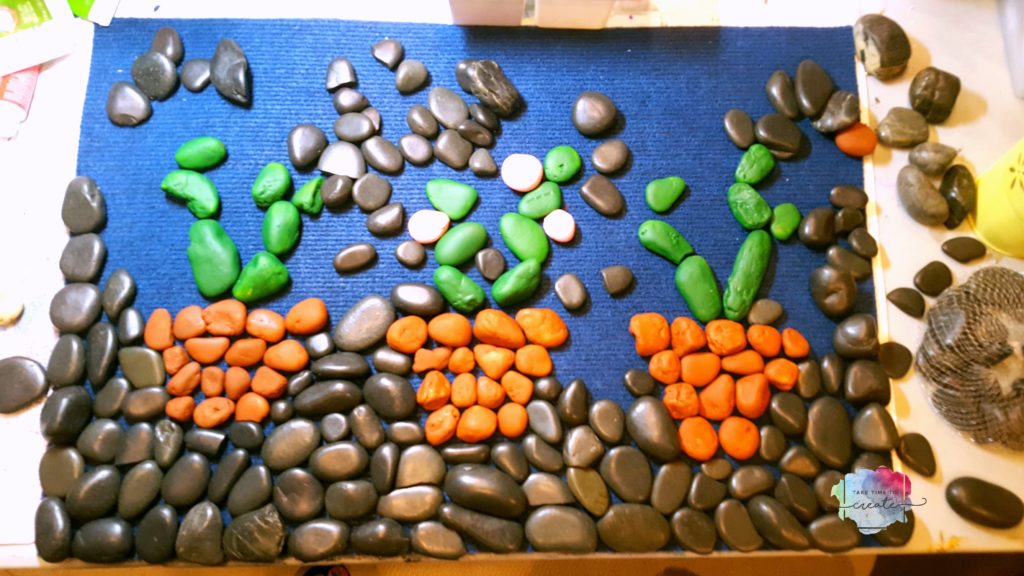
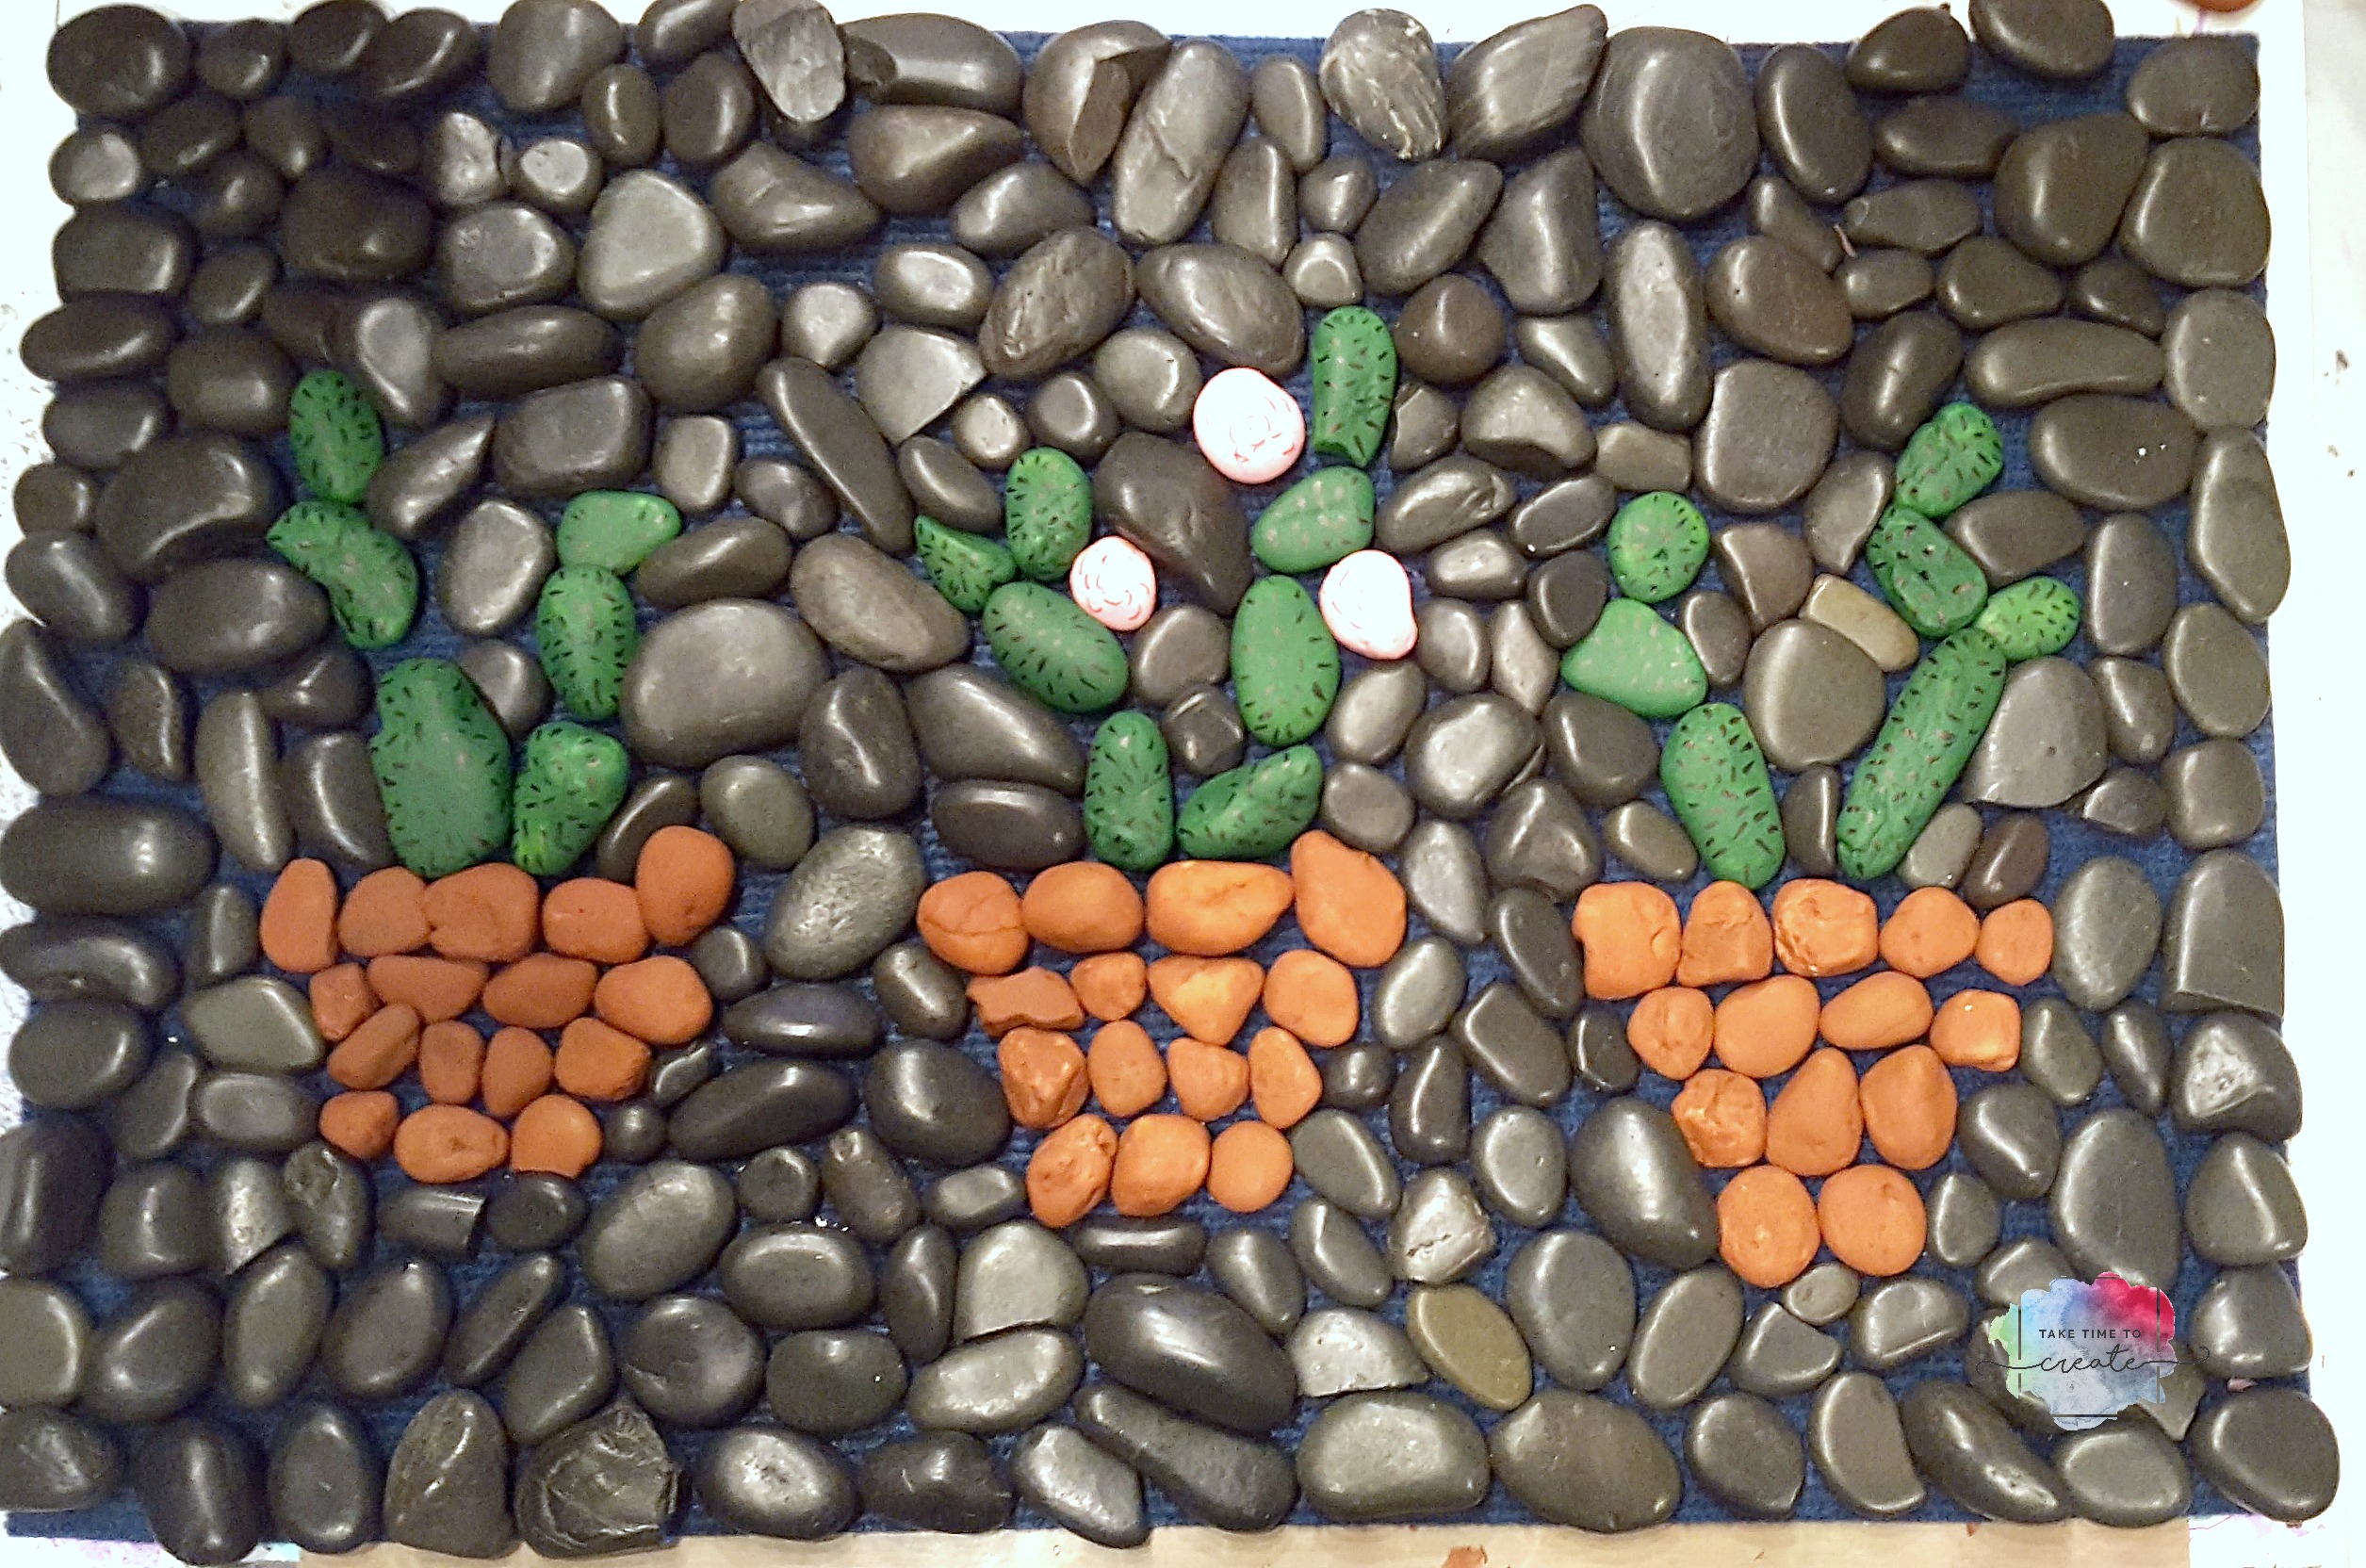
But before the gluing happened I arranged all the rocks on the mat. I used black stones to around the cactuses to outline them and to give them definition and interest. This part does take a while to fit it all in, but it looks so cool when it is done.

I ended up using about 10 bags of rocks, this is because I was mostly looking for particular shapes to fit in certain areas. I do have left overs for my next project.

I let it dry overnight then I took it outside and spayed a couple of coats of spay sealer on the mat.

DIY Cactus Outdoor Mat

I am loving how it turned out! So cute and the perfect detail for my backyard!

DIY Cactus Outdoor Mat

The post DIY Cactus Outdoor Mat appeared first on Take Time To Create.


Mixed Media Altered Bottle

Hello Everyone!

I love looking at wine bottles and any other bottle with a great shape.  They are just so beautiful and I have a hard time sending them to recycling, lol.

So with this bottle I decided to alter it using basic mixed media techniques. Now it is ready to be on display instead of heading to recycling.

You can watch the altered bottle process here:


Materials:

  • Bottle (cleaned and ready for painting)
  • Gesso, soft gloss gel, glue
  • brushes
  • buttons, raffia, and any other bits and bobs that you want to stick on
  • charm bracelet or necklace
  • tissue paper (or old patterns)

Instructions

Find a really great bottle. I love the shape of this one! Make sure it is clean before you start altering it.

altered bottle

For my base layer of texture I added crinkled up tissue paper from old pattered and adhered them with Soft Gloss gel. I will admit that I am still getting the hang of taking pictures and filming at the same time. I don’t have a pic of this but it is the same technique that I used in in these posts:

Mixed Media Box

Tissue Paper Rose

Once the paper is down and dry give everything a coat of black gesso. Once that first layer is dry, now it is the fun part, start adding buttons, ribbon, raffia to the neck, and anything else you want to add detail and interest.

altered bottle

Once all the glue is dry cover everything is black gesso. Make sure you get in all the nooks and crannies. altered bottle

Dry the gesso completely and then dry brush on the colors you want. I did a base layer of gun metal gray and highlighted the details with a pretty metallic purple.  I added an old bracelet to the neck for additional interest.

Spray seal it and you are done!

A beautiful new bottle to add to your decor! altered bottleThe post Mixed Media Altered Bottle appeared first on Take Time To Create.

DIY Rusty Lantern

Hello Everyone!

I seem to really love making everything all rusty and old, lol

I have another item that I made look rusty and worn, using the same techniques that I did earlier.

Here are the other posts about the rust technique:

For this project I used a lantern that I got at the dollar store (these are super cute just like this, but I just had to add my own touch to the lantern)

rust lantern

Then you just start dabbing on your paints with a make up sponge. I used the Finnabair Rust Pastes and I do like them! They add the right colors and texture to make it look like something rusted naturally.

rust lantern

Dab all around until you are happy with the the end look.

rust lantern

rust lantern

Here is the final product. I love this technique and I can’t wait to make something else rusty!
rust lantern

Also, I made a video of the process of making a rusty lantern if you want to check that out.

The post DIY Rusty Lantern appeared first on Take Time To Create.

Decorate Your Flip Flops

Hello Everyone!

This post contains affiliate links

Don’t you just love summer?  Long days, swimming, and flip flops. And you all know how much I love to decorate things and make them my own.

Today’s tutorial is on decorating your flip flops!

You can check out the You Tube video here:

This is an easy diy that you can do with friends or kids, or you can make them all for your self, lol

Materials

  • Flip Flops (here is a link to get them from the Dollar Store) but you can get them almost anywhere
  • Glue (I used this Loctite plastic glue. You can get it here: Glue)
  • Flowers, pom poms, stickles, feathers, or anything else you want to attach to your flip flops.

Instructions

As you can see in this pic I have the flip flops numbered. I did a terrible job of taking pics while was filming, lol, but I think you can get the idea of what I did from the pic. I used the loctite plastic glue on all the flip flops.

diy flip flops

Flip Flop #1

I did want to take away from the pretty design, just enhance it. So for his pair I just glued on some pom-pom trim.

Flip Flop #2

Feathers! This is such a cute, boho idea. Just glue one a pile of feathers, I got mine from the dollar store, but you can get them from almost any craft store.

Flip Flop #3

This is a fun free form design using stickles. Just draw your design and let it dry and you have a fantastic pair of flip flops

Flip Flop #4

Take a large flower and glue it to the top of the shoe. To help keep the flower in place while it was drying I used some clothes pins to keep it in place.

Flip Flop #5

For this pair I disassembled an old statement necklace and glued the pieces on to the flip flop. Just make sure you rough up the metal so it sticks to the plastic.

There you go, 5 different ideas on decorating your flip flops.

What other things do you used to decorate your flip flops?

diy flip flops

The post Decorate Your Flip Flops appeared first on Take Time To Create.


Sea Shell Altered Mason Jar

Hello Everyone!

If you are like me then you probably have about 800 million mason jars in your home.  And all those wonderful crafts on Pinterest have inspired me to start using them!

So I decided to use one of those mason jars in this tutorial. It looks organic and beachy with the sea shells and sand texture. Perfect to store your souvenirs from the beach.

Altered sea shell mason jar

Materials

  • Mason Jar
  • Gesso
  • Acrylic paint and brushes
  • Hot Glue
  • Zipper
  • Sea Shells

Instructions

Find a mason jar, I am sure almost everyone has at least one mason jar in their homes, lol. You will need to prime it with white gesso. Paint a smooth layer all over the glass.

Please excuse my messy craft table, I have way too many projects going on and I am just a messy crafter, haha.

sea shell altered mason jar

The next layer is made to look like sand. I added some sand from the dollar store to some heavy gel and sponged it on with a foam brush. Let this layer completely dry before adding paint. If you have textured paste you can use that, but I didn’t have any so I decided to make some.

sea shell altered mason jar

sea shell altered mason jar

After the jar is dry you can add some acrylic paints. I sponged on 3 tan/sand colors to add detail and interest. Any browish colors should work.

sea shell altered mason jar

sea shell altered mason jar

Once it is all dry you can  add the sea shells, this is the fun part! Waiting until everything is dry will help with the glue adhering to the jar. I just used hot glue and that seemed to work for this project. Add a few shells and keep testing with the zipper to make sure your shells will fit.

Wrap the top with twine or raffia.

sea shell altered mason jar

After I added a bunch of shells I added the zipper. Glue it all down and then fill in the blank spaces with more shells.  I am a fan of adding more stuff until it isbursting. When you add shells to the lid lightly sand the metal to help the glue adhere.

Once it was complete I thought it needed some sparkle so I dry brushed on some beautiful gold acrylic paint.

sea shell altered mason jar

All done! I am loving this technique, and I think it would look great with rhinestones or buttons, or any other small item! So pretty!

sea shell altered mason jar

The post Sea Shell Altered Mason Jar appeared first on Take Time To Create.

DIY Dragon Egg Tutorial

Follow my blog with Bloglovin

Hello Everyone!

As you can see from the link above I am now on Bloglovin! In other exciting news, I will at some craft fairs and a comic con later in the year! As the time gets closer, and as I learn more information, I will share all the details with you! I can’t wait to show my crafts and to see you all in person!

I have a YouTube tutorial of this egg, you can watch it here:

This is a fairly easy tutorial that is fun and a great way to show your love for all things Dragon!

DIY dragon egg


Materials:

  • Old tin egg (my was left over from Easter)
  • Hot Glue
  • Black Gesso
  • Acrylic Paint

Instructions:

First cover your egg with hot glue then then take a silicone tool and smash the glue all around. I learned this technique from watching a video from The Frugal Crafter, I love learning new ideas from other crafters!

DIY dragon egg


diy dragon egg

Once the glue is dry then cover everything in a layer of black gesso. Make sure you get into all the nooks and crannies to completely cover the egg.

DIY dragon egg

Once the gesso is dried paint the egg using acrylic paints. I started with a sliver then I added a purple and ended with a white on top. Dry brush the colors on and try not to coat it too much, you want to see all the colors, including the black base layer.

DIY dragon egg

And there you have it, a custom dragon egg! I love how it looks in my Raku fired bowl that I did in my pottery class.

DIY dragon egg

The post DIY Dragon Egg tutorial appeared first on Take Time To Create.

Travel Journal- Mojito Creek, Blackhawk, CO

Hello Everyone!

Every once in a while you just need to get away, and that is exactly what I did last weekend. If you follow me on Instagram (@taketimetocreate) you will have noticed that I was at my happy place, Mojito Creek. I went up for the weekend to take a class from Tara Pappas and to craft my heart out!

Just for the record, this is not a paid or sponsored post, I just love the place so much that I wanted to tell you all about it.

Mojito Creek is an awesome retreat in Blackhawk, CO. It is a little ways from the casinos (about 20 minutes), and in my opinion that is perfect! If we wanted to go do some fun activities then we could, or we could just stay in the beautiful mountains and relax. That is what I chose to do.

I know you can rent the house for the weekend for a private party or you can come to one of the open weekends. I was there to learn from the artist Tara Pappas (www.tarapappasart.com) and to work on some of my own projects. Tara is an amazing mixed media artist and I will tell you all about the class we took with her in my next post. (I just don’t want this one to get too long, lol)

Anyway, this is my second time visiting Mojito Creek and I loved it just as much the second time as I did the first time I was there.

I drove up there last Friday morning and the weather was perfect! Bright blue skies, sunny, and not too hot. Weather can change pretty quickly in Colorado, and it does get cooler the higher you go in the mountains, but that day it was perfect. The house is at about 9000 ft so the wireless was not as fast as I was  used to, but that just encouraged me to but my phone down and get to crafting!

The kitchen and dining room are nice and big. We had 14 people up there that weekend and I didn’t feel like it was crowded at all. 

Look at all this space for crafting! I mean, it is fantastic how much room we had! Everyone had a huge table with a lamp, there was plenty of room to do just about any craft! I loved seeing all the various crafts that people were doing, some were making cards, other people were scrapbooking, while I was working on some mixed media projects. 

So much space! It can be configured differently when different groups are up there, but having the crafting tables up is my favorite configuration, lol.

When you need a break from crafting there is a nice little sun room tucked off to the side. This is my favorite place to grab my book and read for a while. I didn’t take pictures of the bedrooms but the beds are nice to sleep in, and my room mates were very nice.

The mountains are always beautiful and the flowers were just starting to come out. This was the perfect way for me to regroup and relax and when I got home Sunday afternoon I was ready to tackle my week.


The post Travel Journal- Mojito Creek, Blackhawk, CO appeared first on Take Time To Create.

Create a Purse from an old VHS Tape

Create a Purse from an old VHS Tape

What do you do with all those old VHS tapes? Why you create a purse! Perfect way to add some interest to your outfit!

Hello Everyone!

I am almost embarrassed to admit, but I still have a lot of VHS tapes laying around my house. I hate to toss them, but I have no way of playing them (I don’t even own a VHS player…) So what do I with this pile of tapes? I decided to create a purse!

I will admit that is project did not turn out exactly how I envisioned it. But it did turn out cute and the next one will be better! In the instructions I will tell you what I did and how I will make it better next time, that way you can create it at home with out all my struggles, lol

create a diy vhs purse

Materials:

  • VHS tape
  • screw driver
  • cutters
  • fabric, buttons, trim
  • super glue

Instructions:

create a diy vhs purse

First you find an old VHS tape. If you no longer have one in your stash you can find them at thrift stores, or ask around I am sure someone has one somewhere.

create a diy vhs purse

This is the fun part. Unscrew all the screws and open the tape. Take out the innards and safe them, they will work great for a mixed media project. Next you want to cut off the plastic bits that are sticking up. This is one area that I messed up, I cut too much off the bottom and it doesn’t seal (there is a tiny hole in the bottom. Just be careful and you should be good.

Then I glued some faux leather fabric on one side, in hindsight I probably should have glued it to both sides, but I wanted to see the clear windows still. I think I can make this a little better next time.

create a diy vhs purse

Glue hinges so that you can open and close your purse. Try not to glue your fingers to the tape, lol (I may or may not have done the, lol) Also try not to glue the hinge shut, it takes a lot of careful prying if you happen to glue the hinge (once again I may or may not have done the, lol)

create a diy vhs purse

Then I added a decorated bottle cap and some string to secure the purse closed. Next time I will use elastic, but this works. Also next time I will add fabric to the sides so the tape doesn’t lay flat when open, it will help keep everything contained. Add a strap, I wanted mine to look a little funky so I added pom-pom trim.

create a diy vhs purse

create a diy vhs purse

Overall I am happy with how this turned out, and I am excited to make improvements to version 2.  What are you doing to up cycle your VHS tapes?

The post Create a Purse from an old VHS Tape appeared first on Take Time To Create


Galaxy Mixed Media Canvas

Galaxy Mixed Media Canvas

Mixed media is perfect to showcase a galaxy. With found objects, and paint you too can create your own galaxy.

Hello Everyone!

It has been a while since I last posted, and I am sorry for the long absence, I was traveling for work.

But now I am back and  want to show you a mixed media project that I have been working on for a while. It didn’t turn out how I anticipated, but I love the final results! I just went with the flow and this is what I ended up with.

galaxy mixed media canvas

Start with a black canvas and add all your goodies. I added an old educational film, some plastic bits I had laying around, large plastic gems, metal pieces, bottle caps, there is an old record on the very bottom, plastic coins. For interest and texture I stenciled some stars and swirls in the background and added some tea from a tea bag.


galaxy mixed media canvas

Cover everything in black gesso to get the canvas ready to become a galaxy

galaxy mixed media canvas

Before I even started painting I watched tons of videos on You Tube on how to paint a galaxy. I incorporated a variety of techniques, and I kept working on it until I was happy.

Then I went to town painting. I added layers and layers of  acrylic paint and used some DIY acrylic sprays. When I was finally happy I splattered white paint all over to make it look like stars. And I added some metal shavings and old necklace pieces to bring in some more metal elements.

I am not sure it looks like a galaxy, about half the people I have shown it to thinks it looks like the moon. I am good with both views, in the end I am happy with how it turned out.

galaxy mixed media canvas

galaxy mixed media

What do you think Galaxy or Moon? Now I have been thinking about doing an underwater mixed media, I think what will look awesome!

The post Galaxy Mixed Media Canvas appeared first on Take Time To Create.

Project has been entered into the following design challenges:


DIY Harry Potter Drawstring Backpack

DIY Harry Potter Drawstring Backpack

A trip to Universal Studios isn’t complete with out this DIY Harry Potter Drawstring Backpack!

Hello Everyone!

Next month we will have the opportunity to go to Universal Studios Hollywood!!!  I am so excited! In great anticipation I decided to make a Harry Potter drawstring backpack that will be perfect to carry my wallet, camera, and sunglasses.  I decided to use this simple design that I found on the internet. Everyone know what book this is in reference to without being to obvious, lol

I have made drawstring backpacks before, you can see that post here: Cinderella backpack

My son is such a good sport being my model, lol.


diy harry potter drawstring backpack

Materials:

  • backpack (you can find a similar one here: bag)
  • Gold Sharpie (you can find it here: sharpie)
  • Graphite paper (you can find it here: paper)
  • Clip art from internet

Instructions:

The first thing you do is find an image that you would like to trace (just about any image will do) and print it in the size you need.

Spread out your bag and decide where you want your design.


diy harry potter drawstring backpack

Place the graphite paper on the bag then place the image over the graphite. Trace the image with a pencil so that the image will show up on the bag. Press hard and do over it a few times if needed.

diy harry potter drawstring backpack

Once you like the image take the papers off and set them aside.

Put a piece of cardboard in the bag to prevent the sharpie from bleeding to the other side

Now it is time to start drawing the image with a sharpie.

diy harry potter drawstring backpack

Fill it all in  and clean up the edges. Now you are ready to rock your new bag, and you don’t have to wait to wear it at Universal, this is a bag that can be worn all the time!


diy harry potter drawstring backpack

The post DIY Harry Potter Drawstring Backpack appeared first on Take Time To Create.

This post contains affiliate links, thank you for your support!

« Older posts Newer posts »

© 2024 Take Time To Create

Theme by Anders NorenUp ↑

Follow

Get the latest posts delivered to your mailbox:

%d bloggers like this: