Tag: crafty (page 4 of 6)

Elephant Applique Embroidery Mixed Media

Elephant Applique Embroidery Mixed Media

Hello Everyone!

An appliqued elephant makes the perfect focal point on any mixed media

Embroidery, when I think of embroidery I think of my grandmother or of delicate items, gifts to be given or received. It is not something that I have every really tried. I have little patience and embroidery tends to stretch my patience to the limit. But I like to try new things, so I signed up to take a year long embroidery class at my local fabric shop, the Loopy Ewe. I love this place, they have everything and they are so friendly and helpful.

Every month we have a class and we learn new stitches then we apply what we learn at home and bring in our finished pieces. Well, I tend not to do what everyone else is doing, lol.

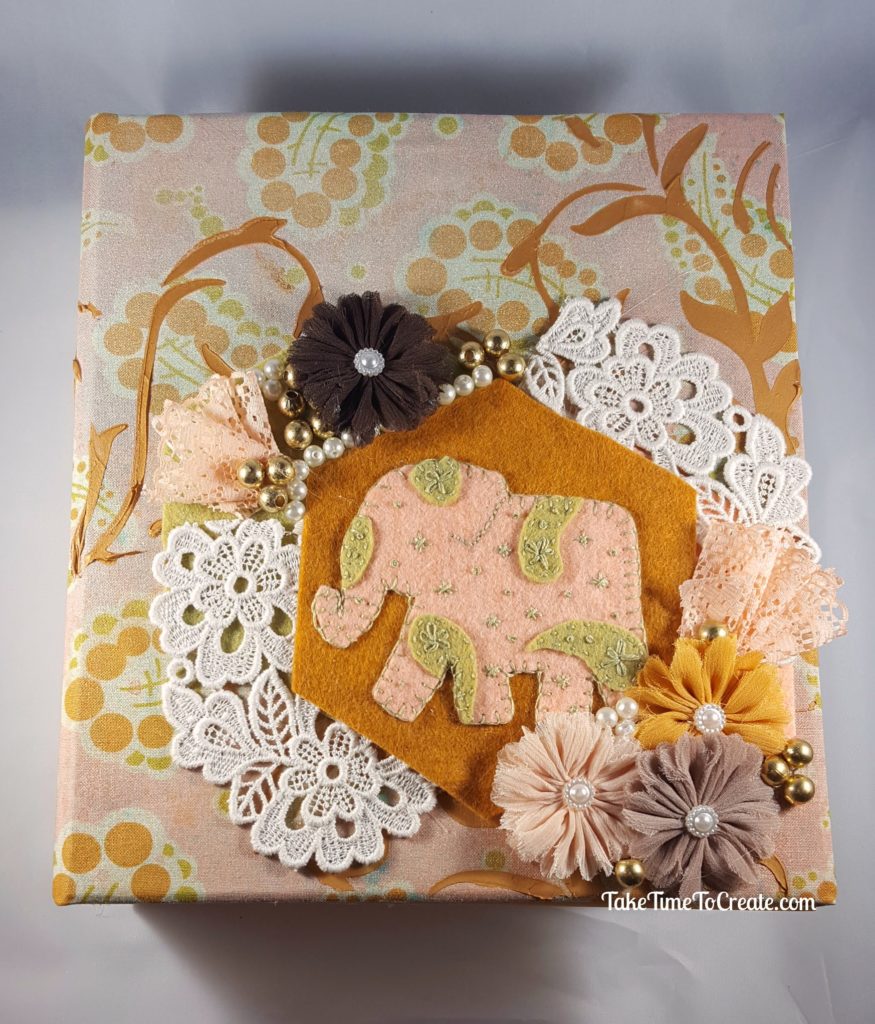
This month we were supposed to create an embroidered piece (I did that part) but we were also supposed to sew a binder cover on. I don’t always get along with my sewing machine and this month I didn’t want to fight with it. So I did a mixed media binder instead.  I have to say, I really love how it turned out. It is perfect for me and now it is cut and ready for me to store my patterns.

Materials

  • Binder- I was proved a 2″ binder. This is one of the shorter binders
  • Embroidery- need applique item, thread, needle
  • For the mixed media- fabric, paper, lace and trims, beads, ink sprays.

Instructions

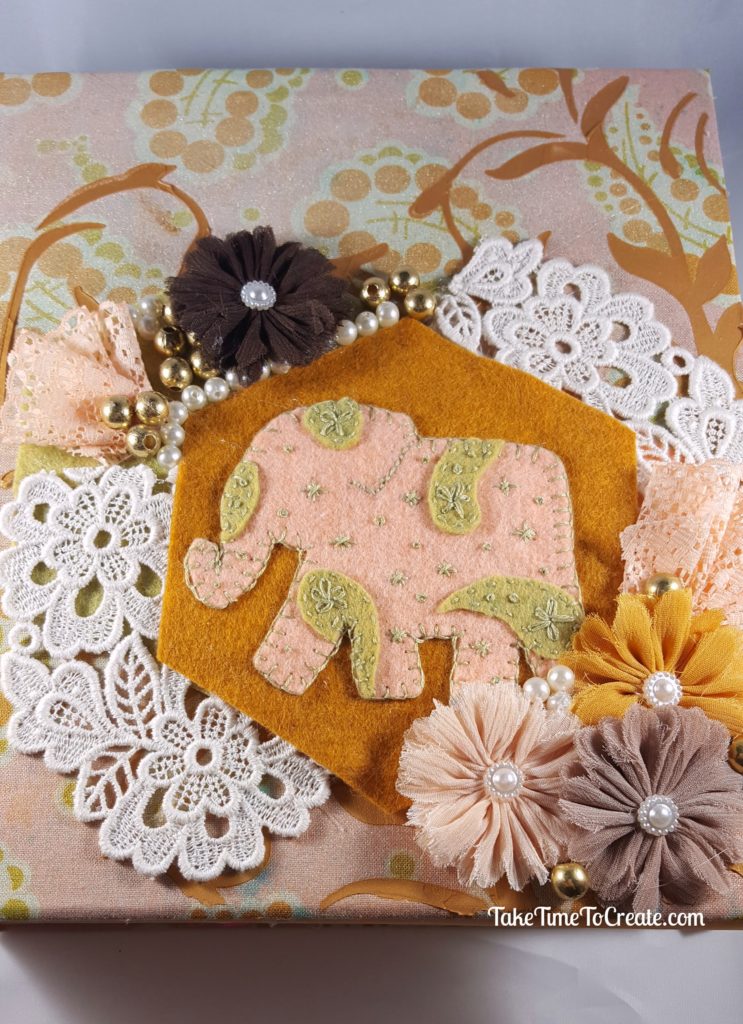
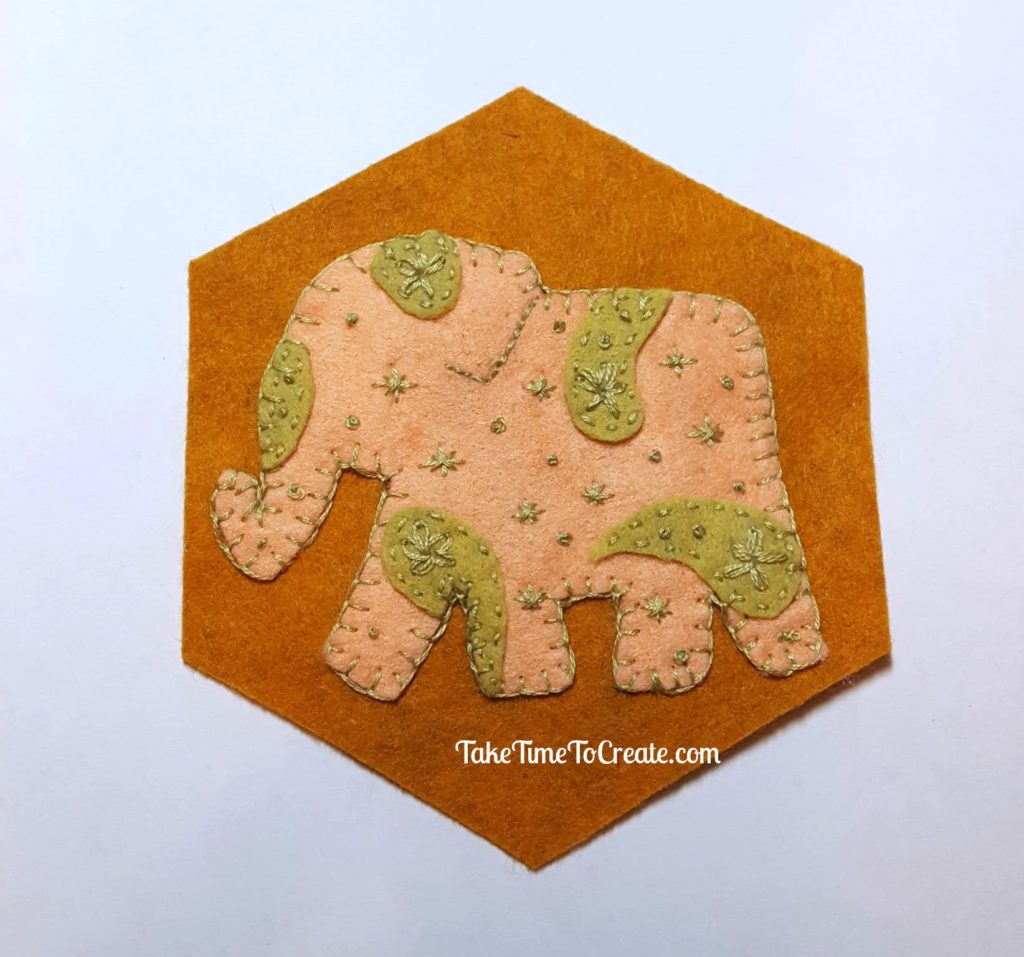
The first thing you do is cut your hex shape and elephant and paisley pattern.  Then stitch the elephant together. I won’t go into detail about applique embroidery because there are far better tutorials out there but I can tell you what stitches I used. I did a running stitch to secure the paisleys, a blanket stitch around the edge, colonial knots, and a lazy daisy for the flowers.

Once my embroidery was complete it was time to start on the binder. I covered the binder in this great fabric.

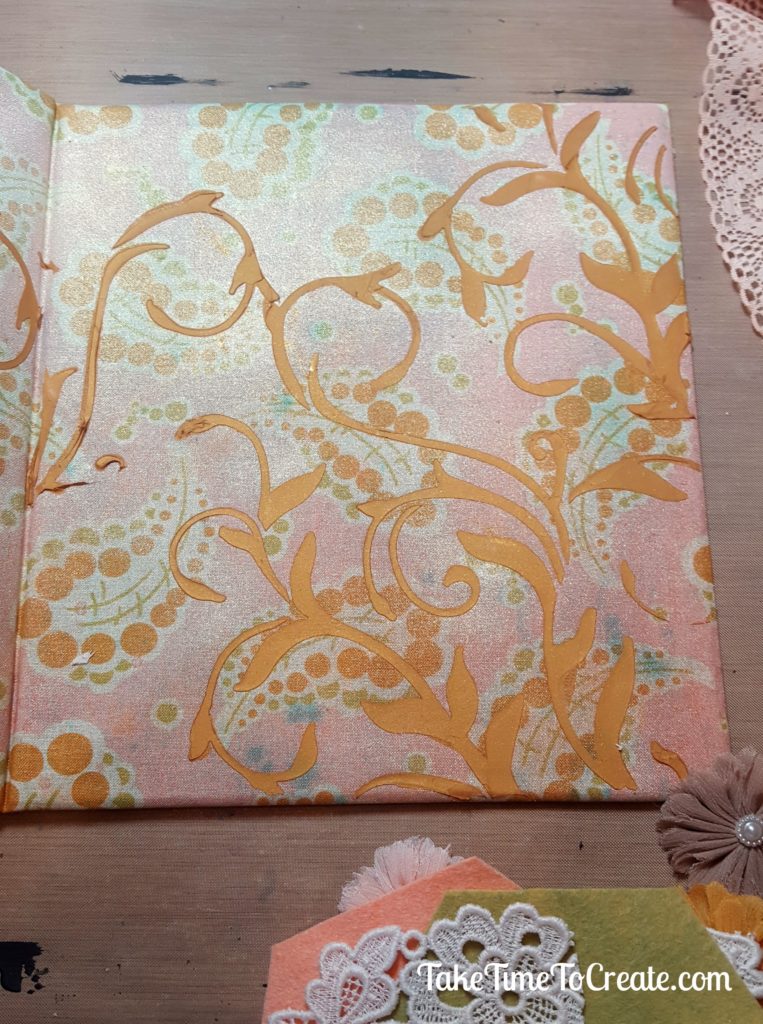
Then I sprayed ti with some ink sprays to give it interest. To add even more interest I stenciled this scrolling pattern on the cover and spine
Then I started playing around with textures and fabrics to try and get a focal point that worked for me
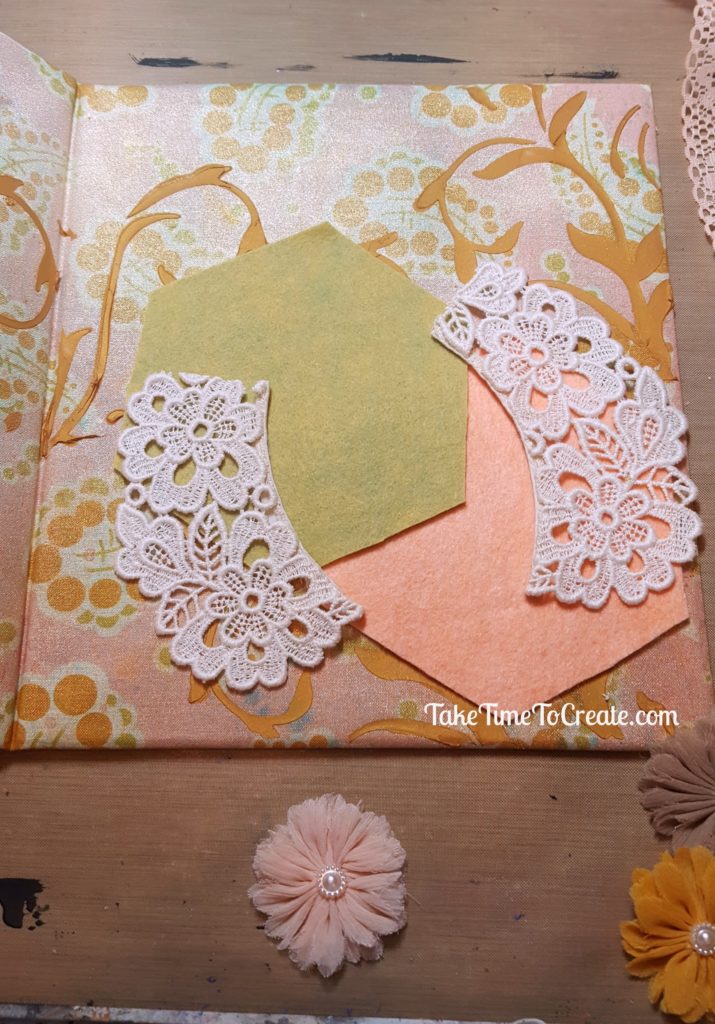
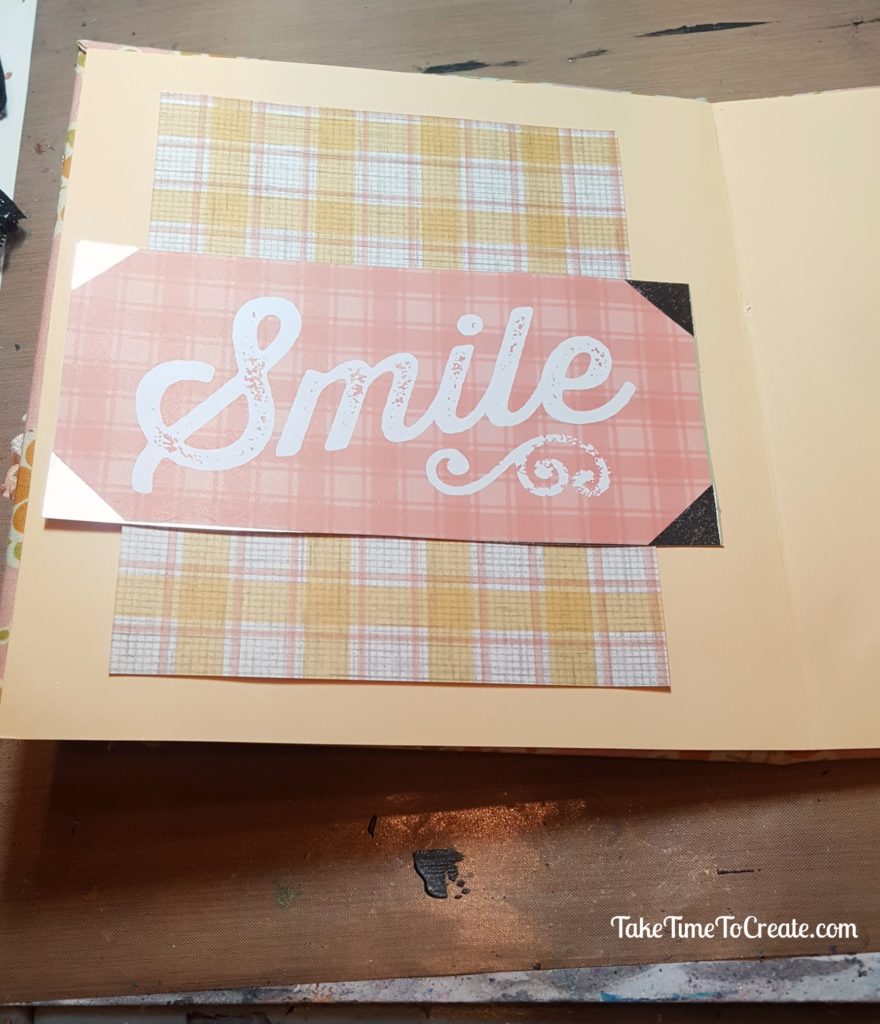
Then I added some paper to the inside, no boring inside for me. Everything must be decorated.

The completed outside of the binder has fabric, beads, Prima flowers, lace, and of course the Elephant Applique Embroidery.

I think this turned out so cute, and I am glad that I made it something that I will use and I made it in my own way, lol.

What have you created instead of following all the instructions? How did you make it your own?

The post Elephant Applique Embroidery Mixed Media appeared first on Take Time To Create.

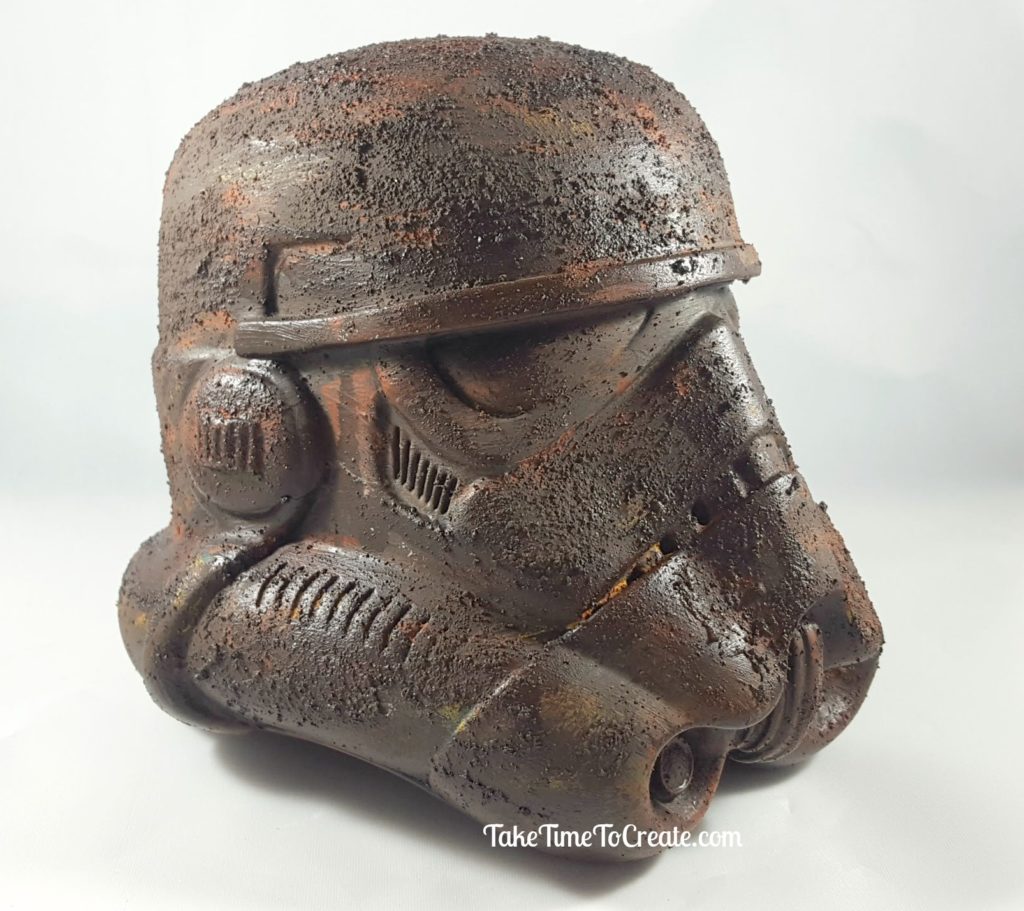
Rust Painted Stormtrooper Helmet

Rust Painted Stormtrooper Helmet

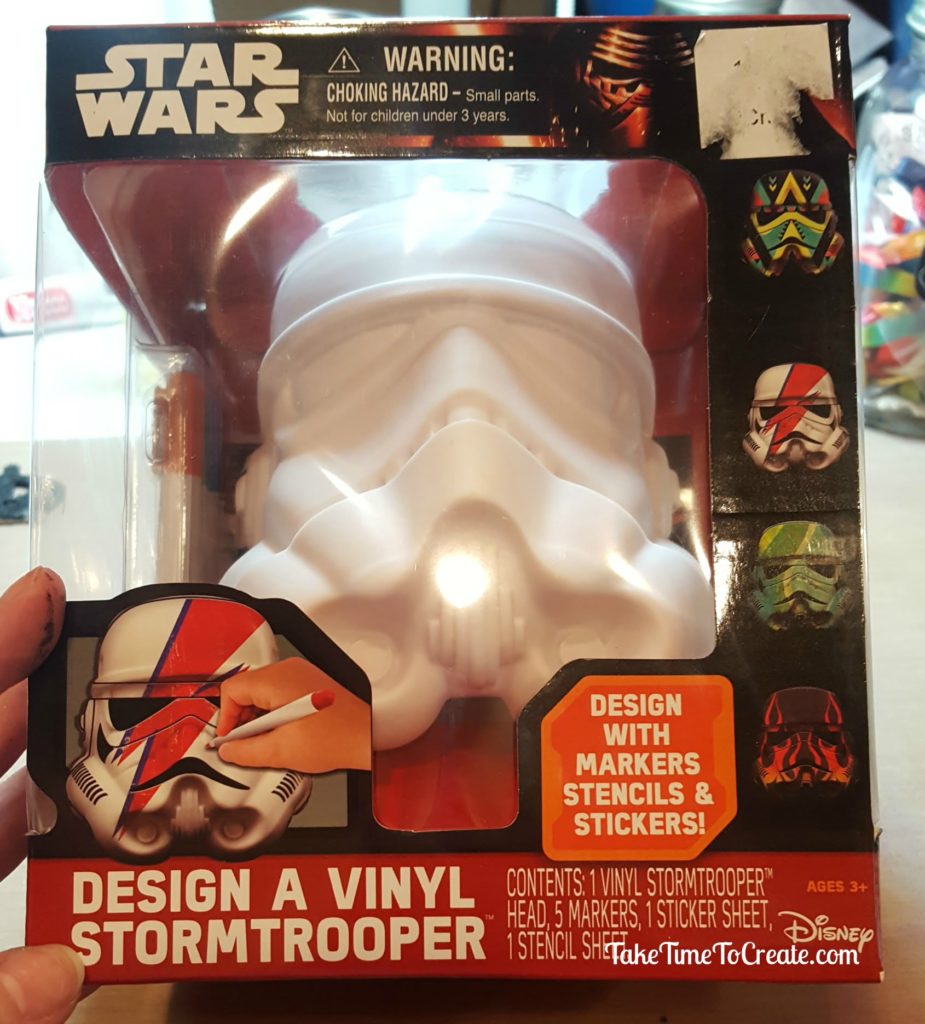
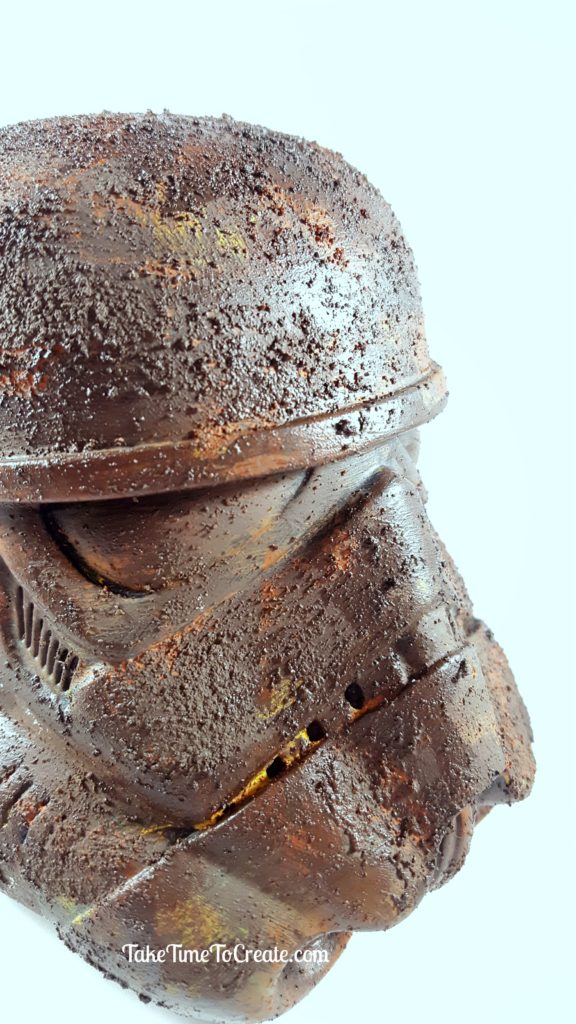
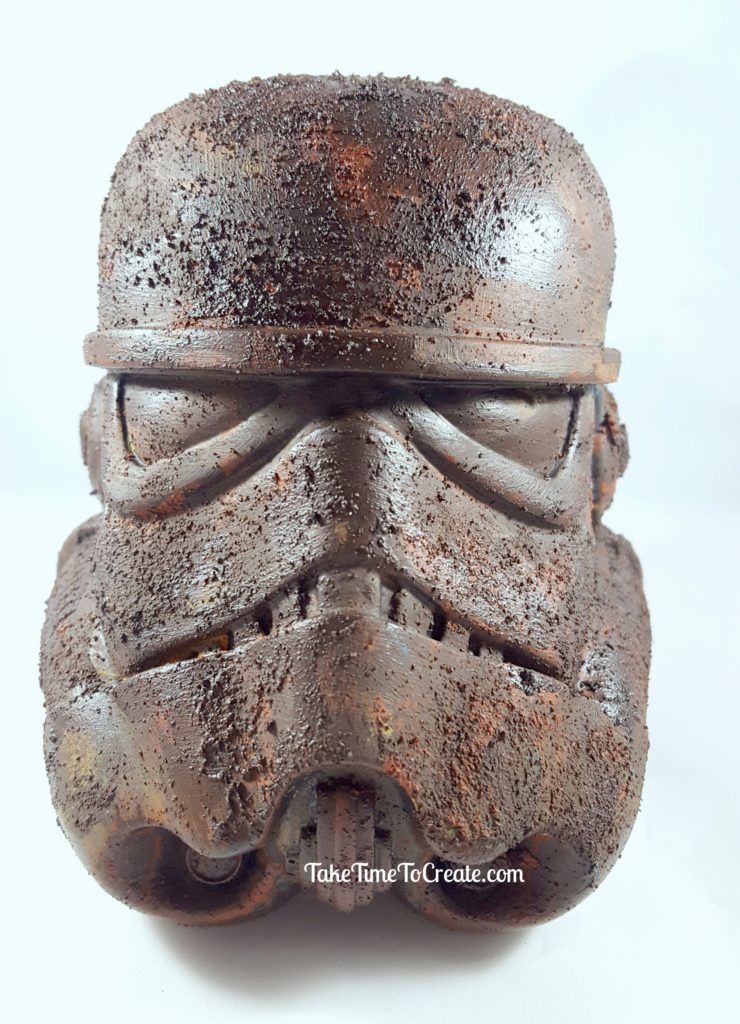
These vinyl Star Wars Stormtrooper helmets look worn and old with a DIY rust paint technique.

Hello Everyone!

Welcome back! I have missed you guys! I hope you all had a wonderful holiday.

2017 is going to be amazing with all these new project I have for you!

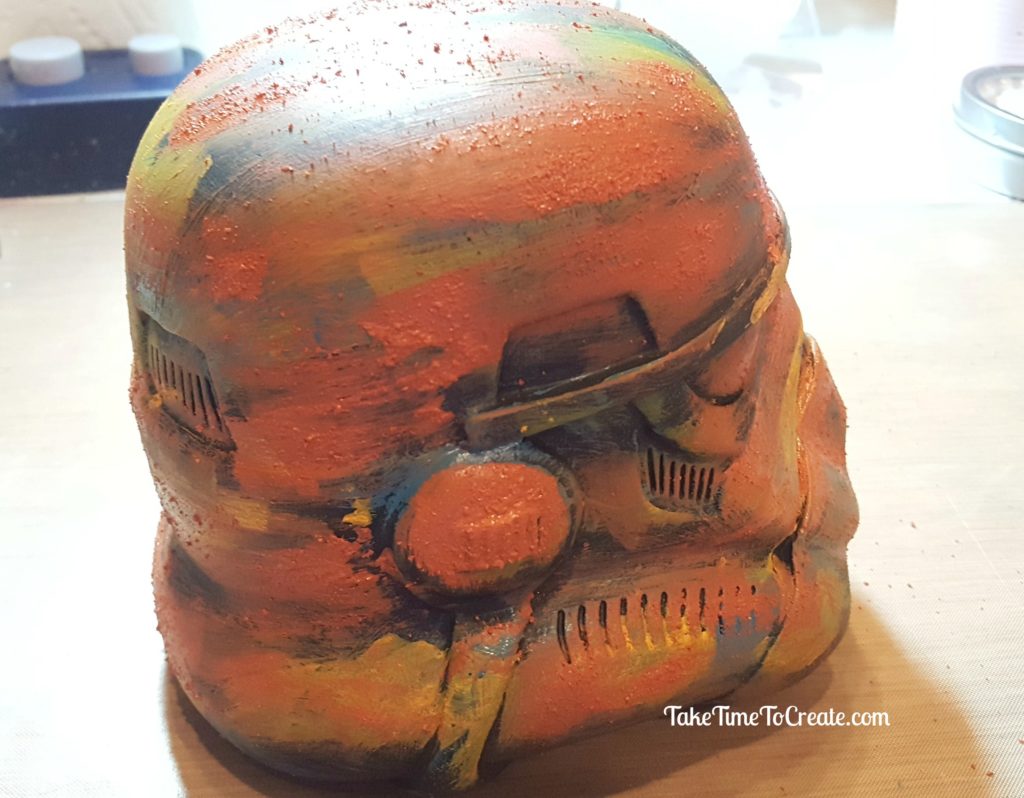
The first is this rust pained Stormtrooper helmet. With the passing of Carrie Fisher I thought I needed to do a Star Wars inspired craft.

This time I did the rust painting a little differently than when I painted the Rust Angel. You can revisit that post here: Rust Angel

Materials:

  • Stormtrooper Vinyl Helmet- You can find it here: Helmet
  • Rust paints. I used some cheap teal colored acrylic paint I had on hand, some Folk Art rust paints, and Prima Marketing rust paste. You can find the Rust past here: Rust Paste
  • Brushes and spray sealer and black gesso

Instructions:

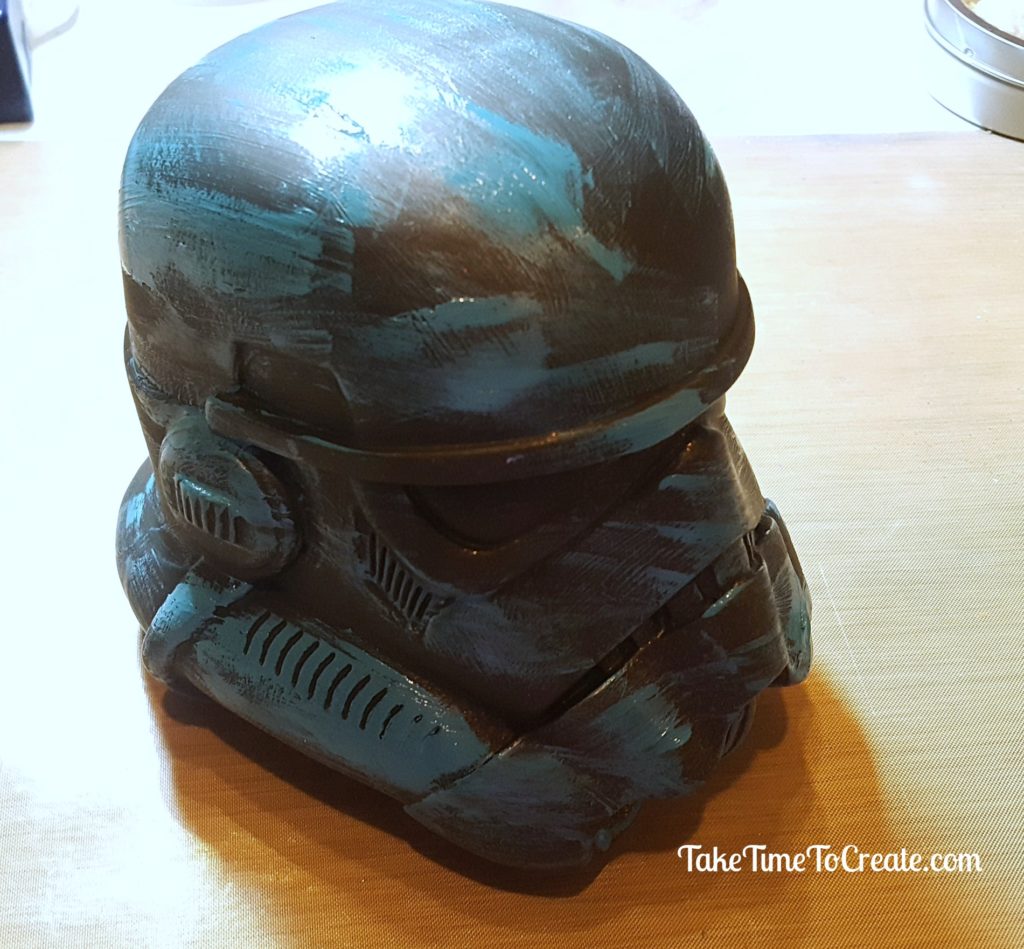
The first step is to paint a coat of Black Gesso. This is the primer and it will make it easier for the paint to adhere to the vinyl.

Then I added some teal paint I had in my stash. Add this in a random fashion, and not all over.

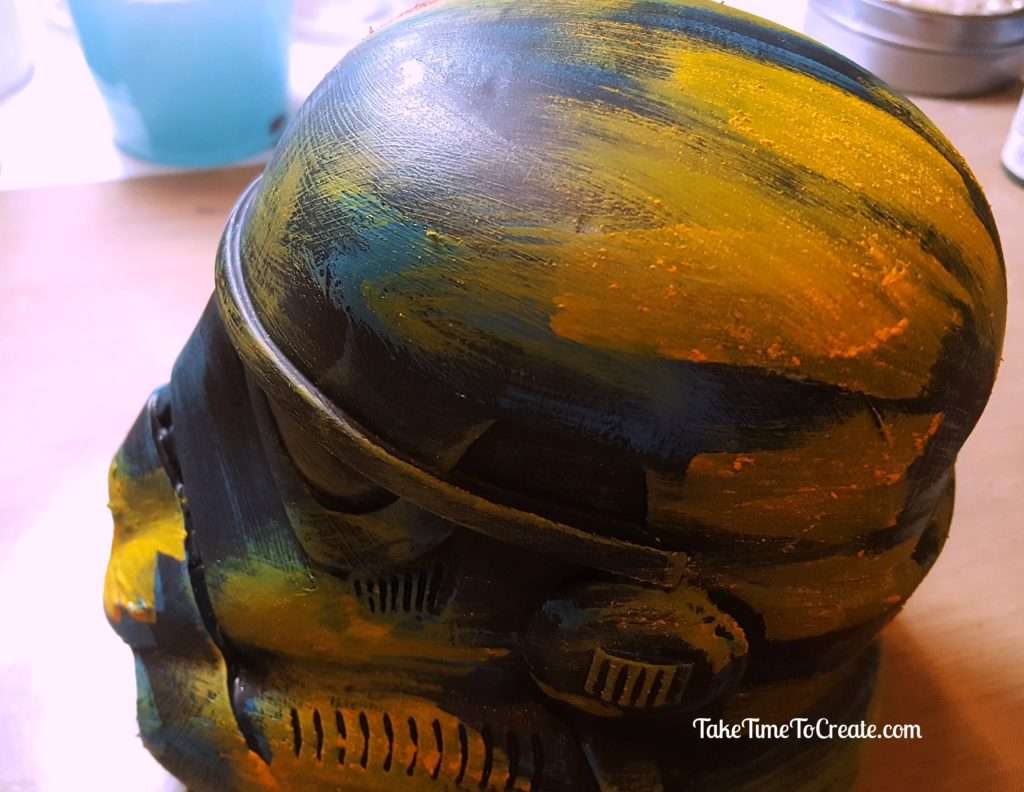
Then I added the yellow from the Prima Marketing rust paste paint pallet. Just a bit, to make it random.

Then I added the middle color of the Prima Marketing rust paste. Keep it random. It looks a little funky at the is point, but it gets so much better when you add the darker coats, believe me, lol.


Then I added the darkest of the Prima Marketing colors. I liked it, but it needed more, so I added some of the Folk Art rust paint that I used for the Angel. I did like how the Prima Marketing

Make sure you can still see the other colors peaking though making it look natural, like it has been left out in the forest for a long time.

When you are happy with your rust painting spray it all with a sealer to keep the texture on the helmet.


Such a fun project! I have a few more things to show you this year that are all rusty and old looking! I can’t wait!

The post Rust Painted Stormtrooper Helmet appeared first on Take Time To Create

This post contains affiliate links.

Merry Christmas and Happy New Year

Merry Christmas and Happy New Year

Merry Christmas and Happy new year to all  my wonderful followers. Because of you I have had a wonderful, fun year and I am excited for next year!

Hello Everyone!

As this year comes to a close I wanted to take a moment and say thank you for making this year pretty great. I had so much fun creating new thing and making tutorials for you enjoy.

I think every blogger says this, but in my case it is true, but I have the best followers! You guys are fun and supportive! Whether you follow me here on the blog or on my other social platforms you guys are just the best!

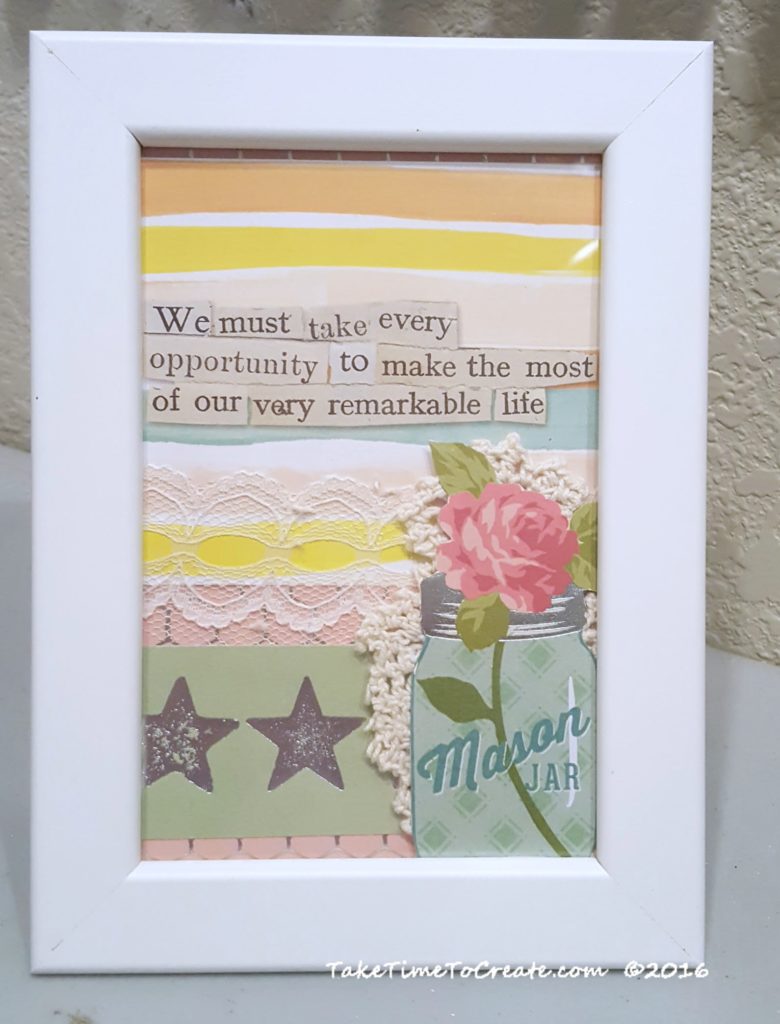
I will close this year with a pic of a collage that I have on my desk. I love this quote from Curly Girl (if you don’t know who that is  you have to follow her. Her designs are wonderful, I love them! You can find her here: Curly Girl Designs)

I took this quote from a planner, “We must take every opportunity to make the most of our very remarkable life,” and made a quick collage. I love having it near my work area as a perfect reminder that this is all pretty remarkable.

Have a safe holiday season and I will see you in the new year with new projects, ideas, and tutorials, and a You Tube Channel! Yikes, yes I am going to start a You Tube Channel to help demo even more things. (I will admit I am a little nervous about this, but it will be fun!)

So many new things for the new year! It is going to be amazing!

See you in 2017!

Linda


Easy DIY Gift Ideas

Easy DIY Gift Ideas

Need a last minute gift? Here is a list of easy DIY gift ideas that will help you check everyone off your list.

Hello Everyone!

Are you at a loss as to what to get or make some of the people on your list? I have the same problem, I get craft-blocked (kinda like writer’s block, but for crafting, haha) when it comes time to make a gift.

So I thought I would go back through my posts and compile and easy list for you reference, easy gift ideas at your finger tips. These gift are great not only for Christmas but for Birthdays, Easter, Weddings, House warming, and almost any occasion.

Just click on the link and it will take you the post with all the details you need to make your own DIY gifts.

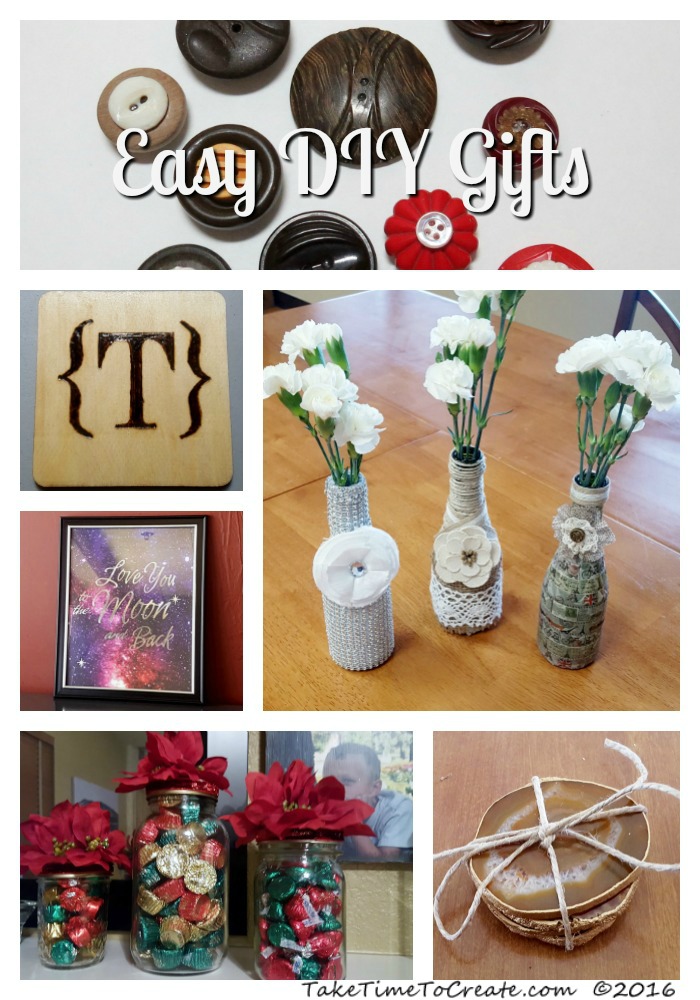
  1. Button Magnets. Vintage buttons glued on a magnet make a really cute gift.
  2. Wood Burn Coaster. This gift is fun to personalize with initials or something they like. Just burn in the design, seal it and add felt and you have a gift that will be treasured.
  3. Gift Bag Art. There are a lot of wonderful gift bags at the Dollar Store. Just cut to size and frame and you have a gift that can fit almost any occasion
  4. Vases. Empty jars and beverage containers make wonderful gifts when they are all decorated with raffia, jute, flowers, and rhinestones. 
  5. Christmas Mason Jars. These jars are a very versatile gift just by changing out the flower on top, add candy to the jar and you are good to go. 
  6. Agate Coasters. These coasters are a beautiful addition to any home and are super easy. Just paint on the edge with a paint pen and add felt the bottom. 

The post Easy DIY Gift Ideas appeared first on Take Time To Create.
DIY Ornaments from Magic Towels!

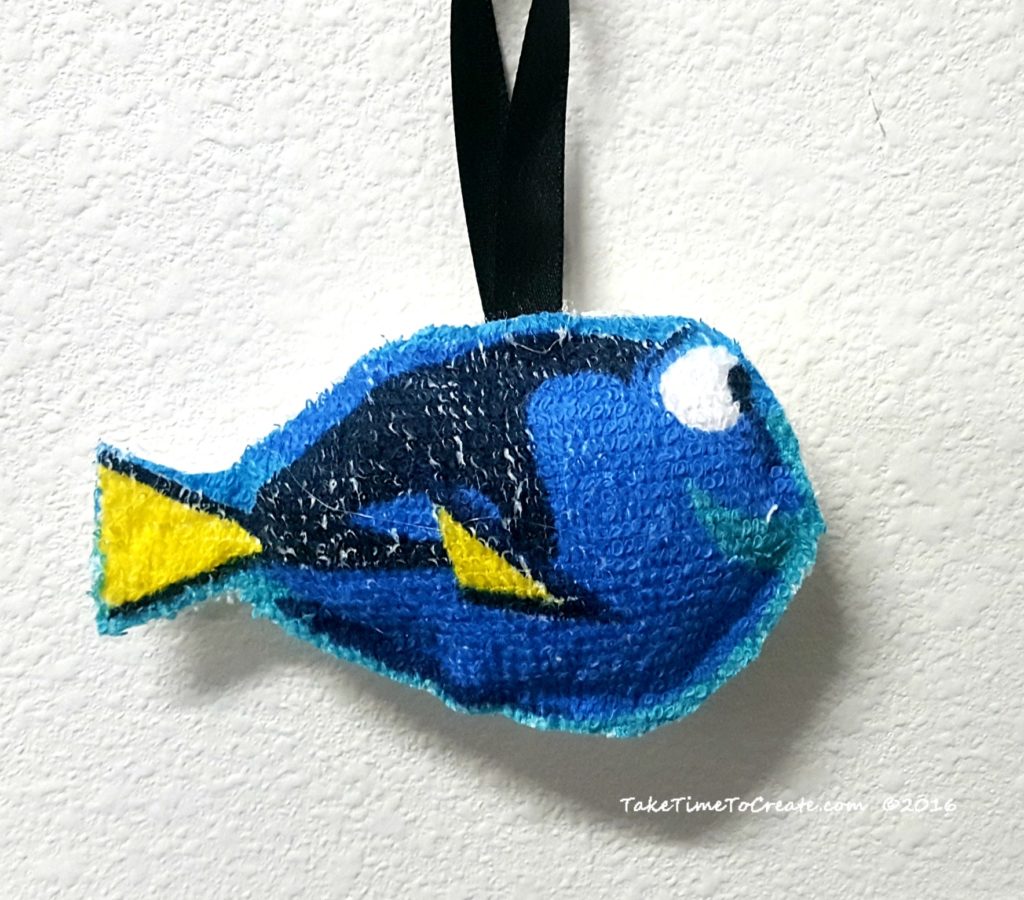
Hello Everyone! With the holidays right around the corner it is time to start thinking about decorating. And since we are on a crafting blog, this post is about DIY Ornaments. This is an easy project that takes magic towels and turns them into ornaments and it is fun to do with the kids. 

DIY Ornaments - Dory

My Finished Dory DIY Ornament

I hope you had a wonderful relaxing Thanksgiving holiday. We had a great time, we went to Florida for the week and it was perfect. Stay tuned, I will do a travel journal about the resort we stayed at.

With Christmas right around the corner I thought I would start doing some holiday crafts and today’s is a DIY ornament.

Materials for your DIY Ornaments:

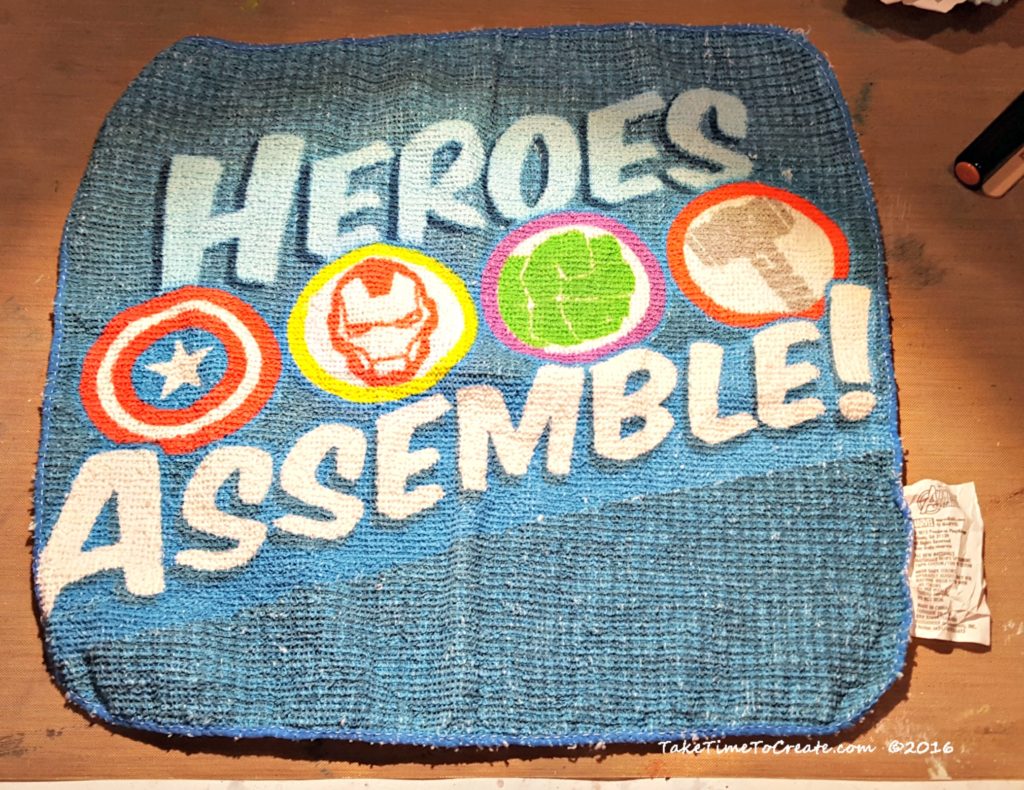
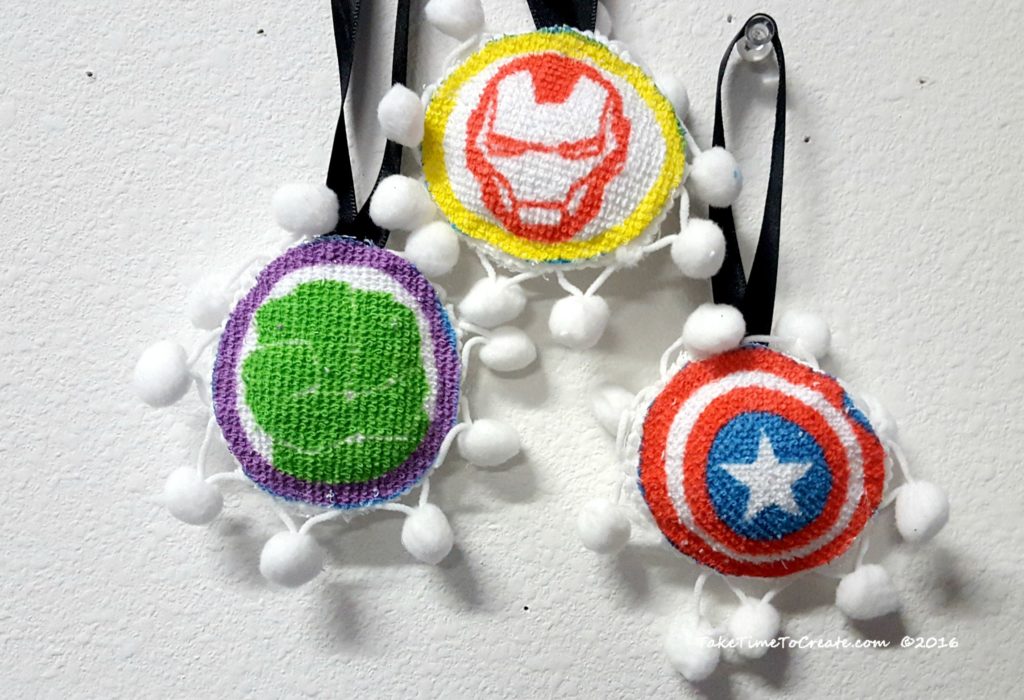
  • Magic Towels (I used a Dory one and an Avengers one, and I got both from the dollar store)
DIY Ornaments - Magic Towel

We start with a simple magic towel.

  • Ribbon
  • Stuffing
  • Hot glue gun and glue sticks

Instructions:

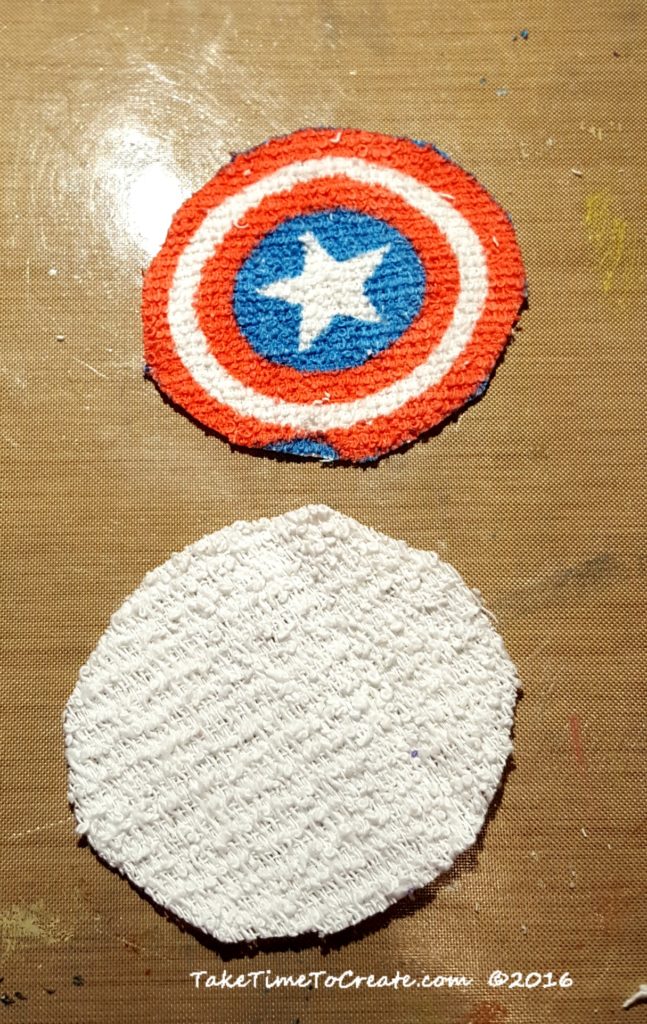
Cut around the shape that you want to make into an ornament. And cut out that same shape in a plain colored wash cloth.


Cut out magic towel

Next, we cut out the parts we want to turn into ornaments.

Then you start gluing. Glue the pom-pom ribbon ) around the edge and then glue the black ribbon to the top.  I used hot glue for all my gluing, but if you are doing this with kids then you might wan to use fabric glue. You can also sew these together, but me and my sewing machine are not getting along right now, so my hot glue gun came to the rescue.

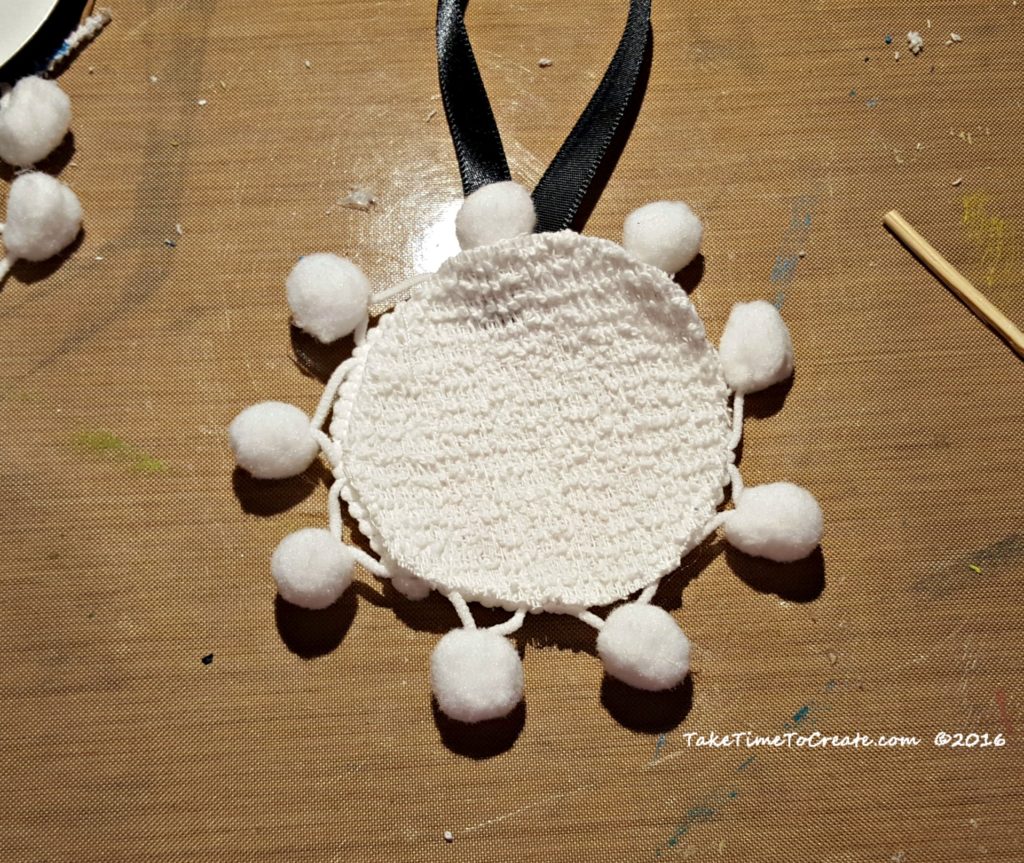
Then glue the plain wash cloth to the back, but make sure you leave a little gap so you can add stuffing. Add a little stuffing and glue the gap closed.

The ornament's backing

Then, add ribbon and glue together.


And that is it. These are great for kids and easy to do. Kids will like having their favorite characters on the tree.

Avengers ornaments

Here are the finished ornaments.

This post DIY Ornaments from Magic Towels appeared first on Take Time To Create


Subscribe via WordPress


The Take Time To Create Crafting Blog RSS Feed

Subscribe via Email

Enter your email address to subscribe to this blog and receive notifications of new posts by email.


Other Ways To Follow


The Take Time To Create Crafting Blog RSS Feed

Subscribe to my RSS feed

The Take Time to Create Crafting Blog Facebook Page

Follow me as Facebook

The Take Time to Create Crafting Blog Etsy Shop

Check out my my Etsy Shop

The Take Time To Create Crafting Blog Pinterest Board

Visit my Pinterest Board

Other Ways To Follow


The Take Time To Create Crafting Blog Instagram

Follow me on Instagram

The Take Time To Create Crafting Blog Twitter Feed

Follow me on Twitter

The Take Time To Create Crafting Blog Email

Send Me an Email


Gift Idea- Mini Canvas Photo Magnets

Gift Idea- Mini Canvas Photo Magnets

Hello Everyone!

Can you believe that Christmas is right around the corner? With Christmas so close I thought I would start showing you some easy DIY gifts.

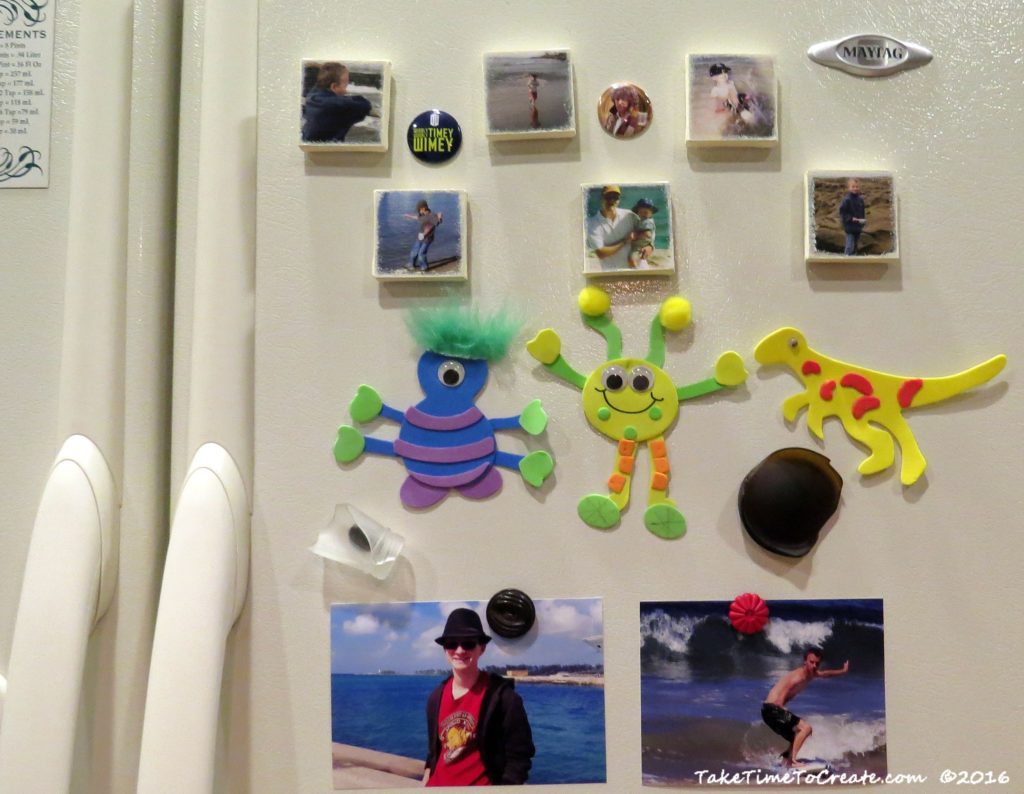
Today I am going to show you how to make these really easy, really cute, mini canvas magnets. These are perfect for Grandparents, aunts and uncles, friends, and even for your self, lol.

mini-canvas-photo-magnets

Materials:

  • Mini canvases
  • Mod Podge, brushes, scrap paper, magnet, glue
  • Paint, photo

Instructions:

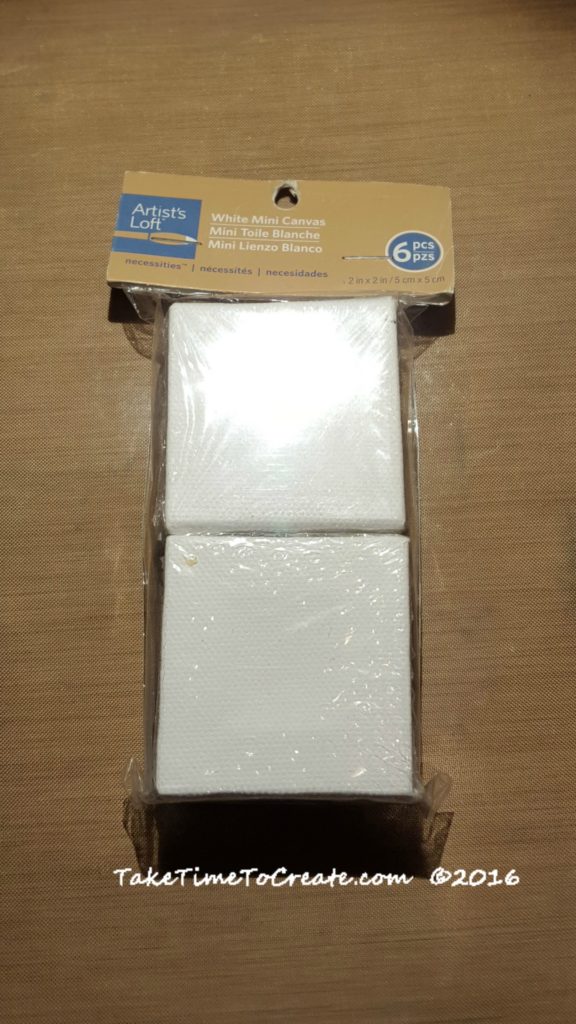
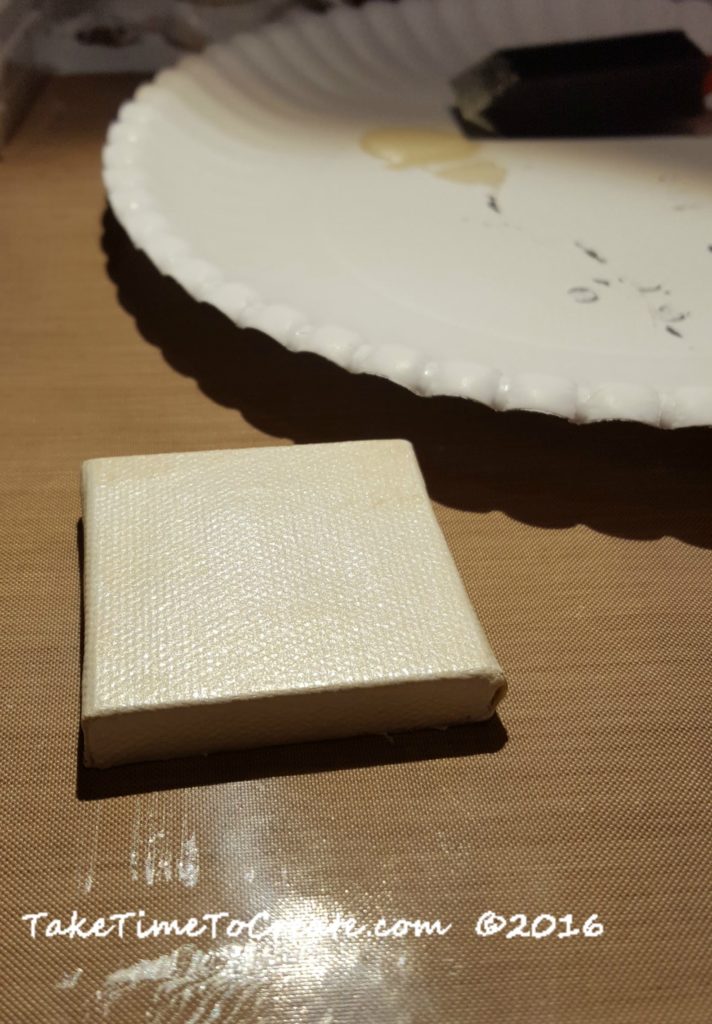
First pick up some of these adorable mini canvases. I couldn’t resist, they are so cute. At just 2″ x 2″ they are perfect for magnets.

mini-canvas

After you are finished admiring the cuteness of the canvas paint is all in a neutral color, including the sides.

paint-canvas

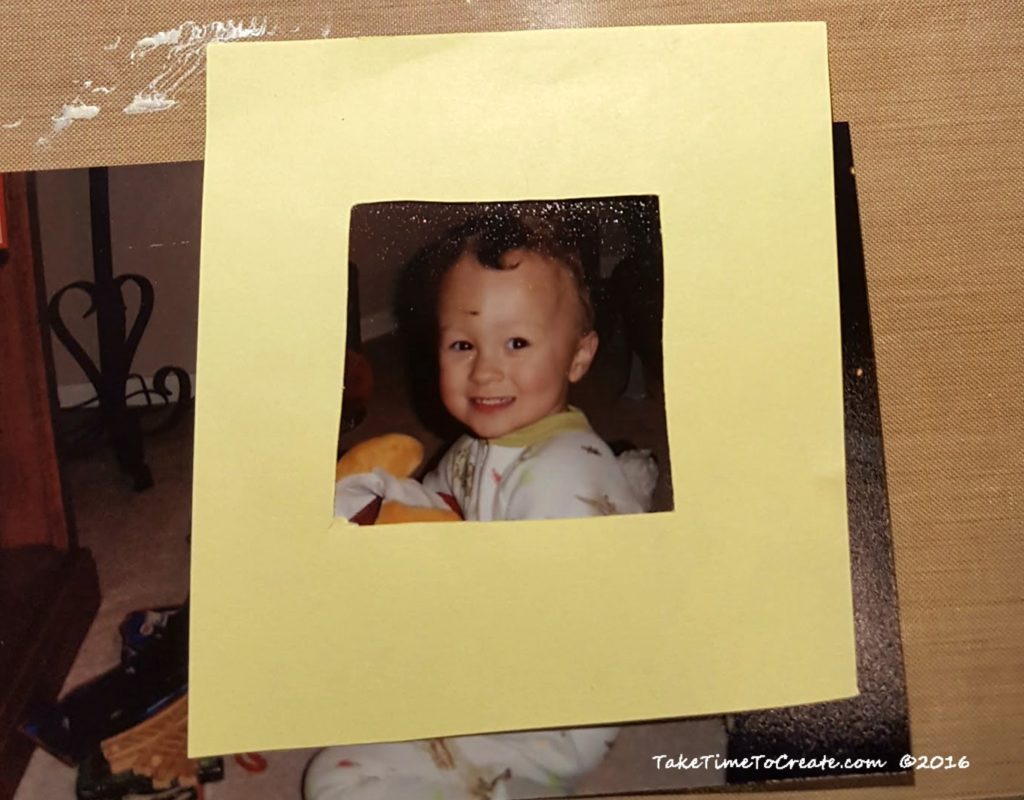
Now it is time to cut out your picture. To help with this make a template by cutting out a square in some scrap paper the size of your canvas. Then use that template to find the best image for your magnet.  You may even discover that the picture you chose won’t work because it is too big or too many details get lost.  (on a funny side note when my teenage son saw me doing these magnets the other day he laughed and said that he was freshly dented in that pic. He still has the scar to this day. ahhh kids, they do keep us on our toes)

make-a-template

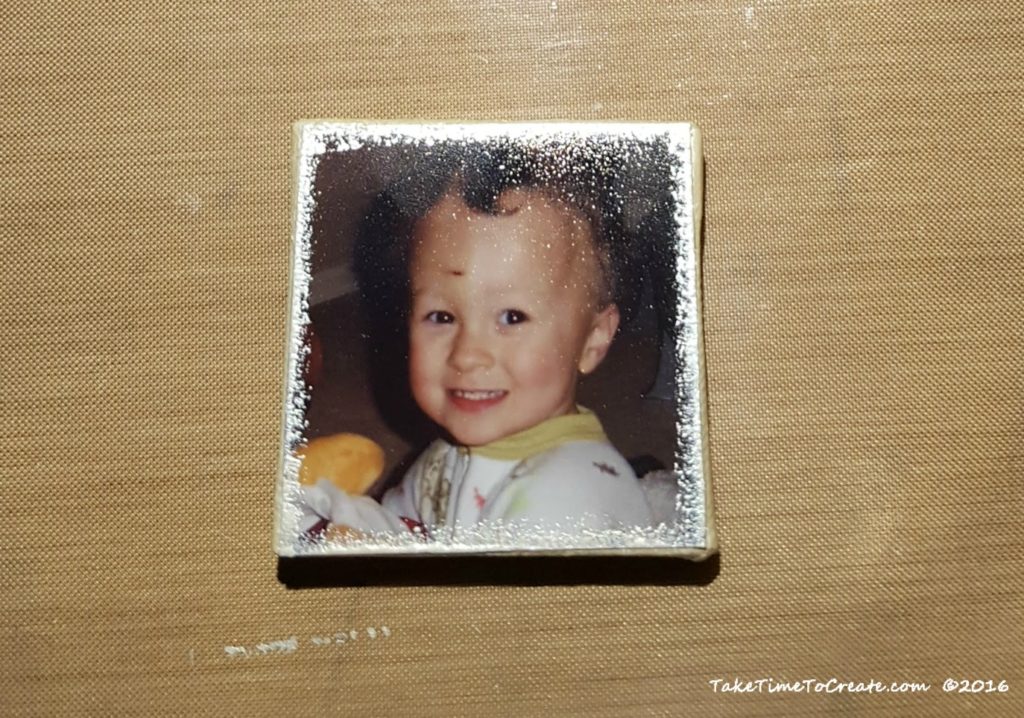
Then glue the picture down using Mod Podge. You can add a layer of Mod Podge to the top if you wish. Then I sponged some of the same paint color I used previously to add a nice boarder. Glue a magnet to the back an you are done. A great gift that can be done in 10 min.

Are there any gifts that you would like me to do a tutorial for? Let’s make this a DIY holiday season!


sponge-around-edges-of-canvas

This post Gift Idea- Mini Canvas Photo Magnets appeared first on Take Time To Create.
Make a Basket Out of Wine Corks

Make a Basket Out of Wine Corks

Hello Everyone!

The question of the day is what to do with left over wine corks? Disclaimer: I did not drink all of this wine to make this craft, lol. I got a big box of wine corks from eBay for really cheap! I just love all the crafts people are doing on Pinterest with the corks so I thought I would try it out.

diy-basket-out-of-wine-corks

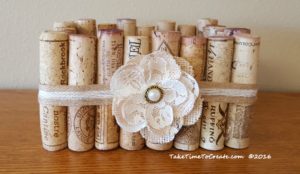
This is a really simple craft that probably won’t take more than 30 min to complete. This basket is perfect for just your desk or table. It is a really cute way to store just about anything.

finished-diy-wine-cork-basket

Instructions:

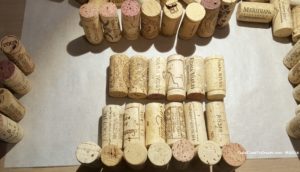
Gather your corks and start to assemble them. Try to get them all about the same size, it will make the basket look better.

start-gluing-the-corks-together

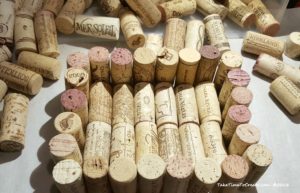
Then start hot gluing them together. Hold the pieces together for a few seconds to make sure they stick, but the hot glue should be strong enough to hold it together.

collect-your-wine-corks

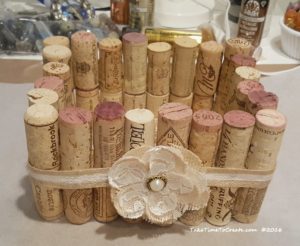
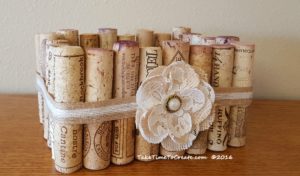
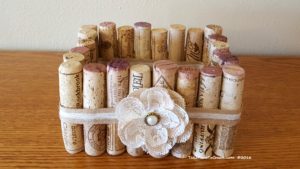
I did 2 rows of 5 for the bottom of the basket and 24 vertical corks for the sides. And I stacked the sides 2 corks tall.

Once I was gluing all the corks together I thought it looked a little plain so I added a ribbon and a flower to jazz it up.

add-ribbon-and-flower

So what have you made with wine corks?    Next I think I will make a trivet and a cork board for my office. Stay tuned to the tutorials.

finish-basket

wine-cork-basket-by-take-time-to-create

The post Make a Basket Out of Wine Corks appeared first on Take Time To Create.
DIY Leaf Bowl From Dollar Store Leaves

Hello Everyone!

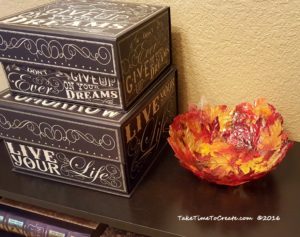
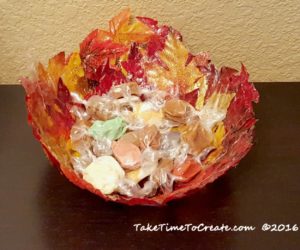
Today I have an easy DIY using leaves from the Dollar Store to make a really cute bowl.

diy-leaf-bowl

I have seen this DIY about 847 times on Pinterest, but I thought that I would add my version to the mix. lol. You can follow me on Pinterest and see all the craziness that I pin.  It is so quick and easy, the longest part is waiting for it to dry…

add-candy-to-leaf-bowl

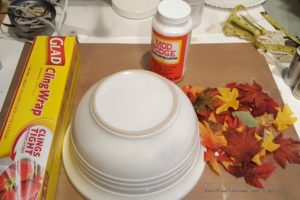
Materials:

  • Leaves
  • Mod Podge, foam brush, cling wrap
  • Bowl

diy-leaf-bowl-materials

Instructions:

Find a bowl that you can use for the mold. We have had this bowl for over 20 years, in fact Dear Hubby had it when we got married. When I first saw it I mentioned to him that it was a great bowl (it is one in a set of 3) and he said “Thanks, I got it at Ace Hardware when I was getting some tools.” lol. Such a man thing to do. Anyway, the bowls are awesome and have held up great! So I thought it would be a perfect mold.  I think I should use the other 2 bowls and make a set of 3 leaf bowls, that would be so cute!

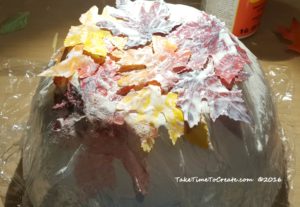
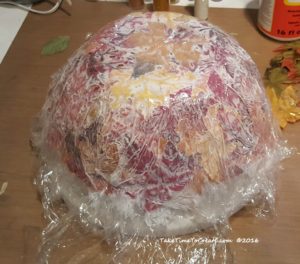
Next wrap cling wrap to the bowl to protect it

Then start adding mod podge and leaves. I used glossy mod podge because that is what I had, but mat would work great as well. Make sure everything is well covered.

add-layers-of-mod-podge-and-leaves

Once everything is covered add some cling wrap to the top to help keep everything in place as is dries. It does take a while to dry, but eventually it will dry

add-cling-wrap-to-top

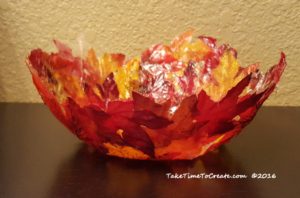
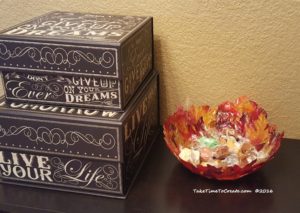
Once it is completely dry slowly, and carefully peal off the cling wrap. And there you go a brand new leaf bowl that is perfect for Halloween, Thanksgiving, or Fall. It is a little fragile and not the sturdiest bowl, but it is perfect for candy or pine cones or pumpkins, any light weight decor is perfect.

diy-bowl-from-dollar-store-leaves

diy-leaf-bowl-on-display

The post DIY Leaf Bowl From Dollar Store Leaves appeared first on Take Time To Create.
Give Thanks-A DIY to show your thanks

Hello Everyone!

Ever have a rough day? I am sure that everyone has had a rough day, at least once. Well that was my day yesterday. There was nothing in particular that was bad, it was just rough overall, and that is the way it stayed until the end of the day. At the very end of the day I went shopping and my friend was able to join me and it just made my day a whole lot better. It was wonderful to see her and it made a great way to end my day.
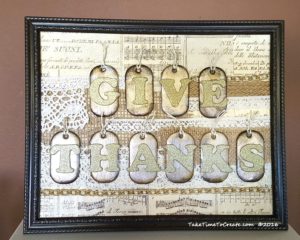
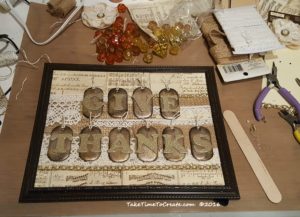
And that got me thinking, that even though my day may have been rough I can always give thanks. I am thankful for my family, friends, and my work, and this blog. Even if everything is not going according to plan, I am still thankful. So after I got home I went straight to my craft room and made this piece that says Give Thanks. It was cathartic to make it and it is a great reminder to always be thankful, even when it is hard.

give-thanks-from-take-time-to-create

Materials

I used stuff that I had in my craft room, which was nice to use up what I already had

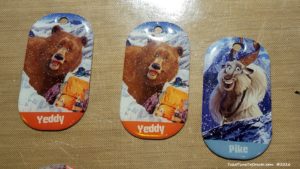
  • I had these plastic dog tags that I found at Who Gives a Scrap. If you don’t have anything like this you can make your own with card stock.

dog-tags-ready-to-alter

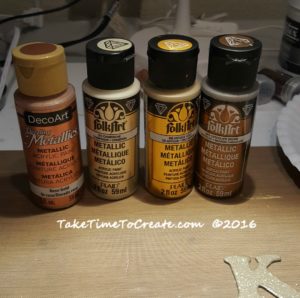
  • Metallic Paint

metallic-paints

  • Gesso, brushes, mod podge, glue, letters, sandpaper
  • Paper, ribbon, burlap, and anything else you need for the background

Instructions

I saw these dog tags awhile ago and I thought they would be perfect for a project, but I wasn’t sure what. I  think they worked perfectly for this project.

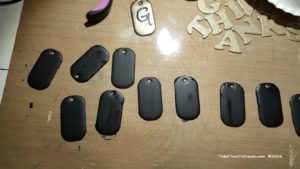
I roughed up the surface with sandpaper then I applied a layer of black gesso

apply-a-layer-of-gesso

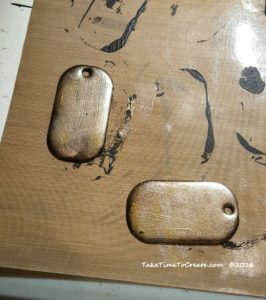
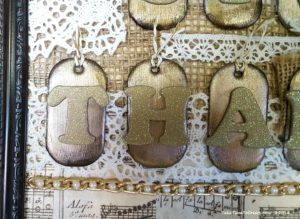
Once they gesso dried I sponged on different metallic paints. I kept on going until I found a look I was happy with. Then I added glitter letters to the tags to spell out Give Thanks.

start-adding-paint

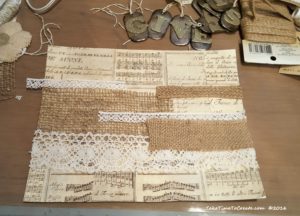
For the background I Mod Podged on different papers I had in a random fashion. Then I added some ribbon and burlap and a faux pearl necklace to add more interest and texture.

layer-paper-and-ribbons-for-background

Then I added string to the dog tags and then I glued it all together and put it in a frame. Now it is ready to hang and be a daily reminder.

give-thanks-up-close

I am pleased with how it turned out. How do you give thanks and what are you thankful for?

give-thanks-finished

Transforming Your Old Figurines

Hello Everyone!

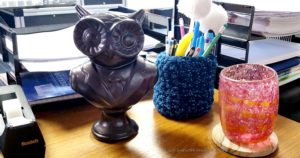
Meet Issac. He is my new friend that sits on my desk at work. It was a simple task of transforming an old figurine from a golden owl into something amazing. Why is his name Issac? No particular reason except I asked my son what his name should be and Issac as suggest, and the name stuck. Perfect name for an owl.

issac-on-my-desk

Now, I will admit I particularly like birds, especially Owls. But, when I saw this disguised looking owl at Goodwill I knew that he had to come home with me.

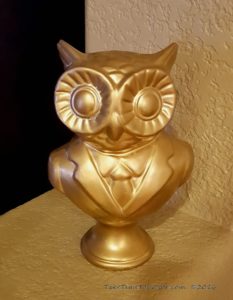
owl-in-all-its-golden-glory

I just love how professional he looks with his suit and tie, He looks so serious. And the fact that he is a bust of an owl just cracked me up.  But he was gold. I didn’t think he really liked being a 70s fantastic golden owl, so I decided to help him out.  As I looked him over I noticed that he was white under his label so my thought is that he was originally white, which would be really cute as well.

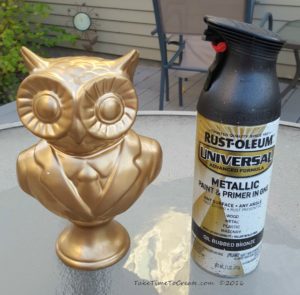
But he needed to be Oil Rubbed Bronze.

spray-paint-your-owl

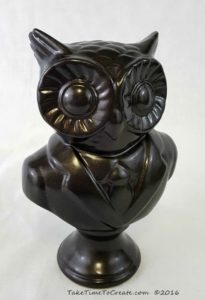
Protect your work space and spray in light, even coats, repeating as necessary. When he is completely covered let him dry. Once he is dried he is ready for display and he is ready to impart his wisdom.

finished-owl

I love covering my thrift finds with spray paint. I painted this Candle Holder,  and these Porch Lights, and these lanterns.  You never know what I will paint next. 

« Older posts Newer posts »

© 2024 Take Time To Create

Theme by Anders NorenUp ↑

Follow

Get the latest posts delivered to your mailbox:

%d bloggers like this: