Tag: old is now new (page 3 of 4)

Craft Supply Thrift Haul and Tips and Tricks

Hello Everyone!

If you are like me you love to get a bargain, especially for craft supplies. Craft supplies can be very expensive, but you can find some great deals at creative reuse centers, or thrift stores.

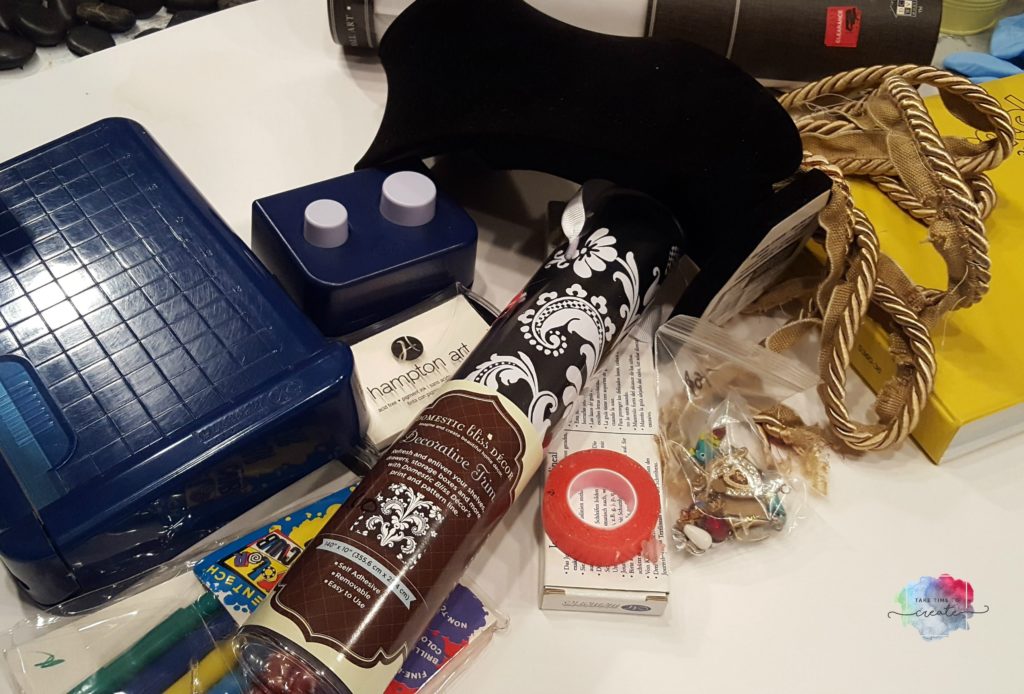
Recently I went to my favorite creative reuse center, Who Gives a Scrap, and I have a craft supply thrift haul video for you.

Also, I wanted to give you a few tips, tricks and hints when shopping for craft supplies at a creative reuse center or thrift store.

Before I get into the tips, the biggest piece of advice I can give you is to buy what you need. If you buy everything that looks good, or interesting, you will be over run with stuff very quickly!

And always ask a person working at the store before trying out something when you trying to determine if the item still works or has ink left in it.

Things to look out for when shopping for Fabric:

  • Size- is it the size I need
  • Condition- are there any rips, tears, or stains that can’t be fixed or worked around

Things to look out for when shopping for Punches or Scissors:

  • Test to make sure they work! Try them out on a piece of paper

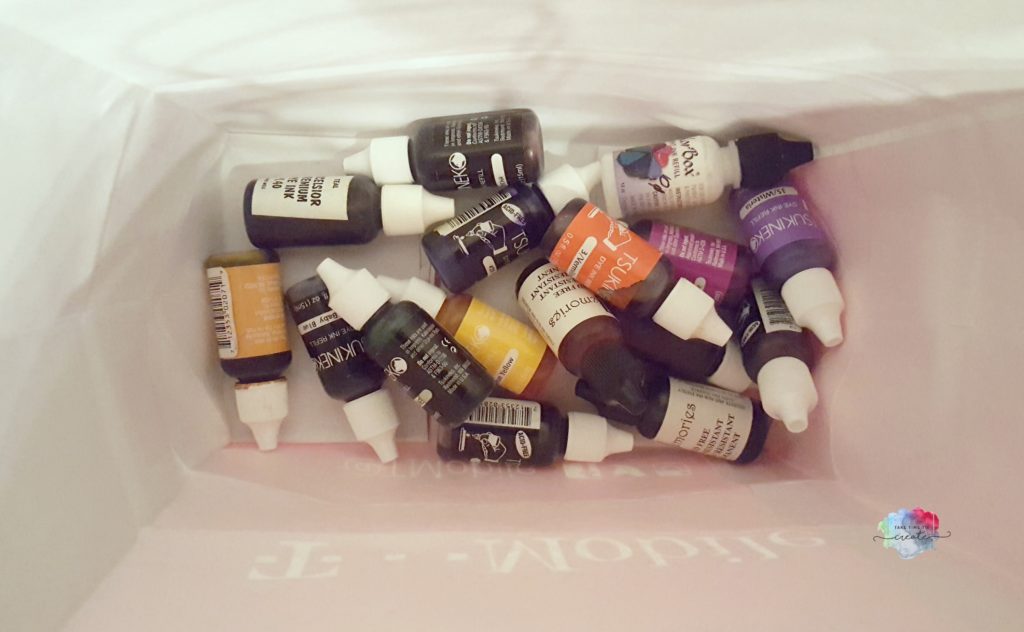
Things to look out for when shopping for Paint or Ink or Markers:

  • Open it to make sure the paint is not dried out, and there is still plenty left
  • Smell it, sometimes paint can start to smell a little funky and you don’t want that, lol
  • Scribble the markers to make sure they work, you don’t want to purchase dried out markers.

Thrift haul

Things to look out for when shopping for Books:

  • Check for pages torn out, if there are missing pages it might be a vital instruction that you are missing, lol
  • Check for overall condition, can you still use it?

Things to look out for when shopping for Embroidery/Cross Stitch/Needle Point Kits:

  • Check to see if it is unopened, if that is the case then you are good to good
  • But if it is open, check to make sure it has the floss, instructions, and anything else you need to complete the kit.

Thrift haul

Things to look out for when shopping for Charms or Jewelry Making supplies:

  • Check to make sure there is enough to complete  your project
  • Check the condition of the beads and tools, if it is not in usable condition then pass on the item.

There you have it, my tips, tricks, suggestions, and hints I use when I go thrift shopping for craft items. Any reputable thrift store, like Who Gives a Scrap, will have quality items that work and are ready for you to use. Keep your eye out, you never know what bargain you can find!

What tips do you use when you go craft supply thrift shopping?

The post Craft Supply Thrift Haul and Tips and Tricks appeared first on Take Time To Create.


Mixed Media Altered Bottle

Hello Everyone!

I love looking at wine bottles and any other bottle with a great shape.  They are just so beautiful and I have a hard time sending them to recycling, lol.

So with this bottle I decided to alter it using basic mixed media techniques. Now it is ready to be on display instead of heading to recycling.

You can watch the altered bottle process here:


Materials:

  • Bottle (cleaned and ready for painting)
  • Gesso, soft gloss gel, glue
  • brushes
  • buttons, raffia, and any other bits and bobs that you want to stick on
  • charm bracelet or necklace
  • tissue paper (or old patterns)

Instructions

Find a really great bottle. I love the shape of this one! Make sure it is clean before you start altering it.

altered bottle

For my base layer of texture I added crinkled up tissue paper from old pattered and adhered them with Soft Gloss gel. I will admit that I am still getting the hang of taking pictures and filming at the same time. I don’t have a pic of this but it is the same technique that I used in in these posts:

Mixed Media Box

Tissue Paper Rose

Once the paper is down and dry give everything a coat of black gesso. Once that first layer is dry, now it is the fun part, start adding buttons, ribbon, raffia to the neck, and anything else you want to add detail and interest.

altered bottle

Once all the glue is dry cover everything is black gesso. Make sure you get in all the nooks and crannies. altered bottle

Dry the gesso completely and then dry brush on the colors you want. I did a base layer of gun metal gray and highlighted the details with a pretty metallic purple.  I added an old bracelet to the neck for additional interest.

Spray seal it and you are done!

A beautiful new bottle to add to your decor! altered bottleThe post Mixed Media Altered Bottle appeared first on Take Time To Create.

DIY Rusty Lantern

Hello Everyone!

I seem to really love making everything all rusty and old, lol

I have another item that I made look rusty and worn, using the same techniques that I did earlier.

Here are the other posts about the rust technique:

For this project I used a lantern that I got at the dollar store (these are super cute just like this, but I just had to add my own touch to the lantern)

rust lantern

Then you just start dabbing on your paints with a make up sponge. I used the Finnabair Rust Pastes and I do like them! They add the right colors and texture to make it look like something rusted naturally.

rust lantern

Dab all around until you are happy with the the end look.

rust lantern

rust lantern

Here is the final product. I love this technique and I can’t wait to make something else rusty!
rust lantern

Also, I made a video of the process of making a rusty lantern if you want to check that out.

The post DIY Rusty Lantern appeared first on Take Time To Create.

Decorate Your Flip Flops

Hello Everyone!

This post contains affiliate links

Don’t you just love summer?  Long days, swimming, and flip flops. And you all know how much I love to decorate things and make them my own.

Today’s tutorial is on decorating your flip flops!

You can check out the You Tube video here:

This is an easy diy that you can do with friends or kids, or you can make them all for your self, lol

Materials

  • Flip Flops (here is a link to get them from the Dollar Store) but you can get them almost anywhere
  • Glue (I used this Loctite plastic glue. You can get it here: Glue)
  • Flowers, pom poms, stickles, feathers, or anything else you want to attach to your flip flops.

Instructions

As you can see in this pic I have the flip flops numbered. I did a terrible job of taking pics while was filming, lol, but I think you can get the idea of what I did from the pic. I used the loctite plastic glue on all the flip flops.

diy flip flops

Flip Flop #1

I did want to take away from the pretty design, just enhance it. So for his pair I just glued on some pom-pom trim.

Flip Flop #2

Feathers! This is such a cute, boho idea. Just glue one a pile of feathers, I got mine from the dollar store, but you can get them from almost any craft store.

Flip Flop #3

This is a fun free form design using stickles. Just draw your design and let it dry and you have a fantastic pair of flip flops

Flip Flop #4

Take a large flower and glue it to the top of the shoe. To help keep the flower in place while it was drying I used some clothes pins to keep it in place.

Flip Flop #5

For this pair I disassembled an old statement necklace and glued the pieces on to the flip flop. Just make sure you rough up the metal so it sticks to the plastic.

There you go, 5 different ideas on decorating your flip flops.

What other things do you used to decorate your flip flops?

diy flip flops

The post Decorate Your Flip Flops appeared first on Take Time To Create.


Sea Shell Altered Mason Jar

Hello Everyone!

If you are like me then you probably have about 800 million mason jars in your home.  And all those wonderful crafts on Pinterest have inspired me to start using them!

So I decided to use one of those mason jars in this tutorial. It looks organic and beachy with the sea shells and sand texture. Perfect to store your souvenirs from the beach.

Altered sea shell mason jar

Materials

  • Mason Jar
  • Gesso
  • Acrylic paint and brushes
  • Hot Glue
  • Zipper
  • Sea Shells

Instructions

Find a mason jar, I am sure almost everyone has at least one mason jar in their homes, lol. You will need to prime it with white gesso. Paint a smooth layer all over the glass.

Please excuse my messy craft table, I have way too many projects going on and I am just a messy crafter, haha.

sea shell altered mason jar

The next layer is made to look like sand. I added some sand from the dollar store to some heavy gel and sponged it on with a foam brush. Let this layer completely dry before adding paint. If you have textured paste you can use that, but I didn’t have any so I decided to make some.

sea shell altered mason jar

sea shell altered mason jar

After the jar is dry you can add some acrylic paints. I sponged on 3 tan/sand colors to add detail and interest. Any browish colors should work.

sea shell altered mason jar

sea shell altered mason jar

Once it is all dry you can  add the sea shells, this is the fun part! Waiting until everything is dry will help with the glue adhering to the jar. I just used hot glue and that seemed to work for this project. Add a few shells and keep testing with the zipper to make sure your shells will fit.

Wrap the top with twine or raffia.

sea shell altered mason jar

After I added a bunch of shells I added the zipper. Glue it all down and then fill in the blank spaces with more shells.  I am a fan of adding more stuff until it isbursting. When you add shells to the lid lightly sand the metal to help the glue adhere.

Once it was complete I thought it needed some sparkle so I dry brushed on some beautiful gold acrylic paint.

sea shell altered mason jar

All done! I am loving this technique, and I think it would look great with rhinestones or buttons, or any other small item! So pretty!

sea shell altered mason jar

The post Sea Shell Altered Mason Jar appeared first on Take Time To Create.

DIY Dragon Egg Tutorial

Follow my blog with Bloglovin

Hello Everyone!

As you can see from the link above I am now on Bloglovin! In other exciting news, I will at some craft fairs and a comic con later in the year! As the time gets closer, and as I learn more information, I will share all the details with you! I can’t wait to show my crafts and to see you all in person!

I have a YouTube tutorial of this egg, you can watch it here:

This is a fairly easy tutorial that is fun and a great way to show your love for all things Dragon!

DIY dragon egg


Materials:

  • Old tin egg (my was left over from Easter)
  • Hot Glue
  • Black Gesso
  • Acrylic Paint

Instructions:

First cover your egg with hot glue then then take a silicone tool and smash the glue all around. I learned this technique from watching a video from The Frugal Crafter, I love learning new ideas from other crafters!

DIY dragon egg


diy dragon egg

Once the glue is dry then cover everything in a layer of black gesso. Make sure you get into all the nooks and crannies to completely cover the egg.

DIY dragon egg

Once the gesso is dried paint the egg using acrylic paints. I started with a sliver then I added a purple and ended with a white on top. Dry brush the colors on and try not to coat it too much, you want to see all the colors, including the black base layer.

DIY dragon egg

And there you have it, a custom dragon egg! I love how it looks in my Raku fired bowl that I did in my pottery class.

DIY dragon egg

The post DIY Dragon Egg tutorial appeared first on Take Time To Create.

Metallic Mixed Media Box

Metallic Mixed Media Box

A mixed media box is great for storage and display. Using basic mixed media techniques you can have a beautiful and useful box.

Hello Everyone!

In case you missed my class at my local creative reuse center, Who Gives a Scrap, I thought I would share with you one of the project I did. It was a beginning mixed media class that was tons of fun to teach and the participants were awesome! I loved seeing the creativity and individually of all the projects.

mixed media box

One of the challenges of teaching at a creative reuse center is trying to use items that you can find, which makes a mixed media project perfect. I prepped my box ahead of the class, but I used items that I found there. The sky is the limit with a box like this.

mixed media box

The first thing I did is find a small canvas for everyone to work with. I found these boxes that had old film canisters in it, these came from a university that was just going to throw them away. I am glad that that they didn’t pitch them. The box is about 6×6 and is a perfect size for beginners to work on, not to big to be intimidating, but not too small to be frustrating.

For the background I took tissue paper from old patters (I must really love old patterns I seem to use them all the time, lol. You can see the rose I made for my mom here: Tissue Paper Rose). I used Mod Podge and crinkled everything up and glued it down. Once it is all dry cover the background with black gesso.
mixed media box

Then I found buttons, and beads, and a knob that I really liked. So I hot glued it all the the box. You could use a gel to glue it down, but I wanted it to dry fast so I used hot glue.  Once I got it all down I painted clear gesso over everything so I could paint the smooth surfaces.
mixed media box

I love metallic paints! I used them all the time. For this project I just dry brushed the metallic paints on, highlighting the peaks and the valleys stayed black. If you don’t gesso then the paint won’t stick to the smooth buttons and beads. mixed media box

After dry brushing the paints i was done. The project was easy enough for beginners, but more advanced crafters could really go to town. I had a great time and I can’t wait to teach my next class!
mixed media box
The post Metallic Mixed Media Box appeared first on Take Time To Create.

Tissue Paper Rose

Tissue Paper Rose

Use the tissue paper in old patterns to create a beautiful tissue paper rose. 

Hello Everyone!

Last weekend was my beautiful mother’s birthday! She is such an important part of my life and I wanted to express that with a handmade gift.

I created this tissue paper rose for her and gave it to her last weekend when we went to lunch and shopping to celebrate!

diy tissue paper rose

I created a video to go along with the tutorial, you can see that here:  You Tube Tissue Paper Rose Tutorial

This was so much fun to create, and it was my first time doing something like this and I am happy with how it turned out.

Materials:

BTW this list contains affiliate links.

Instructions: 

First prep the canvas board with gesso. I chose black gesso to give me a clean slate.

Get the tissue paper ready by ripping the tissue paper and rolling it into a tight strip.

diy tissue paper rose

Roll the strips into a tight circle and glue it down in a spiral. Try and keep it all tight and keep going until you get the size you like.

Make the stems by using the strips in a swirl motion. The leaves were made from a short strip with one end slightly trimmed in a rounded shape.

diy tissue paper rose

Next I put a layer of black gesso on everything.

No photo here: Then I decided that the black was too dark for the center of my rose so I painted over the black with white gesso

Then I added glass bead texture to the outside of the rose.

diy tissue paper rose

Here is where I got really bad at taking photos, lol. But you can see the process in the video

I painted the rose with 2 colors of pink and the background is a light blue to a dark blue to a purple.

I tried to stamp the background with some images but I didn’t love that so I mostly covered that back up.

Then add mod podge and adhere the mica flakes. The mica flakes add so much dimension and sparkle!

diy tissue paper rose

Dry brush a light shimmery white over everything and spray a sealer on when you are done.

It makes a wonderfully sparkly gift that was tons of fun to make. 


diy tissue paper rose

The post Tissue Paper Rose appeared first on Take Time To Create.

This post contains affiliate links.

You Tube Channel and Yarn Bowl

YouTube Channel and Yarn Bowl

Creating a yarn bowl is a great way to use up all you scraps of yarn. 

Hello Everyone!

I am so excited to tell you that I have just started my You Tube Channel! As of today there is only one video, lol, but I will be adding more as the days go by. It is so fun to show you more with my videos and it will help my explain some of my processes better! I will also be videoing some of my art journals and hauls and all kinds of other things.

I would love for you to subscribe to my channel here: Take Time To Create You Tube Channel

Now on to the craft of the week.

Yarn Bowl

This is a pretty easy project that is similar to the leaf bowl that I made a few months ago. You can see that video here: Leaf bowl

Take any bowl with a shape that you like and wrap it with plastic wrap.

Yarn Bowl

Get your yarn ready by cutting it into smaller pieces if you want, I used pieces that were about a foot or more long. This is really up to you how you want your bowl to look. Then I used a lot of Mod Podge to glue it all down. In the future I won’t be using Mod Podge, I don’t think it holds the finished bowl stiff enough.

I think I am going to try Aleene’s Tacky Glue for my next bowl. I have seen on Pinterest where people heat up a glue mixture for their yarn bowl but since I don’t get along with my oven I am trying to stay away from that process, lol.  I will let you know hw my experiments go.

Yarn Bowl

Let it dry completely and carefully remove it from the bowl. Reshape as necessary. So very cute! 
Yarn Bowl

What other ways do you use up your yarn scraps?

This post You Tube Channel and Yarn Bowl appeared first on Take Time To Create.

Create a Purse from an old VHS Tape

Create a Purse from an old VHS Tape

What do you do with all those old VHS tapes? Why you create a purse! Perfect way to add some interest to your outfit!

Hello Everyone!

I am almost embarrassed to admit, but I still have a lot of VHS tapes laying around my house. I hate to toss them, but I have no way of playing them (I don’t even own a VHS player…) So what do I with this pile of tapes? I decided to create a purse!

I will admit that is project did not turn out exactly how I envisioned it. But it did turn out cute and the next one will be better! In the instructions I will tell you what I did and how I will make it better next time, that way you can create it at home with out all my struggles, lol

create a diy vhs purse

Materials:

  • VHS tape
  • screw driver
  • cutters
  • fabric, buttons, trim
  • super glue

Instructions:

create a diy vhs purse

First you find an old VHS tape. If you no longer have one in your stash you can find them at thrift stores, or ask around I am sure someone has one somewhere.

create a diy vhs purse

This is the fun part. Unscrew all the screws and open the tape. Take out the innards and safe them, they will work great for a mixed media project. Next you want to cut off the plastic bits that are sticking up. This is one area that I messed up, I cut too much off the bottom and it doesn’t seal (there is a tiny hole in the bottom. Just be careful and you should be good.

Then I glued some faux leather fabric on one side, in hindsight I probably should have glued it to both sides, but I wanted to see the clear windows still. I think I can make this a little better next time.

create a diy vhs purse

Glue hinges so that you can open and close your purse. Try not to glue your fingers to the tape, lol (I may or may not have done the, lol) Also try not to glue the hinge shut, it takes a lot of careful prying if you happen to glue the hinge (once again I may or may not have done the, lol)

create a diy vhs purse

Then I added a decorated bottle cap and some string to secure the purse closed. Next time I will use elastic, but this works. Also next time I will add fabric to the sides so the tape doesn’t lay flat when open, it will help keep everything contained. Add a strap, I wanted mine to look a little funky so I added pom-pom trim.

create a diy vhs purse

create a diy vhs purse

Overall I am happy with how this turned out, and I am excited to make improvements to version 2.  What are you doing to up cycle your VHS tapes?

The post Create a Purse from an old VHS Tape appeared first on Take Time To Create


« Older posts Newer posts »

© 2024 Take Time To Create

Theme by Anders NorenUp ↑

Follow

Get the latest posts delivered to your mailbox:

%d bloggers like this: