Hello Everyone!
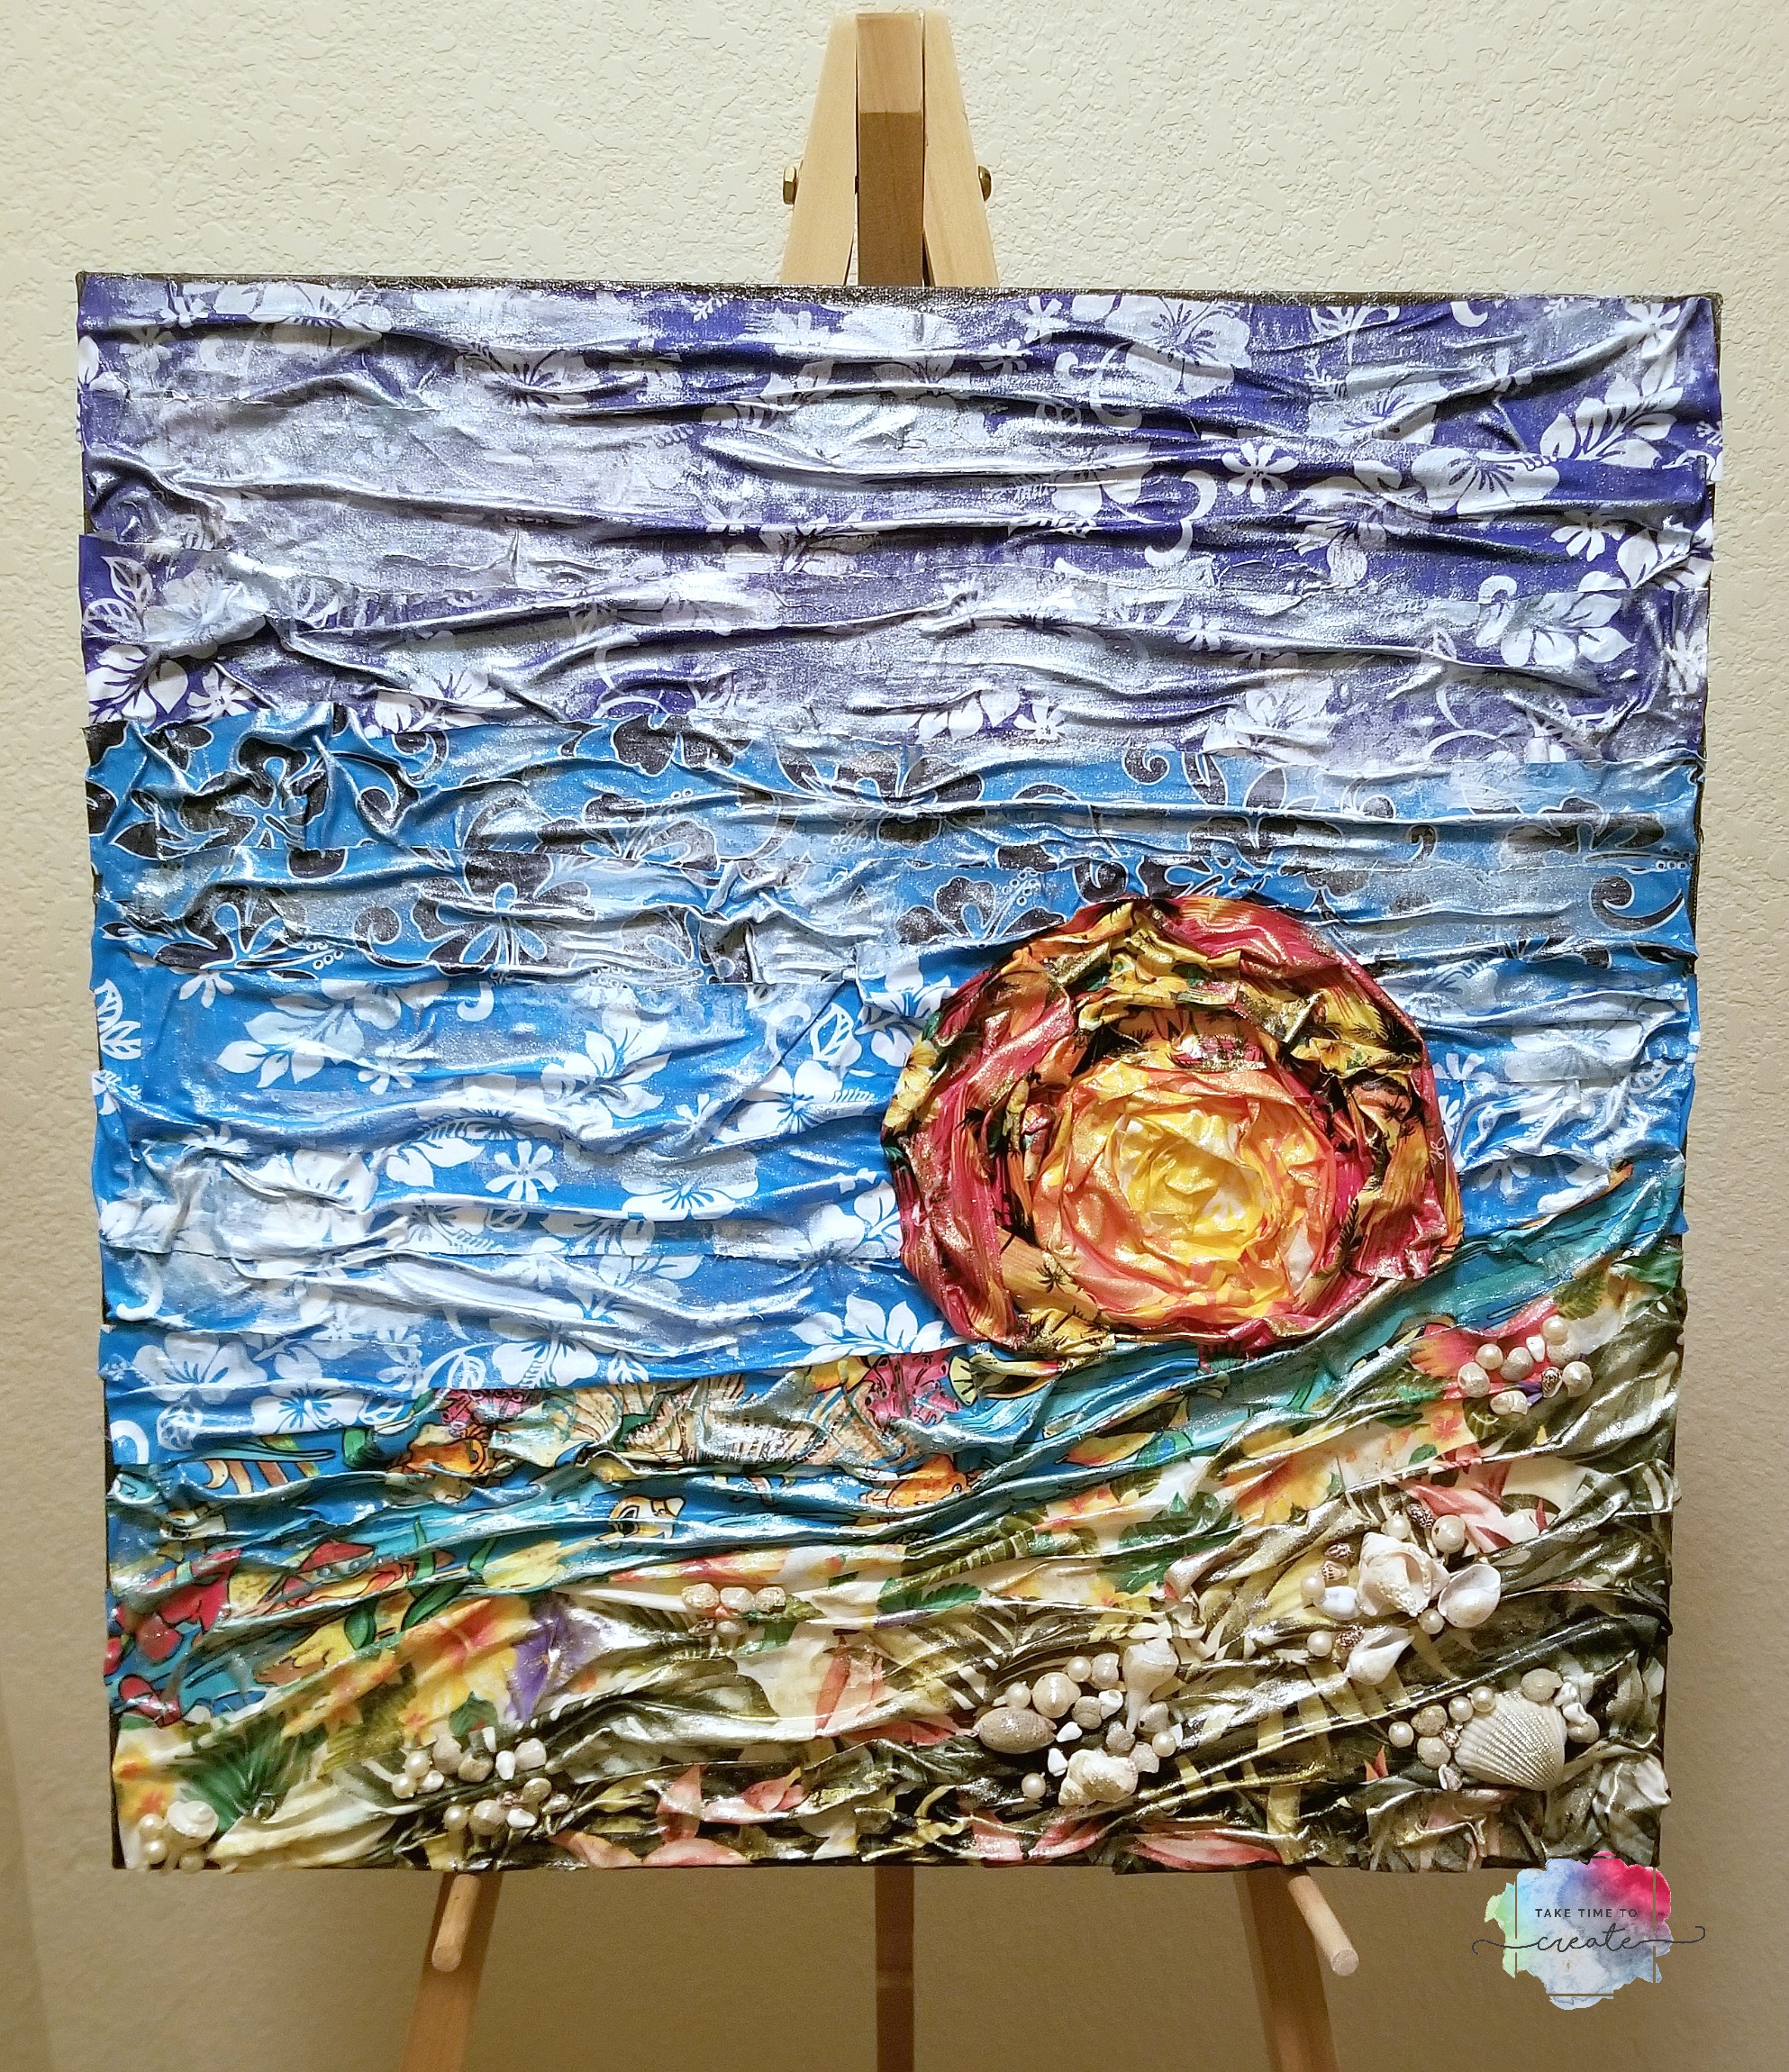
Don’t you just love it when a plan comes together? Recently I went to Hawaii with my family and I went to Quilt and Fabric land and I picked up a pile of fat quarters (with complete honesty, I don’t sew but I do glue things onto canvases, lol) I knew I wanted to make a beach landscape mixed media canvas. I am so thrilled with how it turned out, just how I imagined it!
You can see the video here in case you need more in depth instructions:
Materials:
Affiliate links to products I used (or similar)
- Tropical Fat Quarters (not what I used, but they might work): http://amzn.to/2GjuV4y
- Soho Black Paint: http://amzn.to/2DARal1
- Finnabair Sparks: http://amzn.to/2DBbFxK
- Finnabair brushes: http://amzn.to/2DPJheS0
- Canvas
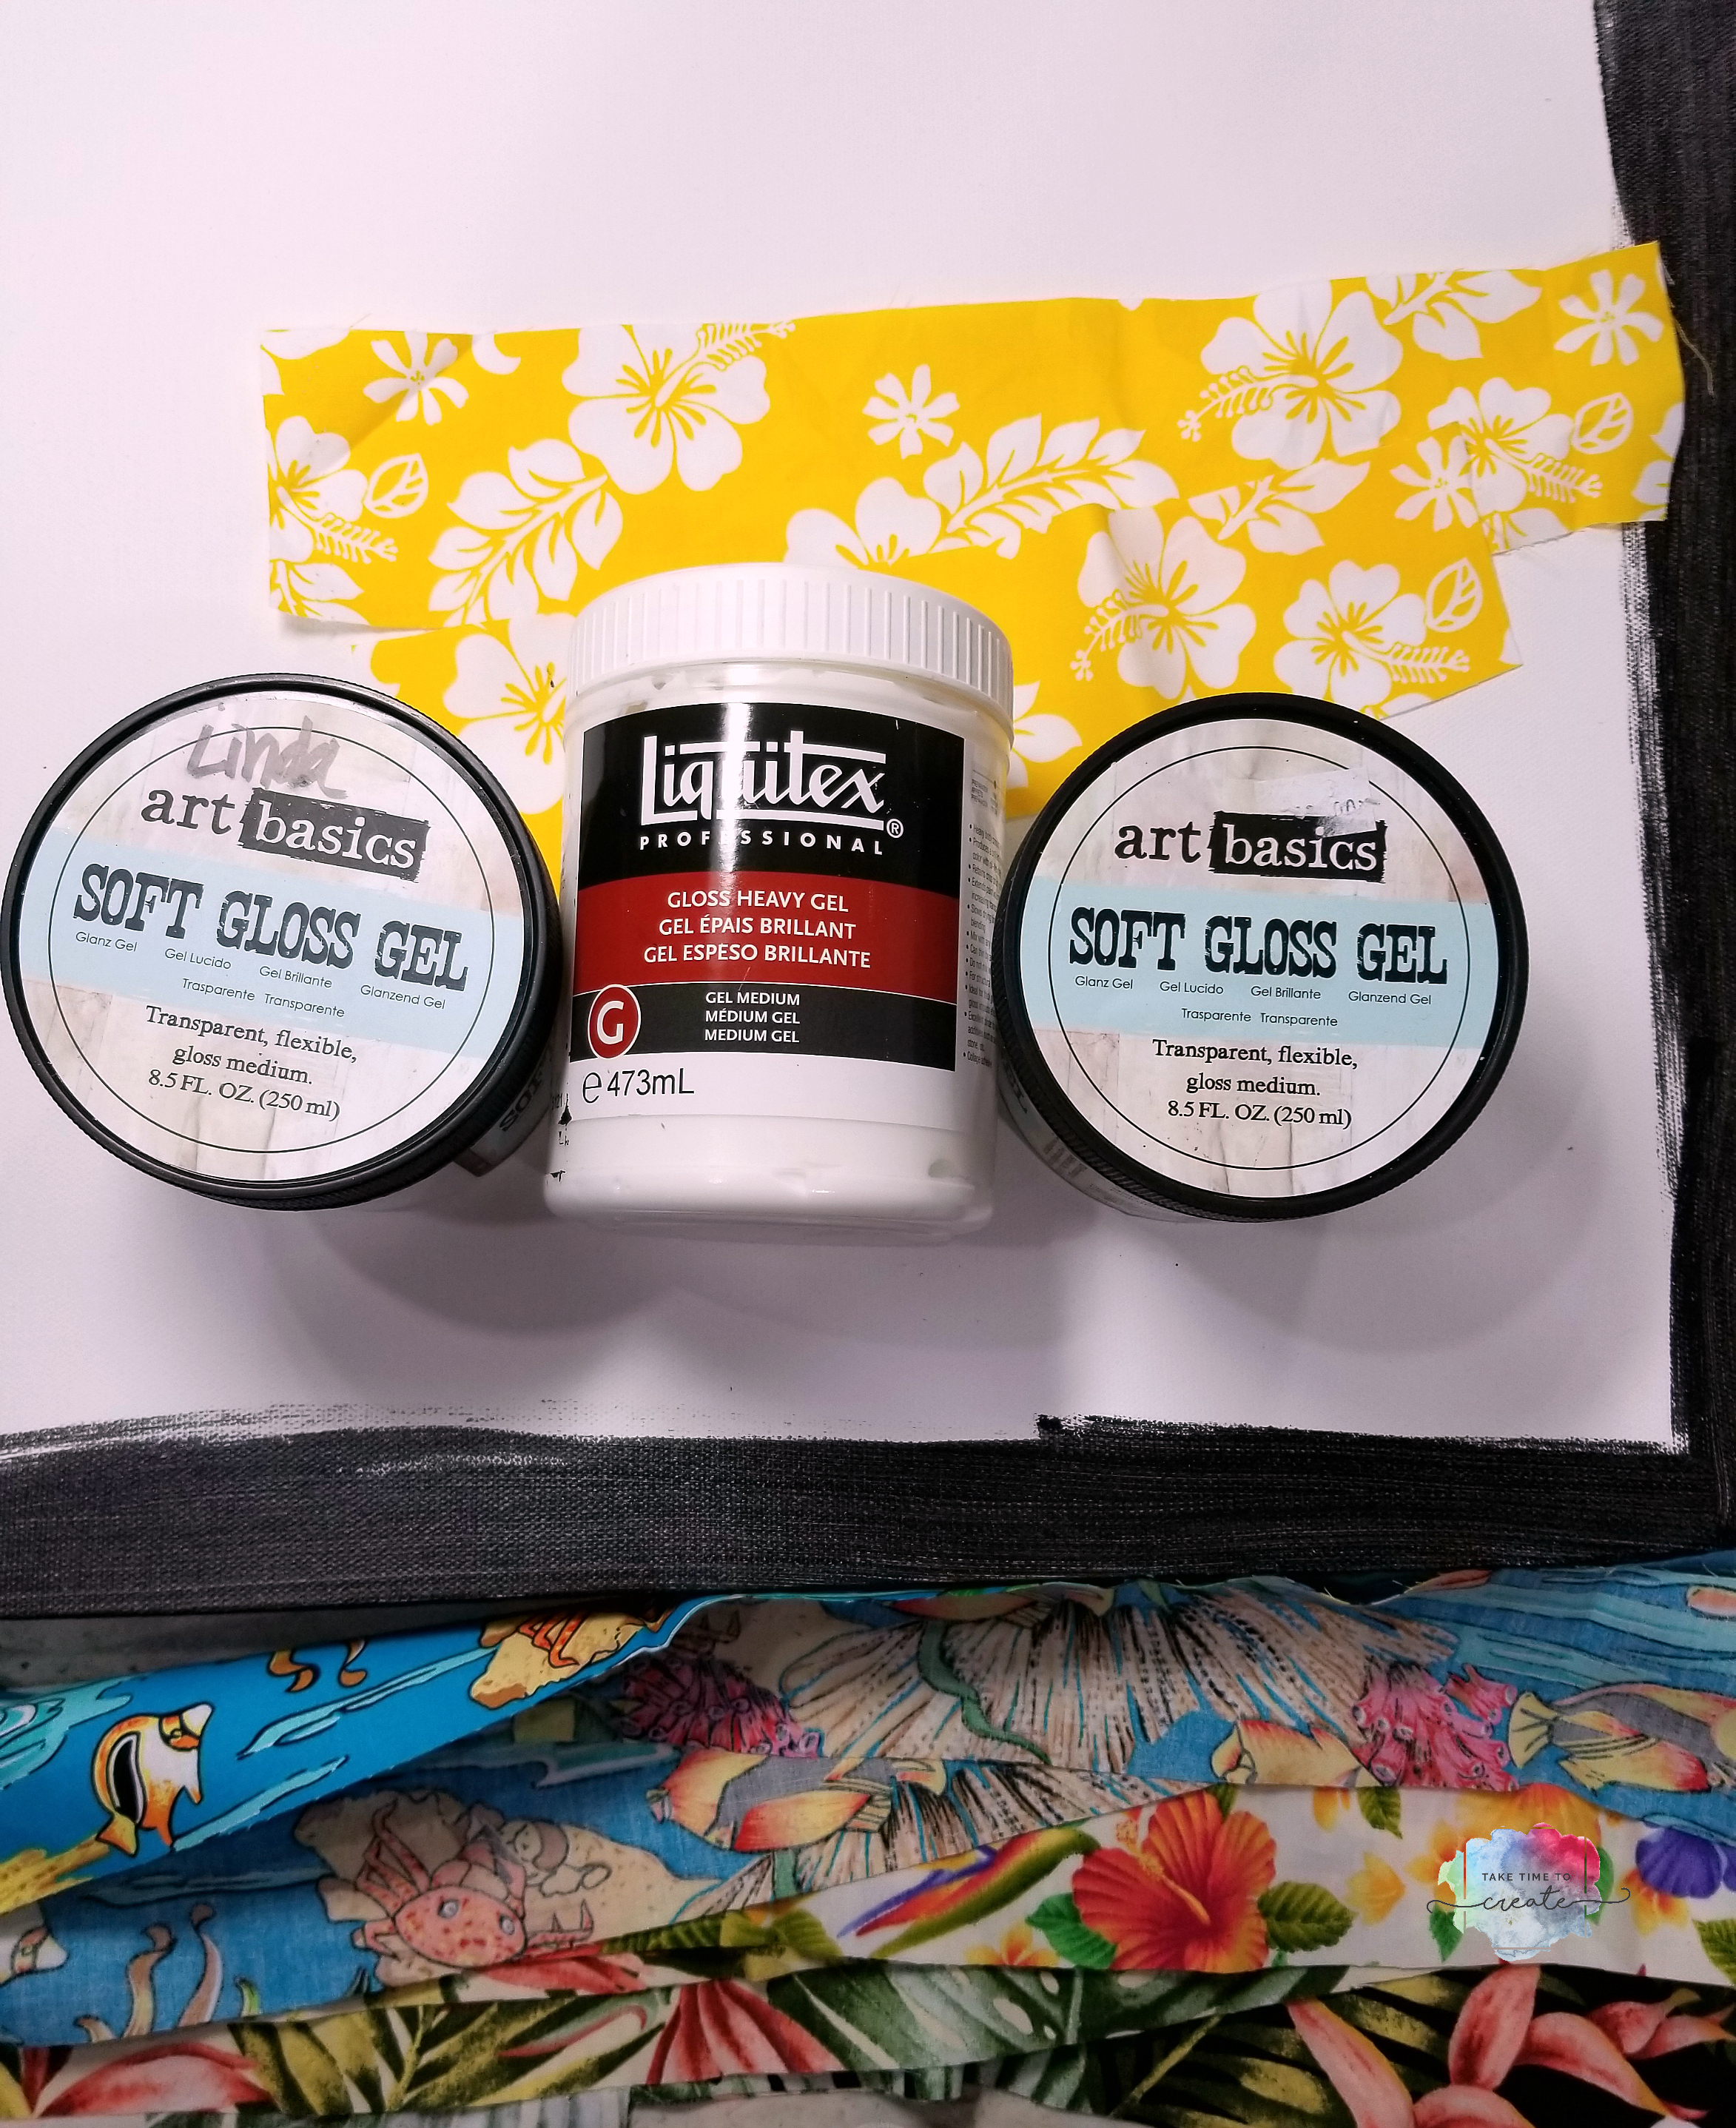
- Modeling paste and a gel
Instructions:
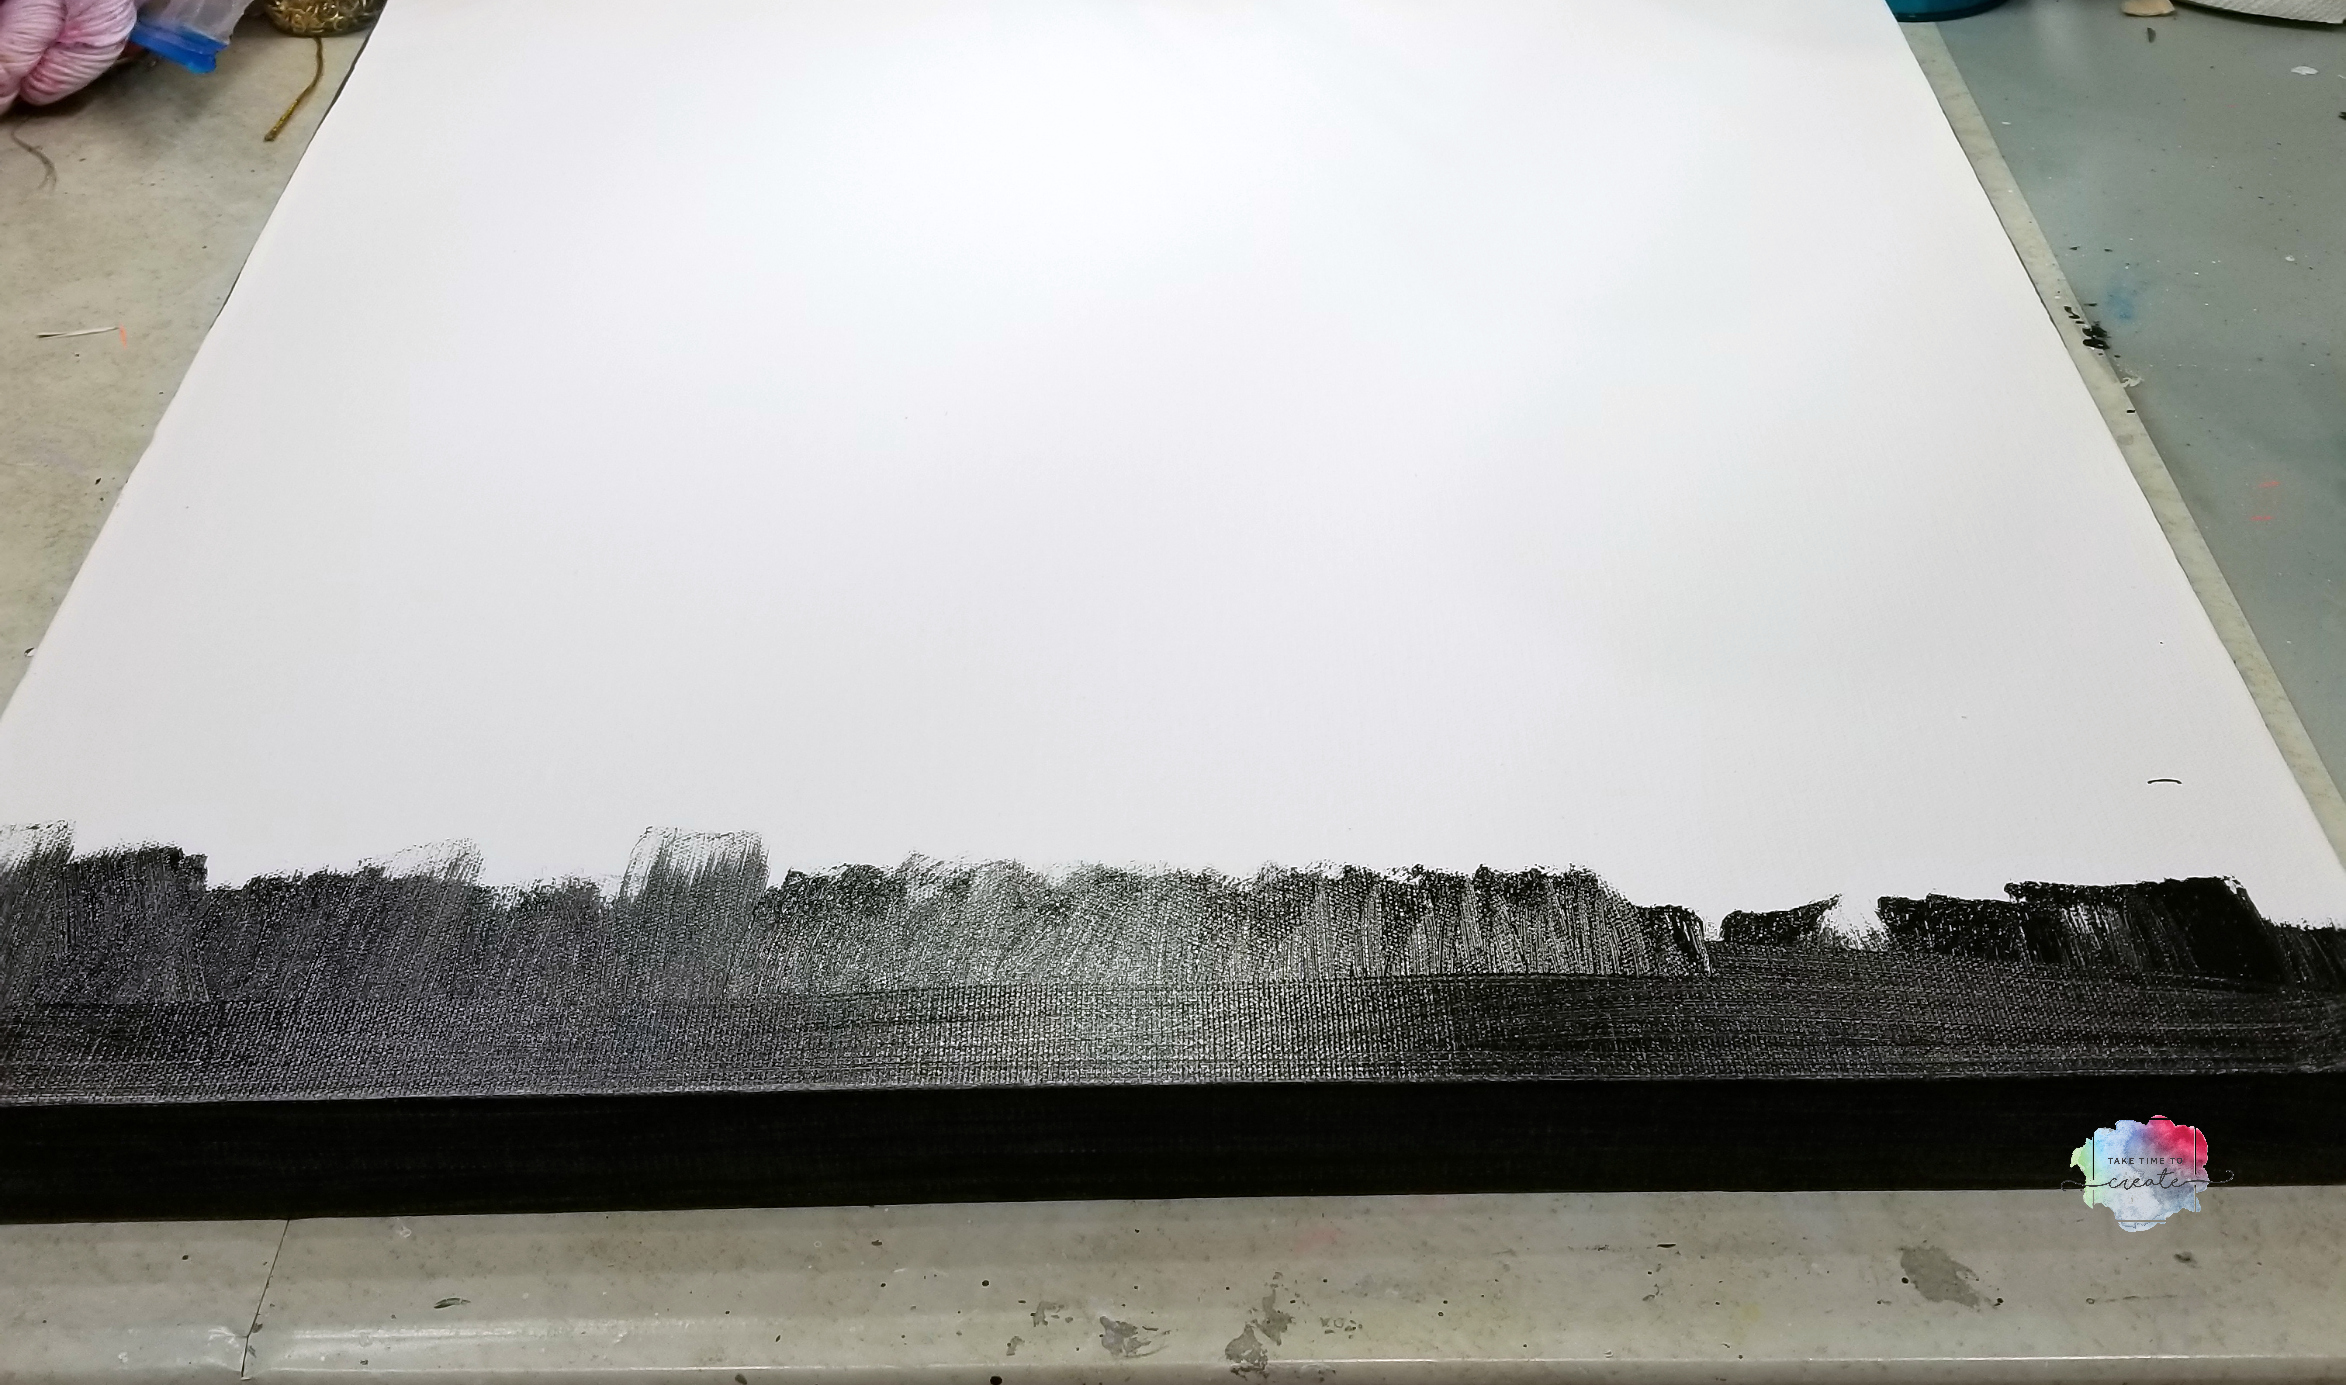
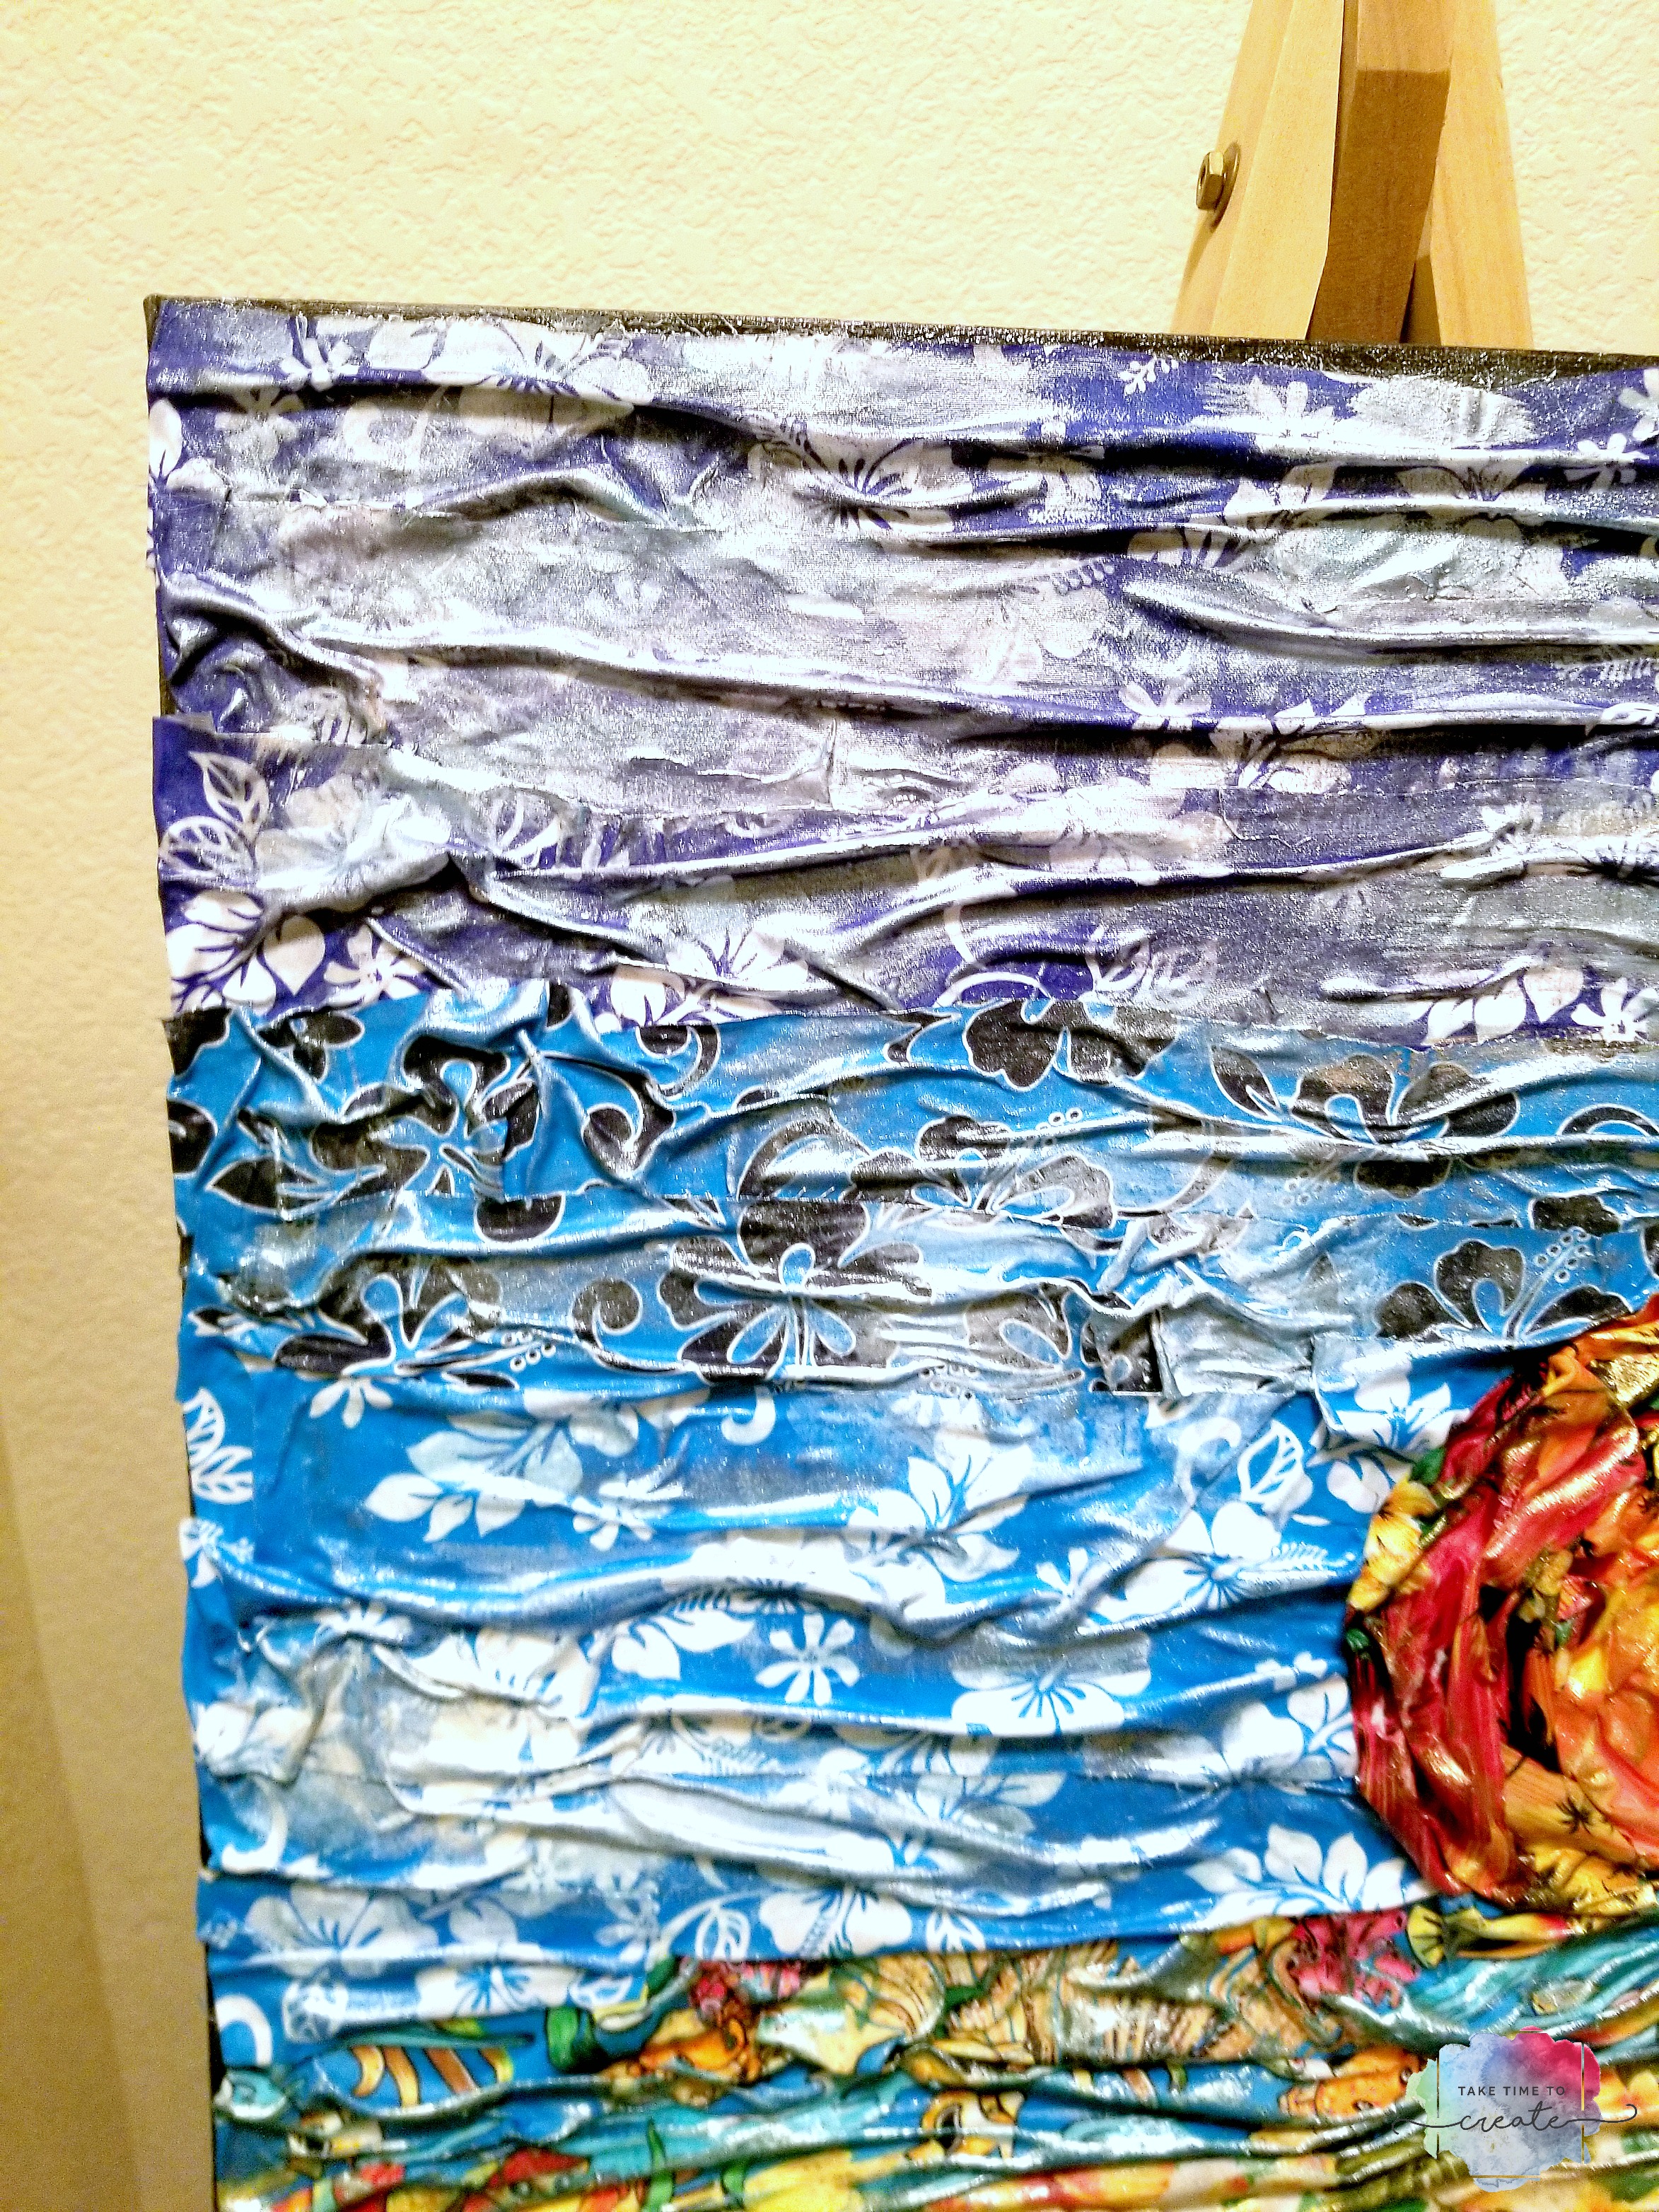
Use any sized canvas you want, I used a 20×20 and painted the edges with black acrylic paint.
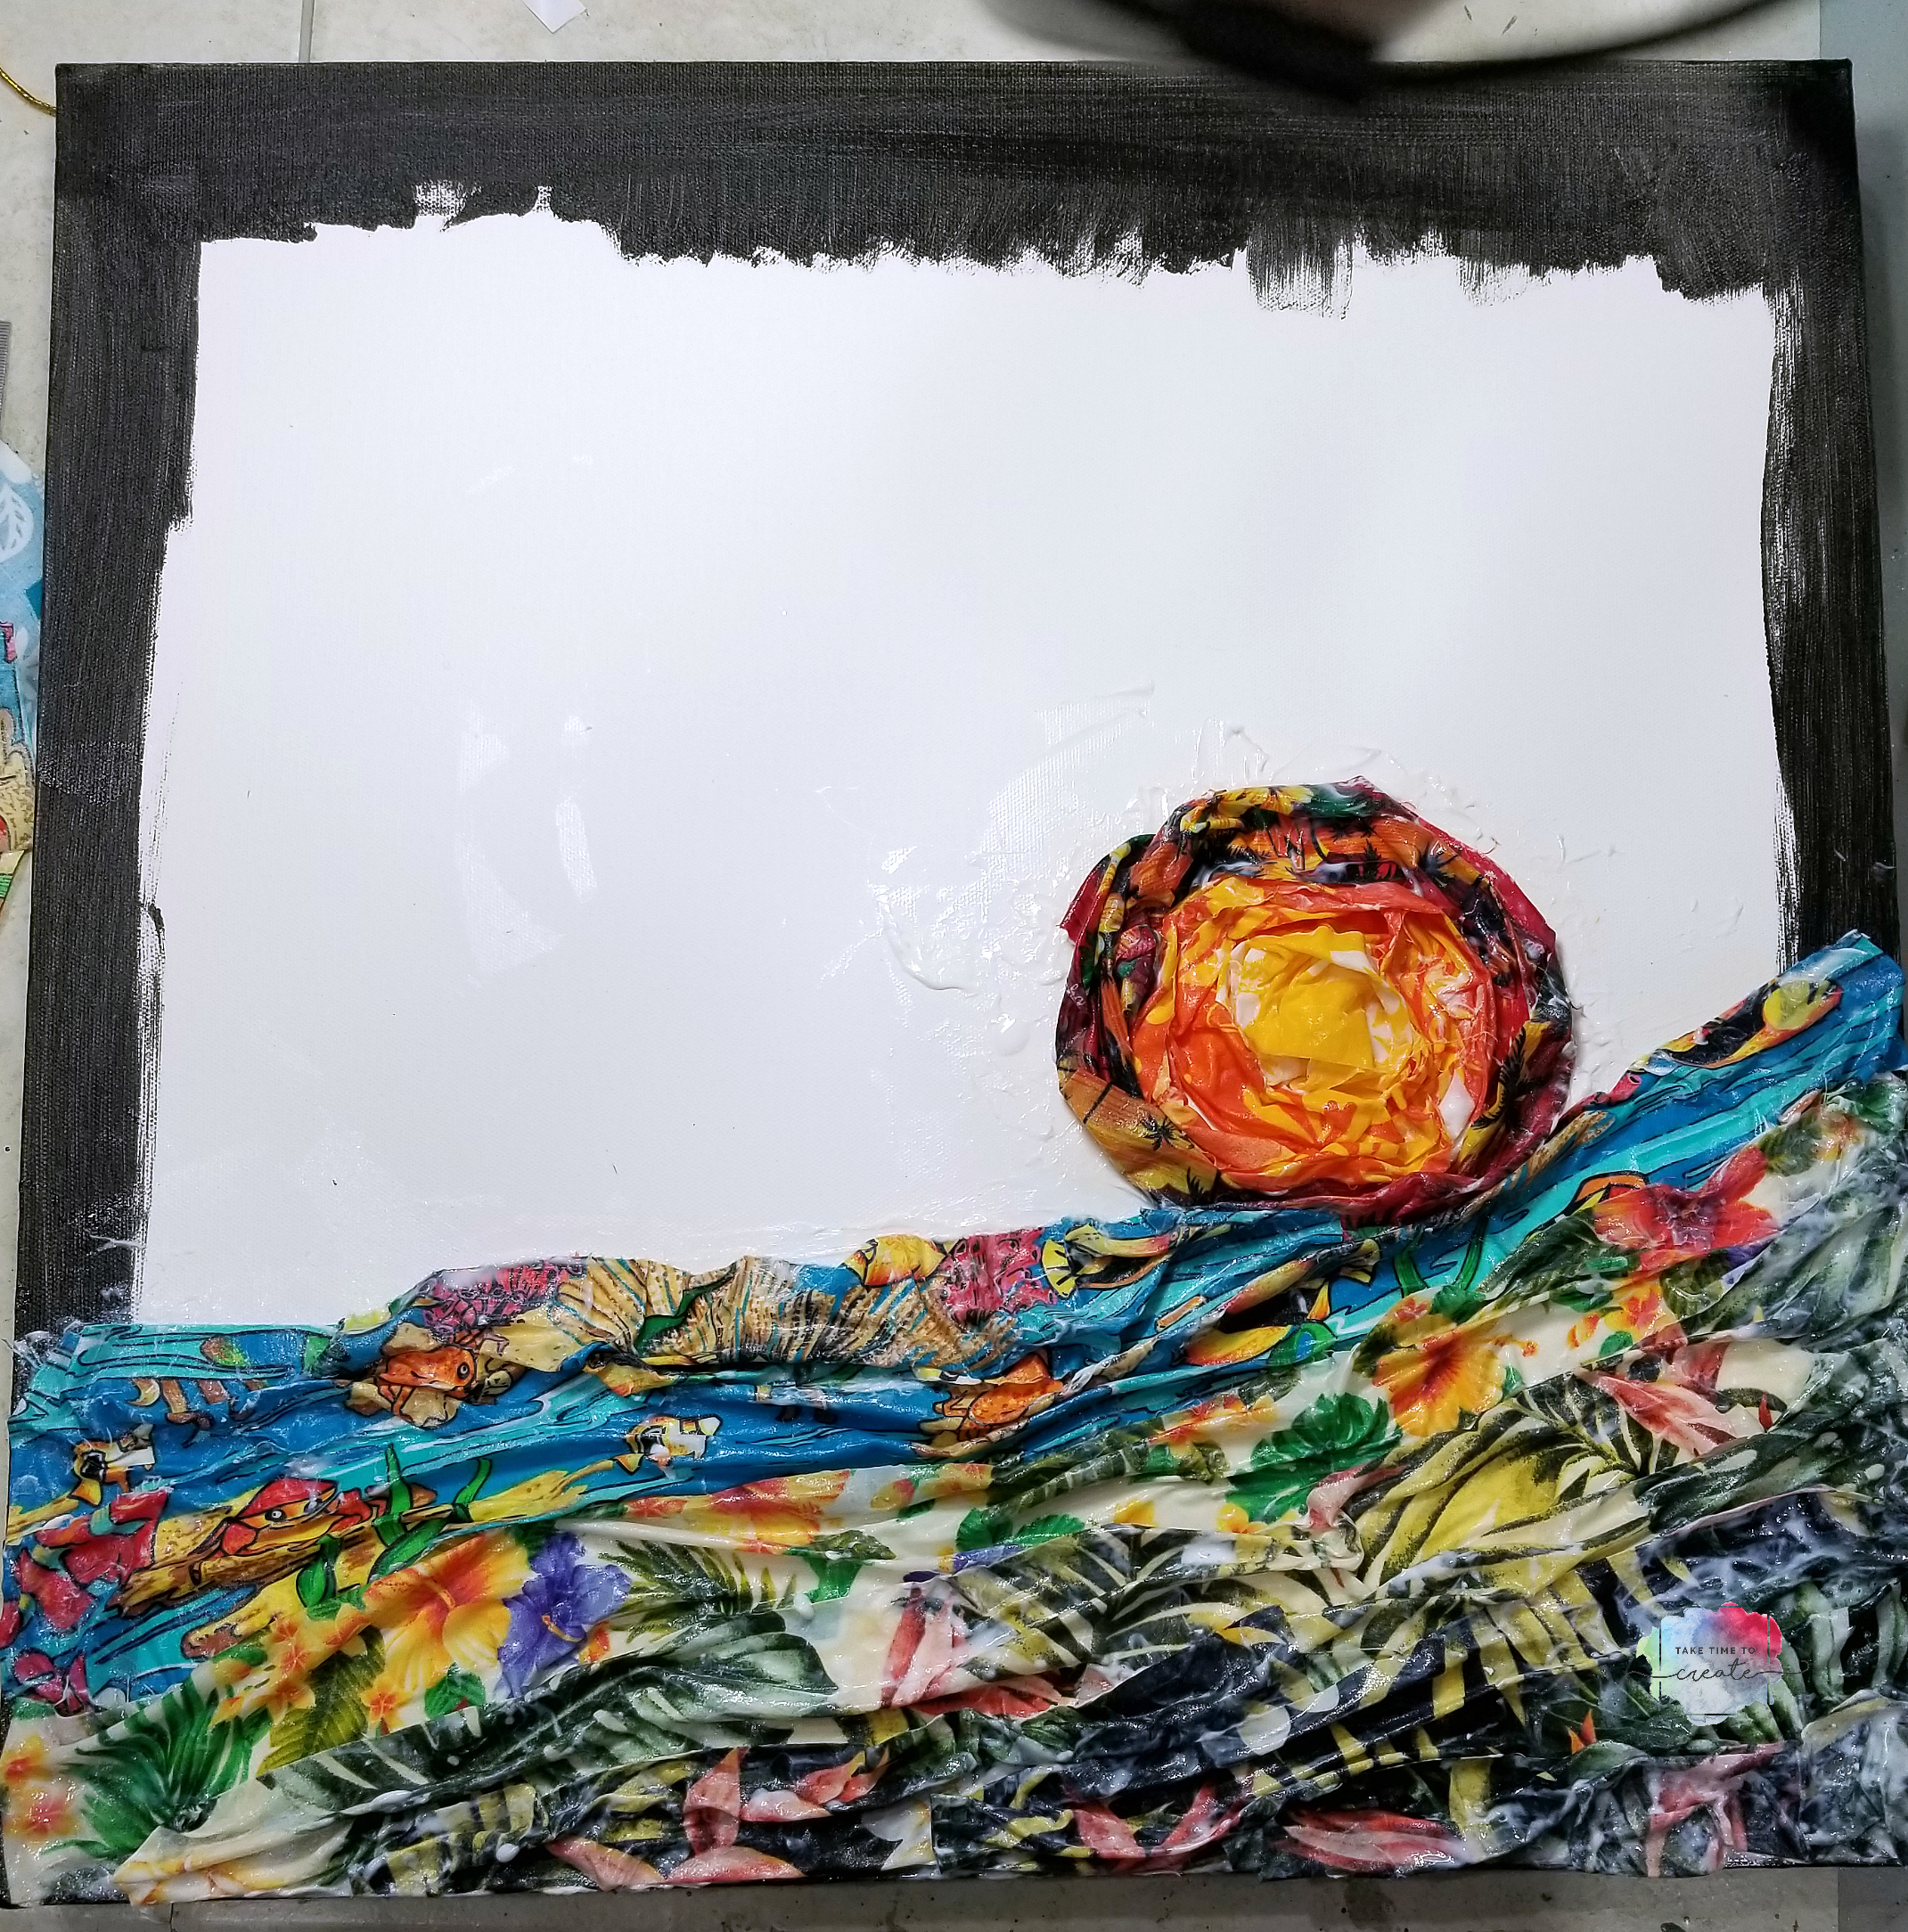
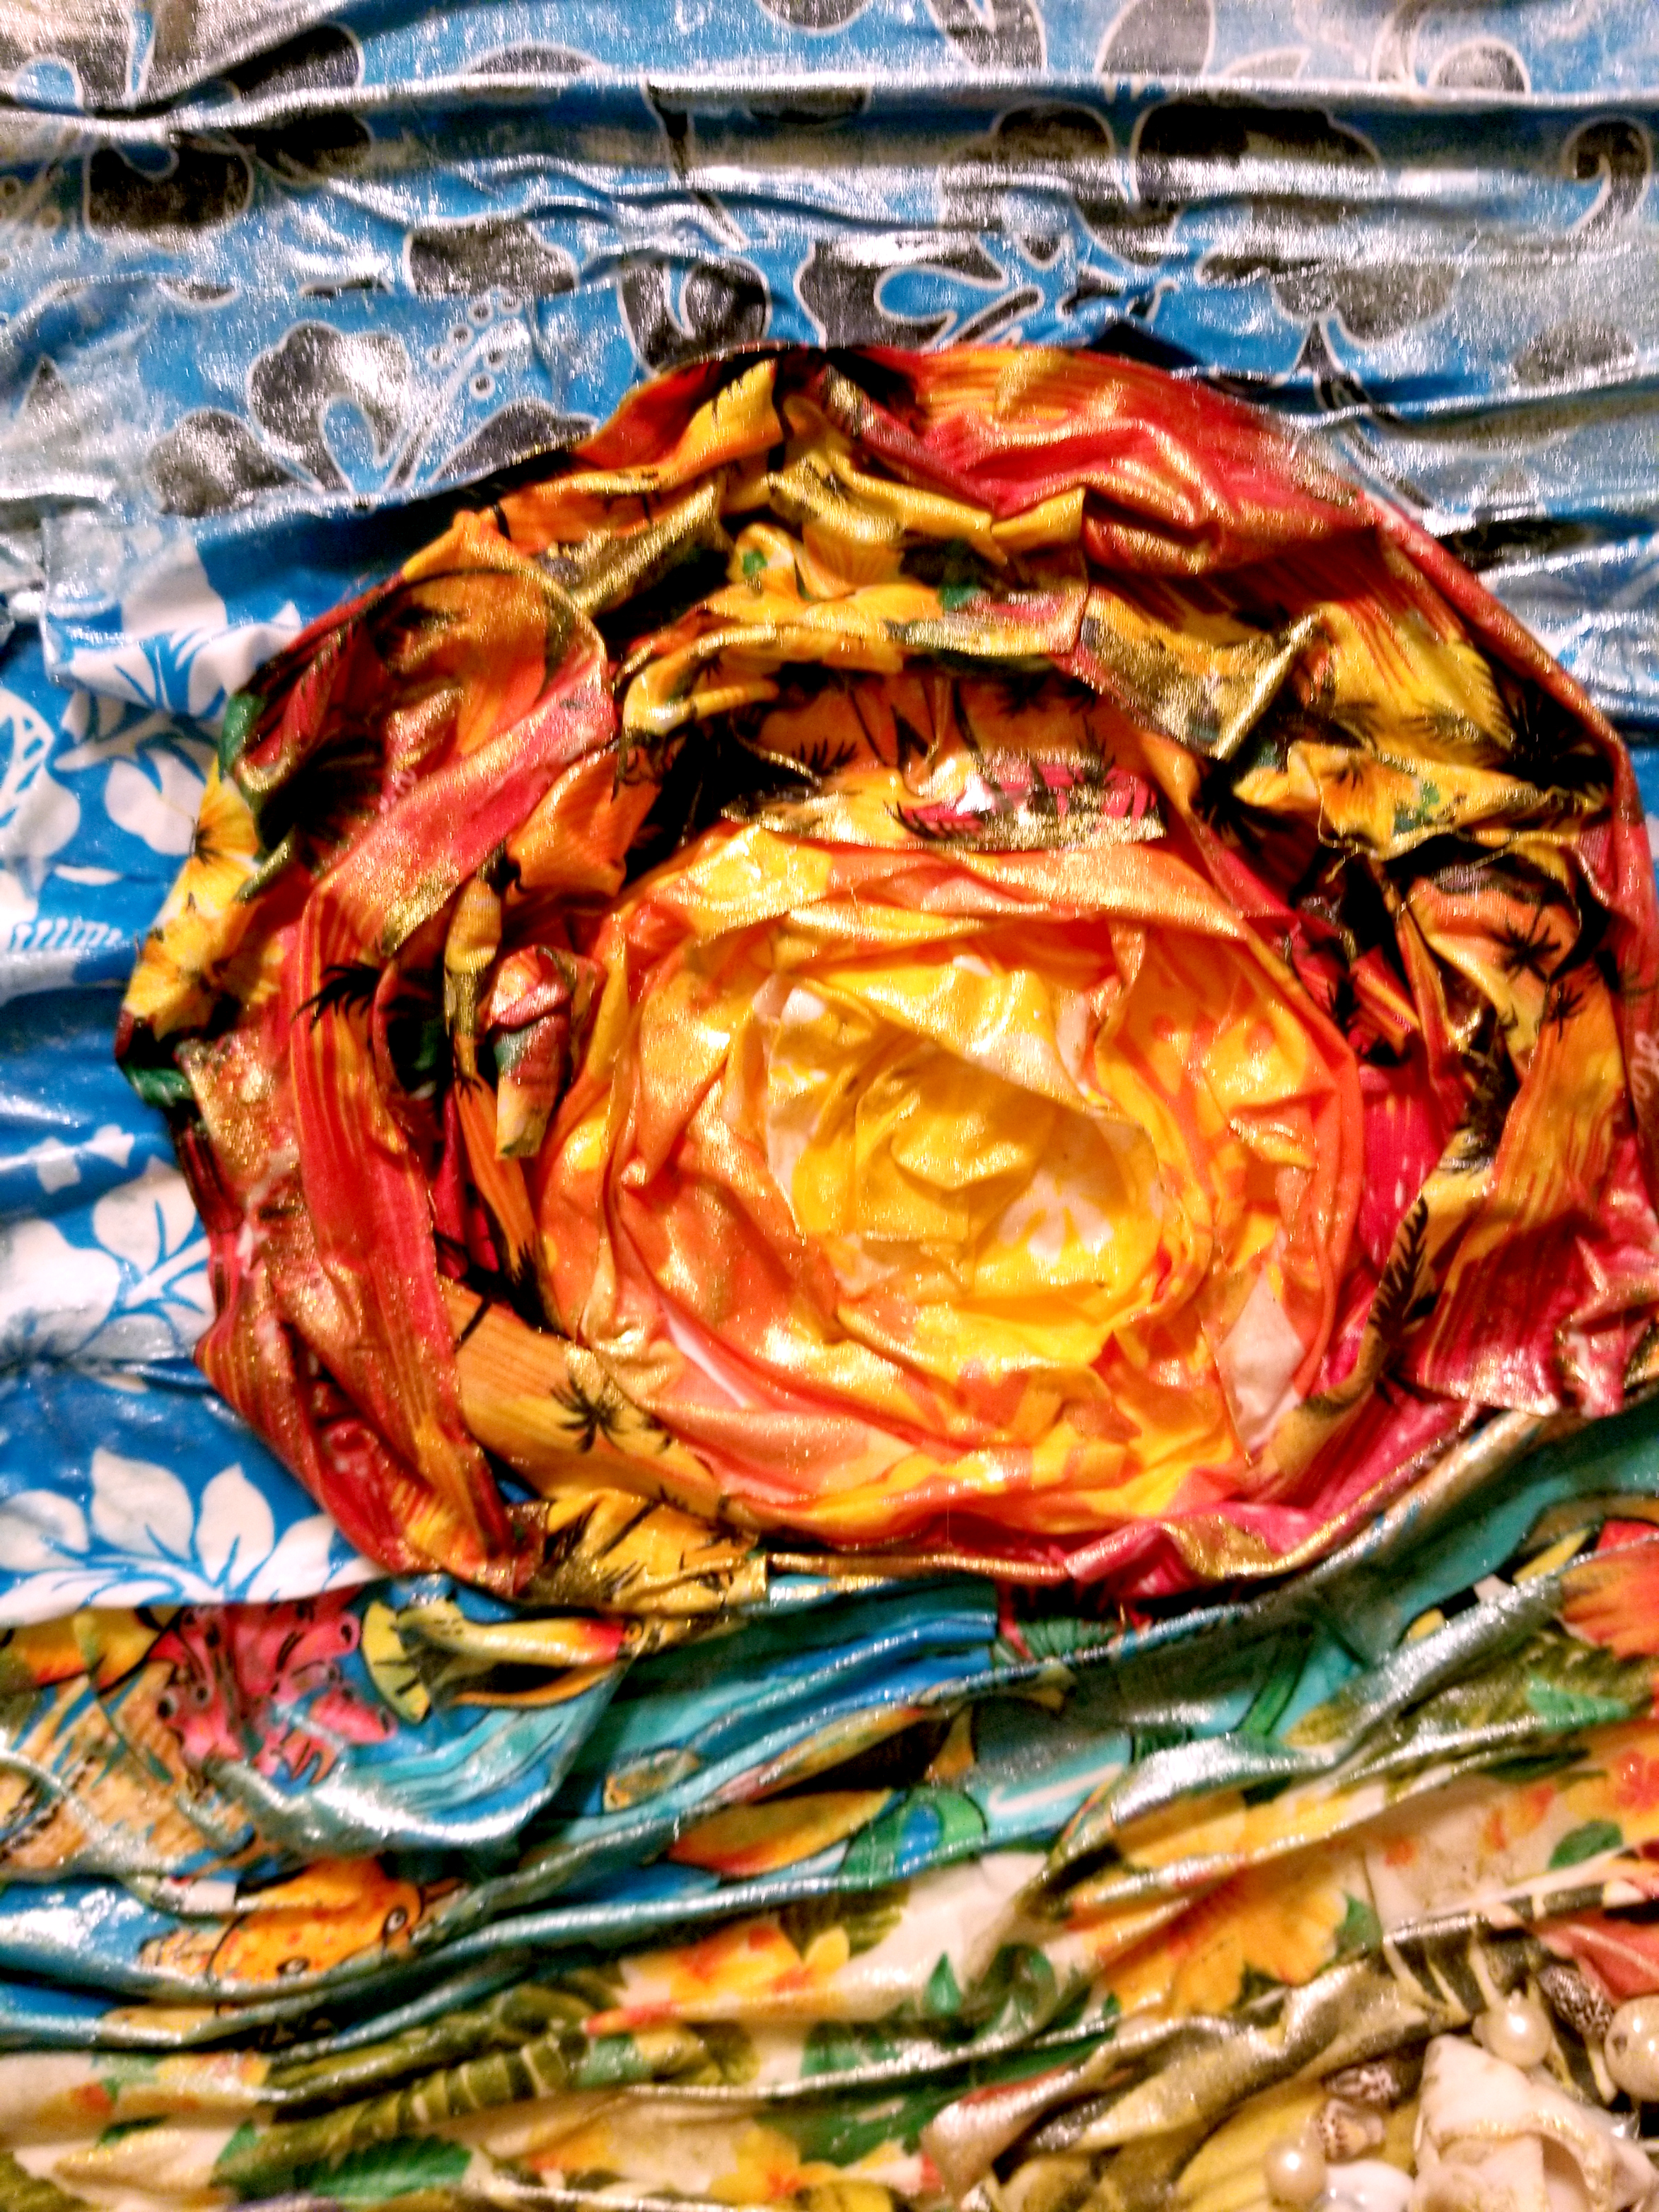
First cut your fabric into strips then plan out what you want you canvas to look like. I wanted a beach landscape with a sun set, so I used a lot of blues for the sky, turquoise for the water, tans for the beach, and yellow, reds, and oranges for the sun. This will give you a rough idea of what it will look like, but things will move and shift and you will change your mind throughout the process, which is perfectly fine.

Now, we need to adhere everything down. So I took a heavy gloss gel (modeling paste would work as well) and spread a thin layer on to the canvas. Then I dipped a strip of fabric into the soft gloss gel and soaked the fabric (make sure you ring it out out) then I crinkled it up and put it on the canvas. I wanted to to stay in place and this seemed to work great.
I started with the sun, which was my focal point and then I built the scenery up from there. This does take a while, but be patient and take breaks if needed. Then let it dry completely before moving on to the next step.
Once it was all dry I adhered sea shells on to the fabric with the heavy gel. I wanted to add more texture and interest to the canvas.
Then I dry brushed on different paints in metallic and sparks colors to add even more detail.

I love how this turned out and I can’t wait to create more landscapes with fabric!
What scene should I create next?
The post Beach Landscape with Fabric- Mixed Media Canvas appeared first on Take Time to Create.