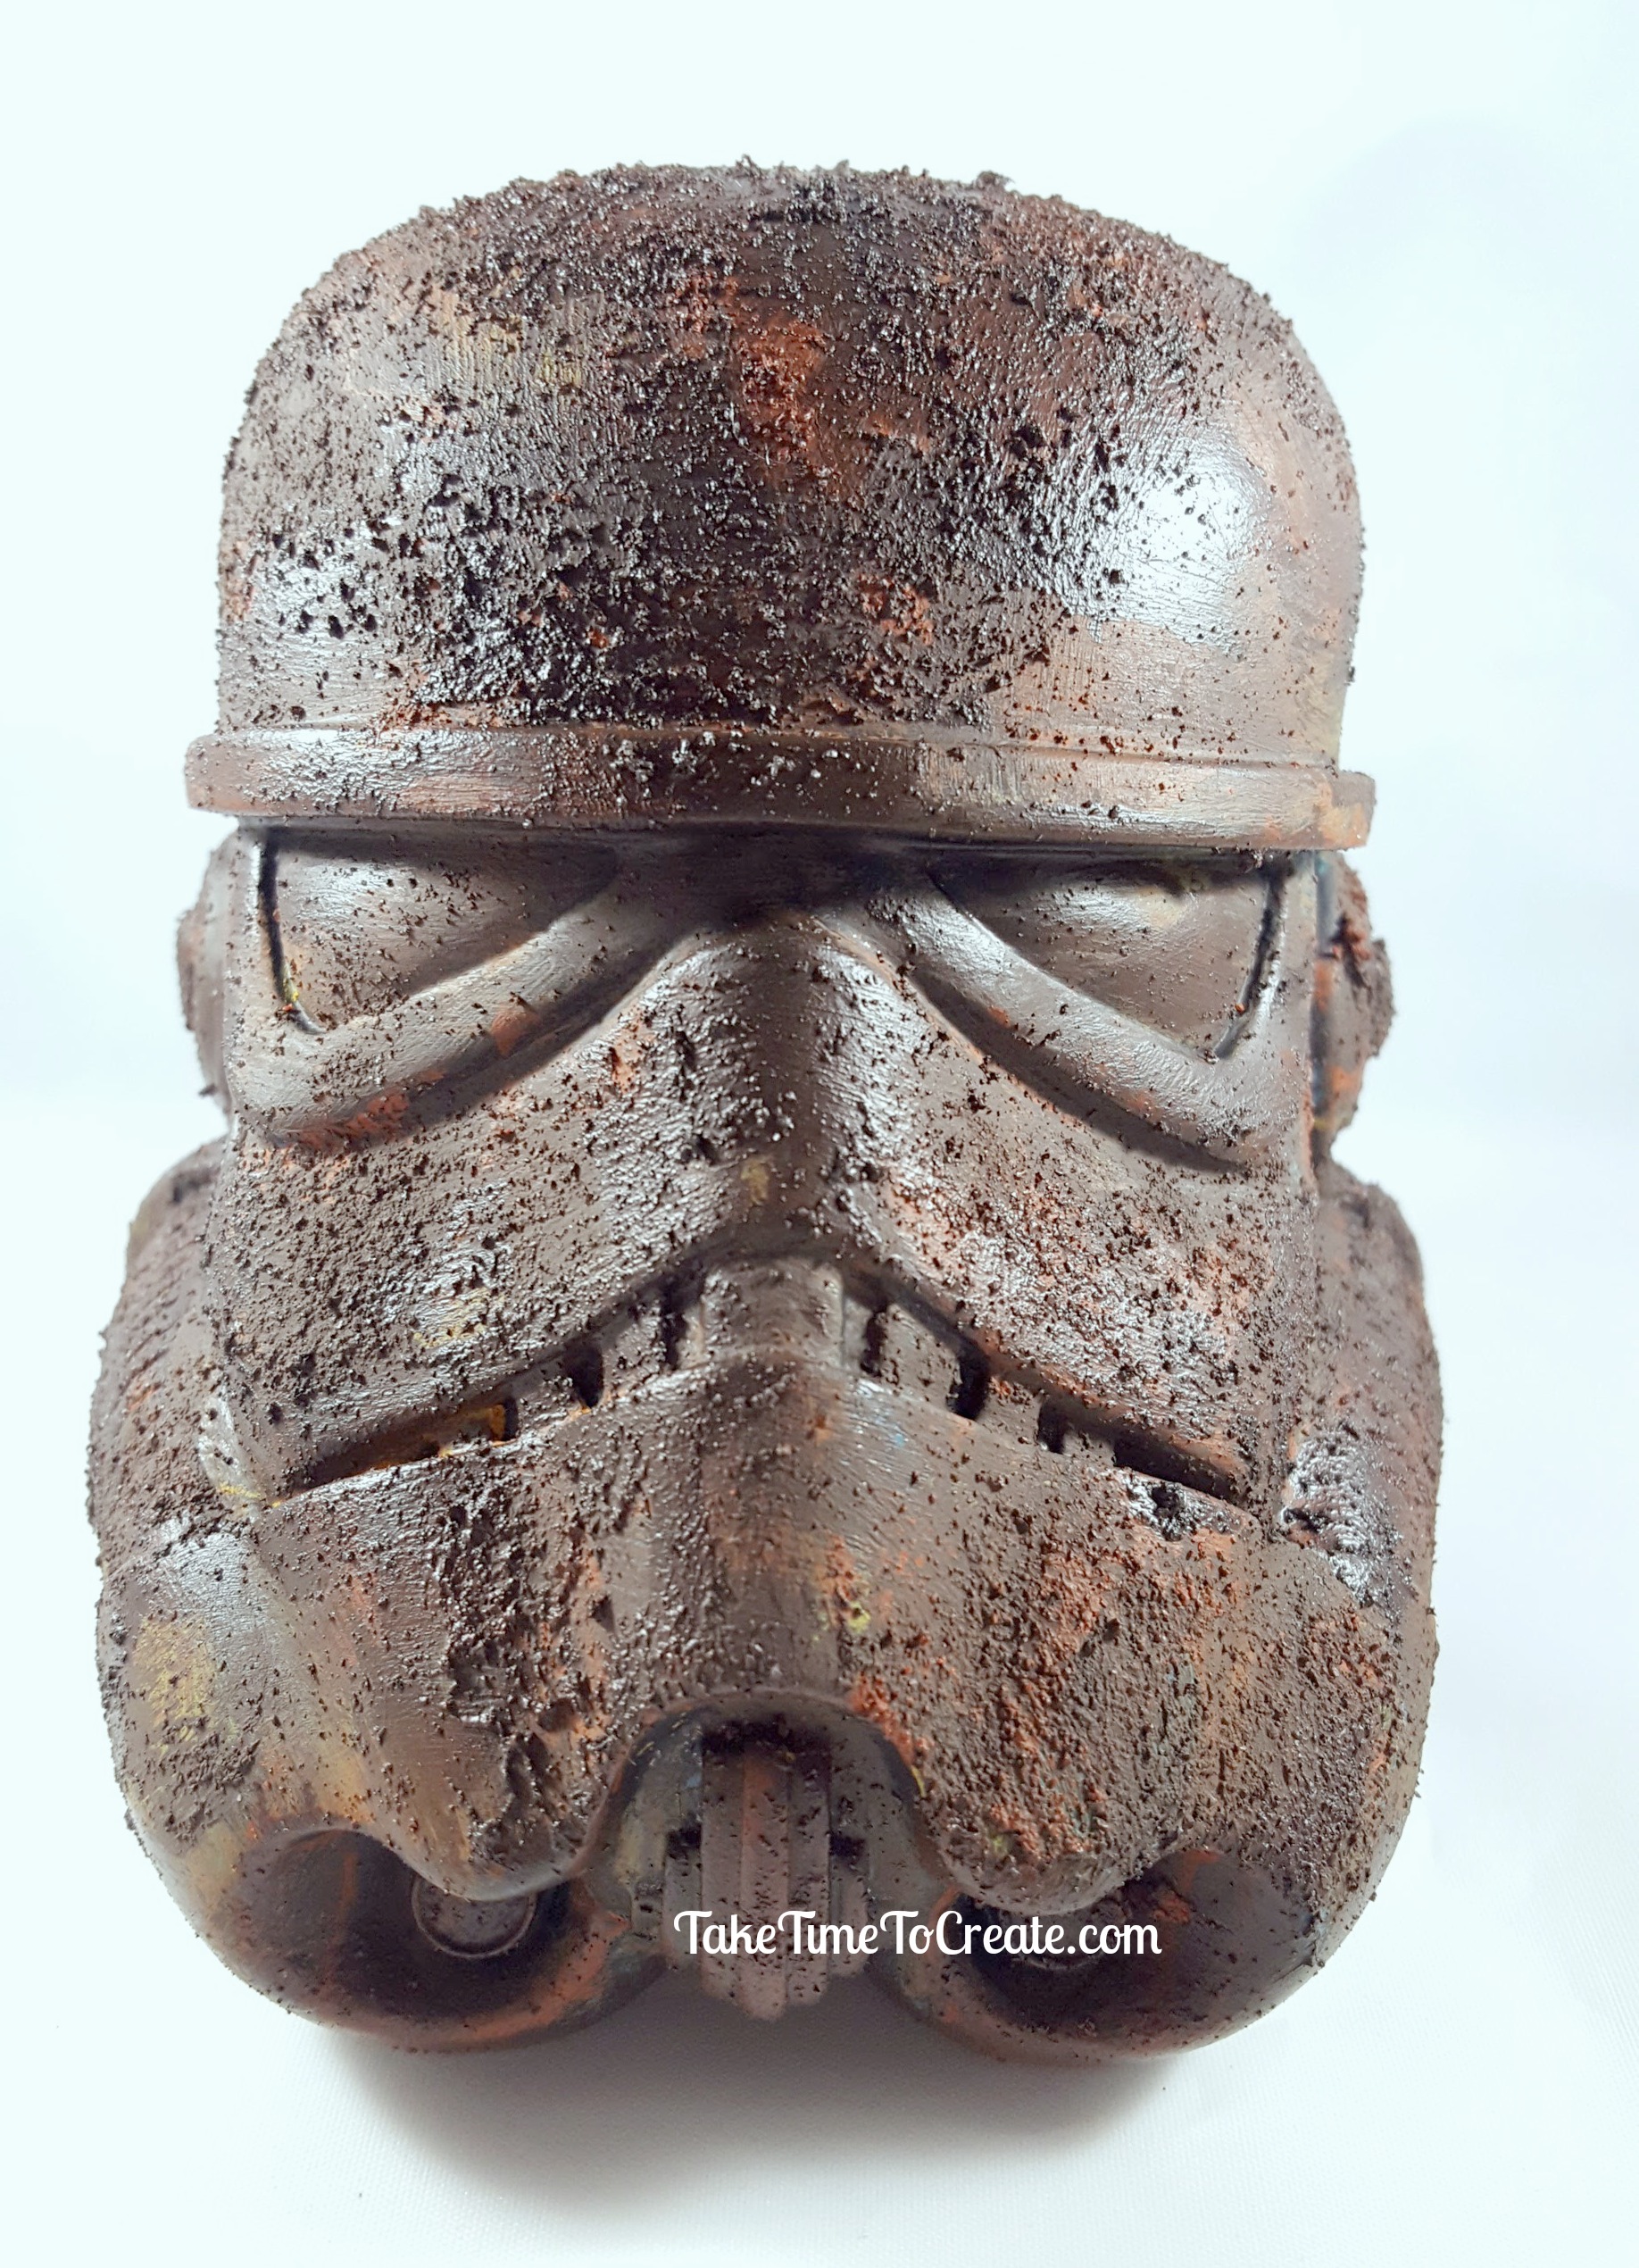
Rust Painted Stormtrooper Helmet
These vinyl Star Wars Stormtrooper helmets look worn and old with a DIY rust paint technique.
Hello Everyone!
Welcome back! I have missed you guys! I hope you all had a wonderful holiday.
2017 is going to be amazing with all these new project I have for you!
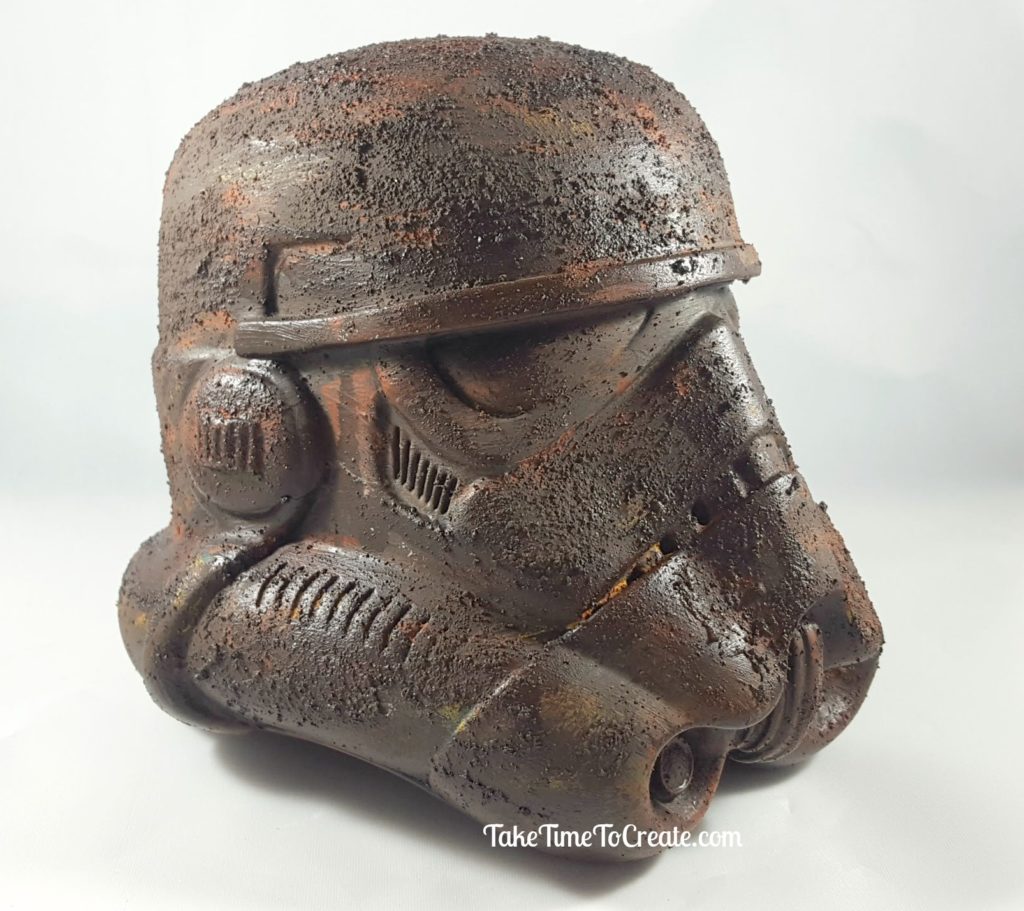
The first is this rust pained Stormtrooper helmet. With the passing of Carrie Fisher I thought I needed to do a Star Wars inspired craft.
This time I did the rust painting a little differently than when I painted the Rust Angel. You can revisit that post here: Rust Angel
Materials:
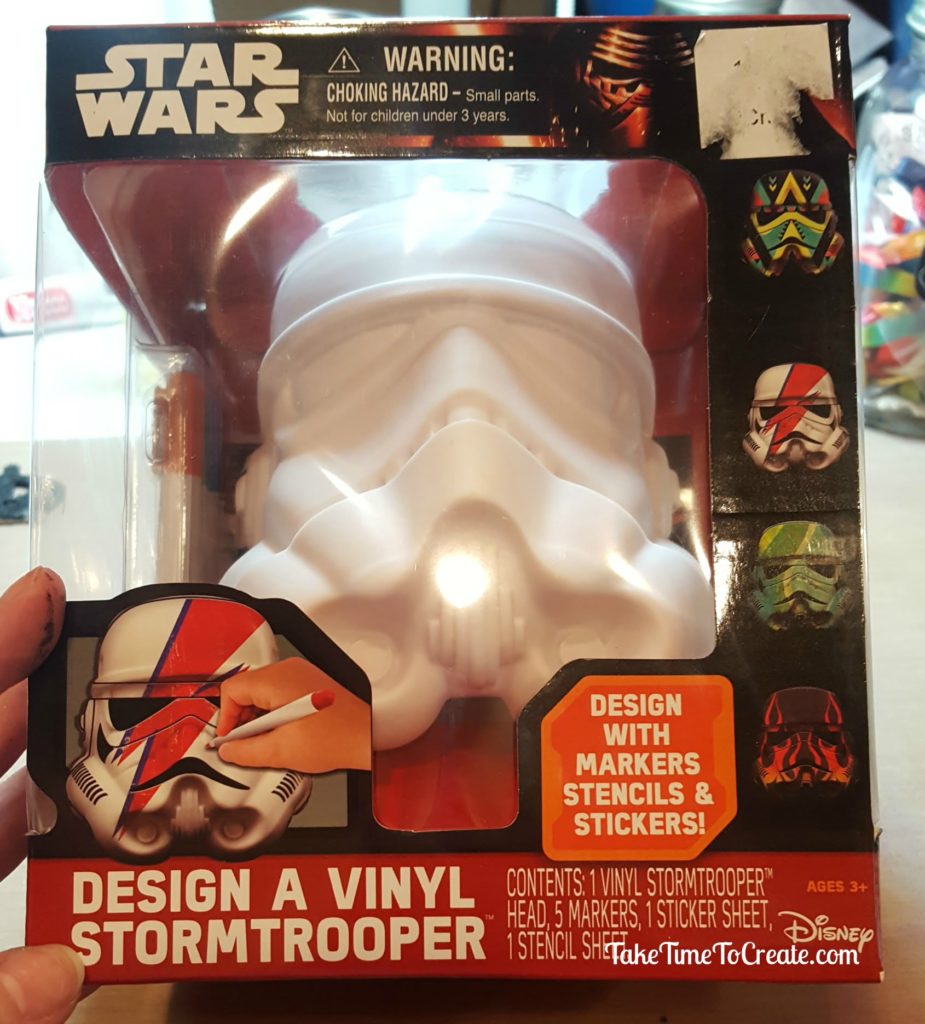
- Stormtrooper Vinyl Helmet- You can find it here: Helmet
- Rust paints. I used some cheap teal colored acrylic paint I had on hand, some Folk Art rust paints, and Prima Marketing rust paste. You can find the Rust past here: Rust Paste
- Brushes and spray sealer and black gesso
Instructions:
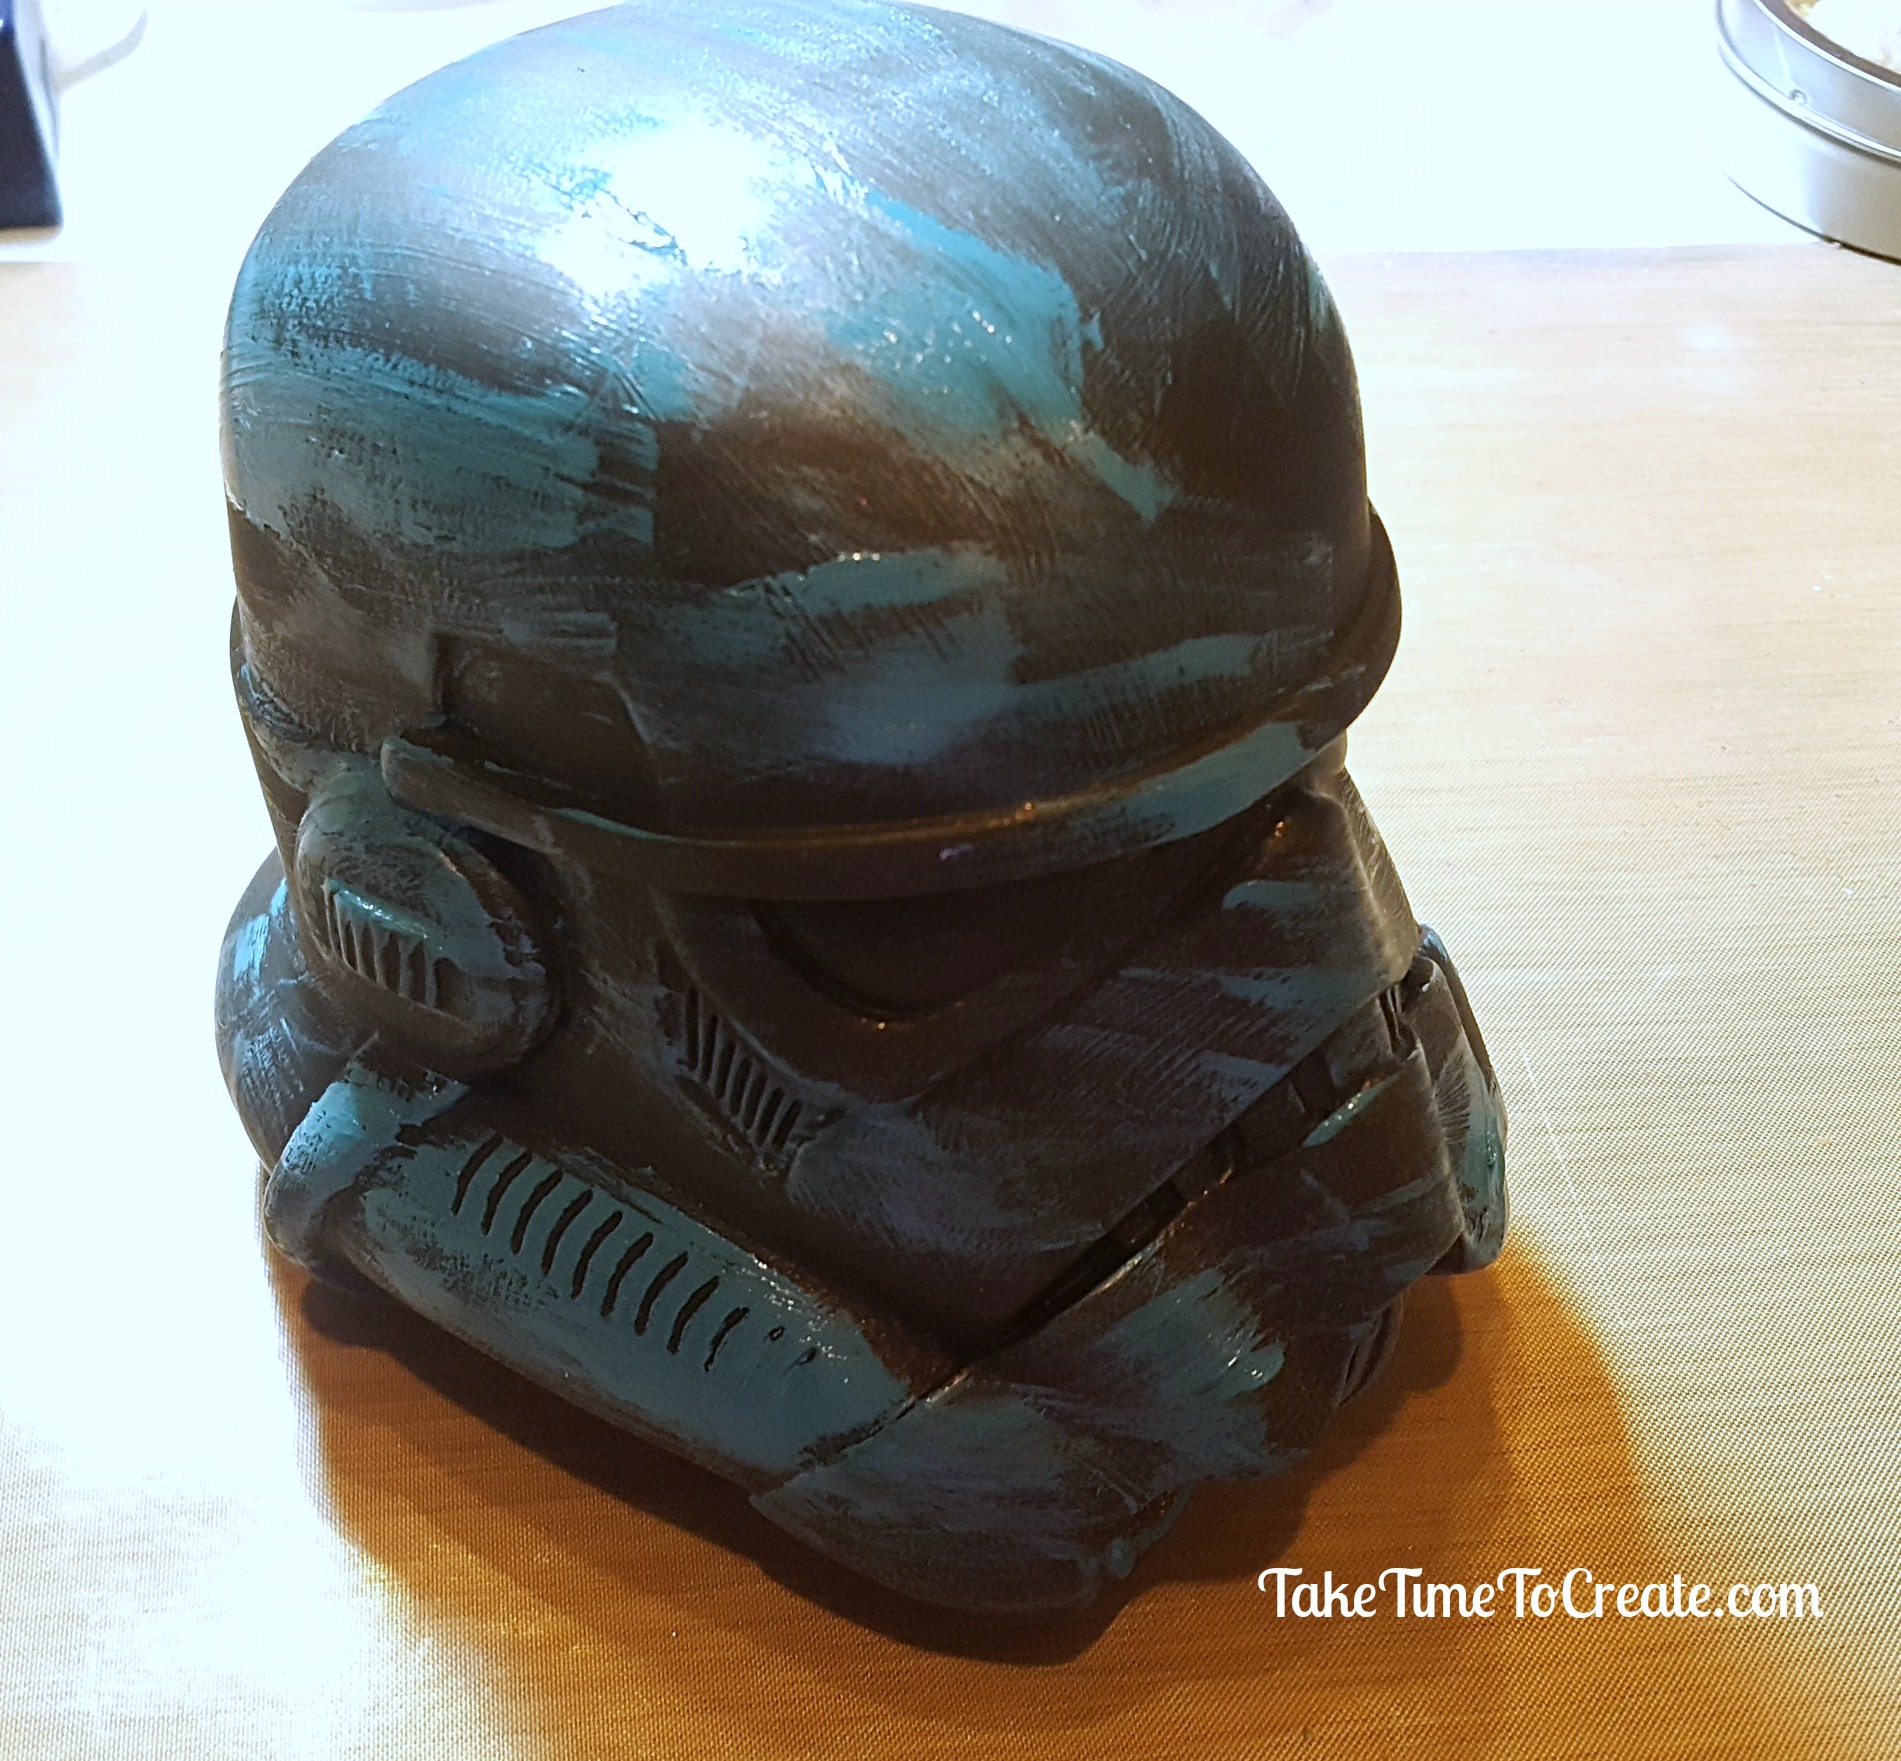
The first step is to paint a coat of Black Gesso. This is the primer and it will make it easier for the paint to adhere to the vinyl.
Then I added some teal paint I had in my stash. Add this in a random fashion, and not all over.
Then I added the yellow from the Prima Marketing rust paste paint pallet. Just a bit, to make it random.
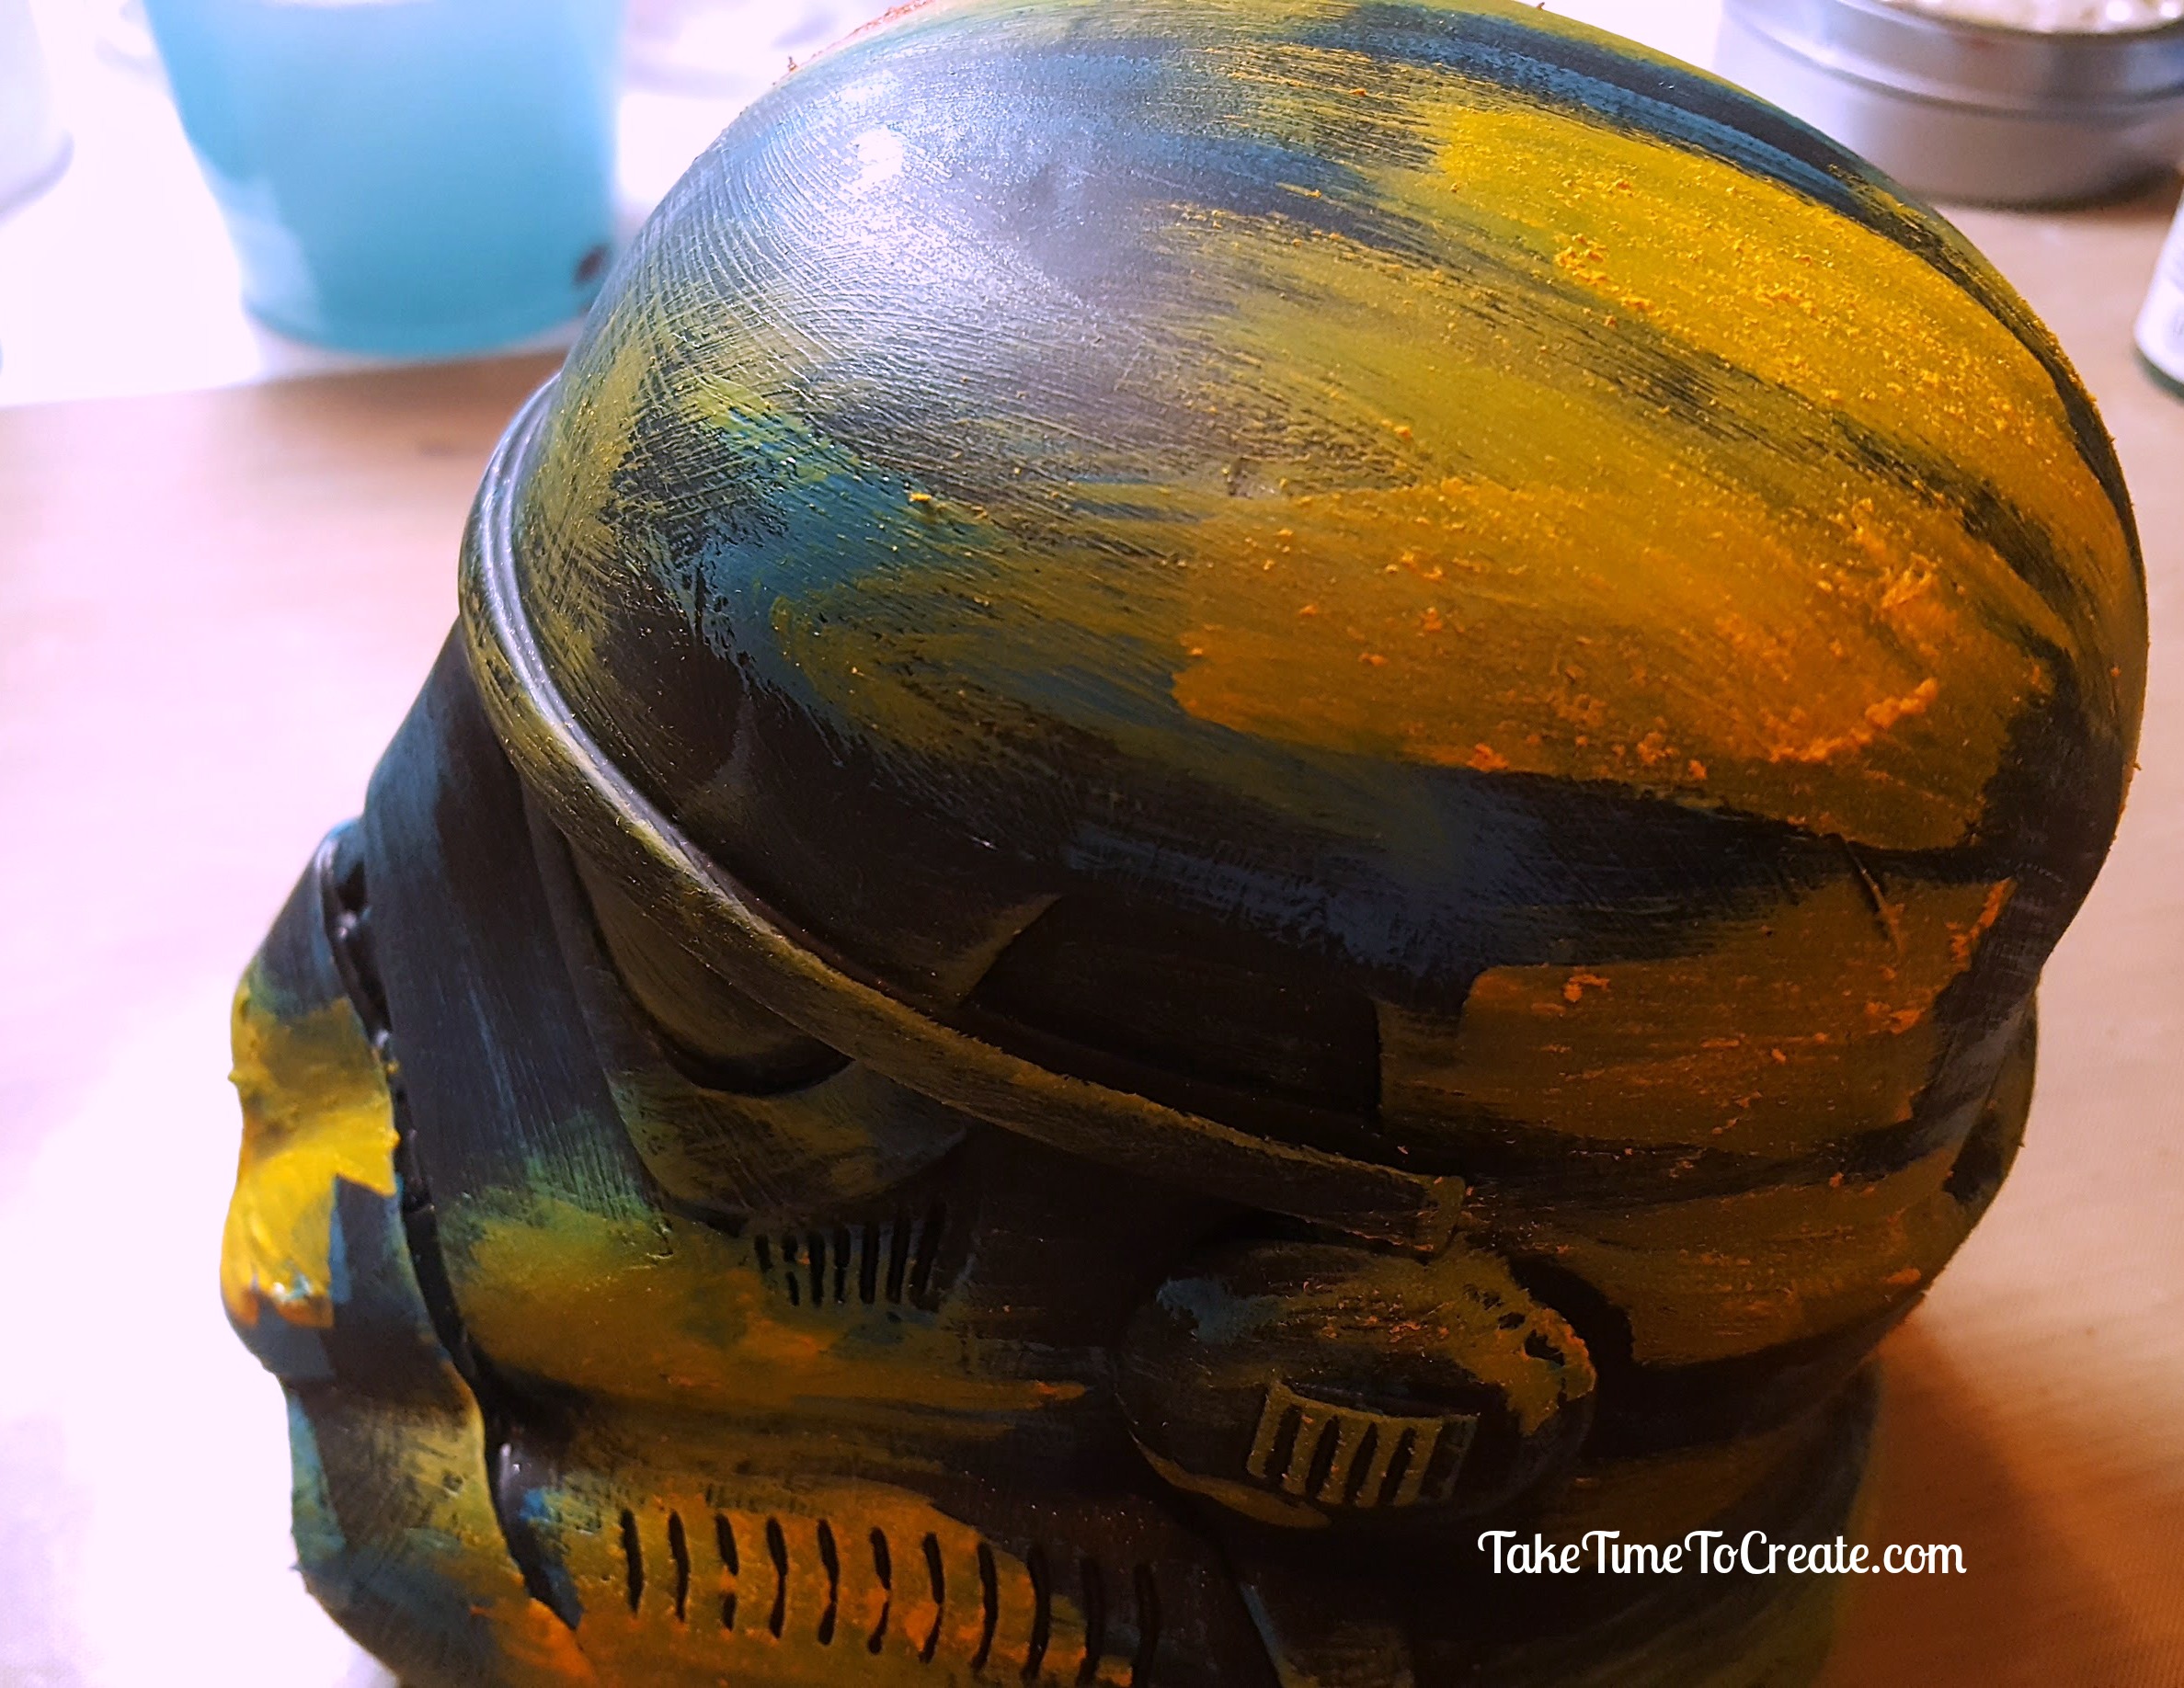
Then I added the middle color of the Prima Marketing rust paste. Keep it random. It looks a little funky at the is point, but it gets so much better when you add the darker coats, believe me, lol.

Then I added the darkest of the Prima Marketing colors. I liked it, but it needed more, so I added some of the Folk Art rust paint that I used for the Angel. I did like how the Prima Marketing

Make sure you can still see the other colors peaking though making it look natural, like it has been left out in the forest for a long time.
When you are happy with your rust painting spray it all with a sealer to keep the texture on the helmet.
Such a fun project! I have a few more things to show you this year that are all rusty and old looking! I can’t wait!
The post Rust Painted Stormtrooper Helmet appeared first on Take Time To Create
This post contains affiliate links.