Tag: crafty (page 2 of 6)

DIY School Supplies

Hello Everyone!

Yikes! Can you believe it? School is just right around the corner! Or maybe it has already started for some people.

DIY School Supplies

To help ease the transition  I have a school supplies inspired DIY! These are perfect for dorms, or even the office. Do you want to know the best part? They are all a little geeky 🙂 Which is perfect!

The video can be found here:

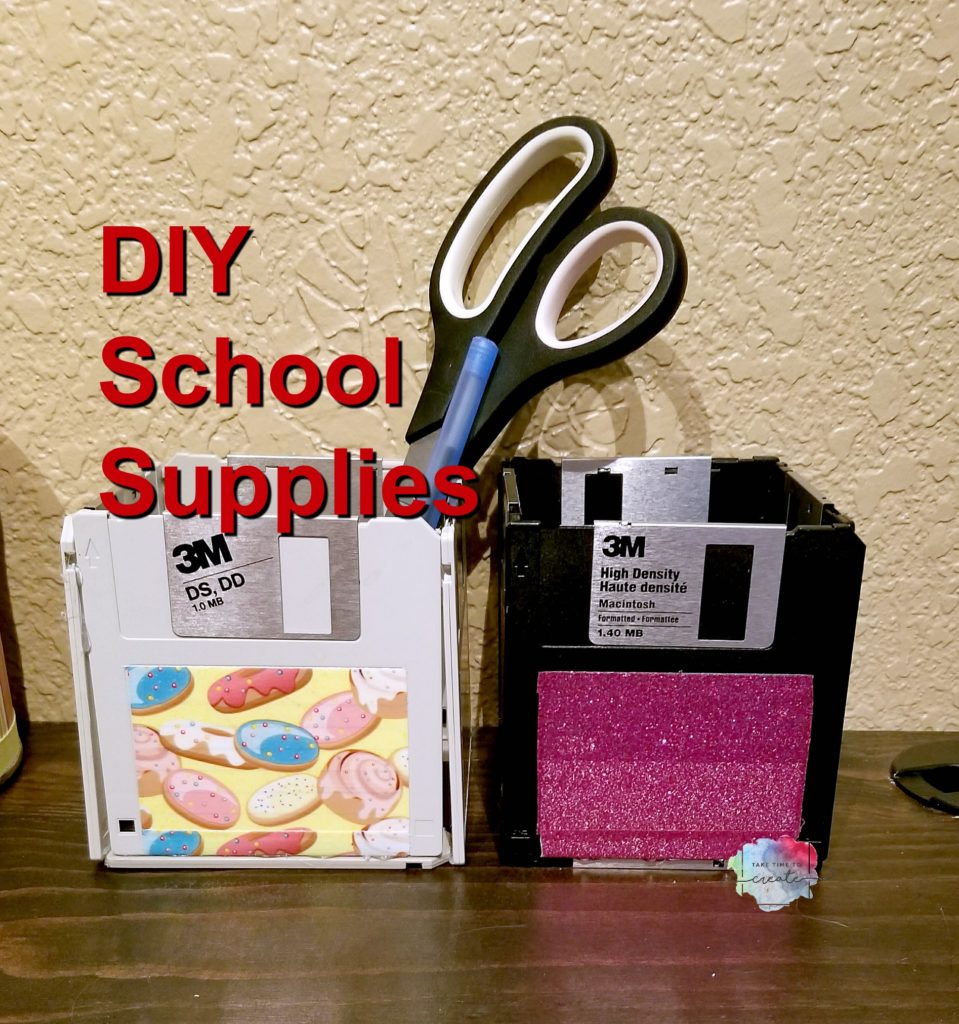
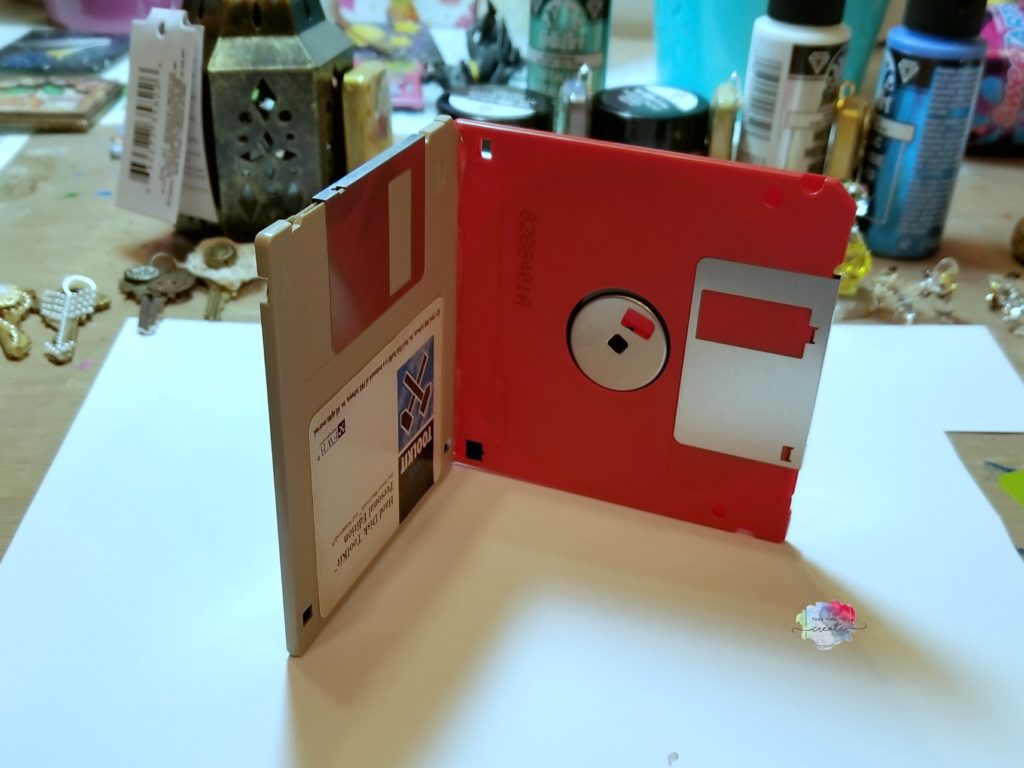
Let’s start with the first project: Floppy Disc Pencil Holder

Grab your floppy discs from the basement and smile a little when you think of all the people that told you to throw them away, you knew they would come in handy someday, lol. Well today is the day!

I used duck tape to cover up the label and make it look a little cuter, but you could use washi tape or paint them.

Then just hot glue the sides together and then to bottom. Now you have  a cute place to put all your pencils and pens

DIY School Supplies

DIY School Supplies

The next 2 are magnets. First is the Action Figure Magnets

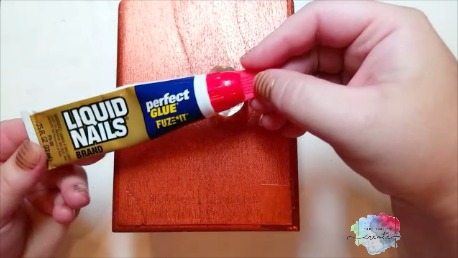
Find some really awesome action figures from the Dollar Store and glue a magnet to the back (Loctight or E6000 or any strong glue should work) .

That is it. Now you have a really cute magnet to hold all your important papers.

DIY School Supplies

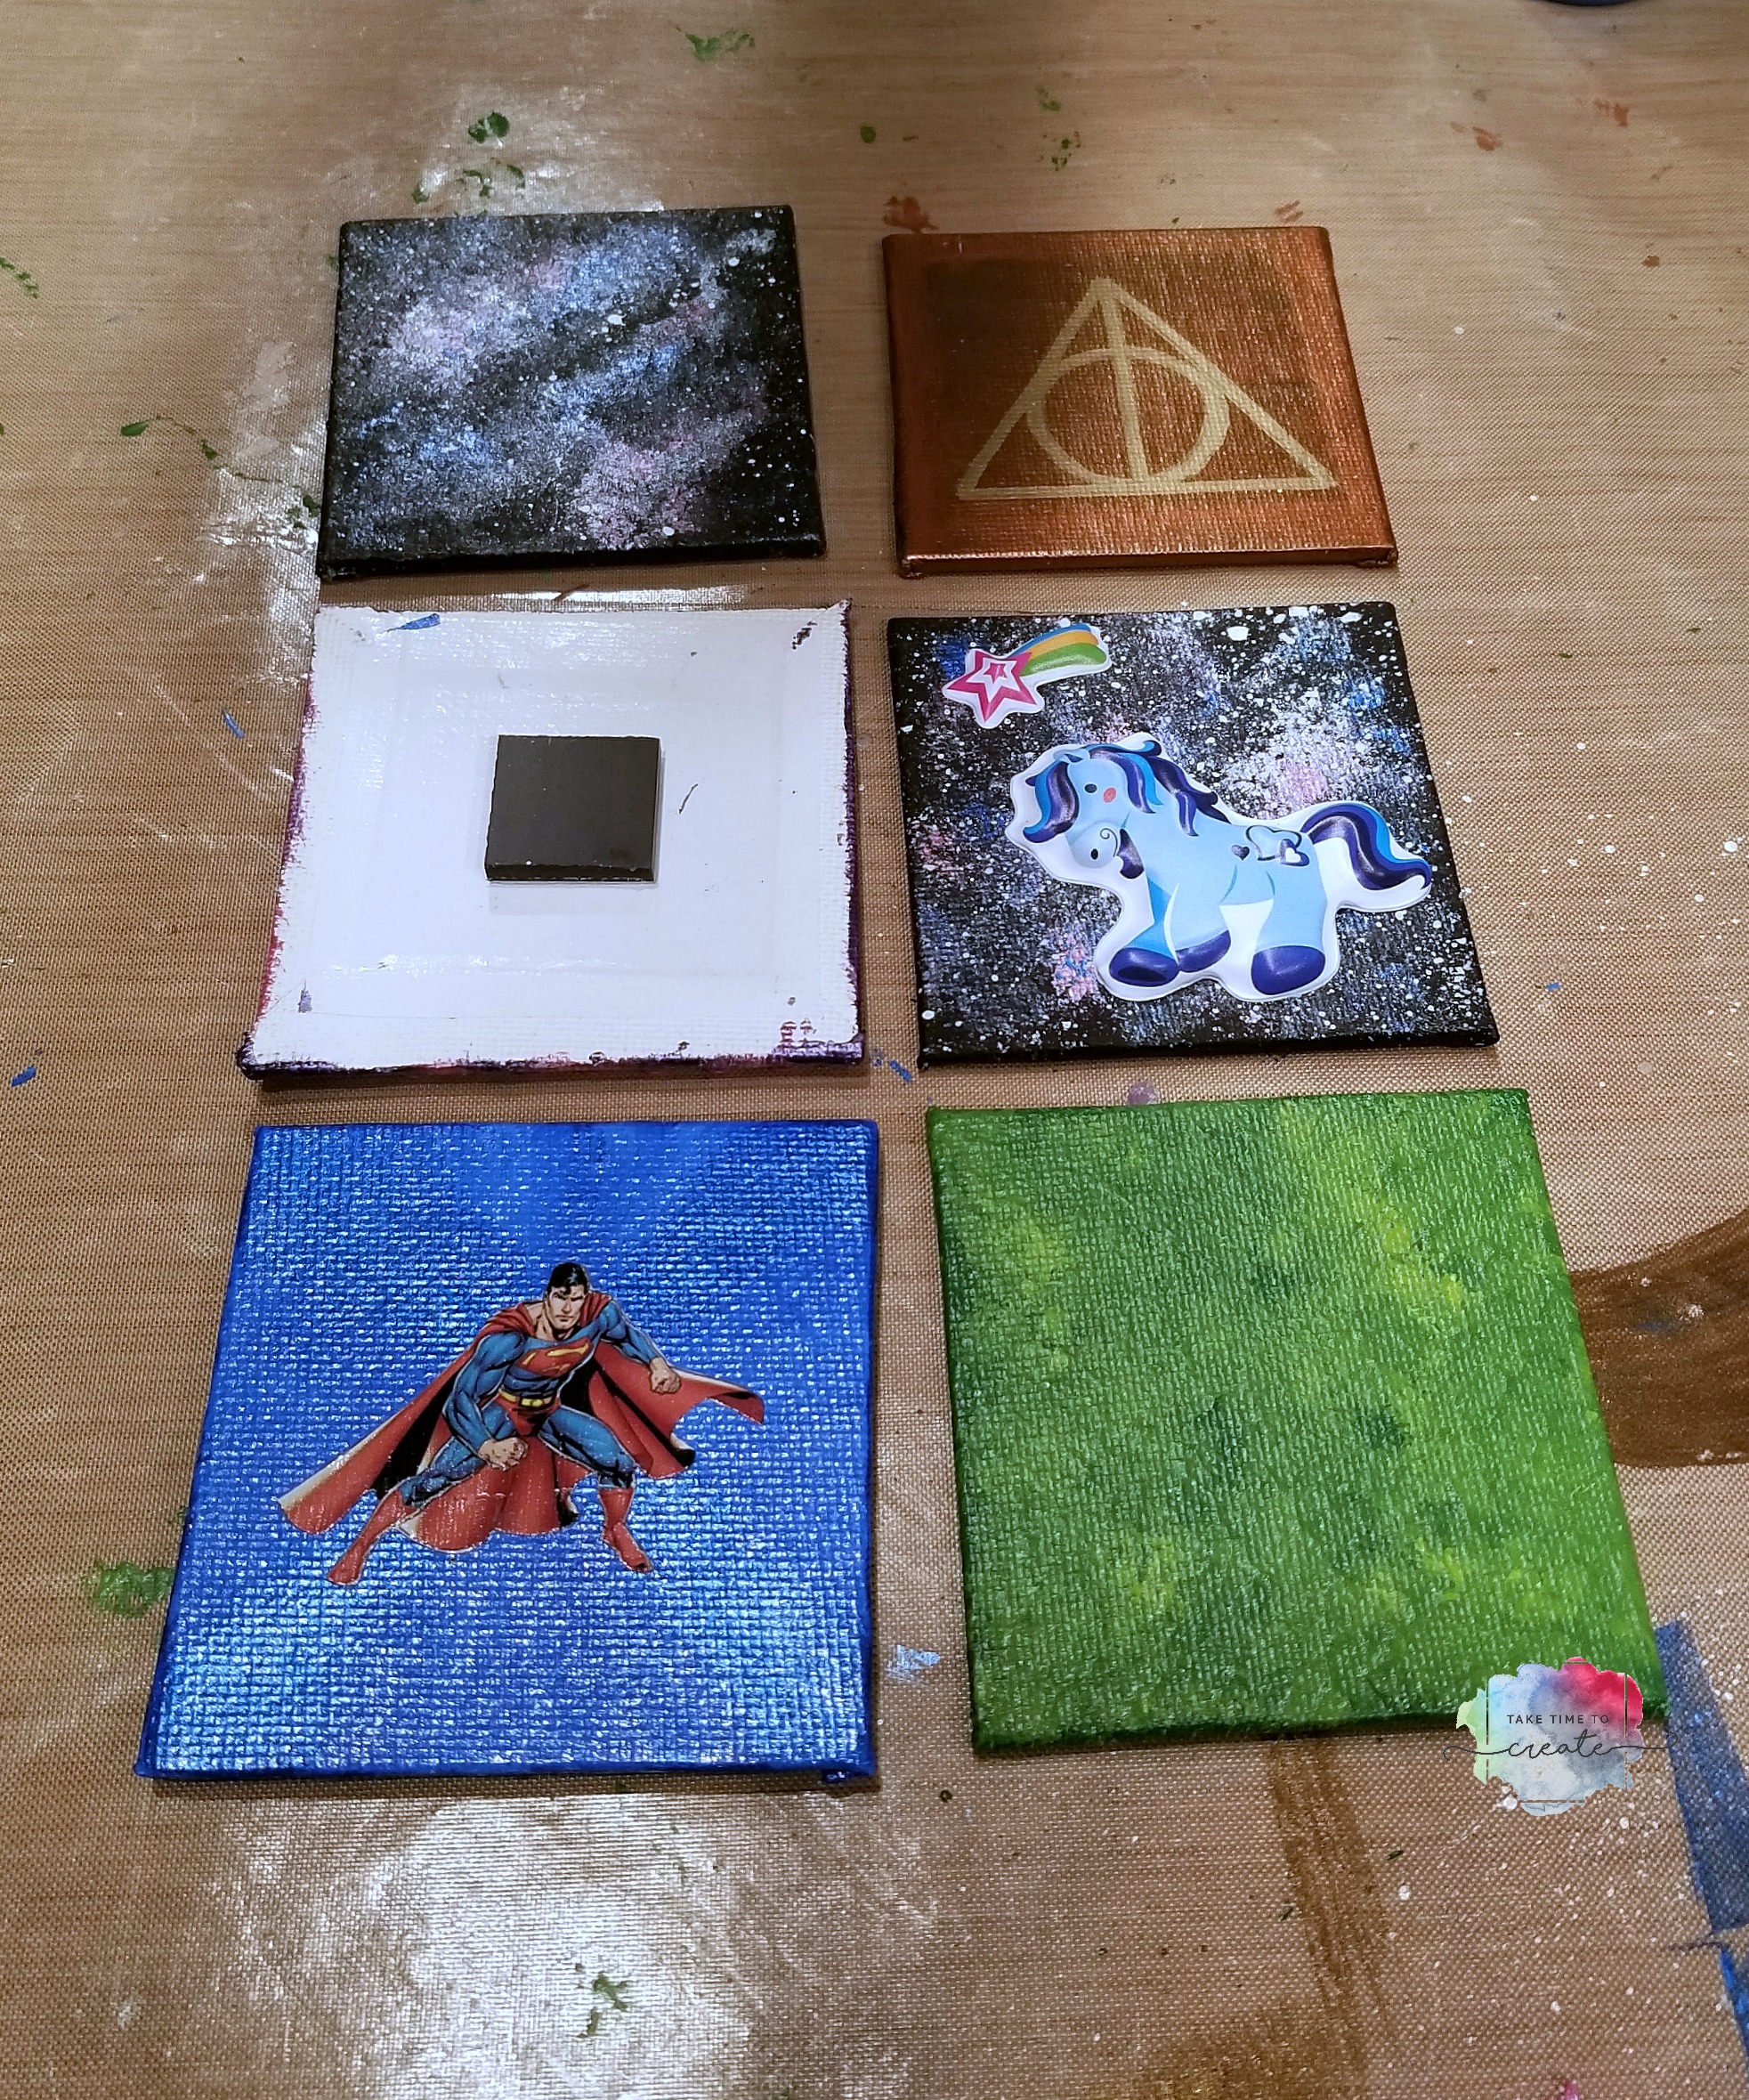
The last project are these Canvas Magnets

Paint the mini canvas in any way you want, I did a galaxy, or stickers, or used a paint pen depending on what I wanted to do. In the video I show how I painted my galaxy if you are wanting to one like that.

Then you glue a magnet to the back and you now have a super cute magnet!


DIY School Supplies

Now you are ready for school! What supplies are you making this year?

The post DIY School Supplies appeared first on Take Time To Create.

DIY Watermelon Bag

Hello everyone!

This post contains affiliate links

One of my favorite summer treats is watermelon! I am convinced that it is the perfect food, sweet, juicy, messy, and pink, lol.

So I decided to make my very own watermelon bag to wear and show the world my love of watermelons.

diy watermelon bag

Materials:

  • Bag- I got mine from Sammy dress about a year ago, but here is a similar one on Amazon: Bag
  • Paint- I used Folk art acrylic paint, but any acrylic paint should do the trick: Paint
  • Paint pen- for drawing the seeds: paint pen


Instructions:

Here is the bag before any painting. It is a good bag and just fine the way it is, but I was determined to have a watermelon bag, lol.

diy watermelon bag

I found these 3 great colors from Folk Art in Pink Melon, Citrus Green and Classic Green. I thought they were the perfect watermelon color!diy watermelon bag

but before you start to paint measure your bag. You to make sure that you have about 2/3 of be bag in pink and the rest in green. But this is just a guess, use your eye to make a good judgement as to how much of each color.

diy watermelon bag

Then start painting. I started with the pink then went on to the greens. I painted in broad strokes and left the strokes in each of the colors as I painted. I didn’t want it too blended, I was going for a casual vibe. You can always blend more if that is  your style.

diy watermelon bag

You can leave it with out the seeds, but I thought the bag needed them. I just painted them on using a paint pen.

diy watermelon bag

I am loving how it turned out! What fruit bags are you going to make this summer?

diy watermelon bag


The post DIY Watermelon Bag appeared first on Take Time To Create.


DIY- Restoration Hardware Inspired Box

Hello Everyone!

This post contains affiliate links.

Today I have another Restoration Hardware Inspired project!

As many of you know, I love RH, they have amazing home decor items! I did a chandelier inspired project a few years ago, you can find that here: Chandelier


I found these beautiful metallic boxes on the RH website. I love the wood and the beautiful gem on top. But the price is a little out of my reach right now.

But it is easy to make one! My is not exactly the same… but that is all part of the fun in doing an inspired project.

Materials:

  • Box. I used a wooden cigar box, but any wooden box will do. The cardboard cigar box probably won’t work as well, but if that is all you have then just paint the printing with white paint first then it should work ok.
  • Metallic paint. I used the Folk Art paint I had in my stash, but use what you have
  • Gem. I had this giant plastic gem that worked great. Of course I got my box and gem from Who Gives A Scrap, lol.
  • Glue. Use a glue that will work on wood and plastic, I used Loctite glue.

Instructions: 

Pick your color and paint 2 coats on the box. I used a gold and a copper paint that looked really cool. If you want to make it look more like the RH box you can sand it first and use a wood filler it you want to cover up the writing.  I wanted the rustic finish with the metallic and gems, a little contrast that I like.

RH Inspired Box

Once the outside and inside are completely dry then glue your gem on with your glue. I liked the gem on the top, but you can place it anywhere that looks good.

RH Inspired Box

Once the glue has dried overnight you can add a spray sealer if you want. I wanted to protect the paint so I did add a gloss spray sealer.

RH Inspired Box

And there you have it, a RH inspired box. So very cute and it is great to give as a gift, or put the gift inside and use it as the wrapping.

RH Inspired Box


RH Inspired Box


RH Inspired Box

What companies inspire your DIY projects?

The post DIY- Restoration Hardware Inspired Box appeared first on Take Time To Create.

Craft Supply Thrift Haul and Tips and Tricks

Hello Everyone!

If you are like me you love to get a bargain, especially for craft supplies. Craft supplies can be very expensive, but you can find some great deals at creative reuse centers, or thrift stores.

Recently I went to my favorite creative reuse center, Who Gives a Scrap, and I have a craft supply thrift haul video for you.

Also, I wanted to give you a few tips, tricks and hints when shopping for craft supplies at a creative reuse center or thrift store.

Before I get into the tips, the biggest piece of advice I can give you is to buy what you need. If you buy everything that looks good, or interesting, you will be over run with stuff very quickly!

And always ask a person working at the store before trying out something when you trying to determine if the item still works or has ink left in it.

Things to look out for when shopping for Fabric:

  • Size- is it the size I need
  • Condition- are there any rips, tears, or stains that can’t be fixed or worked around

Things to look out for when shopping for Punches or Scissors:

  • Test to make sure they work! Try them out on a piece of paper

Things to look out for when shopping for Paint or Ink or Markers:

  • Open it to make sure the paint is not dried out, and there is still plenty left
  • Smell it, sometimes paint can start to smell a little funky and you don’t want that, lol
  • Scribble the markers to make sure they work, you don’t want to purchase dried out markers.

Thrift haul

Things to look out for when shopping for Books:

  • Check for pages torn out, if there are missing pages it might be a vital instruction that you are missing, lol
  • Check for overall condition, can you still use it?

Things to look out for when shopping for Embroidery/Cross Stitch/Needle Point Kits:

  • Check to see if it is unopened, if that is the case then you are good to good
  • But if it is open, check to make sure it has the floss, instructions, and anything else you need to complete the kit.

Thrift haul

Things to look out for when shopping for Charms or Jewelry Making supplies:

  • Check to make sure there is enough to complete  your project
  • Check the condition of the beads and tools, if it is not in usable condition then pass on the item.

There you have it, my tips, tricks, suggestions, and hints I use when I go thrift shopping for craft items. Any reputable thrift store, like Who Gives a Scrap, will have quality items that work and are ready for you to use. Keep your eye out, you never know what bargain you can find!

What tips do you use when you go craft supply thrift shopping?

The post Craft Supply Thrift Haul and Tips and Tricks appeared first on Take Time To Create.


DIY Cactus Outdoor Mat

Hello Everyone!

This post contains affiliate links

I am loving summer! The long, hot days, endless sunshine. We have been spending a lot of time on our back porch, and I noticed that we needed a new outdoor mat in front of our door.

So I gathered some materials and created this DIY cactus outdoor mat.

Here is the video tutorial:

Materials:

Instructions:

The first thing you do is grab an outdoor mat ( I found mine at the dollar store) and some rocks (Dollar store, lol) and start arranging them. I made some rough cactus shapes to start.

DIY Cactus Outdoor Mat

Once I had a good idea what it would look like I started painting the cactuses. I used acrylic paint (Artists Loft) and painted the cactus green and the pot brown.

For the pink flowers I painted some swirl details with a paint pen.

To glue the rocks to the mat I used Liquid Nails.

But before the gluing happened I arranged all the rocks on the mat. I used black stones to around the cactuses to outline them and to give them definition and interest. This part does take a while to fit it all in, but it looks so cool when it is done.

I ended up using about 10 bags of rocks, this is because I was mostly looking for particular shapes to fit in certain areas. I do have left overs for my next project.

I let it dry overnight then I took it outside and spayed a couple of coats of spay sealer on the mat.

DIY Cactus Outdoor Mat

I am loving how it turned out! So cute and the perfect detail for my backyard!

DIY Cactus Outdoor Mat

The post DIY Cactus Outdoor Mat appeared first on Take Time To Create.


Mixed Media Altered Bottle

Hello Everyone!

I love looking at wine bottles and any other bottle with a great shape.  They are just so beautiful and I have a hard time sending them to recycling, lol.

So with this bottle I decided to alter it using basic mixed media techniques. Now it is ready to be on display instead of heading to recycling.

You can watch the altered bottle process here:


Materials:

  • Bottle (cleaned and ready for painting)
  • Gesso, soft gloss gel, glue
  • brushes
  • buttons, raffia, and any other bits and bobs that you want to stick on
  • charm bracelet or necklace
  • tissue paper (or old patterns)

Instructions

Find a really great bottle. I love the shape of this one! Make sure it is clean before you start altering it.

altered bottle

For my base layer of texture I added crinkled up tissue paper from old pattered and adhered them with Soft Gloss gel. I will admit that I am still getting the hang of taking pictures and filming at the same time. I don’t have a pic of this but it is the same technique that I used in in these posts:

Mixed Media Box

Tissue Paper Rose

Once the paper is down and dry give everything a coat of black gesso. Once that first layer is dry, now it is the fun part, start adding buttons, ribbon, raffia to the neck, and anything else you want to add detail and interest.

altered bottle

Once all the glue is dry cover everything is black gesso. Make sure you get in all the nooks and crannies. altered bottle

Dry the gesso completely and then dry brush on the colors you want. I did a base layer of gun metal gray and highlighted the details with a pretty metallic purple.  I added an old bracelet to the neck for additional interest.

Spray seal it and you are done!

A beautiful new bottle to add to your decor! altered bottleThe post Mixed Media Altered Bottle appeared first on Take Time To Create.

Product Review-Finnabair Sparks Acrylic Paint

Hello Everyone!

Today I have something a bit different, a product review. This will be a new feature on my blog and You Tube Channel. I think it is fun to review new products and see what is out there and how it compares to the current products.

FYI I did buy all of these paints with my own money and this is not a sponsored post.

Recently I saw this really sparkly, beautiful paints from Prima Marketing. They are called Sparks Acrylic paints from Finnabair. I love anything that sparkles so I figured this was right up my alley.

Sparks Paint

I did a swatch of all 9 colors on a black gessoed canvas board and a white gessoed canvas board just to see how they looked on each background. I have to say they are very pretty, but some looked better on the white and some looked better on the black.

Acrylic Sparks

The paint is a little thinner than a regular acrylic, but a little goes a long way. It is great for dry brushing and adding details and emphasis to certain areas. And it does live up to its name, it does sparkle. They are beautiful paints!

So I had to try them out on a project. I found this dragon at Goodwill (sorry I don’t have a before picture, but believe me it was ugly. It was almost every color of the rainbow, and the paint was chipping) So I added a layer of black gesso and then added the sparks paint on top. Much better, lol. The pictures don’t show all the beautiful sparkly nature of the paint, but it is there.

Painted Dragon

painted Dragon

I think I am in love with the paint, I am glad I did purchase them and I can see using them a lot in the future.

I did a video review on them as well and you can check that out here:

What would you like me to review next? I love trying new products, it seems like there is always something new coming out

The post Product Review- Finnabair Sparks Paint appeared first on Take Time To Create.

Decorate Your Flip Flops

Hello Everyone!

This post contains affiliate links

Don’t you just love summer?  Long days, swimming, and flip flops. And you all know how much I love to decorate things and make them my own.

Today’s tutorial is on decorating your flip flops!

You can check out the You Tube video here:

This is an easy diy that you can do with friends or kids, or you can make them all for your self, lol

Materials

  • Flip Flops (here is a link to get them from the Dollar Store) but you can get them almost anywhere
  • Glue (I used this Loctite plastic glue. You can get it here: Glue)
  • Flowers, pom poms, stickles, feathers, or anything else you want to attach to your flip flops.

Instructions

As you can see in this pic I have the flip flops numbered. I did a terrible job of taking pics while was filming, lol, but I think you can get the idea of what I did from the pic. I used the loctite plastic glue on all the flip flops.

diy flip flops

Flip Flop #1

I did want to take away from the pretty design, just enhance it. So for his pair I just glued on some pom-pom trim.

Flip Flop #2

Feathers! This is such a cute, boho idea. Just glue one a pile of feathers, I got mine from the dollar store, but you can get them from almost any craft store.

Flip Flop #3

This is a fun free form design using stickles. Just draw your design and let it dry and you have a fantastic pair of flip flops

Flip Flop #4

Take a large flower and glue it to the top of the shoe. To help keep the flower in place while it was drying I used some clothes pins to keep it in place.

Flip Flop #5

For this pair I disassembled an old statement necklace and glued the pieces on to the flip flop. Just make sure you rough up the metal so it sticks to the plastic.

There you go, 5 different ideas on decorating your flip flops.

What other things do you used to decorate your flip flops?

diy flip flops

The post Decorate Your Flip Flops appeared first on Take Time To Create.


Sea Shell Altered Mason Jar

Hello Everyone!

If you are like me then you probably have about 800 million mason jars in your home.  And all those wonderful crafts on Pinterest have inspired me to start using them!

So I decided to use one of those mason jars in this tutorial. It looks organic and beachy with the sea shells and sand texture. Perfect to store your souvenirs from the beach.

Altered sea shell mason jar

Materials

  • Mason Jar
  • Gesso
  • Acrylic paint and brushes
  • Hot Glue
  • Zipper
  • Sea Shells

Instructions

Find a mason jar, I am sure almost everyone has at least one mason jar in their homes, lol. You will need to prime it with white gesso. Paint a smooth layer all over the glass.

Please excuse my messy craft table, I have way too many projects going on and I am just a messy crafter, haha.

sea shell altered mason jar

The next layer is made to look like sand. I added some sand from the dollar store to some heavy gel and sponged it on with a foam brush. Let this layer completely dry before adding paint. If you have textured paste you can use that, but I didn’t have any so I decided to make some.

sea shell altered mason jar

sea shell altered mason jar

After the jar is dry you can add some acrylic paints. I sponged on 3 tan/sand colors to add detail and interest. Any browish colors should work.

sea shell altered mason jar

sea shell altered mason jar

Once it is all dry you can  add the sea shells, this is the fun part! Waiting until everything is dry will help with the glue adhering to the jar. I just used hot glue and that seemed to work for this project. Add a few shells and keep testing with the zipper to make sure your shells will fit.

Wrap the top with twine or raffia.

sea shell altered mason jar

After I added a bunch of shells I added the zipper. Glue it all down and then fill in the blank spaces with more shells.  I am a fan of adding more stuff until it isbursting. When you add shells to the lid lightly sand the metal to help the glue adhere.

Once it was complete I thought it needed some sparkle so I dry brushed on some beautiful gold acrylic paint.

sea shell altered mason jar

All done! I am loving this technique, and I think it would look great with rhinestones or buttons, or any other small item! So pretty!

sea shell altered mason jar

The post Sea Shell Altered Mason Jar appeared first on Take Time To Create.

How to Create Faux Sea Glass (Tumbled Glass)

Hello Everyone!

This post contains affiliate links

My happy place is the ocean, I love watching the water, soaking up the sun, and collecting sea glass. But since I live near the mountains,  no where near the ocean, I have to make my own sea glass, haha.

This is an easy project to do with just a few items. I know that there are a lot of other tutorial for faux sea glass, but I thought I would share with you my process that may be a little different from what other people do.

Materials:

  • Rock Tumbler- You can find a similar one here: Tumbler
  • Broken Glass
  • Sand and Rocks

Instructions:

Safety first! Wear safety goggles and gloves when breaking the glass. I put the glass in a plastic bag and then wrap it with a towel that way everything stays contained. When you have the sizes you want then carefully remove it and place it in your tumbler.

faux sea glass tumbled glass

Add  you glass to the tumbler, but don’t overfill it! ( I have over filled it and it started leaking when tumbling and made a big mess). Anyway, add some sand (I just had some white play sand that I had on hand) and I added a few rocks to add something for the glass to rub on. (The whole idea is for the glass to tumble around and smooth out the edges without breaking any glass)

faux sea glass tumbled glass

Then I added some fine grit that came with the tumbler. I am not sure what it is, but I thought it would help make things smooth, lol. So I threw it in because I had some.

Then cover it all with water, make sure it is less than half full, I know that doesn’t seem like a lot but it doesn’t work with more than that.

faux sea glass tumbled glass

Seal your tumbler and plug it in. As always follow the instructions on your tumbler because yours might be different than mine. Let is tumble for about a week or so.  I leave it in the basement so it isn’t too loud or annoying.

faux sea glass tumbled glass

And there you have it faux sea glass! After a week I am thrilled with how they turned out! faux sea glass tumbled glass
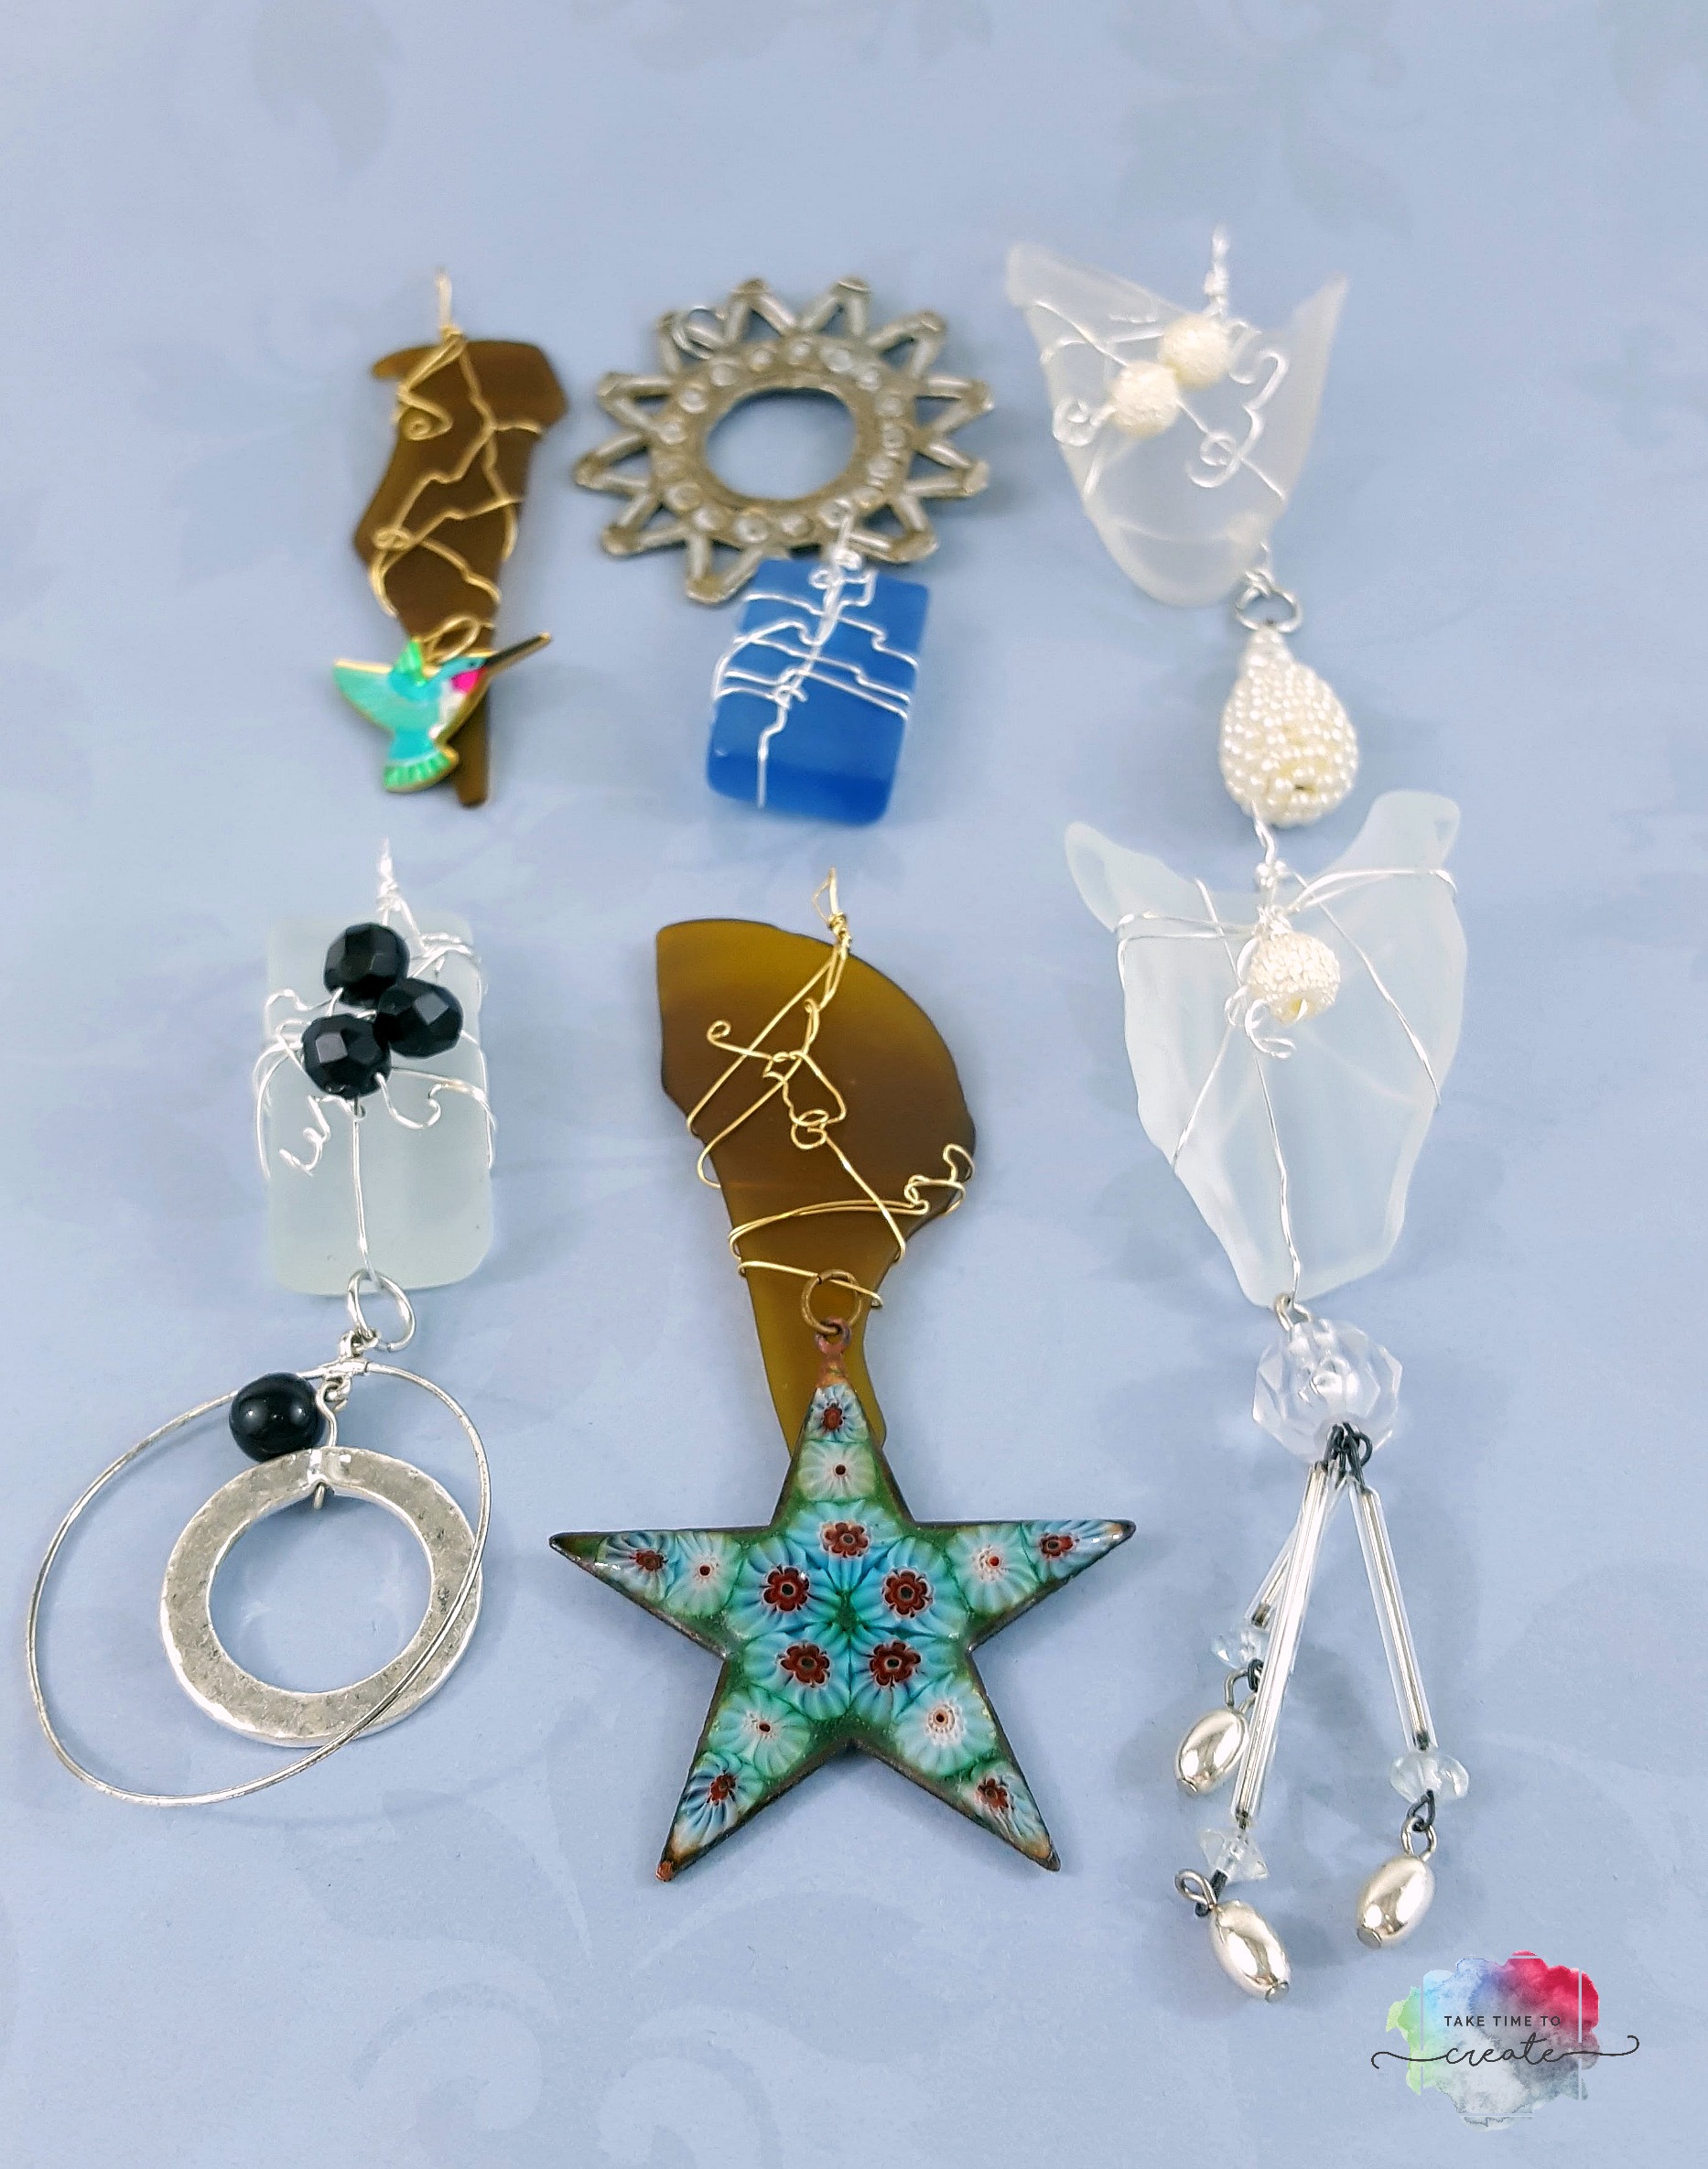
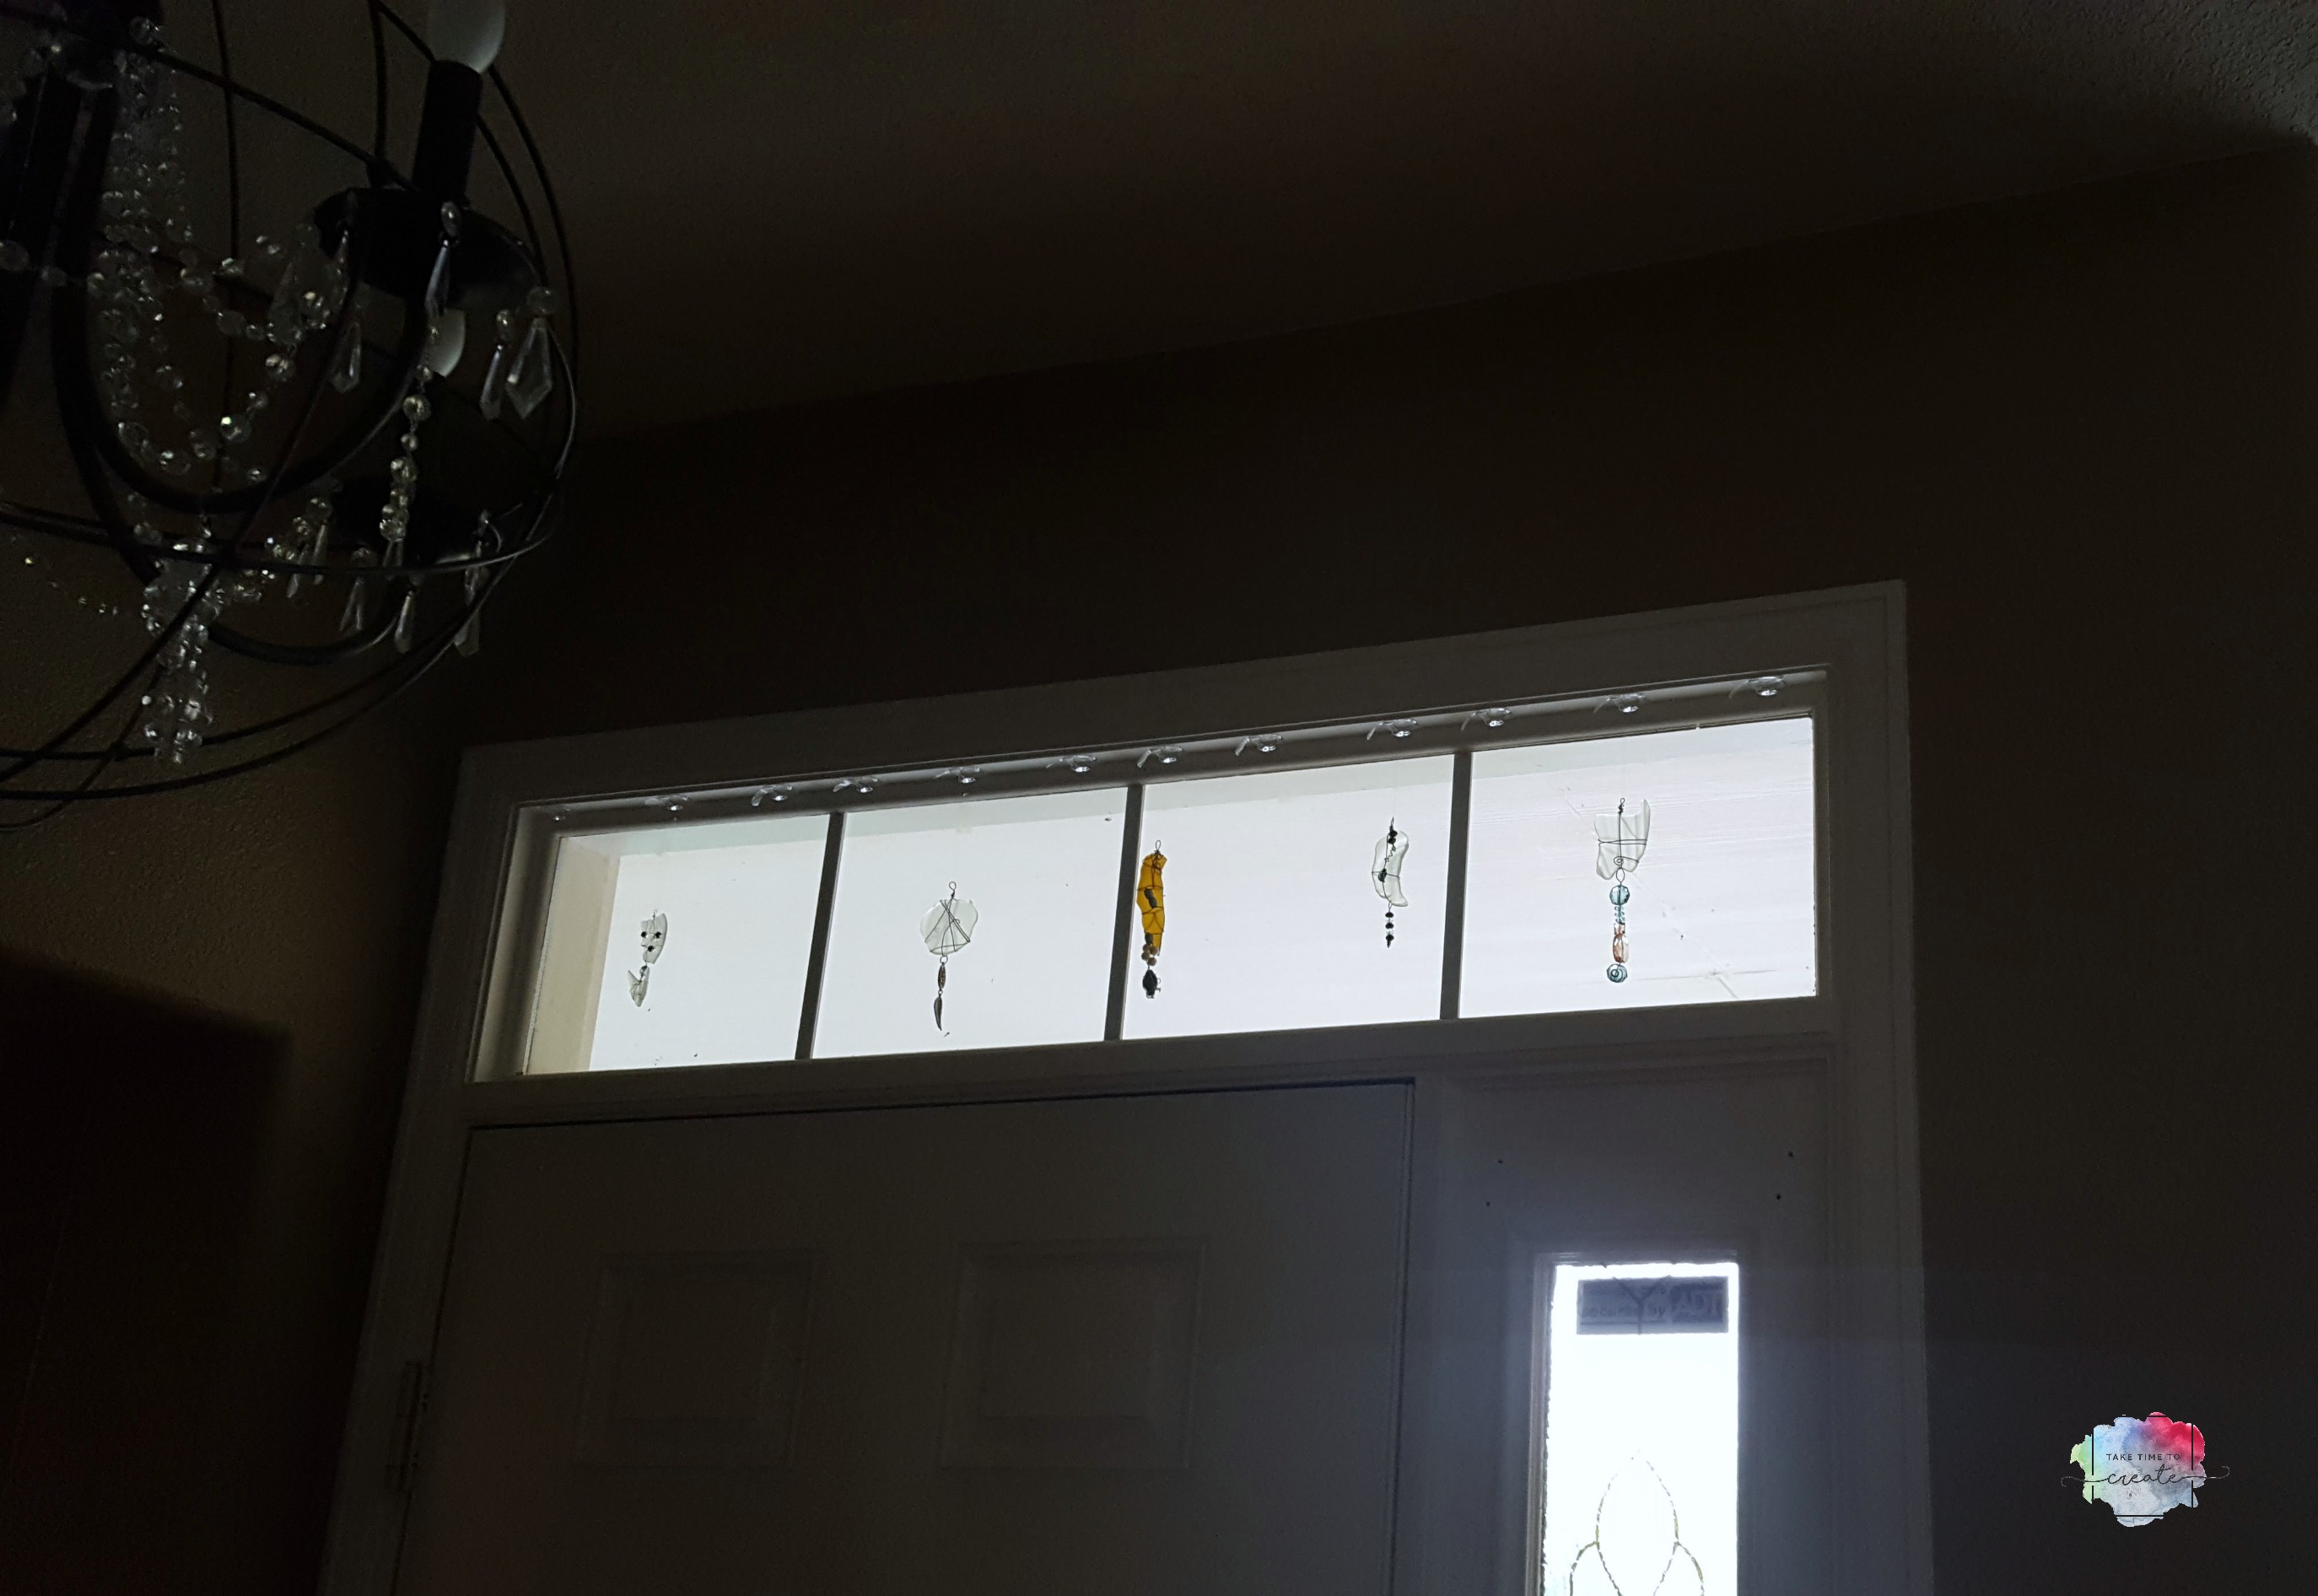
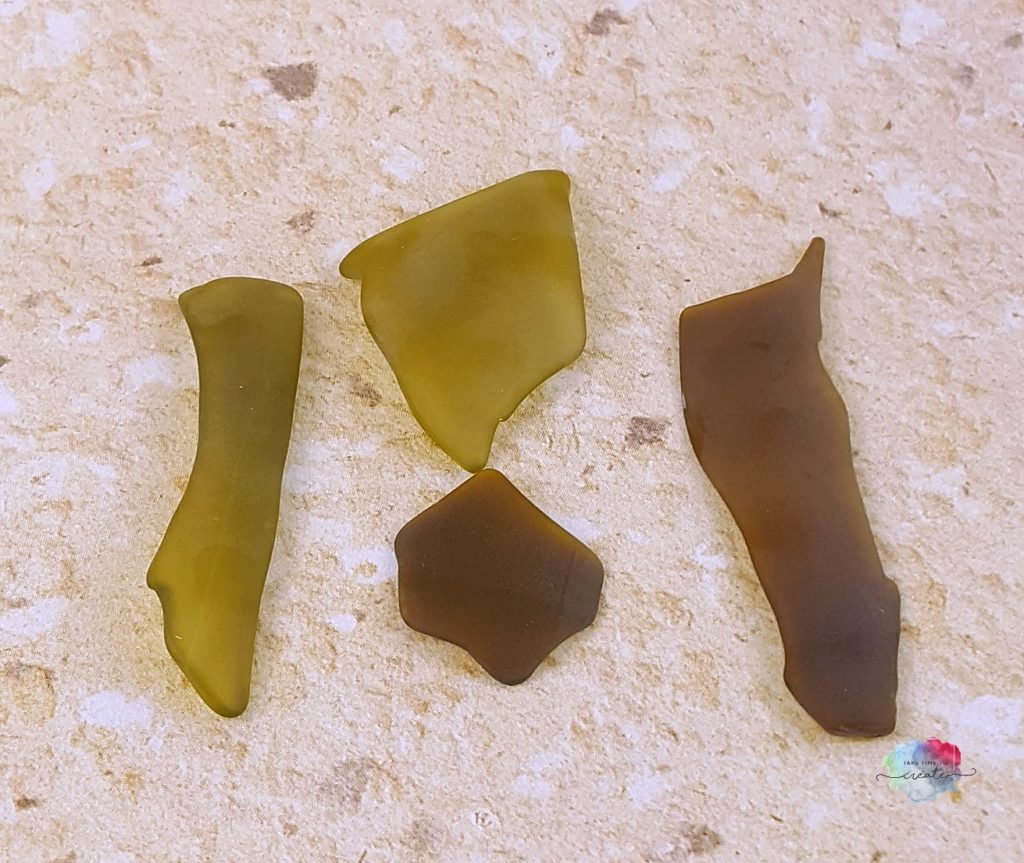
I decided that I needed to wrap them with wire and add beads and old pieces of jewelry to make window dangles. (I will post a tutorial on how I made these)
faux sea glass tumbled glass

Aren’t they pretty hanging from my window above my front door.  Time to make more to fill the window with pretty window dangles.

faux sea glass tumbled glass


The post How to Create Faux Sea Glass appeared first on Take Time To Create.

« Older posts Newer posts »

© 2024 Take Time To Create

Theme by Anders NorenUp ↑

Follow

Get the latest posts delivered to your mailbox:

%d bloggers like this: