Tag: dollar store craft (page 1 of 2)

DIY Dollar Tree Ornaments

Hello Everyone!

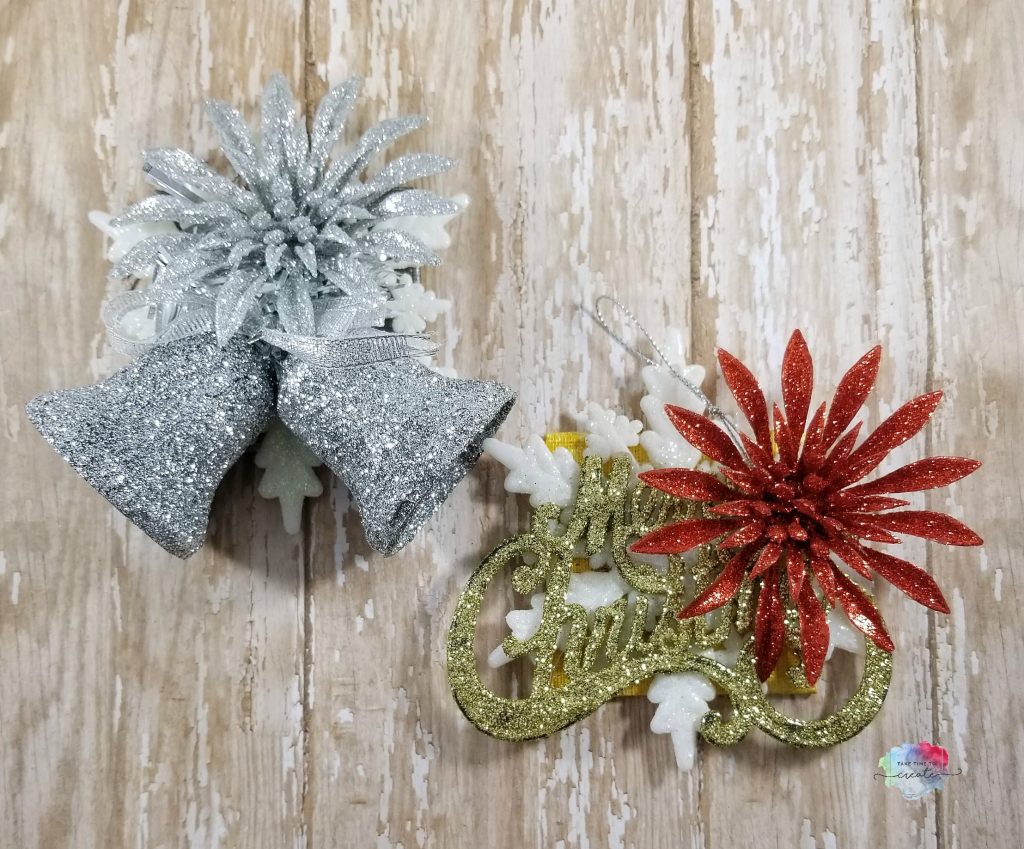
I know it seems early, but Christmas is right around the corner. I created these ornaments using goodies from the Dollar Tree.

FYI: I was compensated for this post. This post also contains affiliate links and I will be compensated if you make a purchase after clicking on my links.


This was such a fun project to complete.  I had a lot of ornaments and Dollar Tree goodies in my stash for this project, but they have a lot of the same ornaments year after year, along with some new ones.

I love how glittery the Dollar Tree Christmas items are, they make the perfect decorations.


diy ornament

For this project grab a tiny canvas and paint it in any color you want, I used a silver and a gold.  (if you don’t have a canvas a piece of study cardboard or foam board will work)
ns.productsocialmetatags:resources.openGraphTitle

diy ornament


I saw it on DollarTree

ns.productsocialmetatags:resources.openGraphTitle

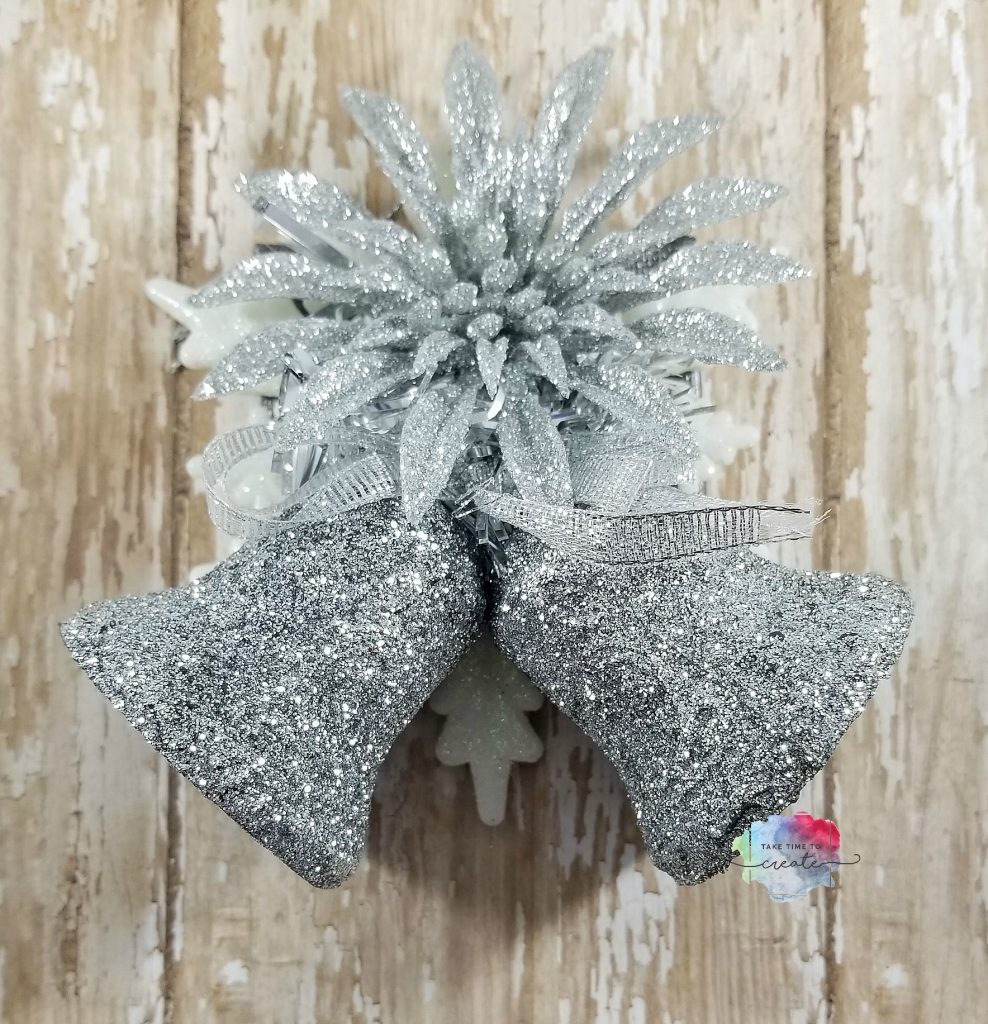
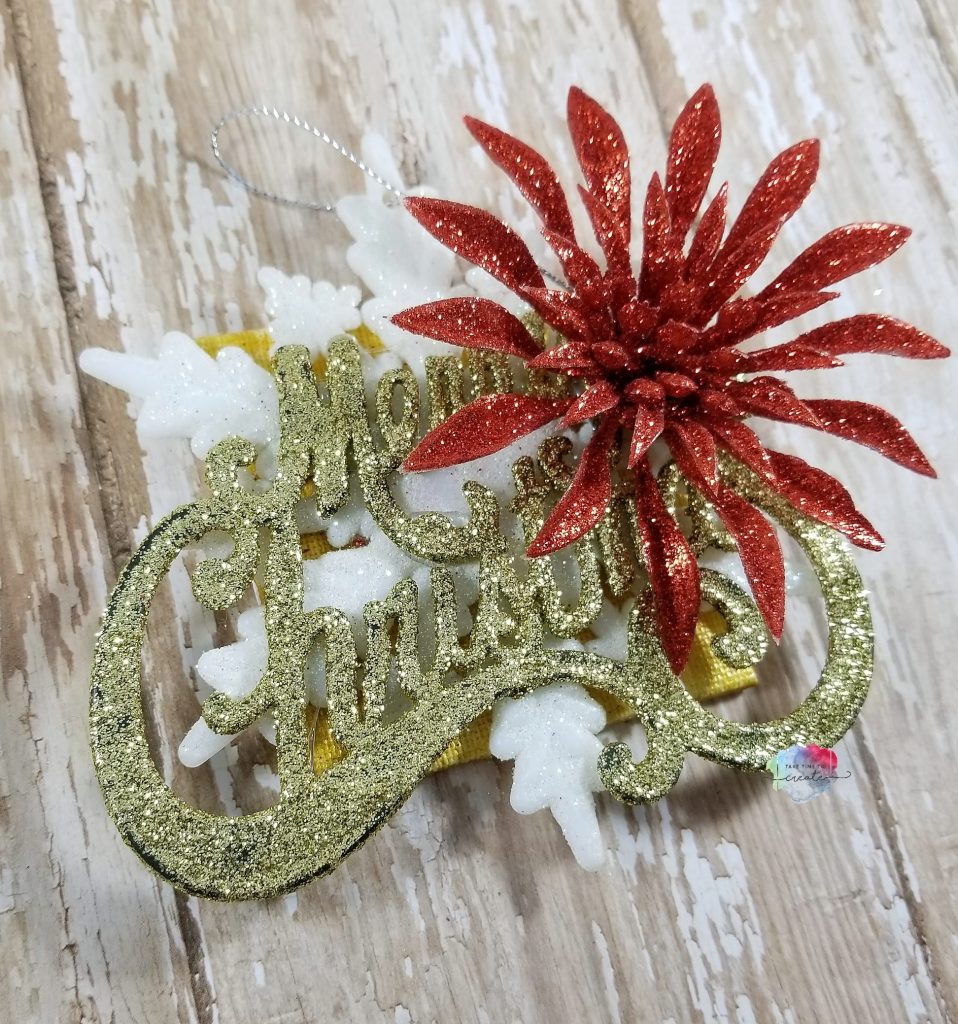
Once the paint is dry you can start layering your ornaments. I used hot glue to attach it.  I used 3 ornaments on each canvas to create an interesting look.

Just build your layers until you get what you are looking for and you are done! Add a string or ribbon to the back if needed.

diy ornament


This project is great to make unique ornaments for your tree, or you can use them as gift tags or gifts to just about anyone on your list.

Dollar Tree links:
Silver ornament bells- https://tinyurl.com/y74zglh8
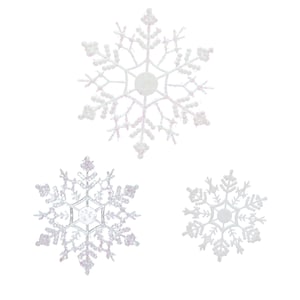
Snowflake ornaments- https://tinyurl.com/y8m8couj
Wintery Ornaments https://tinyurl.com/ybw8jglg
Poinsetta Ornaments https://tinyurl.com/y9wkawc8

Amazon Affiliate links:
Tiny canvas https://tinyurl.com/ya7st5yb
Metallic paint- https://tinyurl.com/y7e2yvoc


the post DIY Dollar Tree Ornaments appeared first on Take Time To Create.

Upcycled Mixed Media Tag Using Dollar Tree Cards

Hello Everyone!

I am excited to tell you that as of today the Dollar Tree will be selling Expression from Hallmark cards! Now, I usually like to make my greeting cards, but sometimes I am in a pinch and so I need a good place to purchase them, and the Dollar Tree really came through with these cards!

There are over 6,500 Dollar Tree stores nationwide and on August 30th every store will carry Expressions from Hallmark, $1 each and Heartline a Hallmark company, 2 for $1. With hundreds of new greeting cards to choose from, you can celebrate every moment with your friends and family without breaking the bank!

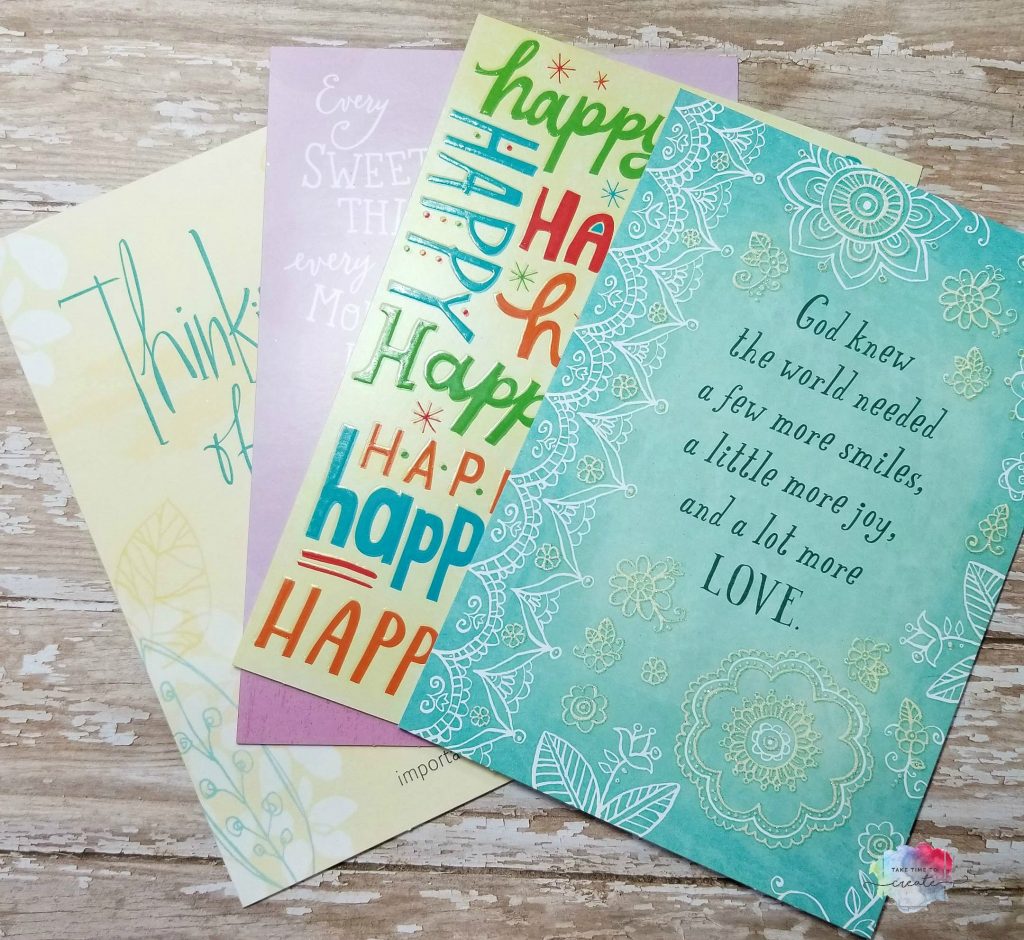
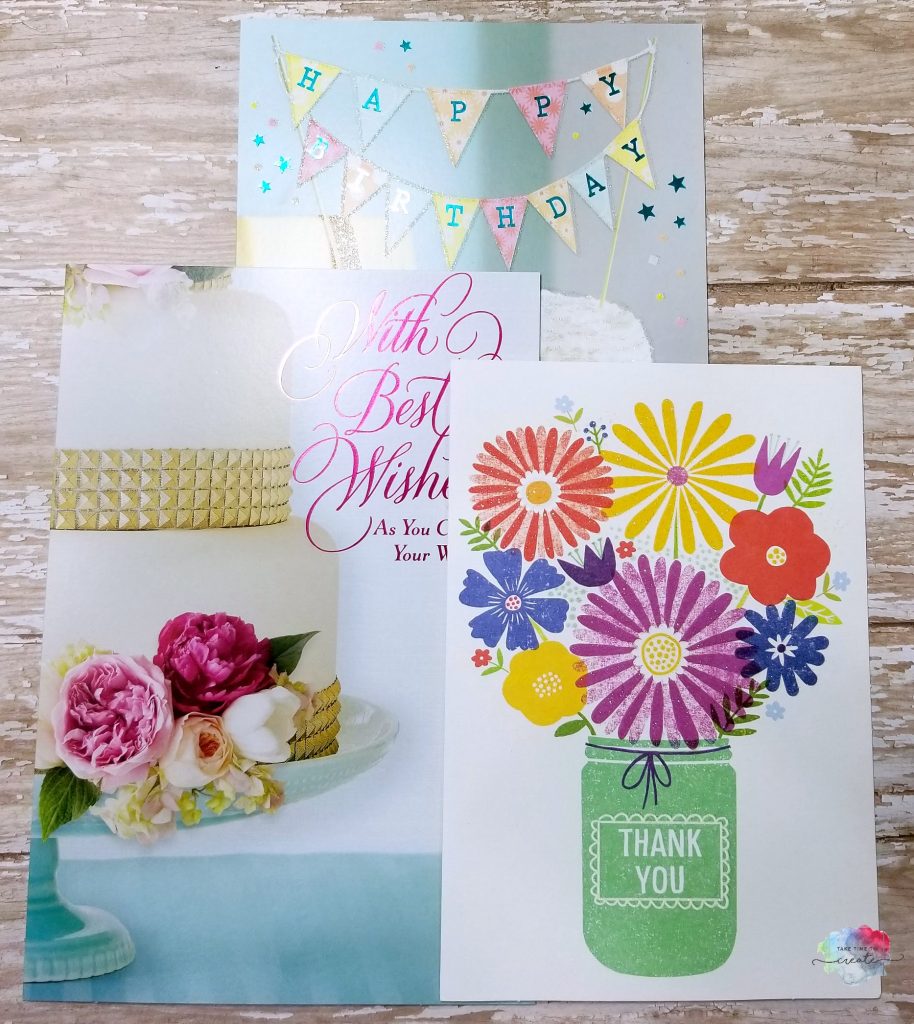
I received a pack of cards from the Dollar Tree and I have to say, they are wonderful. Great colors and designs and some glitter (of course I am a fan of glitter, lol) and they are printed on nice heavy card stock.

upcycled tag

They a few different varieties, like the Joyfully Yours line (that is the teal one on the right in the above photo)  Joyfully Yours lets family and friends express their faith in just the right way during holidays, special occasions, and moments big and small.

upcycled tag

I was please with the selection and I am excited to use the cards. You all know I am a big fan of upcycling and repurposing items in my art. Since the cards are on nice paper it is easy to reuse them and make cards and tags from old greeting cards.

upcycled tag

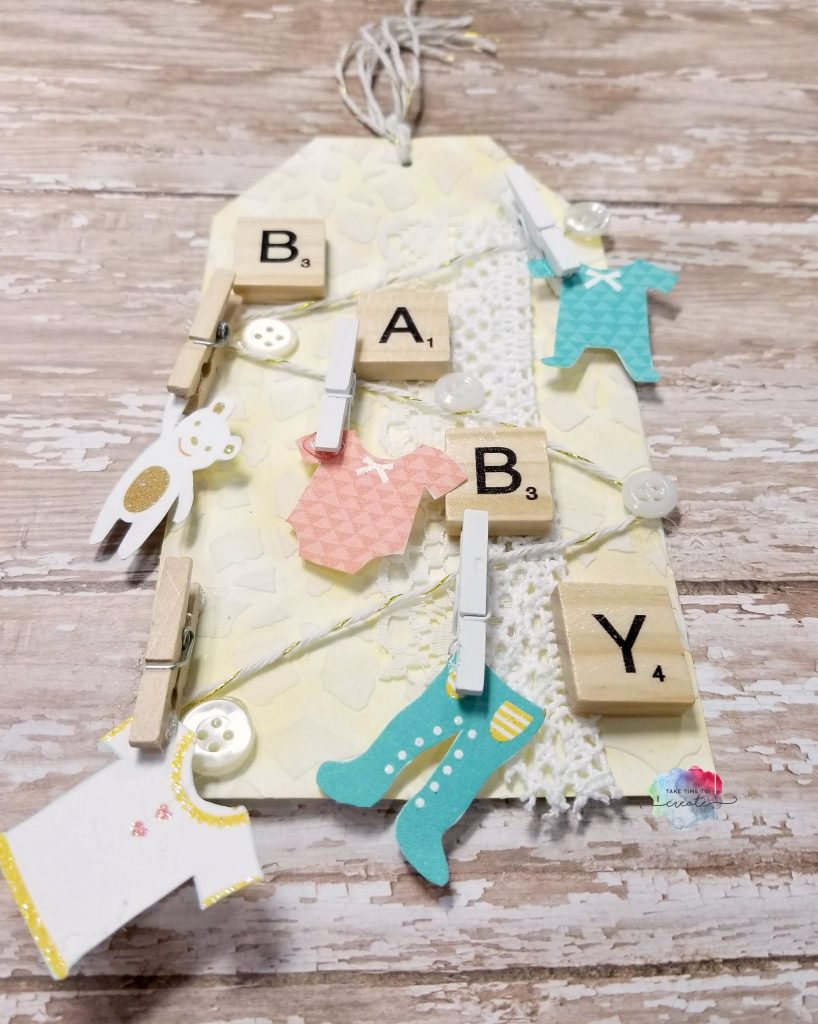
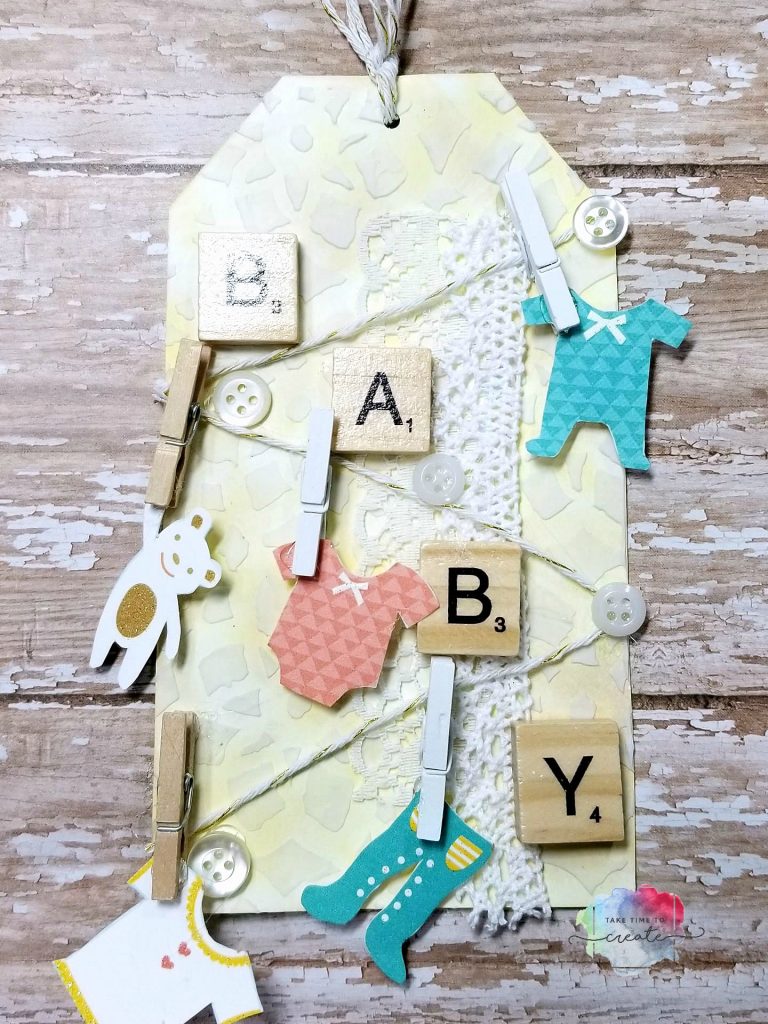
In the video at the beginning of the post I show you how to take the baby card and make this cute mixed media tag. I used some ink, stencils, scrabble tiles, bakers twine, and other elements.

upcycled tag

Such a cute little tag and easy to make and have on hand. You can do this technique for any occasion!

I was compensated for this post. This post also contains affiliate links and I will be compensated if you make a purchase after clicking on my links.

Dollar Tree Affiliate Links:
Expressions from Hallmark- https://tinyurl.com/ya8agy7n
Hot Glue- https://tinyurl.com/y8nw388p
Lace-https://tinyurl.com/yahjgdt3.

Amazon Affiliate links:
Versa Magic- https://amzn.to/2PnyvyB
Tag die cut- https://amzn.to/2NafZMN
Finnabair stencil set- https://amzn.to/2PR27p6
Finnabair Modeling paste- https://amzn.to/2wu09D7
Finnabair silicone brush- https://amzn.to/2PlieKn
Bakers twine- https://amzn.to/2N4kwjz
Mini clothes pins- https://amzn.to/2MZ8197
Scrabble Tiles- https://amzn.to/2MCRAzZ

The Post Upcycled Mixed Media Tag Using Dollar Tree Cards appeared first on Take Time To Create.
 

Dollar Tree DIY Easter Decor

Hello Everyone!

Can you believe that Easter is just right around the corner? Where is this year going? Anyway, I have a fun and easy Dollar Tree DIY Easter Decor project for you.

FTC Disclaimer:

I was compensated for this post. This post also contains affiliate links and I will be compensated if you make a purchase after clicking on my links.

So, to do this project you will need a few supplies, most of them can be picked up at the Dollar Tree.

Materials (affiliate links)

Bulk Special Moments Frameless Canvas Art, 8.5 in. atcom

from: DollarTree

Bulk Iridescent Easter Grass, 1.75-oz. Bags atcom

from: DollarTree

Bulk Colorful Fillable Metallic Plastic Easter Eggs, 6-ct. Packs atcom

from: DollarTree

Instructions:

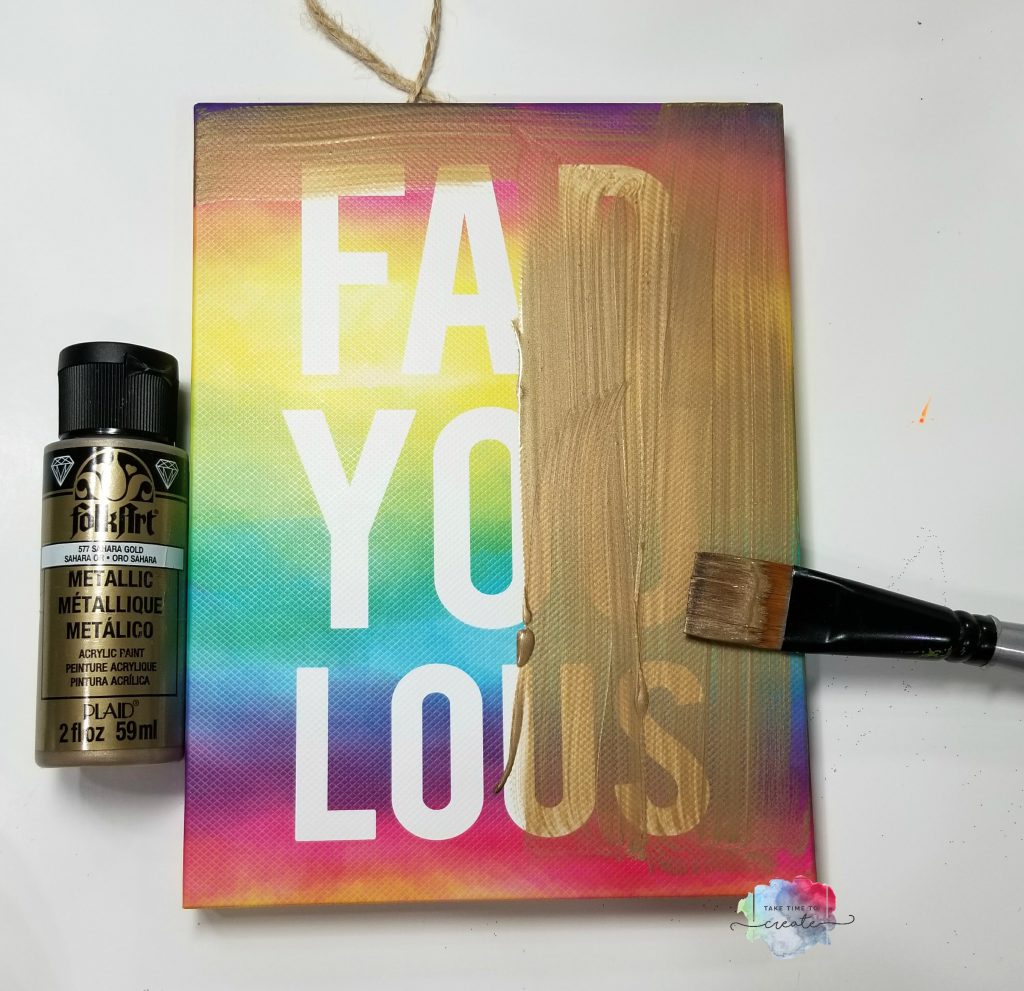
First you will want to paint your canvas. I used a gold Folk Art paint. You can use any color you want, but it will take a few coats to cover up the canvas.  You might not be able to find the exact canvas I am using, but look around they seem to always have some great choices for canvases, and you might want to experiment with different sizes.


Dollar Tree Easter DIY

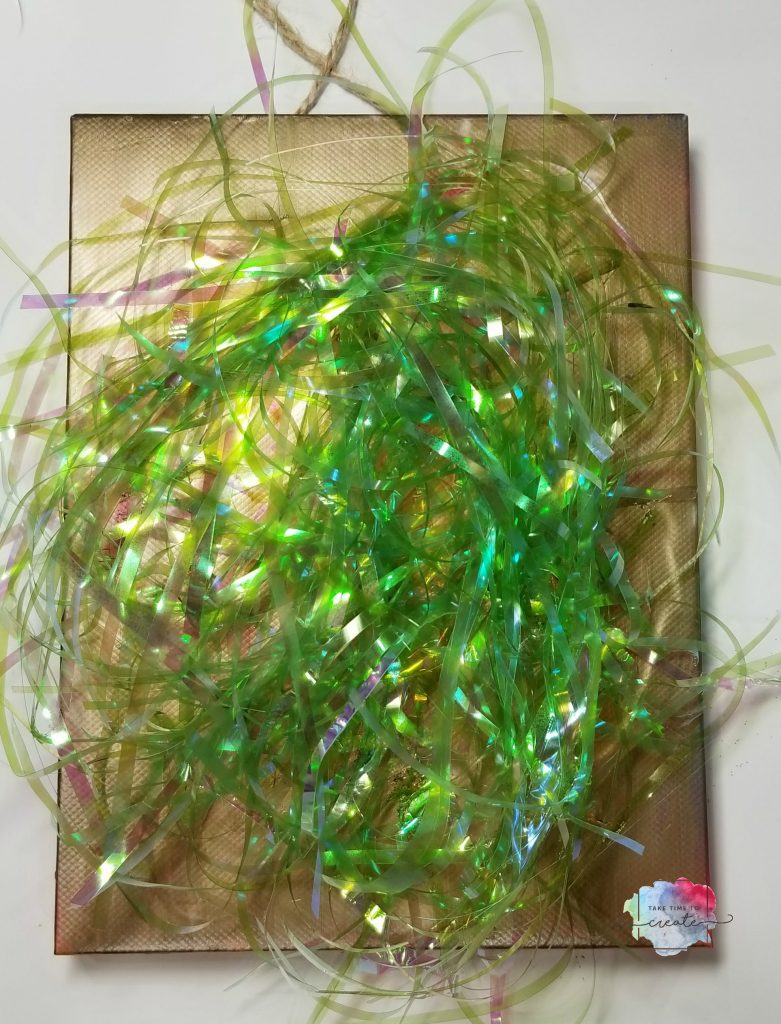
Once your paint is dry you can add the grass. Take as much as you want and shape it into a nest shape and hot glue it to the canvas.

Dollar Tree Easter DIY

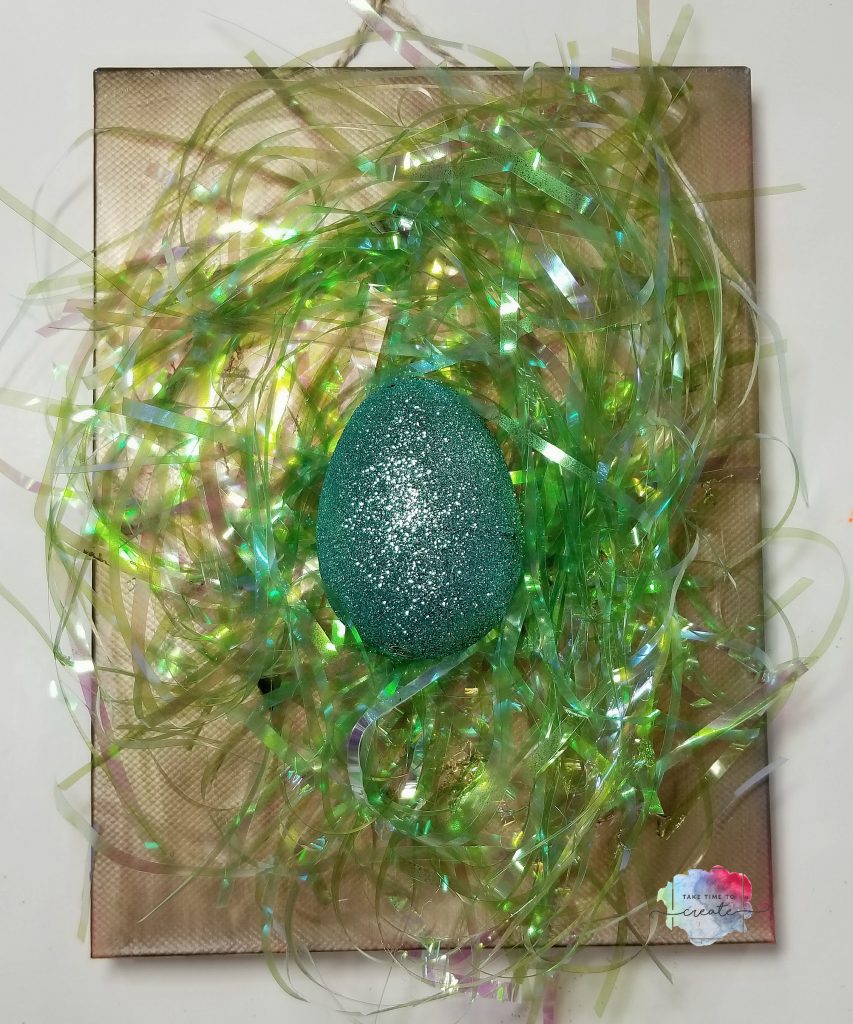
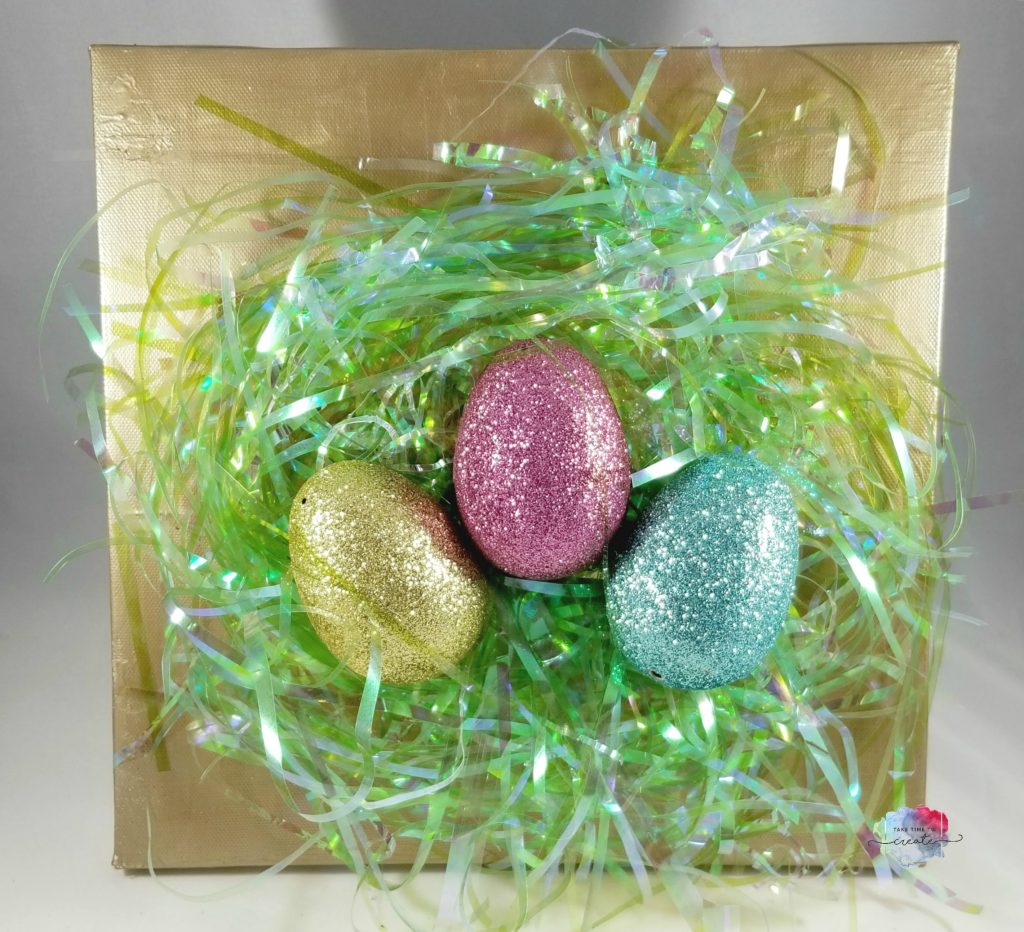
Then you add your eggs, add a single one in the middle, or a grouping of 3. If you can’t find any eggs look around for another spring related item that would fit on your canvas. Be creative and experiment with your center piece.


Dollar Tree Easter DIY

These are just so cute when they are all finished. These would look great in a grouping of 3. Also, this would be a fun project for kids or a church group. There are so many great options for these canvases.

Dollar Tree Easter DIY


What Easter project are you working on?

The post Dollar Tree DIY Easter Decor appeared first on Take Time To Create.
 

DIY Dollar Tree Snowflake Christmas Decoration

Hello Everyone!

I was compensated for this post. This post also contains affiliate links and I will be compensated if you make a purchase after clicking on my links.

Christmas is just around the corner and I am getting excited! I love to make my own decorations, the glittery the better, lol.

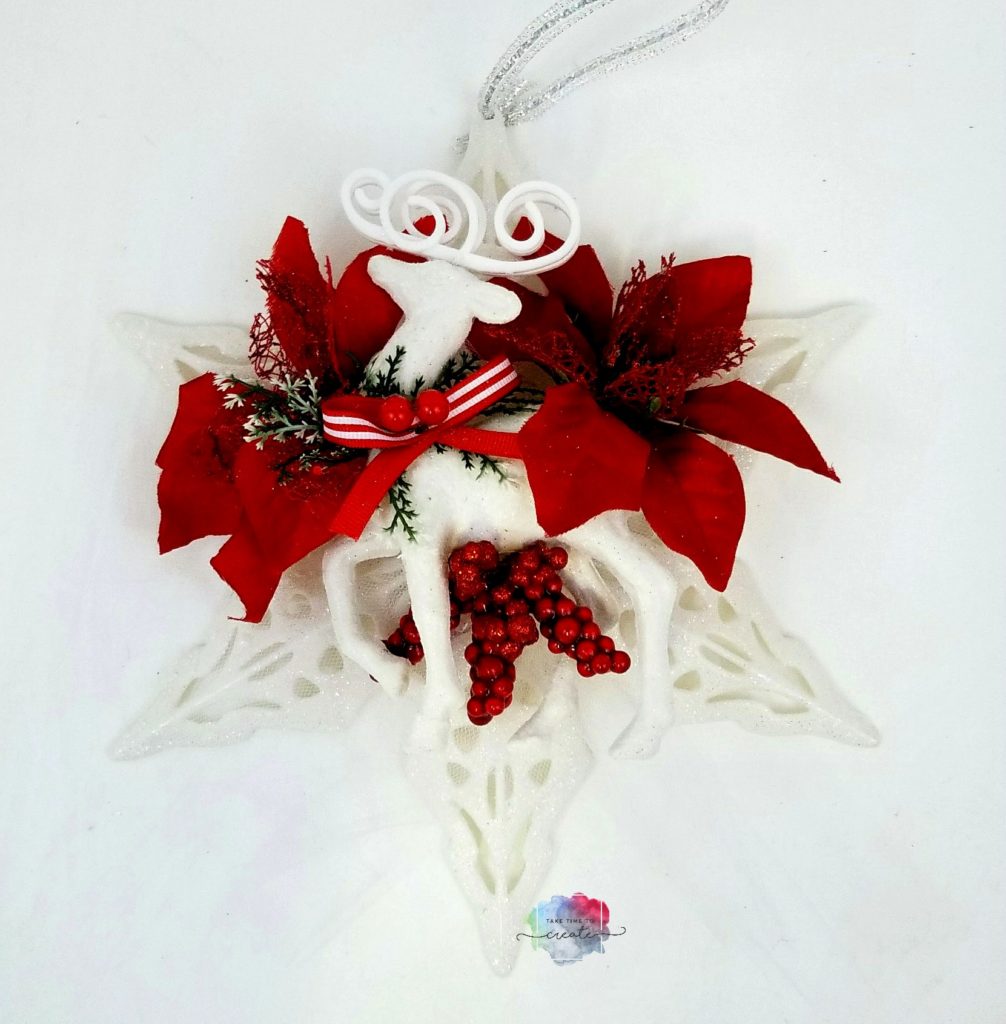
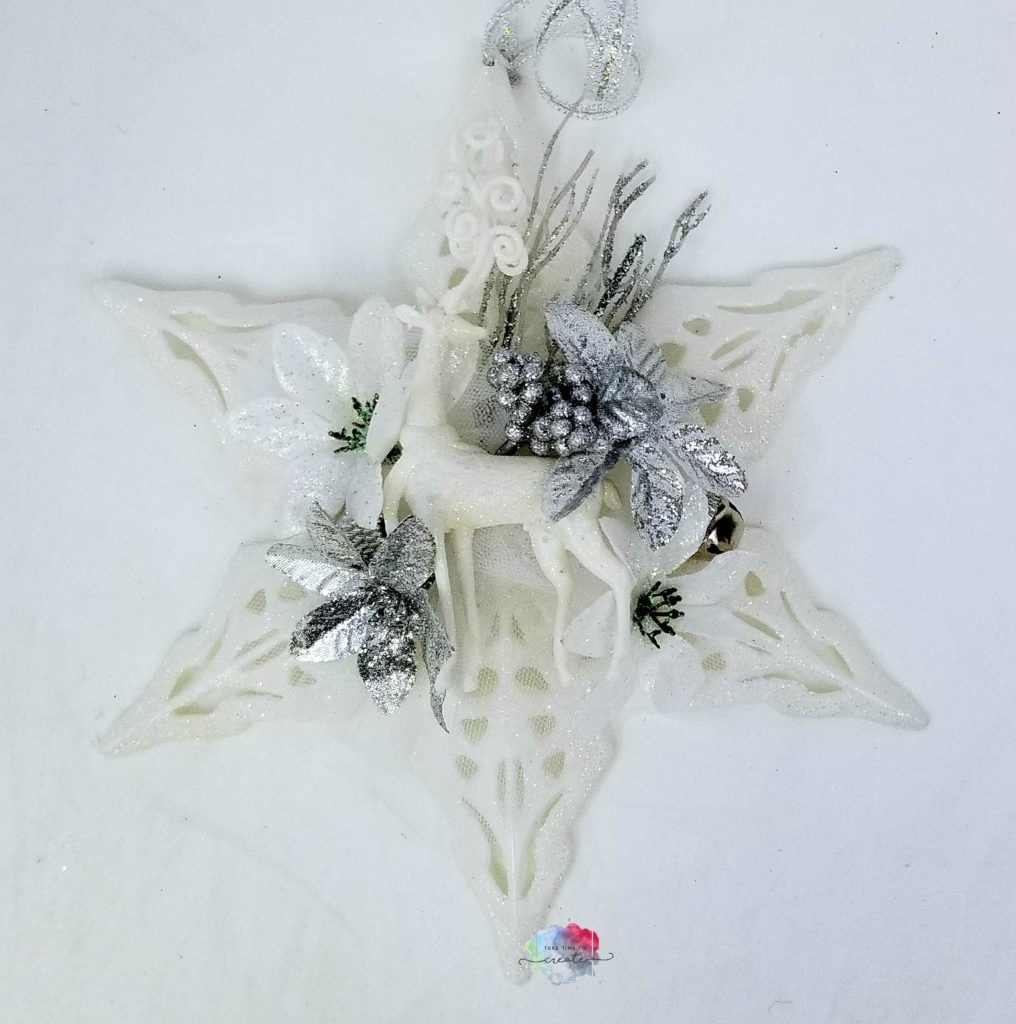
Dollar Tree is the perfect place to get supplies to make your own decorations, like these Snowflakes I made.

These snowflakes are so easy to make and they look so cute hanging on your wall.

Materials Needed (affiliate links):

Bulk 5-Stem Christmas House Glittered Poinsettia Bushes, 13 in. atcom

from: DollarTree

Instructions: 

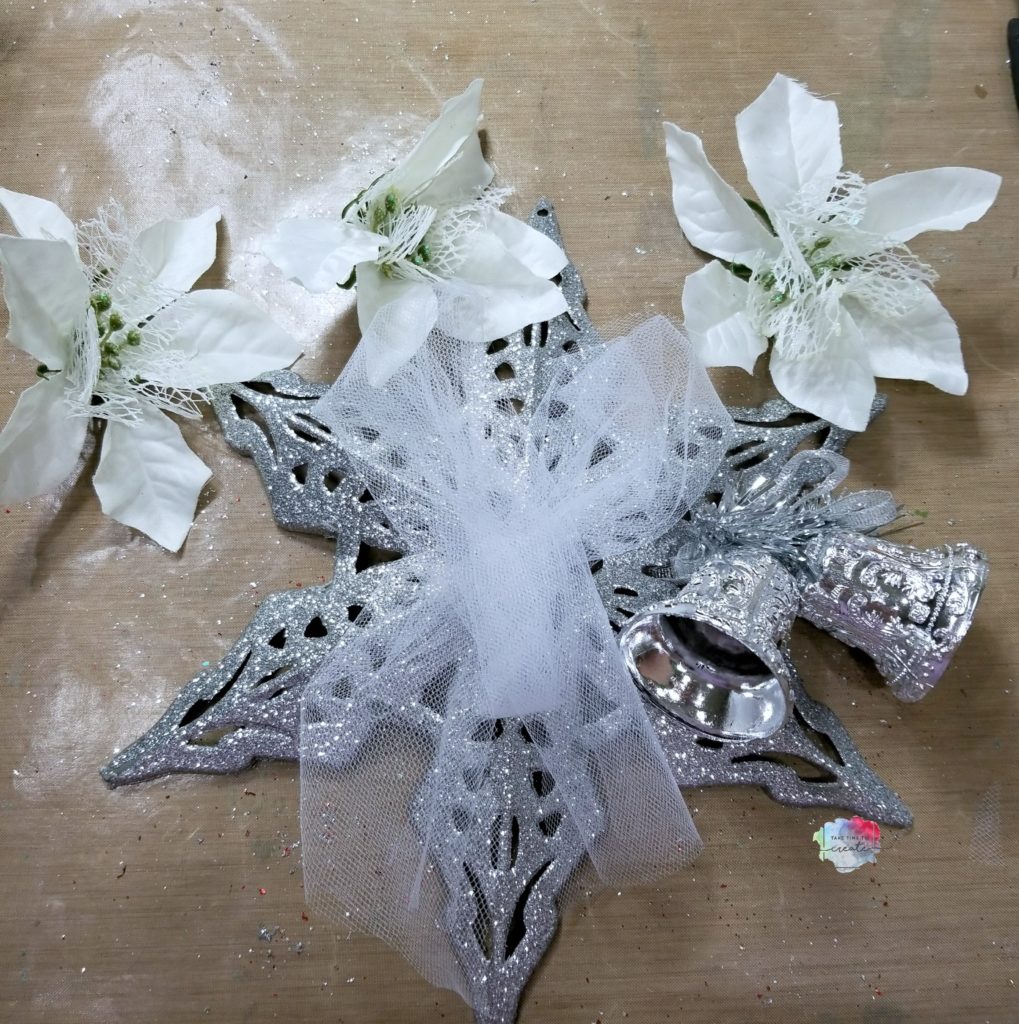
Start with your glittery snowflake and add some tulle as a base layer. Or you can add glitter mesh, or ribbon, or lace, anything really. You just want to make sure you have an anchor for your focal point. Glue the tulle on with hot glue.

DIY Dollar Tree Snowflake Decor

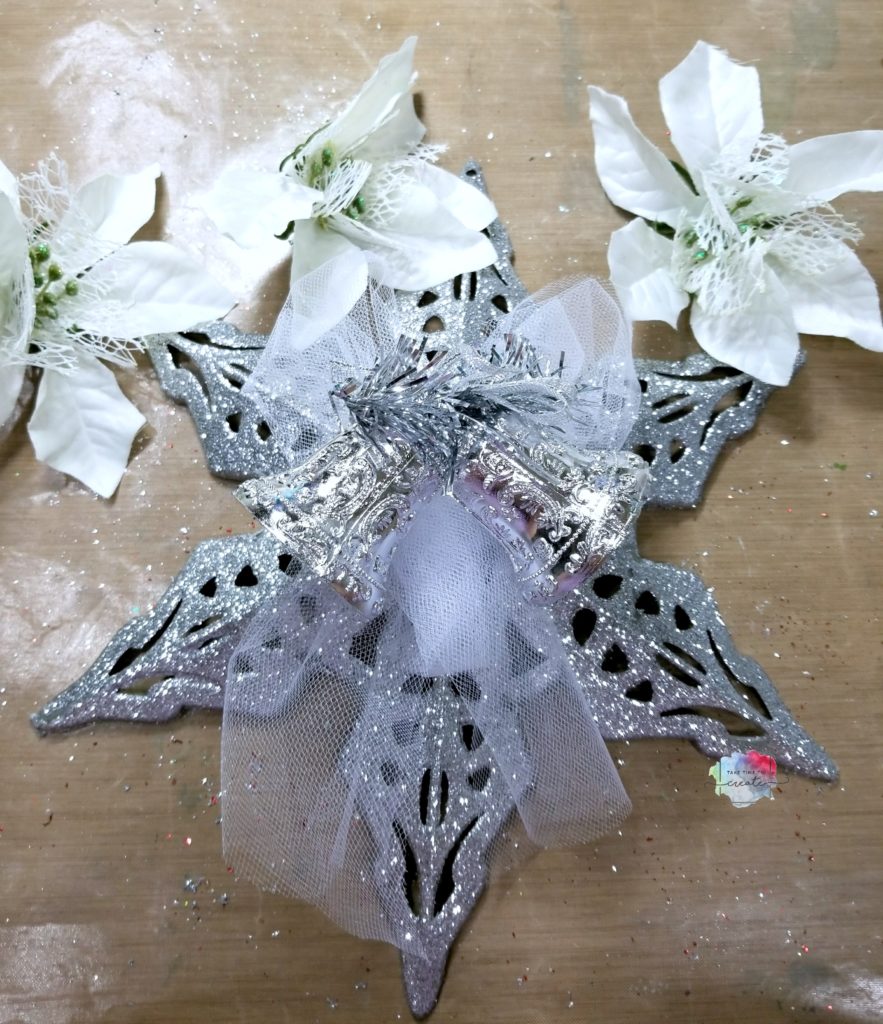
Then you want to glue on your focal point to the center of the snowflake

DIY Dollar Tree Snowflake Decor

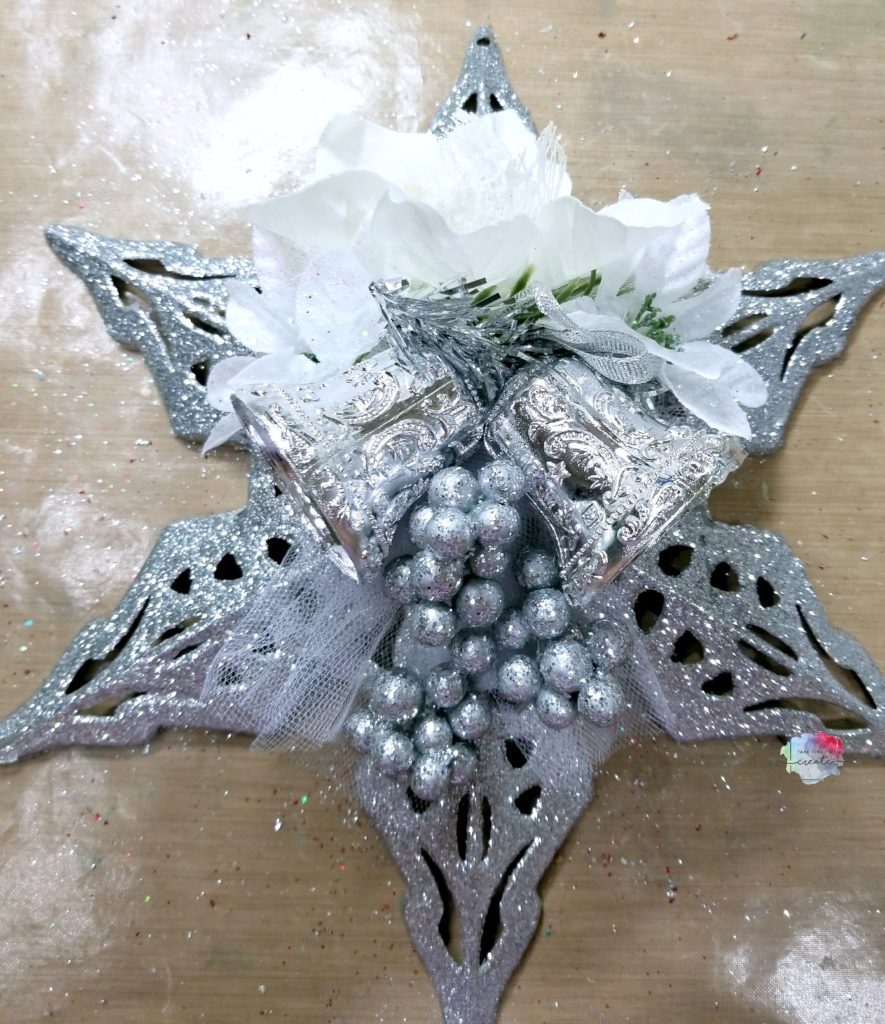
Then you glue on accents and decoration all around your focal point. Poinsettias, floral picks, beads, jingle bells, and small ornaments work great for this step. Anything will work, you just want to fill up the empty spaces and make it full and festive.

DIY Dollar Tree Snowflake Decor

There you go, nice and easy and they looks so festive and glittery.  A grouping of the snowflakes would look really great on a wall, or it could be the perfect gift!

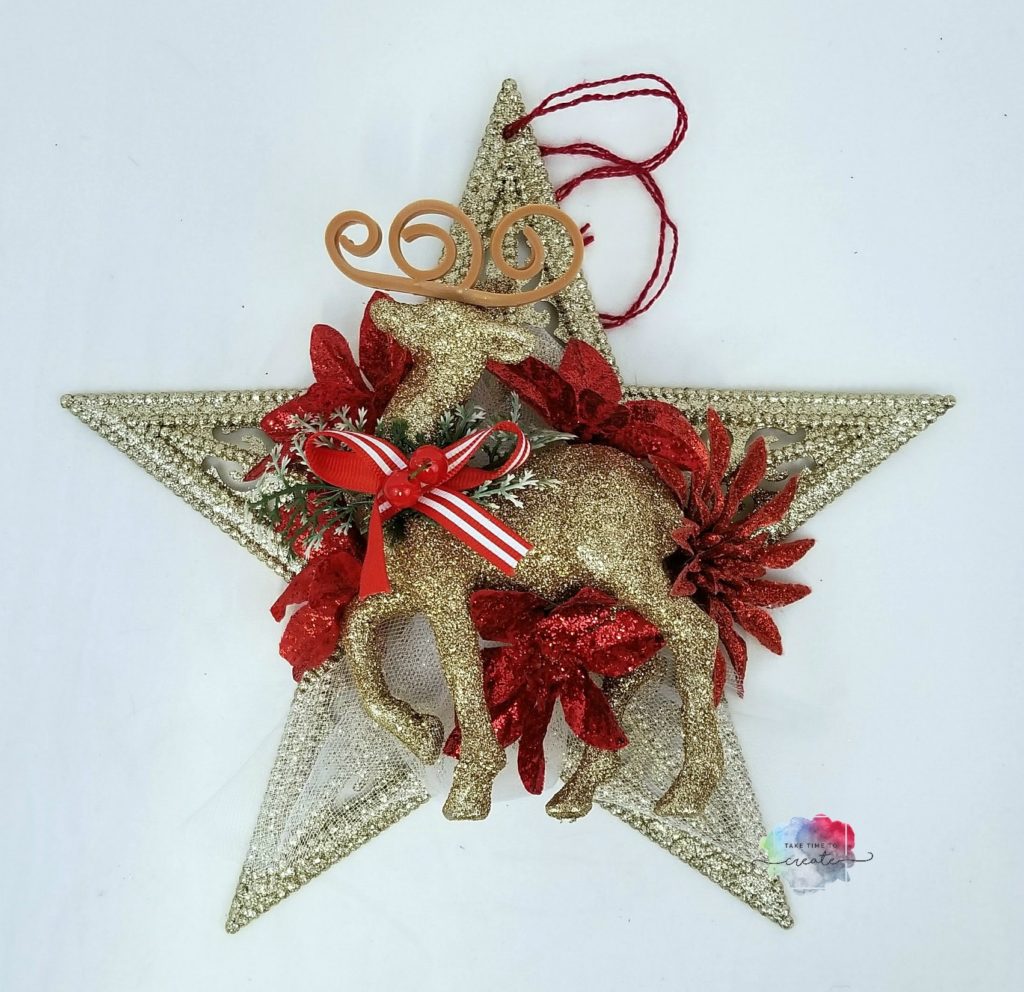
I thought it would be fun to show you some other variations I created. I just love making these, I can’t seem to stop, lol

DIY Dollar Tree Snowflake Decor

DIY Dollar Tree Snowflake Decor

DIY Dollar Tree Snowflake Decor

What Christmas decorations do you make?

The post DIY Dollar Tree Snowflake Christmas Decoration appeared first on Take Time To Create.
DIY Halloween Floral Mickey Mouse Ears

Hello Everyone!

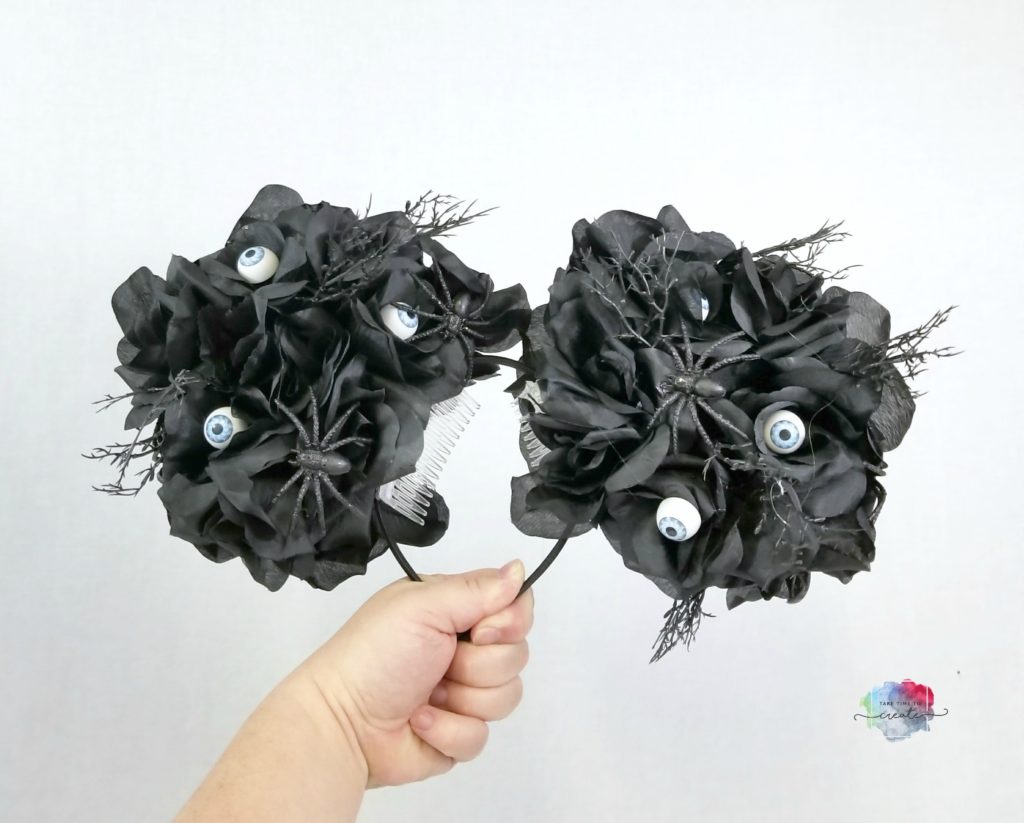
DIY Halloween Floral Mickey Mouse Ears! What more do you need for a trip to Disney World?

As many of you already know, I love Disney! It is my happy place and I love being able to go. In Oct I will be crocheting with the Crochet Crowd at Disney World! I am so excited!

As I get ready for this awesome adventure I decided I needed new Mickey Mouse ears! I like to make a pair for each day I am there, so get ready to see more ears, lol.

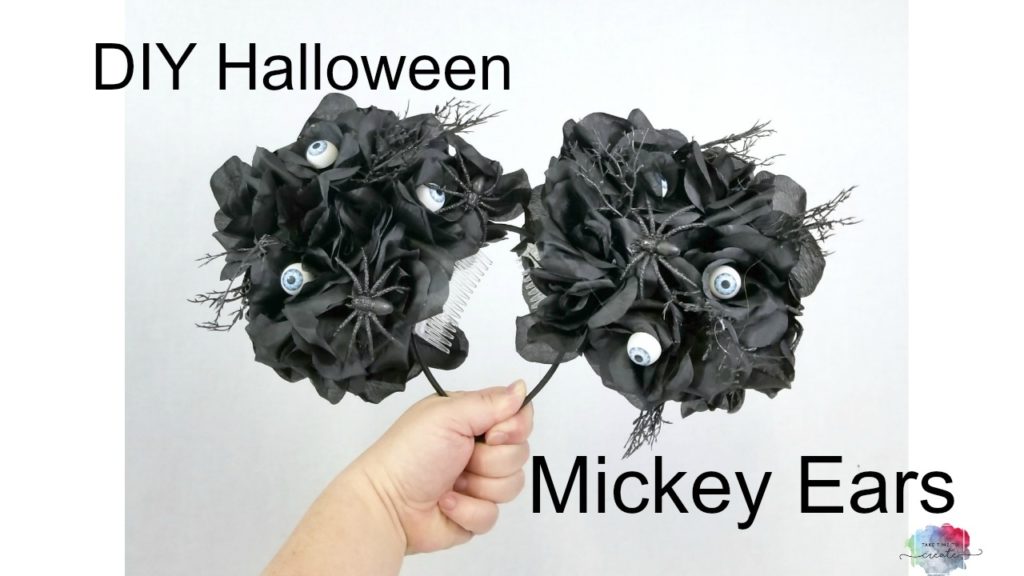
This first pair uses black eyeball roses from the dollar store. They are so cute and since I will be there during Halloween,  these ears will be perfect!

DIY Halloween Mickey Mouse Ears

This is a pretty easy project, which is great because I will need to make a few, lol

Materials:

  • Headband (I found a pack on eBay)
  • Thick foam
  • Felt
  • Hot Glue
  • Roses
  • Combs
  • Ribbon
  • Mickey Ear Template (I found mine here: Template)

Instructions:

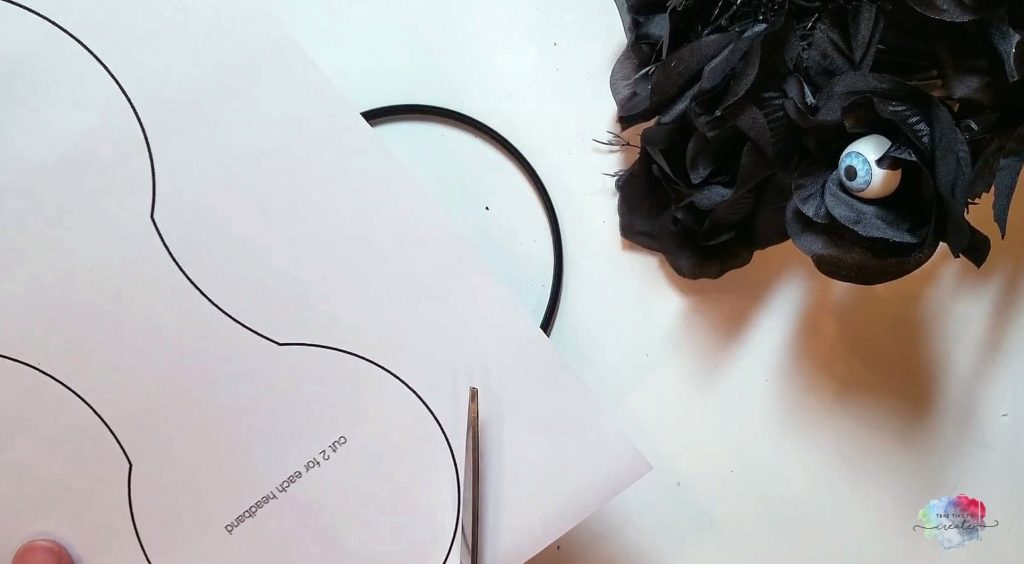
Cut out your template, save it when you are done in case you want to make more ears

DIY Halloween Mickey Mouse Ears

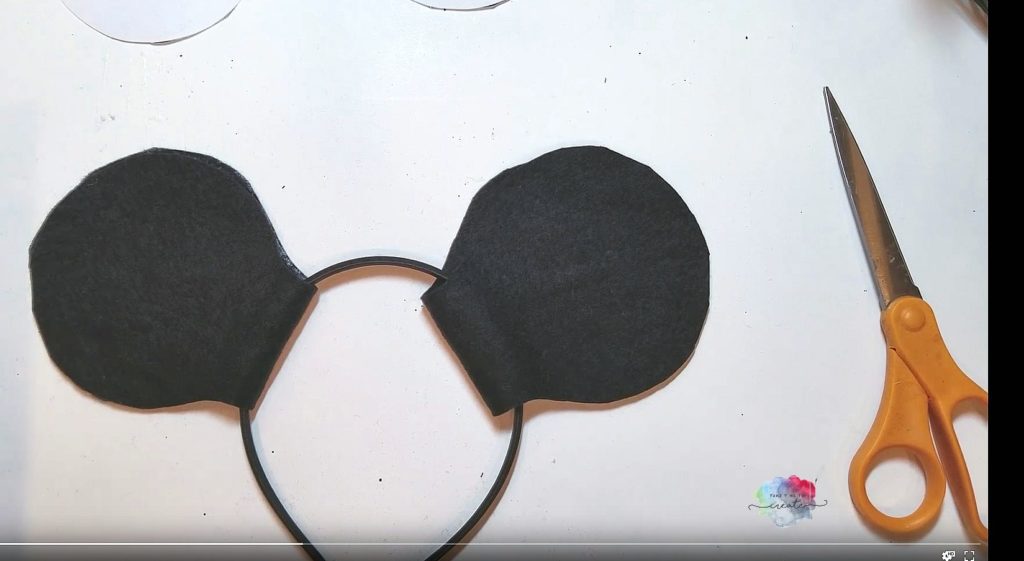
Cut some felt in the shape of your ear template.

DIY Halloween Mickey Mouse Ears

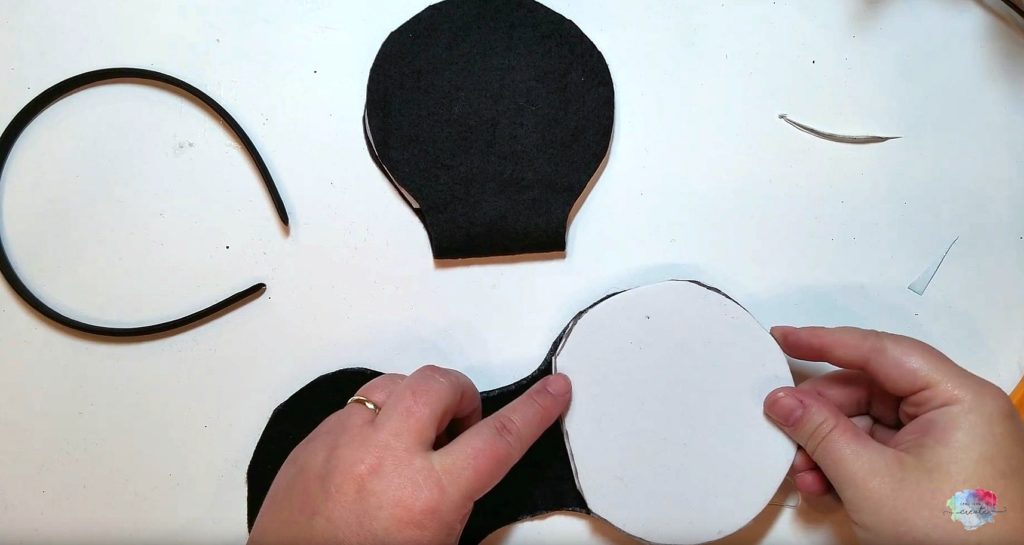
To help thicken up your ears add some thick foam to the center of your ears. The flowers need a little help stabilizing.

DIY Halloween Mickey Mouse Ears

Hot glue your foam and felt to your headband. Be mindful of the placement, you don’t want your ears too close together and not too far apart. Then I added ribbon along the edge to cover up the foam.

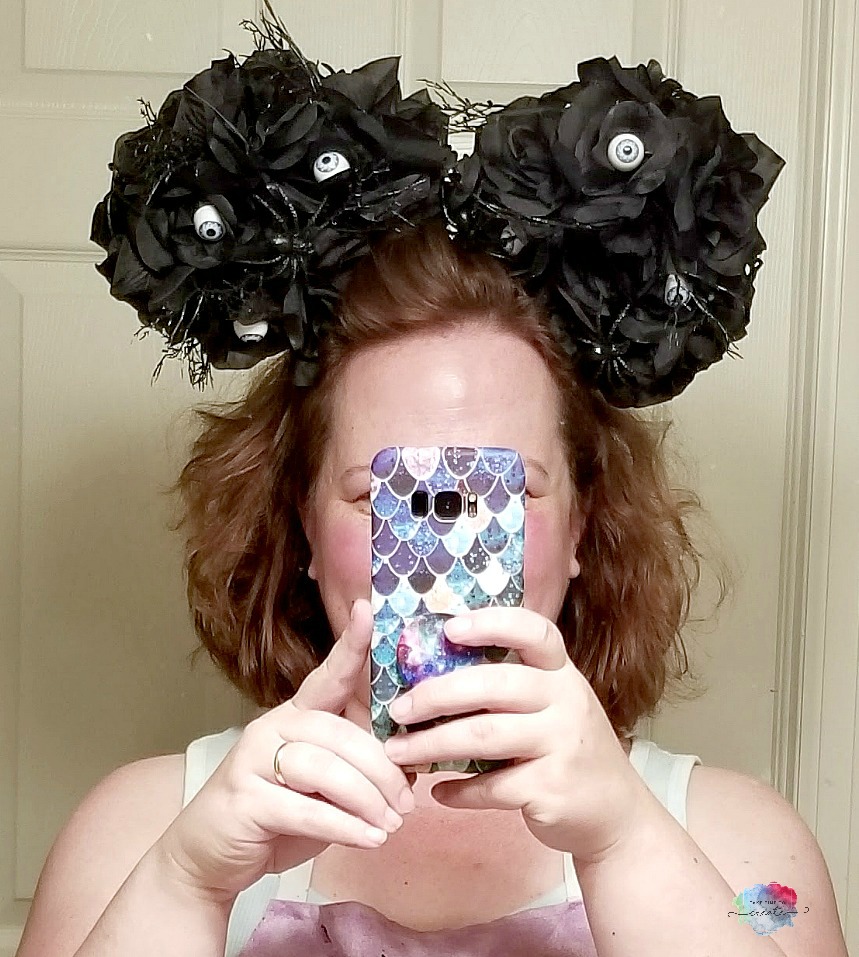
Now it time for the fun part, hot glue your roses on to your ears. I used 6 bundles of roses from the dollar store. (4 were ones with eyeballs and 2 were just plain black roses) Go to town filling you ears with roses. I do the front and backs when I make ears, I think they turn out nicer that way. Add spiders and any other spooky element you want.

I did add some hair combs to the headband to help keep it on my head. They are not heavy, but the combs help them stay on your head.

Now you are ready to rock your new ears! This is a big, bold look that will be perfect for Disney!


DIY Halloween Mickey Mouse Ears

The post DIY Halloween Floral Mickey Mouse Ears appeared first on Take Time To Create.
DIY School Supplies

Hello Everyone!

Yikes! Can you believe it? School is just right around the corner! Or maybe it has already started for some people.

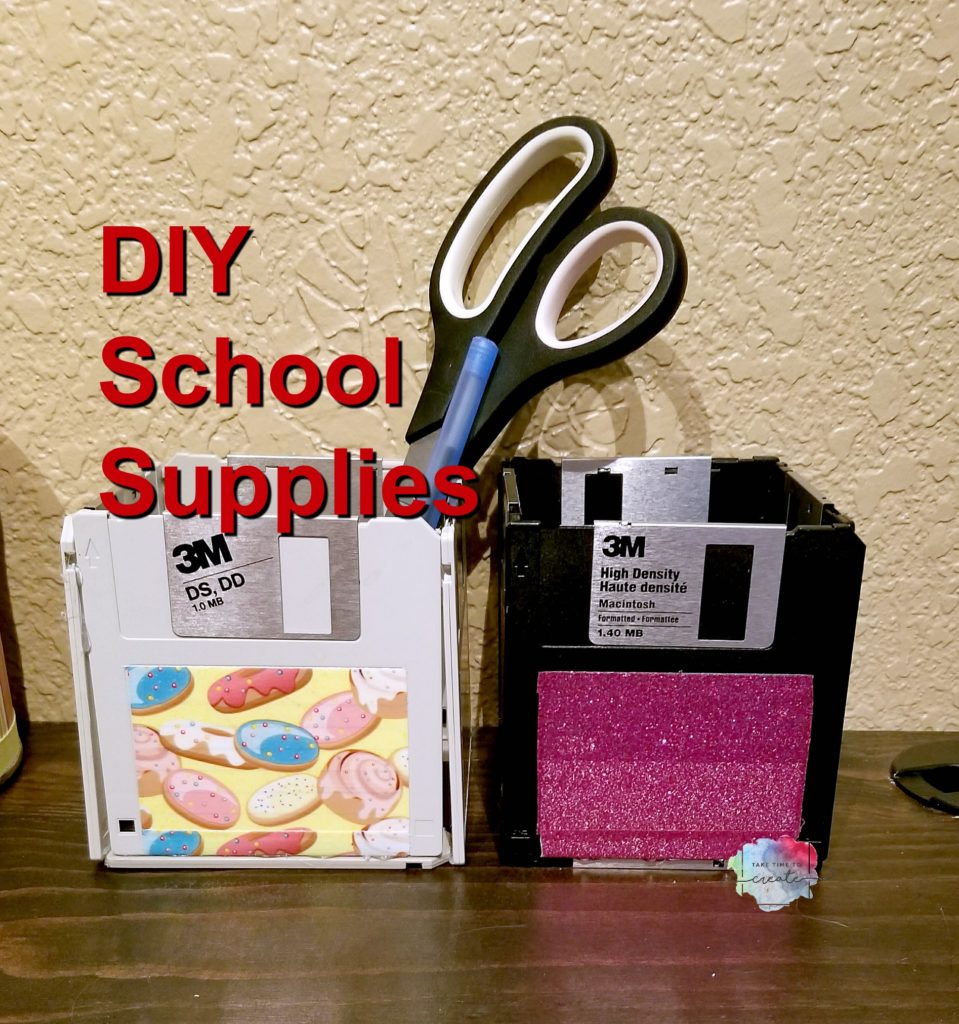
DIY School Supplies

To help ease the transition  I have a school supplies inspired DIY! These are perfect for dorms, or even the office. Do you want to know the best part? They are all a little geeky 🙂 Which is perfect!

The video can be found here:

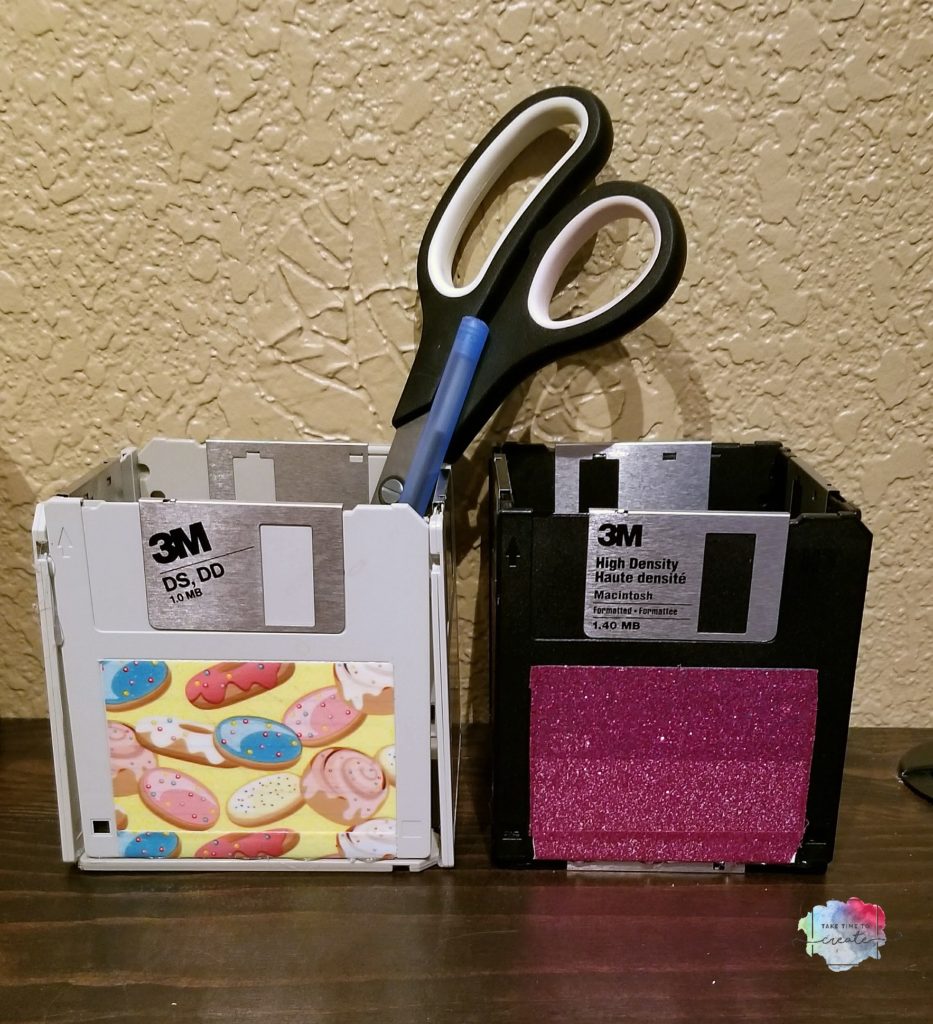
Let’s start with the first project: Floppy Disc Pencil Holder

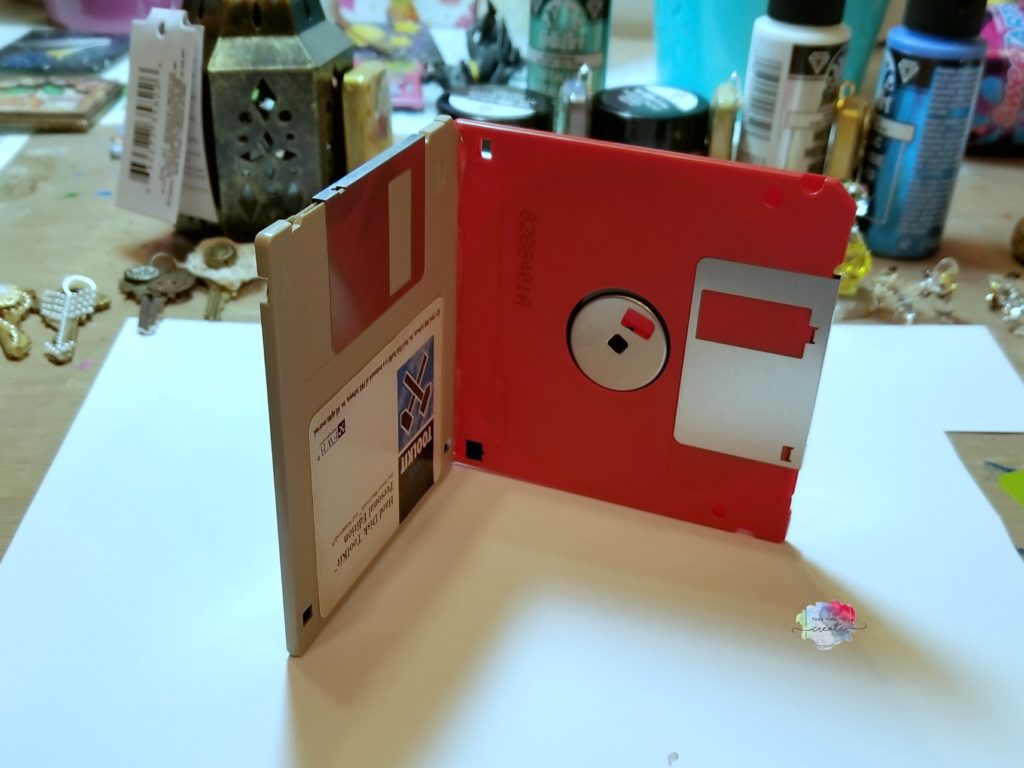
Grab your floppy discs from the basement and smile a little when you think of all the people that told you to throw them away, you knew they would come in handy someday, lol. Well today is the day!

I used duck tape to cover up the label and make it look a little cuter, but you could use washi tape or paint them.

Then just hot glue the sides together and then to bottom. Now you have  a cute place to put all your pencils and pens

DIY School Supplies

DIY School Supplies

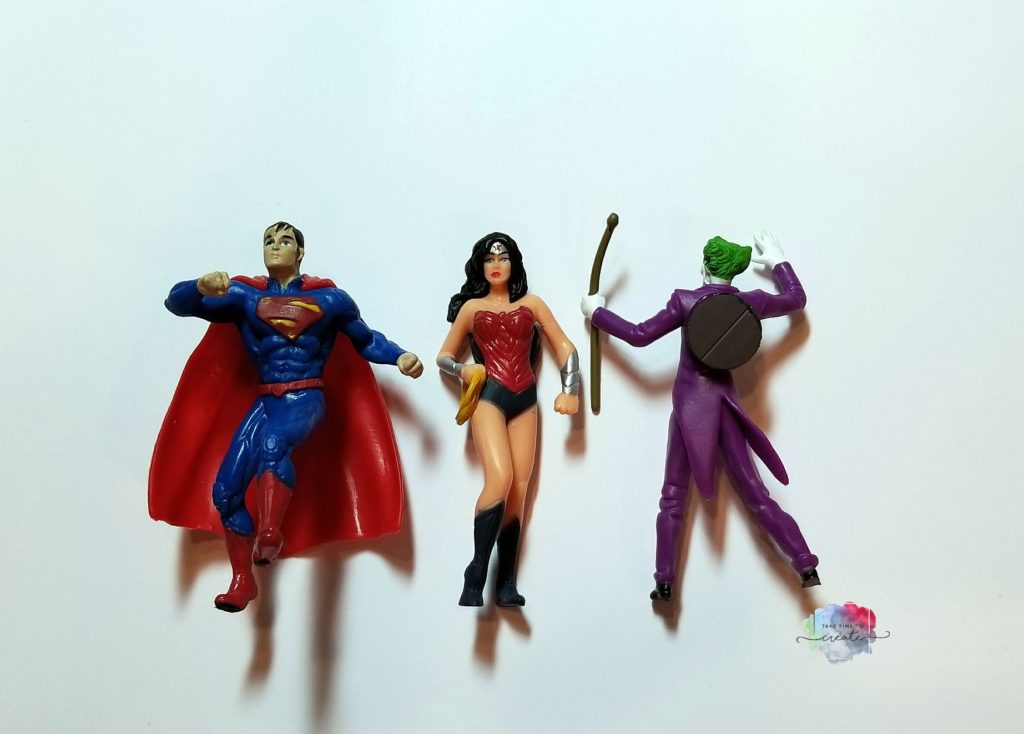
The next 2 are magnets. First is the Action Figure Magnets

Find some really awesome action figures from the Dollar Store and glue a magnet to the back (Loctight or E6000 or any strong glue should work) .

That is it. Now you have a really cute magnet to hold all your important papers.

DIY School Supplies

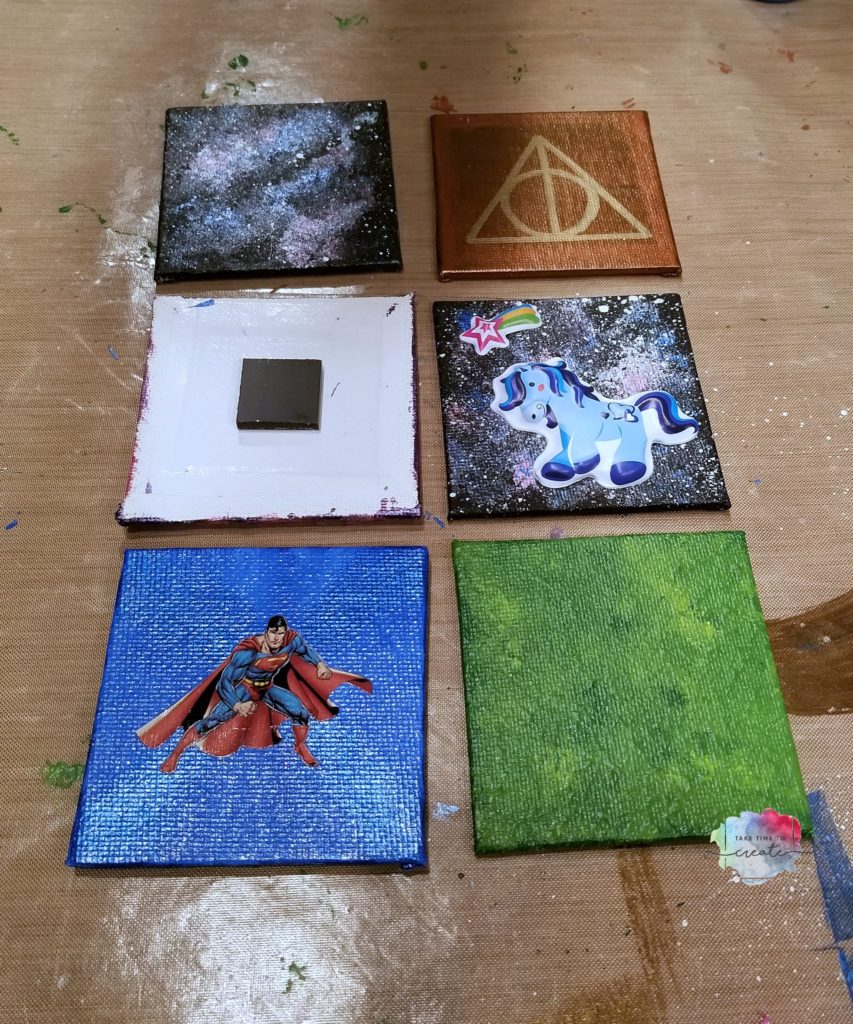
The last project are these Canvas Magnets

Paint the mini canvas in any way you want, I did a galaxy, or stickers, or used a paint pen depending on what I wanted to do. In the video I show how I painted my galaxy if you are wanting to one like that.

Then you glue a magnet to the back and you now have a super cute magnet!


DIY School Supplies

Now you are ready for school! What supplies are you making this year?

The post DIY School Supplies appeared first on Take Time To Create.
DIY Cactus Outdoor Mat

Hello Everyone!

This post contains affiliate links

I am loving summer! The long, hot days, endless sunshine. We have been spending a lot of time on our back porch, and I noticed that we needed a new outdoor mat in front of our door.

So I gathered some materials and created this DIY cactus outdoor mat.

Here is the video tutorial:

Materials:

Instructions:

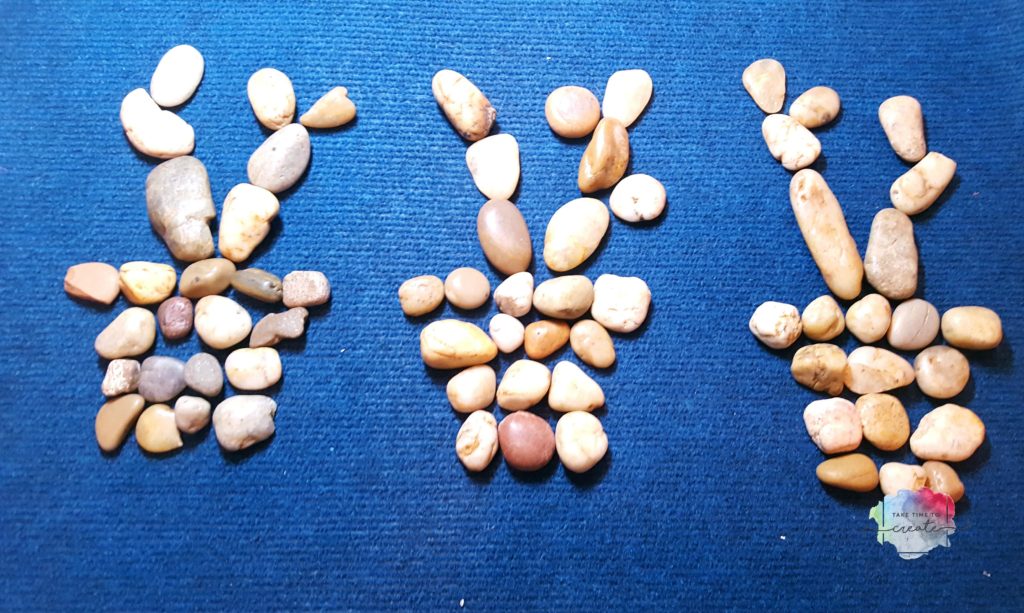
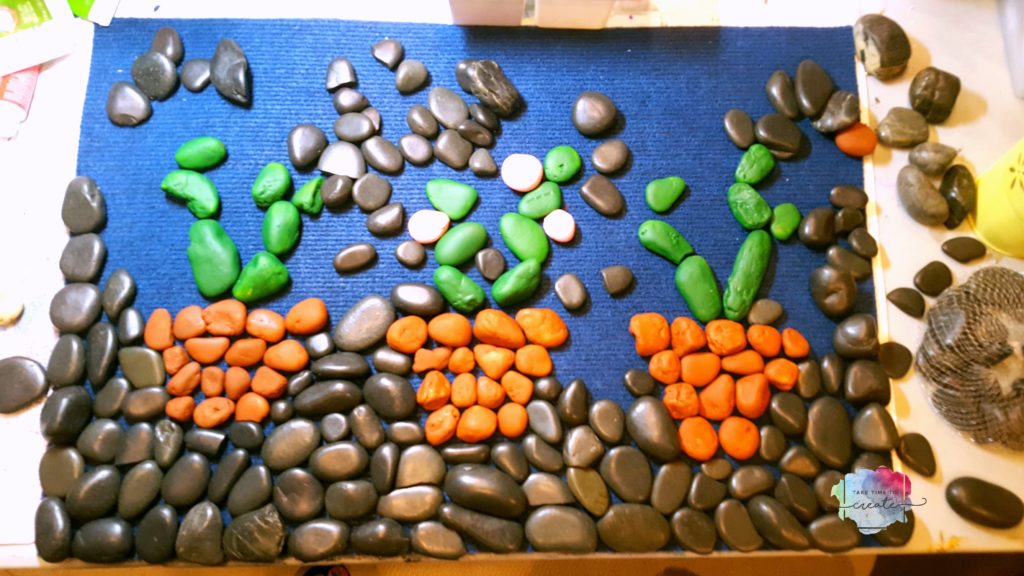
The first thing you do is grab an outdoor mat ( I found mine at the dollar store) and some rocks (Dollar store, lol) and start arranging them. I made some rough cactus shapes to start.

DIY Cactus Outdoor Mat

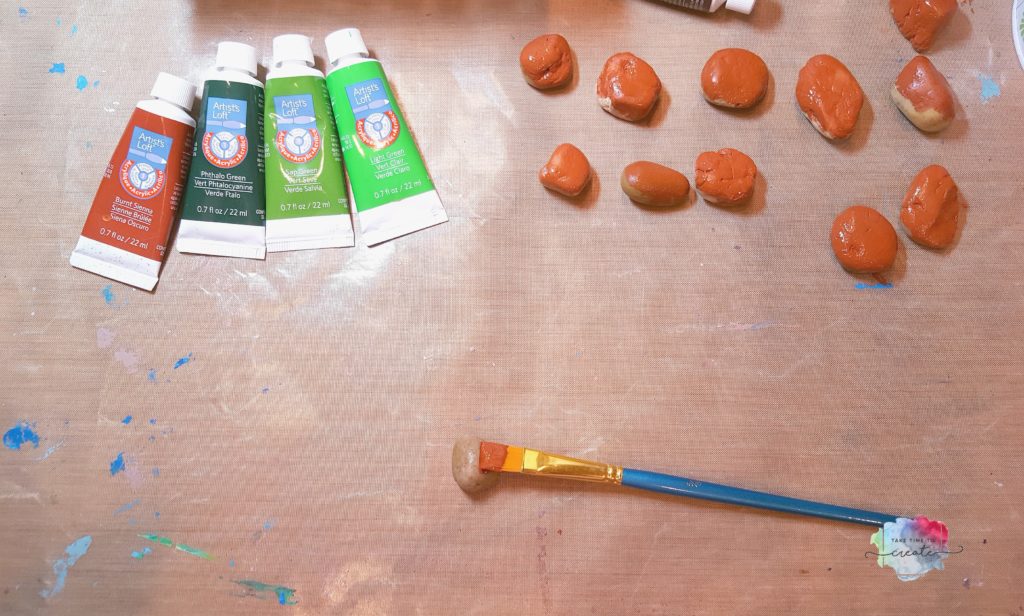
Once I had a good idea what it would look like I started painting the cactuses. I used acrylic paint (Artists Loft) and painted the cactus green and the pot brown.

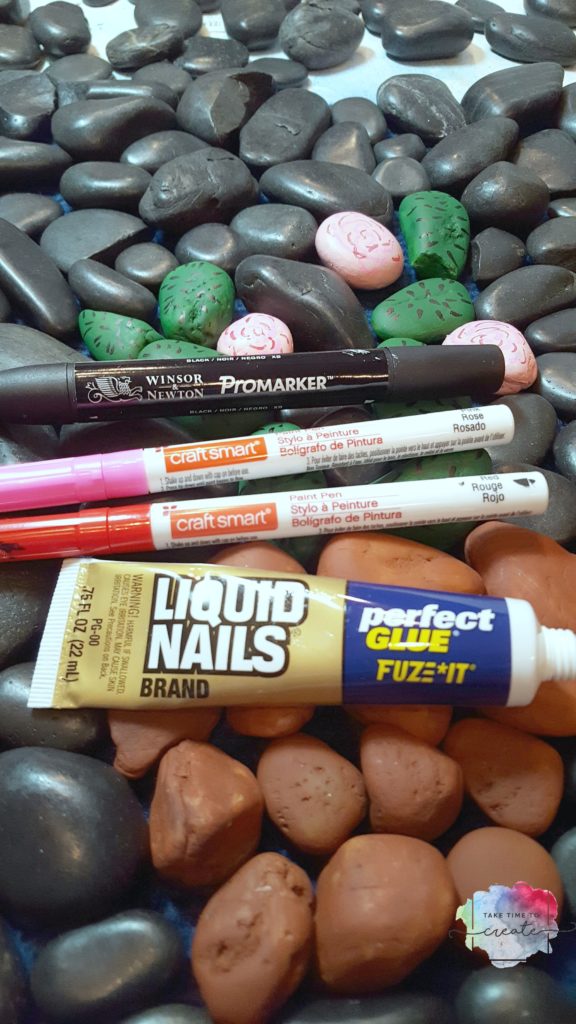
For the pink flowers I painted some swirl details with a paint pen.

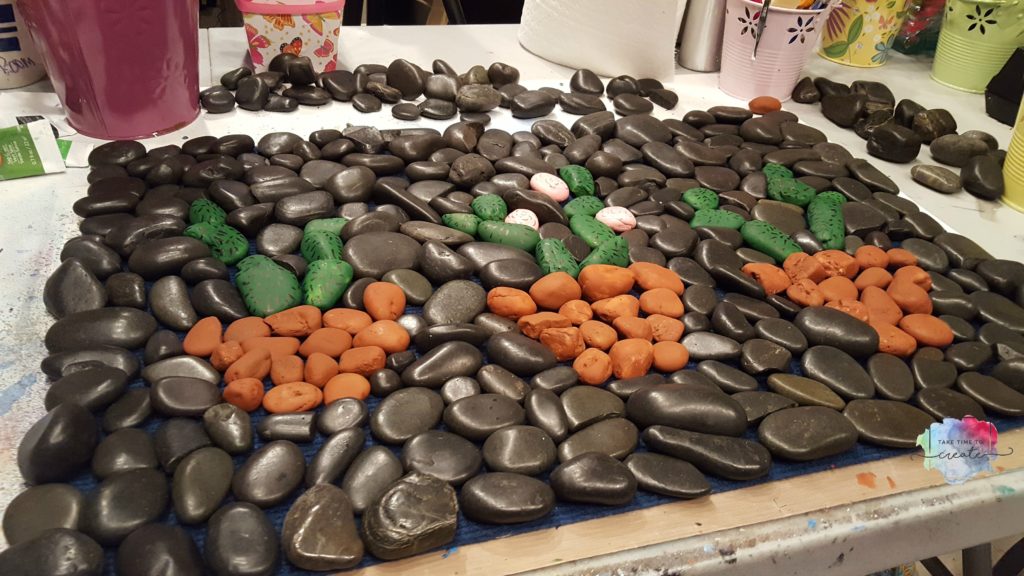
To glue the rocks to the mat I used Liquid Nails.

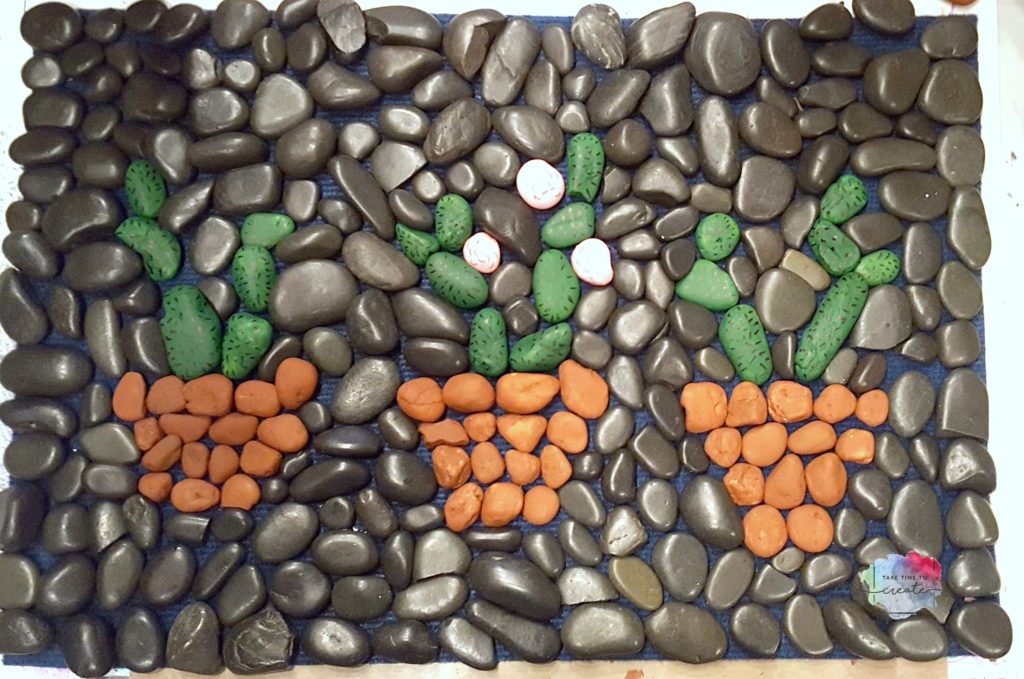
But before the gluing happened I arranged all the rocks on the mat. I used black stones to around the cactuses to outline them and to give them definition and interest. This part does take a while to fit it all in, but it looks so cool when it is done.

I ended up using about 10 bags of rocks, this is because I was mostly looking for particular shapes to fit in certain areas. I do have left overs for my next project.

I let it dry overnight then I took it outside and spayed a couple of coats of spay sealer on the mat.

DIY Cactus Outdoor Mat

I am loving how it turned out! So cute and the perfect detail for my backyard!

DIY Cactus Outdoor Mat

The post DIY Cactus Outdoor Mat appeared first on Take Time To Create.
 

DIY Rusty Lantern

Hello Everyone!

I seem to really love making everything all rusty and old, lol

I have another item that I made look rusty and worn, using the same techniques that I did earlier.

Here are the other posts about the rust technique:

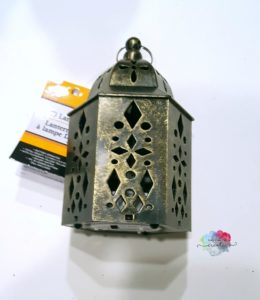
For this project I used a lantern that I got at the dollar store (these are super cute just like this, but I just had to add my own touch to the lantern)

rust lantern

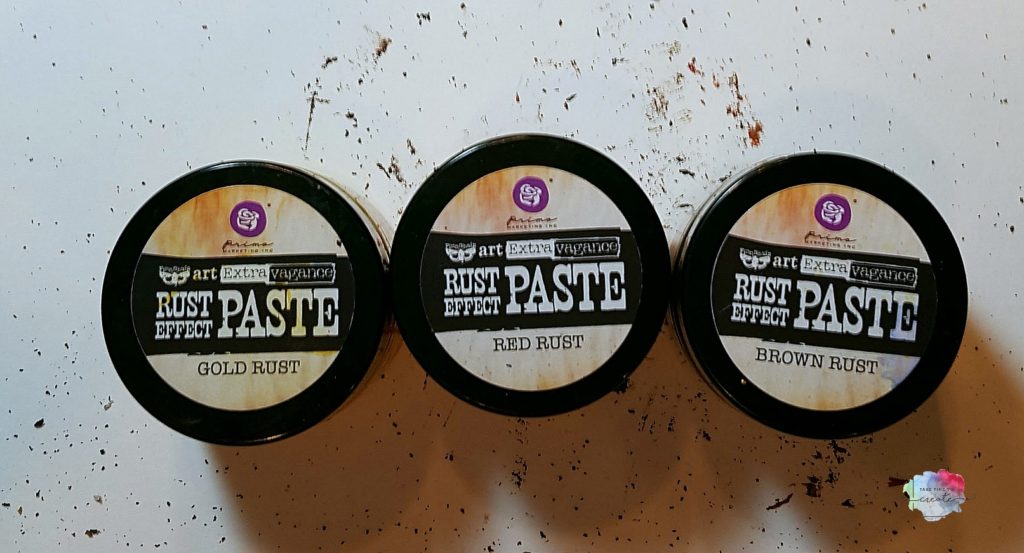
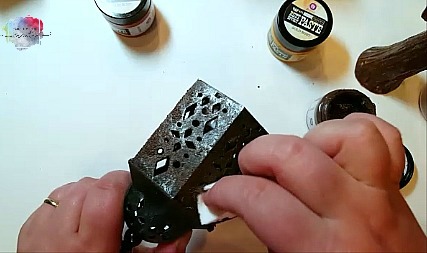
Then you just start dabbing on your paints with a make up sponge. I used the Finnabair Rust Pastes and I do like them! They add the right colors and texture to make it look like something rusted naturally.

rust lantern

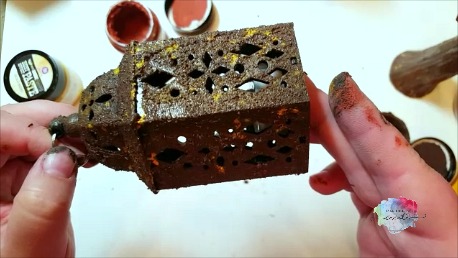
Dab all around until you are happy with the the end look.

rust lantern

rust lantern

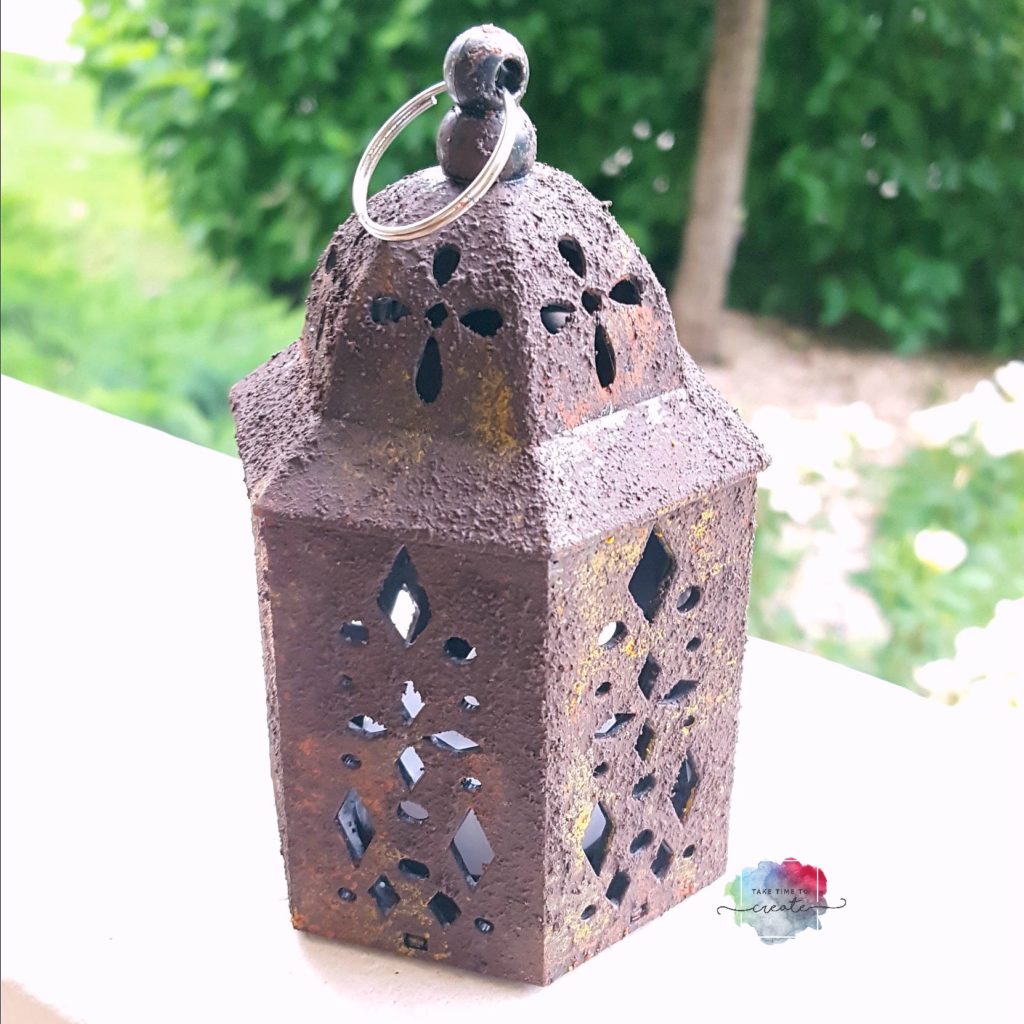
Here is the final product. I love this technique and I can’t wait to make something else rusty!
rust lantern

Also, I made a video of the process of making a rusty lantern if you want to check that out.

The post DIY Rusty Lantern appeared first on Take Time To Create.
Decorate Your Flip Flops

Hello Everyone!

This post contains affiliate links

Don’t you just love summer?  Long days, swimming, and flip flops. And you all know how much I love to decorate things and make them my own.

Today’s tutorial is on decorating your flip flops!

You can check out the You Tube video here:

This is an easy diy that you can do with friends or kids, or you can make them all for your self, lol

Materials

  • Flip Flops (here is a link to get them from the Dollar Store) but you can get them almost anywhere
  • Glue (I used this Loctite plastic glue. You can get it here: Glue)
  • Flowers, pom poms, stickles, feathers, or anything else you want to attach to your flip flops.

Instructions

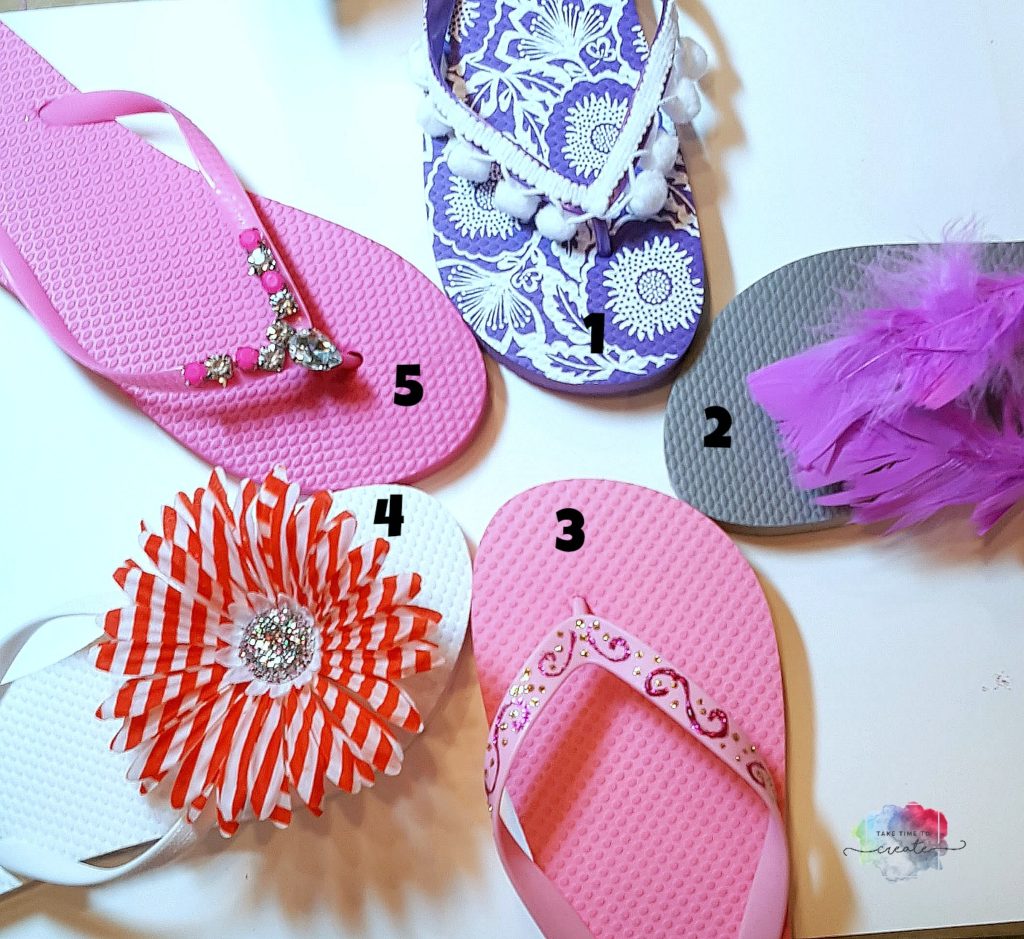
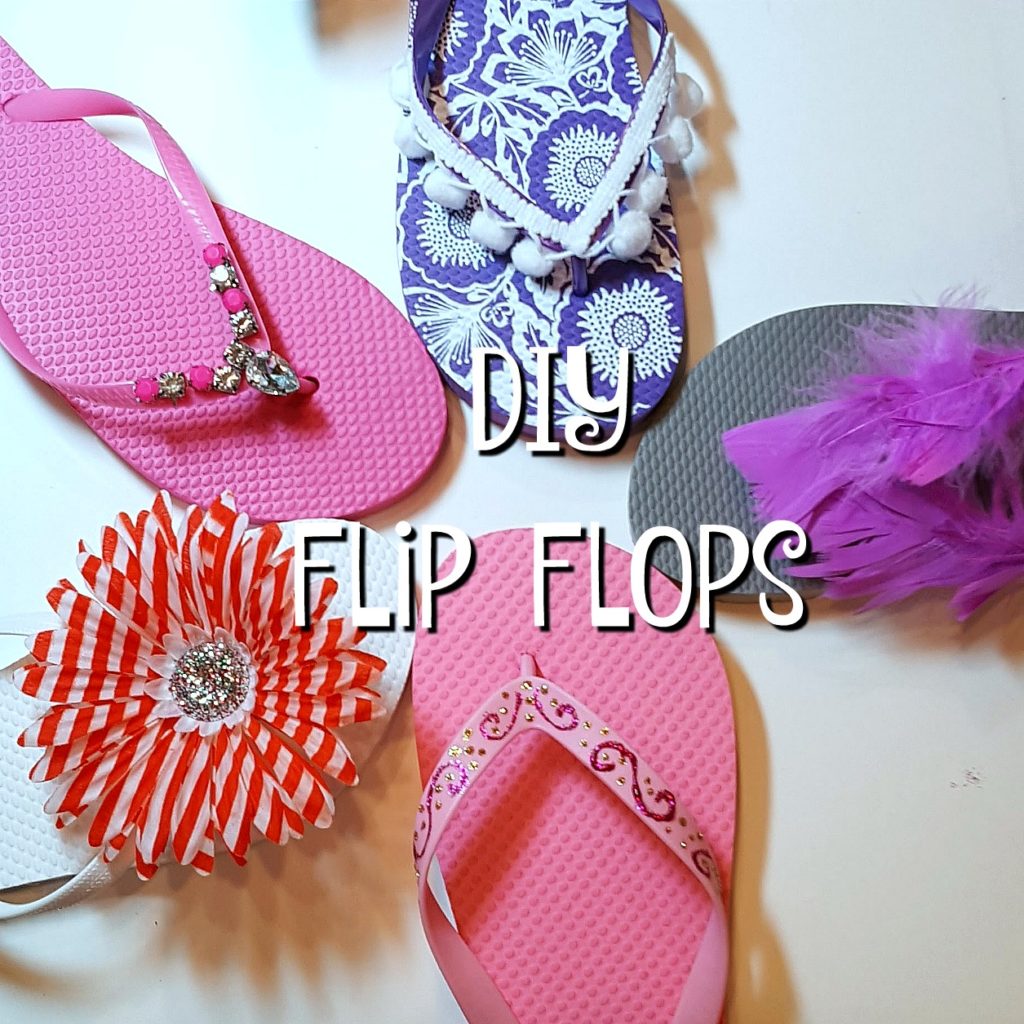
As you can see in this pic I have the flip flops numbered. I did a terrible job of taking pics while was filming, lol, but I think you can get the idea of what I did from the pic. I used the loctite plastic glue on all the flip flops.

diy flip flops

Flip Flop #1

I did want to take away from the pretty design, just enhance it. So for his pair I just glued on some pom-pom trim.

Flip Flop #2

Feathers! This is such a cute, boho idea. Just glue one a pile of feathers, I got mine from the dollar store, but you can get them from almost any craft store.

Flip Flop #3

This is a fun free form design using stickles. Just draw your design and let it dry and you have a fantastic pair of flip flops

Flip Flop #4

Take a large flower and glue it to the top of the shoe. To help keep the flower in place while it was drying I used some clothes pins to keep it in place.

Flip Flop #5

For this pair I disassembled an old statement necklace and glued the pieces on to the flip flop. Just make sure you rough up the metal so it sticks to the plastic.

There you go, 5 different ideas on decorating your flip flops.

What other things do you used to decorate your flip flops?

diy flip flops

The post Decorate Your Flip Flops appeared first on Take Time To Create.


DIY Dragon Egg Tutorial

Follow my blog with Bloglovin

Hello Everyone!

As you can see from the link above I am now on Bloglovin! In other exciting news, I will at some craft fairs and a comic con later in the year! As the time gets closer, and as I learn more information, I will share all the details with you! I can’t wait to show my crafts and to see you all in person!

I have a YouTube tutorial of this egg, you can watch it here:

This is a fairly easy tutorial that is fun and a great way to show your love for all things Dragon!

DIY dragon egg


Materials:

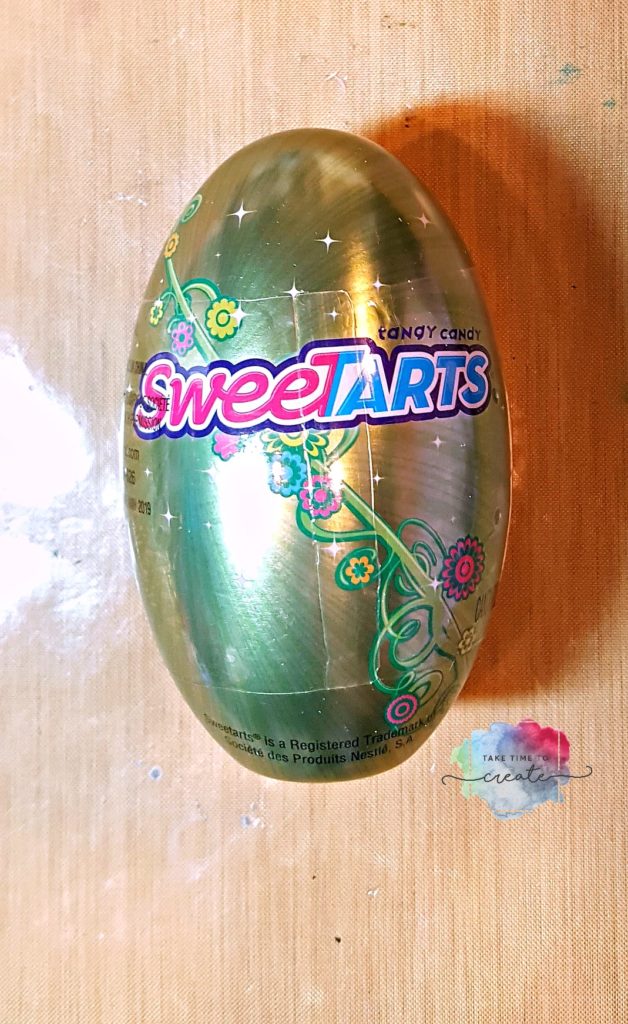
  • Old tin egg (my was left over from Easter)
  • Hot Glue
  • Black Gesso
  • Acrylic Paint

Instructions:

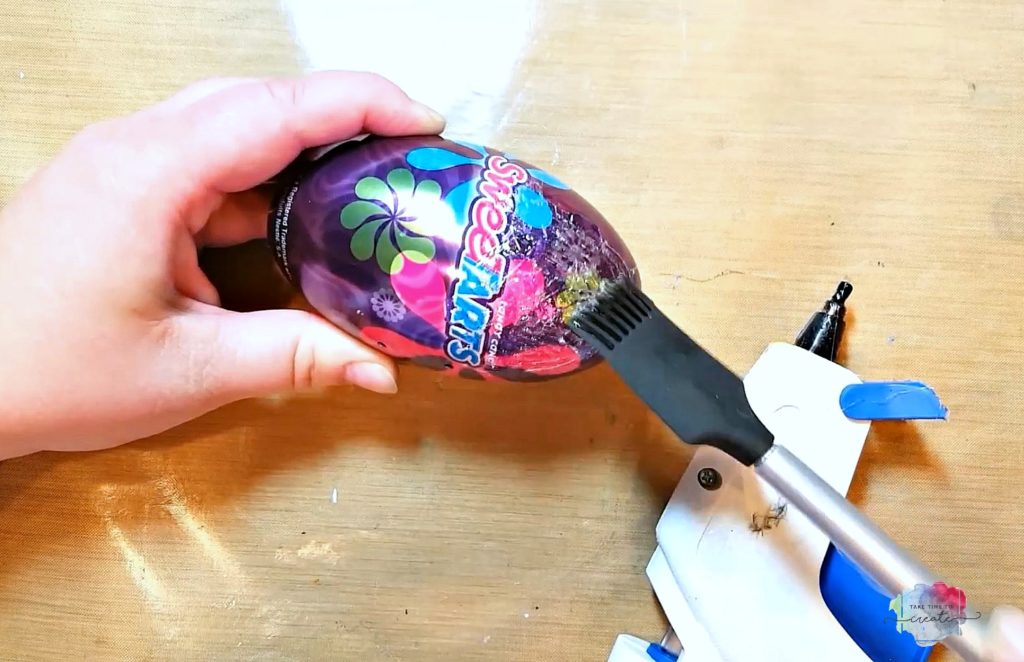
First cover your egg with hot glue then then take a silicone tool and smash the glue all around. I learned this technique from watching a video from The Frugal Crafter, I love learning new ideas from other crafters!

DIY dragon egg


diy dragon egg

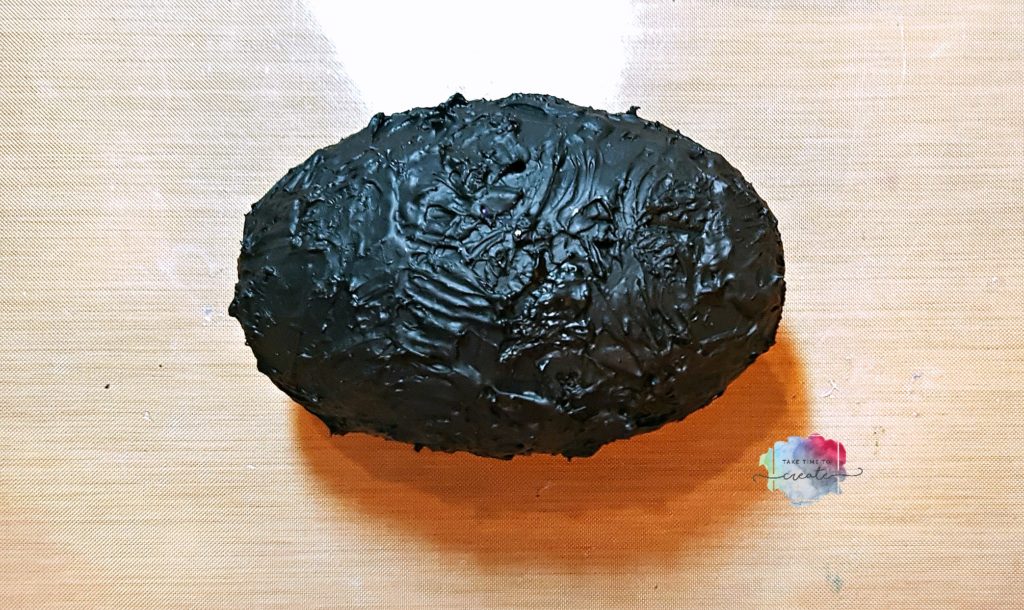
Once the glue is dry then cover everything in a layer of black gesso. Make sure you get into all the nooks and crannies to completely cover the egg.

DIY dragon egg

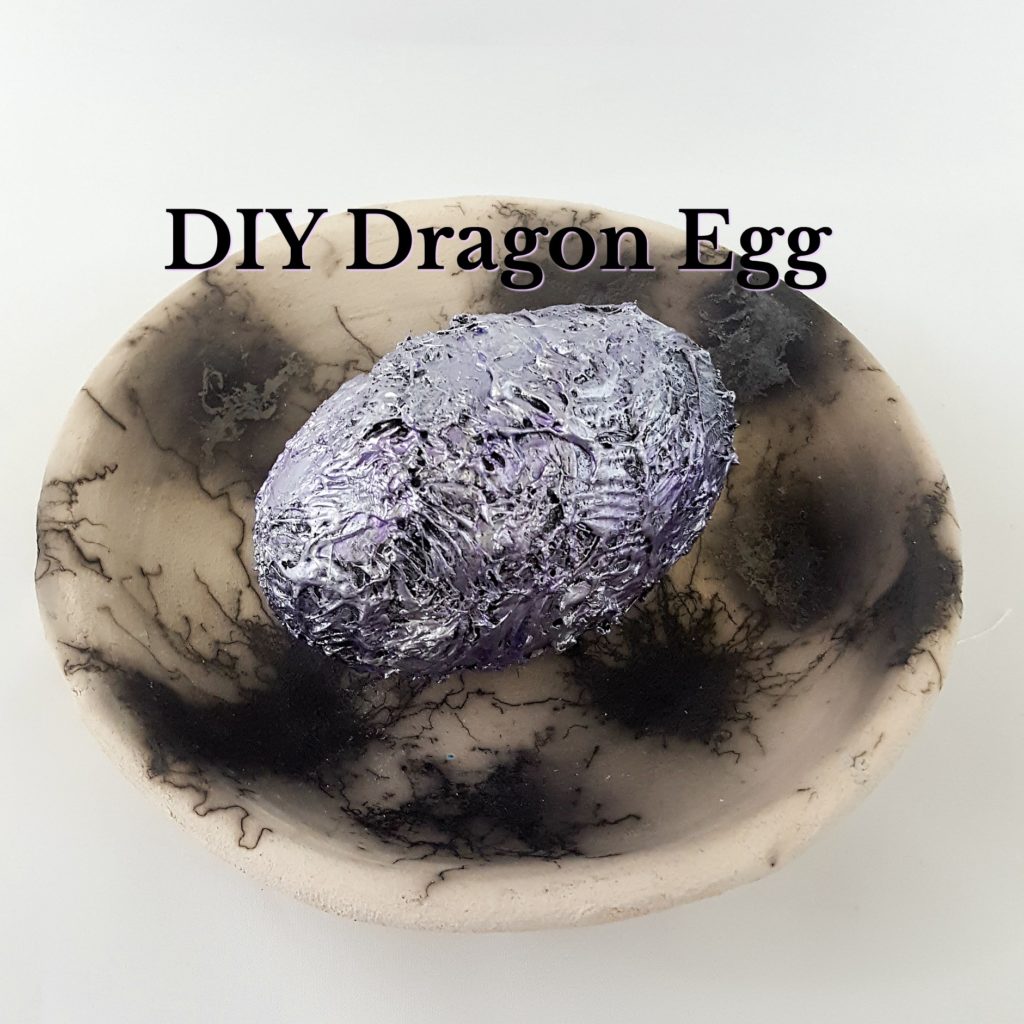
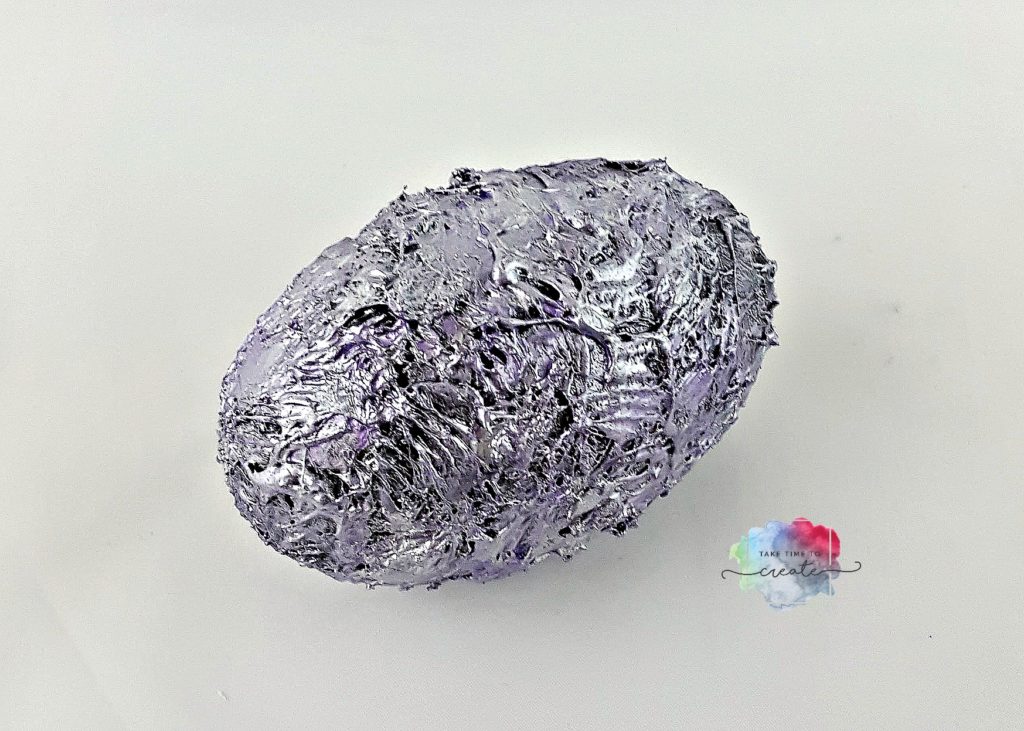
Once the gesso is dried paint the egg using acrylic paints. I started with a sliver then I added a purple and ended with a white on top. Dry brush the colors on and try not to coat it too much, you want to see all the colors, including the black base layer.

DIY dragon egg

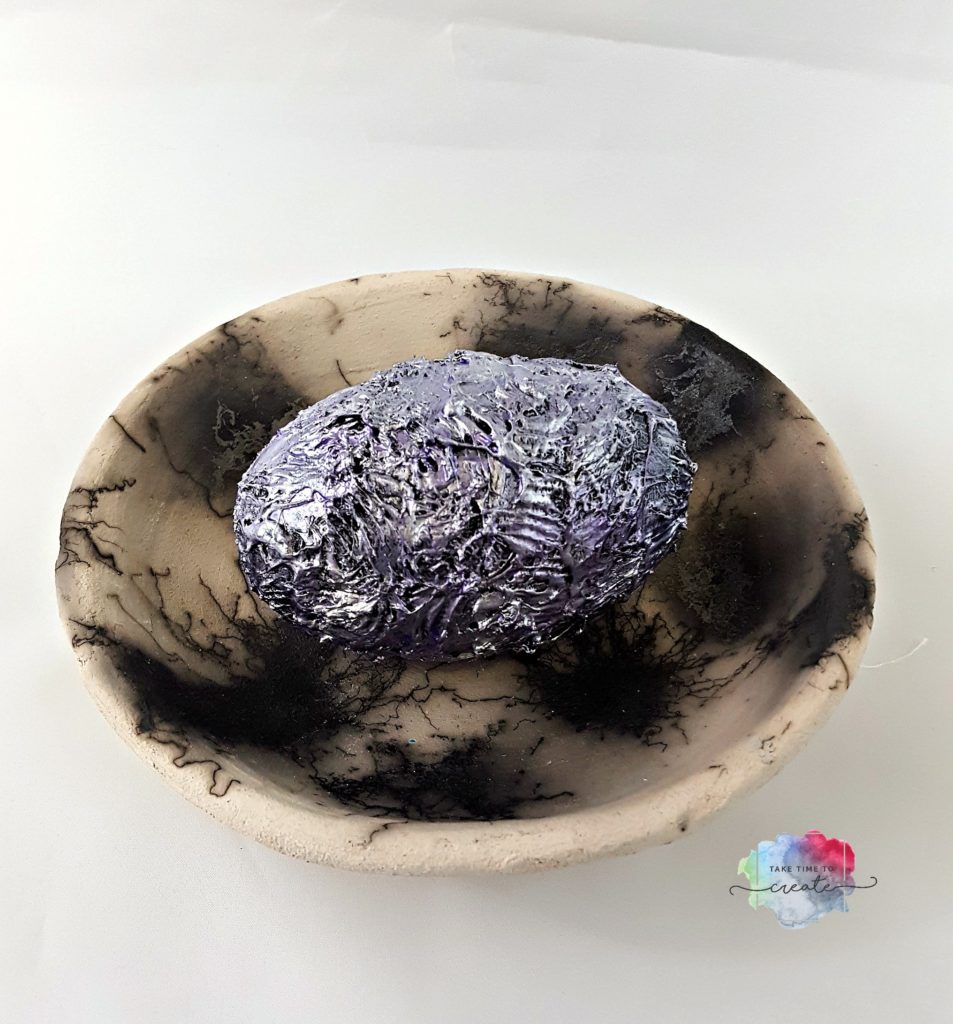
And there you have it, a custom dragon egg! I love how it looks in my Raku fired bowl that I did in my pottery class.

DIY dragon egg

The post DIY Dragon Egg tutorial appeared first on Take Time To Create.

« Older posts

© 2025 Take Time To Create

Theme by Anders NorenUp ↑

Follow

Get the latest posts delivered to your mailbox:

%d bloggers like this: