Tag: recycle (page 3 of 4)

How to Create Faux Sea Glass (Tumbled Glass)

Hello Everyone!

This post contains affiliate links

My happy place is the ocean, I love watching the water, soaking up the sun, and collecting sea glass. But since I live near the mountains,  no where near the ocean, I have to make my own sea glass, haha.

This is an easy project to do with just a few items. I know that there are a lot of other tutorial for faux sea glass, but I thought I would share with you my process that may be a little different from what other people do.

Materials:

  • Rock Tumbler- You can find a similar one here: Tumbler
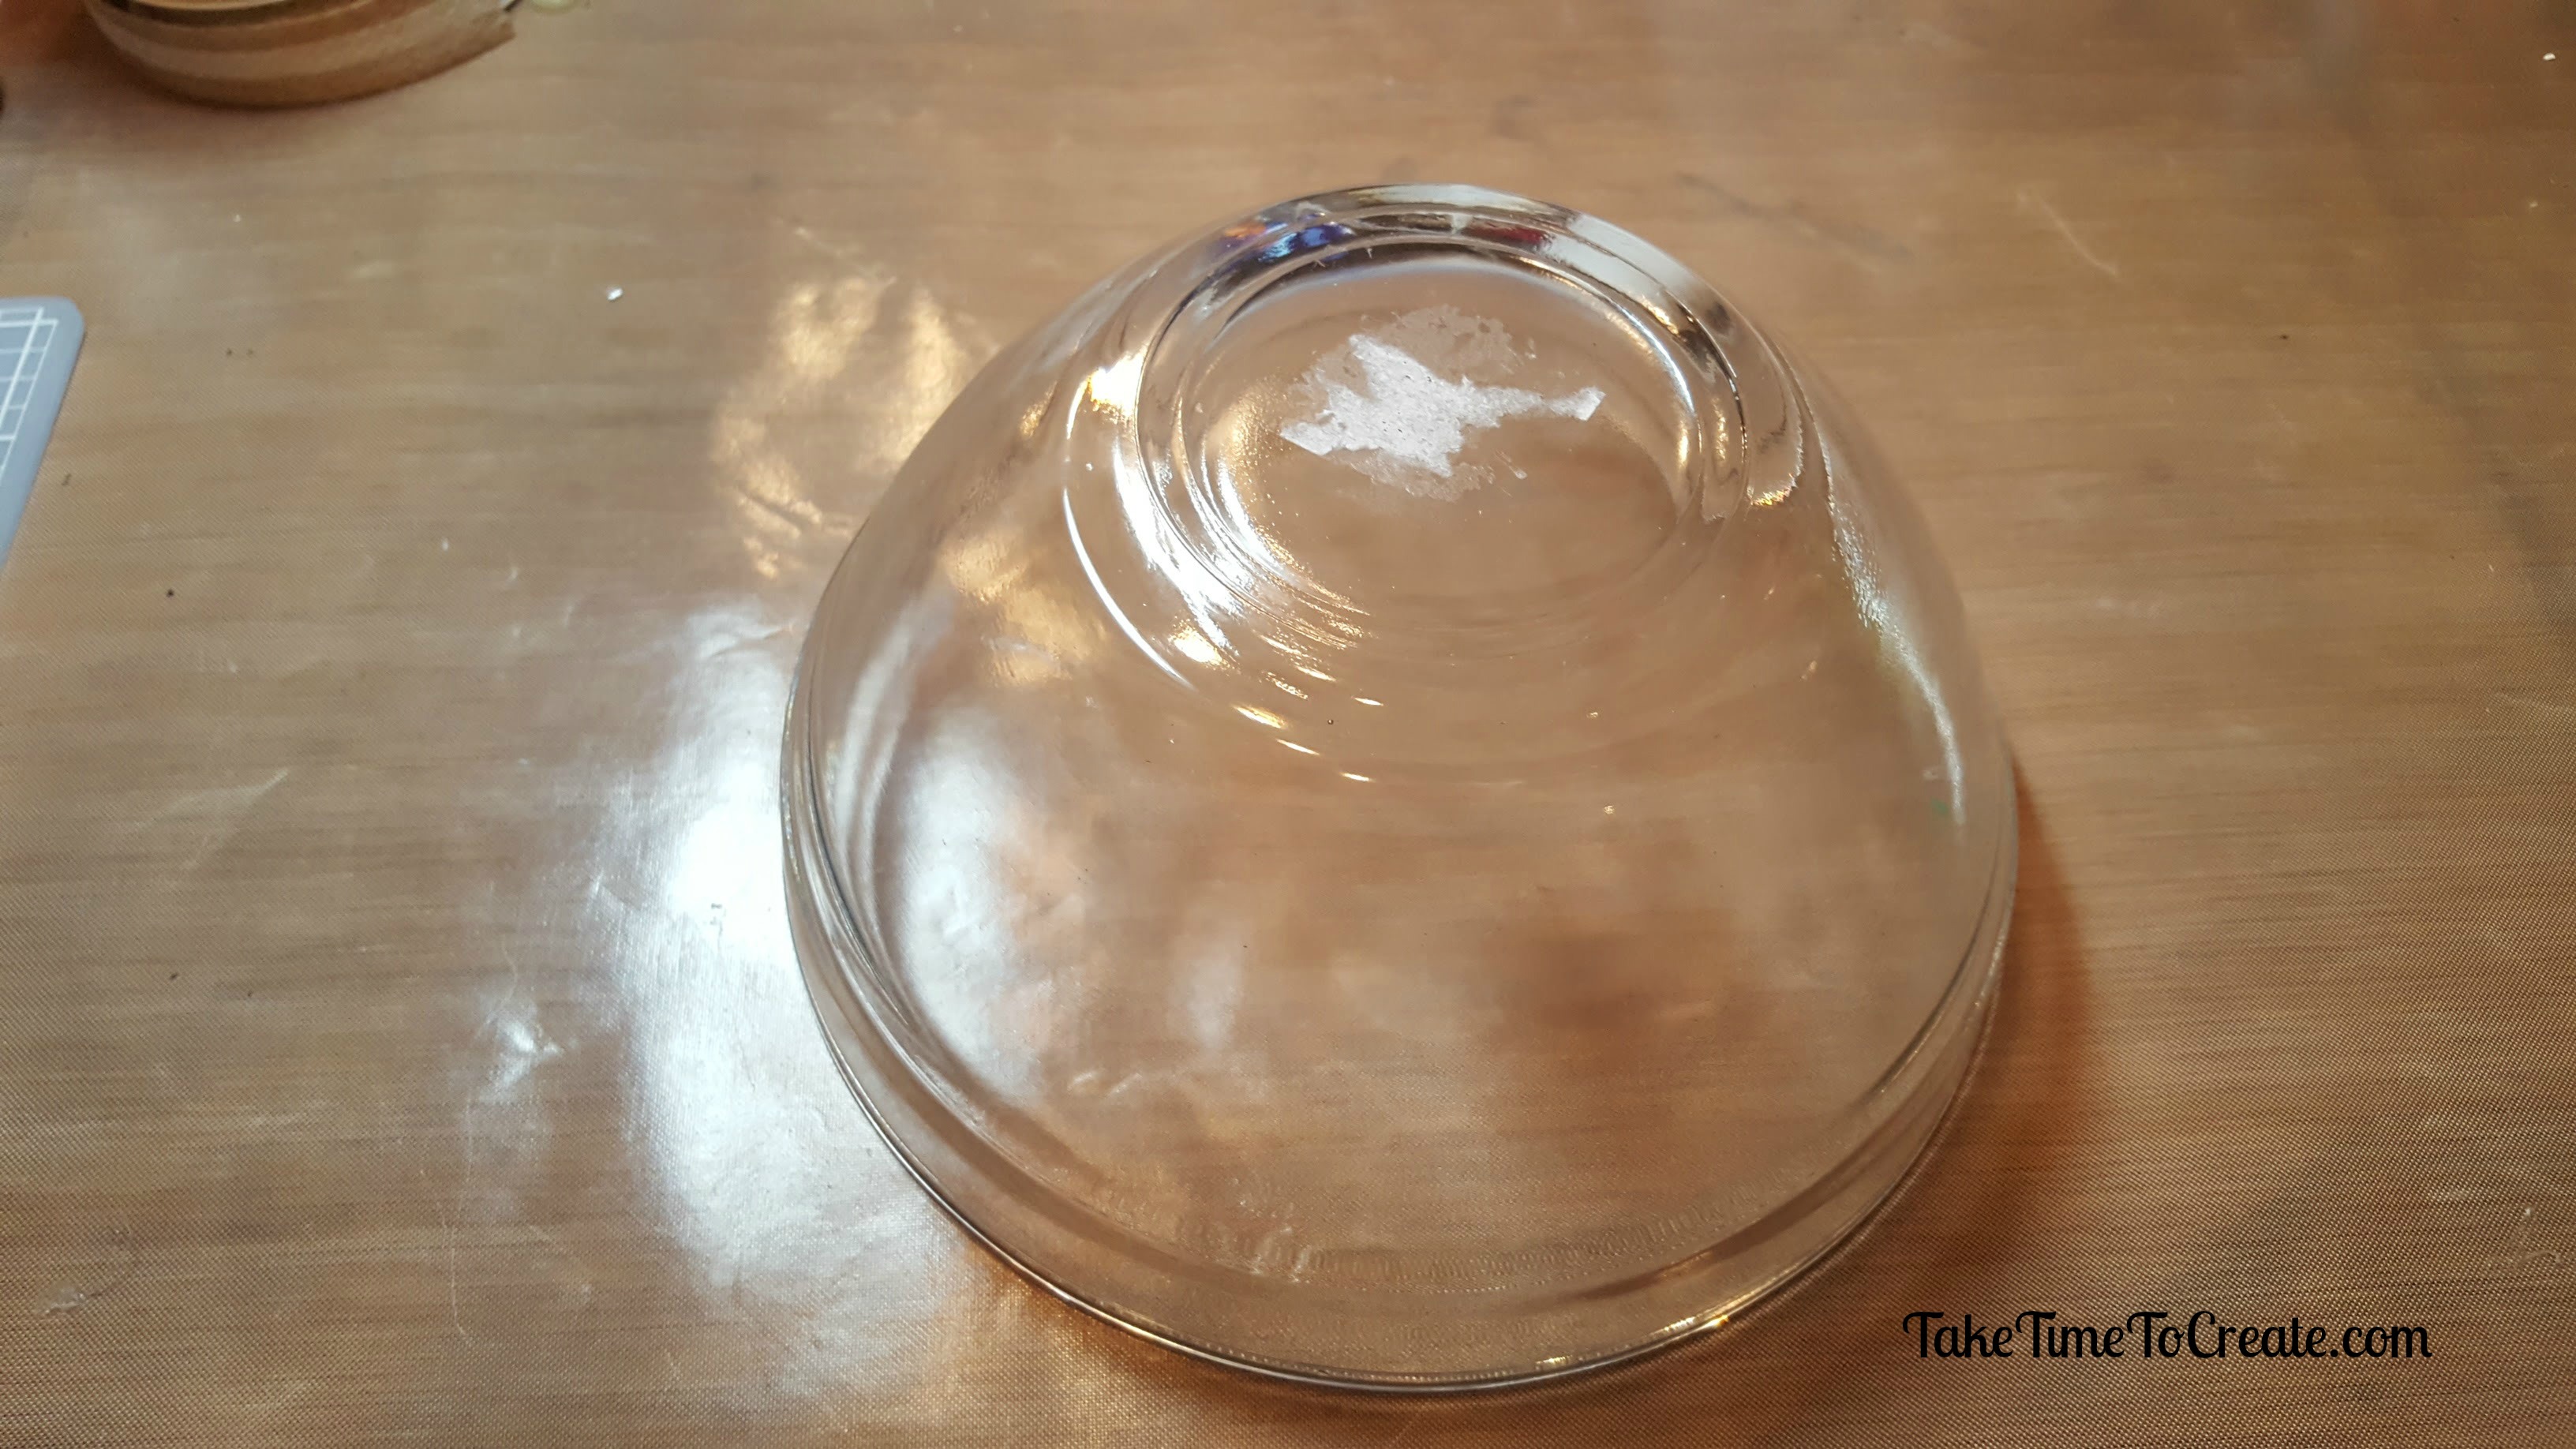
  • Broken Glass
  • Sand and Rocks

Instructions:

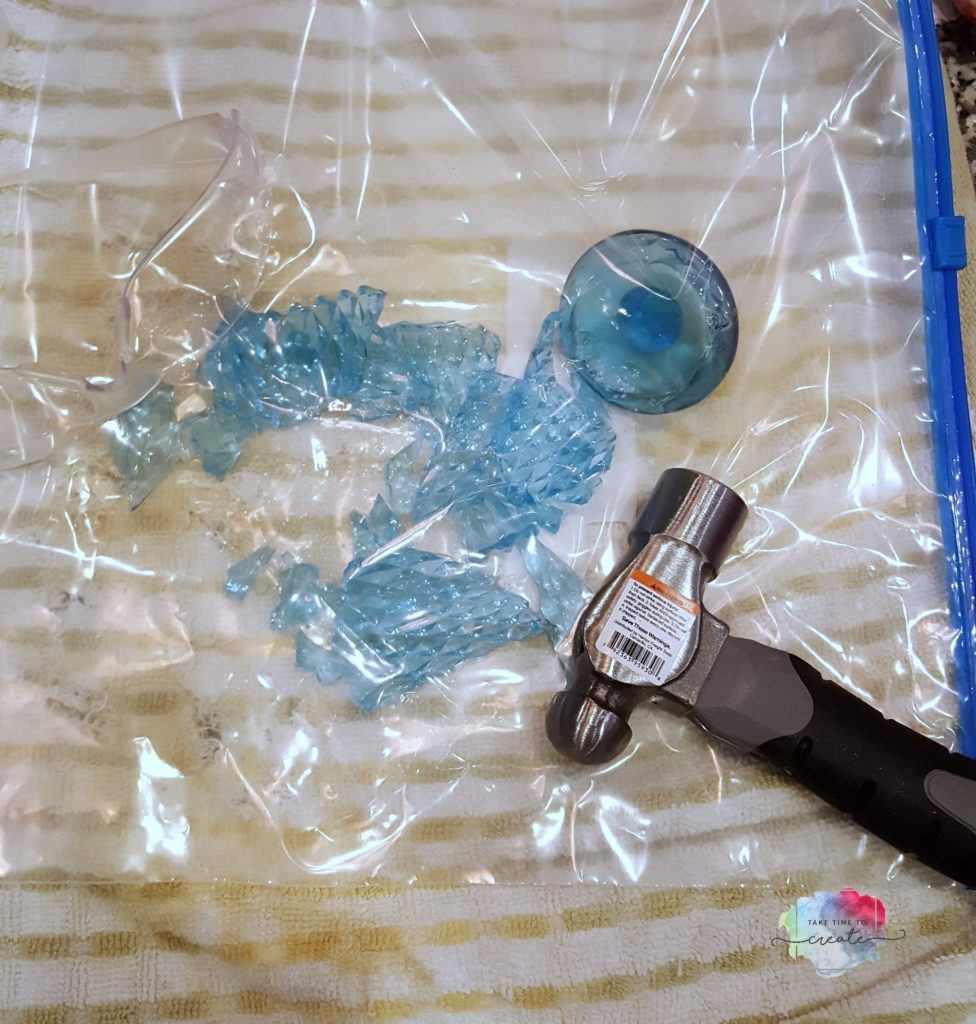
Safety first! Wear safety goggles and gloves when breaking the glass. I put the glass in a plastic bag and then wrap it with a towel that way everything stays contained. When you have the sizes you want then carefully remove it and place it in your tumbler.

faux sea glass tumbled glass

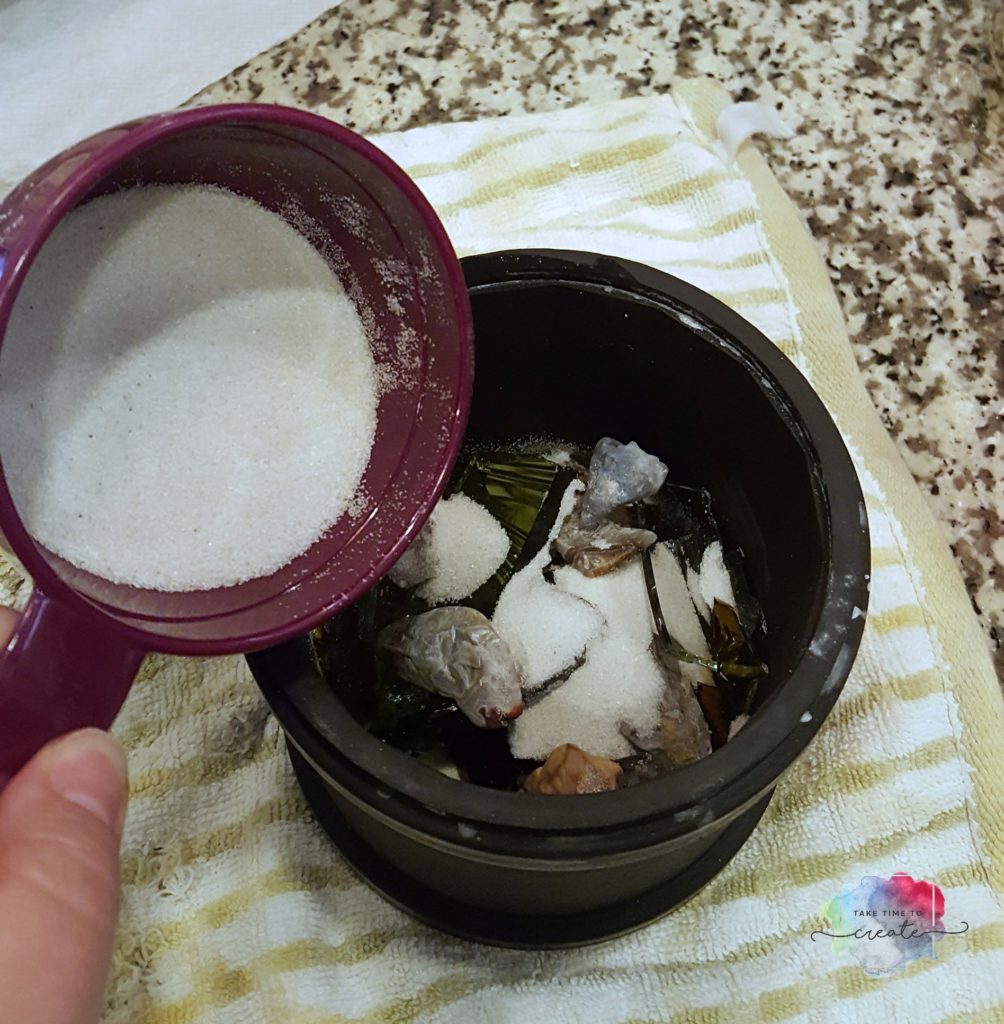
Add  you glass to the tumbler, but don’t overfill it! ( I have over filled it and it started leaking when tumbling and made a big mess). Anyway, add some sand (I just had some white play sand that I had on hand) and I added a few rocks to add something for the glass to rub on. (The whole idea is for the glass to tumble around and smooth out the edges without breaking any glass)

faux sea glass tumbled glass

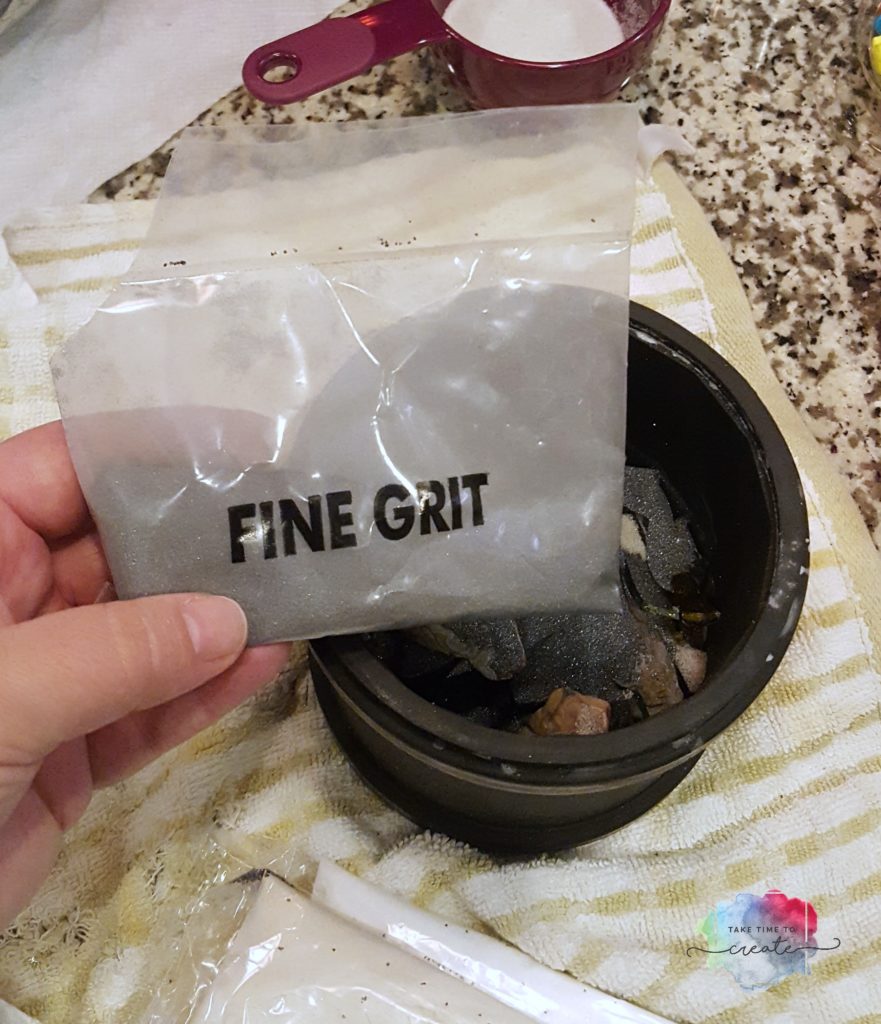
Then I added some fine grit that came with the tumbler. I am not sure what it is, but I thought it would help make things smooth, lol. So I threw it in because I had some.

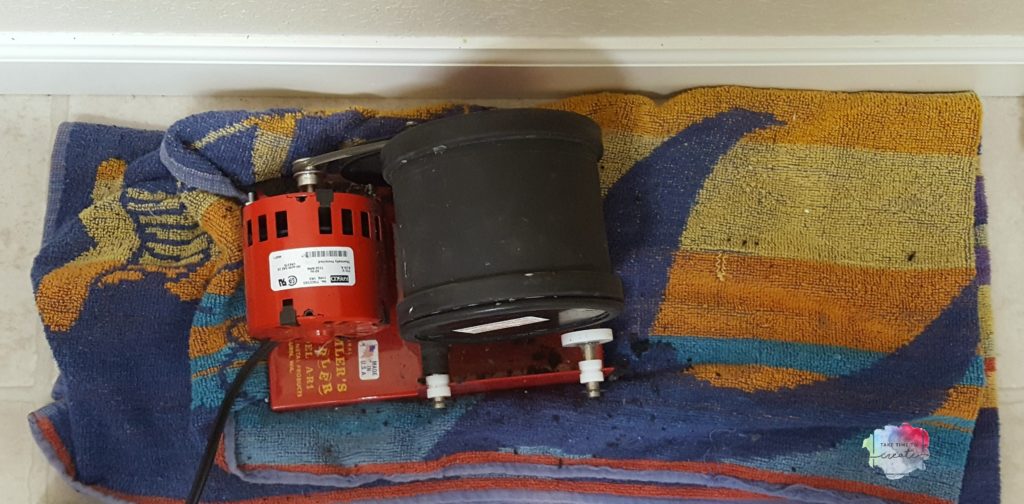
Then cover it all with water, make sure it is less than half full, I know that doesn’t seem like a lot but it doesn’t work with more than that.

faux sea glass tumbled glass

Seal your tumbler and plug it in. As always follow the instructions on your tumbler because yours might be different than mine. Let is tumble for about a week or so.  I leave it in the basement so it isn’t too loud or annoying.

faux sea glass tumbled glass

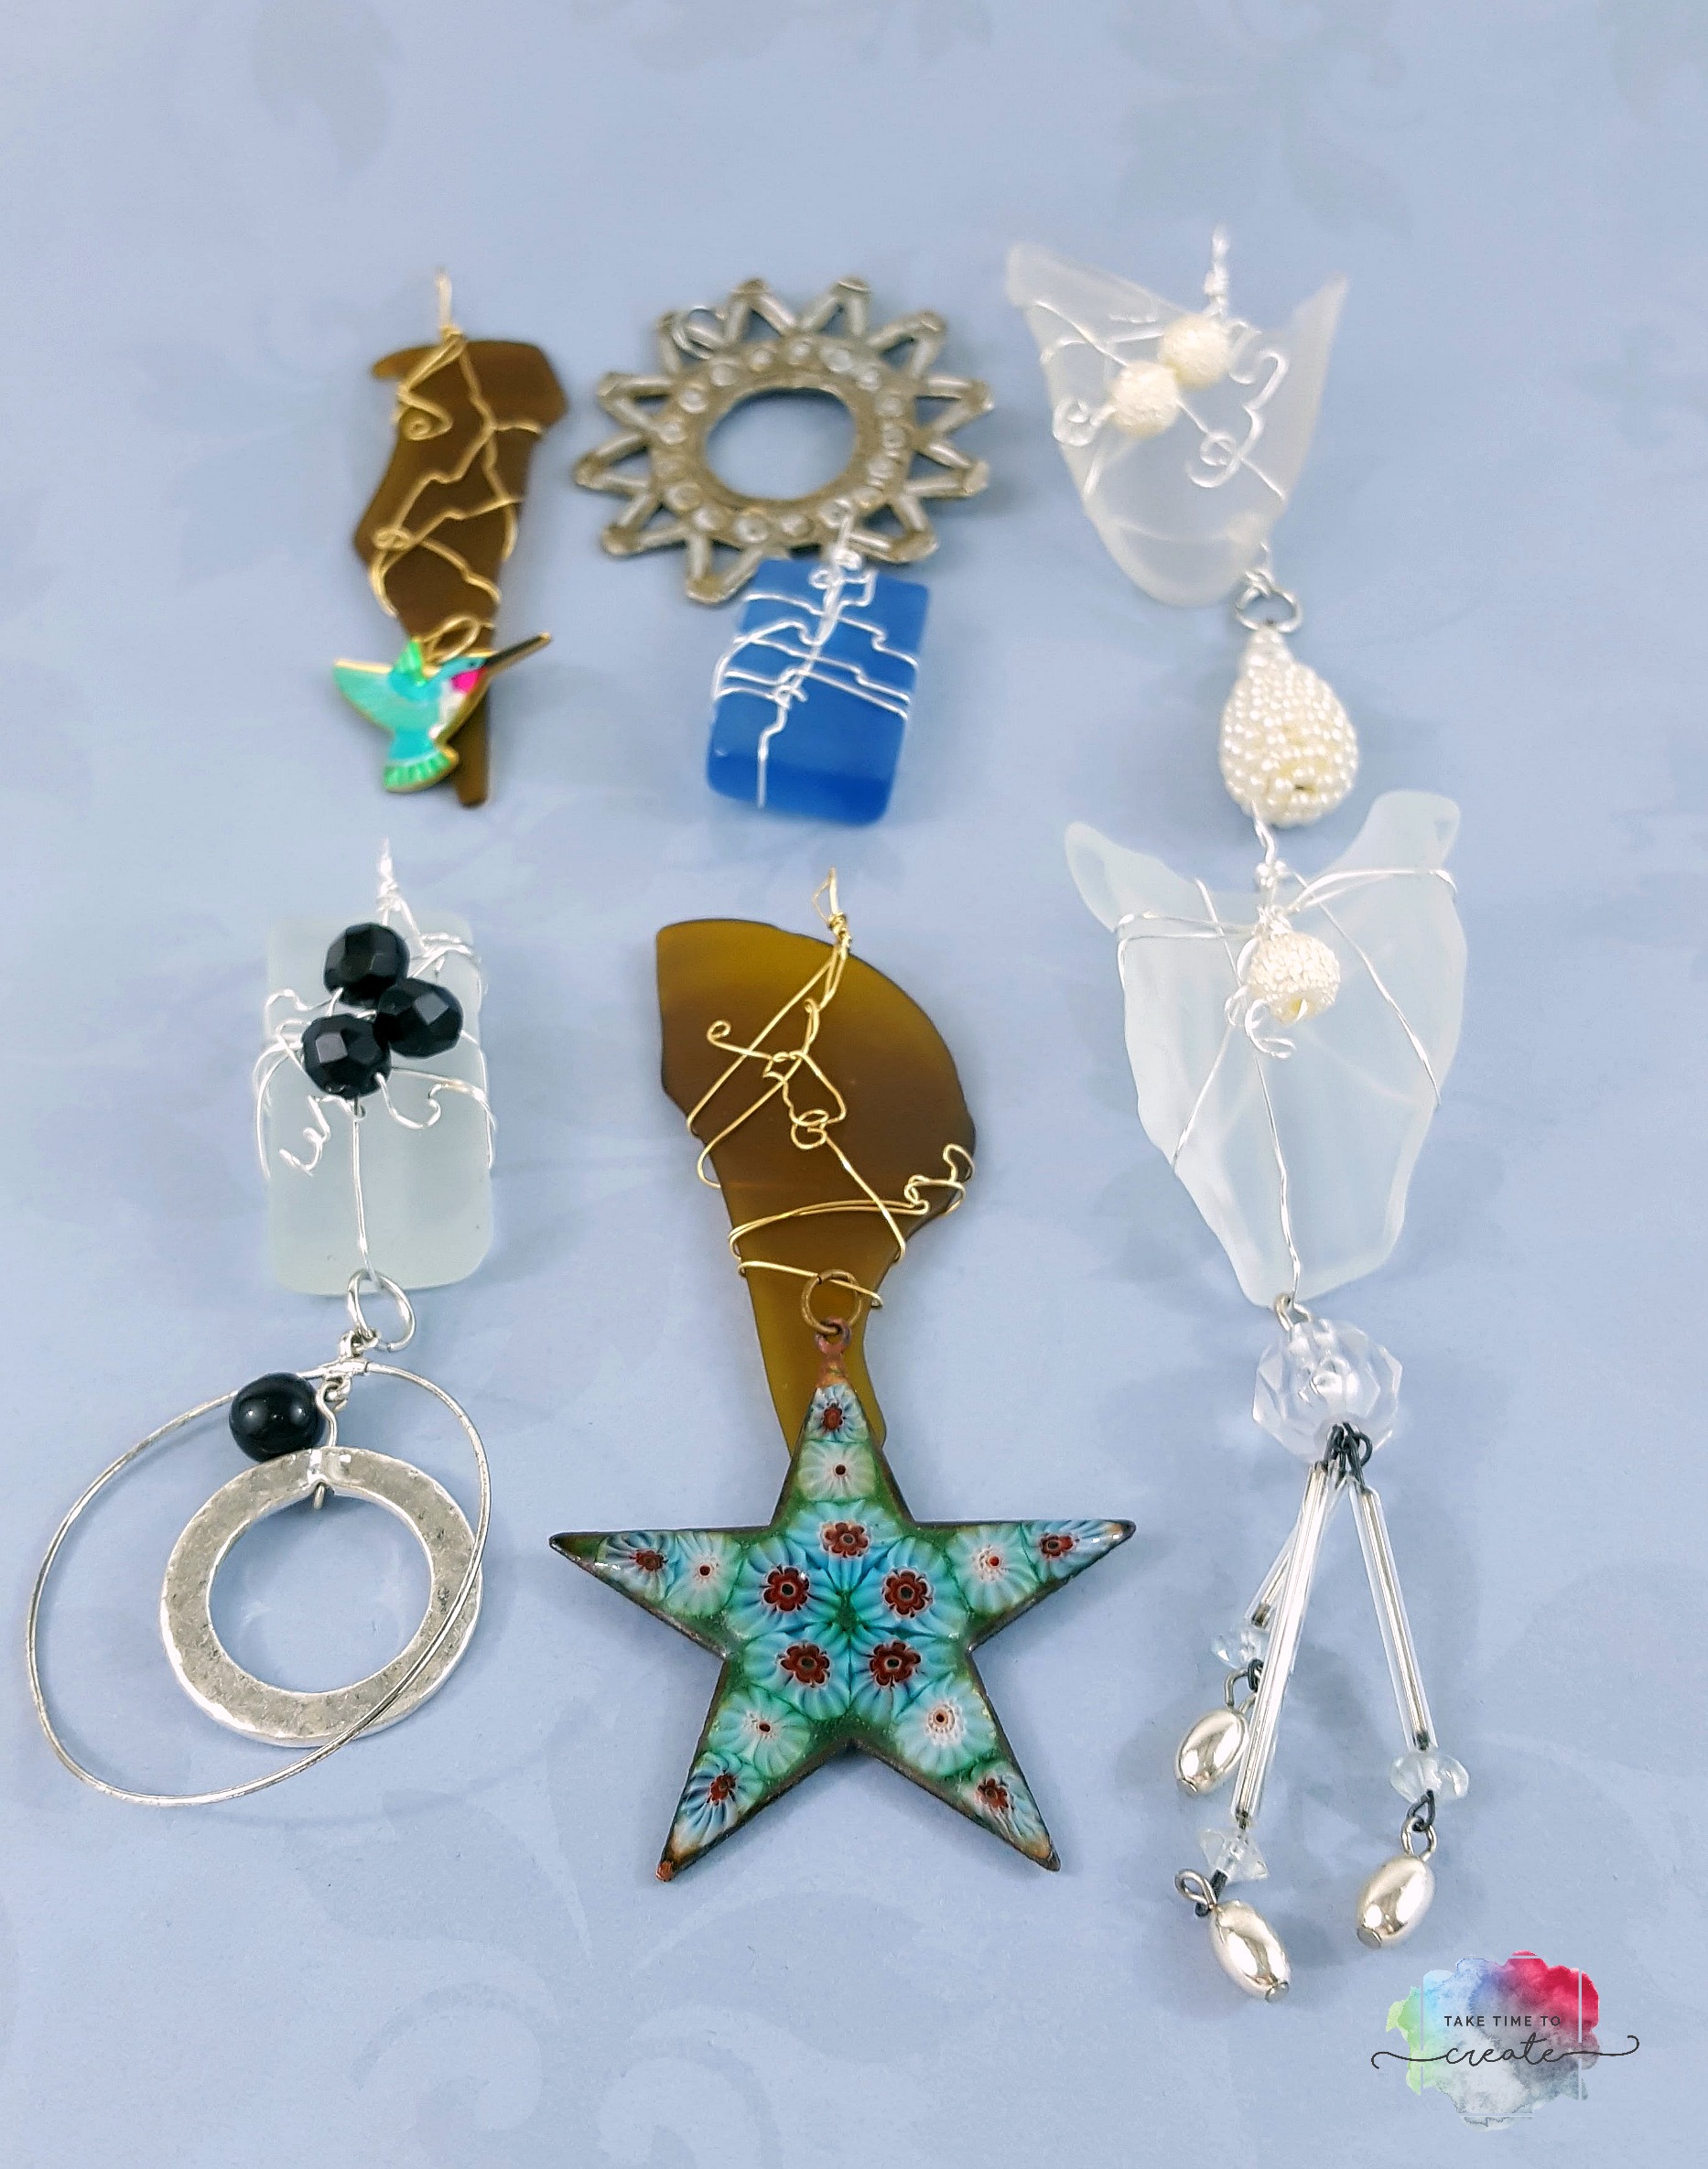
And there you have it faux sea glass! After a week I am thrilled with how they turned out! faux sea glass tumbled glass
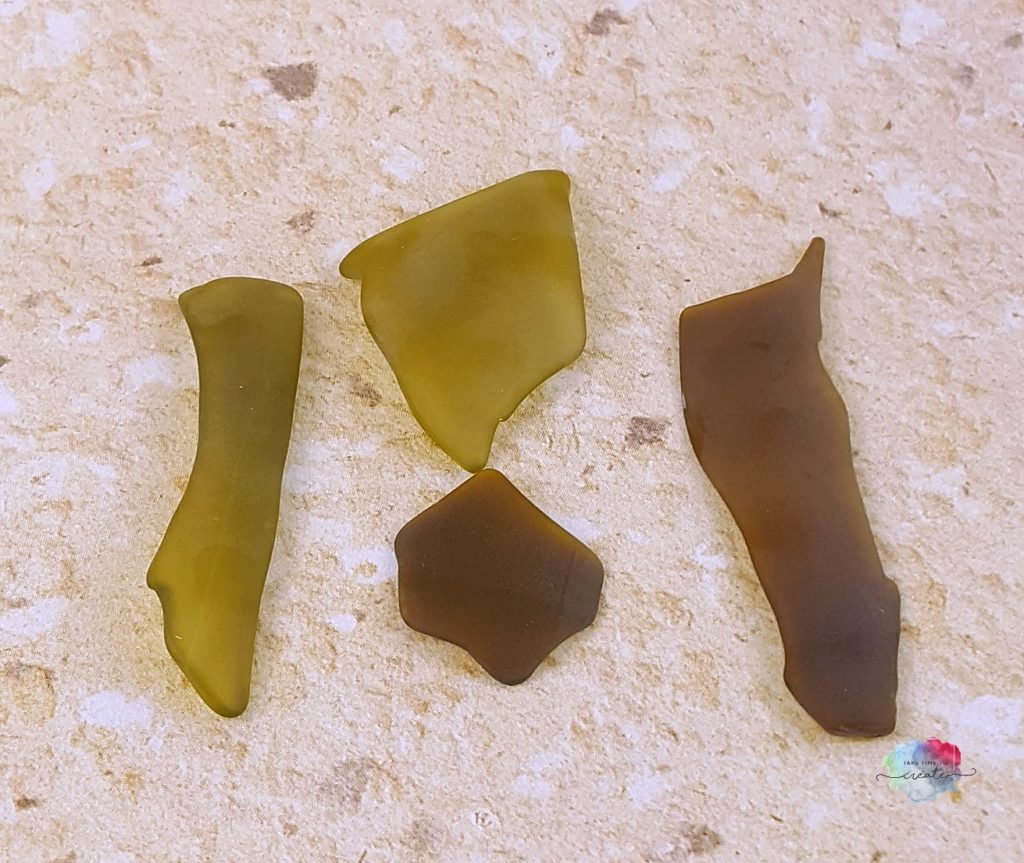
I decided that I needed to wrap them with wire and add beads and old pieces of jewelry to make window dangles. (I will post a tutorial on how I made these)
faux sea glass tumbled glass

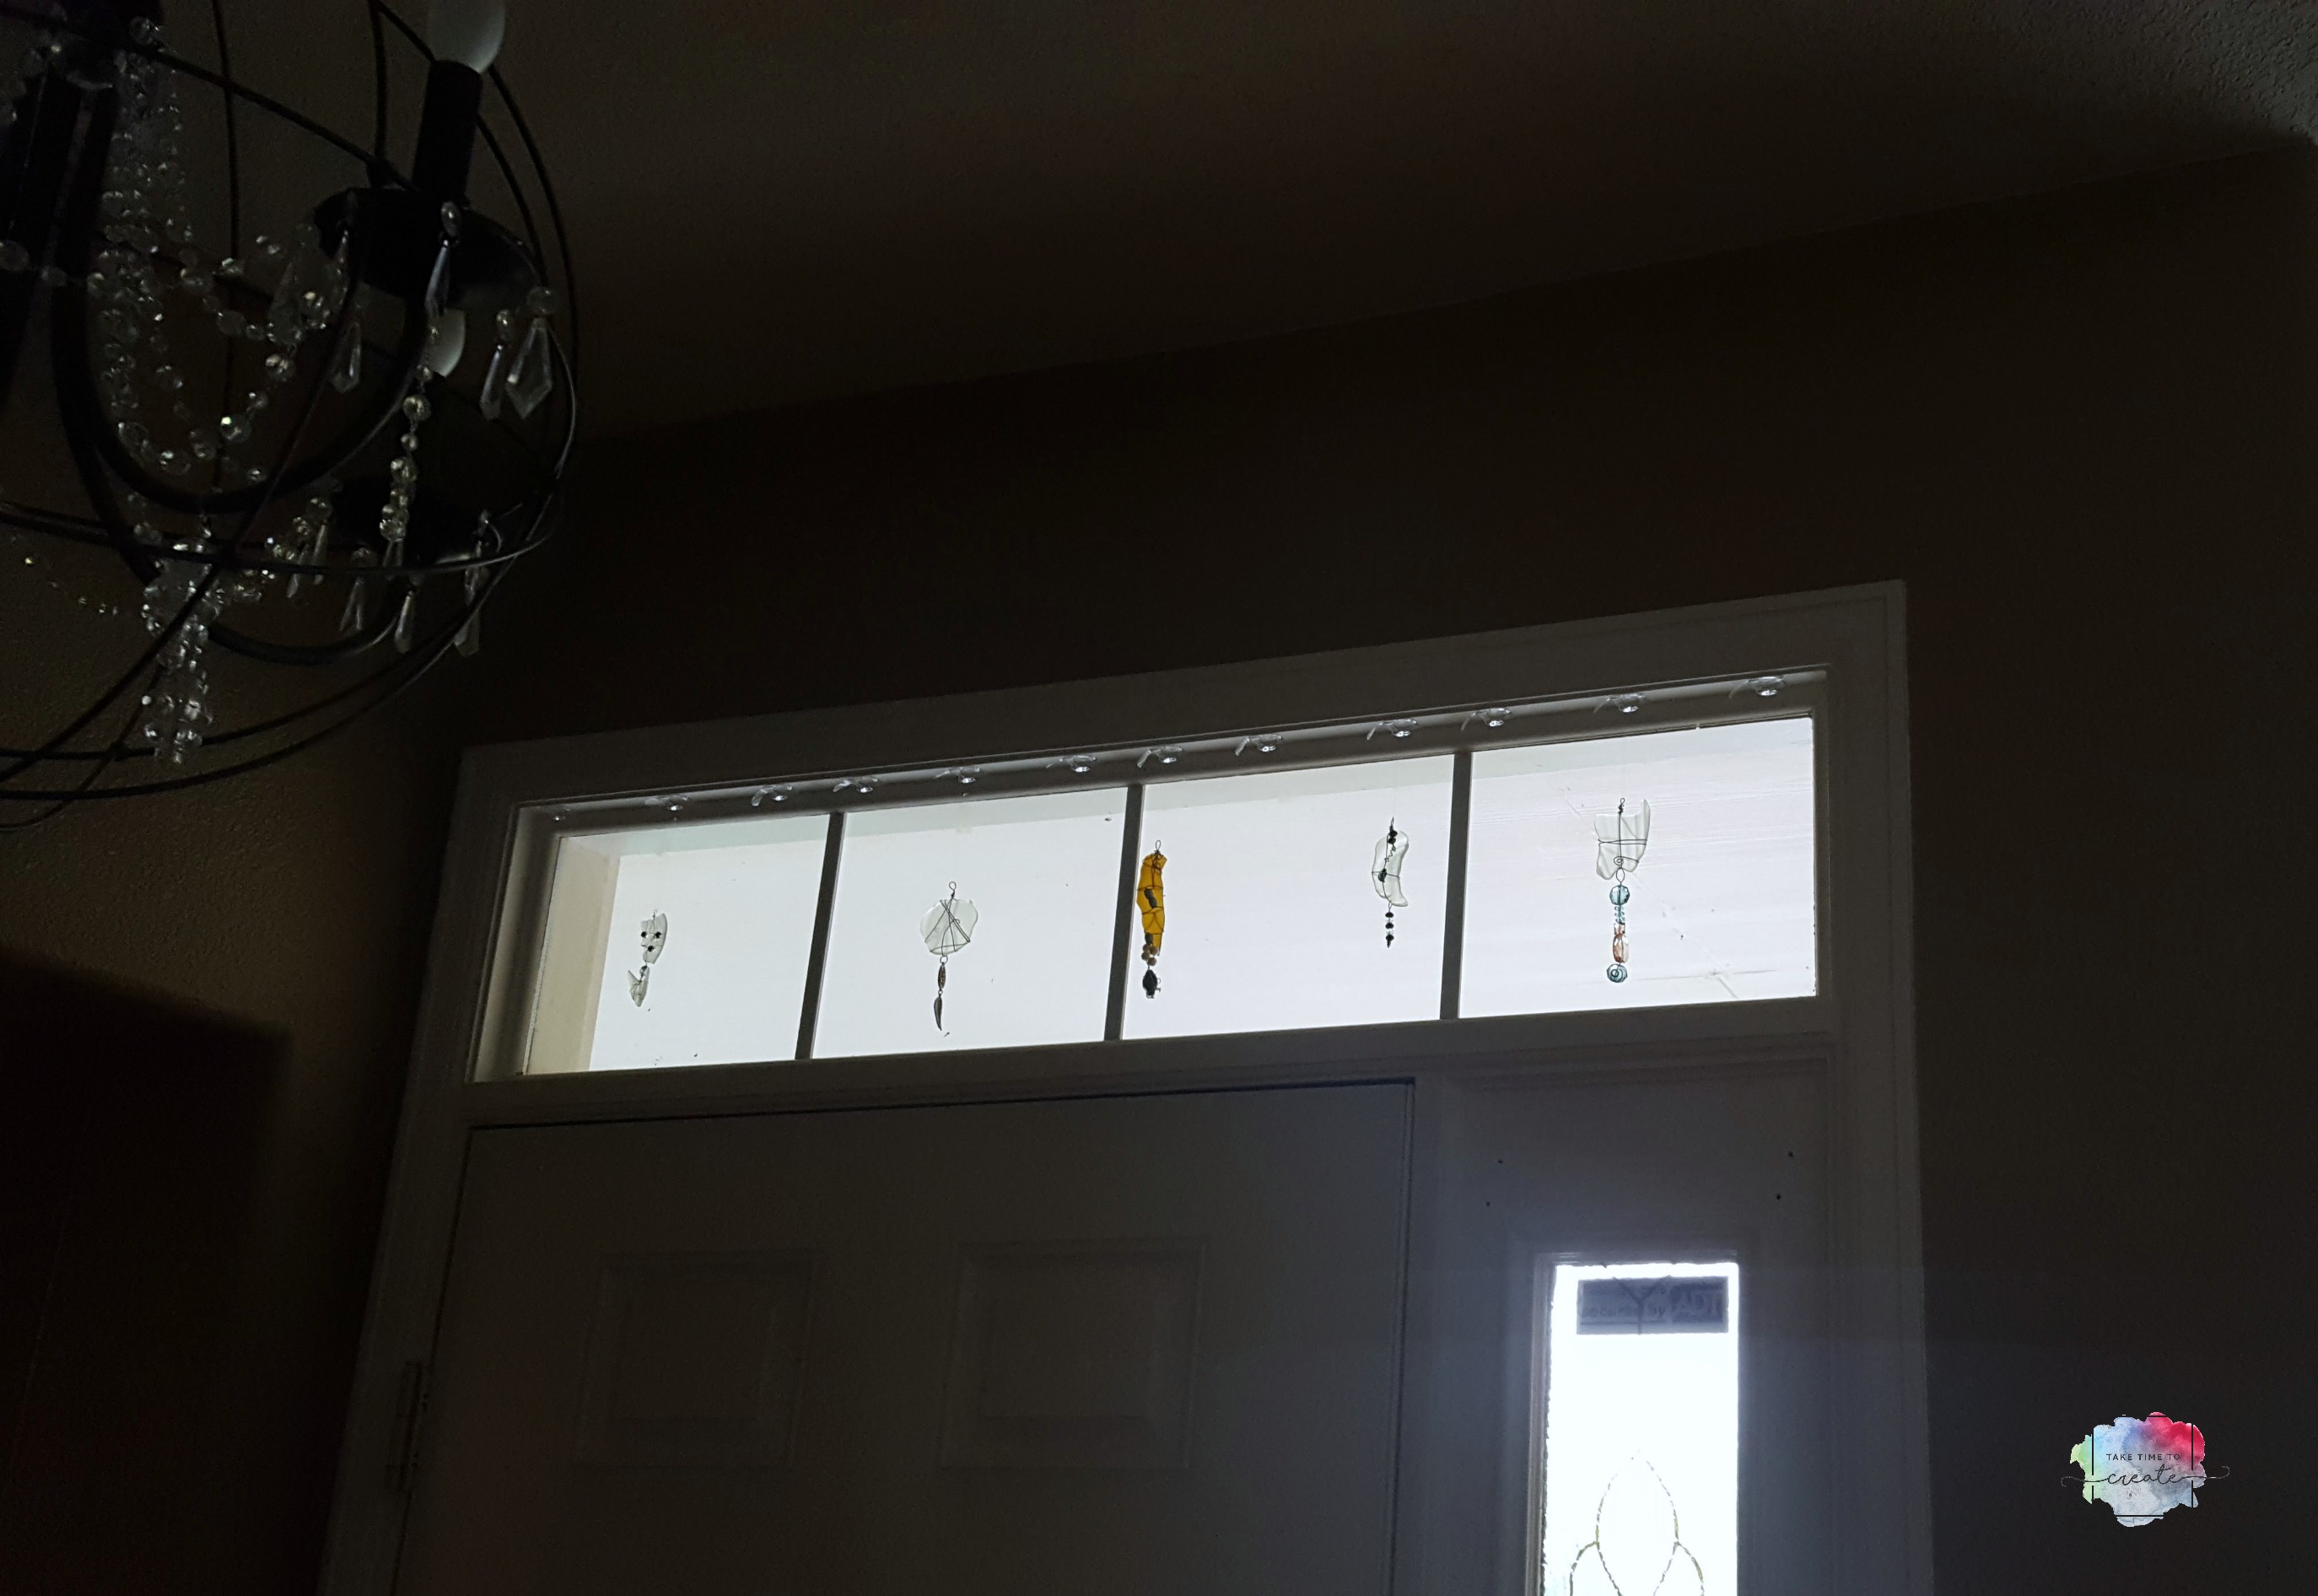
Aren’t they pretty hanging from my window above my front door.  Time to make more to fill the window with pretty window dangles.

faux sea glass tumbled glass


The post How to Create Faux Sea Glass appeared first on Take Time To Create.

Tissue Paper Rose

Tissue Paper Rose

Use the tissue paper in old patterns to create a beautiful tissue paper rose. 

Hello Everyone!

Last weekend was my beautiful mother’s birthday! She is such an important part of my life and I wanted to express that with a handmade gift.

I created this tissue paper rose for her and gave it to her last weekend when we went to lunch and shopping to celebrate!

diy tissue paper rose

I created a video to go along with the tutorial, you can see that here:  You Tube Tissue Paper Rose Tutorial

This was so much fun to create, and it was my first time doing something like this and I am happy with how it turned out.

Materials:

BTW this list contains affiliate links.

Instructions: 

First prep the canvas board with gesso. I chose black gesso to give me a clean slate.

Get the tissue paper ready by ripping the tissue paper and rolling it into a tight strip.

diy tissue paper rose

Roll the strips into a tight circle and glue it down in a spiral. Try and keep it all tight and keep going until you get the size you like.

Make the stems by using the strips in a swirl motion. The leaves were made from a short strip with one end slightly trimmed in a rounded shape.

diy tissue paper rose

Next I put a layer of black gesso on everything.

No photo here: Then I decided that the black was too dark for the center of my rose so I painted over the black with white gesso

Then I added glass bead texture to the outside of the rose.

diy tissue paper rose

Here is where I got really bad at taking photos, lol. But you can see the process in the video

I painted the rose with 2 colors of pink and the background is a light blue to a dark blue to a purple.

I tried to stamp the background with some images but I didn’t love that so I mostly covered that back up.

Then add mod podge and adhere the mica flakes. The mica flakes add so much dimension and sparkle!

diy tissue paper rose

Dry brush a light shimmery white over everything and spray a sealer on when you are done.

It makes a wonderfully sparkly gift that was tons of fun to make. 


diy tissue paper rose

The post Tissue Paper Rose appeared first on Take Time To Create.

This post contains affiliate links.

You Tube Channel and Yarn Bowl

YouTube Channel and Yarn Bowl

Creating a yarn bowl is a great way to use up all you scraps of yarn. 

Hello Everyone!

I am so excited to tell you that I have just started my You Tube Channel! As of today there is only one video, lol, but I will be adding more as the days go by. It is so fun to show you more with my videos and it will help my explain some of my processes better! I will also be videoing some of my art journals and hauls and all kinds of other things.

I would love for you to subscribe to my channel here: Take Time To Create You Tube Channel

Now on to the craft of the week.

Yarn Bowl

This is a pretty easy project that is similar to the leaf bowl that I made a few months ago. You can see that video here: Leaf bowl

Take any bowl with a shape that you like and wrap it with plastic wrap.

Yarn Bowl

Get your yarn ready by cutting it into smaller pieces if you want, I used pieces that were about a foot or more long. This is really up to you how you want your bowl to look. Then I used a lot of Mod Podge to glue it all down. In the future I won’t be using Mod Podge, I don’t think it holds the finished bowl stiff enough.

I think I am going to try Aleene’s Tacky Glue for my next bowl. I have seen on Pinterest where people heat up a glue mixture for their yarn bowl but since I don’t get along with my oven I am trying to stay away from that process, lol.  I will let you know hw my experiments go.

Yarn Bowl

Let it dry completely and carefully remove it from the bowl. Reshape as necessary. So very cute! 
Yarn Bowl

What other ways do you use up your yarn scraps?

This post You Tube Channel and Yarn Bowl appeared first on Take Time To Create.

Create a Purse from an old VHS Tape

Create a Purse from an old VHS Tape

What do you do with all those old VHS tapes? Why you create a purse! Perfect way to add some interest to your outfit!

Hello Everyone!

I am almost embarrassed to admit, but I still have a lot of VHS tapes laying around my house. I hate to toss them, but I have no way of playing them (I don’t even own a VHS player…) So what do I with this pile of tapes? I decided to create a purse!

I will admit that is project did not turn out exactly how I envisioned it. But it did turn out cute and the next one will be better! In the instructions I will tell you what I did and how I will make it better next time, that way you can create it at home with out all my struggles, lol

create a diy vhs purse

Materials:

  • VHS tape
  • screw driver
  • cutters
  • fabric, buttons, trim
  • super glue

Instructions:

create a diy vhs purse

First you find an old VHS tape. If you no longer have one in your stash you can find them at thrift stores, or ask around I am sure someone has one somewhere.

create a diy vhs purse

This is the fun part. Unscrew all the screws and open the tape. Take out the innards and safe them, they will work great for a mixed media project. Next you want to cut off the plastic bits that are sticking up. This is one area that I messed up, I cut too much off the bottom and it doesn’t seal (there is a tiny hole in the bottom. Just be careful and you should be good.

Then I glued some faux leather fabric on one side, in hindsight I probably should have glued it to both sides, but I wanted to see the clear windows still. I think I can make this a little better next time.

create a diy vhs purse

Glue hinges so that you can open and close your purse. Try not to glue your fingers to the tape, lol (I may or may not have done the, lol) Also try not to glue the hinge shut, it takes a lot of careful prying if you happen to glue the hinge (once again I may or may not have done the, lol)

create a diy vhs purse

Then I added a decorated bottle cap and some string to secure the purse closed. Next time I will use elastic, but this works. Also next time I will add fabric to the sides so the tape doesn’t lay flat when open, it will help keep everything contained. Add a strap, I wanted mine to look a little funky so I added pom-pom trim.

create a diy vhs purse

create a diy vhs purse

Overall I am happy with how this turned out, and I am excited to make improvements to version 2.  What are you doing to up cycle your VHS tapes?

The post Create a Purse from an old VHS Tape appeared first on Take Time To Create


Create Mixed Media Canvas

Create Mixed Media Canvas

Old paint brushes are given a new lift with this Create Mixed Media Canvas

Hello Everyone!

Have you ever been so involved with a project that you forget to take pictures as you care creating? I think that is a good thing, it means that you are enjoying the creating process and not worried about how it will look in a photo.

This happened to me with this canvas. I know this is not perfect when I am trying to teach you how I created something, but it was good for me to spend time with my art.

I used my favorite mixed media techniques. You can view my other Mixed Media projects here:

create mixed media canvas

I painted the blank canvas with black gesso then stenciled the swirls in the background.

For the Doily I sprayed it with different colors of spray ink to create this look.

The paint brushes were old ones that I had in my craft room, to prep them paint them with black gesso and then dry brush metallic colors.

I added flowers, jems and butterflies, (the butterflies are actually plastic bows from the dollar store that I cut off the ends and added beads)

create mixed media canvas

I added the glitter word Create and outlined it in black. Then I dry brushed everything in a few metallic colors.

I love this mixed media, it inspires me in my craft room. What have  you made for your craft room that inspires you?

create mixed media canvas


The post Create Mixed Media Canvas appeared first on Take Time To Create


Vintage Sewing Pattern Collage

Vintage Sewing Pattern Collage

Hello Everyone!

A vintage sewing pattern collage is a wonderful way to display an old sewing pattern. The patterns are fun to look at and alter for any of you crafts. 

I just love looking at old patterns. The pictures are great, with wonderful colors! Recently I found some terrific patterns at my local creative reuse center, Who Gives A Scrap, and I ended up getting about 10 or so, lol.

The pattern covers are perfect for a collage and the tissue paper on the inside work great for textures in mixed media. (I will show you how to do that later)

Materials:

  • Frame ( I found mine at the dollar store)
  • Sewing patterns, dictionary paper, stencils, paint, label maker
  • Mod podge, brushes

Instructions:

Bloom Where  You Are Planted:

This one was a lot of fun! I adhered 2 dictionary pages with Mod Podge to a piece of paper that fit the frame.

Then I stenciled the flowers (I stenciled in 1 color then I went back and added another color on top).

After stenciling add the cut out girl from the pattern.

For the edges I painted some darker colors and then lightened it up afterwards. I wanted it to look like a mat in the frame.

stenciling the Vintage sewing pattern collage

The frame was super easy. I painted the silver frame in a gold color, once that was dry I painted over it in a pearl white color.

When everything was dry I sanded it to create a shabby chic look. I think it turned out super cute.

Before I added everything in the frame I used a hand held label maker to print the quote.

Vintage sewing pattern collage bloom where you are planted

Take These Broken Wings and Learn to Fly

This frame is essentially the same except I used a different stencil, but I still used 2 colors to give it dimension.

I didn’t add any colors to the edges, I thought with the wings I would look too busy.

I drew on the wings before attaching the girl.

Vintage sewing pattern collage

This frame was easy as well. I just painted the silver frame gold to match a little better.

These are such easy collages to do, I think they would make a great gift!

Vintage sewing pattern collage take these broken wings and learn to fly

The post Vintage Sewing Pattern Collage appeared first on Take Time To Create.


diy-pillows-burlap-coffee-sacks

Sewing Craft Project Burlap Pillows

Used burlap coffee sacks make for a great sewing craft project… they also make make great pillows. They are fun and unique and perfect for any decor.

Hello Everyone!

sewing craft project burlap pillow case

Finished burlap pillow case

Today is a cold, wintry day and I am inclined to stay inside all day (I do have to go to work, but when I get home I am going to snuggle down and say warm) anyway, as I think about staying home I am reminded of this sewing craft project I did where I made pillows from Burlap sacks. I did this a while ago, but I still love them so much. I think they are perfect for my decor. 

Materials:

  • You will need the used burlap sacks that is used for coffee. I originally purchased mine on eBay, but I did find some on Amazon. You can use this link: Burlap Coffee Sacks.  There are a lot of vendors for these sacks so you have your pick! But they usually come with random patterns, I don’t think you are able to pick your pattern. So keep that in mind when purchasing. 
  • Pillow form. I found mine at Ikea, they have the best prices for pillow forms
  • Needle and thread, or sewing machine. 
burlap sacks

This sewing craft project starts with burlap bags

Instructions:

Cut your sack to the dimensions of your pillow form. If you want the pillow to look more full then cut the sack a bit smaller. (I have to be honest here, I didn’t actually sew these pillows. My fabulous mom sewed them for me. haha, I don’t know what I would do without her.)

Once it is cut, pin the right sides together and sew the right sides together. Leave a little hole so you have room to put your pillow form in. 

Stuff your pillow and stitch the hole. 

finished sewing craft project

Here is another finished pillow

That is it, very easy to make a custom pillow for your home. You can use this technique for almost any fabric.  I love how easy it is to update your decor, and reusing items that might otherwise land in the landfill is a double awesome!

BTW if you are wondering how I painted my couch green you can check out this old post: Painted Couch

burlap-pillows-3

This post DIY Pillows from Burlap Coffee Sacks appeared first on Take Time To Create


If you enjoyed this post, make sure you Follow Take Time To Create so you don’t miss out on other great posts.

Follow Take Time To Create on WordPress.com


This post contains affiliate links.


Make a Basket Out of Wine Corks

Make a Basket Out of Wine Corks

Hello Everyone!

The question of the day is what to do with left over wine corks? Disclaimer: I did not drink all of this wine to make this craft, lol. I got a big box of wine corks from eBay for really cheap! I just love all the crafts people are doing on Pinterest with the corks so I thought I would try it out.

diy-basket-out-of-wine-corks

This is a really simple craft that probably won’t take more than 30 min to complete. This basket is perfect for just your desk or table. It is a really cute way to store just about anything.

finished-diy-wine-cork-basket

Instructions:

Gather your corks and start to assemble them. Try to get them all about the same size, it will make the basket look better.

start-gluing-the-corks-together

Then start hot gluing them together. Hold the pieces together for a few seconds to make sure they stick, but the hot glue should be strong enough to hold it together.

collect-your-wine-corks

I did 2 rows of 5 for the bottom of the basket and 24 vertical corks for the sides. And I stacked the sides 2 corks tall.

Once I was gluing all the corks together I thought it looked a little plain so I added a ribbon and a flower to jazz it up.

add-ribbon-and-flower

So what have you made with wine corks?    Next I think I will make a trivet and a cork board for my office. Stay tuned to the tutorials.

finish-basket

wine-cork-basket-by-take-time-to-create

The post Make a Basket Out of Wine Corks appeared first on Take Time To Create.

How to Reupholster an Office Chair

Hello everyone!

An office chair has got to be one of the most pieces of furniture that a person can own. You spend a ton of time in your chair so it should be comfortable and good looking. I had a chair that was wonderful, it worked great and I had it a long time. But it broke. So I had to search for a new one. After searching high and low I found one at a surplus store. It was in great condition and for only $15, I thought it was a steal. The only problem was the green fabric covering it. The color was ok, a dark green, but it was itchy and that was not ok. So I decided to recover so it didn’t drive me crazy sitting on it for 8 hours a day.

How to Reupholster an Office Chair

I think it turned out very cute. I found the fabric at Who Gives a Scrap. I talked about this awesome donation center last week. You can revisit that post here. They had this great upholstery fabric for only $2. Can’t beat that price. Here is how I went about recovering the chair.

Materials:

~Chair (this one wouldn’t be too bad if it wasn’t for the itchy fabric. Now I know why they had it for sale at the surplus store.)

How to Reupholster an Office Chair

~ Fabric (The stripped patter is cute and for only $2 I could pass that up.)

How to Reupholster an Office Chair

~ Staple gun, screw driver, glue gun, ribbon for edging

Instructions:

~ The first thing I did was take off the arm rests with the screw driver. I could have taken the whole chair apart and this might have made the process easier, but I decided to work around everything except the arm rests.

How to Reupholster an Office Chair

~ Then I measure the fabric and started stapling it on. The way this chair is constructed is a little weird. It has a plastic back and the original cover was Velcroed on, but I didn’t want to go that trouble so I decided to staple over everything.

How to Reupholster an Office Chair     How to Reupholster an Office Chair

~ I got the top part done then I went to town on the seat of the chair. The stripes made it easy to match the top to the bottom. I stapled everywhere then I went back and added more. I wanted to make sure everything held.

How to Reupholster an Office Chair     How to Reupholster an Office Chair

~ Once everything was secure and stapled on I hot glued on a tan ribbon that coordinated with the fabric. Then I put the arms back on that that was it. It took me a couple of hours to complete but it was worth it to not have an itchy chair.

How to Reupholster an Office Chair     How to Reupholster an Office Chair

Once I finished my son loved it so much he has asked me to do a chair for him. But if my chair is ever missing I know who to took it. Smile

How to Reupholster an Office Chair

DIY Cell Phone Case From Old Tie

Hello Everyone!

I found this fantastic store in town, it is call Who Gives A Scrap. (BTW I love the name!) Anyway, this store is so awesome it has all kinds of craft supply donations that are up for sale. The stock is always changing so you never know what you will find. If you follow me on Instagram you already saw my haul, but this what I scored yesterday for about $25! The item I am most excited about is the bead loom. I have tons of pins on Pinterest for the bead loom and now that I have one I am excited to learn how to use it. Does anyone have any experience or tips on how to use a bead loom? Please share if you do.

So many new things to play with and to use for my crafts and DIY projects. Even our cat, Starlight, approves. haha.

DIY Cell Phone Case From Old Tie


The other day my sister and I were having a Craftersation on Pinterest. (A Craftersation  is a craft conversation between pinners on Pinterest.) She has the best Pinterest boards and I think she has pinned just about everything on the internet, haha. You can follow her here.

Anyway she pinned this really cute cell phone case made from an old tie so I pinned a different version of the same thing. And on it went for while. We have a lot of Craftersations, it is a fun way to stay connected and see what each other is interested in even though we live almost a thousand miles apart.

When I was at Who Gives a Scrap I saw that they had some old ties that would be perfect to make a cell phone case out of. After I got home yesterday I made my version of what I saw on Pinterest.

Here it is all done. I am in love with it!

DIY Cell Phone Case From Old Tie

Materials:

~Old Tie

~ Needle and thread, or sewing machine

~ Button or snap

Instructions:

This is one of the ties that I picked up yesterday. Isn’t it wonderful? I fell in love with it on the spot. For this project the wider the tie the better. Skinny ties from the 80s won’t work, but those ties can be use for different projects.

DIY Cell Phone Case From Old Tie

Next just measure how much space you need for your phone. The pointed part will be the flap, so factor that in. You will have to pick out the stitched that keep the flaps together so you can slide your phone in.

DIY Cell Phone Case From Old Tie

For this step I glued the ends together and the center flap closed using Fabric Fusion. I used clothes pins to hold it together while the glue dried. The glue worked just fine, but when I do this project again I think I will sew it all instead of using glue, I think it will be stronger and it will look better. You can hand stitch or use a machine.


DIY Cell Phone Case From Old Tie      DIY Cell Phone Case From Old Tie

Next I hand stitched on these buttons I had in my stash. They are so cute, I got them from Patterns of Time. They have so many great items on their website, when I ordered last it was hard to narrow down the items in my shopping cart to a reasonable amount, haha.

DIY Cell Phone Case From Old Tie

The case was all complete I thought it was very cute just the way it was but I decided that it should become a purse instead of just a case. This Tie Purse is perfect for me when I go out for an evening and my skirt doesn’t have pockets and I need to carry a phone and my ID and a credit card and some cash, it will all fit into this cute purse.

To add the straps all you do is hand sew the remaining part of the tie onto the sides of the case. And that is it.

DIY Cell Phone Case From Old Tie

Have you made one of these before? I would love to see it if you have. Stay tuned for more projects made from items I got from Who Gives A Scrap, that place rocks!!

DIY Cell Phone Case From Old TieDIY Cell Phone Case From Old Tie

There are no affiliate links in this post. All opinions are my own.

« Older posts Newer posts »

© 2024 Take Time To Create

Theme by Anders NorenUp ↑

Follow

Get the latest posts delivered to your mailbox:

%d bloggers like this: