Tag: diy craft (page 2 of 6)

Art Journal from Junk Mail

Hello Everyone!

It is that time of year when all the junk mail comes to your house. I recycle what I can, but sometimes it is just too pretty to throw away. So I save it.

And that is were the problem comes in, I have a stack of junk mail that needs to be dealt with, so I turned a few pieces into art journals.

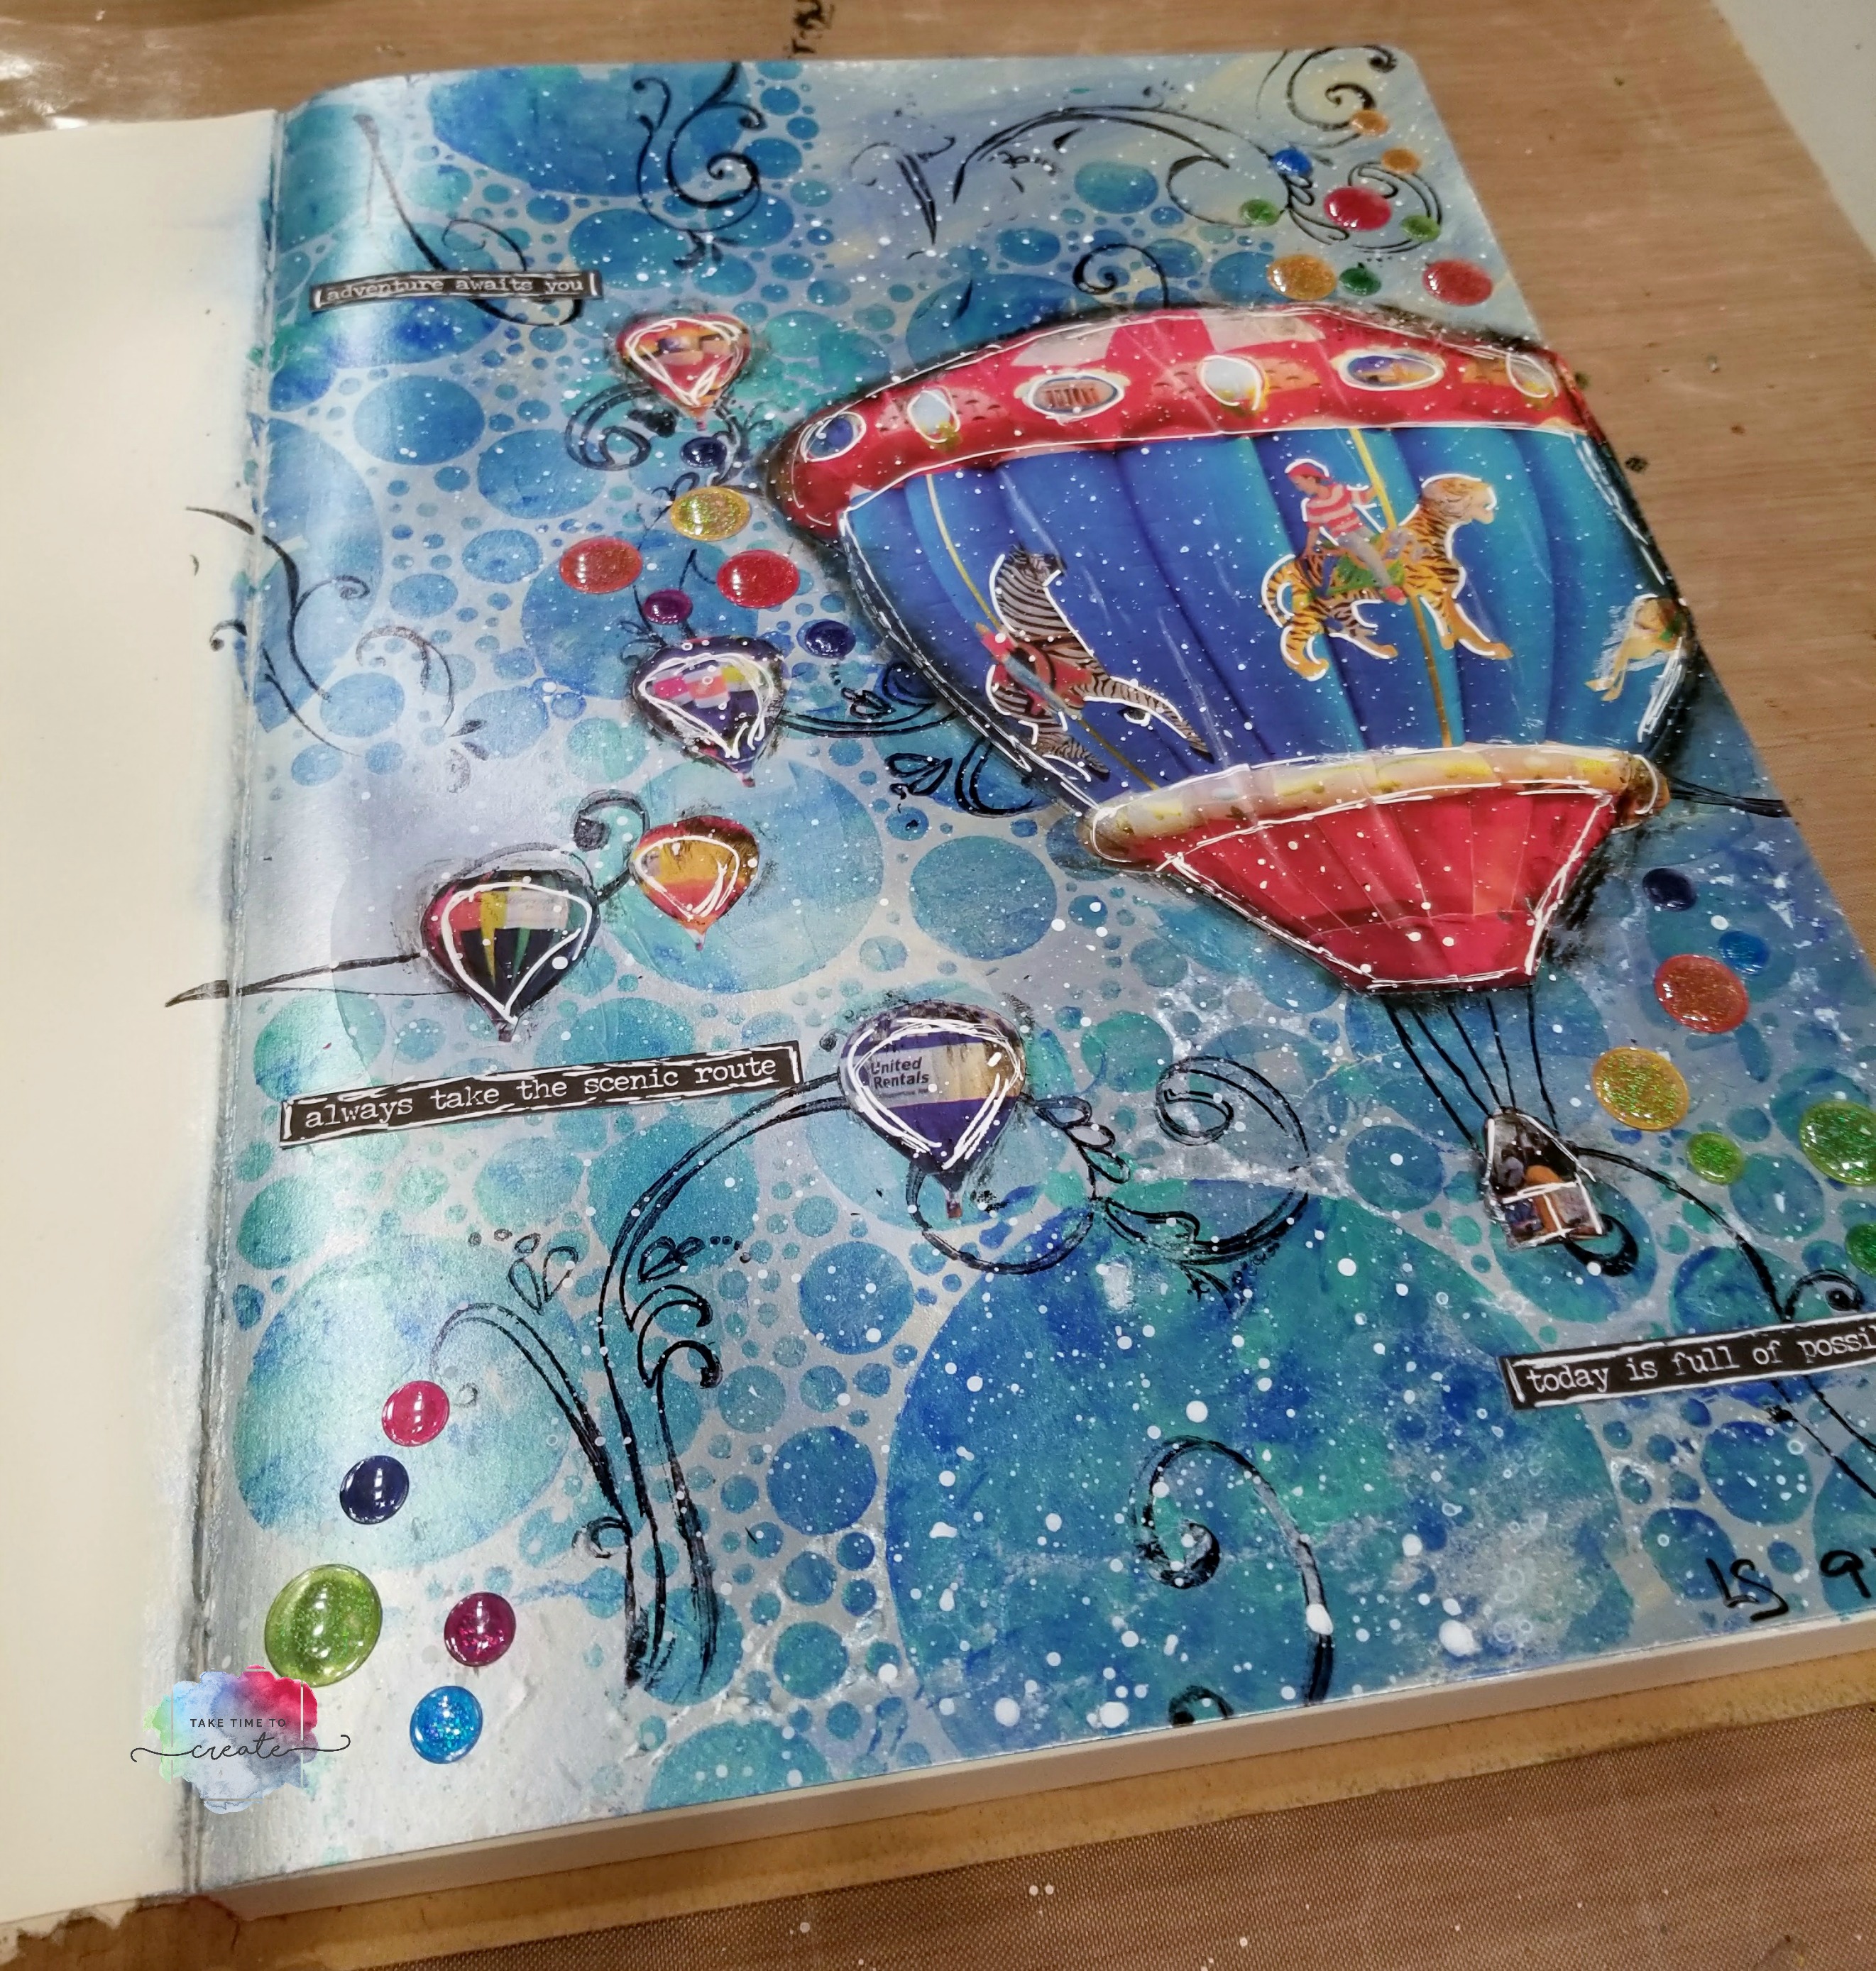
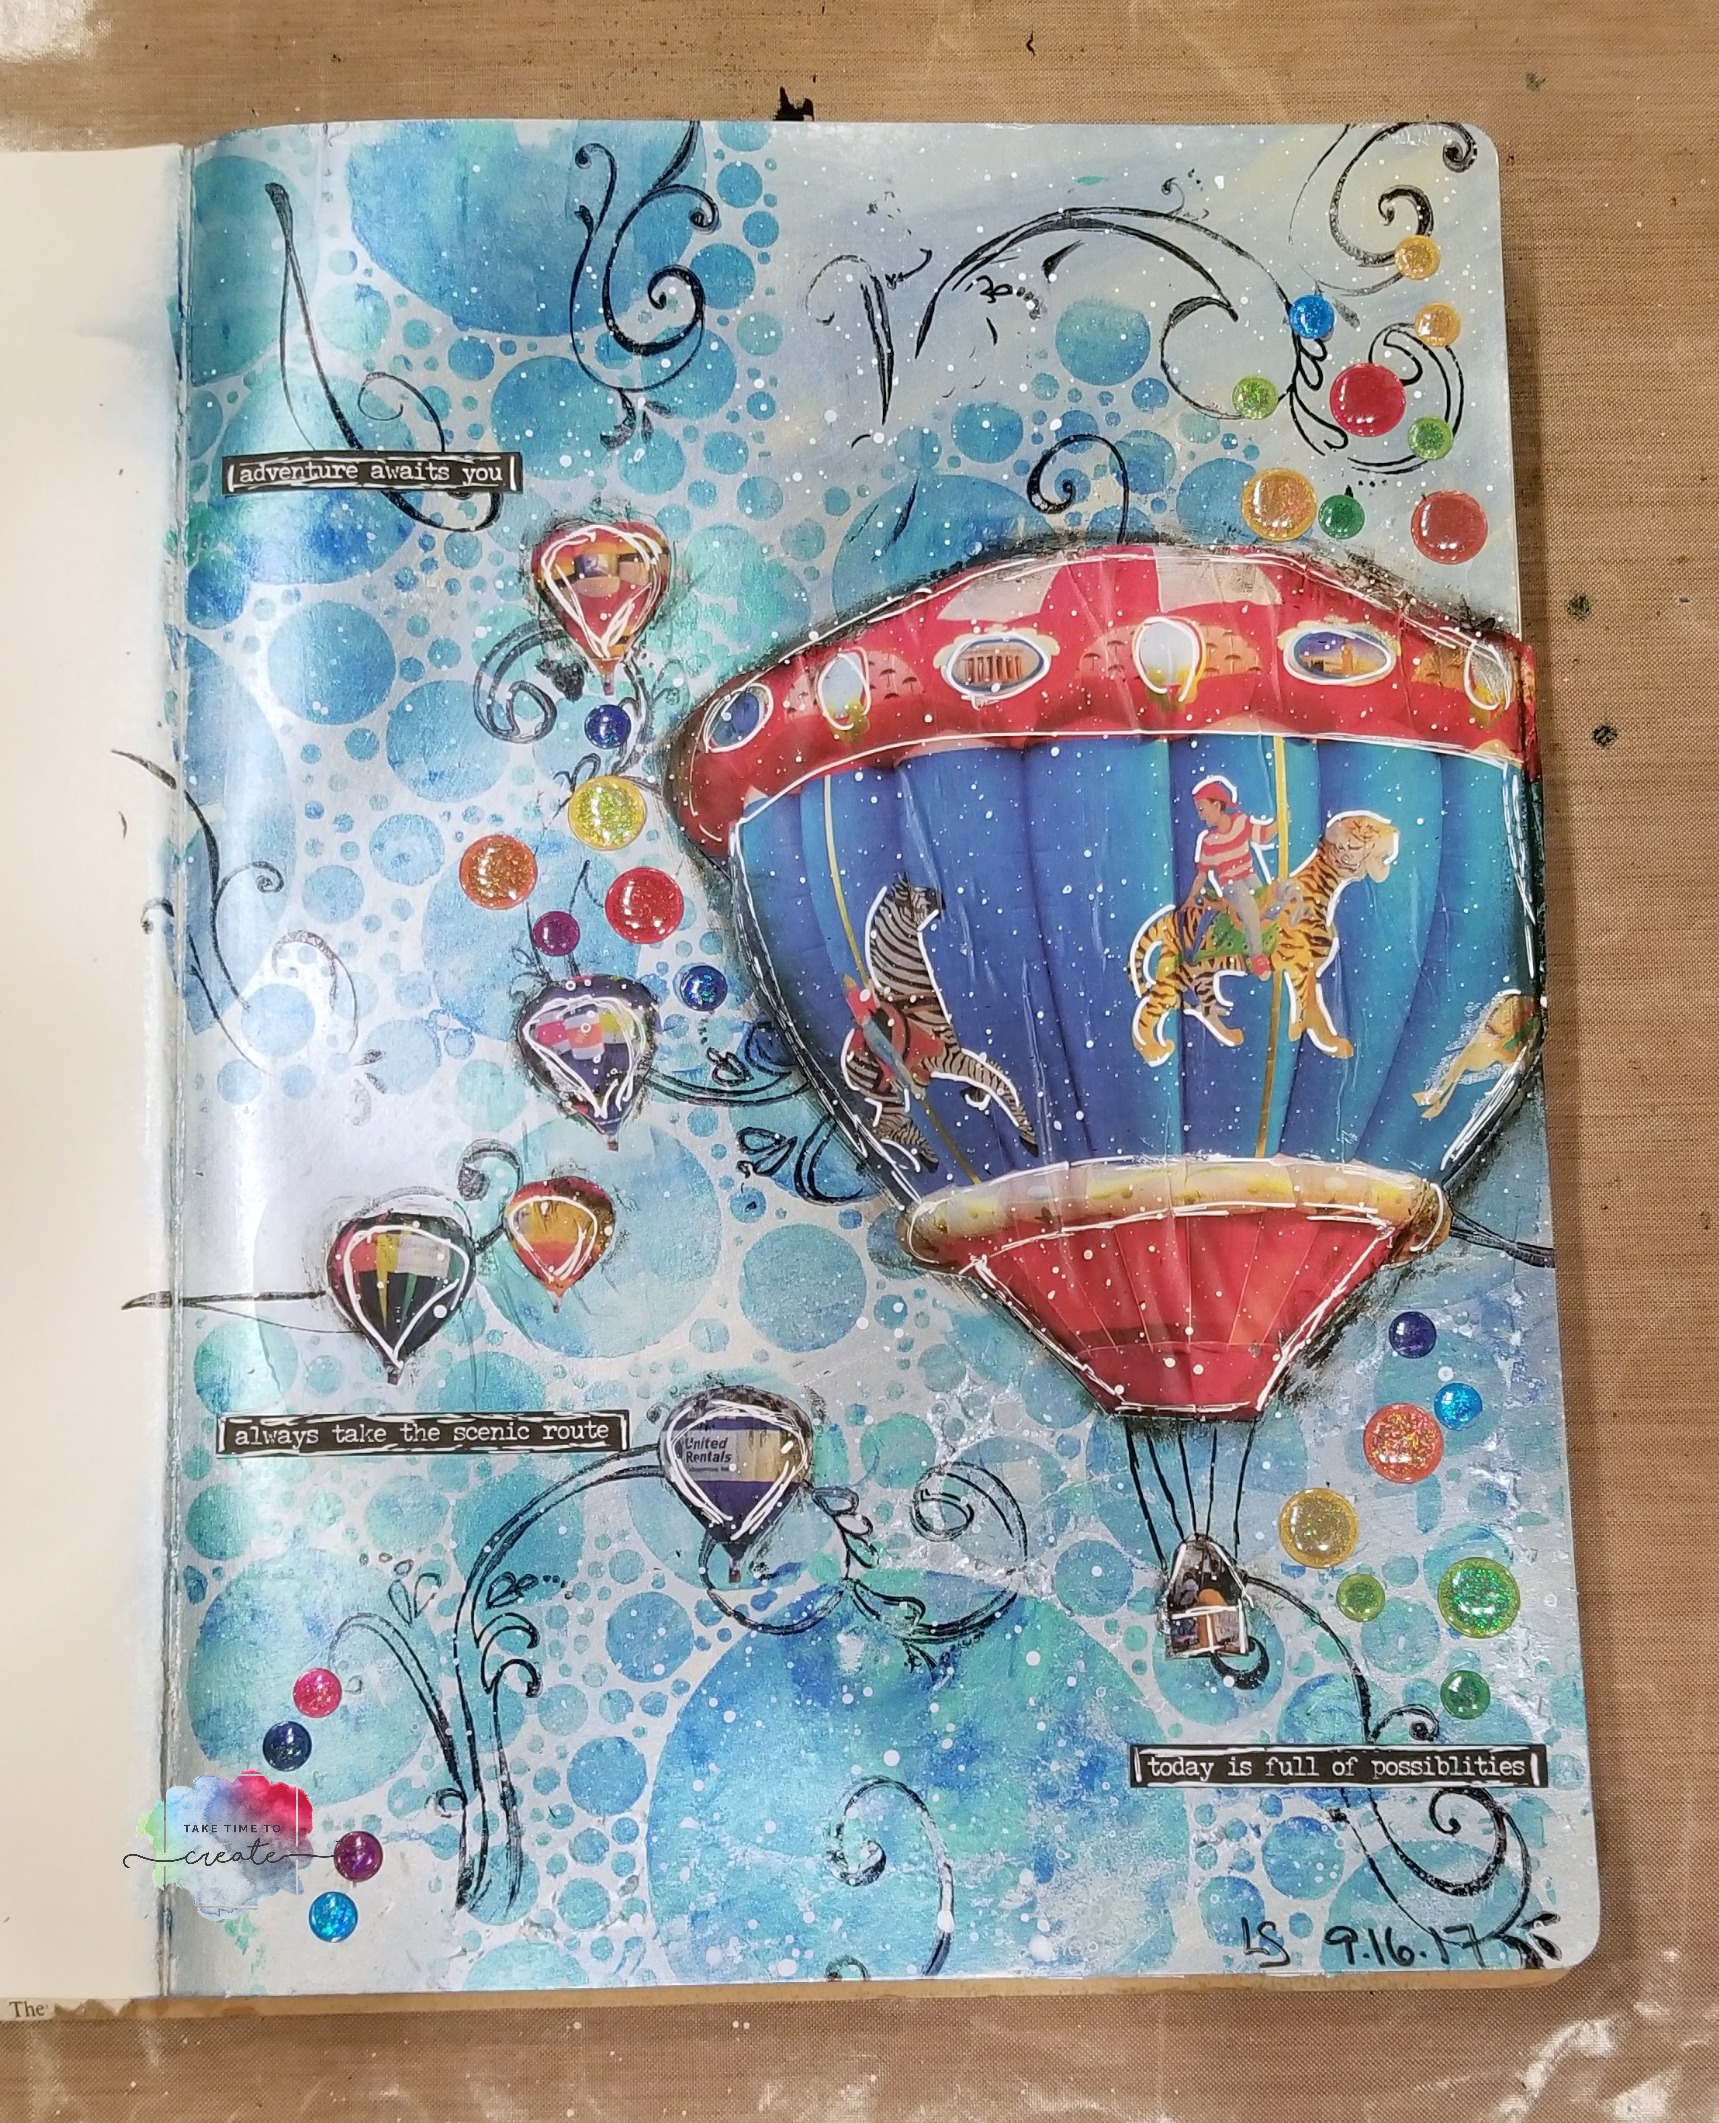
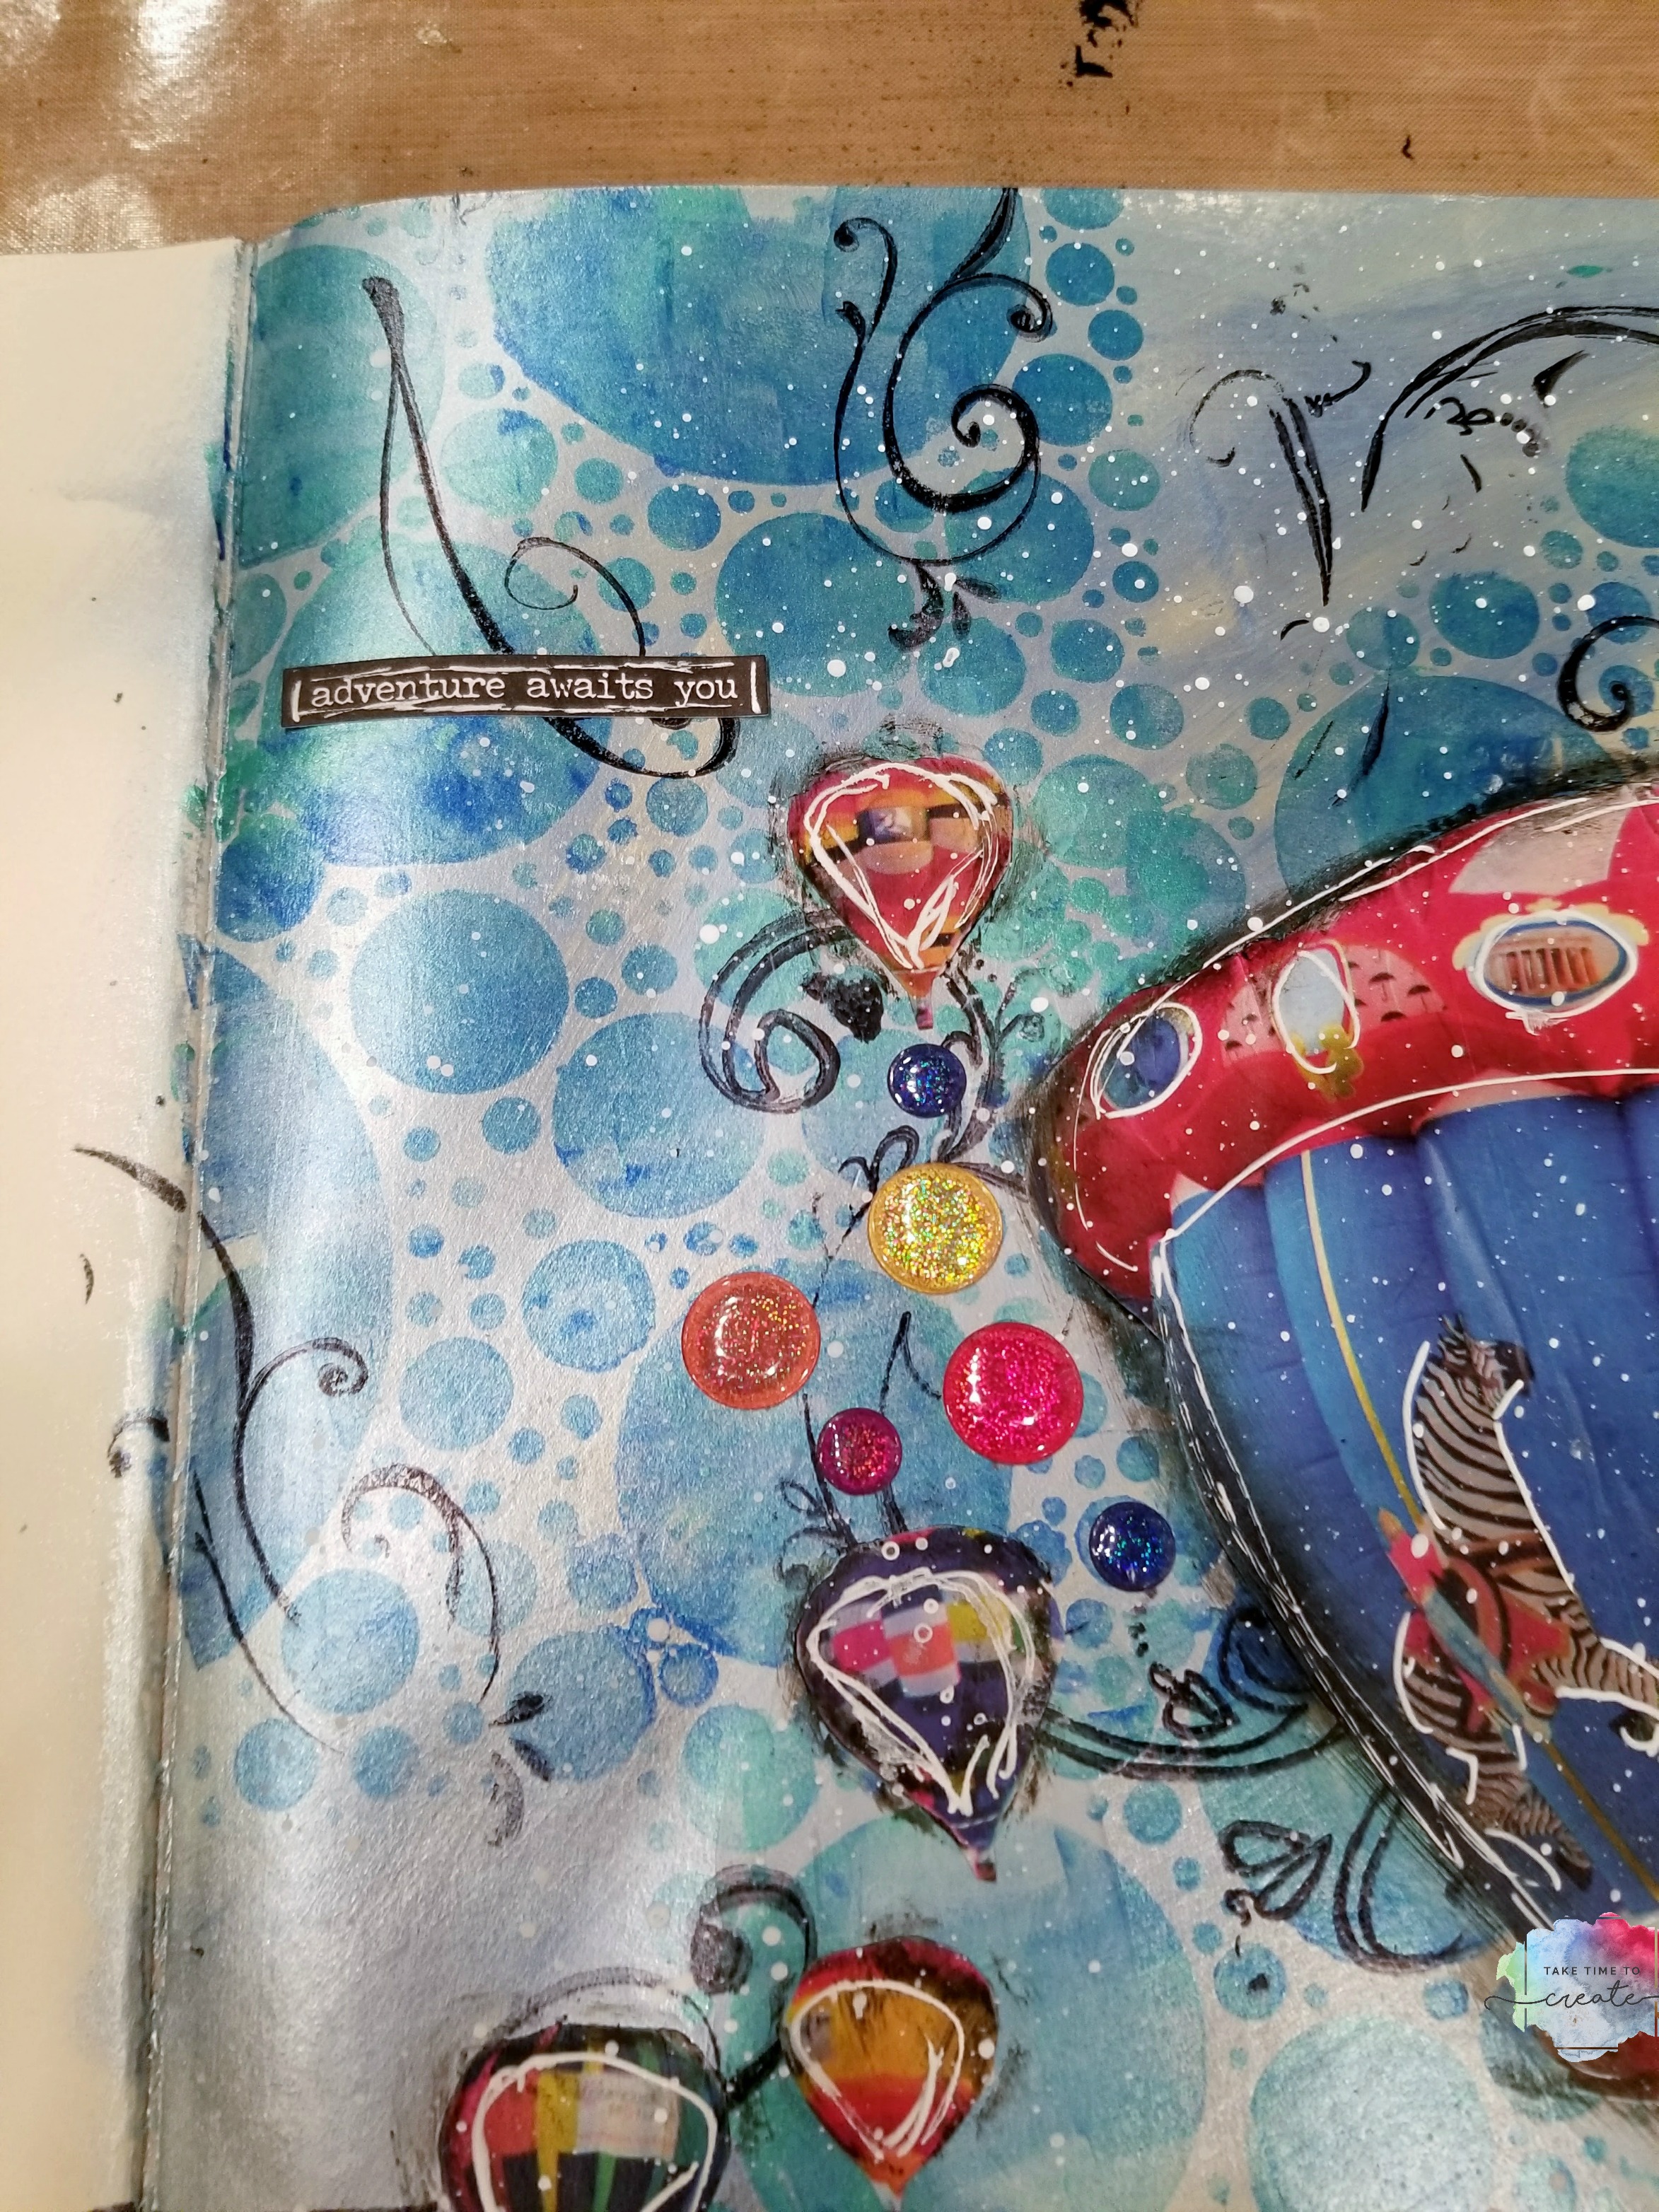
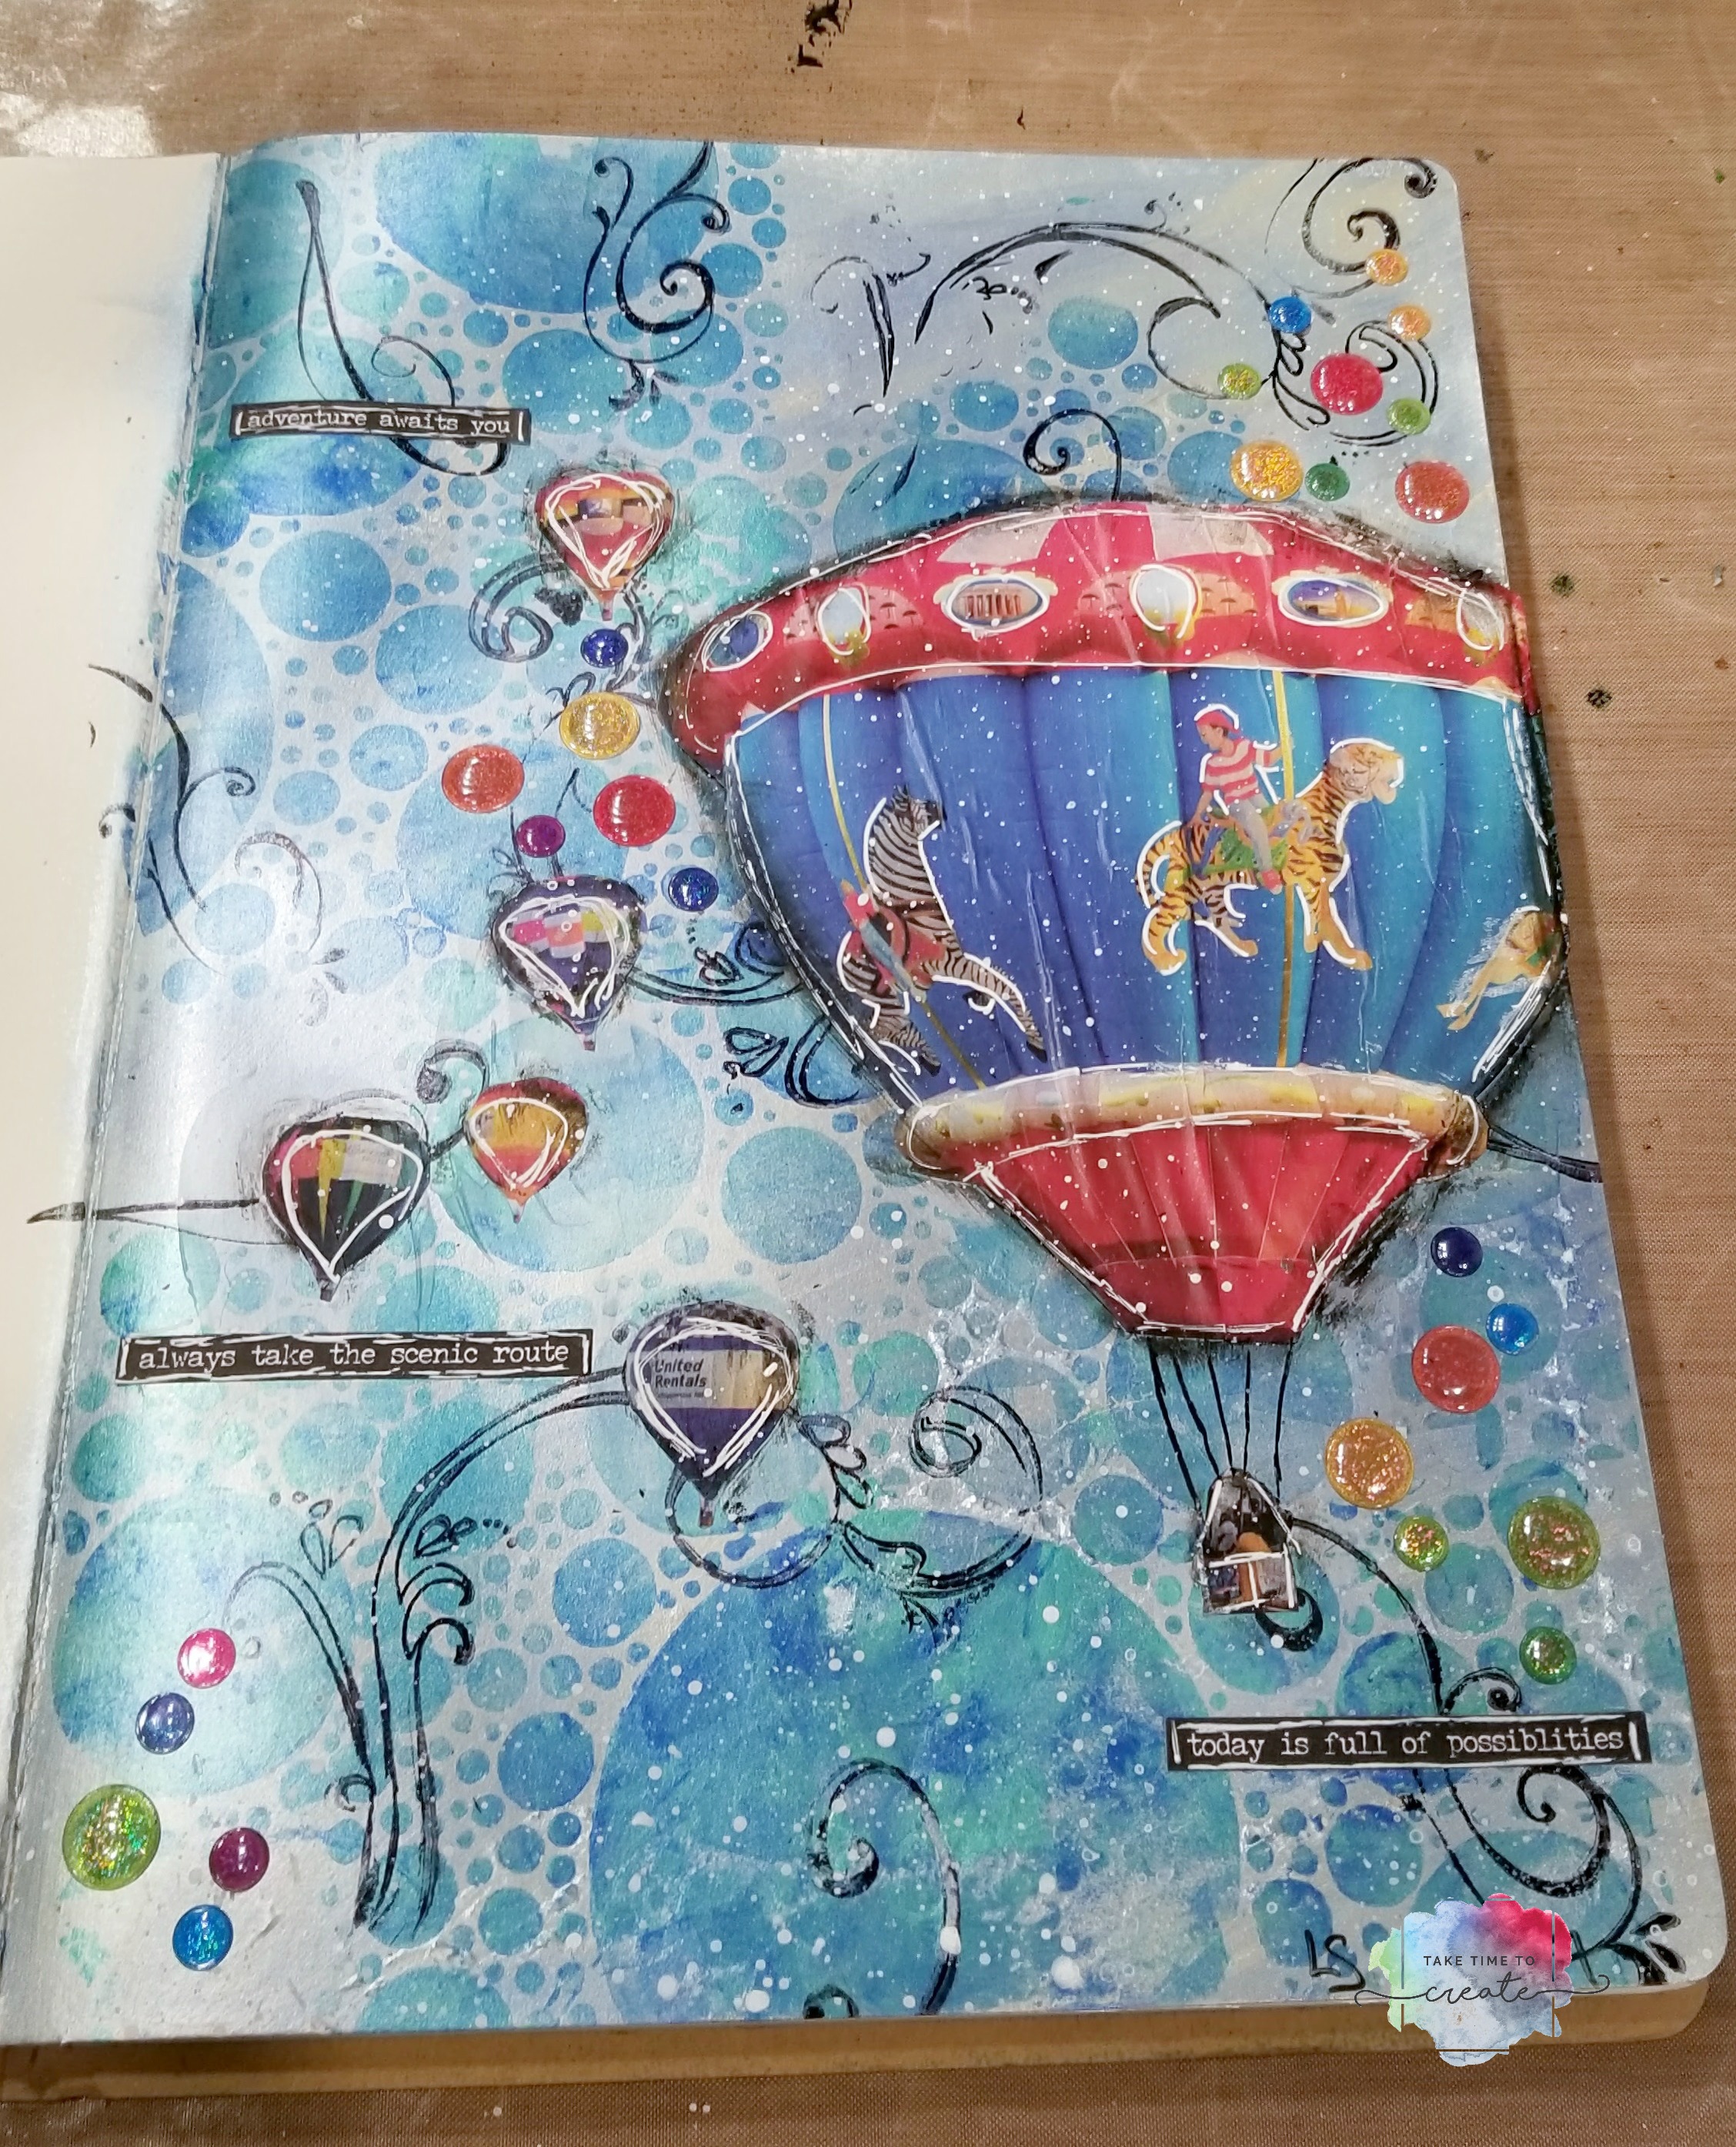
This is just the tutorial on how I created the art journal, if you want to see what I did to the inside let me know in the comments and I will show you the art (when I am finished with it, lol)

Here is the video tutorial:


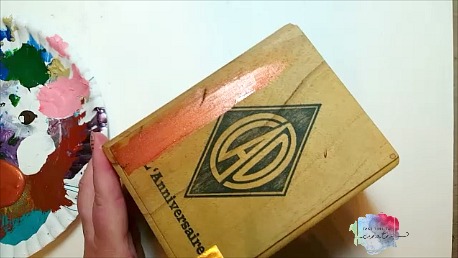
So what you do is start with really great junk mail. I had one from Capital One and Tiffany’s. Side note: I have only been to Tiffany’s once and I bought the cheapest pair of earrings there about 10 years ago and I still get their mailers, lol. And their mailers are beautiful!

art journal from junk mail

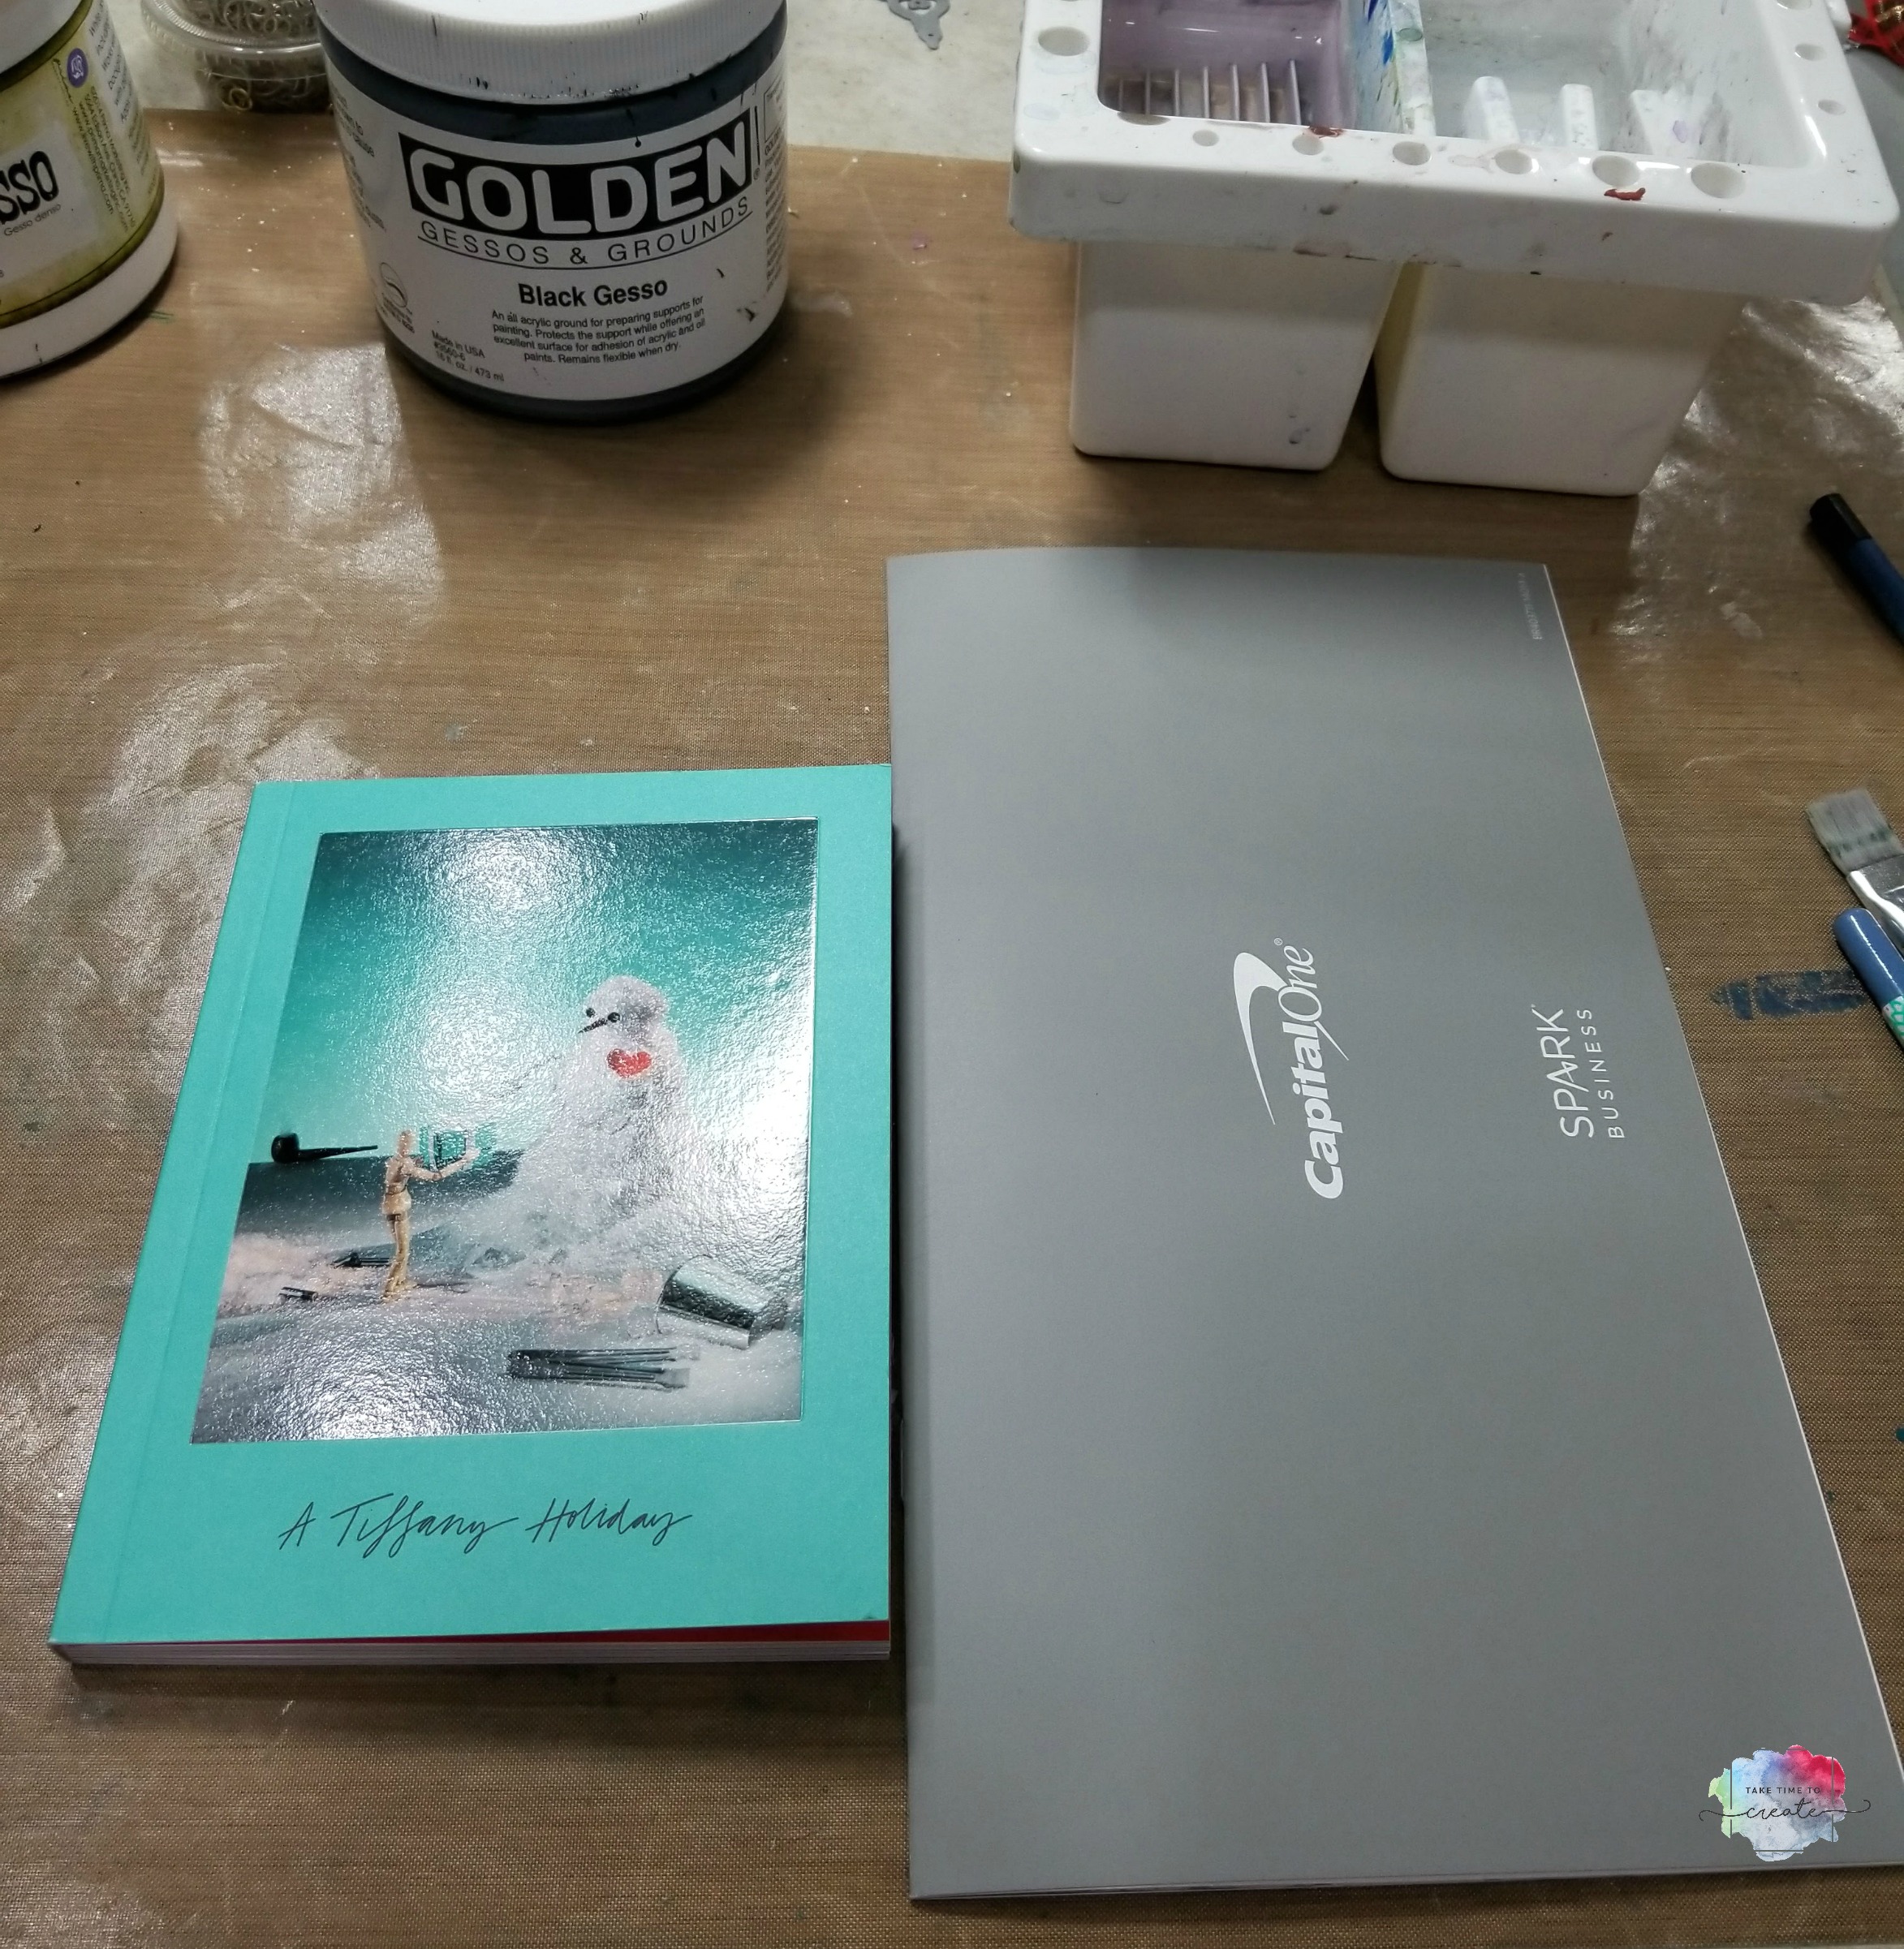
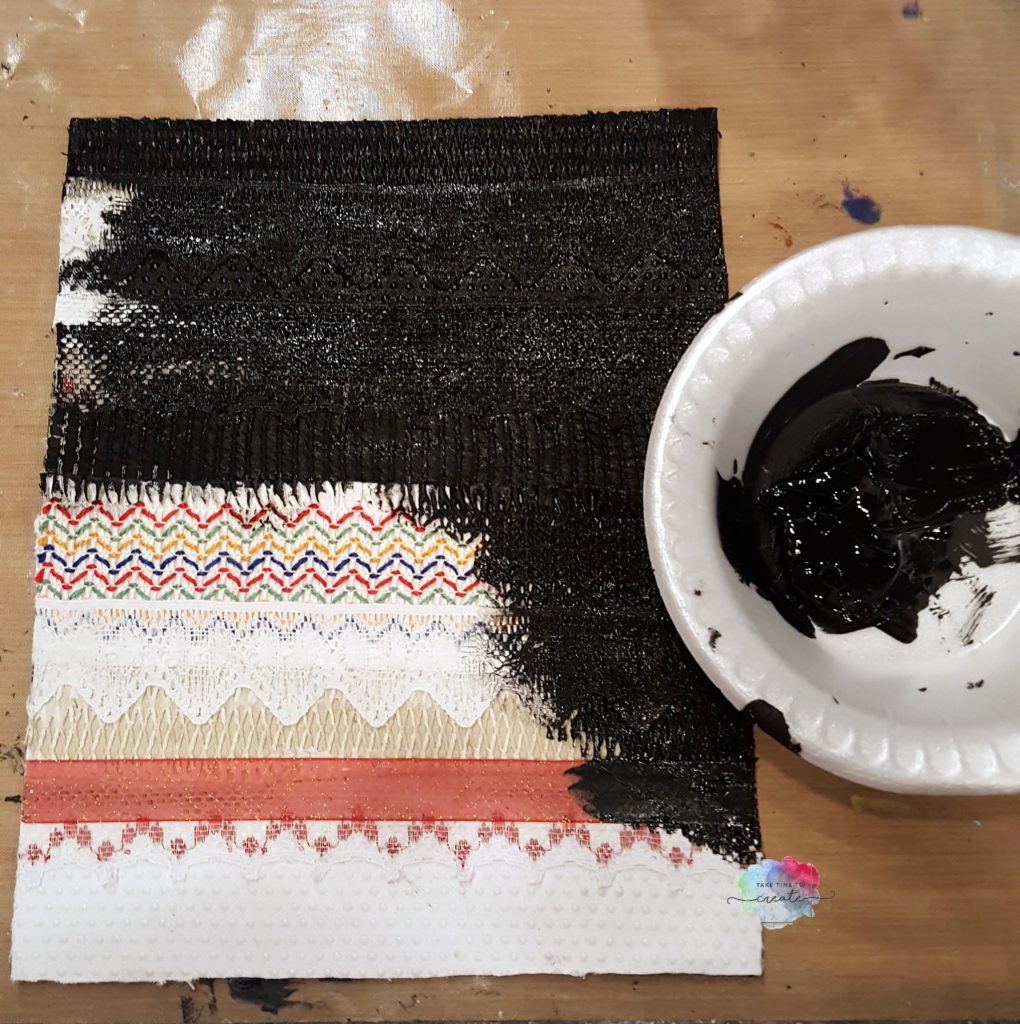
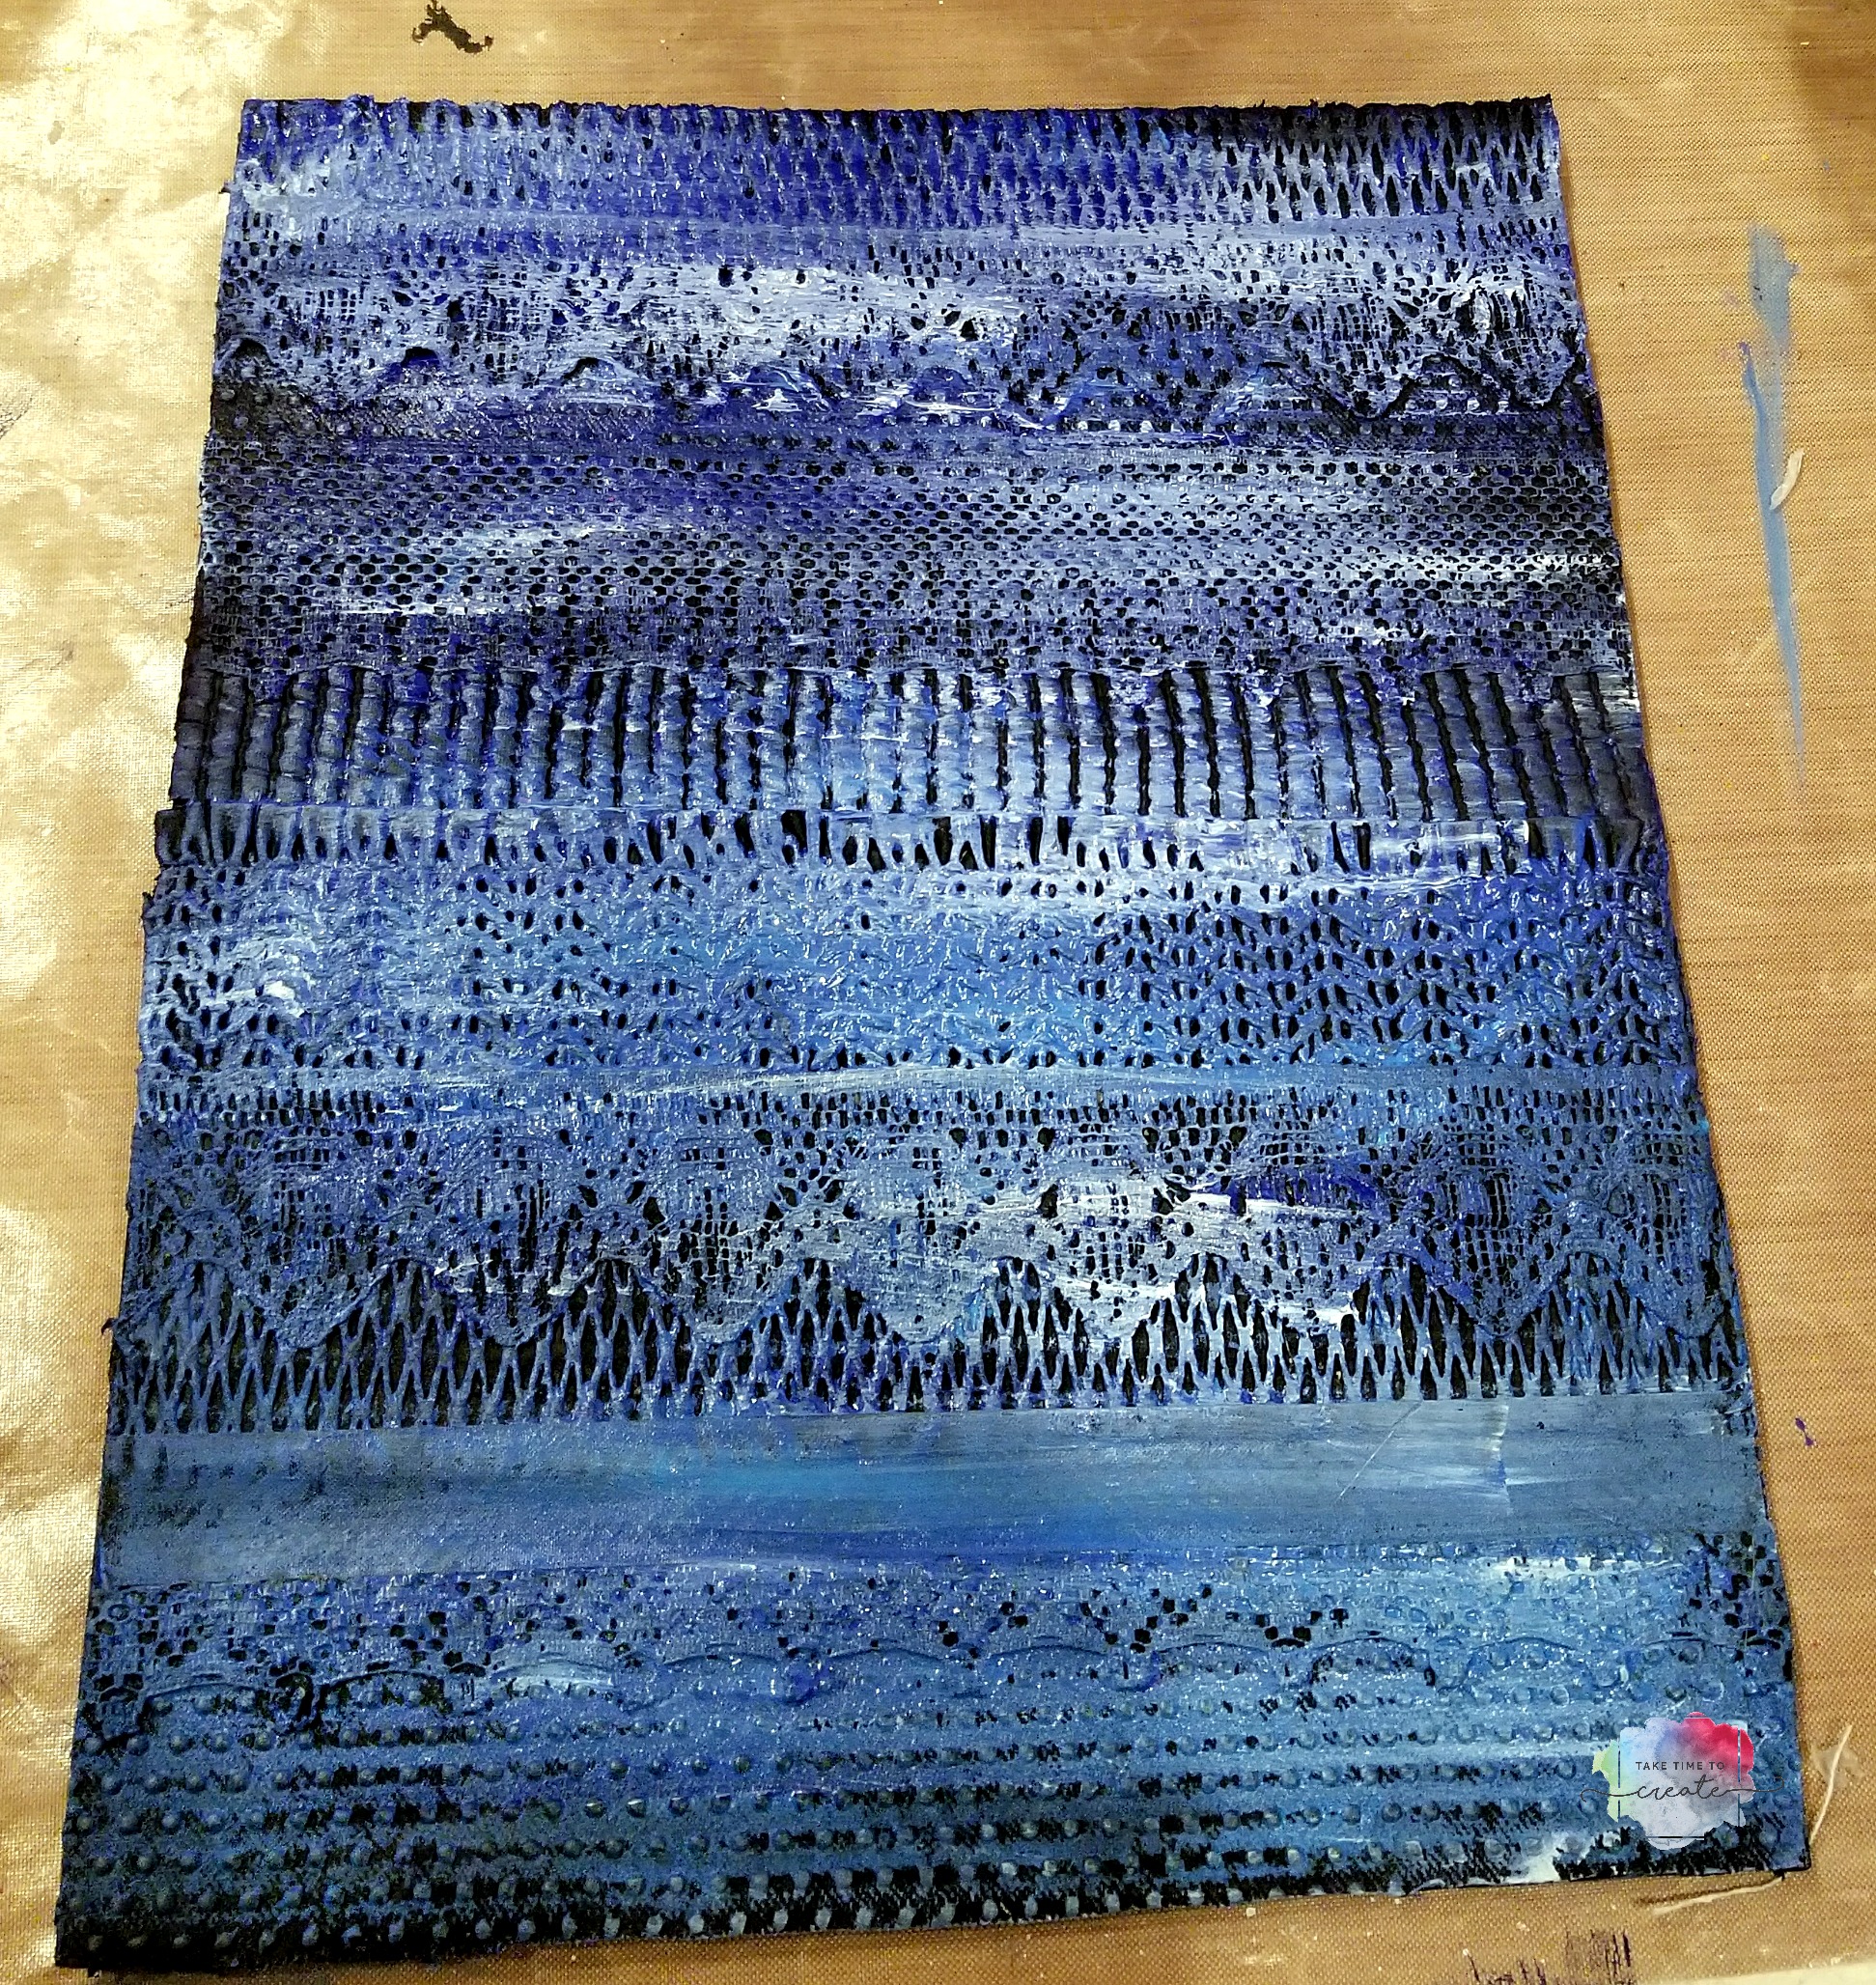
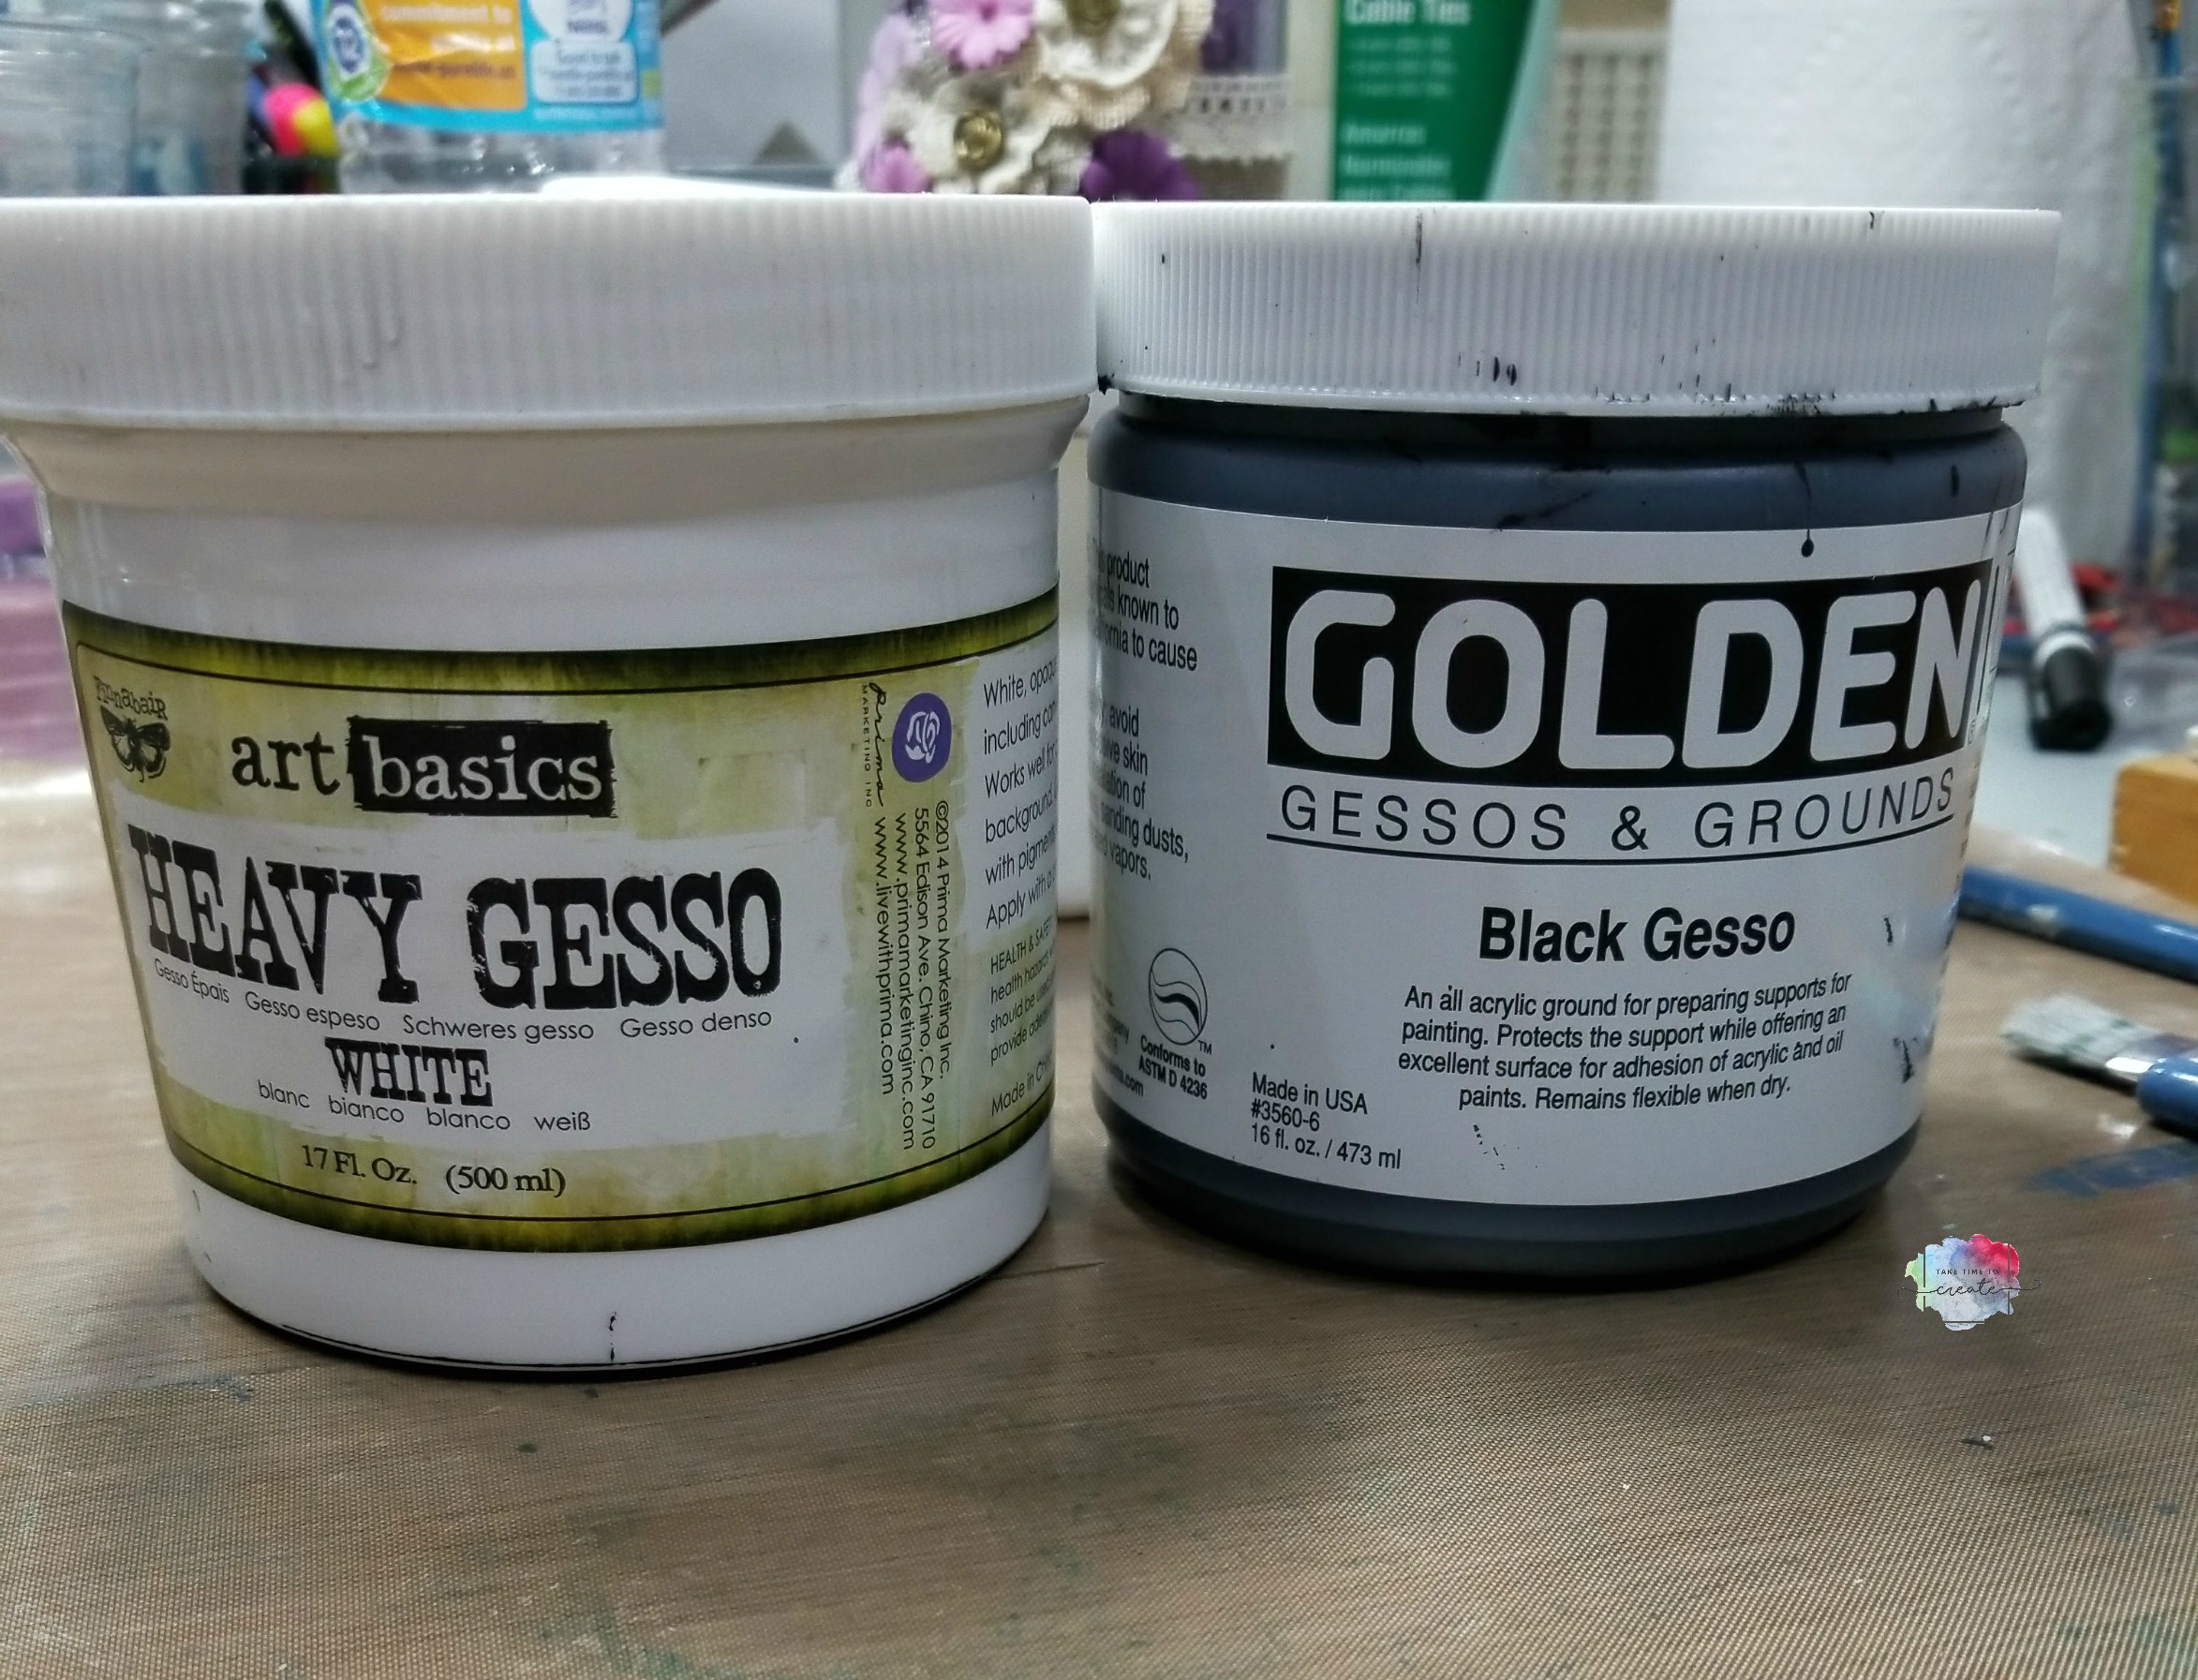
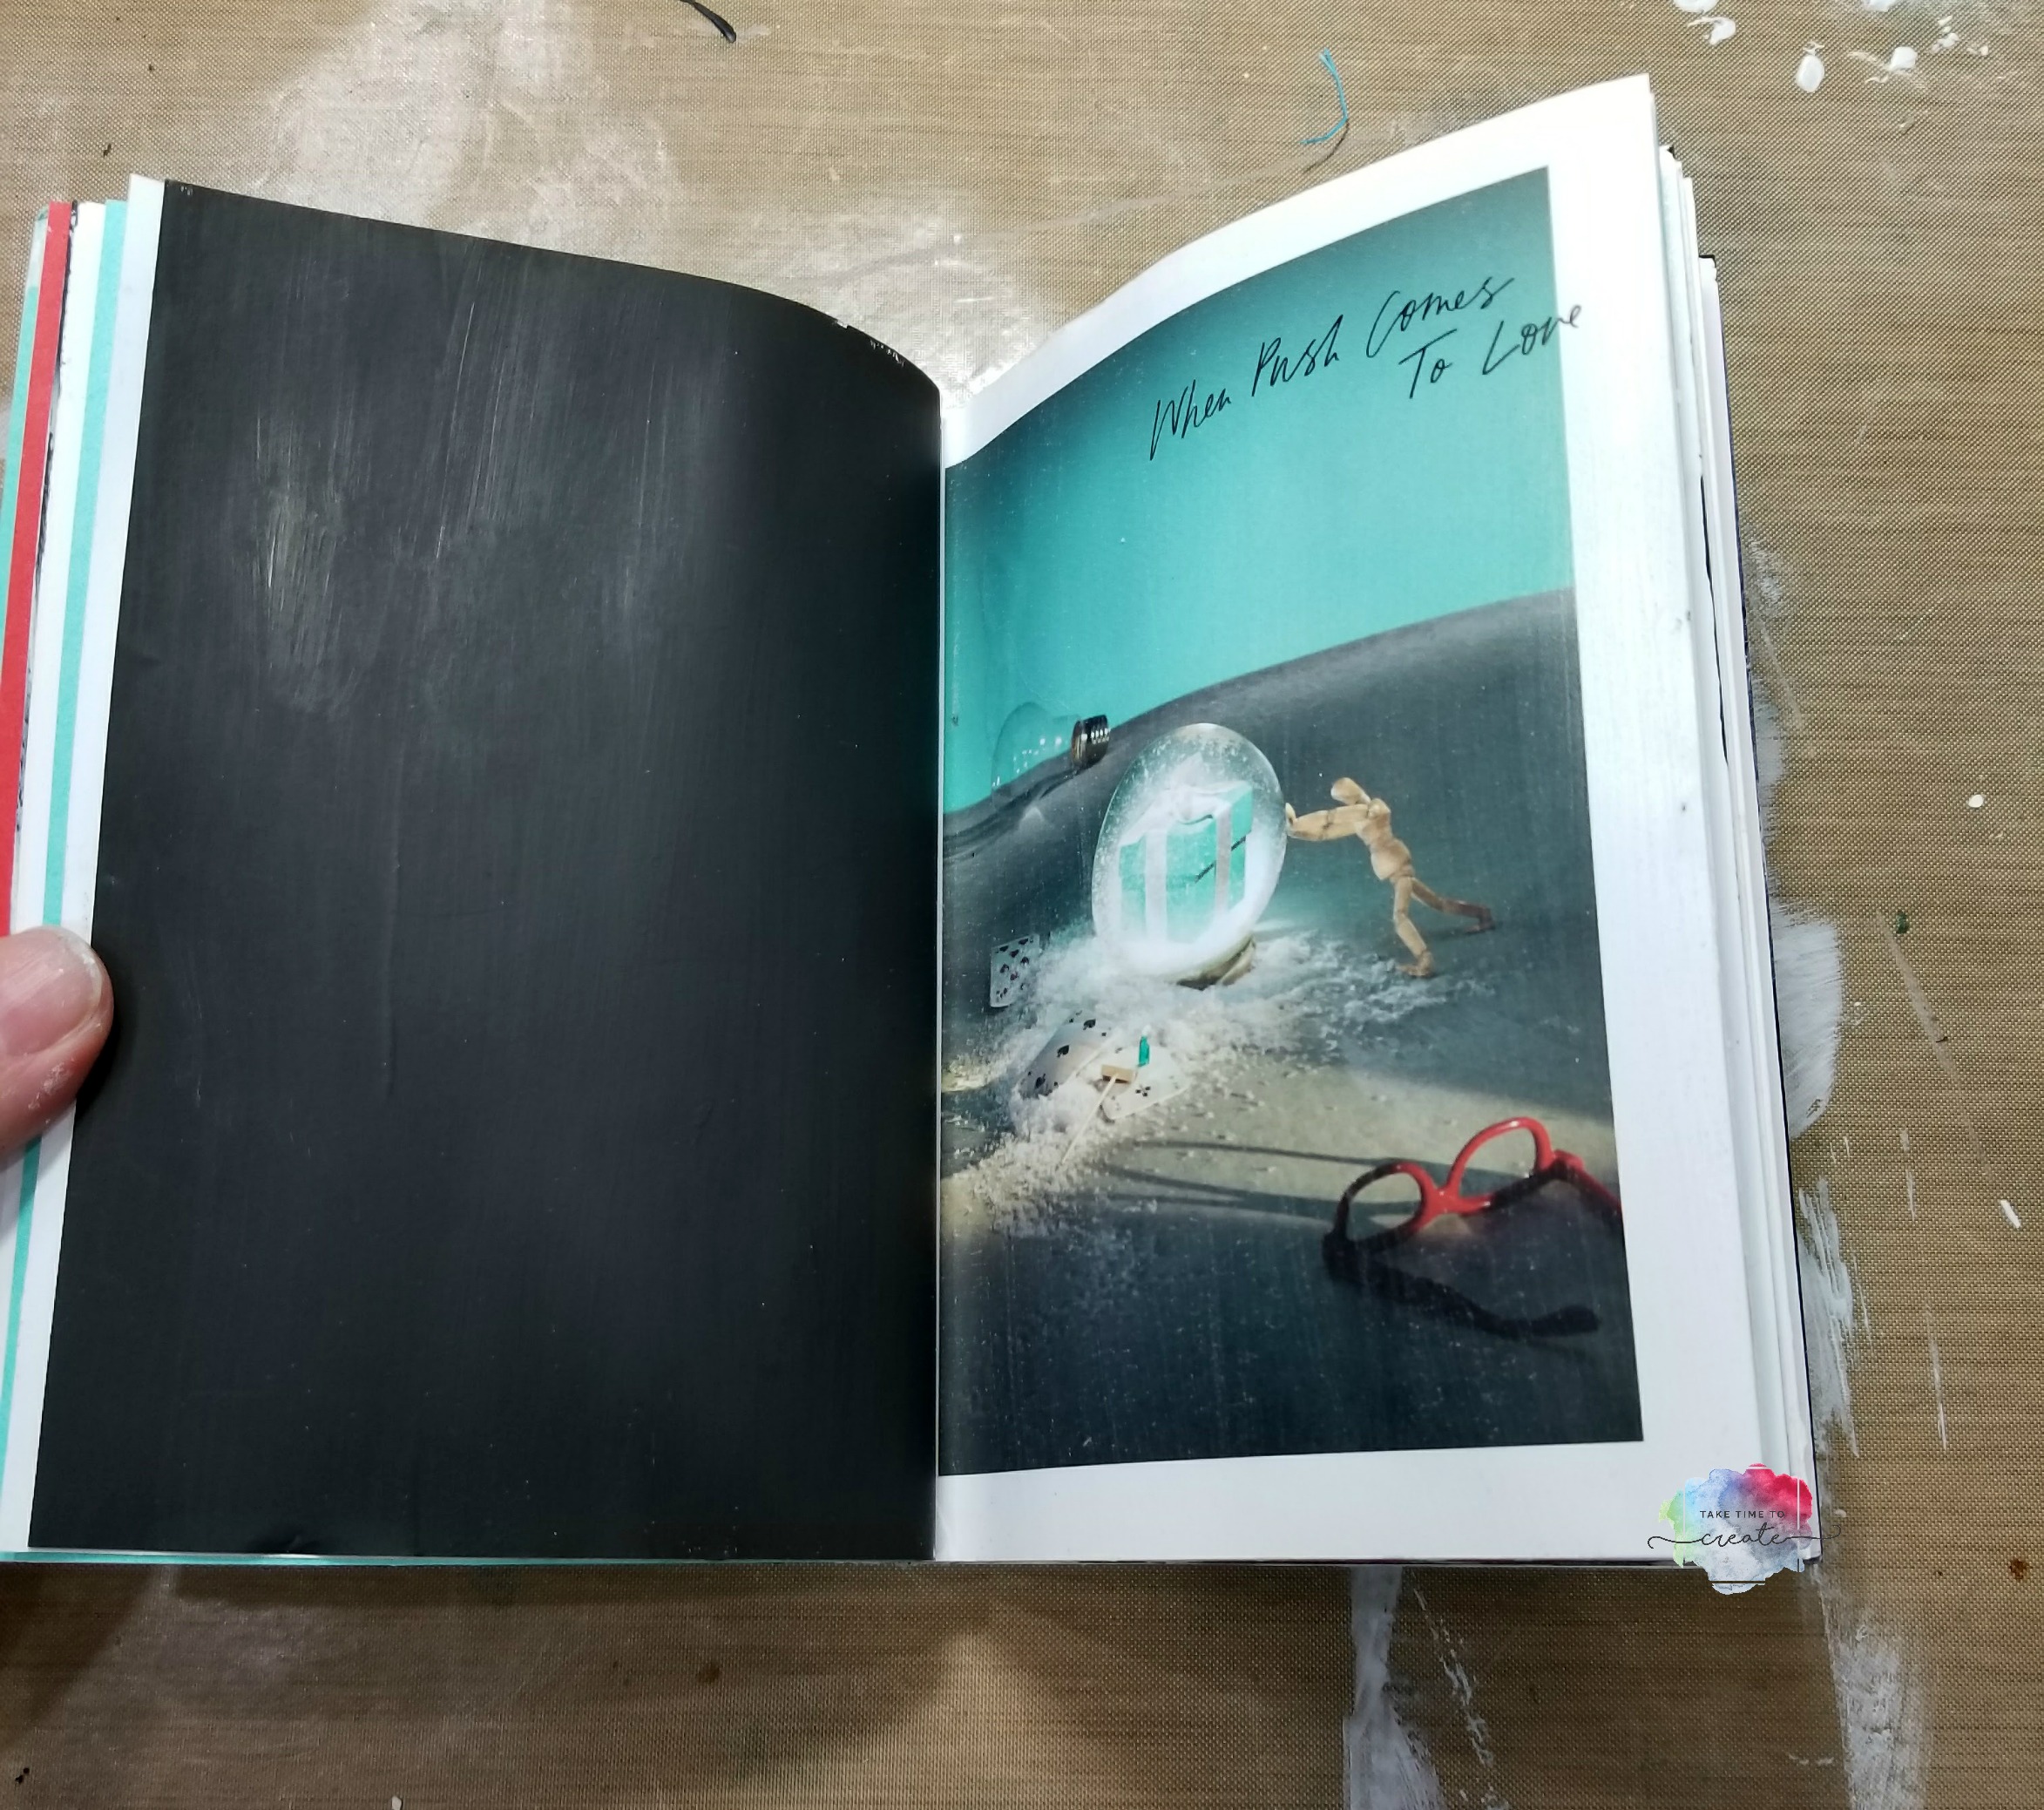
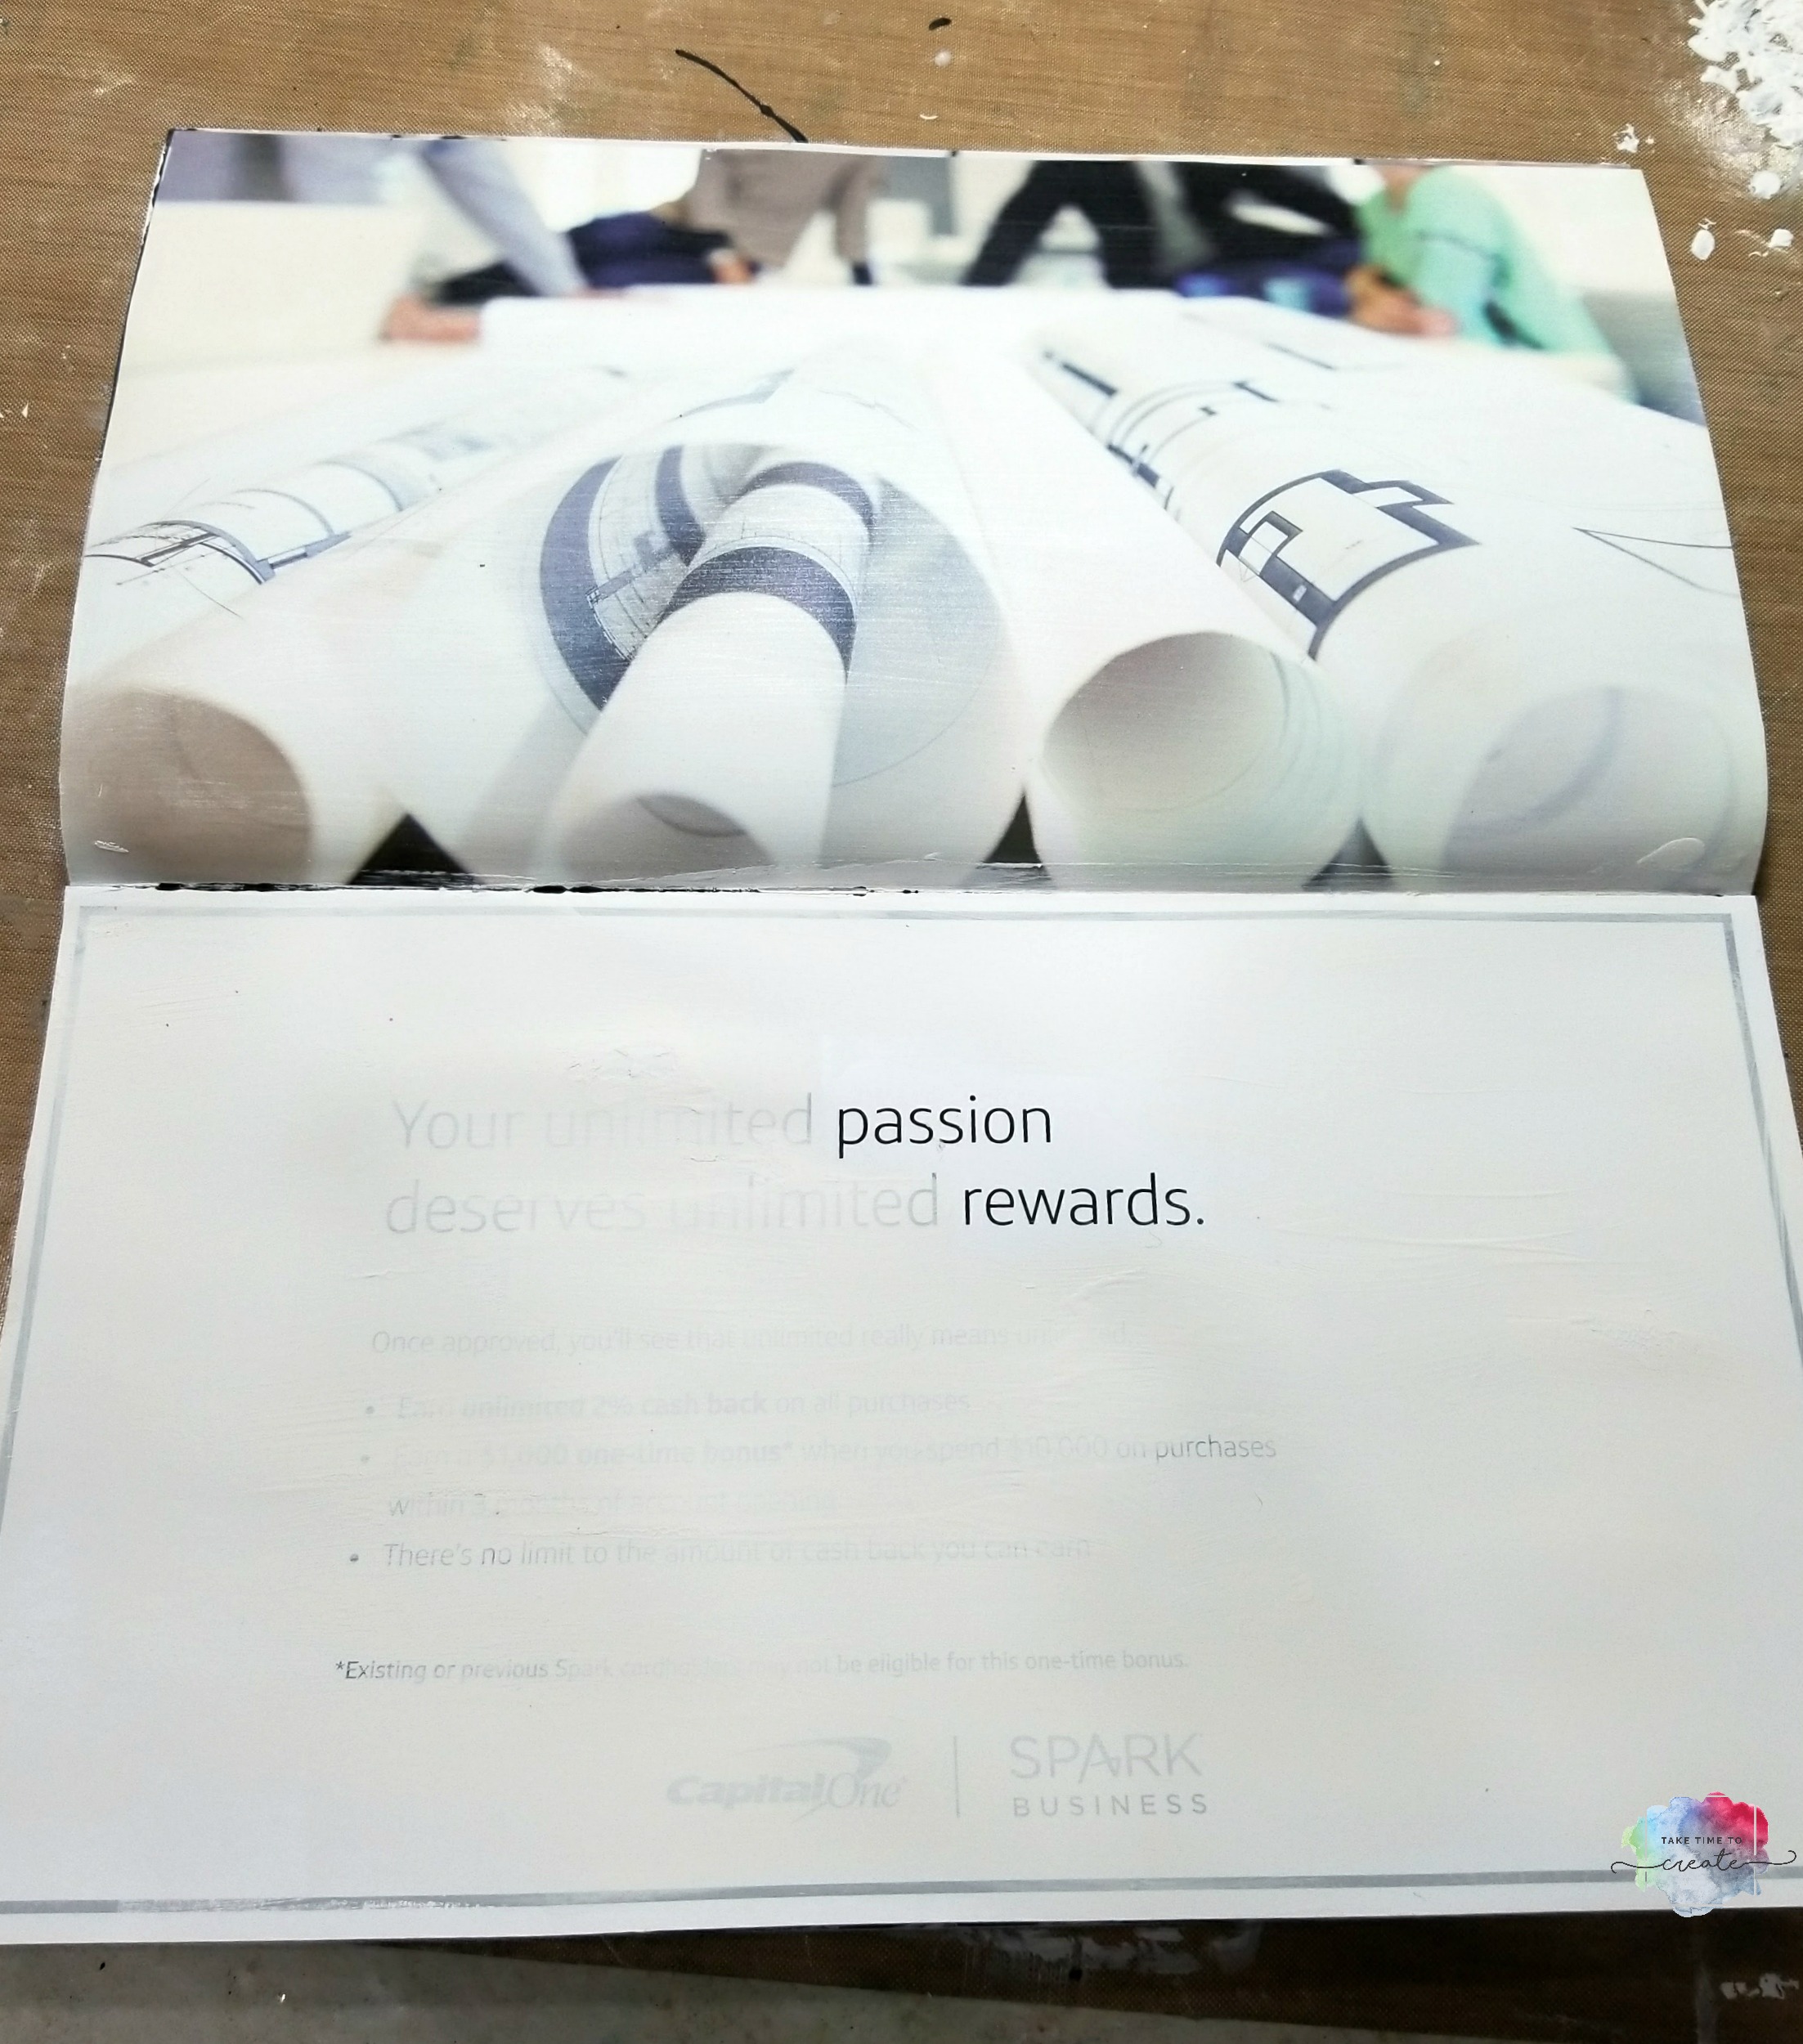
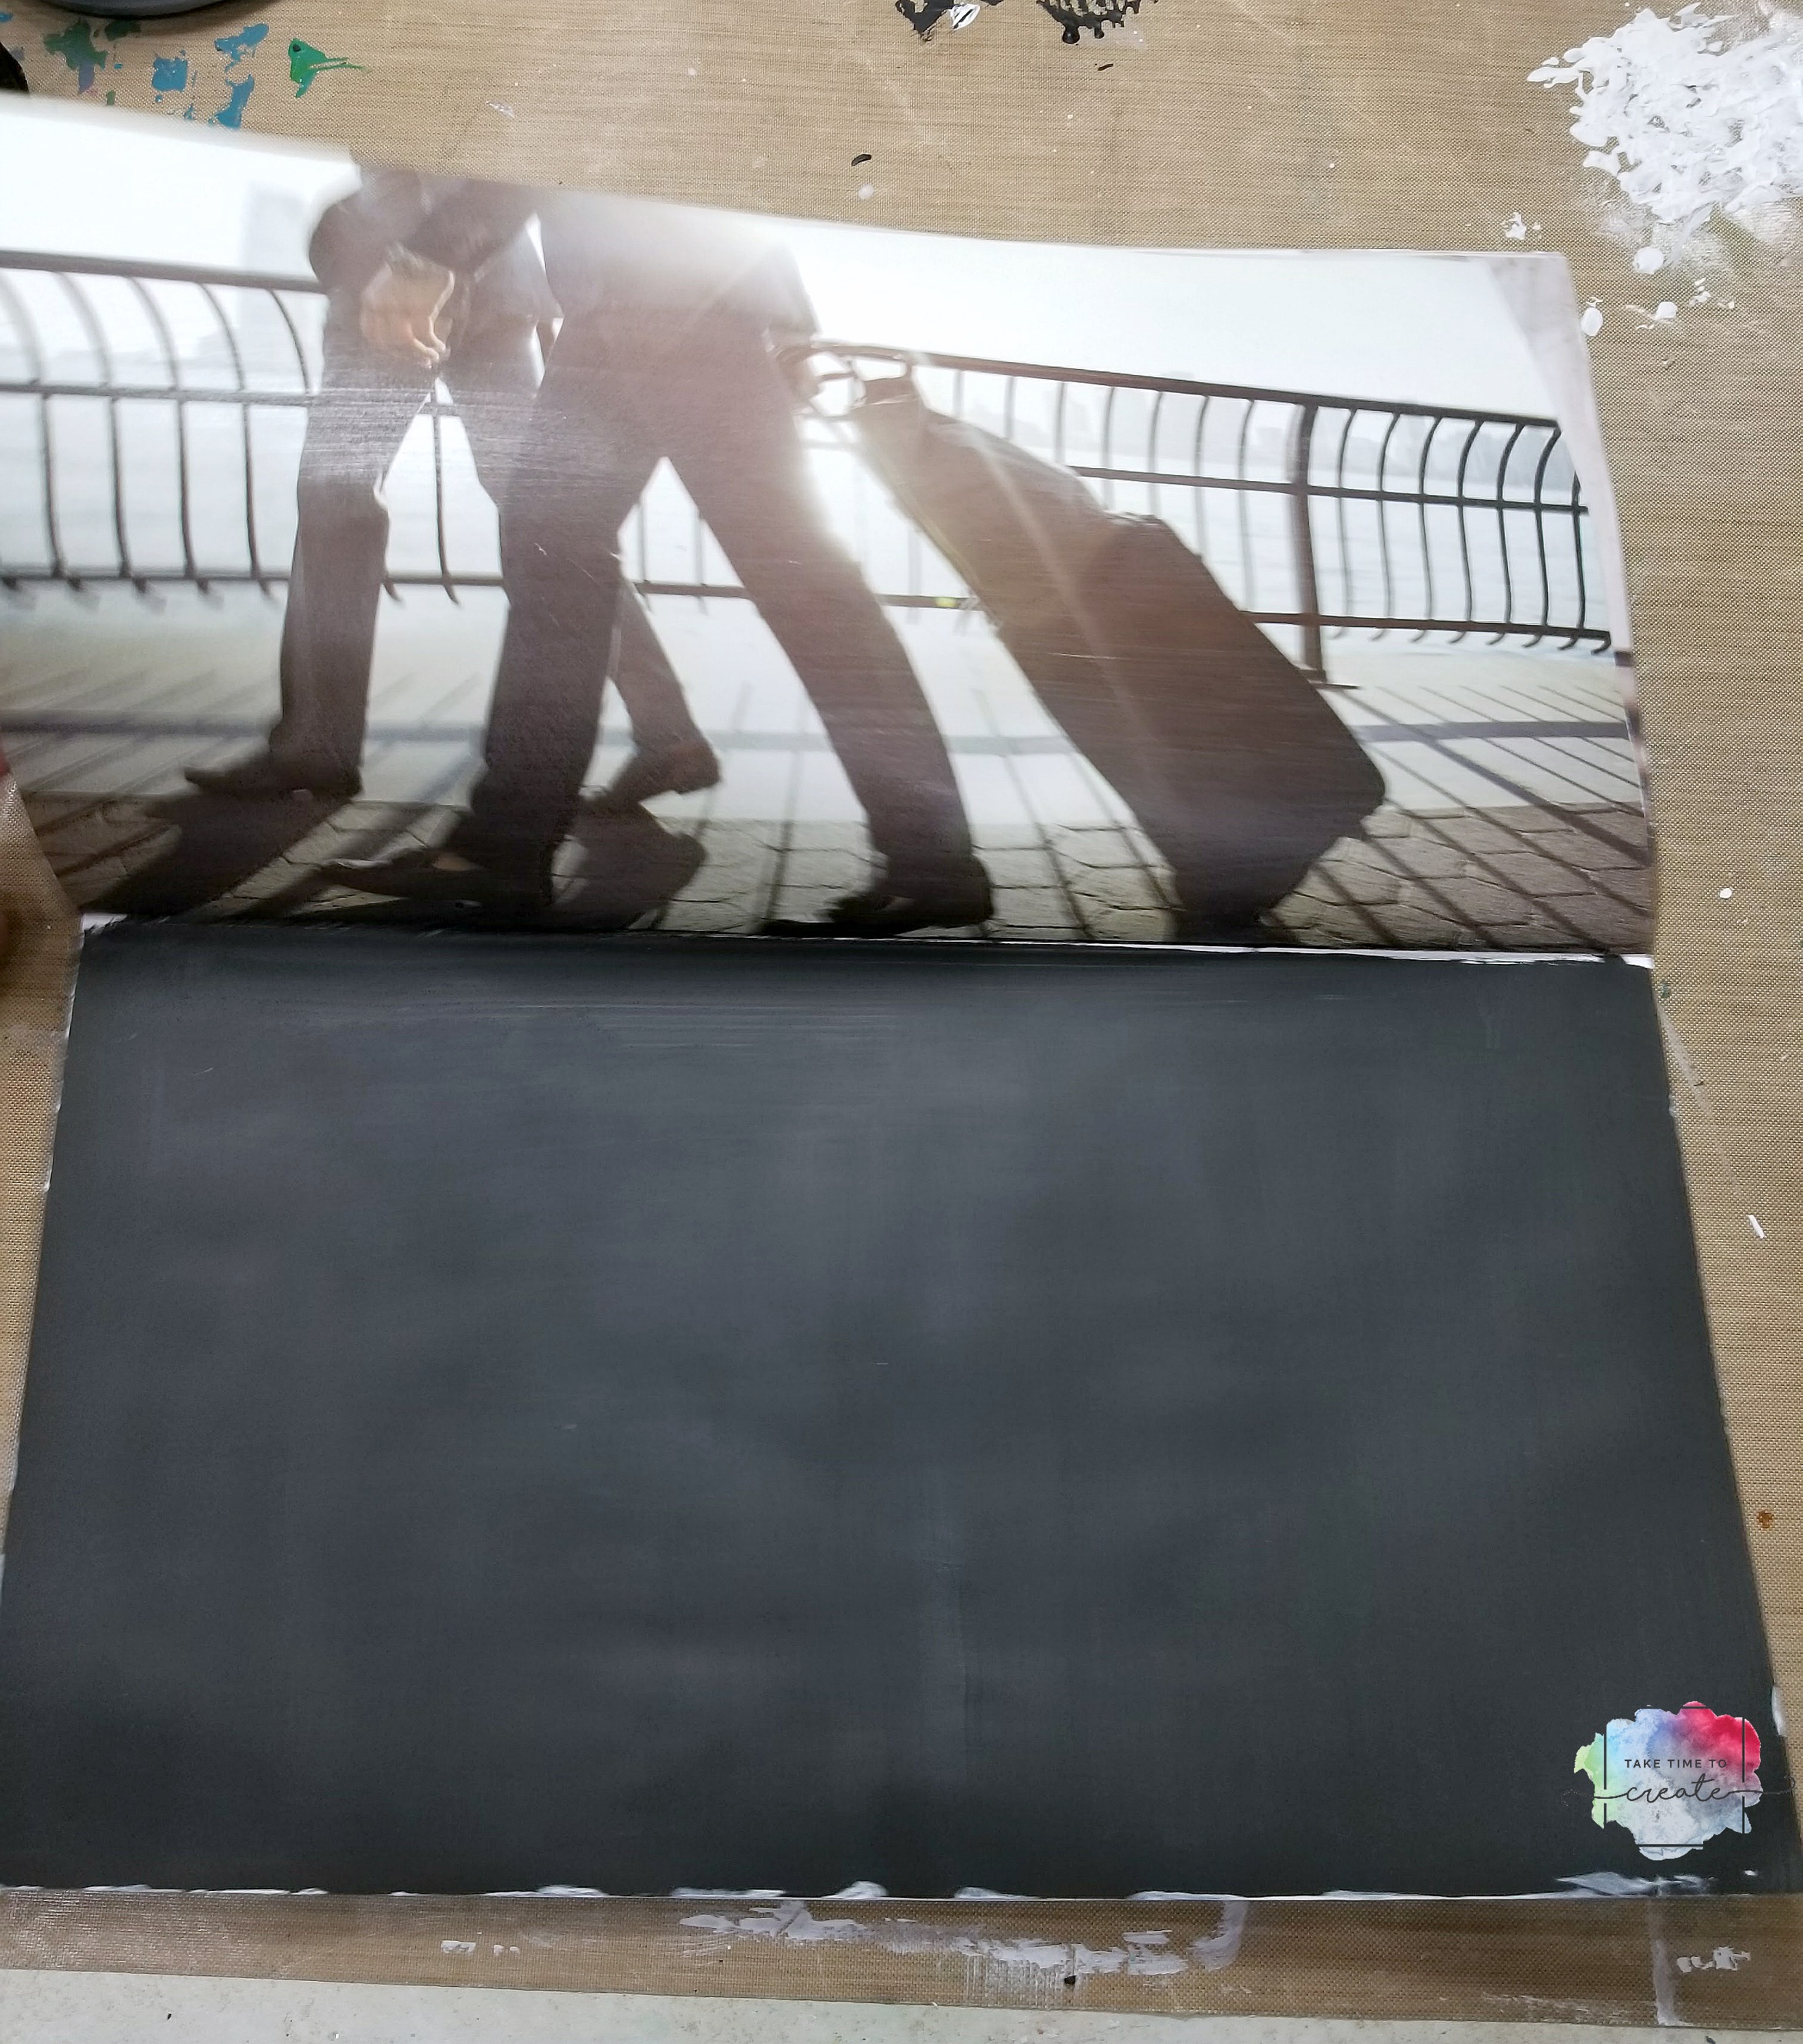
Once you decided on what you want to alter grab some gesso. I used white, black and clear. The black is fun so I can use some light colors, it breaks up the book. I also added clear gesso over some of the images, that way I keep the image but the page is prepped to take all sorts of mediums.

art journal from junk mail

The cover of the Tiffany book is so pretty and festive! This will be my holiday 2017 art journal. When looking for junk mail to make into an art journal look for mailers that have slightly thicker paper. If it is too thin then the pages will buckle and it won’t hold up.


art journal from junk mail

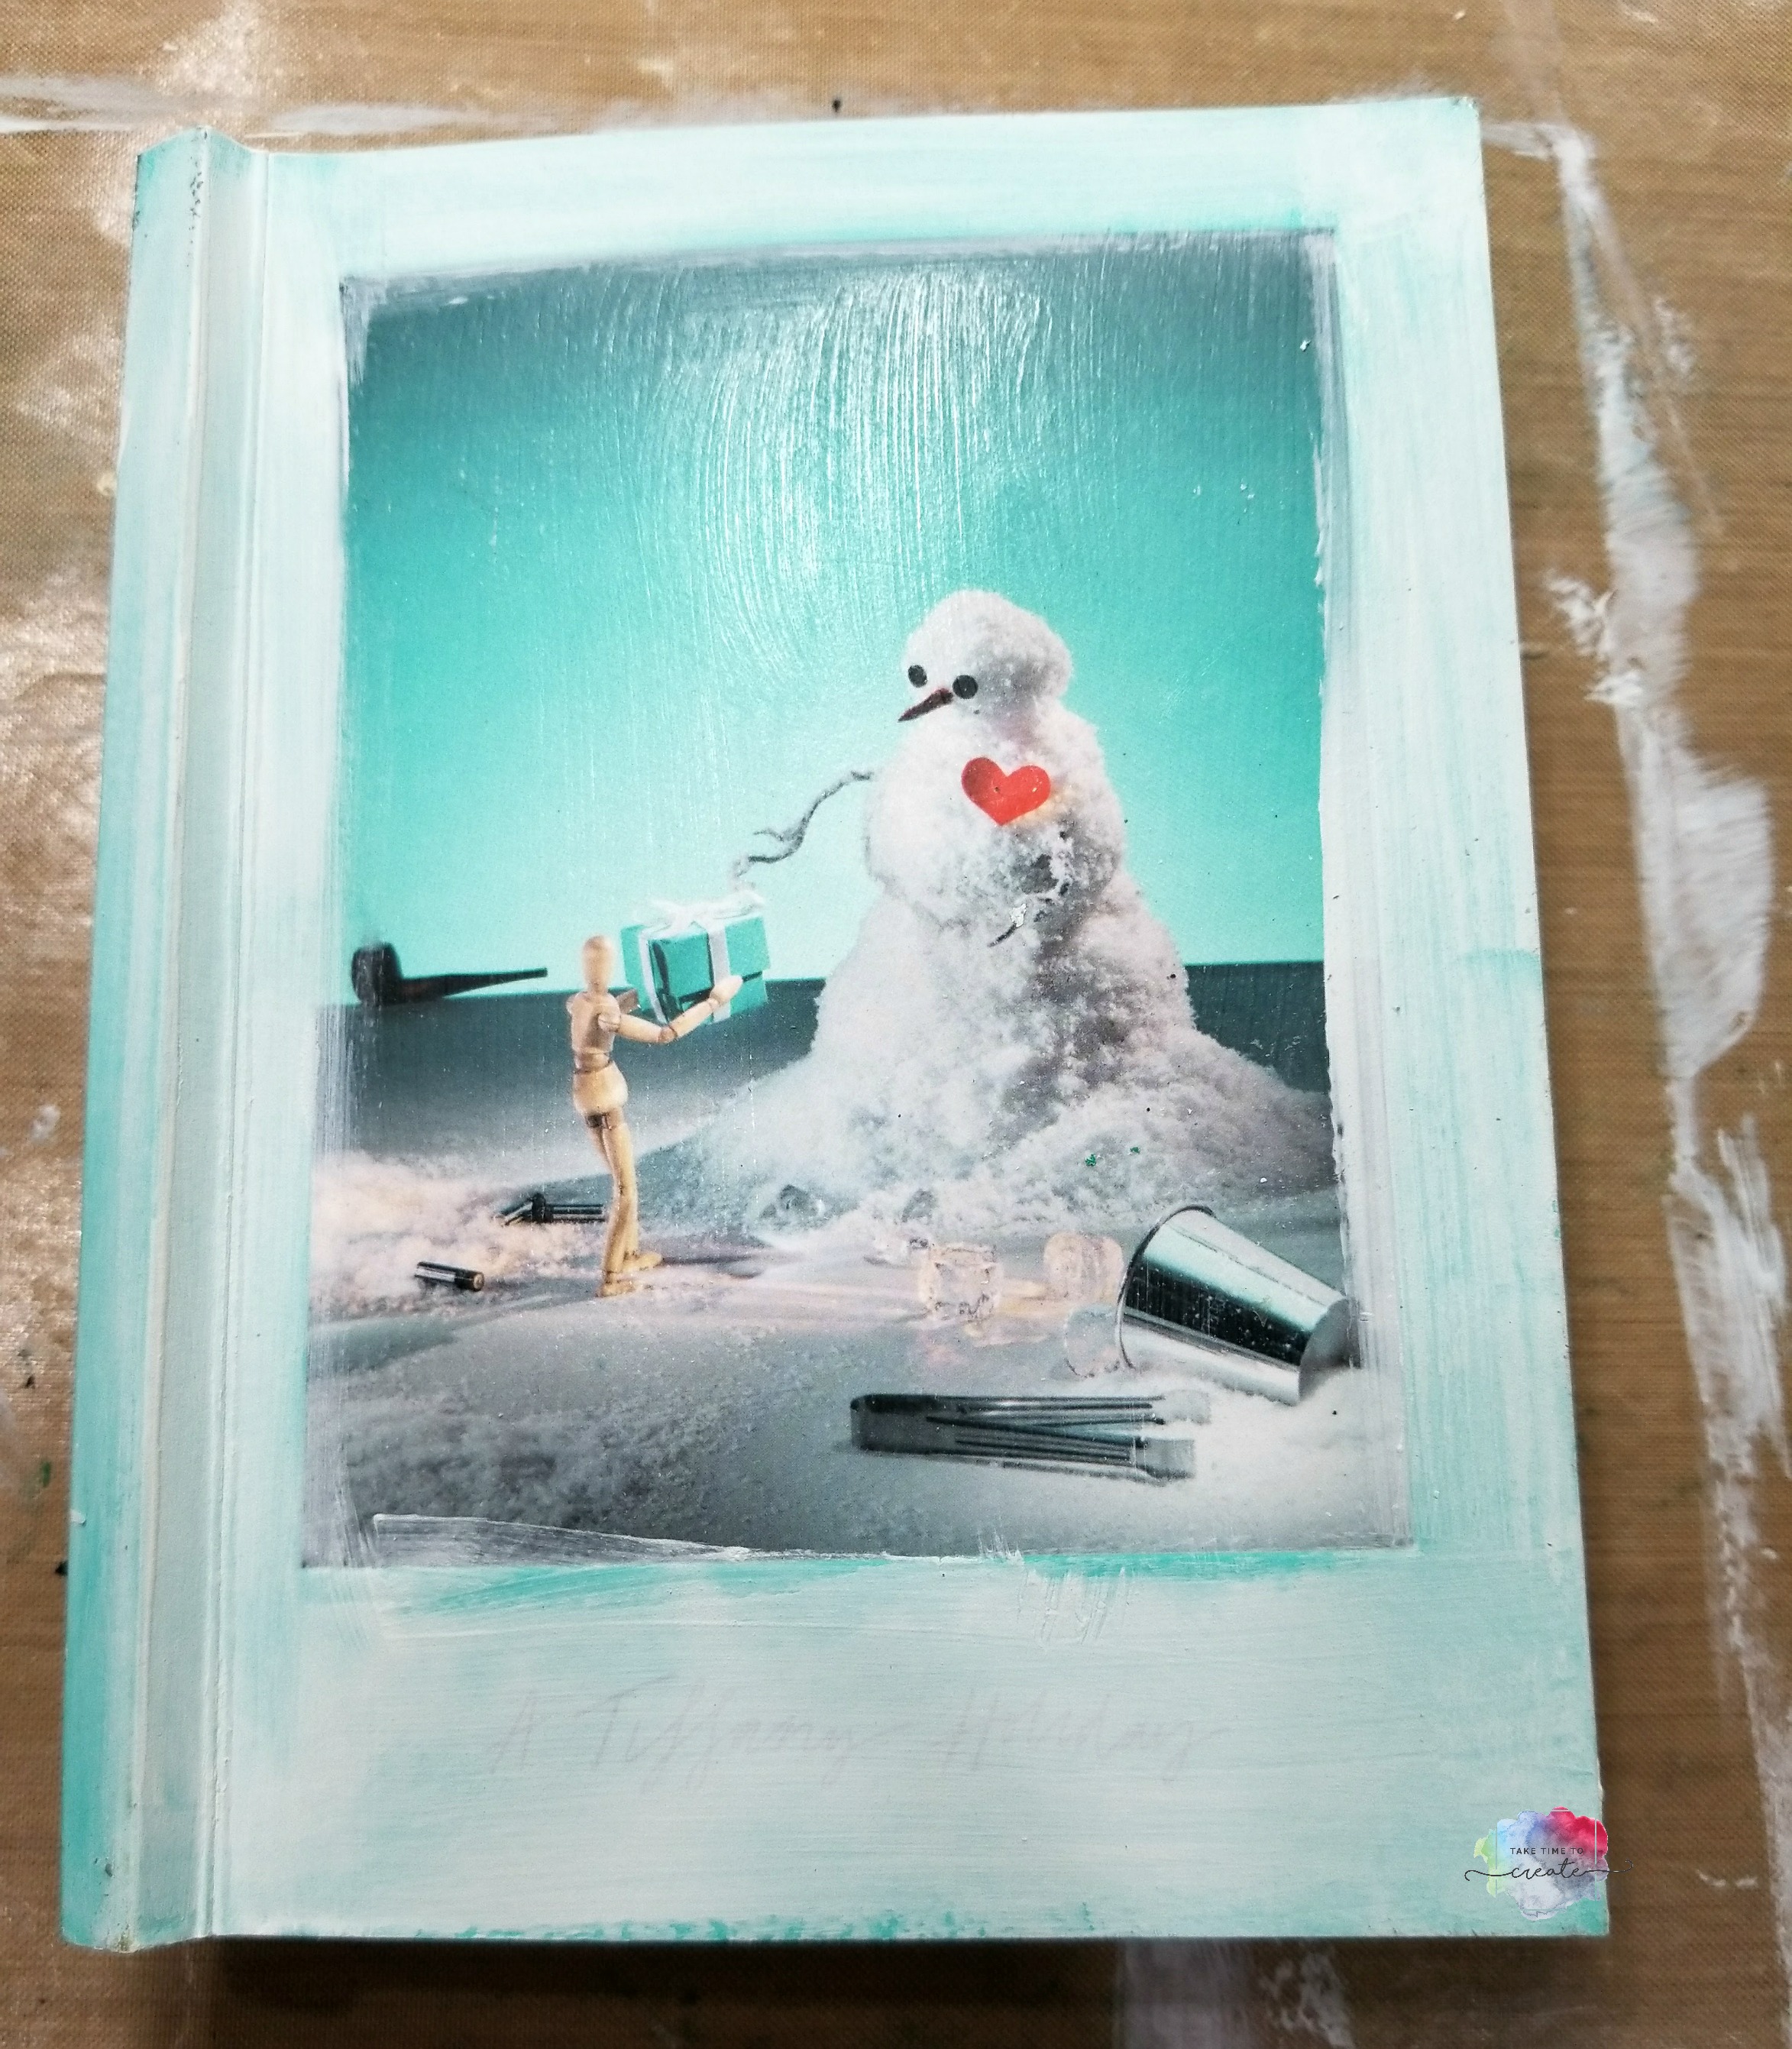
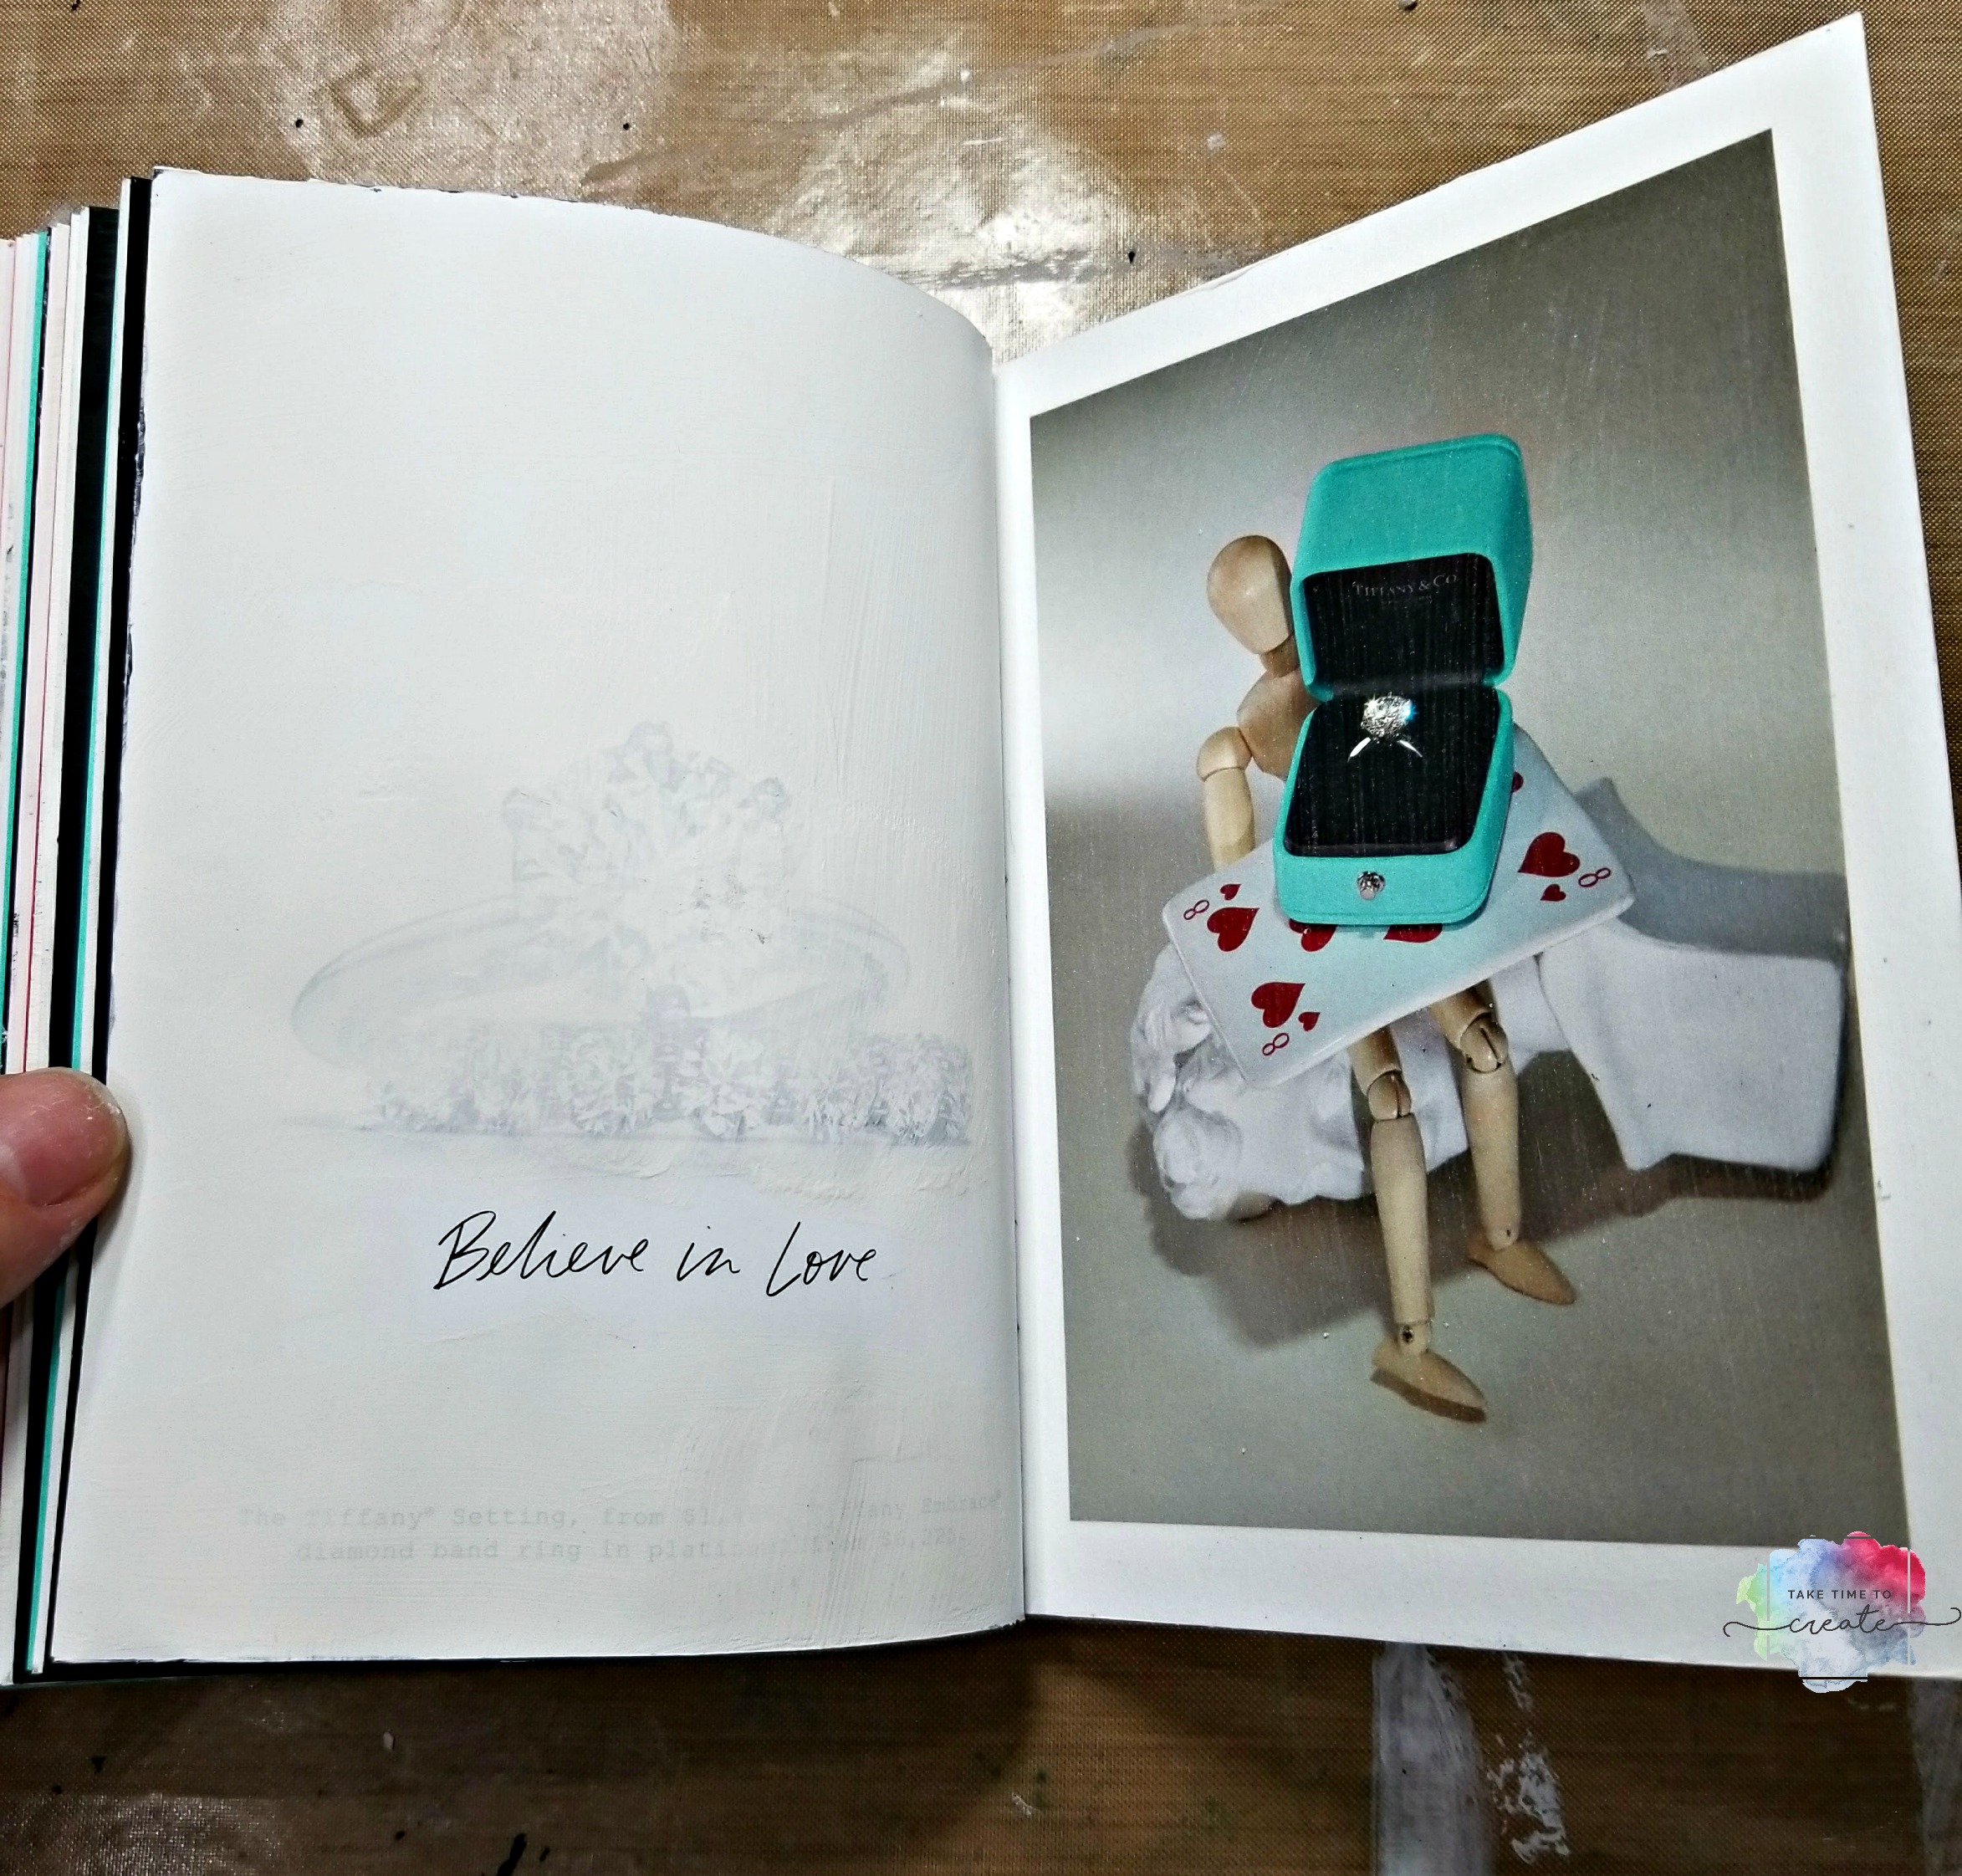
The white gesso didn’t cover all the images completely, but that is ok, I will fill the page with other art and it won’t get in the way. But if you want the image to be completely gone, the add a few layers.

I left some words uncovered, I thought they we fun and it will help me start the page.

art journal from junk mail

art journal from junk mail

The Capital One mailer was a great size and it will be fun to do more landscape journal pages. I kept the images and some words, and it makes for a great starting point.

art journal from junk mail

art journal from junk mail


It was a lot of fun to prep my new art journals. What piece of junk mail do you have that is too beautiful to recycle? And did you just keep it or did you re purpose it?


The post Art Journal from Junk Mail appeared first on Take Time To Create.


Ebay Mystery Box Unboxing

Hello Everyone!

Have you seen the latest You Tube trend of creators doing an Ebay Mystery Unboxing? This was too tempting to resist, so of course I had to try it, lol.

But before I get into the unboxing, I want to tell you about a Giveaway I am doing on Instagram.

I will be giving one lucky person a Tropicals Prima Watercolors set. Head over to my Instagram to enter –instragram.com/taketimetocreate. Give away ends on Nov 12.

Anyway… on to the unboxing. You can check out my reaction video here:

I have to say, this was so much fun to do. If you have seen other Ebay mystery boxes you might know that some You Tubers have gotten junk. Absolute junk! I mean trash and other horrible things. I was very apprehensive in opening my boxes.

But I lucked out! I purchased 2 boxes from Ebay one was $25 the other was $40 and they both promised to have craft and art supplies in the box. You can pick a random box or a themed box, I went with crafting/art themed ones. But buyer beware, these are mystery boxes and you never know what you will get.

When I opened my box I was pleasantly surprised! They were both filled with awesome goodies and I can’t wait to try them out. Whew! I am so glad they were worth it.

Check out a sneak peak of some the awesome goodies I got! So many wonderful things to tryout and experiment with.

ebay mystery box

What do  you think of the Ebay Mystery boxes? Are you going to try it out?

The post Ebay Mystery Box Unboxing appeared first on Take Time To Create.

DIY Dollar Tree Snowflake Christmas Decoration

Hello Everyone!

I was compensated for this post. This post also contains affiliate links and I will be compensated if you make a purchase after clicking on my links.

Christmas is just around the corner and I am getting excited! I love to make my own decorations, the glittery the better, lol.

Dollar Tree is the perfect place to get supplies to make your own decorations, like these Snowflakes I made.

These snowflakes are so easy to make and they look so cute hanging on your wall.

Materials Needed (affiliate links):

Bulk 5-Stem Christmas House Glittered Poinsettia Bushes, 13 in. atcom

from: DollarTree

Instructions: 

Start with your glittery snowflake and add some tulle as a base layer. Or you can add glitter mesh, or ribbon, or lace, anything really. You just want to make sure you have an anchor for your focal point. Glue the tulle on with hot glue.

DIY Dollar Tree Snowflake Decor

Then you want to glue on your focal point to the center of the snowflake

DIY Dollar Tree Snowflake Decor

Then you glue on accents and decoration all around your focal point. Poinsettias, floral picks, beads, jingle bells, and small ornaments work great for this step. Anything will work, you just want to fill up the empty spaces and make it full and festive.

DIY Dollar Tree Snowflake Decor

There you go, nice and easy and they looks so festive and glittery.  A grouping of the snowflakes would look really great on a wall, or it could be the perfect gift!

I thought it would be fun to show you some other variations I created. I just love making these, I can’t seem to stop, lol

DIY Dollar Tree Snowflake Decor

DIY Dollar Tree Snowflake Decor

DIY Dollar Tree Snowflake Decor

What Christmas decorations do you make?

The post DIY Dollar Tree Snowflake Christmas Decoration appeared first on Take Time To Create.

DIY Magic Band and Magic Keeper

Hello Everyone!

As many of you already know I am headed to Disney World soon to participate in the Crochet Crowd’s Wish Upon A Stitch! I am so excited!  So to prep for the trip I have been making new Mickey Ears like this Black Rose one and I just finished a DIY Magic Band and Magic Keeper!

This is the new Magic Band 2- so that means you can pop the middle part out and put it in a Magic Keeper! I love the versatility of the new Magic Bands.

I made a Mulan Inspired Magic Band this time (Last Time I did a Steampunk Beauty and the Beast– here is the link to the Blog Post and Video)

Here is the video tutorial:


Materials (Affiliate Links)

  • Glue Syringe: http://amzn.to/2yeV8Q9
  • wax stick for rhinestone: http://amzn.to/2yWy9qh
  • Sally Hansen Wine Not color: http://amzn.to/2yabiZn

I painted a base coat with nail polish then I painted 3 coats of this beautiful red color and I painted the edges with a copper color. Use nail polish, it seems to work the best with magic bands. The last one I had held up really well and so I am doing the same thing this time.

Just like last time I added a watch face because I wear my magic band on my left hand and I didn’t want it to interfere with my watch.

Once the nail polish was dry I glued (I used E6000) on charms and rhinestones and whatever else I could find. I found a Dragons, Chinese Coins, Rhinestones, flower, and a sword for symbolizing Mulan.

Once the glue was dried I painted a final coat of base coat on the magic band. Let it all dry and you are good to go!

Fair warning-It may not work with all the paint on the magic band… I had no problems last time, but you never know with the new version. I will try it out and let you know how it goes.

DIY Magic Band and Magic Keeper


DIY Magic Band and Magic Keeper

DIY Magic Band and Magic Keeper

DIY Magic Band and Magic Keeper

These Magic Keepers are so cute, but plain black. I just have to paint everything, and I think it looks so cute now that it is done!

I painted a layer of clear gesso to prime the plastic to prep it for water marbling. For water marbling I just had a bin of water and then I placed drops of nail polish and swirled them around. Once I was happy with my marbling I dipped my Magic Keeper in the water and it turned out so cute!

Once it was dry I added some holographic nail polish on top to add some sparkle, you can never have too much sparkle.  Once it is all dry I added a layer of base coat on the top to seal it, now it is good to go for my week at Disney!


DIY Magic Band and Magic Keeper

DIY Magic Band and Magic Keeper

Have you ever decorated a Magic Band? How did you decorate it?

The post DIY Magic Band and Magic Keeper appeared first on Take Time To Create.

DIY Halloween Floral Mickey Mouse Ears

Hello Everyone!

DIY Halloween Floral Mickey Mouse Ears! What more do you need for a trip to Disney World?

As many of you already know, I love Disney! It is my happy place and I love being able to go. In Oct I will be crocheting with the Crochet Crowd at Disney World! I am so excited!

As I get ready for this awesome adventure I decided I needed new Mickey Mouse ears! I like to make a pair for each day I am there, so get ready to see more ears, lol.

This first pair uses black eyeball roses from the dollar store. They are so cute and since I will be there during Halloween,  these ears will be perfect!

DIY Halloween Mickey Mouse Ears

This is a pretty easy project, which is great because I will need to make a few, lol

Materials:

  • Headband (I found a pack on eBay)
  • Thick foam
  • Felt
  • Hot Glue
  • Roses
  • Combs
  • Ribbon
  • Mickey Ear Template (I found mine here: Template)

Instructions:

Cut out your template, save it when you are done in case you want to make more ears

DIY Halloween Mickey Mouse Ears

Cut some felt in the shape of your ear template.

DIY Halloween Mickey Mouse Ears

To help thicken up your ears add some thick foam to the center of your ears. The flowers need a little help stabilizing.

DIY Halloween Mickey Mouse Ears

Hot glue your foam and felt to your headband. Be mindful of the placement, you don’t want your ears too close together and not too far apart. Then I added ribbon along the edge to cover up the foam.

Now it time for the fun part, hot glue your roses on to your ears. I used 6 bundles of roses from the dollar store. (4 were ones with eyeballs and 2 were just plain black roses) Go to town filling you ears with roses. I do the front and backs when I make ears, I think they turn out nicer that way. Add spiders and any other spooky element you want.

I did add some hair combs to the headband to help keep it on my head. They are not heavy, but the combs help them stay on your head.

Now you are ready to rock your new ears! This is a big, bold look that will be perfect for Disney!


DIY Halloween Mickey Mouse Ears

The post DIY Halloween Floral Mickey Mouse Ears appeared first on Take Time To Create.

Sunflower Mixed Media Canvas

Hello Everyone!

Fall is in the air and I am just loving it! I especially love seeing all the sunflowers, they are my favorite flowers! They are so pretty, and bright. Seeing all the sunflowers I was inspired to make a Sunflower Mixed Media Canvas.

Sunflower Mixed Media

Let me tell you how I made this canvas!

First I started with a canvas board and covered it with different ribbons (I adhered it with modeling paste), then I covered it all with black gesso.

Sunflower Mixed Media

I painted the canvas with a few different shades of blue acrylic paint.  I loved how it looks like a sky, but it was a little bright,  I did end up toning it down by the time I was finished.

Sunflower Mixed Media

Now it is time to add all the goodies!! I had this pack of rusty nails that I found in my Grandpa’s shop, I couldn’t pass up this great texture. (be careful if you are using rusty nails, I wore gloves and washed my hands often)

I added book pages, burlap, other metal items, flowers, hinges, clear round dots, keys, brads, hot glue, and anything else I could find. Just use what you have in your stash and around the house. I  adhered it all with modeling paste (I tinted the paste with some brown acrylic paint).

Sunflower Mixed Media

Once everything was all dry I primed the elements with clear gesso then I sprinkled mica powder on (yellow in the flowers, green in the grass and stems, and blue in the sky) I added water to activate it and I loved the look. Once that was all dry I dry brushed acrylic paint all over to add more color and details.

I am in love with how it turned out! I used such a random assortment of products, I will list them all below for you. As always, let me know if you have and questions on this project.

Sunflower Mixed Media

Sunflower Mixed Media

Sunflower Mixed Media


Materials used: (affiliate links)

The post Sunflower Mixed Media Canvas Appeared first on Take Time To Create.

Hot Air Balloon Art Journal Page

Hello Everyone!

Lately I have been getting back to my Art Journal and I have been in love! It is so great to get back to painting and creating without worrying about selling it (I have been doing a lot of craft fairs lately).

If you follow me on You Tube you probably have already seen my time lapse video of my journal page, but in case you didn’t here is the video:

I used a lot of material that I had on hand, which is fun to use what I have.

Materials: (affiliate links)

Instructions:

I started with my Dylusions Creative Journal from Ranger. I love this journal it is big and the paper is thick and doesn’t warp when I add a lot of paint and mediums on it.

I painted light blue all over and while it was still wet I painted dark blue on then layered the champagne color on top. I didn’t blend it all together, but kept the colors a little separate with a little blending.


Hot Air Balloon Art journal page

Completly dry that layer before going on to the next step. The back ground was nice but it needed more texture, so I stenciled in some circles using the dark blue and a teal color.

Once that was dry I stamped swirls on top with archival in . They don’t have to be perfect, in fact I think it all looks better when things are not exactly perfect.

Hot Air Balloon Art journal page

While that is all drying I cut out some hot air balloons I found in a magazine and adhered them down with matt medium.

The journal page was starting to look better but it needed a little bling, so I added some resin dots I found at the dollar store and I added some great quotes from Tim Holtz Big Chat stickers. (I love these stickers!)

Hot Air Balloon Art journal page

Then I splashed white acrylic paint on the page and then went around the edges of the balloons with a black gelato.

For the final touch I outlined major elements with a white gel pen.

Hot Air Balloon Art journal page

Art Journal pages are so much fun!

What is  your favorite journal to work in?

The post Hot Air Balloon Art Journal Page appeared first on Take Time To Create.


DIY Watermelon Bag

Hello everyone!

This post contains affiliate links

One of my favorite summer treats is watermelon! I am convinced that it is the perfect food, sweet, juicy, messy, and pink, lol.

So I decided to make my very own watermelon bag to wear and show the world my love of watermelons.

diy watermelon bag

Materials:

  • Bag- I got mine from Sammy dress about a year ago, but here is a similar one on Amazon: Bag
  • Paint- I used Folk art acrylic paint, but any acrylic paint should do the trick: Paint
  • Paint pen- for drawing the seeds: paint pen


Instructions:

Here is the bag before any painting. It is a good bag and just fine the way it is, but I was determined to have a watermelon bag, lol.

diy watermelon bag

I found these 3 great colors from Folk Art in Pink Melon, Citrus Green and Classic Green. I thought they were the perfect watermelon color!diy watermelon bag

but before you start to paint measure your bag. You to make sure that you have about 2/3 of be bag in pink and the rest in green. But this is just a guess, use your eye to make a good judgement as to how much of each color.

diy watermelon bag

Then start painting. I started with the pink then went on to the greens. I painted in broad strokes and left the strokes in each of the colors as I painted. I didn’t want it too blended, I was going for a casual vibe. You can always blend more if that is  your style.

diy watermelon bag

You can leave it with out the seeds, but I thought the bag needed them. I just painted them on using a paint pen.

diy watermelon bag

I am loving how it turned out! What fruit bags are you going to make this summer?

diy watermelon bag


The post DIY Watermelon Bag appeared first on Take Time To Create.


DIY- Restoration Hardware Inspired Box

Hello Everyone!

This post contains affiliate links.

Today I have another Restoration Hardware Inspired project!

As many of you know, I love RH, they have amazing home decor items! I did a chandelier inspired project a few years ago, you can find that here: Chandelier


I found these beautiful metallic boxes on the RH website. I love the wood and the beautiful gem on top. But the price is a little out of my reach right now.

But it is easy to make one! My is not exactly the same… but that is all part of the fun in doing an inspired project.

Materials:

  • Box. I used a wooden cigar box, but any wooden box will do. The cardboard cigar box probably won’t work as well, but if that is all you have then just paint the printing with white paint first then it should work ok.
  • Metallic paint. I used the Folk Art paint I had in my stash, but use what you have
  • Gem. I had this giant plastic gem that worked great. Of course I got my box and gem from Who Gives A Scrap, lol.
  • Glue. Use a glue that will work on wood and plastic, I used Loctite glue.

Instructions: 

Pick your color and paint 2 coats on the box. I used a gold and a copper paint that looked really cool. If you want to make it look more like the RH box you can sand it first and use a wood filler it you want to cover up the writing.  I wanted the rustic finish with the metallic and gems, a little contrast that I like.

RH Inspired Box

Once the outside and inside are completely dry then glue your gem on with your glue. I liked the gem on the top, but you can place it anywhere that looks good.

RH Inspired Box

Once the glue has dried overnight you can add a spray sealer if you want. I wanted to protect the paint so I did add a gloss spray sealer.

RH Inspired Box

And there you have it, a RH inspired box. So very cute and it is great to give as a gift, or put the gift inside and use it as the wrapping.

RH Inspired Box


RH Inspired Box


RH Inspired Box

What companies inspire your DIY projects?

The post DIY- Restoration Hardware Inspired Box appeared first on Take Time To Create.

DIY Cactus Outdoor Mat

Hello Everyone!

This post contains affiliate links

I am loving summer! The long, hot days, endless sunshine. We have been spending a lot of time on our back porch, and I noticed that we needed a new outdoor mat in front of our door.

So I gathered some materials and created this DIY cactus outdoor mat.

Here is the video tutorial:

Materials:

Instructions:

The first thing you do is grab an outdoor mat ( I found mine at the dollar store) and some rocks (Dollar store, lol) and start arranging them. I made some rough cactus shapes to start.

DIY Cactus Outdoor Mat

Once I had a good idea what it would look like I started painting the cactuses. I used acrylic paint (Artists Loft) and painted the cactus green and the pot brown.

For the pink flowers I painted some swirl details with a paint pen.

To glue the rocks to the mat I used Liquid Nails.

But before the gluing happened I arranged all the rocks on the mat. I used black stones to around the cactuses to outline them and to give them definition and interest. This part does take a while to fit it all in, but it looks so cool when it is done.

I ended up using about 10 bags of rocks, this is because I was mostly looking for particular shapes to fit in certain areas. I do have left overs for my next project.

I let it dry overnight then I took it outside and spayed a couple of coats of spay sealer on the mat.

DIY Cactus Outdoor Mat

I am loving how it turned out! So cute and the perfect detail for my backyard!

DIY Cactus Outdoor Mat

The post DIY Cactus Outdoor Mat appeared first on Take Time To Create.


« Older posts Newer posts »

© 2024 Take Time To Create

Theme by Anders NorenUp ↑

Follow

Get the latest posts delivered to your mailbox:

%d bloggers like this: