Tag: homemade (page 1 of 5)

WDW Park Icons Canvas- Mixed Media

Hello Everyone!

It is no secret how much I love Disney and visiting Disney World is one of my favorite things to do! When I began my journey into fabric mixed media I just knew that I would need to create some canvases that paid homage to Disney World.

So I created these 4 canvases celebrating each of the 4 parks at WDW.

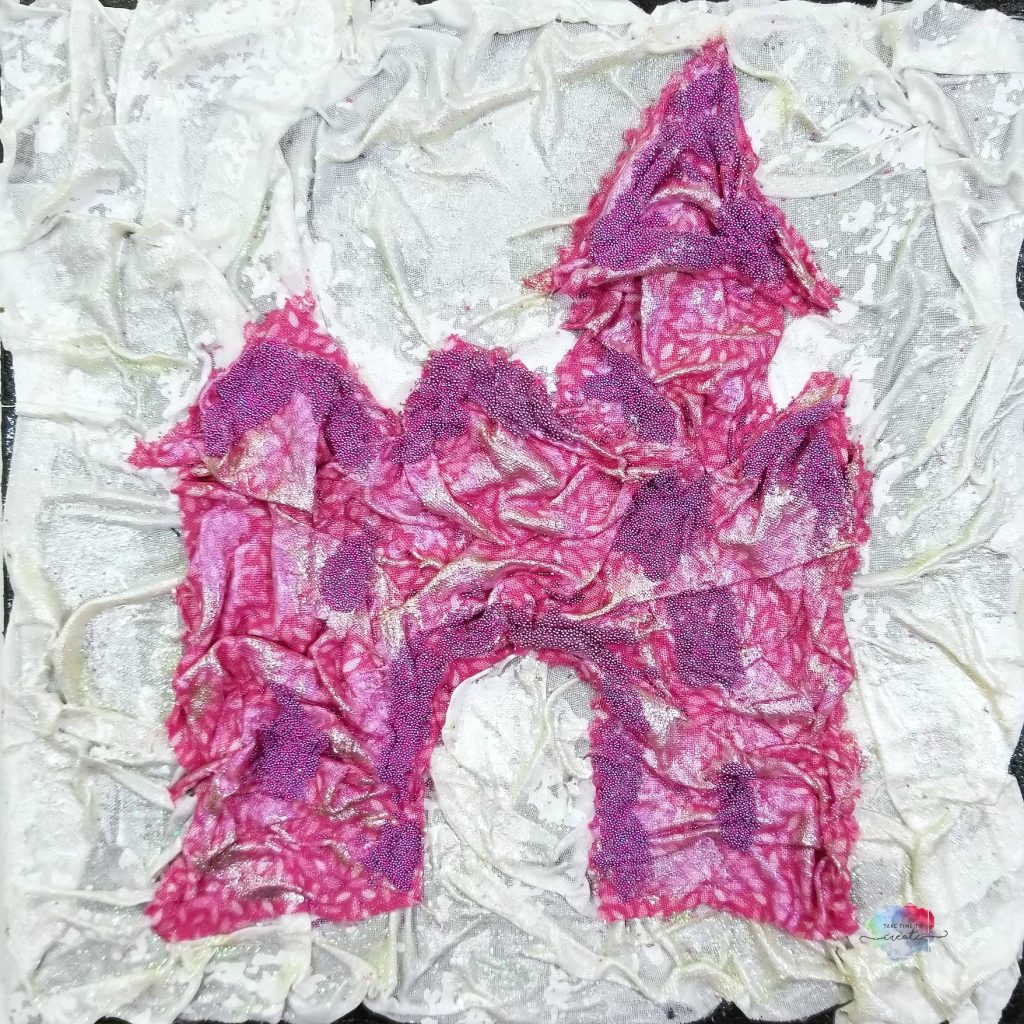
The first is a pretty pink castle, this is for the Magic Kingdom. It is hard to tell in the photo but there is a lot of glitter and shine on the canvas, especially on the white background.

WDW Park Icons

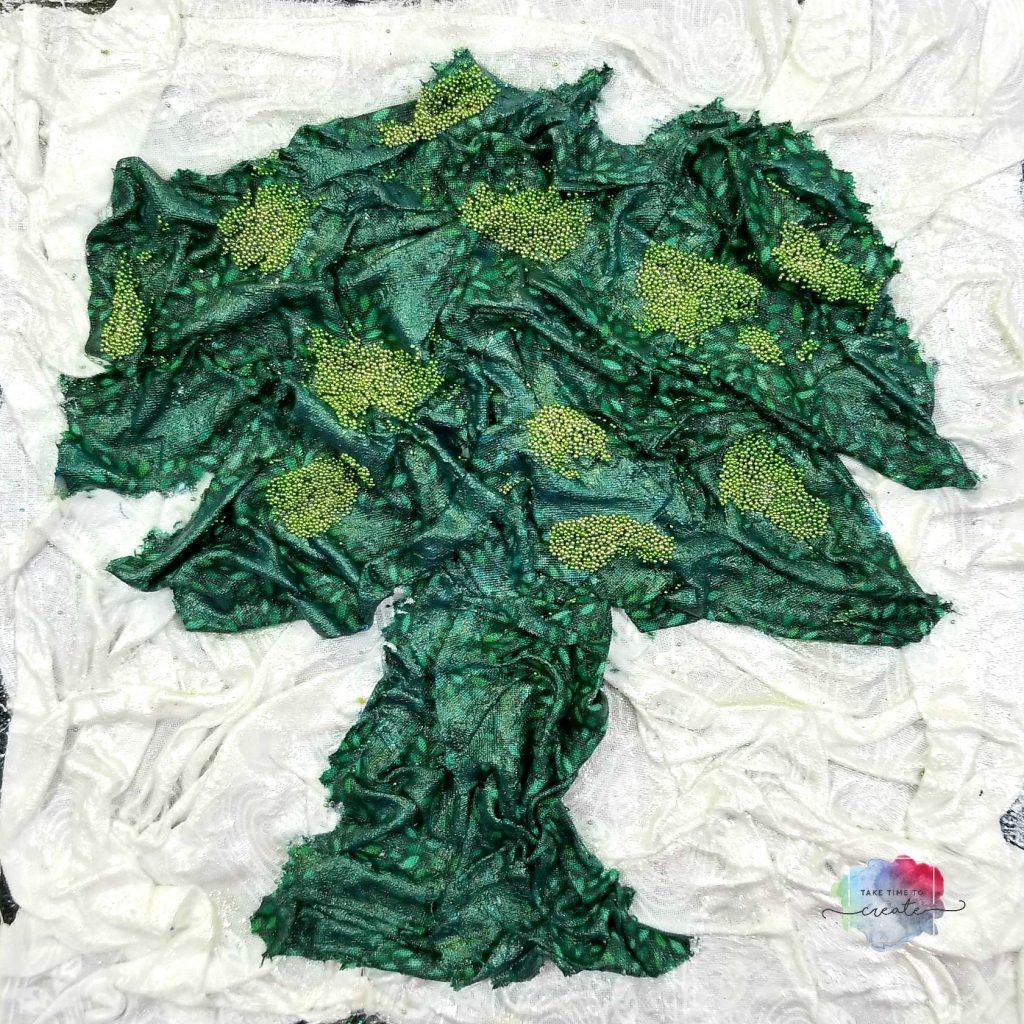
Then there is EPCOT with an image of Spaceship Earth. This is one of my favorite rides, probably because it is slow and relaxing with lots of air conditioning, lol. Perfect break in the middle of a hot day in Florida, lol

WDW Park Icons

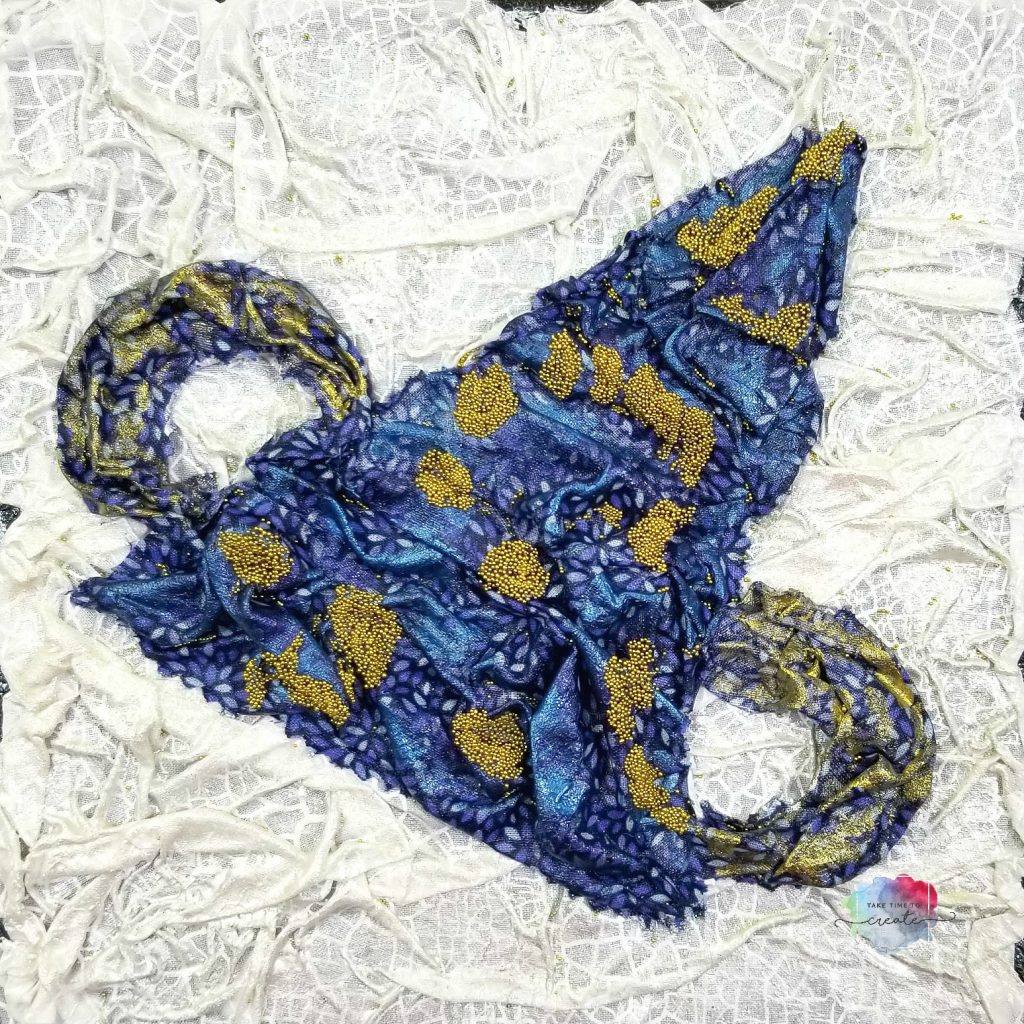
Then we have MGM, no I am sorry Hollywood Studios, lol. I think I will always call it MGM. And I loved the giant sorcerer’s hat that was in the middle of the park for the longest time. I know they removed the hat, but I loved it so much and that reminds me the most of the park, so I thought I would use the hat to depict MGM.


WDW Park Icons

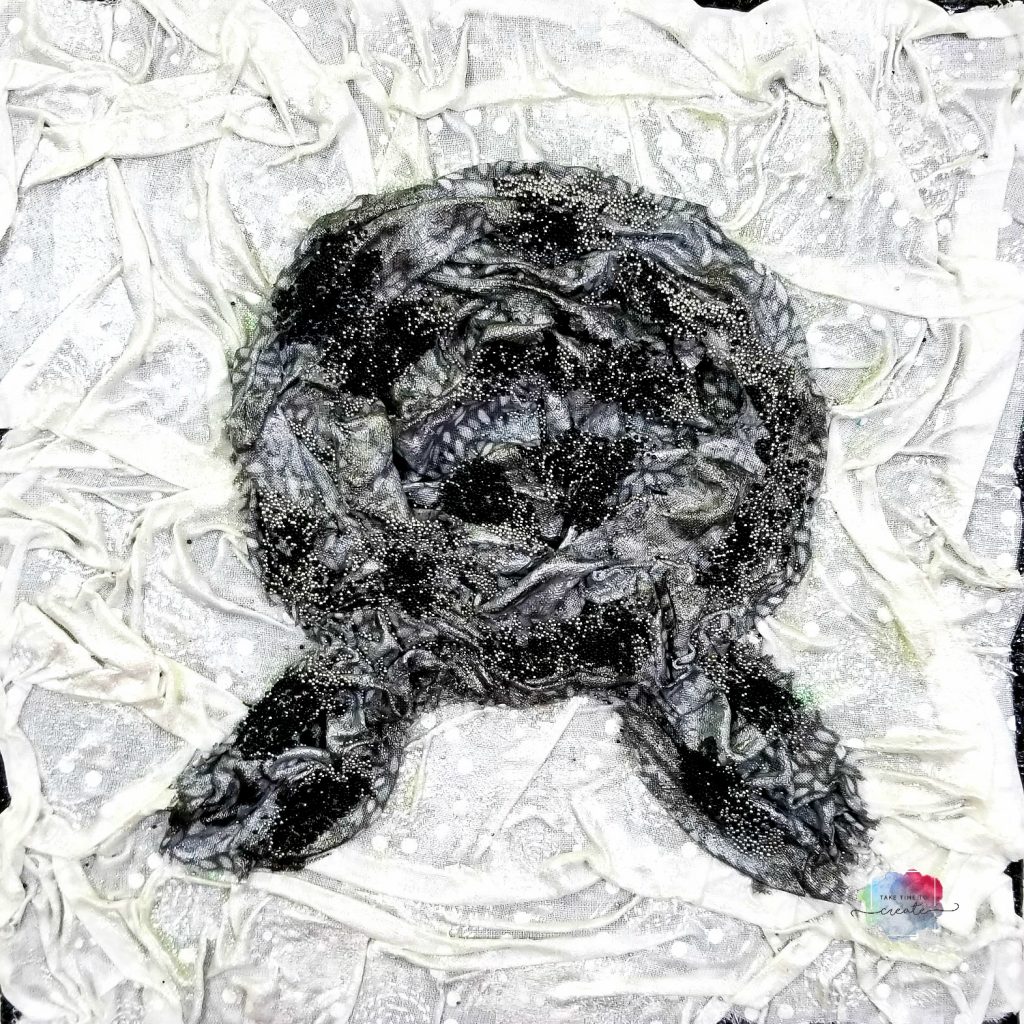
Last but not least is the Animal Kingdom. I love going to this newer park and I have to say the new Avatar section is amazing!

WDW Park Icons


Overall these were so much fun to create and reminisce about going to Disney and I am eager to start my next canvas!


Affiliate Links
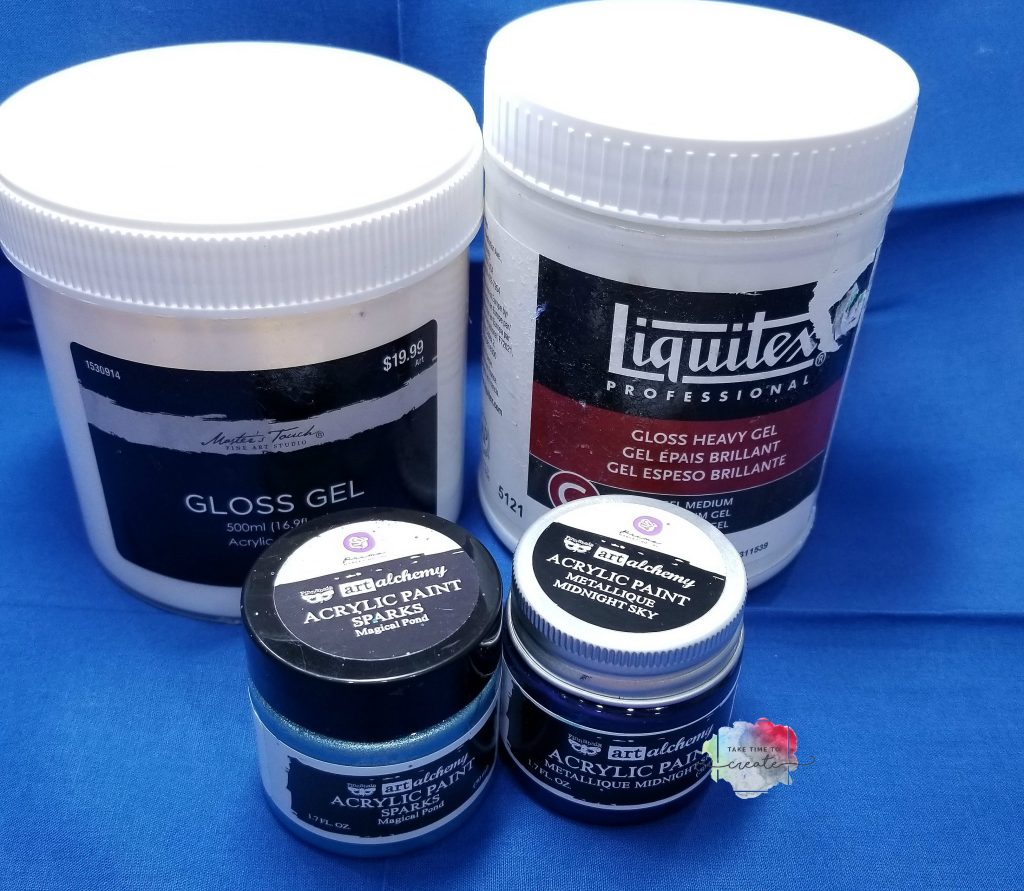
Liquitex heavy Gel- https://amzn.to/2DDcWbp
Liquitex gloss gel- https://amzn.to/2JZRSfq
Finnabair Sparks https://amzn.to/2DDkJG2
Finnabair Metallique https://amzn.to/2qJbRGn
Micro beads-https://amzn.to/2DD9opK and https://amzn.to/2B3KjSj
8×8 canvas https://amzn.to/2B3KmgX
Fabric roll (similar) https://amzn.to/2DCF1zF

The post WDW Park Icons Canvas- Mixed Media appeared first on Take Time To Create.

Blue Fabric Mixed Media Frame

Hello Everyone!

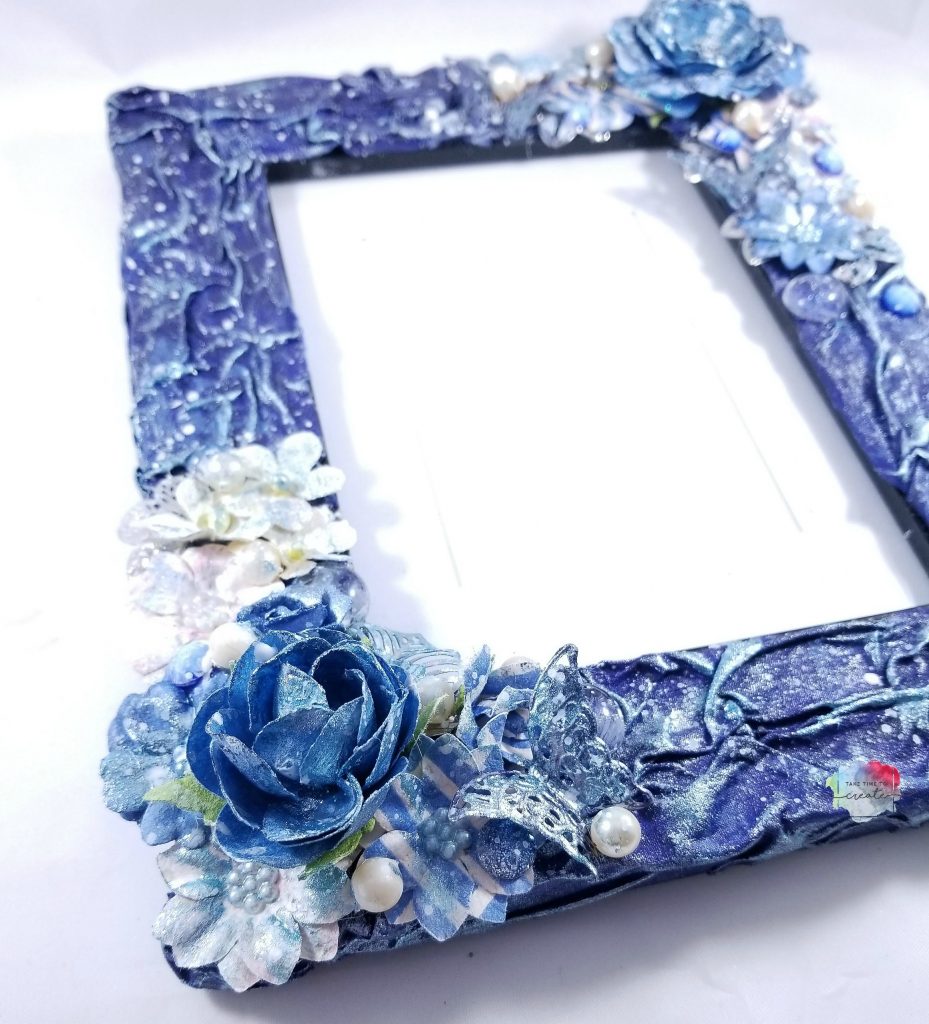
Have you ever finished a project and thought  you were done only to realize that you weren’t? Well that is exactly what happened to me with this Blue Mixed Media Fabric Frame.

A little while ago I created the fabric frame and I thought it was pretty cute as is. If you missed that blog post you can catch it here: Fabric Frame

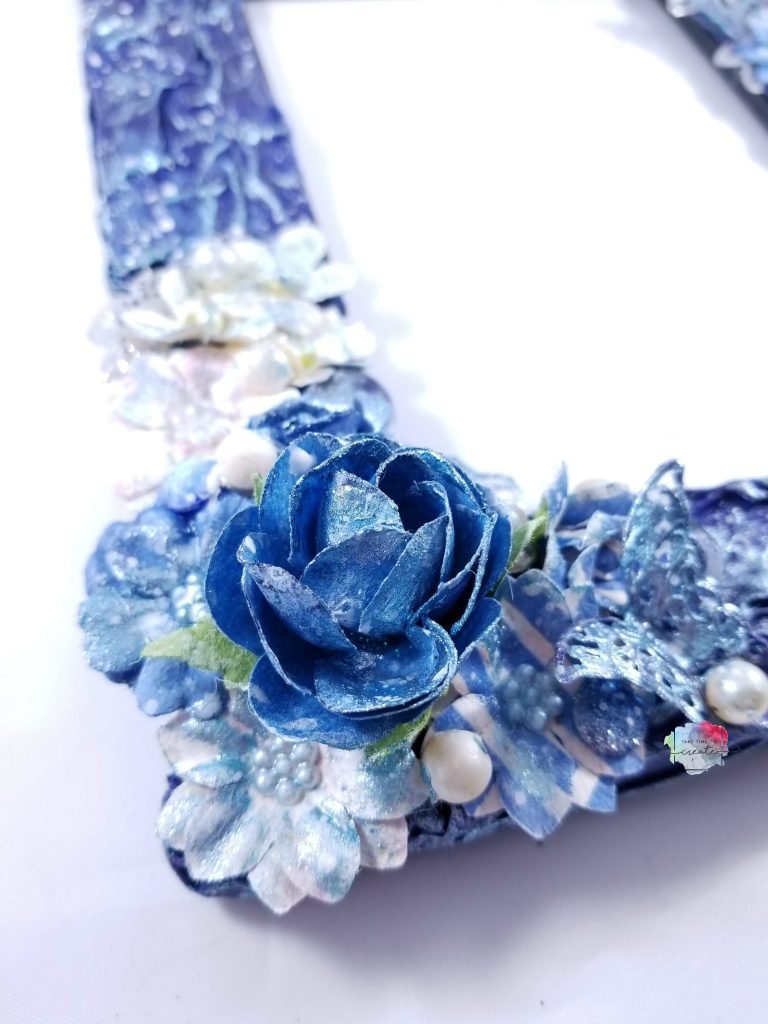
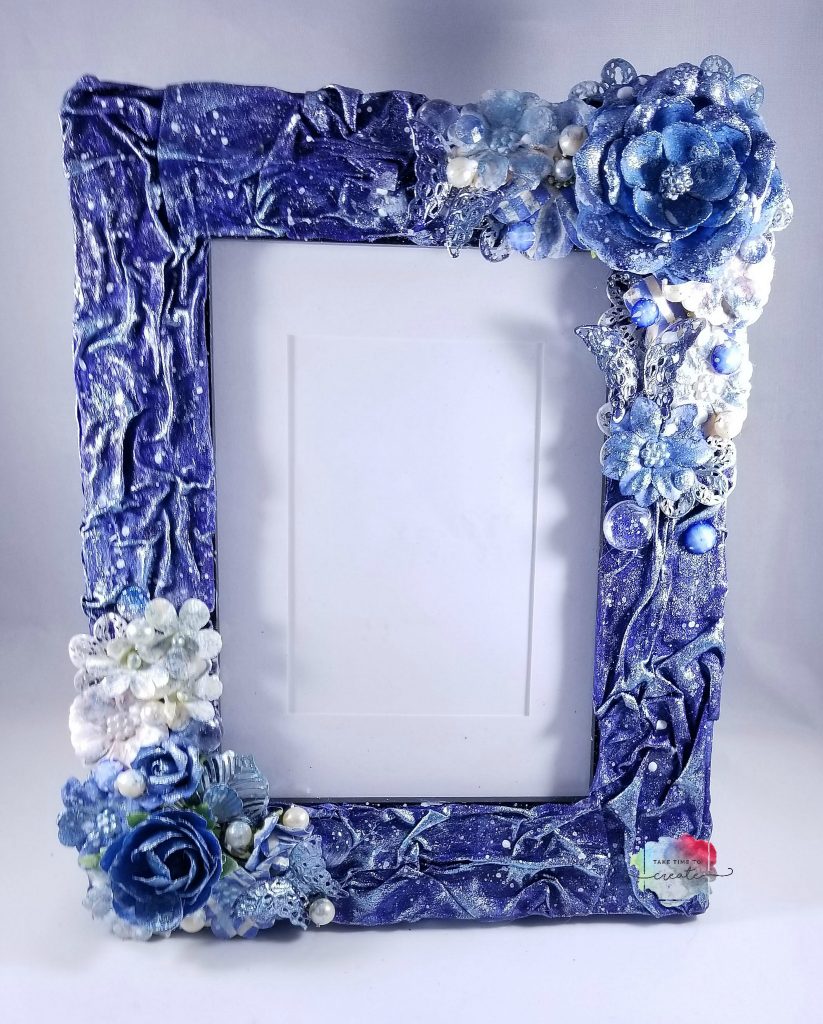
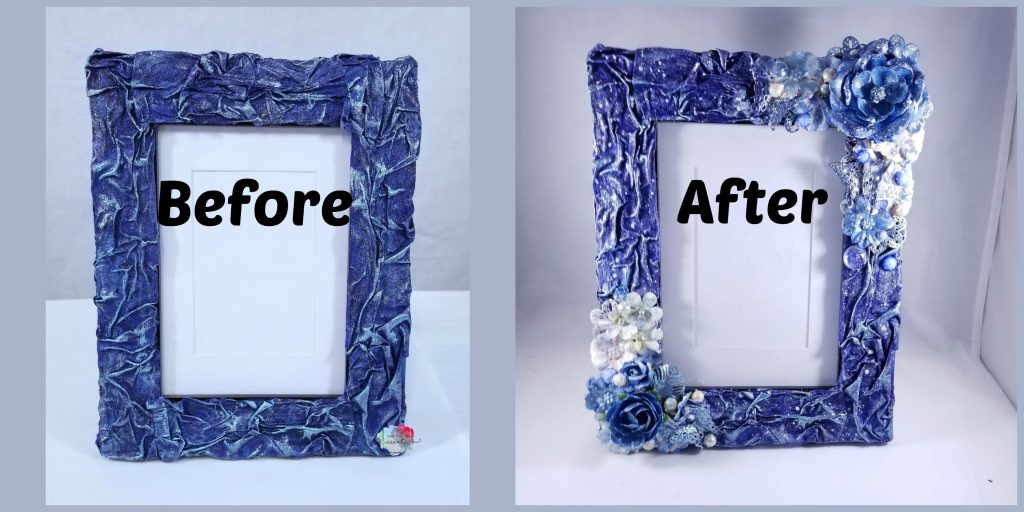
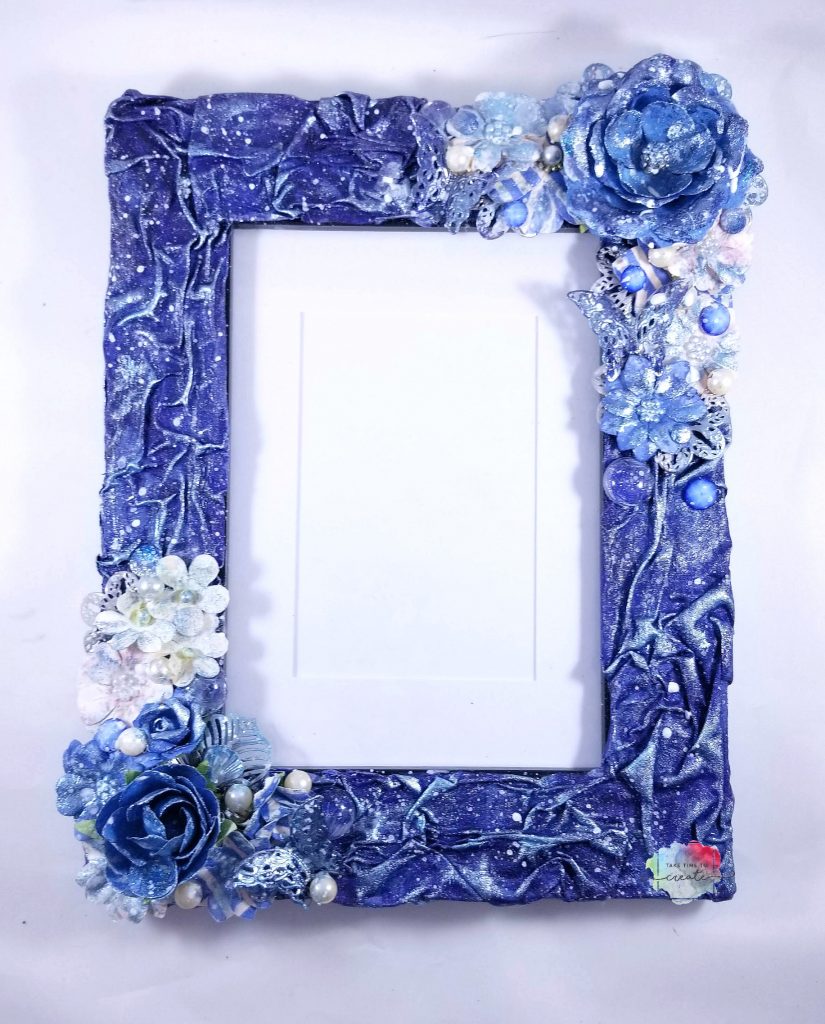
And the original frame was really cute and I did love it, but as I thought about it I thought it needed more. And by more, I mean a lot, lol. So I embellished it, and painted it some more. I love how it turned out and it is a personal choice how much or how little you add to your frame.

Fabric Frame

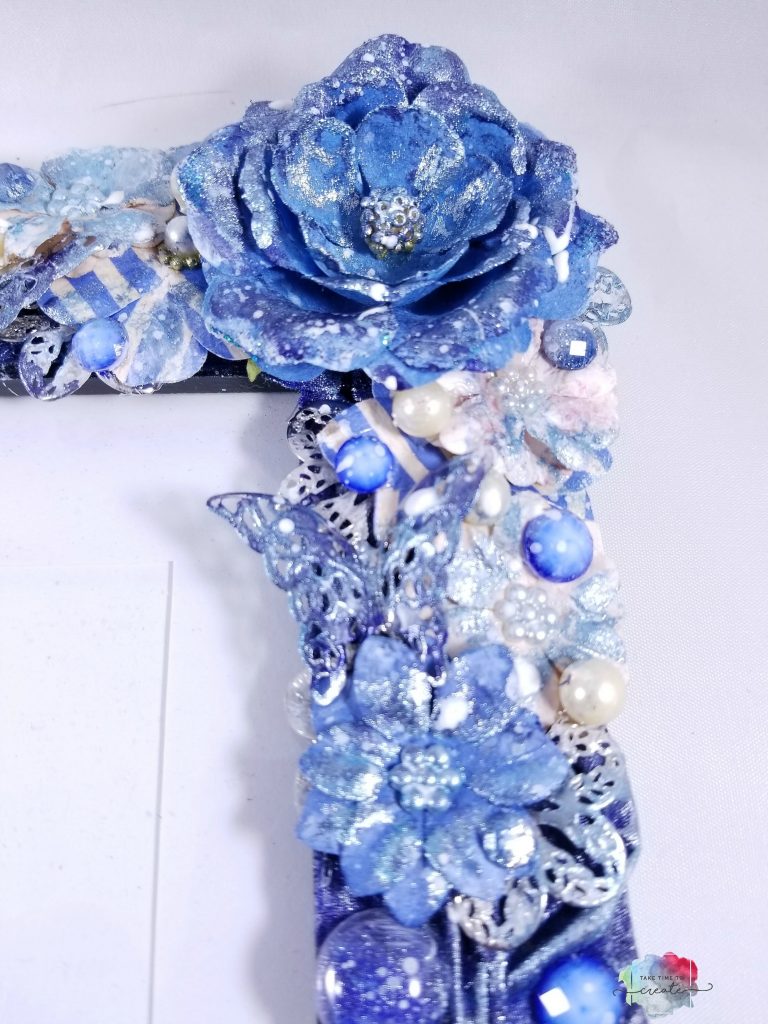
As you can see the original just has fabric and paint, but the embellished one has flowers, pearls, metal elements, and more added to the frame.

Fabric Frame

I clustered 2 groupings on opposite corners of the frame. I added a variety of elements to create interest and texture to the frame. If you know what photo you will be putting in the frame you can tailor the elements to the photo, I think that would look amazing.


Fabric Frame

After the gesso was all dry I painted over everything with Finnabari Sparks and Metallique paints. They were the same colors as the original frame and I thought that would help make it all cohesive.


Fabric Frame

The last step was adding splashes all over to really blend the original and the new elements together. I wanted it to look like I planned it all at once, lol.

Fabric Frame

I really like how this all came together. I love adding new elements on top of project I thought I had finished.

What project did you think you finished but went back later to add embellishments to? Share in the comments.

Fabric Frame

Affiliate Links (similar product if actual one can’t be found)

  • Prima Marketing Flowers: https://amzn.to/2pPuO9W
  • Finnabair Sparks: https://amzn.to/2QNzIQb
  • Finnabair Metallique- https://amzn.to/2A7wYb1
  • White Gesso- https://amzn.to/2ITPExV
  • Prima Marketing Say it in Crystals- https://amzn.to/2IRaNbL
  • Finnabair Pebbles- https://amzn.to/2yik091


The post Blue Fabric Mixed Media Frame appeared first on Take Time To Create.
Summer Greeting Cards

Hello Everyone!

I just love the summer! Bright colors, warm weather, and sunshine! So when I saw the Bo Bunny Summer Mood Collections I knew I had to  make some summer greeting cards!

This post is sponsored by Scrapbookcollections.com, a one stop shop for an entire Scrapbook Collection! Perfect way to get everything you need all in one place.

Recently I have become pen pals with my sisters and I really like to make handmade cards to send them. Writing each other has helped us learn more about each other as adults and I have really been enjoying it!

You can create both of these cards with everything in the kit, you will just need to add a blank card, and adhesive.

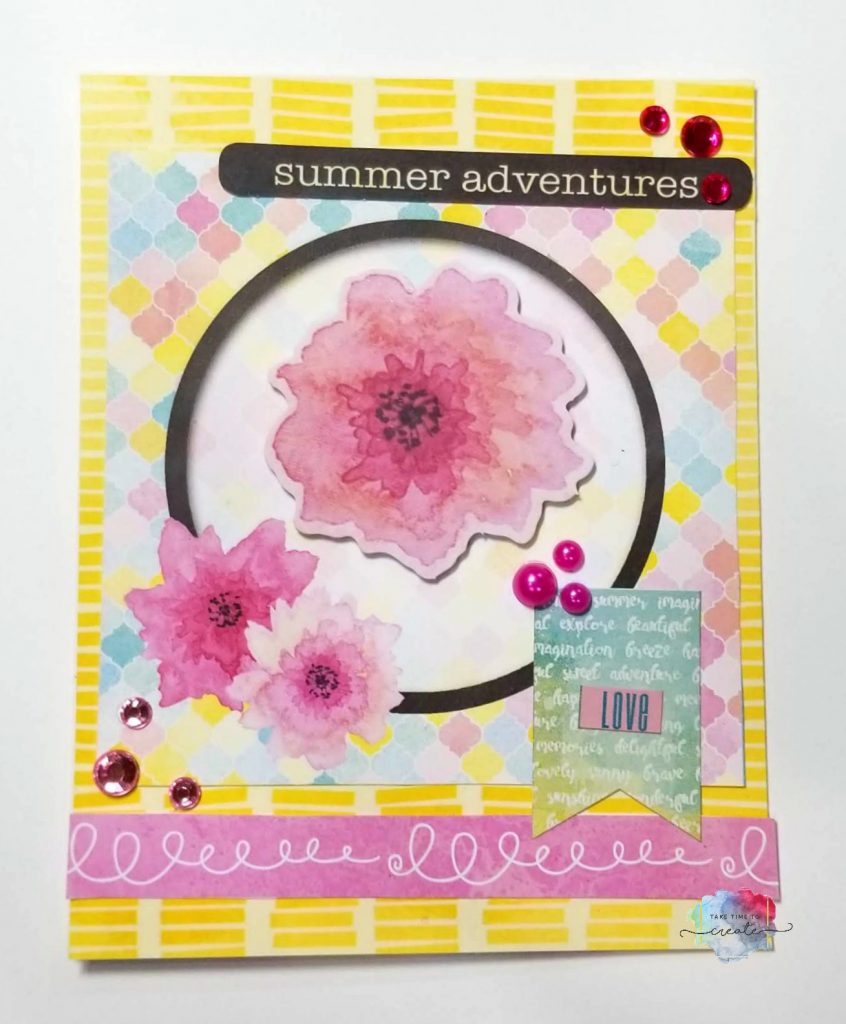
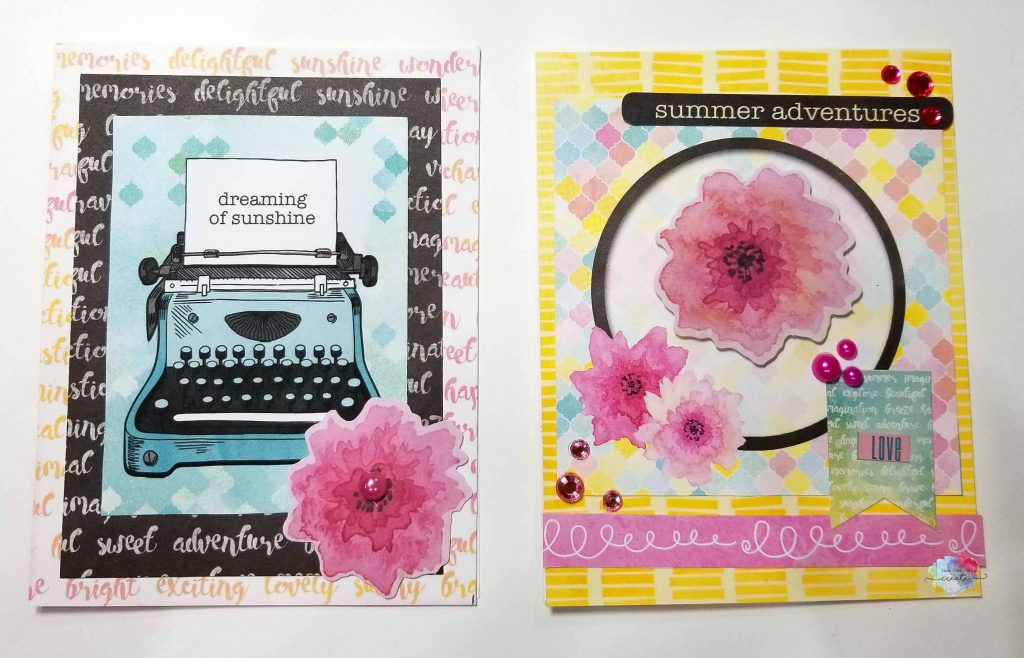
This first card I used the bright yellow paper for the background then added the pretty circle cut out in the middle.

I added accents and rhinestones to jazz it up and the flower in the middle is raised just a little bit with foam tape. You don’t want to add too many embellishments if the card is going through the mail, you don’t want it to arrive damaged.

summer greeting card

This second card is not featured in the video, it is a bonus for my blog readers.

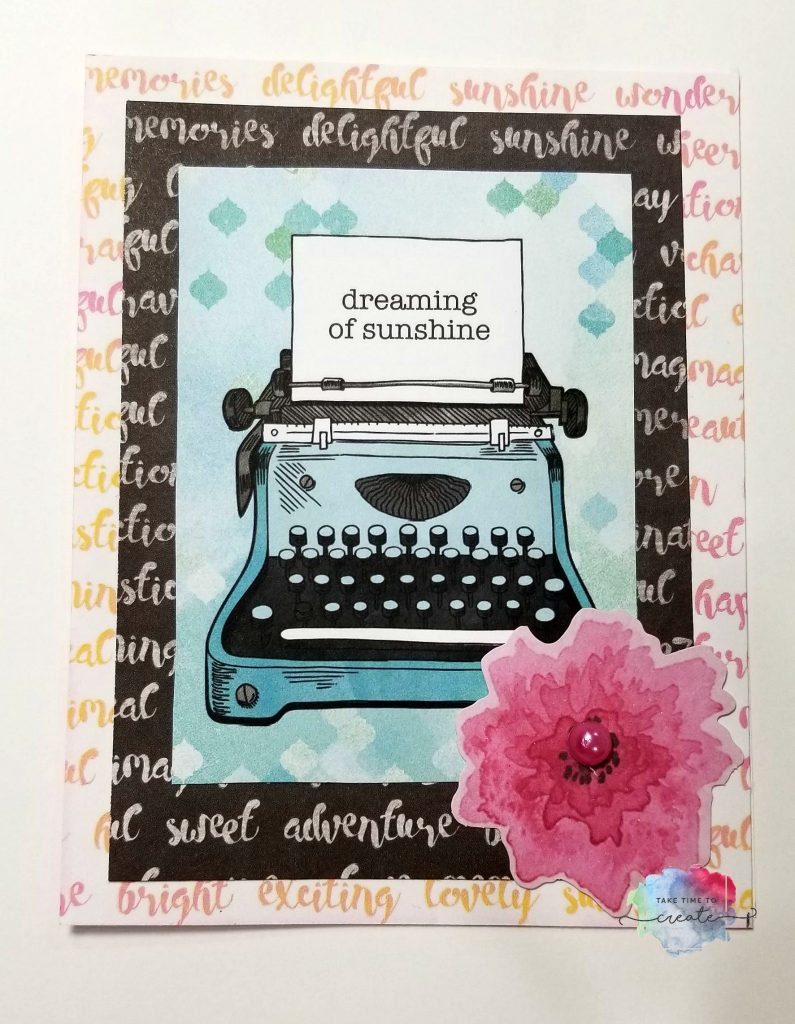
I took 2 different paper backgrounds and layered them together, then I added the typewriter from the Noteworthy pack. Then I added the flower to the corner. This is a perfect card to send to friends or family for almost any occasion.

summer greeting card

I think both cards turned out really cute and I am excited to send them to my sisters. And I am excited to create even more creations from this adorable scrapbook kit!

Use the code taketimesummer for a discount at Scrapbookcollections.com!

summer greeting card

The post Summer Greeting Cards appeared first on Take Time to Create.


Easy Fabric Frame DIY

Hello Everyone!

Today I have a fun, easy fabric frame project for you. I am still on a fabric kick, I have so many ideas using fabric and I can’t wait to share them with you.


For this project I used fabric I got from Annie’s Fabric Club. This is not sponsored, but I really like the fabric I got, and I am looking forward to next month’s fabric.  Here is the link to the club if you are interested in joining: https://www.creativequiltersfabricclub.com/

This is such a fun, easy project that only takes a few materials

Materials (with affiliate links):


Instructions:

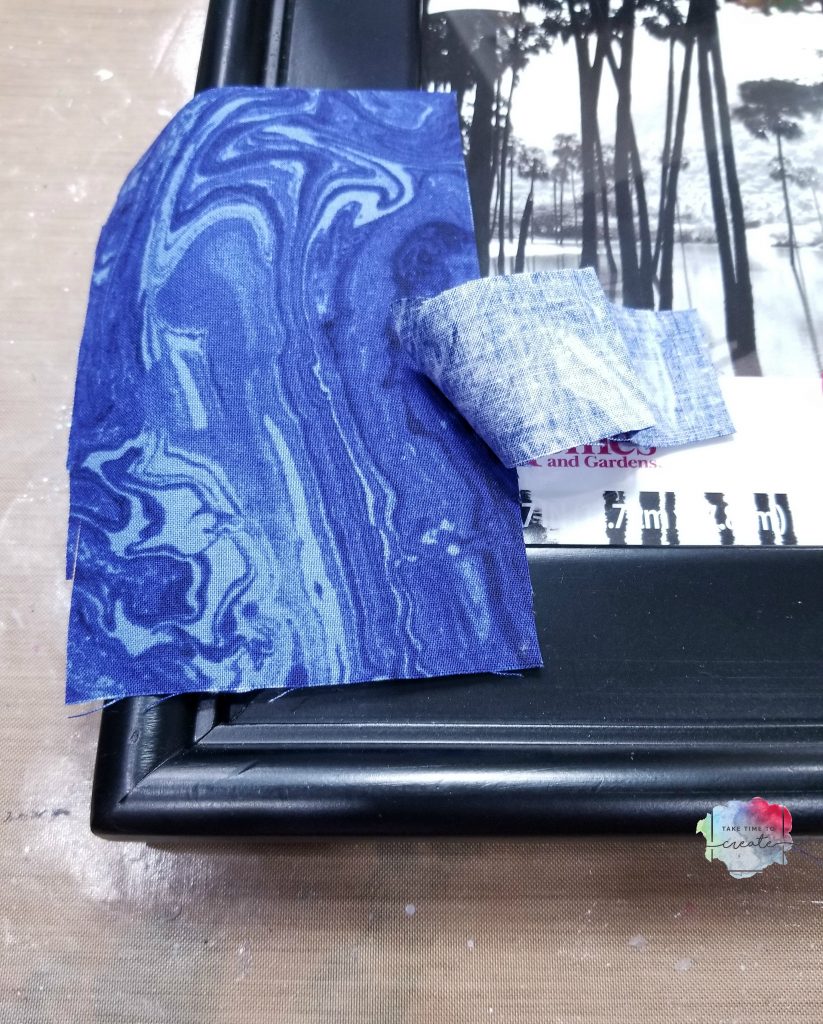
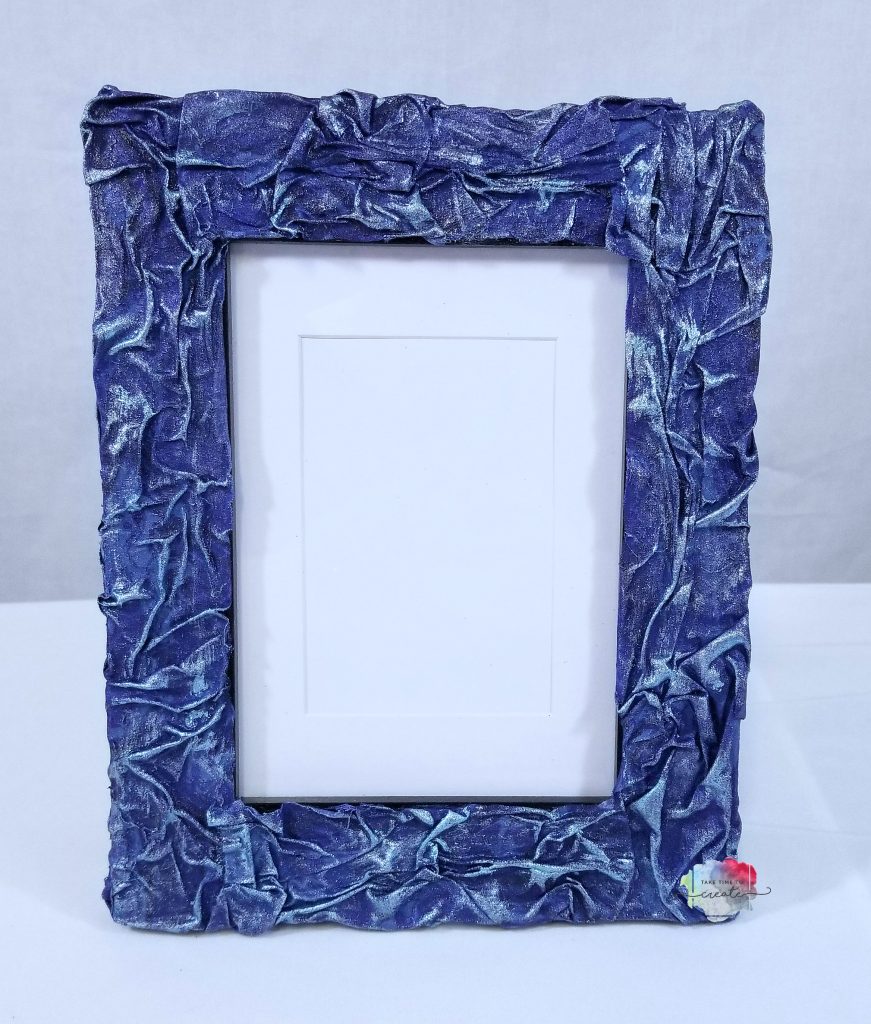
Gather all your material including the fabric and your frame. The frame should have a wide enough border that gives you plenty of room to add fabric. The color of the frame doesn’t matter a lot because you will be covering it in fabric.

To get started cut your fabric in strips that are a little wider than your frame. Spread heavy gloss gel on the frame. Coat your fabric strip in Gloss gel and add to frame, crinkling it up as you go. While everything is wet take the time to get all the wrinkles and texture you are wanting.

Fabric Frame

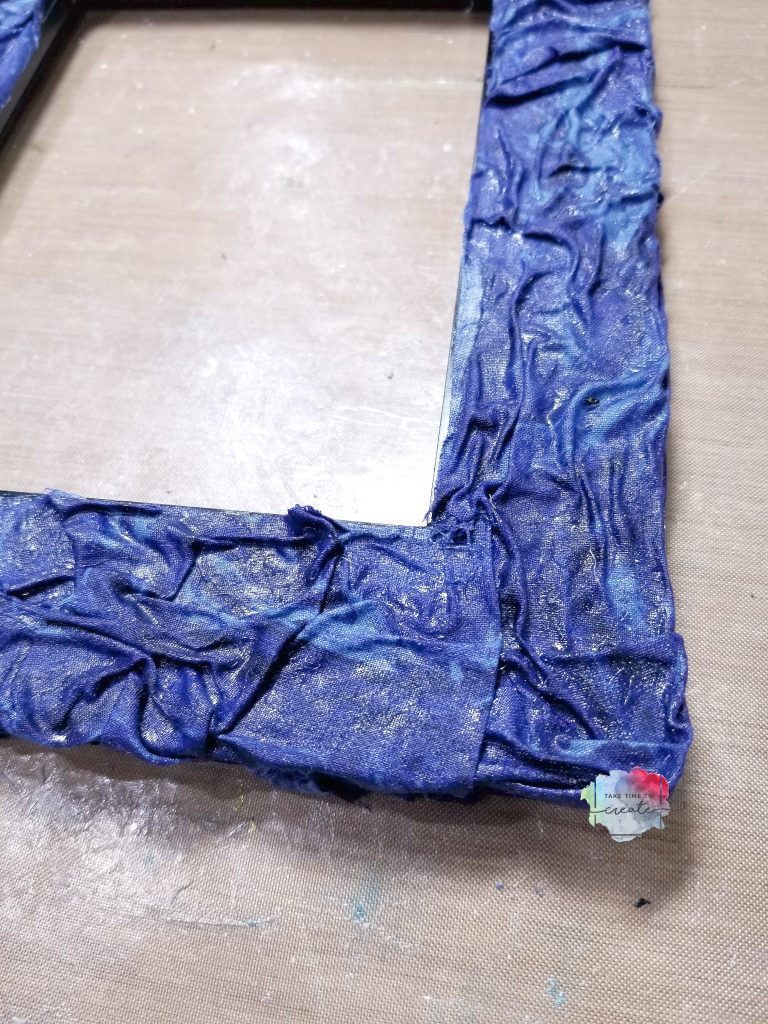
Take your time and make sure it looks like what you are going for. Before you let your frame dry clean up the edges and back with a baby wipe. Let the frame dry. Once dry you can leave it at this step if you want, or you can go on to the next step which is adding paint.

Fabric Frame

After the fabric dried (leaving it over night is best) I dry brushed on a Finnabair Metallique and a Finnabair Sparks paint to add some detail and sparkle. I really love her paints and they add that bit of interest that I am looking for. .

And that is it, the frame is done! These are so much fun and easy to make, I think I will be making a lot more as gifts this year.


The post Easy Fabric Frame DIY appeared first on Take Time To Create.
 

Dollar Tree DIY Easter Decor

Hello Everyone!

Can you believe that Easter is just right around the corner? Where is this year going? Anyway, I have a fun and easy Dollar Tree DIY Easter Decor project for you.

FTC Disclaimer:

I was compensated for this post. This post also contains affiliate links and I will be compensated if you make a purchase after clicking on my links.

So, to do this project you will need a few supplies, most of them can be picked up at the Dollar Tree.

Materials (affiliate links)

Bulk Special Moments Frameless Canvas Art, 8.5 in. atcom

from: DollarTree

Bulk Iridescent Easter Grass, 1.75-oz. Bags atcom

from: DollarTree

Bulk Colorful Fillable Metallic Plastic Easter Eggs, 6-ct. Packs atcom

from: DollarTree

Instructions:

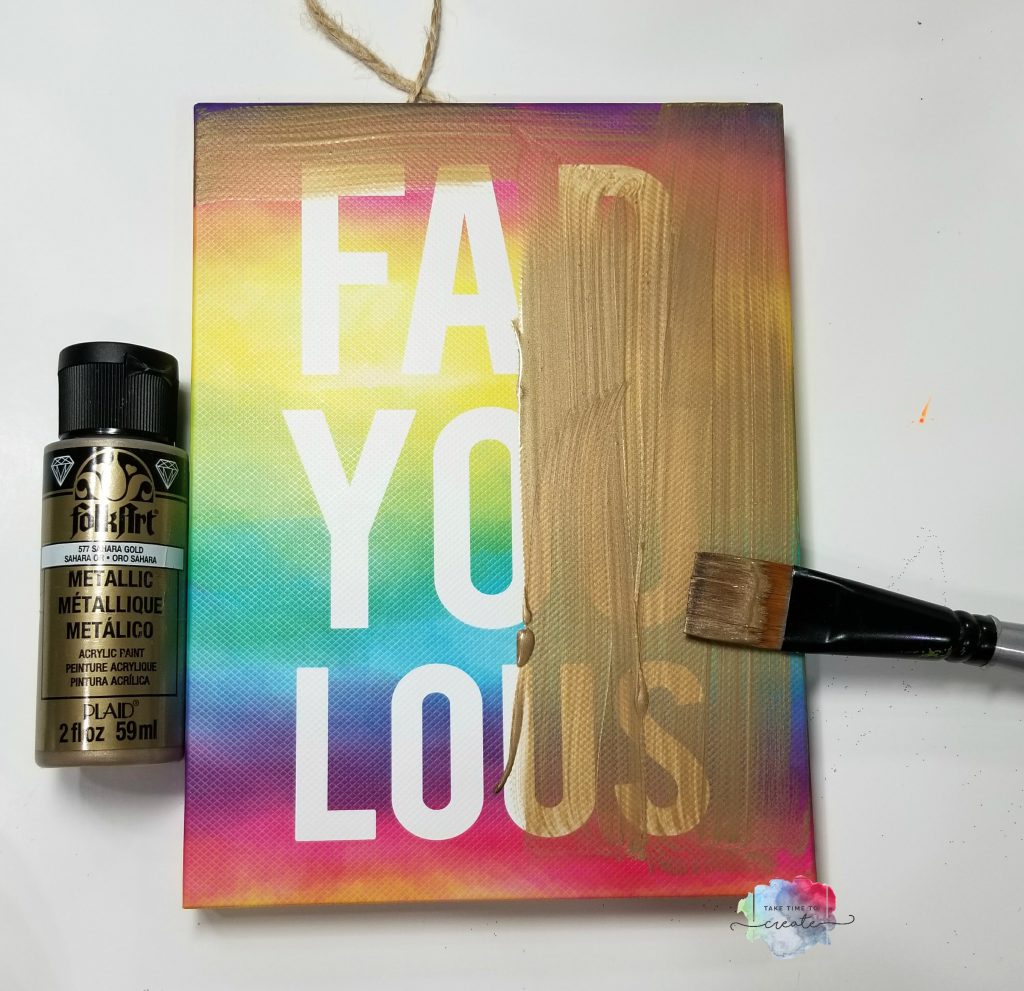
First you will want to paint your canvas. I used a gold Folk Art paint. You can use any color you want, but it will take a few coats to cover up the canvas.  You might not be able to find the exact canvas I am using, but look around they seem to always have some great choices for canvases, and you might want to experiment with different sizes.


Dollar Tree Easter DIY

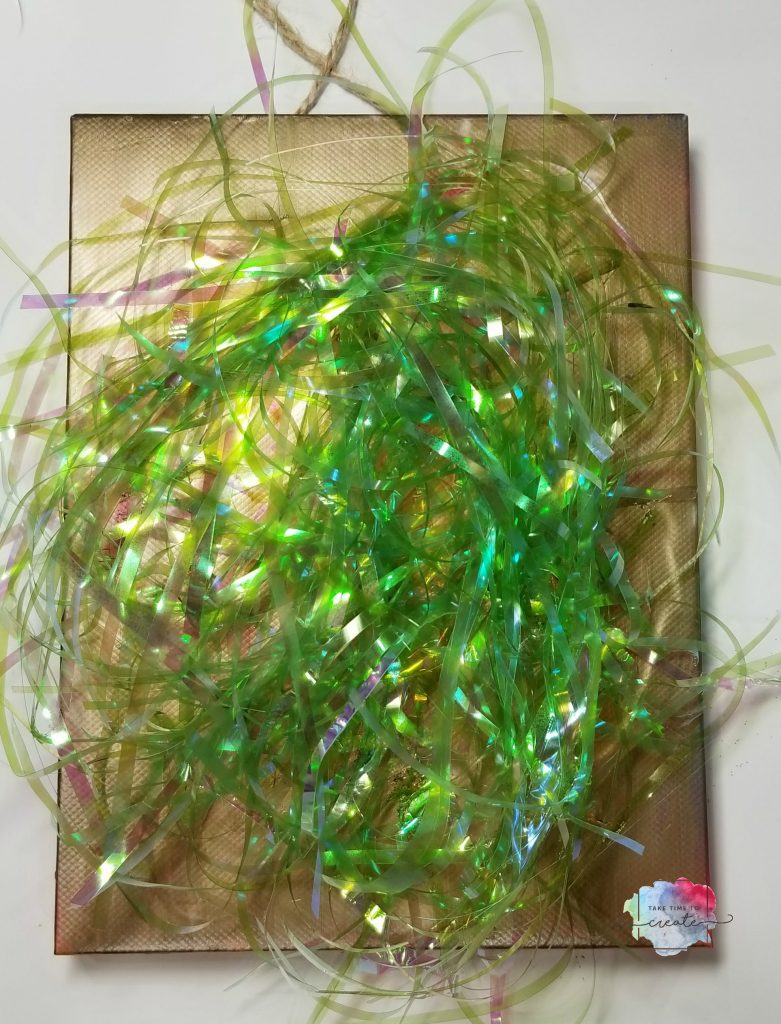
Once your paint is dry you can add the grass. Take as much as you want and shape it into a nest shape and hot glue it to the canvas.

Dollar Tree Easter DIY

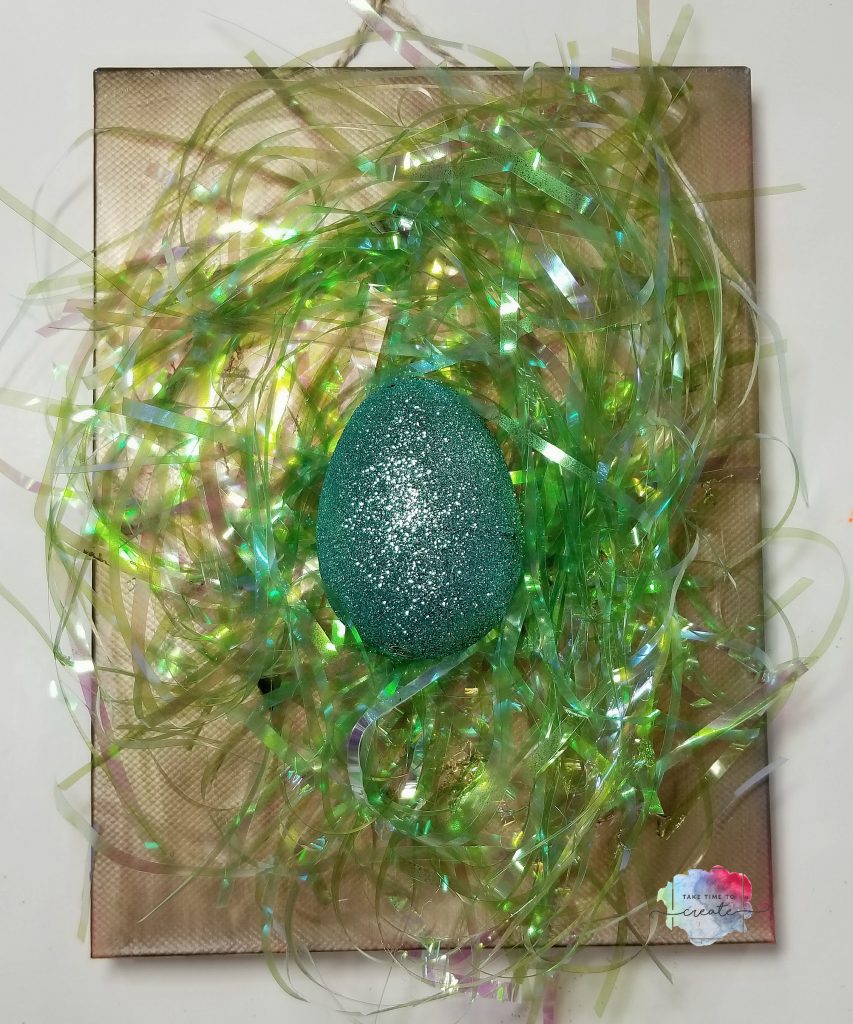
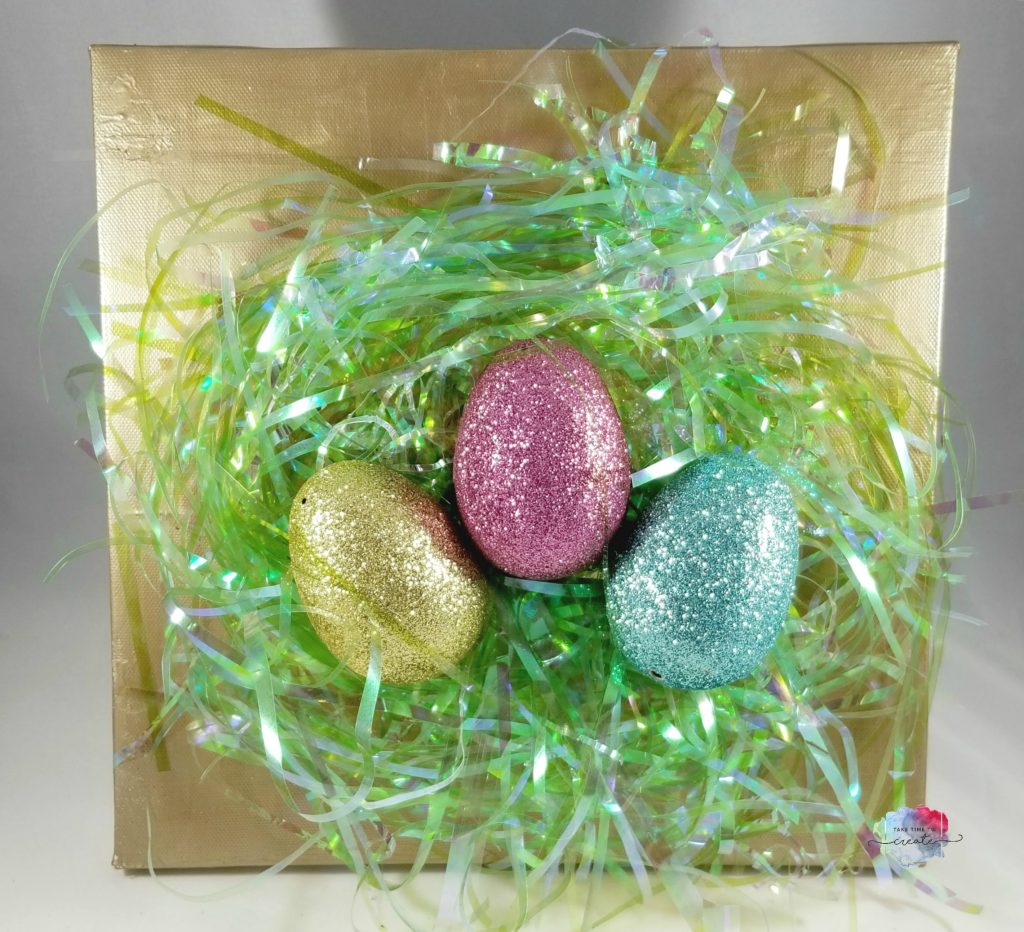
Then you add your eggs, add a single one in the middle, or a grouping of 3. If you can’t find any eggs look around for another spring related item that would fit on your canvas. Be creative and experiment with your center piece.


Dollar Tree Easter DIY

These are just so cute when they are all finished. These would look great in a grouping of 3. Also, this would be a fun project for kids or a church group. There are so many great options for these canvases.

Dollar Tree Easter DIY


What Easter project are you working on?

The post Dollar Tree DIY Easter Decor appeared first on Take Time To Create.
 

Altered Bottle for Bath Soaks

Hello Everyone!

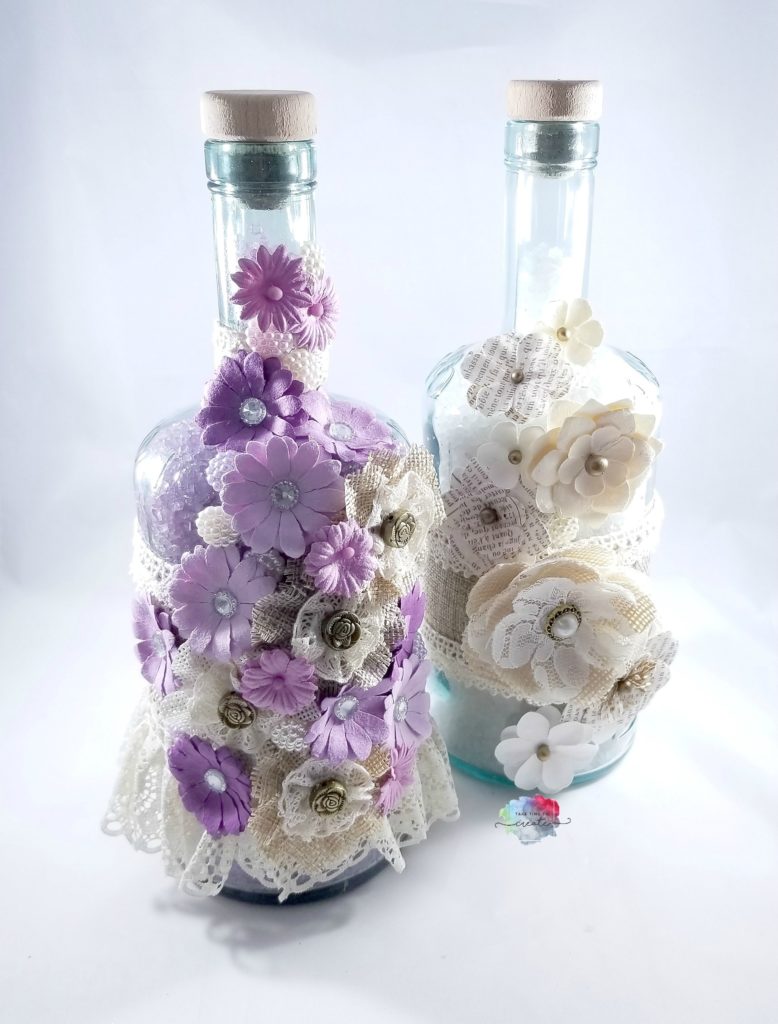
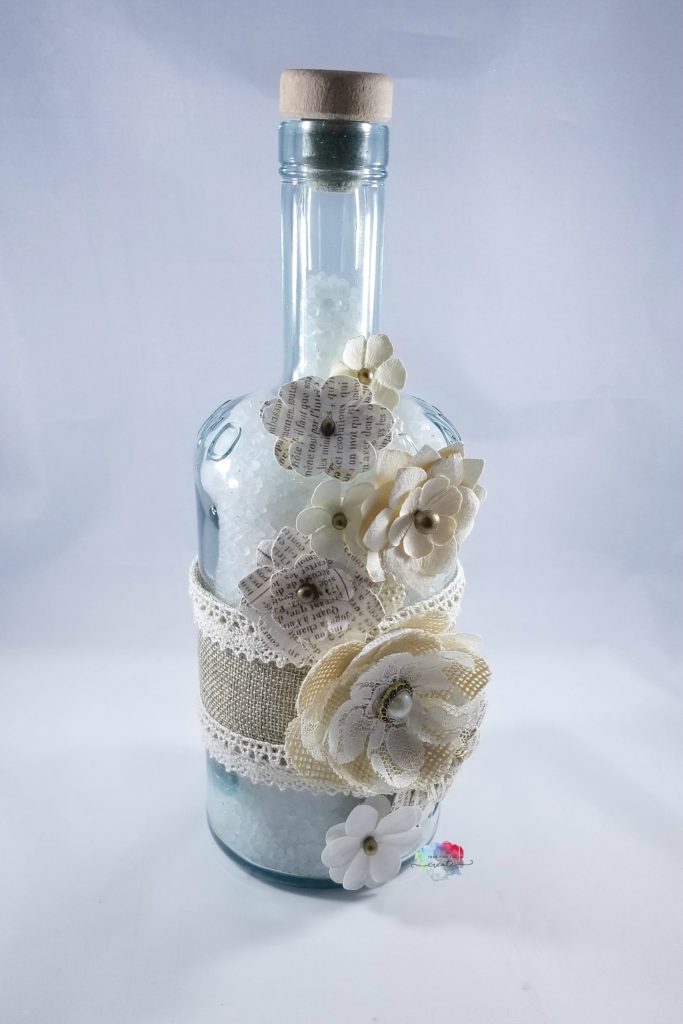
With the holidays approaching it is important to take time to relax and a bath is perfect for relaxing! I made these altered bottles for bath soaks which look great in your bathroom!

They are easy to make and they can also make a perfect handmade gift, or you can sell them at a craft fair.


For this project find a really great bottle. I found mine at Who Give a Scrap. It is on on the larger size, that worked perfectly for me.  Make sure it has a lid and that you clean it thoroughly.

altered bottle for bath salts

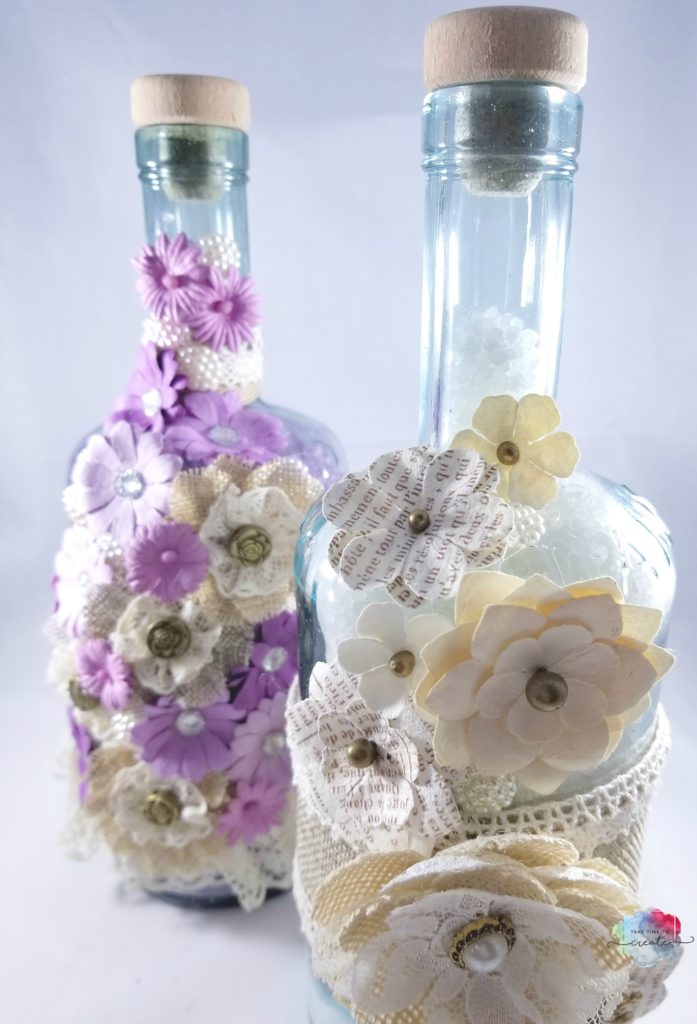
Once the bottle is clean and dry add your embellishments. I added burlap and lace around the bottle to start.

altered bottle for bath salts

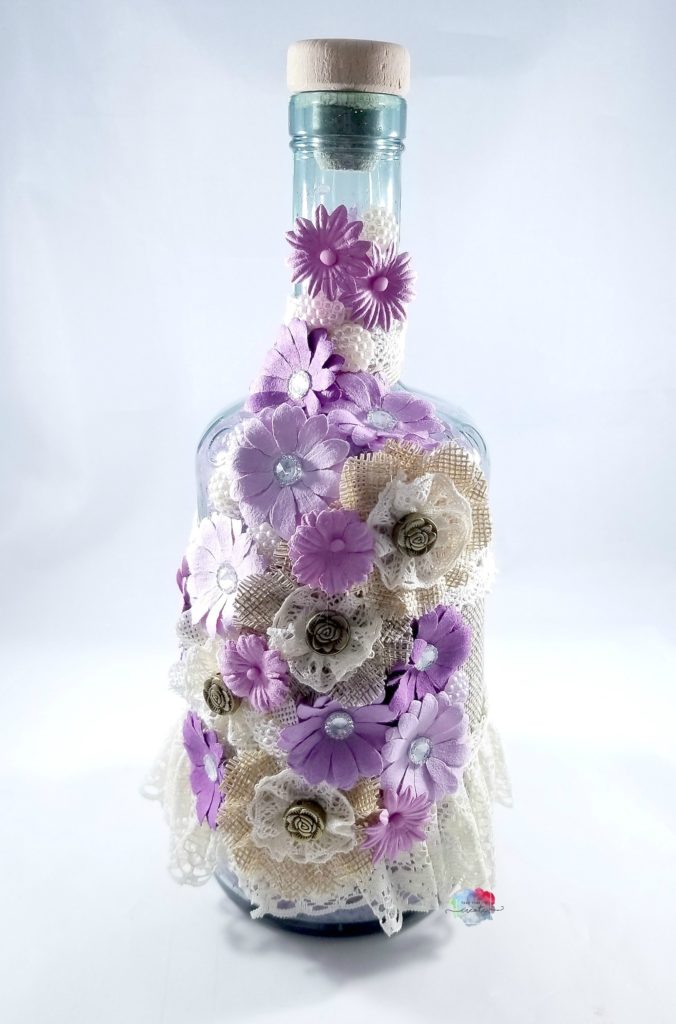
Then I added a lot of flowers and beads to create the look I was going for. You can add flowers, buttons, keys, and found objects. Anything would look great on the bottle.

altered bottle for bath salts

Once it was all decorated I added the bath salts and the cork. Now I have a great gift, or even something for me.

altered bottle for bath salts

How do you try and relax during the holidays?

The post Altered Bottle for Bath Soaks appeared first on Take Time To Create.
DIY Dollar Tree Snowflake Christmas Decoration

Hello Everyone!

I was compensated for this post. This post also contains affiliate links and I will be compensated if you make a purchase after clicking on my links.

Christmas is just around the corner and I am getting excited! I love to make my own decorations, the glittery the better, lol.

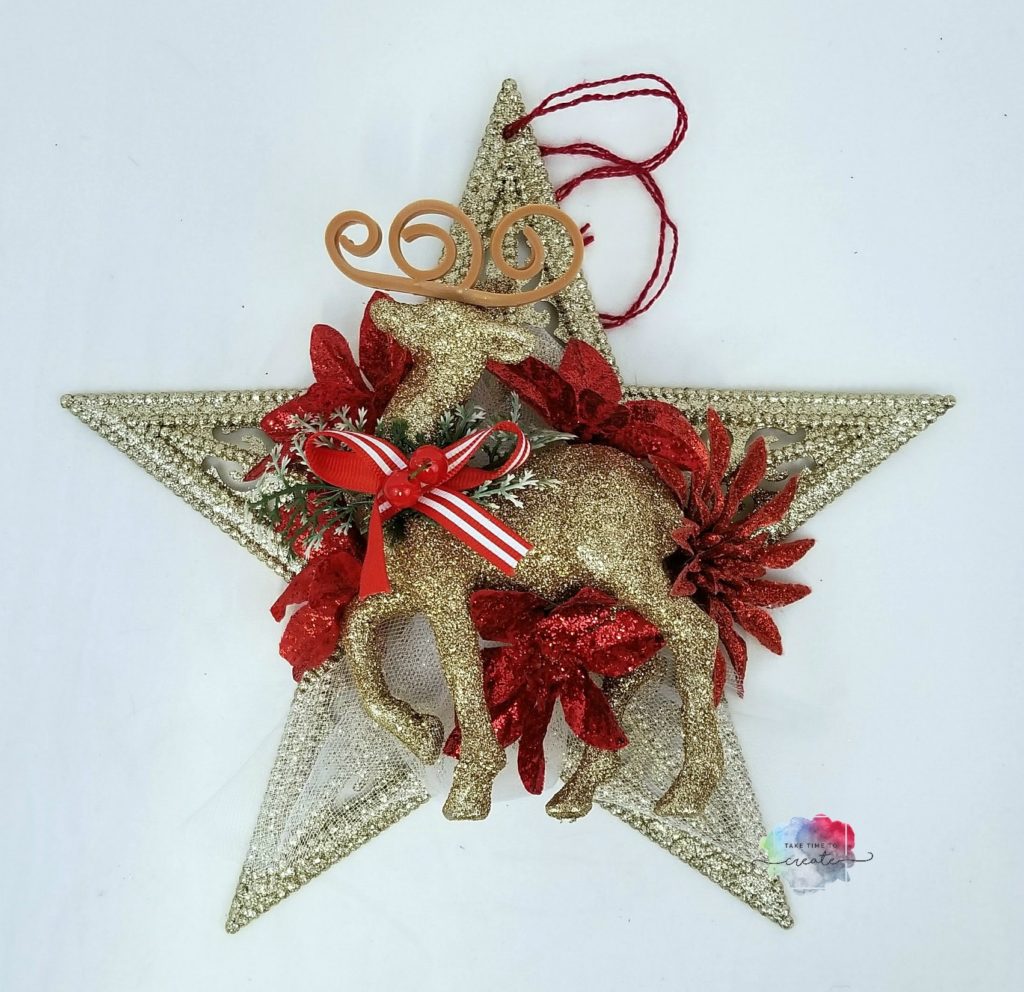
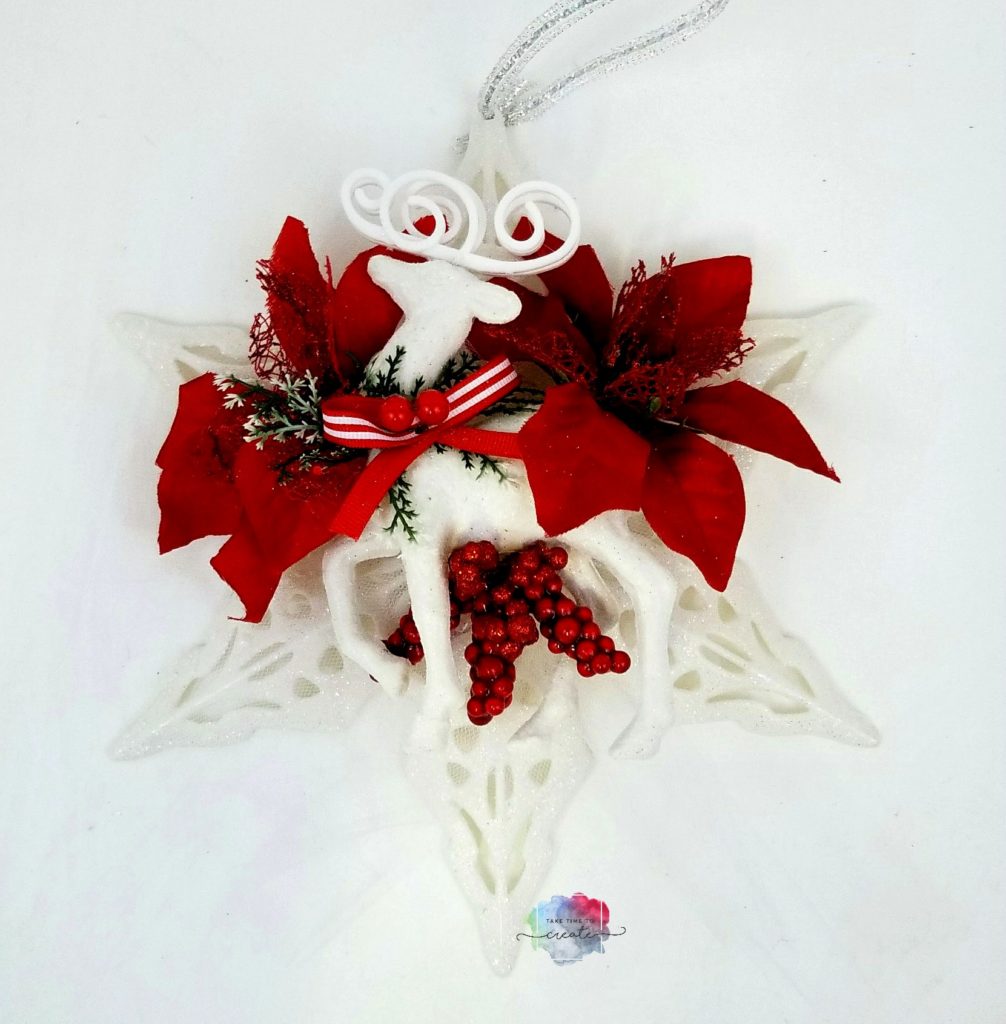
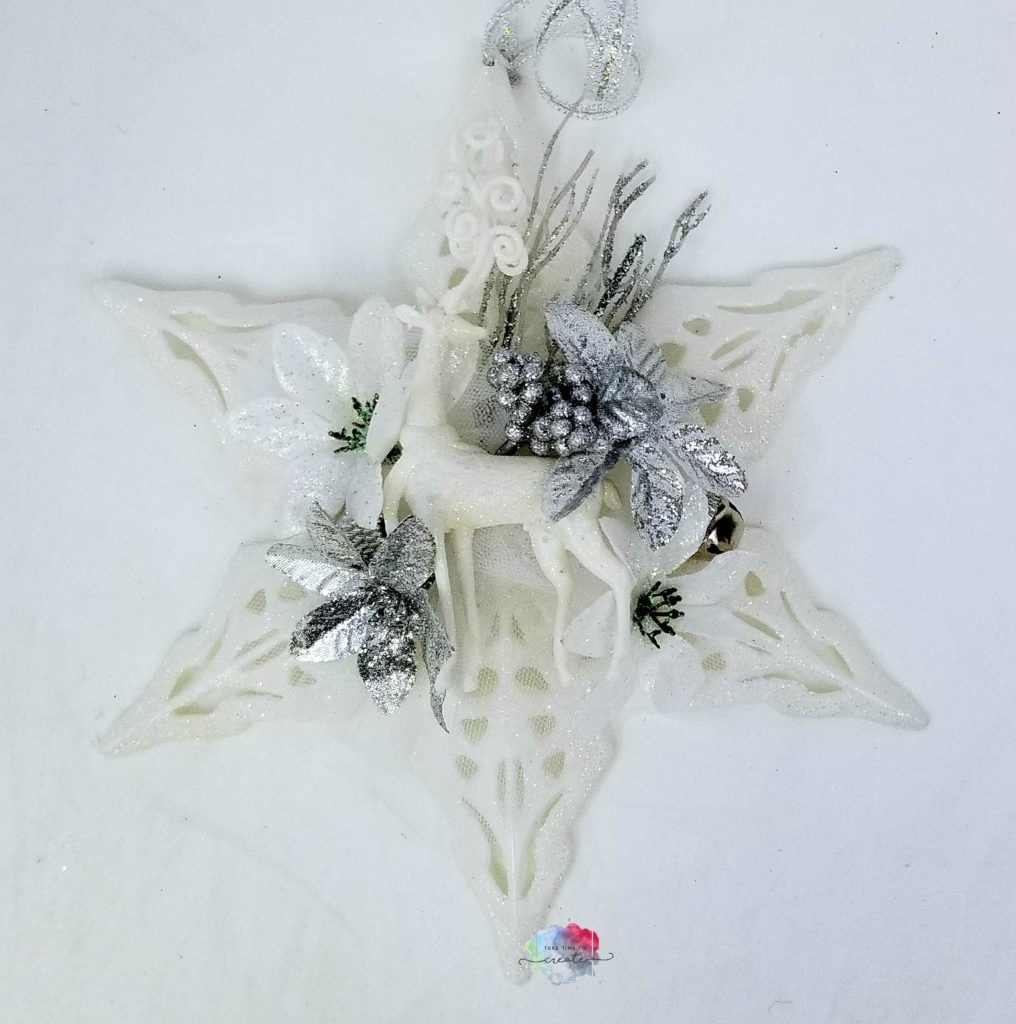
Dollar Tree is the perfect place to get supplies to make your own decorations, like these Snowflakes I made.

These snowflakes are so easy to make and they look so cute hanging on your wall.

Materials Needed (affiliate links):

Bulk 5-Stem Christmas House Glittered Poinsettia Bushes, 13 in. atcom

from: DollarTree

Instructions: 

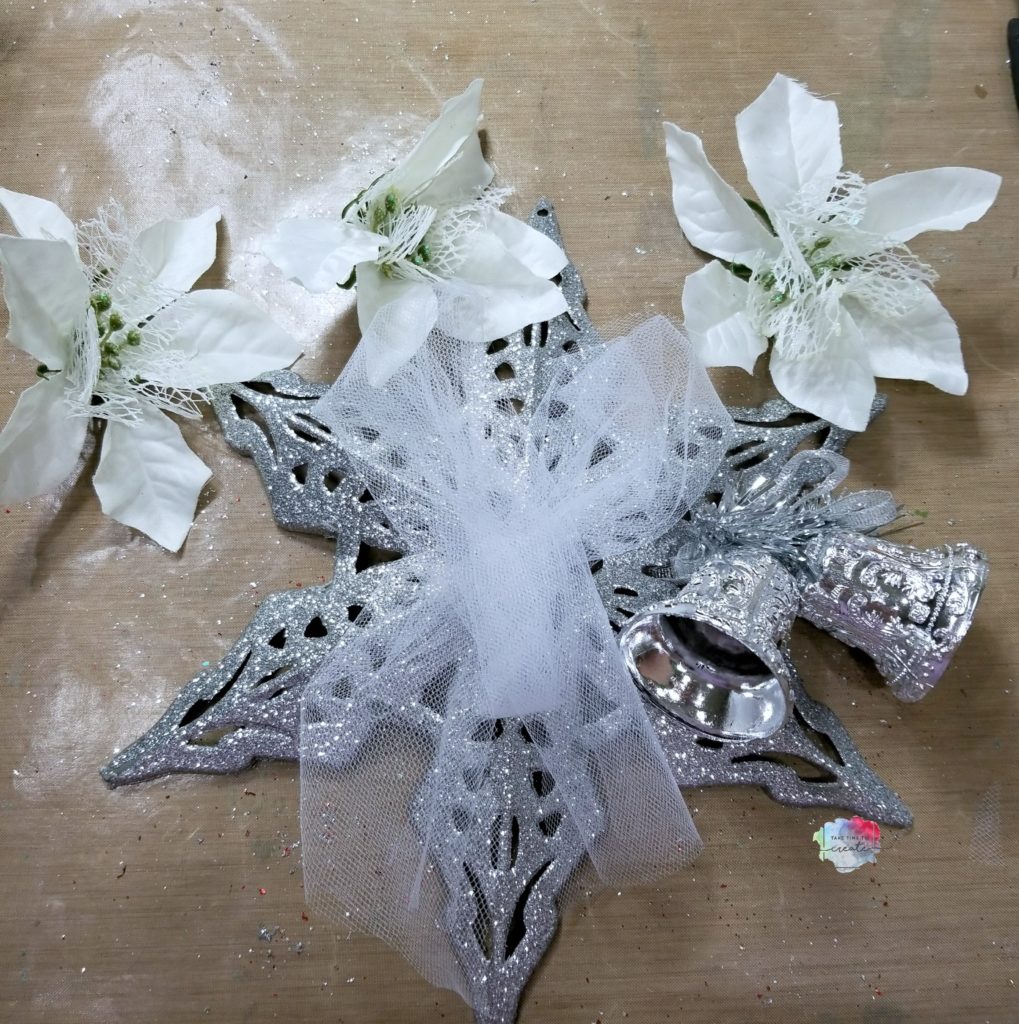
Start with your glittery snowflake and add some tulle as a base layer. Or you can add glitter mesh, or ribbon, or lace, anything really. You just want to make sure you have an anchor for your focal point. Glue the tulle on with hot glue.

DIY Dollar Tree Snowflake Decor

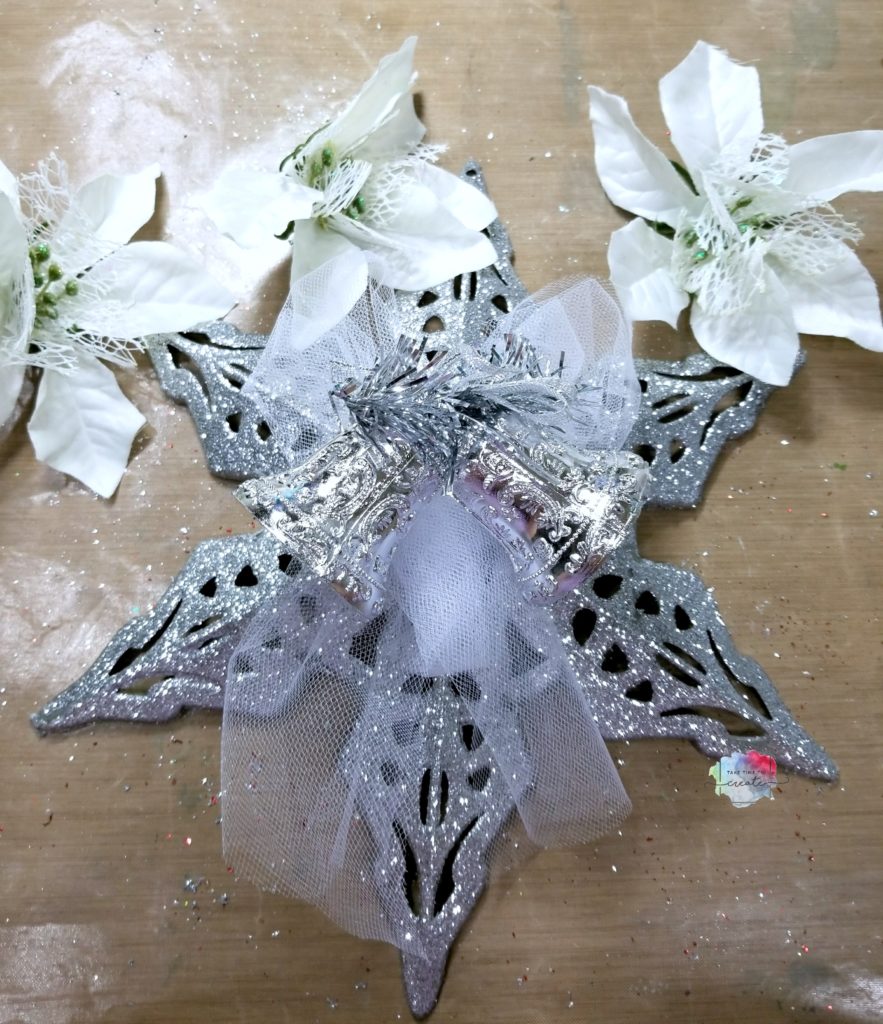
Then you want to glue on your focal point to the center of the snowflake

DIY Dollar Tree Snowflake Decor

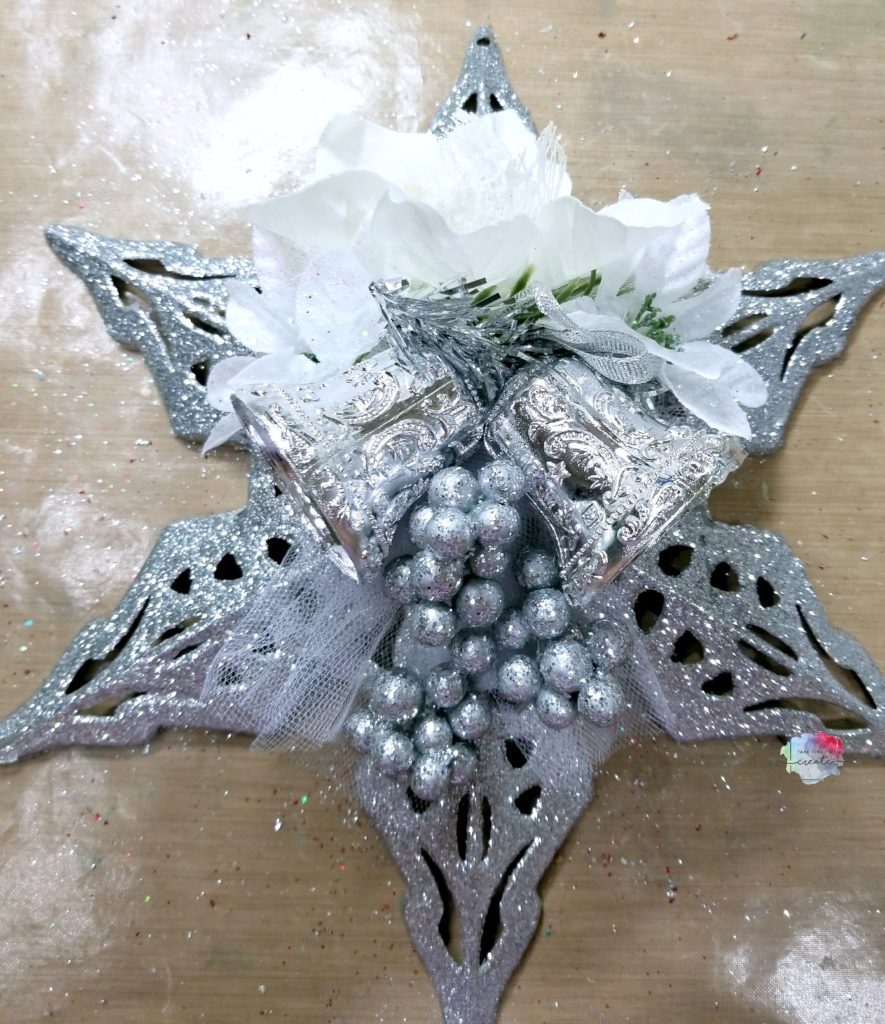
Then you glue on accents and decoration all around your focal point. Poinsettias, floral picks, beads, jingle bells, and small ornaments work great for this step. Anything will work, you just want to fill up the empty spaces and make it full and festive.

DIY Dollar Tree Snowflake Decor

There you go, nice and easy and they looks so festive and glittery.  A grouping of the snowflakes would look really great on a wall, or it could be the perfect gift!

I thought it would be fun to show you some other variations I created. I just love making these, I can’t seem to stop, lol

DIY Dollar Tree Snowflake Decor

DIY Dollar Tree Snowflake Decor

DIY Dollar Tree Snowflake Decor

What Christmas decorations do you make?

The post DIY Dollar Tree Snowflake Christmas Decoration appeared first on Take Time To Create.
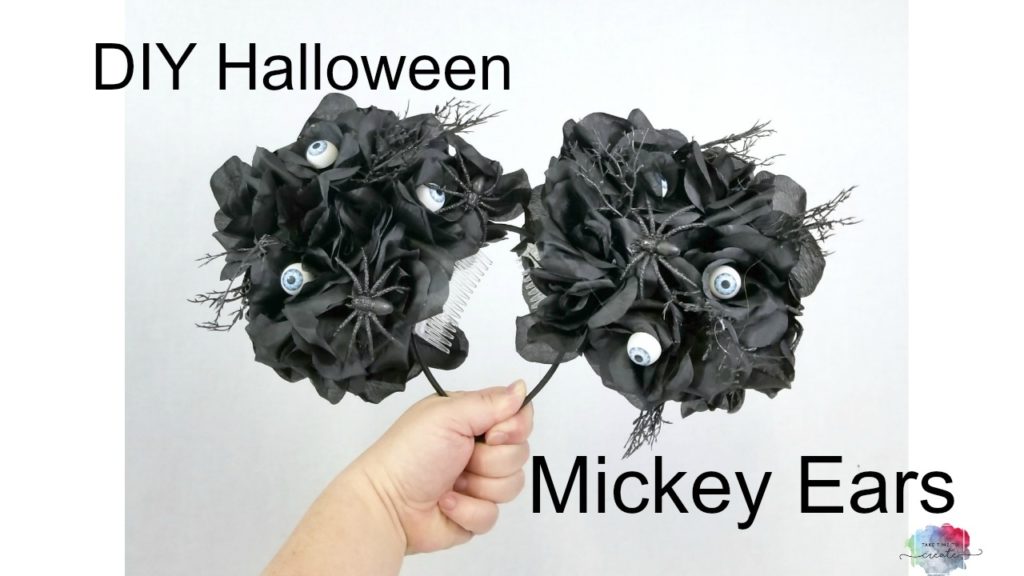
DIY Halloween Floral Mickey Mouse Ears

Hello Everyone!

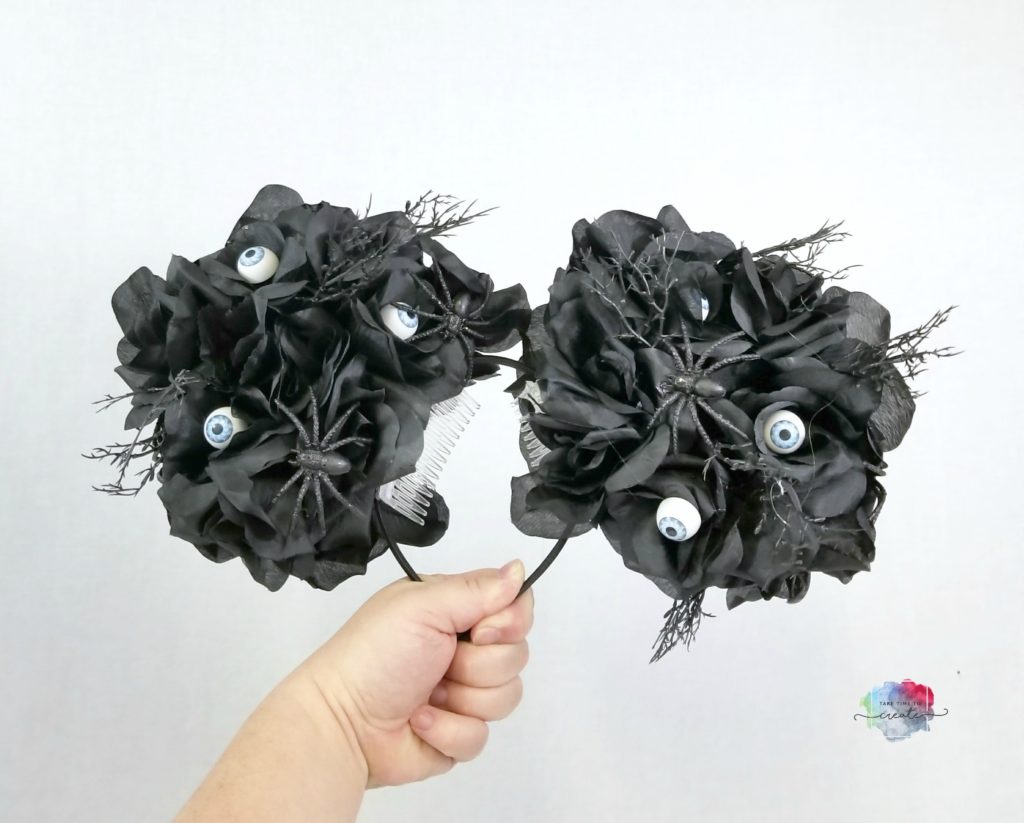
DIY Halloween Floral Mickey Mouse Ears! What more do you need for a trip to Disney World?

As many of you already know, I love Disney! It is my happy place and I love being able to go. In Oct I will be crocheting with the Crochet Crowd at Disney World! I am so excited!

As I get ready for this awesome adventure I decided I needed new Mickey Mouse ears! I like to make a pair for each day I am there, so get ready to see more ears, lol.

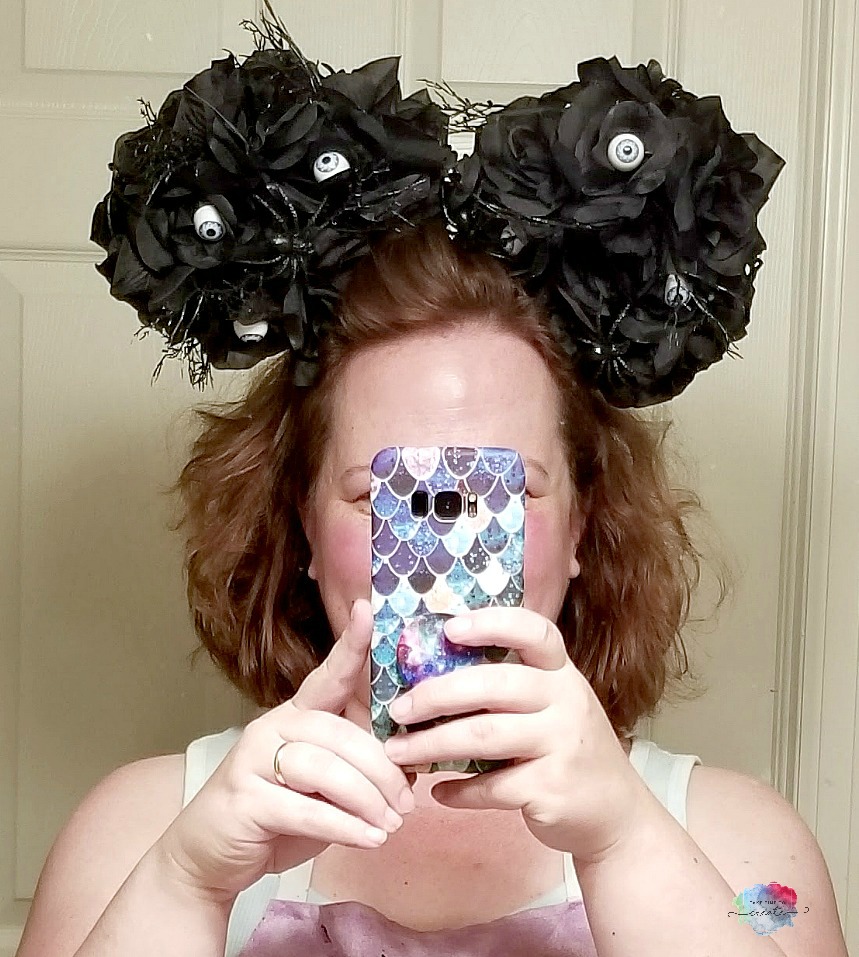
This first pair uses black eyeball roses from the dollar store. They are so cute and since I will be there during Halloween,  these ears will be perfect!

DIY Halloween Mickey Mouse Ears

This is a pretty easy project, which is great because I will need to make a few, lol

Materials:

  • Headband (I found a pack on eBay)
  • Thick foam
  • Felt
  • Hot Glue
  • Roses
  • Combs
  • Ribbon
  • Mickey Ear Template (I found mine here: Template)

Instructions:

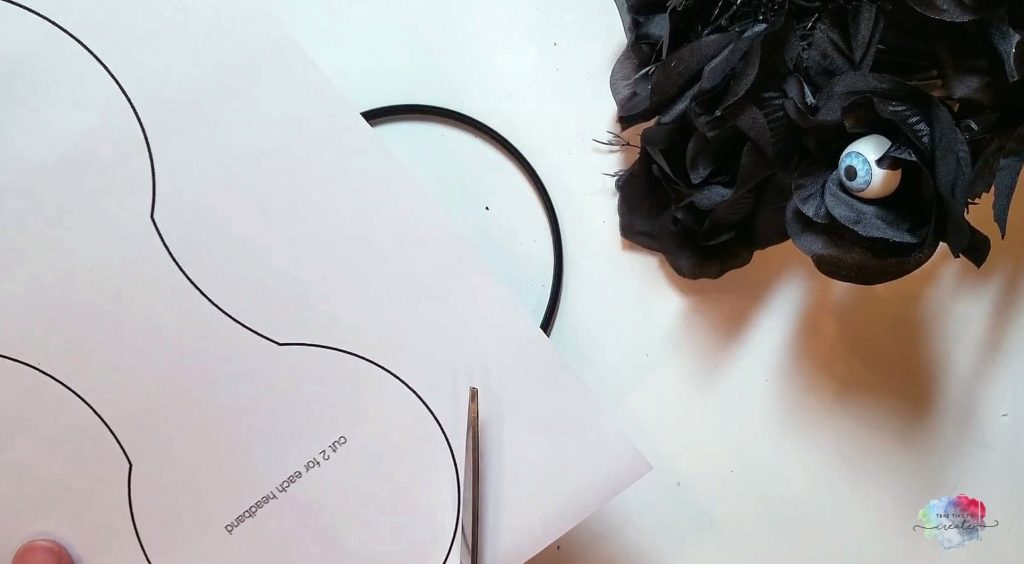
Cut out your template, save it when you are done in case you want to make more ears

DIY Halloween Mickey Mouse Ears

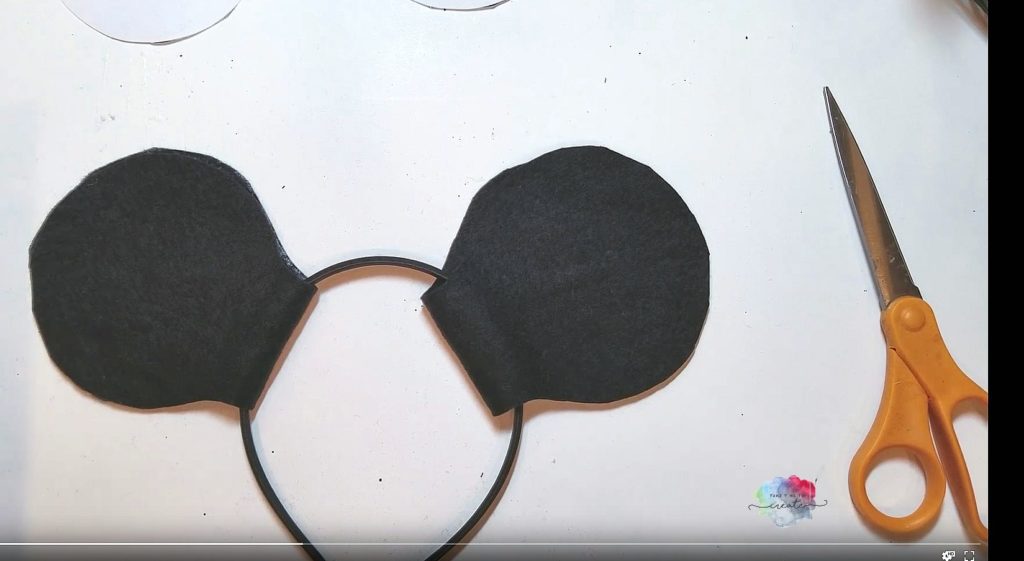
Cut some felt in the shape of your ear template.

DIY Halloween Mickey Mouse Ears

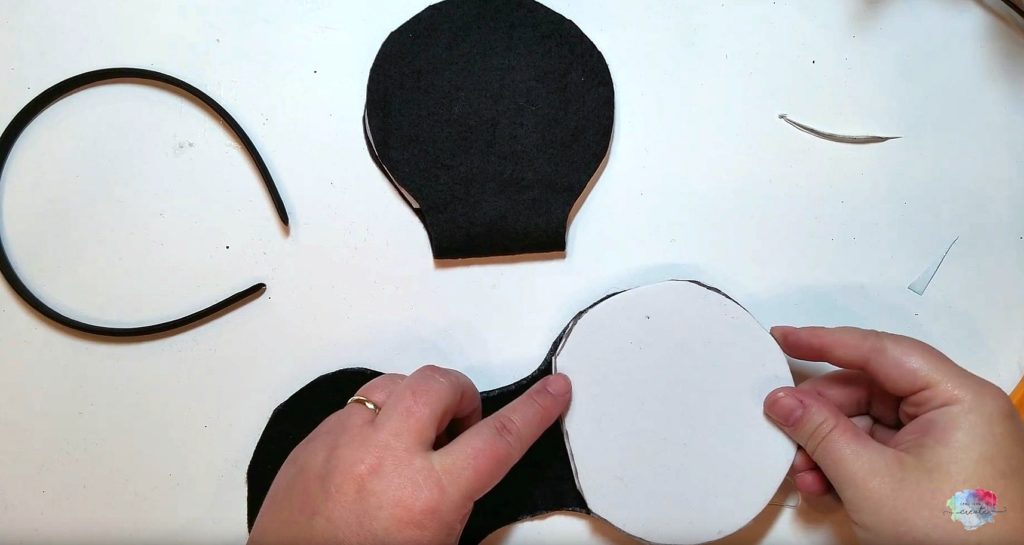
To help thicken up your ears add some thick foam to the center of your ears. The flowers need a little help stabilizing.

DIY Halloween Mickey Mouse Ears

Hot glue your foam and felt to your headband. Be mindful of the placement, you don’t want your ears too close together and not too far apart. Then I added ribbon along the edge to cover up the foam.

Now it time for the fun part, hot glue your roses on to your ears. I used 6 bundles of roses from the dollar store. (4 were ones with eyeballs and 2 were just plain black roses) Go to town filling you ears with roses. I do the front and backs when I make ears, I think they turn out nicer that way. Add spiders and any other spooky element you want.

I did add some hair combs to the headband to help keep it on my head. They are not heavy, but the combs help them stay on your head.

Now you are ready to rock your new ears! This is a big, bold look that will be perfect for Disney!


DIY Halloween Mickey Mouse Ears

The post DIY Halloween Floral Mickey Mouse Ears appeared first on Take Time To Create.
Sunflower Mixed Media Canvas

Hello Everyone!

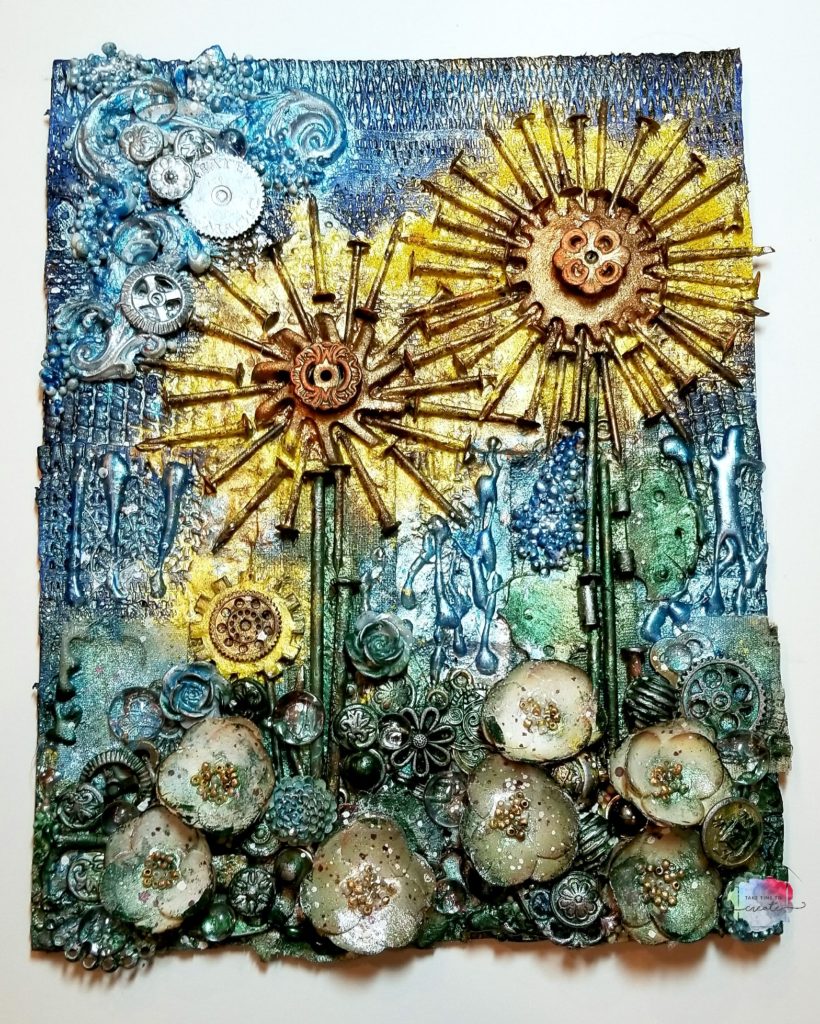
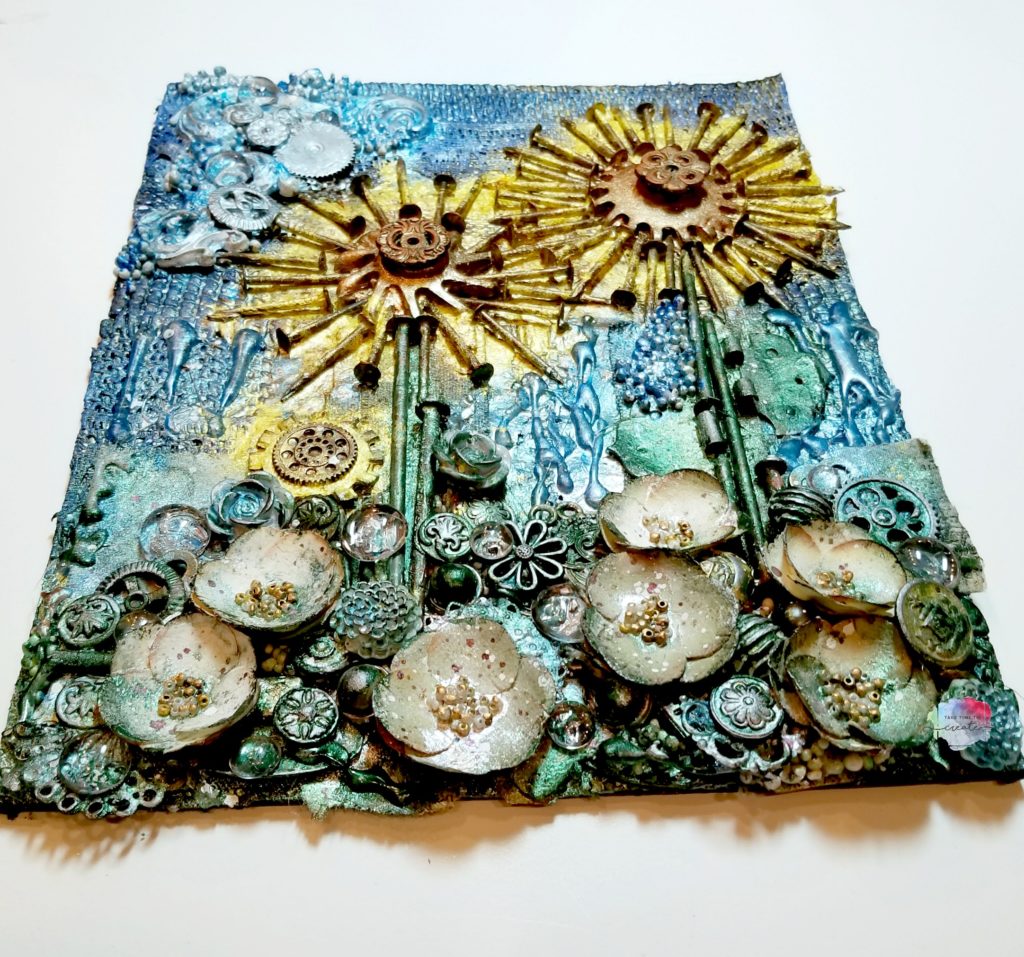
Fall is in the air and I am just loving it! I especially love seeing all the sunflowers, they are my favorite flowers! They are so pretty, and bright. Seeing all the sunflowers I was inspired to make a Sunflower Mixed Media Canvas.

Sunflower Mixed Media

Let me tell you how I made this canvas!

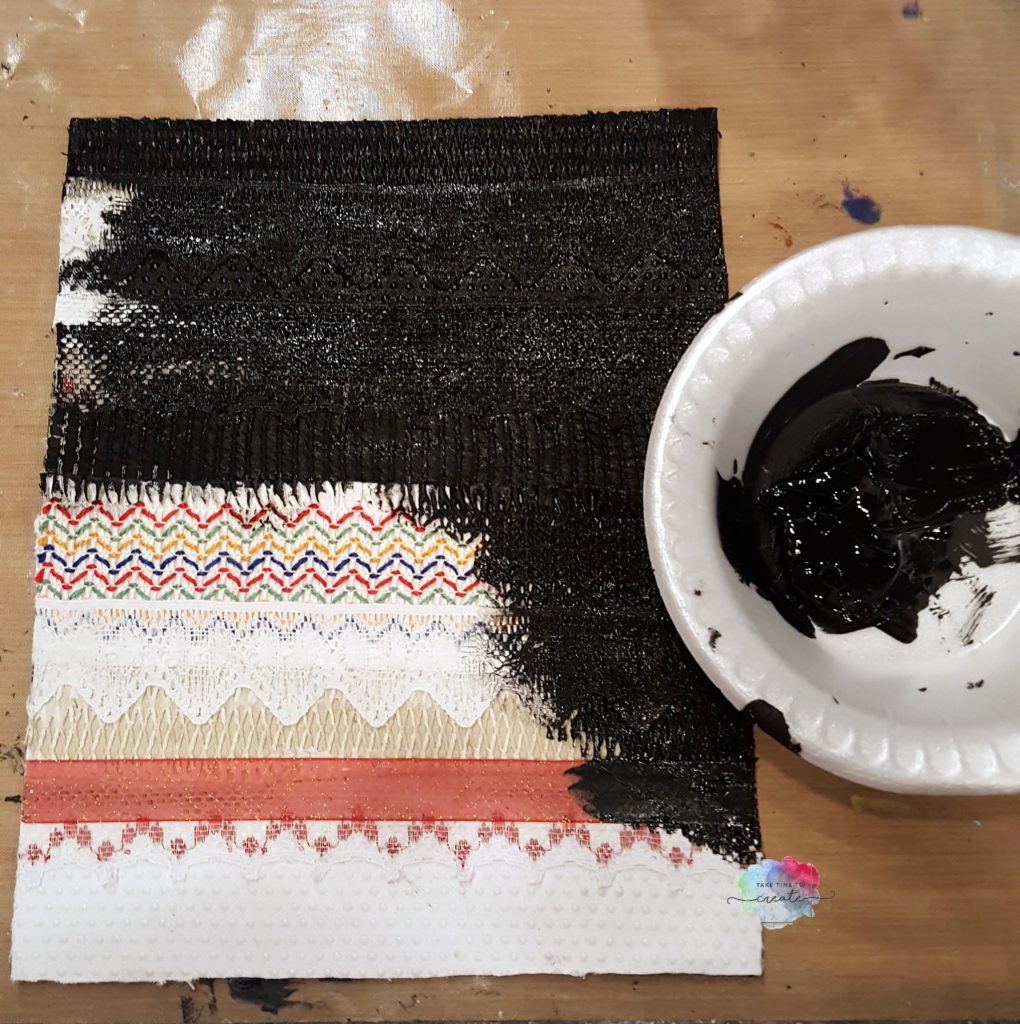
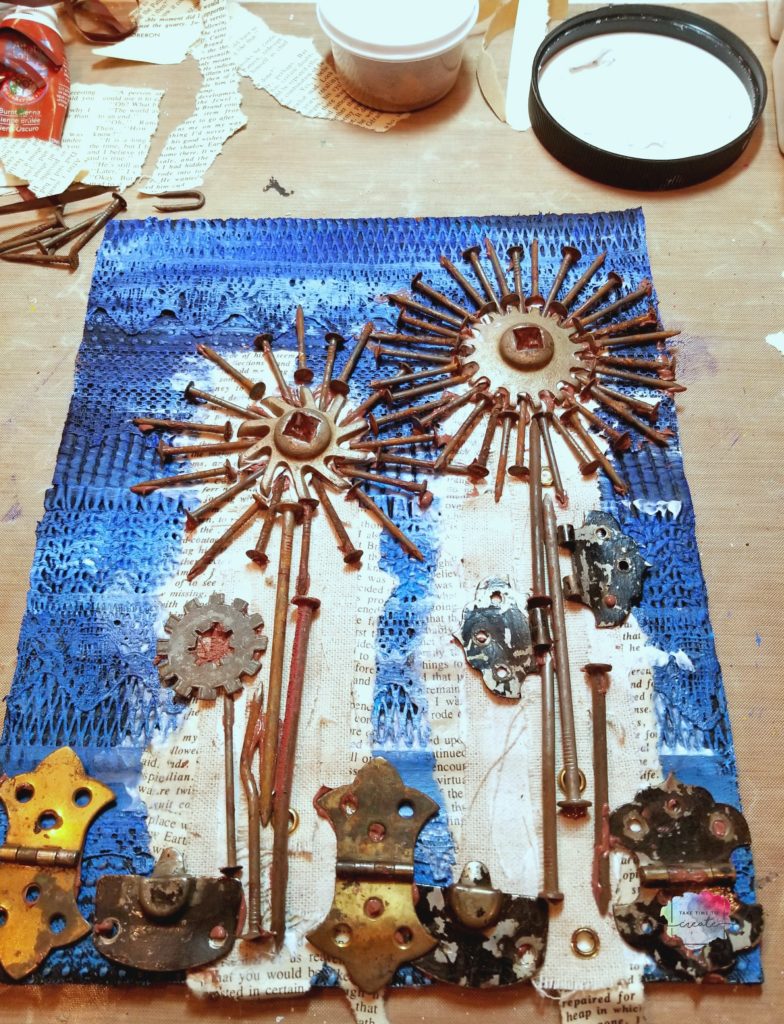
First I started with a canvas board and covered it with different ribbons (I adhered it with modeling paste), then I covered it all with black gesso.

Sunflower Mixed Media

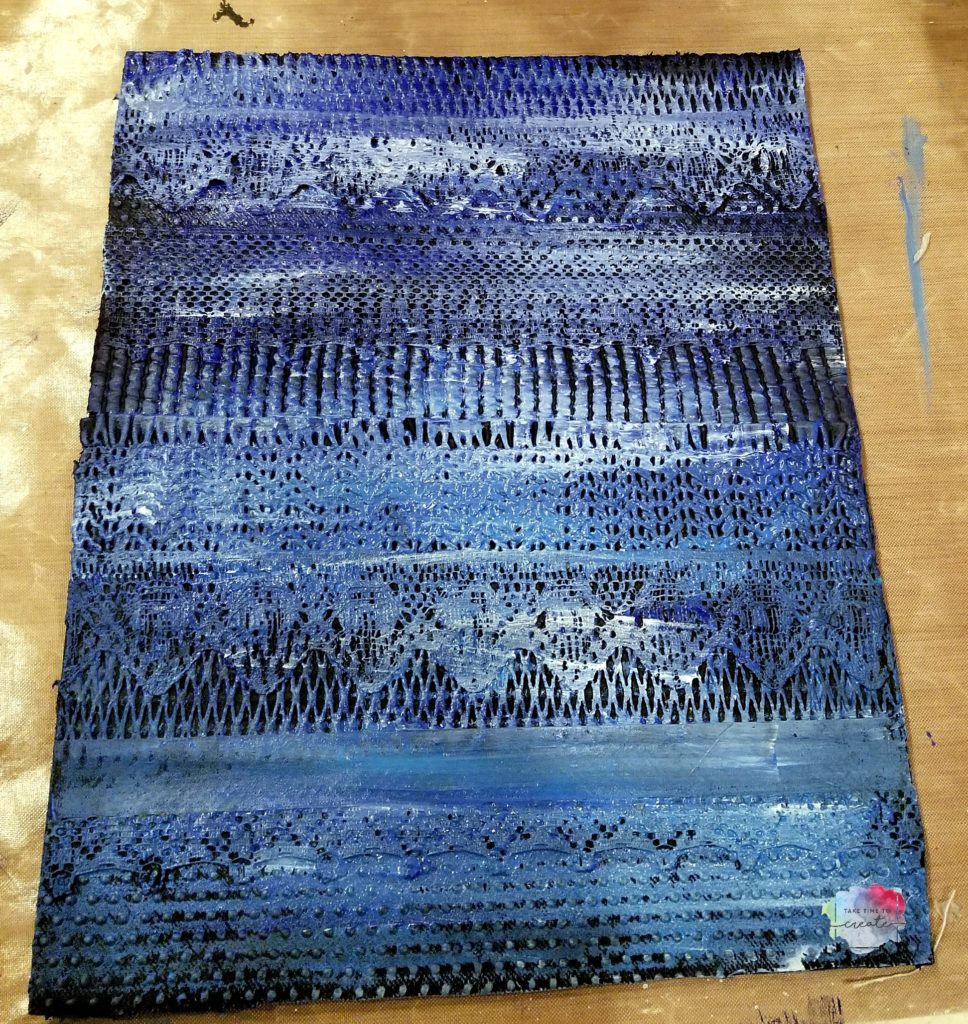
I painted the canvas with a few different shades of blue acrylic paint.  I loved how it looks like a sky, but it was a little bright,  I did end up toning it down by the time I was finished.

Sunflower Mixed Media

Now it is time to add all the goodies!! I had this pack of rusty nails that I found in my Grandpa’s shop, I couldn’t pass up this great texture. (be careful if you are using rusty nails, I wore gloves and washed my hands often)

I added book pages, burlap, other metal items, flowers, hinges, clear round dots, keys, brads, hot glue, and anything else I could find. Just use what you have in your stash and around the house. I  adhered it all with modeling paste (I tinted the paste with some brown acrylic paint).

Sunflower Mixed Media

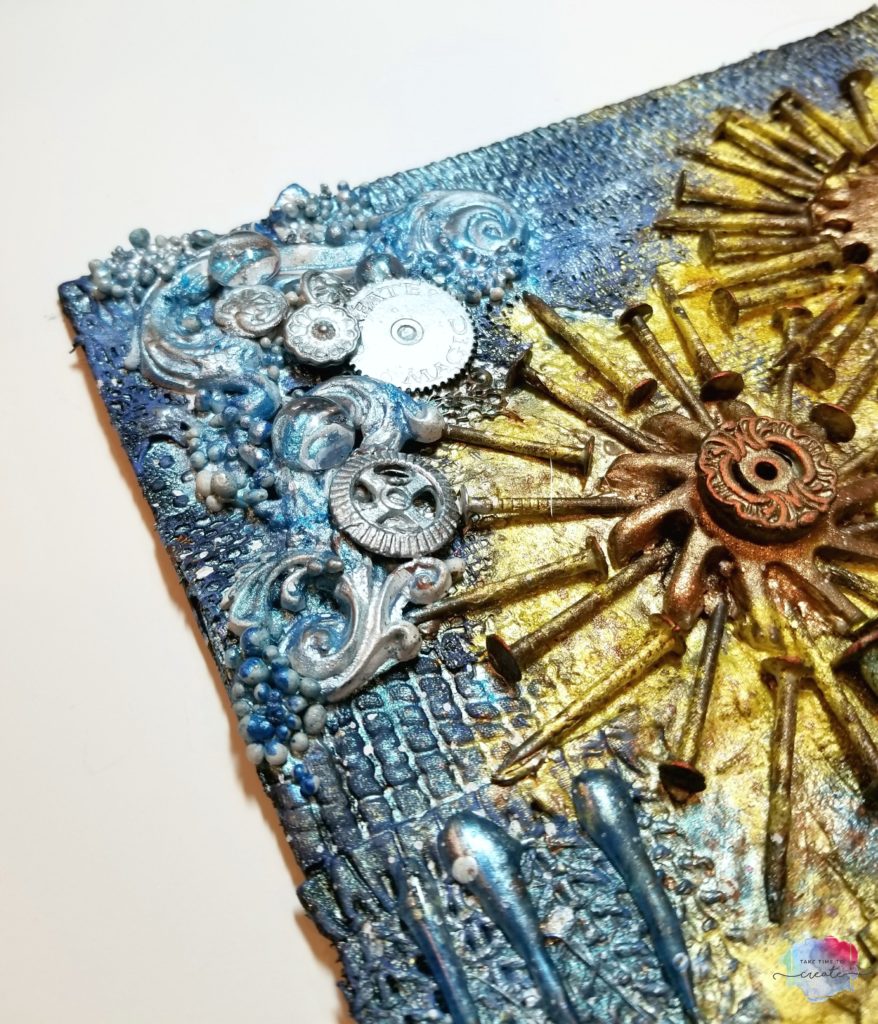
Once everything was all dry I primed the elements with clear gesso then I sprinkled mica powder on (yellow in the flowers, green in the grass and stems, and blue in the sky) I added water to activate it and I loved the look. Once that was all dry I dry brushed acrylic paint all over to add more color and details.

I am in love with how it turned out! I used such a random assortment of products, I will list them all below for you. As always, let me know if you have and questions on this project.

Sunflower Mixed Media

Sunflower Mixed Media

Sunflower Mixed Media


Materials used: (affiliate links)

The post Sunflower Mixed Media Canvas Appeared first on Take Time To Create.
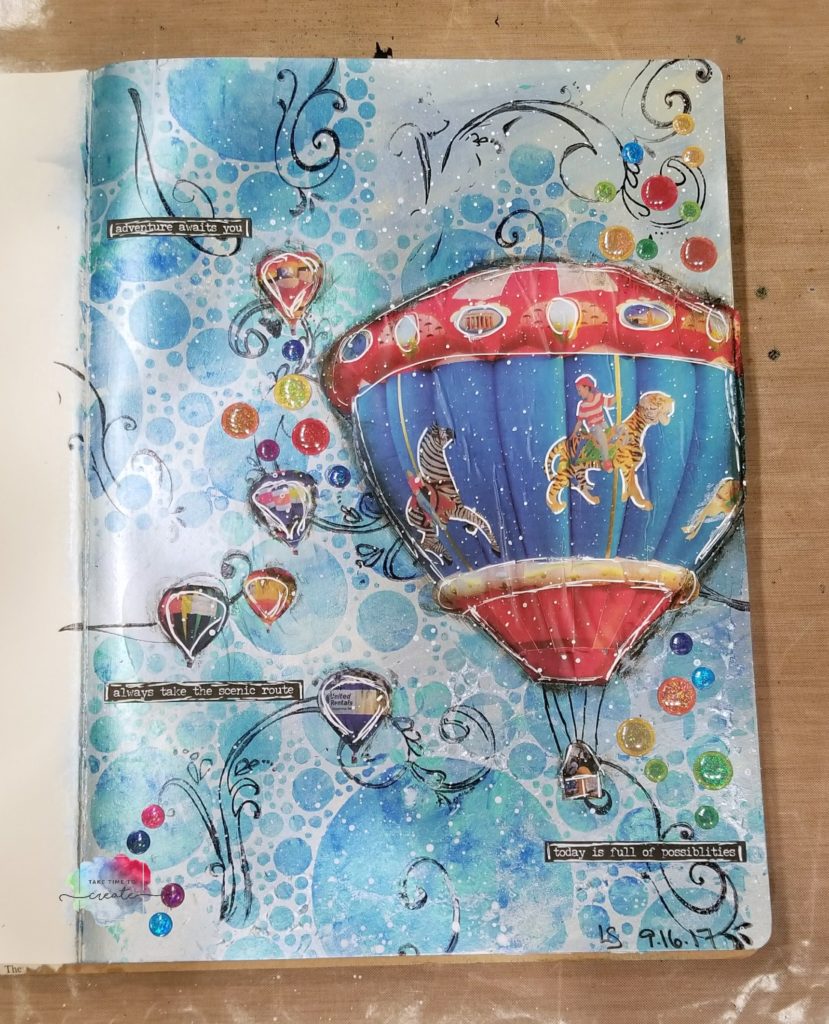
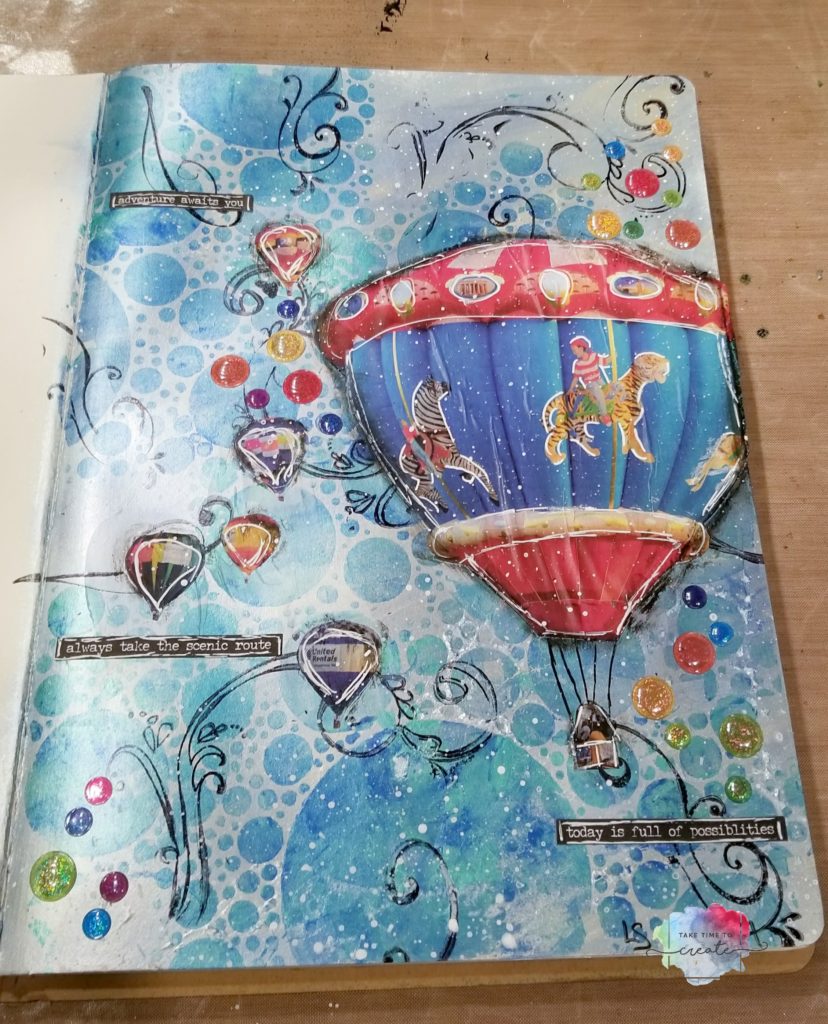
Hot Air Balloon Art Journal Page

Hello Everyone!

Lately I have been getting back to my Art Journal and I have been in love! It is so great to get back to painting and creating without worrying about selling it (I have been doing a lot of craft fairs lately).

If you follow me on You Tube you probably have already seen my time lapse video of my journal page, but in case you didn’t here is the video:

I used a lot of material that I had on hand, which is fun to use what I have.

Materials: (affiliate links)

Instructions:

I started with my Dylusions Creative Journal from Ranger. I love this journal it is big and the paper is thick and doesn’t warp when I add a lot of paint and mediums on it.

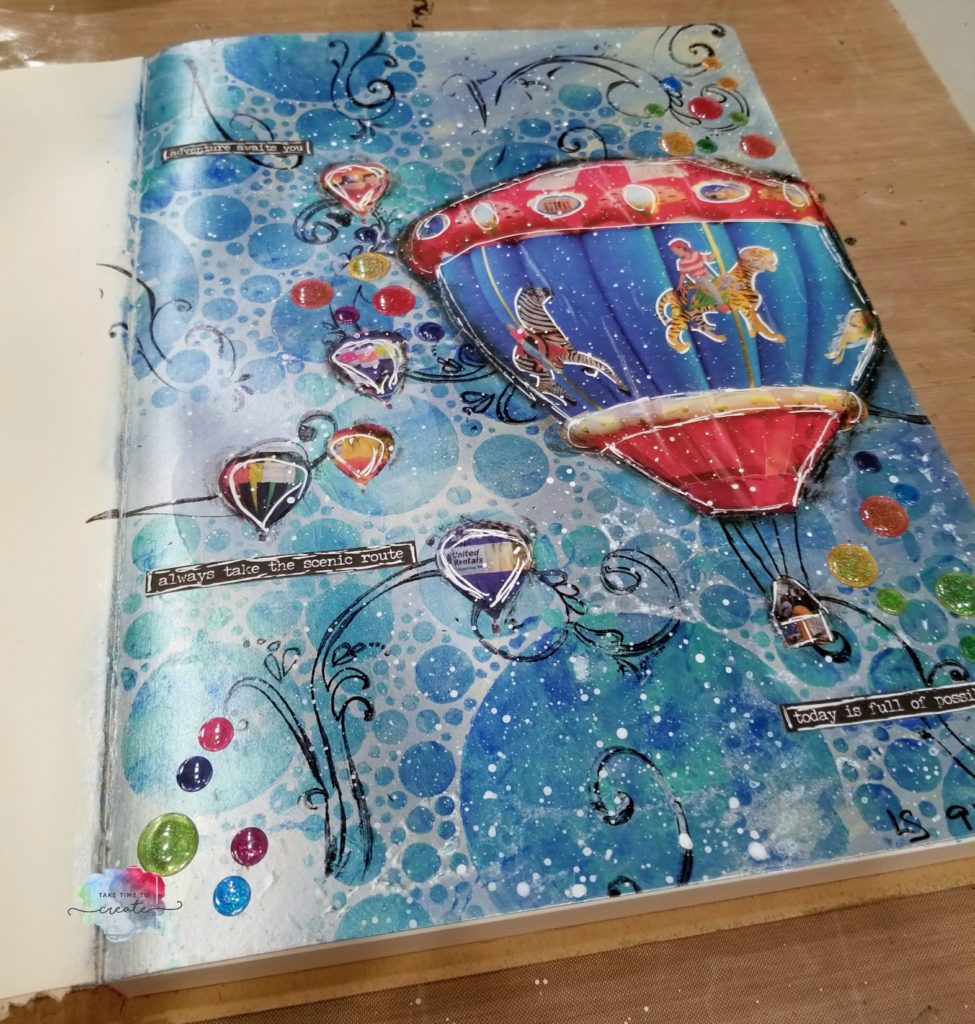
I painted light blue all over and while it was still wet I painted dark blue on then layered the champagne color on top. I didn’t blend it all together, but kept the colors a little separate with a little blending.


Hot Air Balloon Art journal page

Completly dry that layer before going on to the next step. The back ground was nice but it needed more texture, so I stenciled in some circles using the dark blue and a teal color.

Once that was dry I stamped swirls on top with archival in . They don’t have to be perfect, in fact I think it all looks better when things are not exactly perfect.

Hot Air Balloon Art journal page

While that is all drying I cut out some hot air balloons I found in a magazine and adhered them down with matt medium.

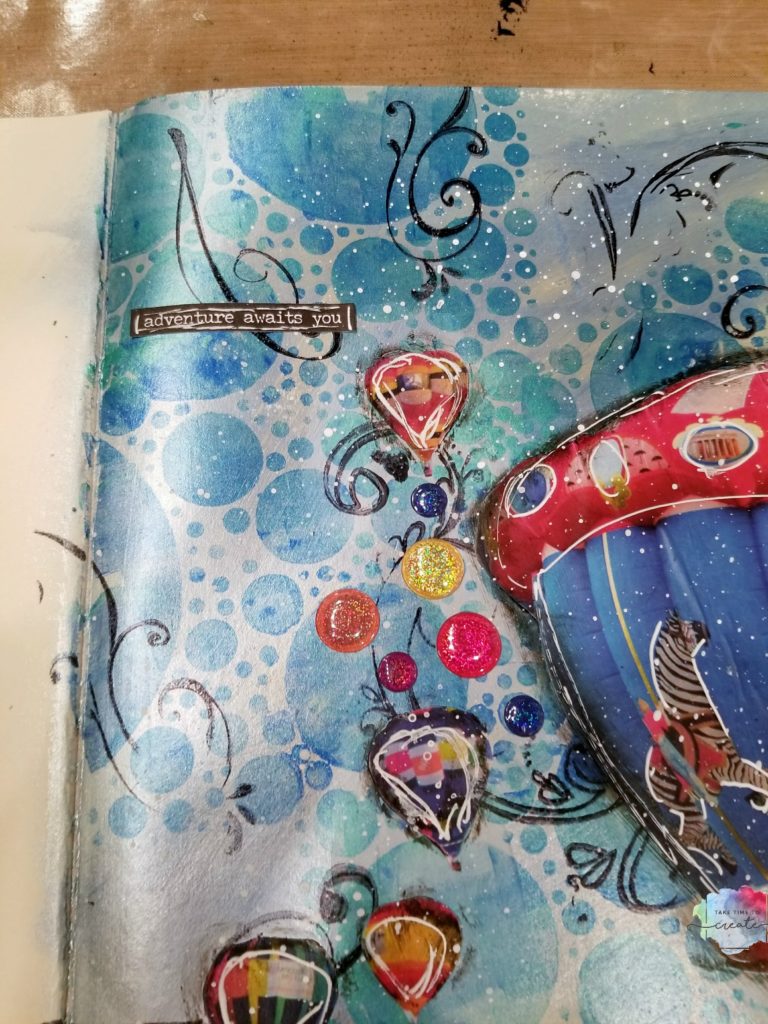
The journal page was starting to look better but it needed a little bling, so I added some resin dots I found at the dollar store and I added some great quotes from Tim Holtz Big Chat stickers. (I love these stickers!)

Hot Air Balloon Art journal page

Then I splashed white acrylic paint on the page and then went around the edges of the balloons with a black gelato.

For the final touch I outlined major elements with a white gel pen.

Hot Air Balloon Art journal page

Art Journal pages are so much fun!

What is  your favorite journal to work in?

The post Hot Air Balloon Art Journal Page appeared first on Take Time To Create.
 

« Older posts

© 2025 Take Time To Create

Theme by Anders NorenUp ↑

Follow

Get the latest posts delivered to your mailbox:

%d bloggers like this: