Tag: canvas (page 1 of 2)

WDW Park Icons Canvas- Mixed Media

Hello Everyone!

It is no secret how much I love Disney and visiting Disney World is one of my favorite things to do! When I began my journey into fabric mixed media I just knew that I would need to create some canvases that paid homage to Disney World.

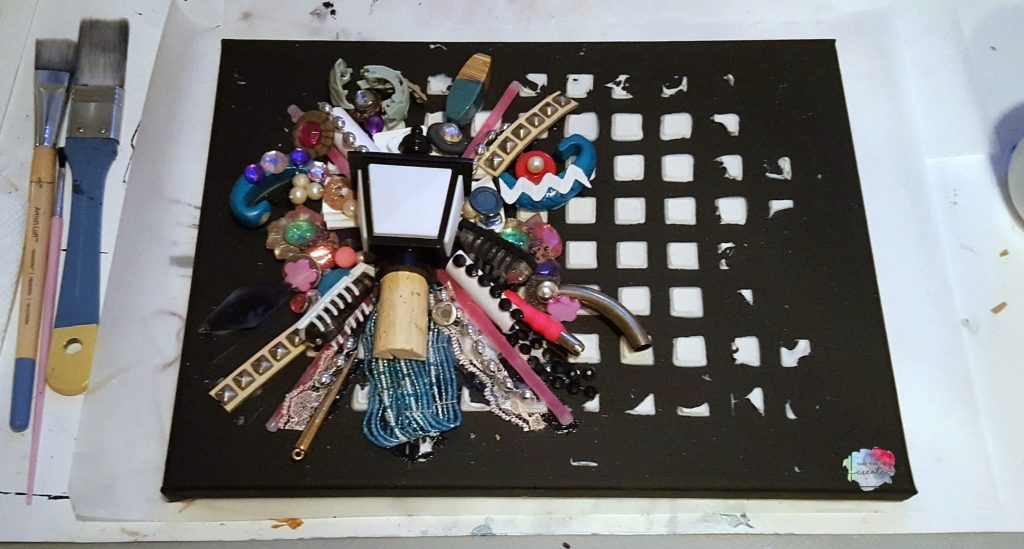
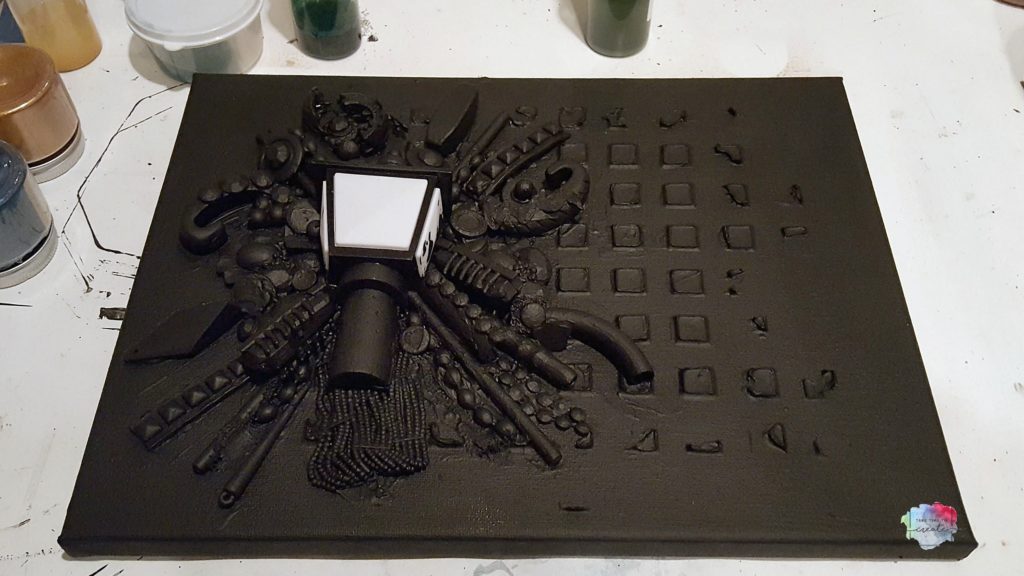
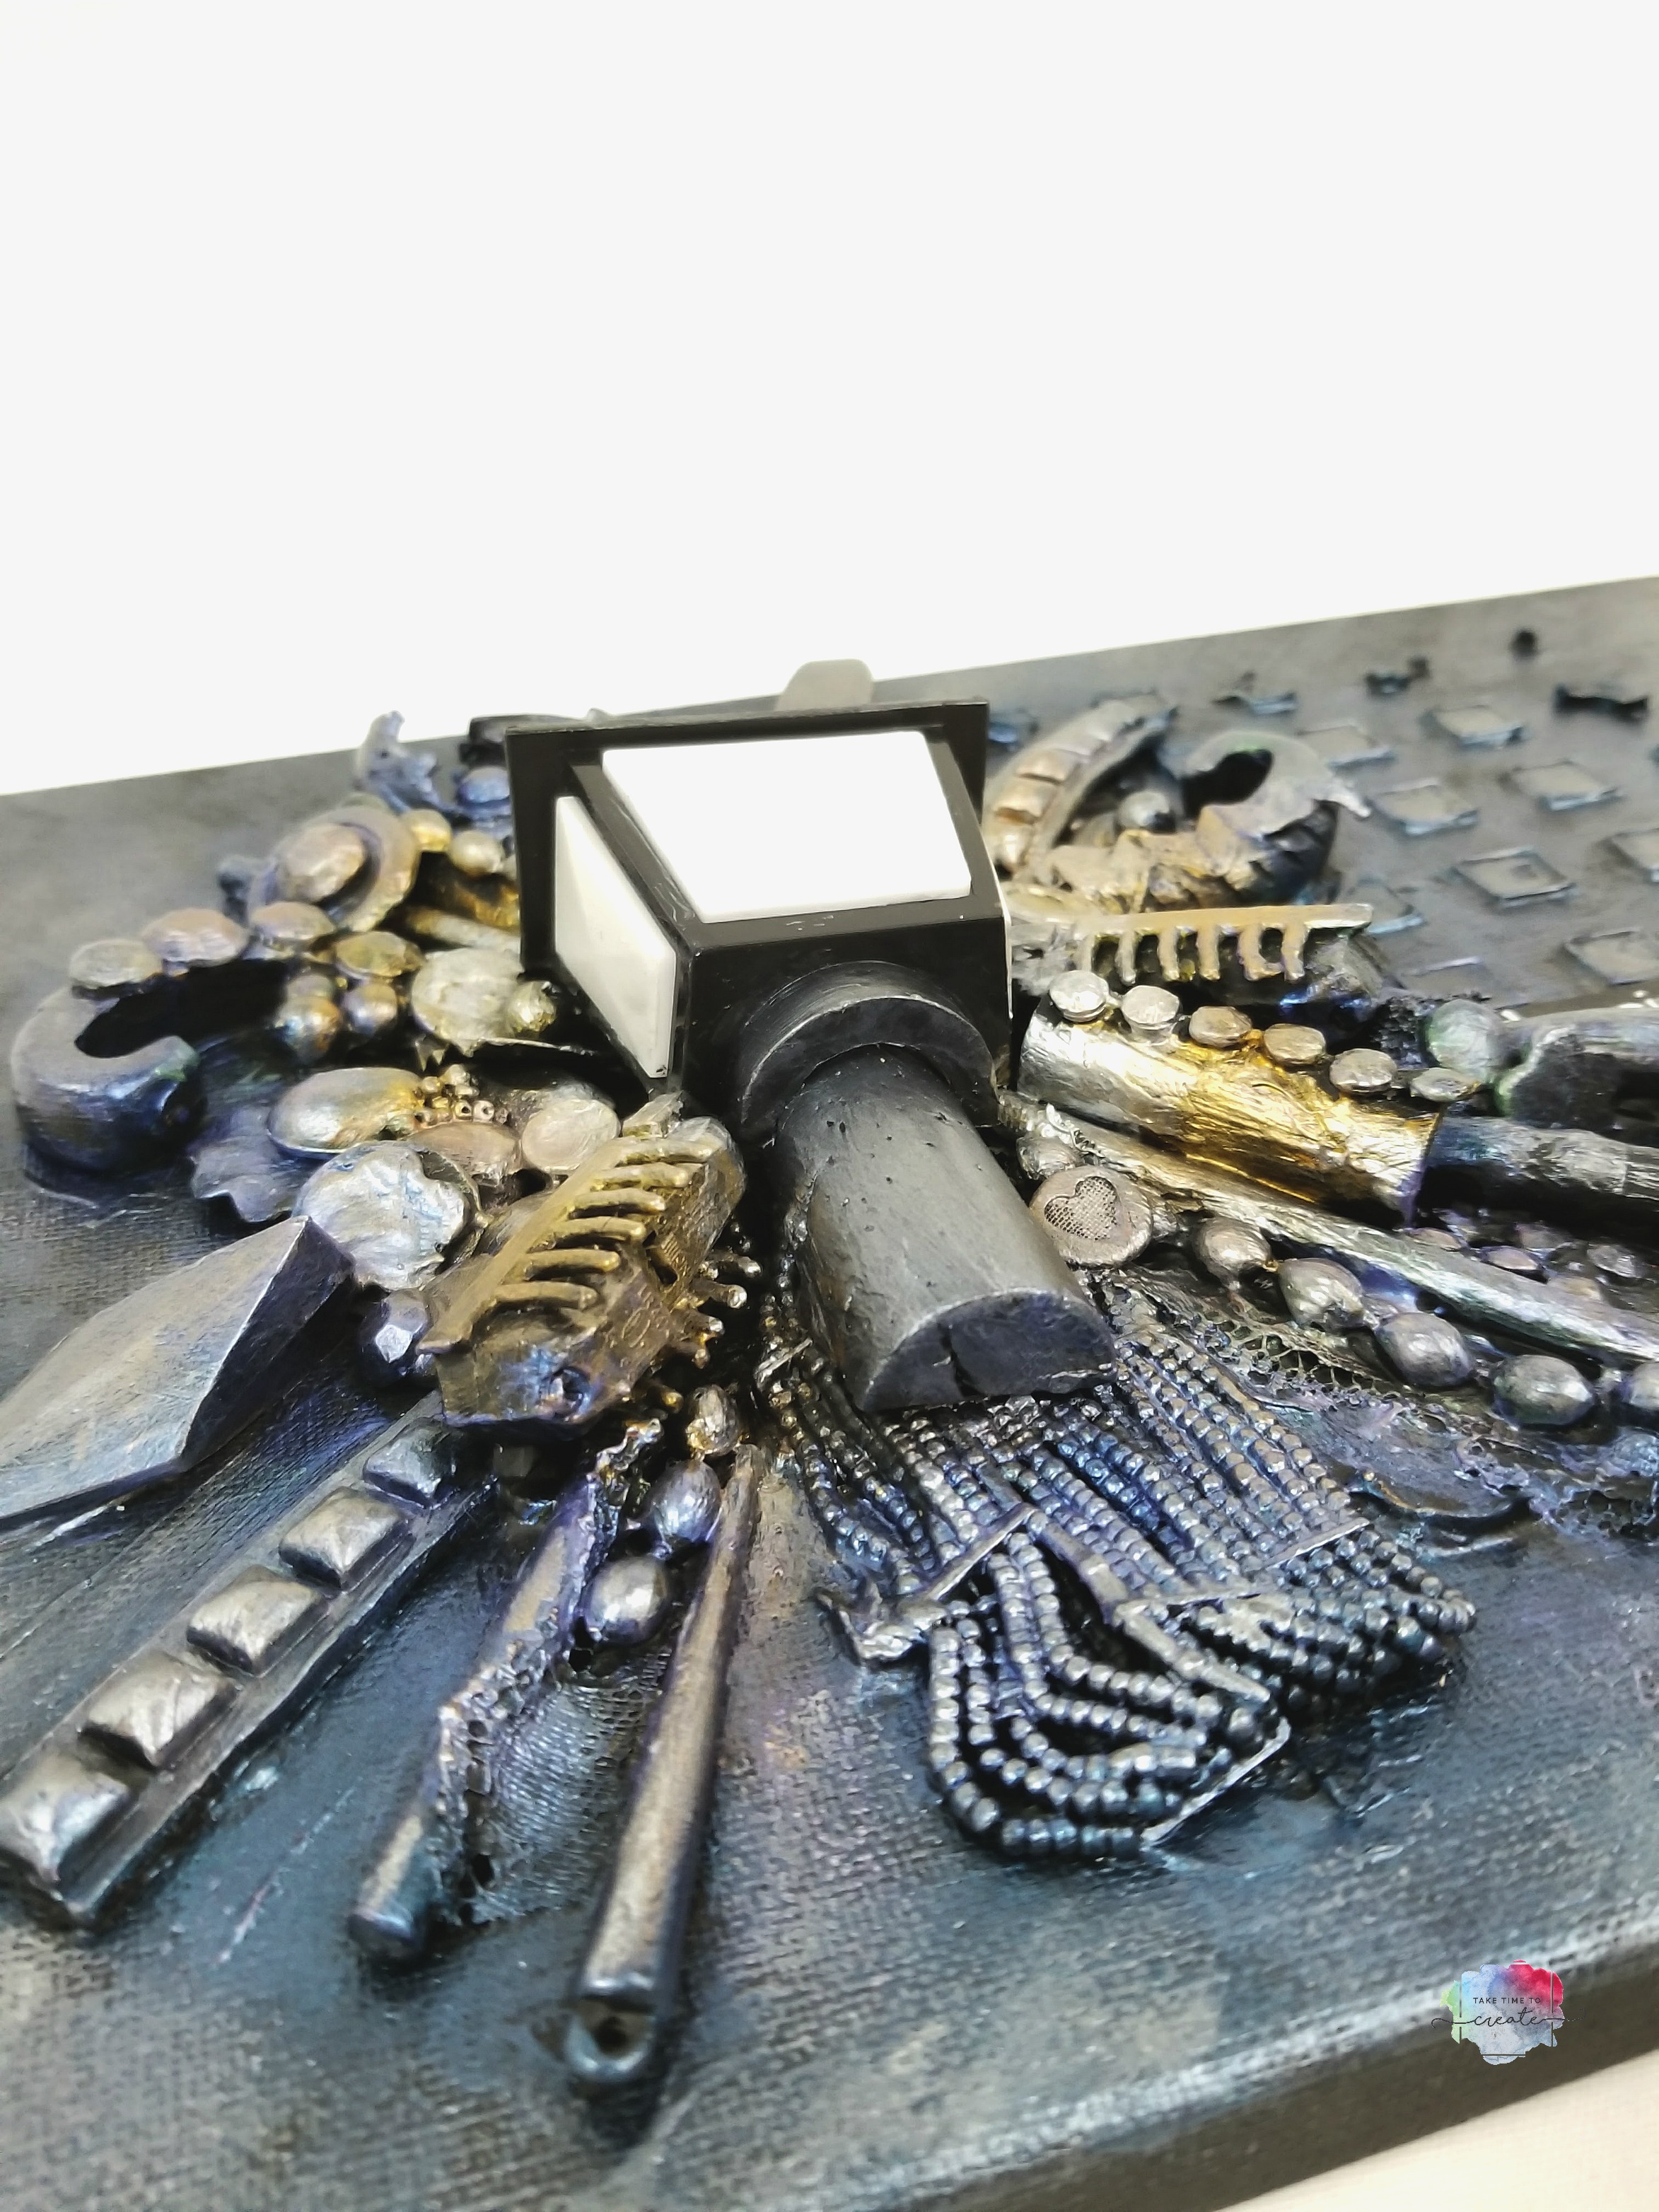
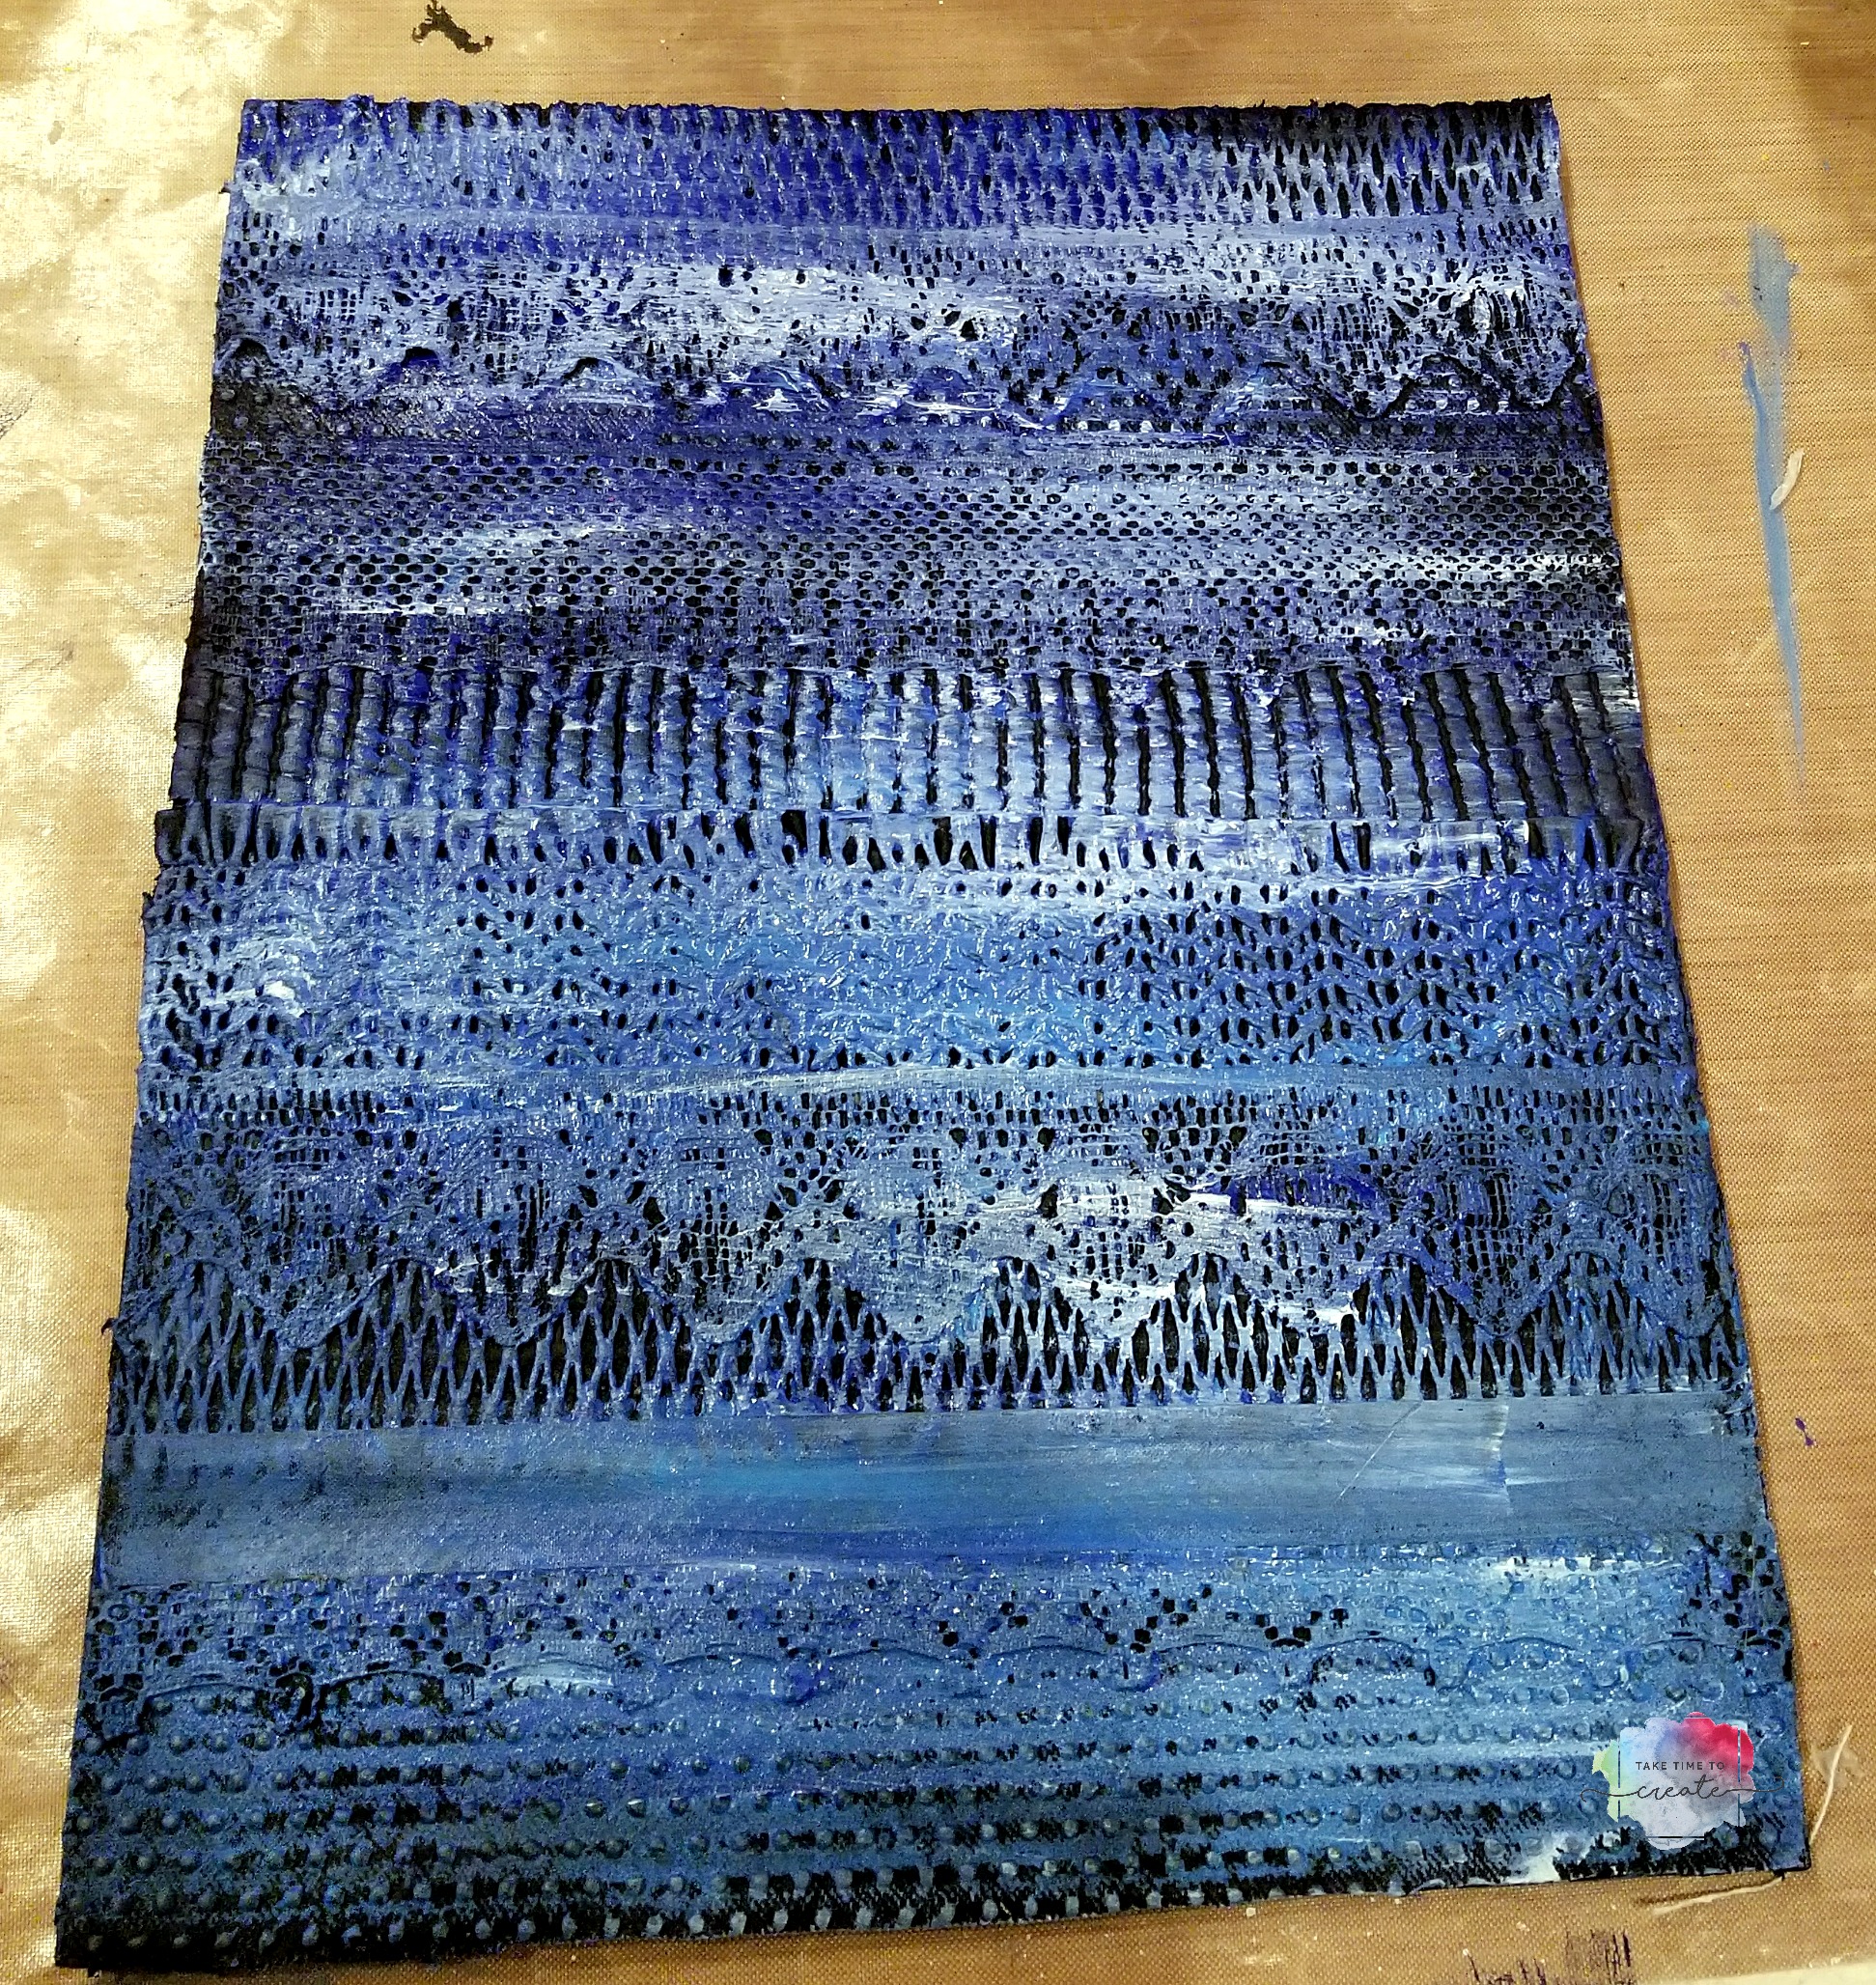
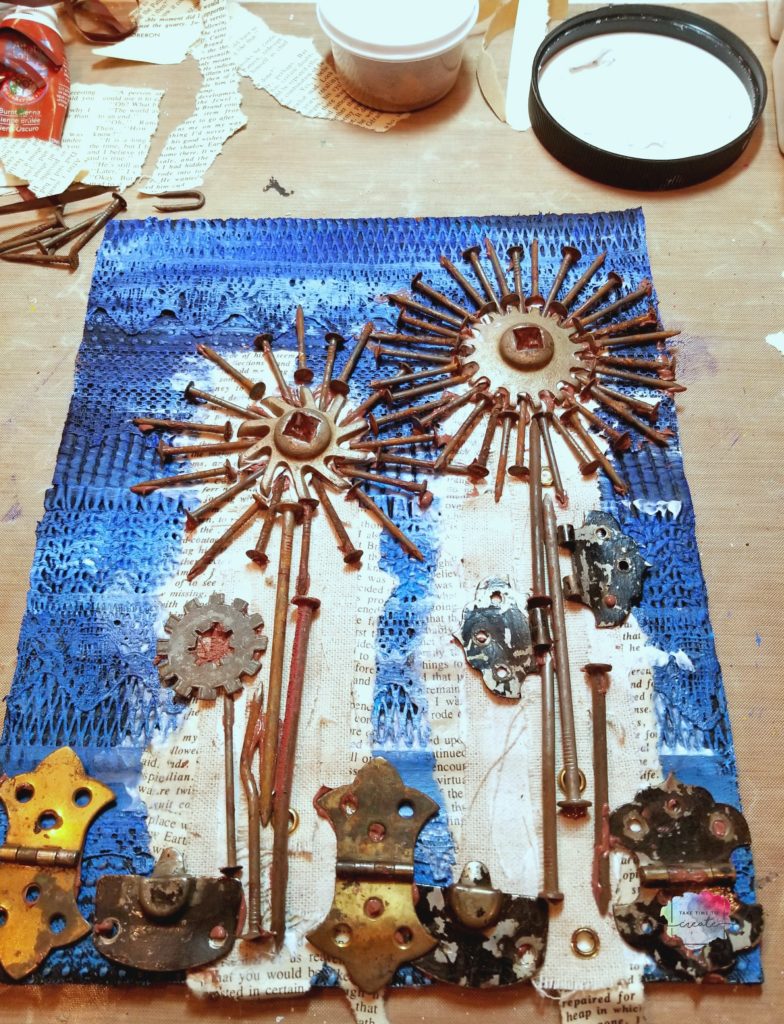
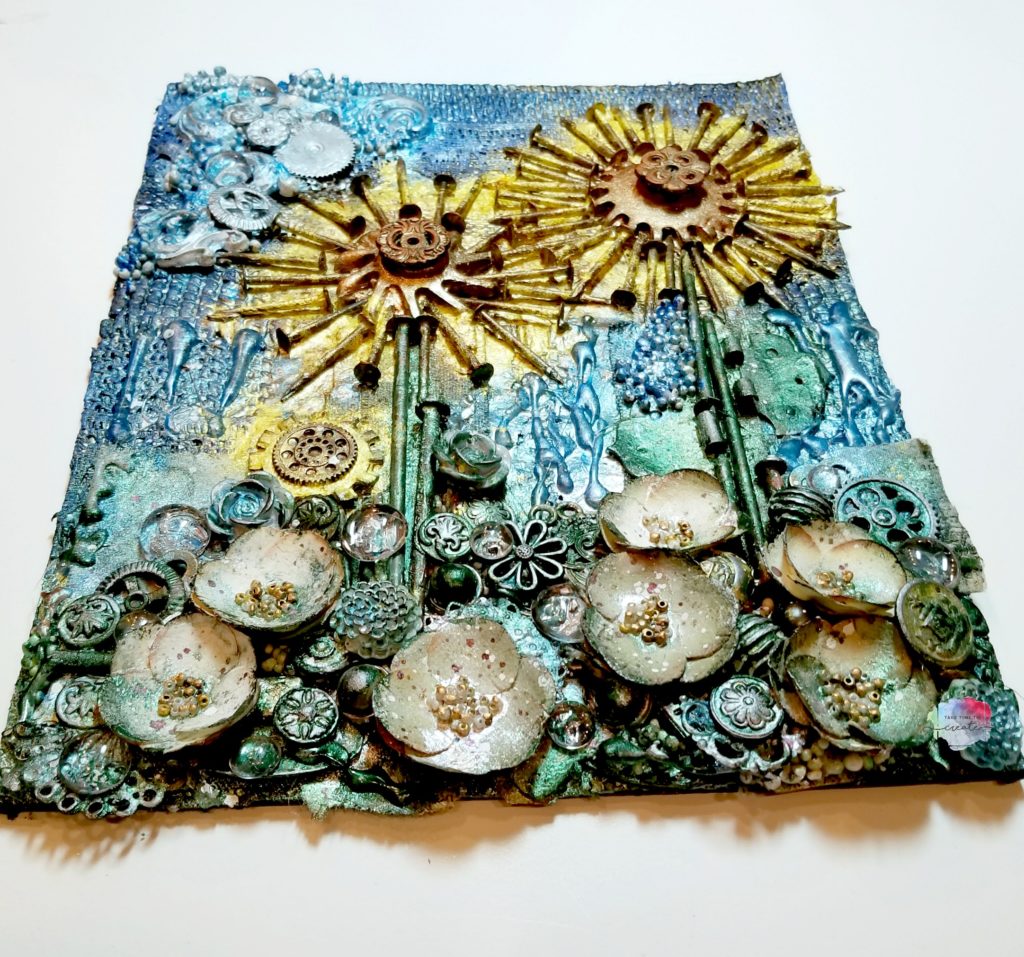
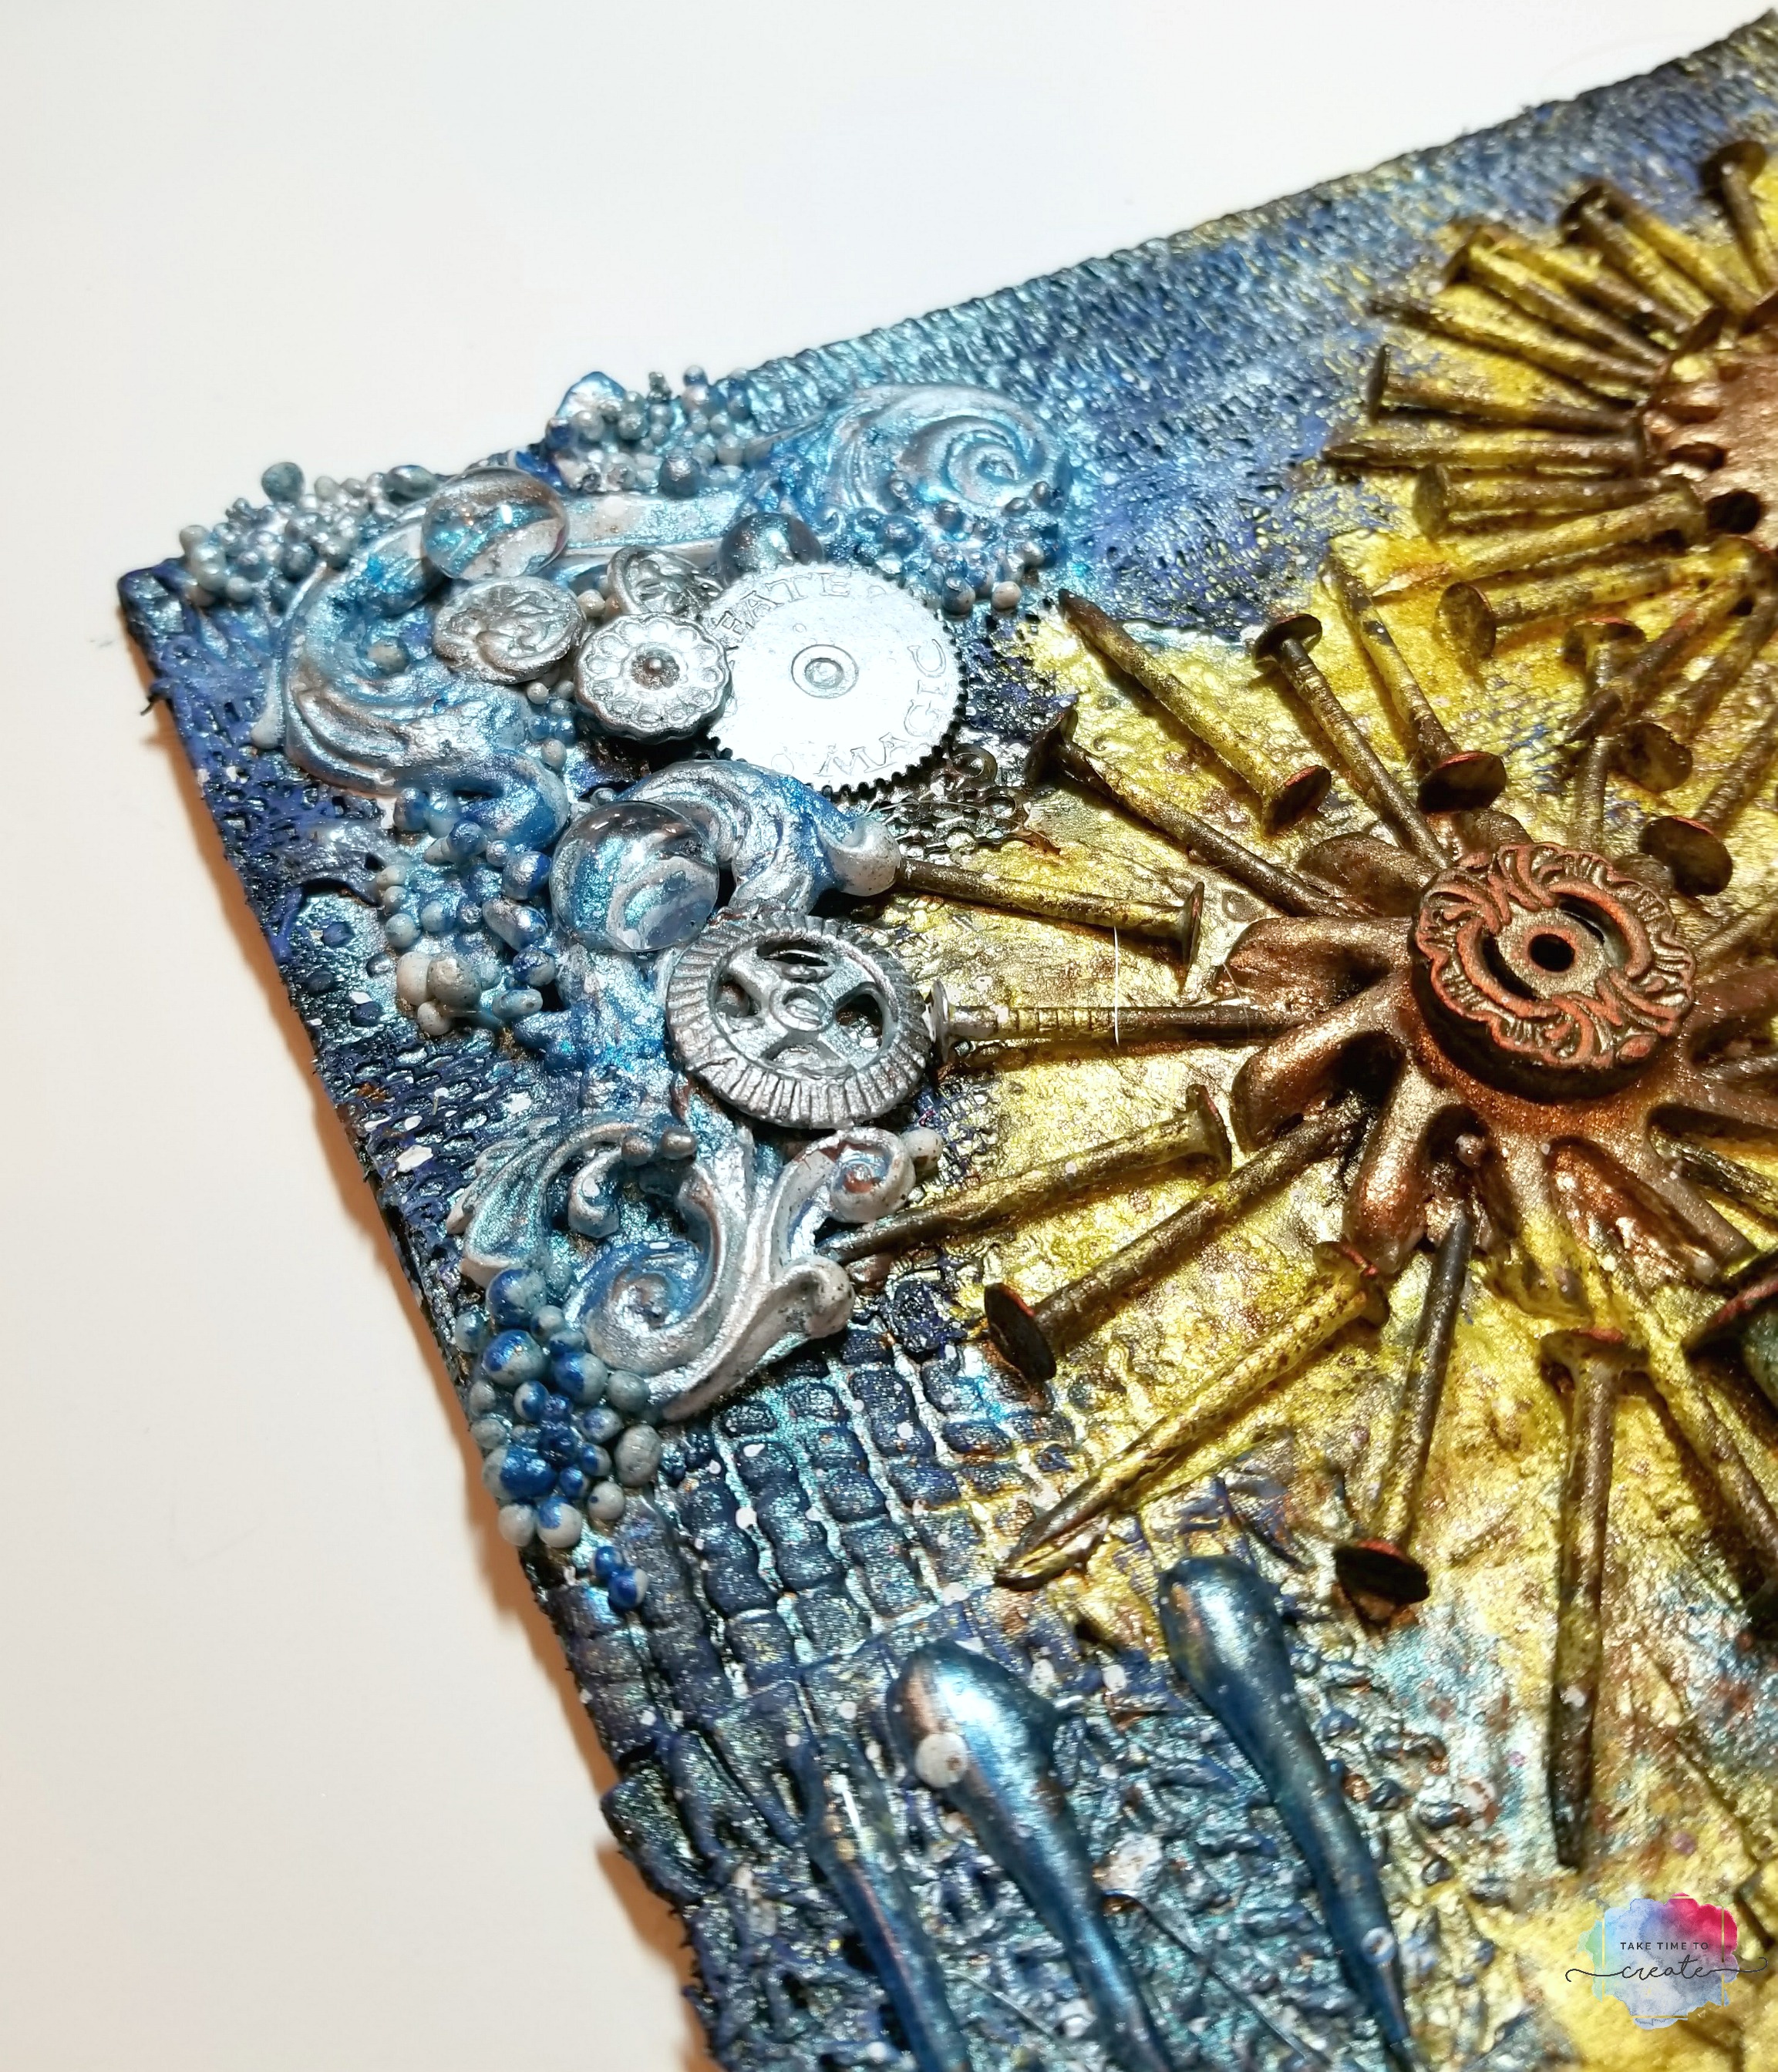
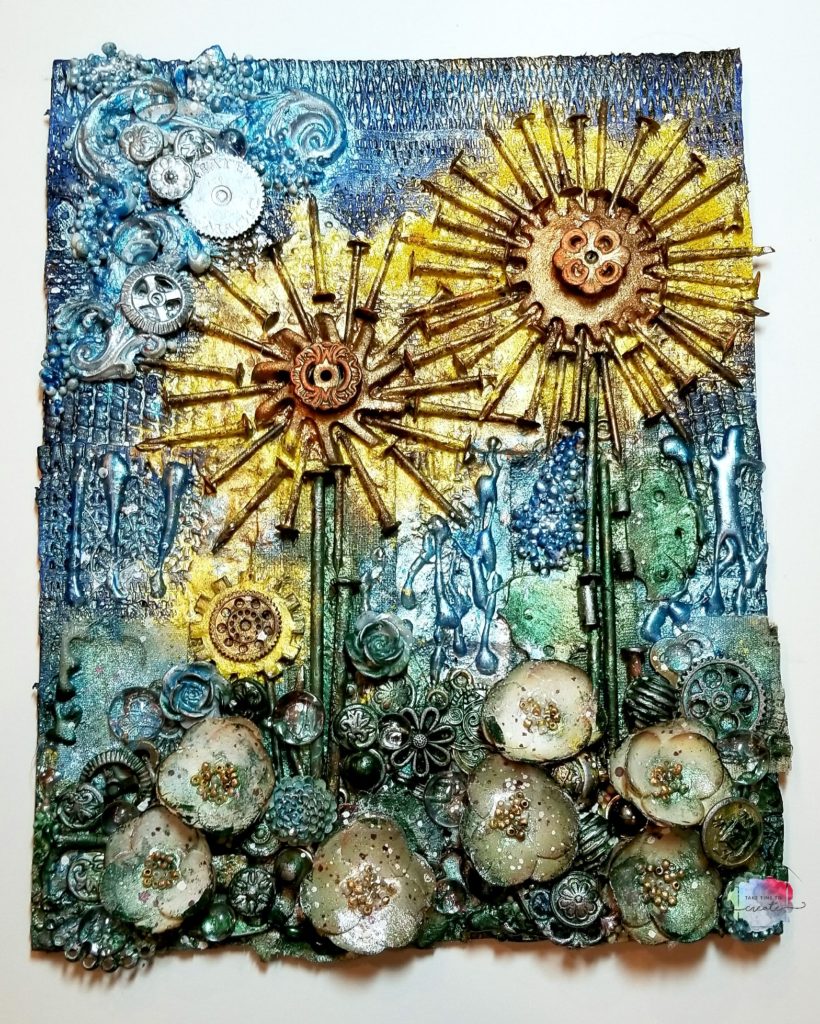
So I created these 4 canvases celebrating each of the 4 parks at WDW.

The first is a pretty pink castle, this is for the Magic Kingdom. It is hard to tell in the photo but there is a lot of glitter and shine on the canvas, especially on the white background.

WDW Park Icons

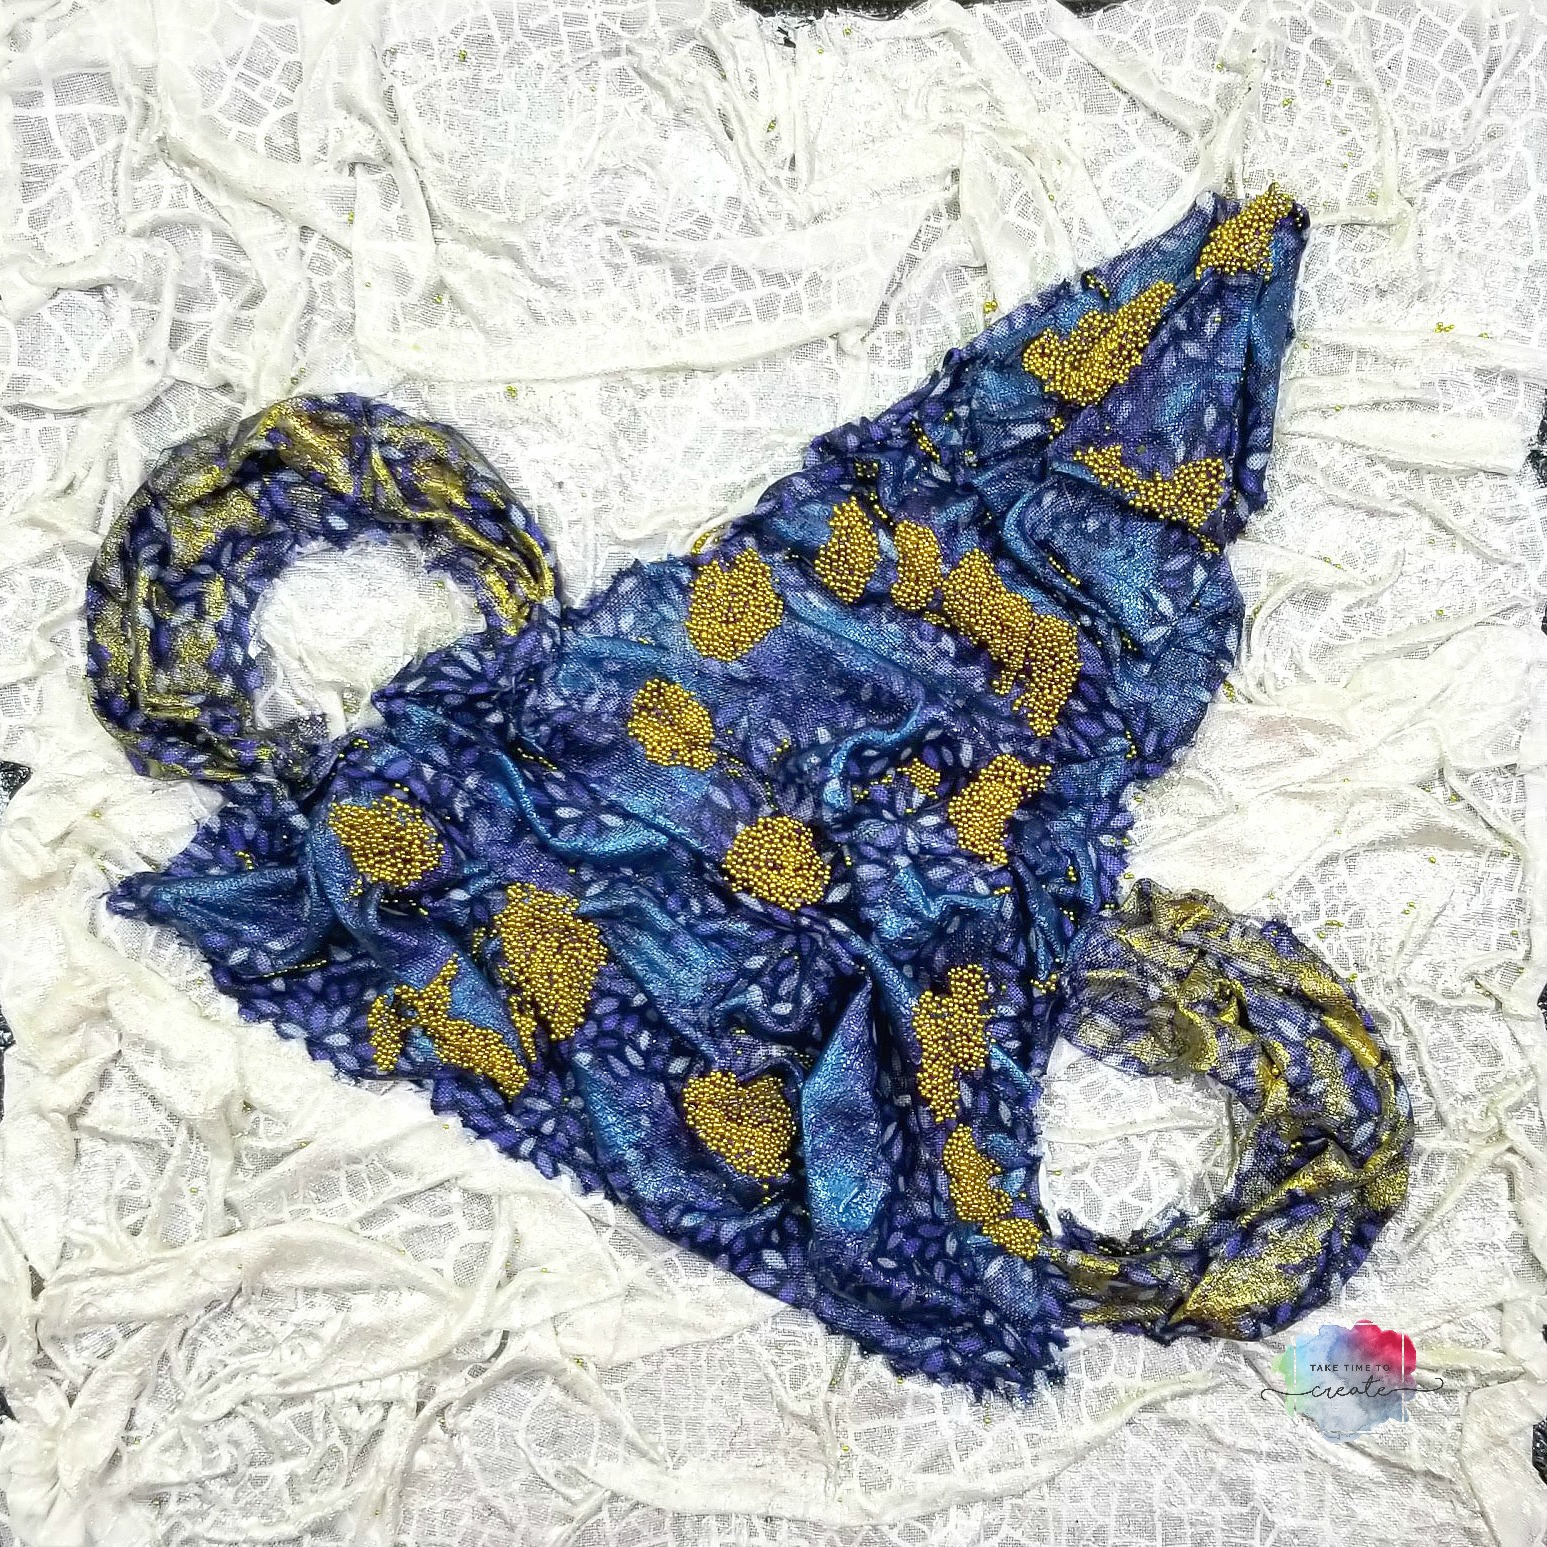
Then there is EPCOT with an image of Spaceship Earth. This is one of my favorite rides, probably because it is slow and relaxing with lots of air conditioning, lol. Perfect break in the middle of a hot day in Florida, lol

WDW Park Icons

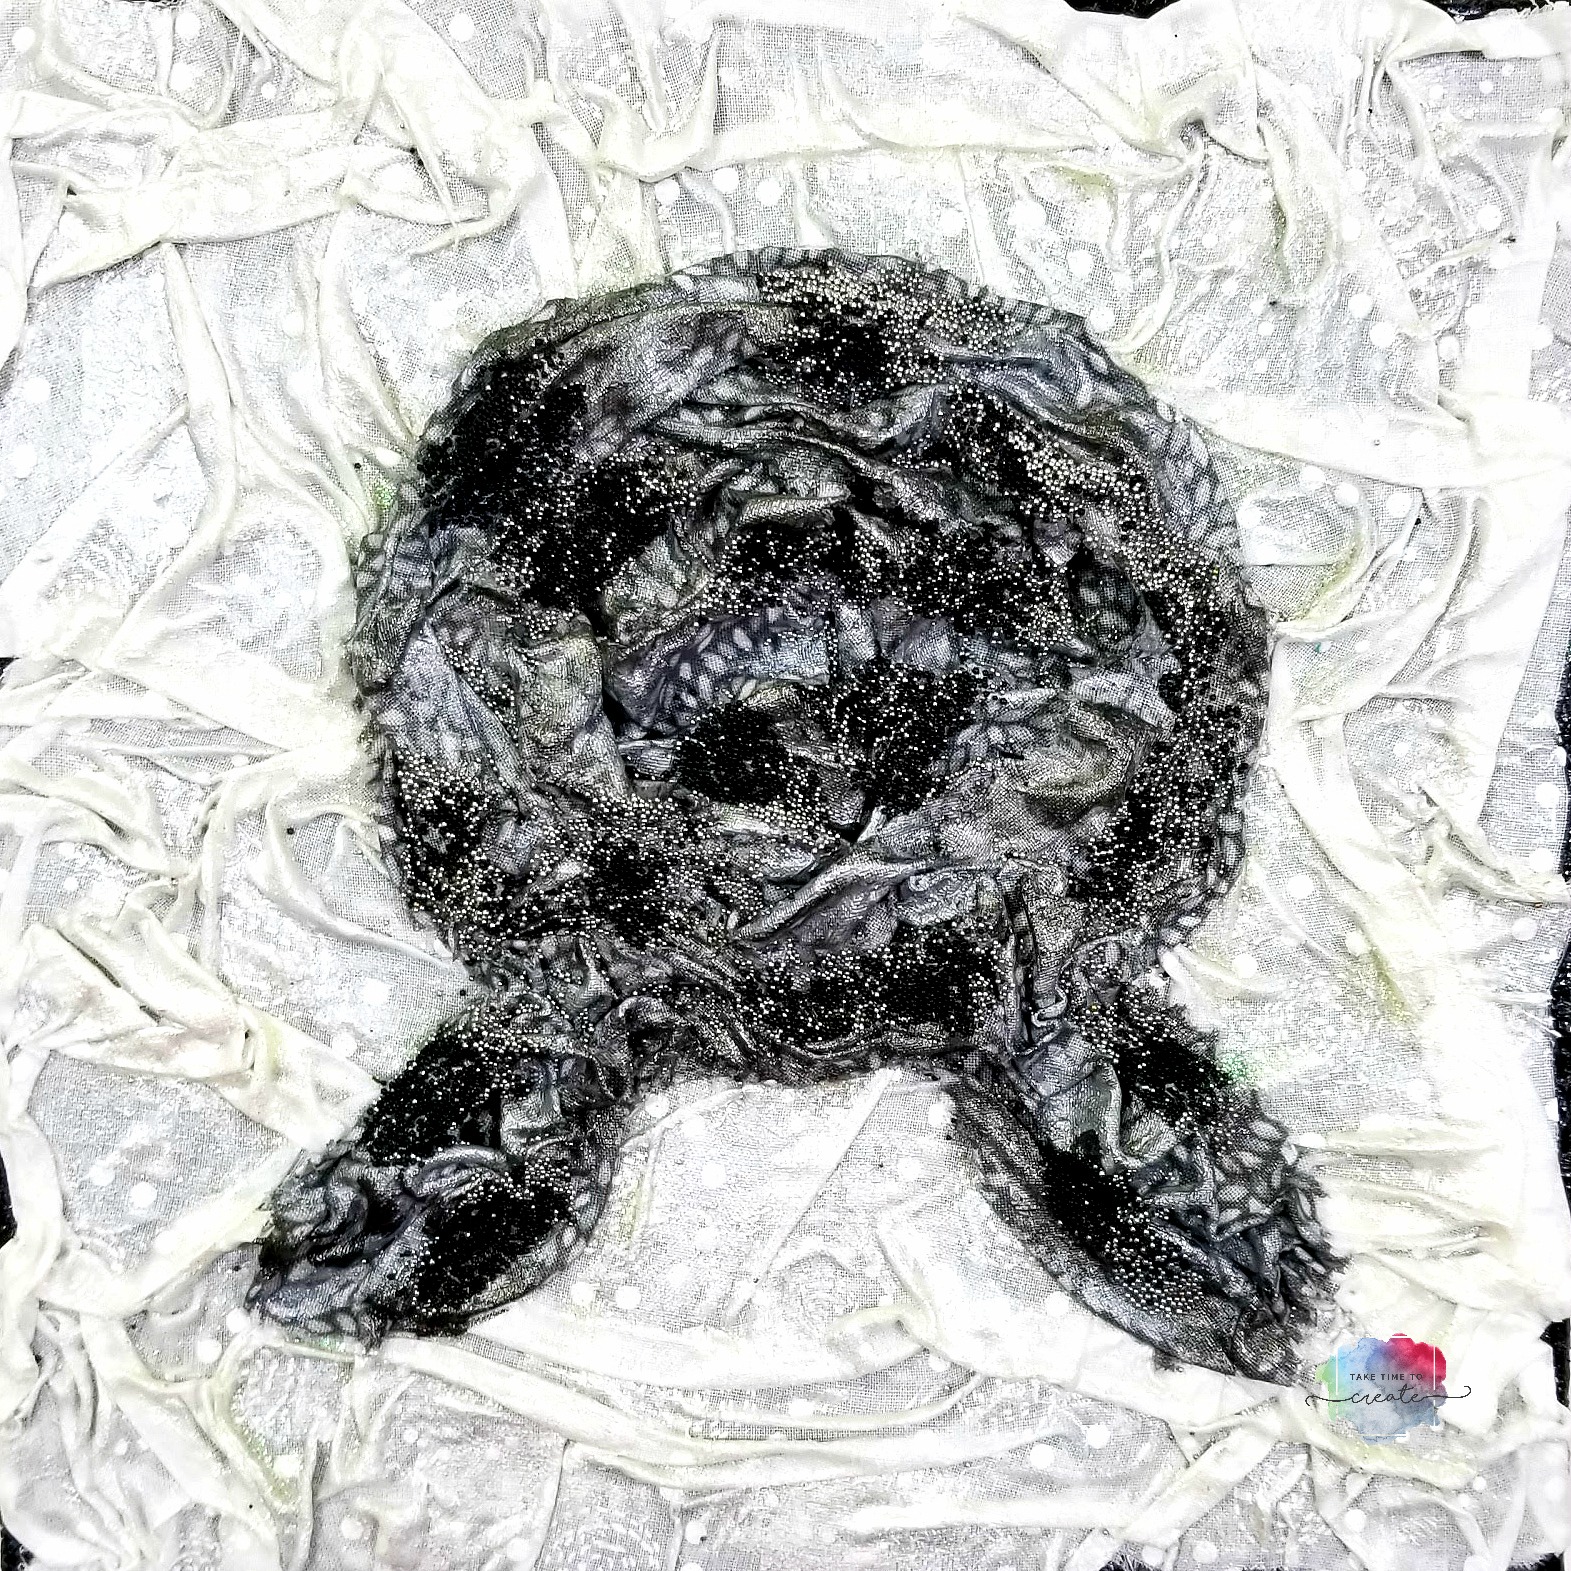
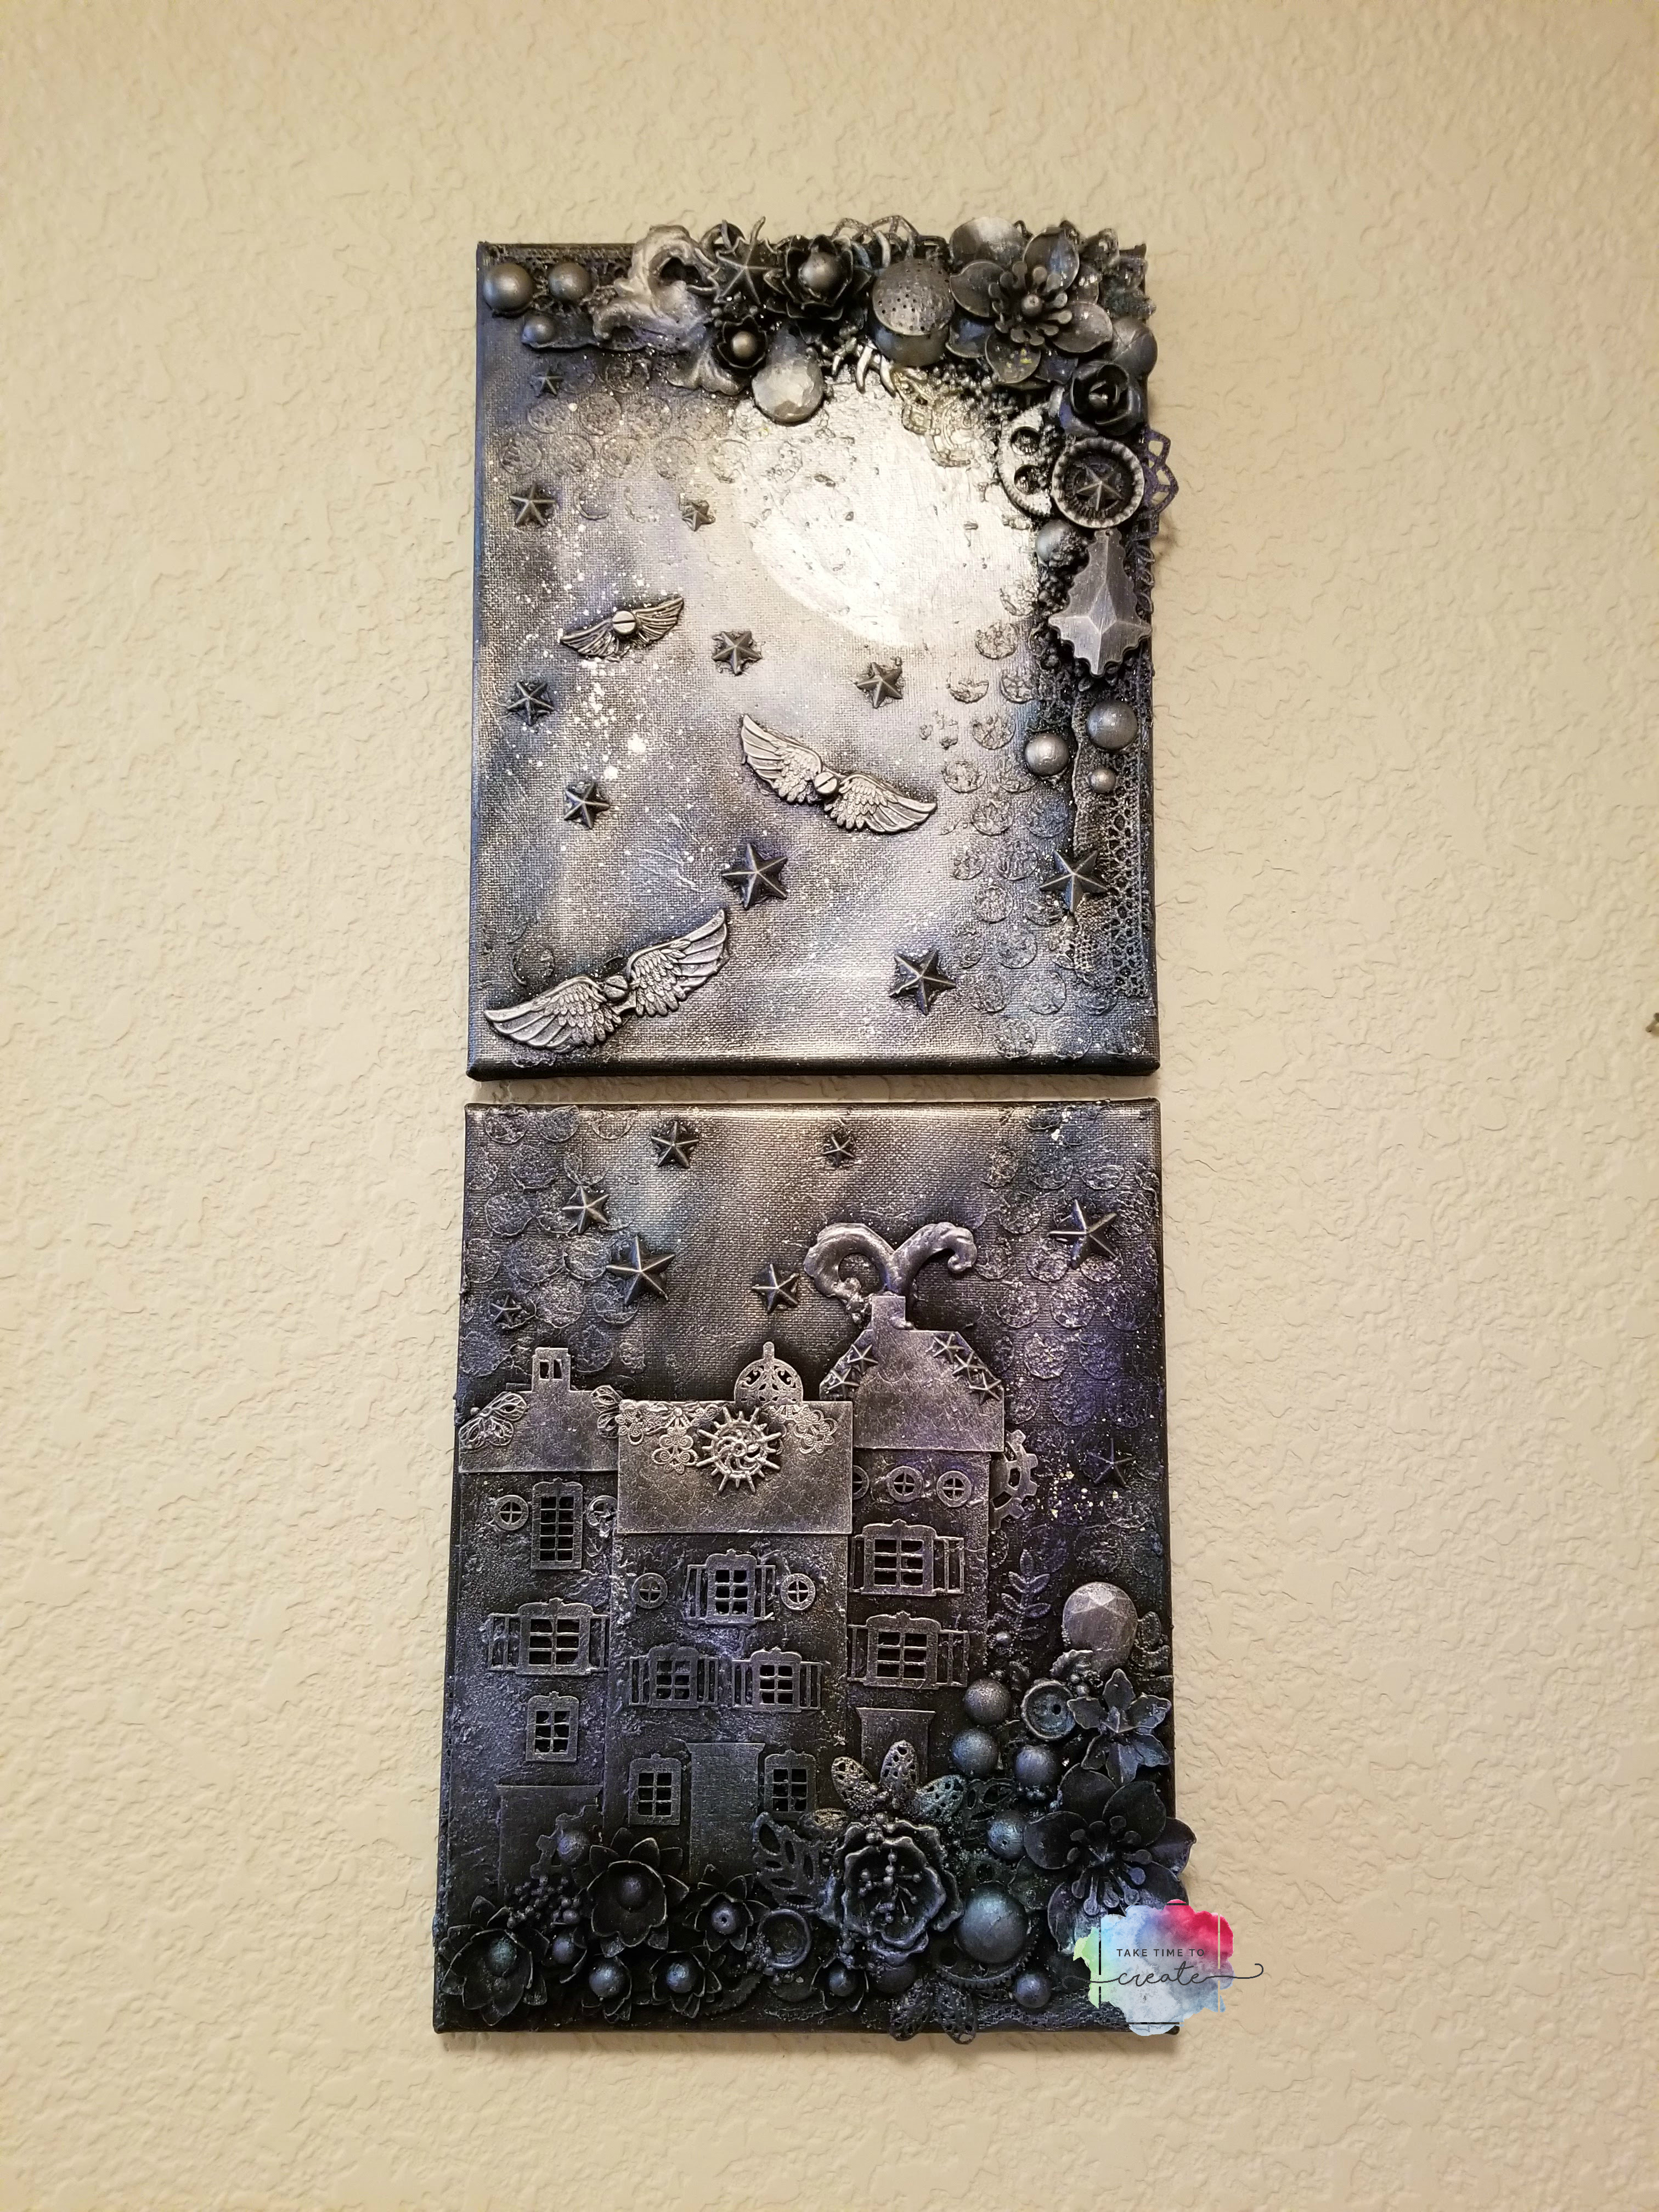
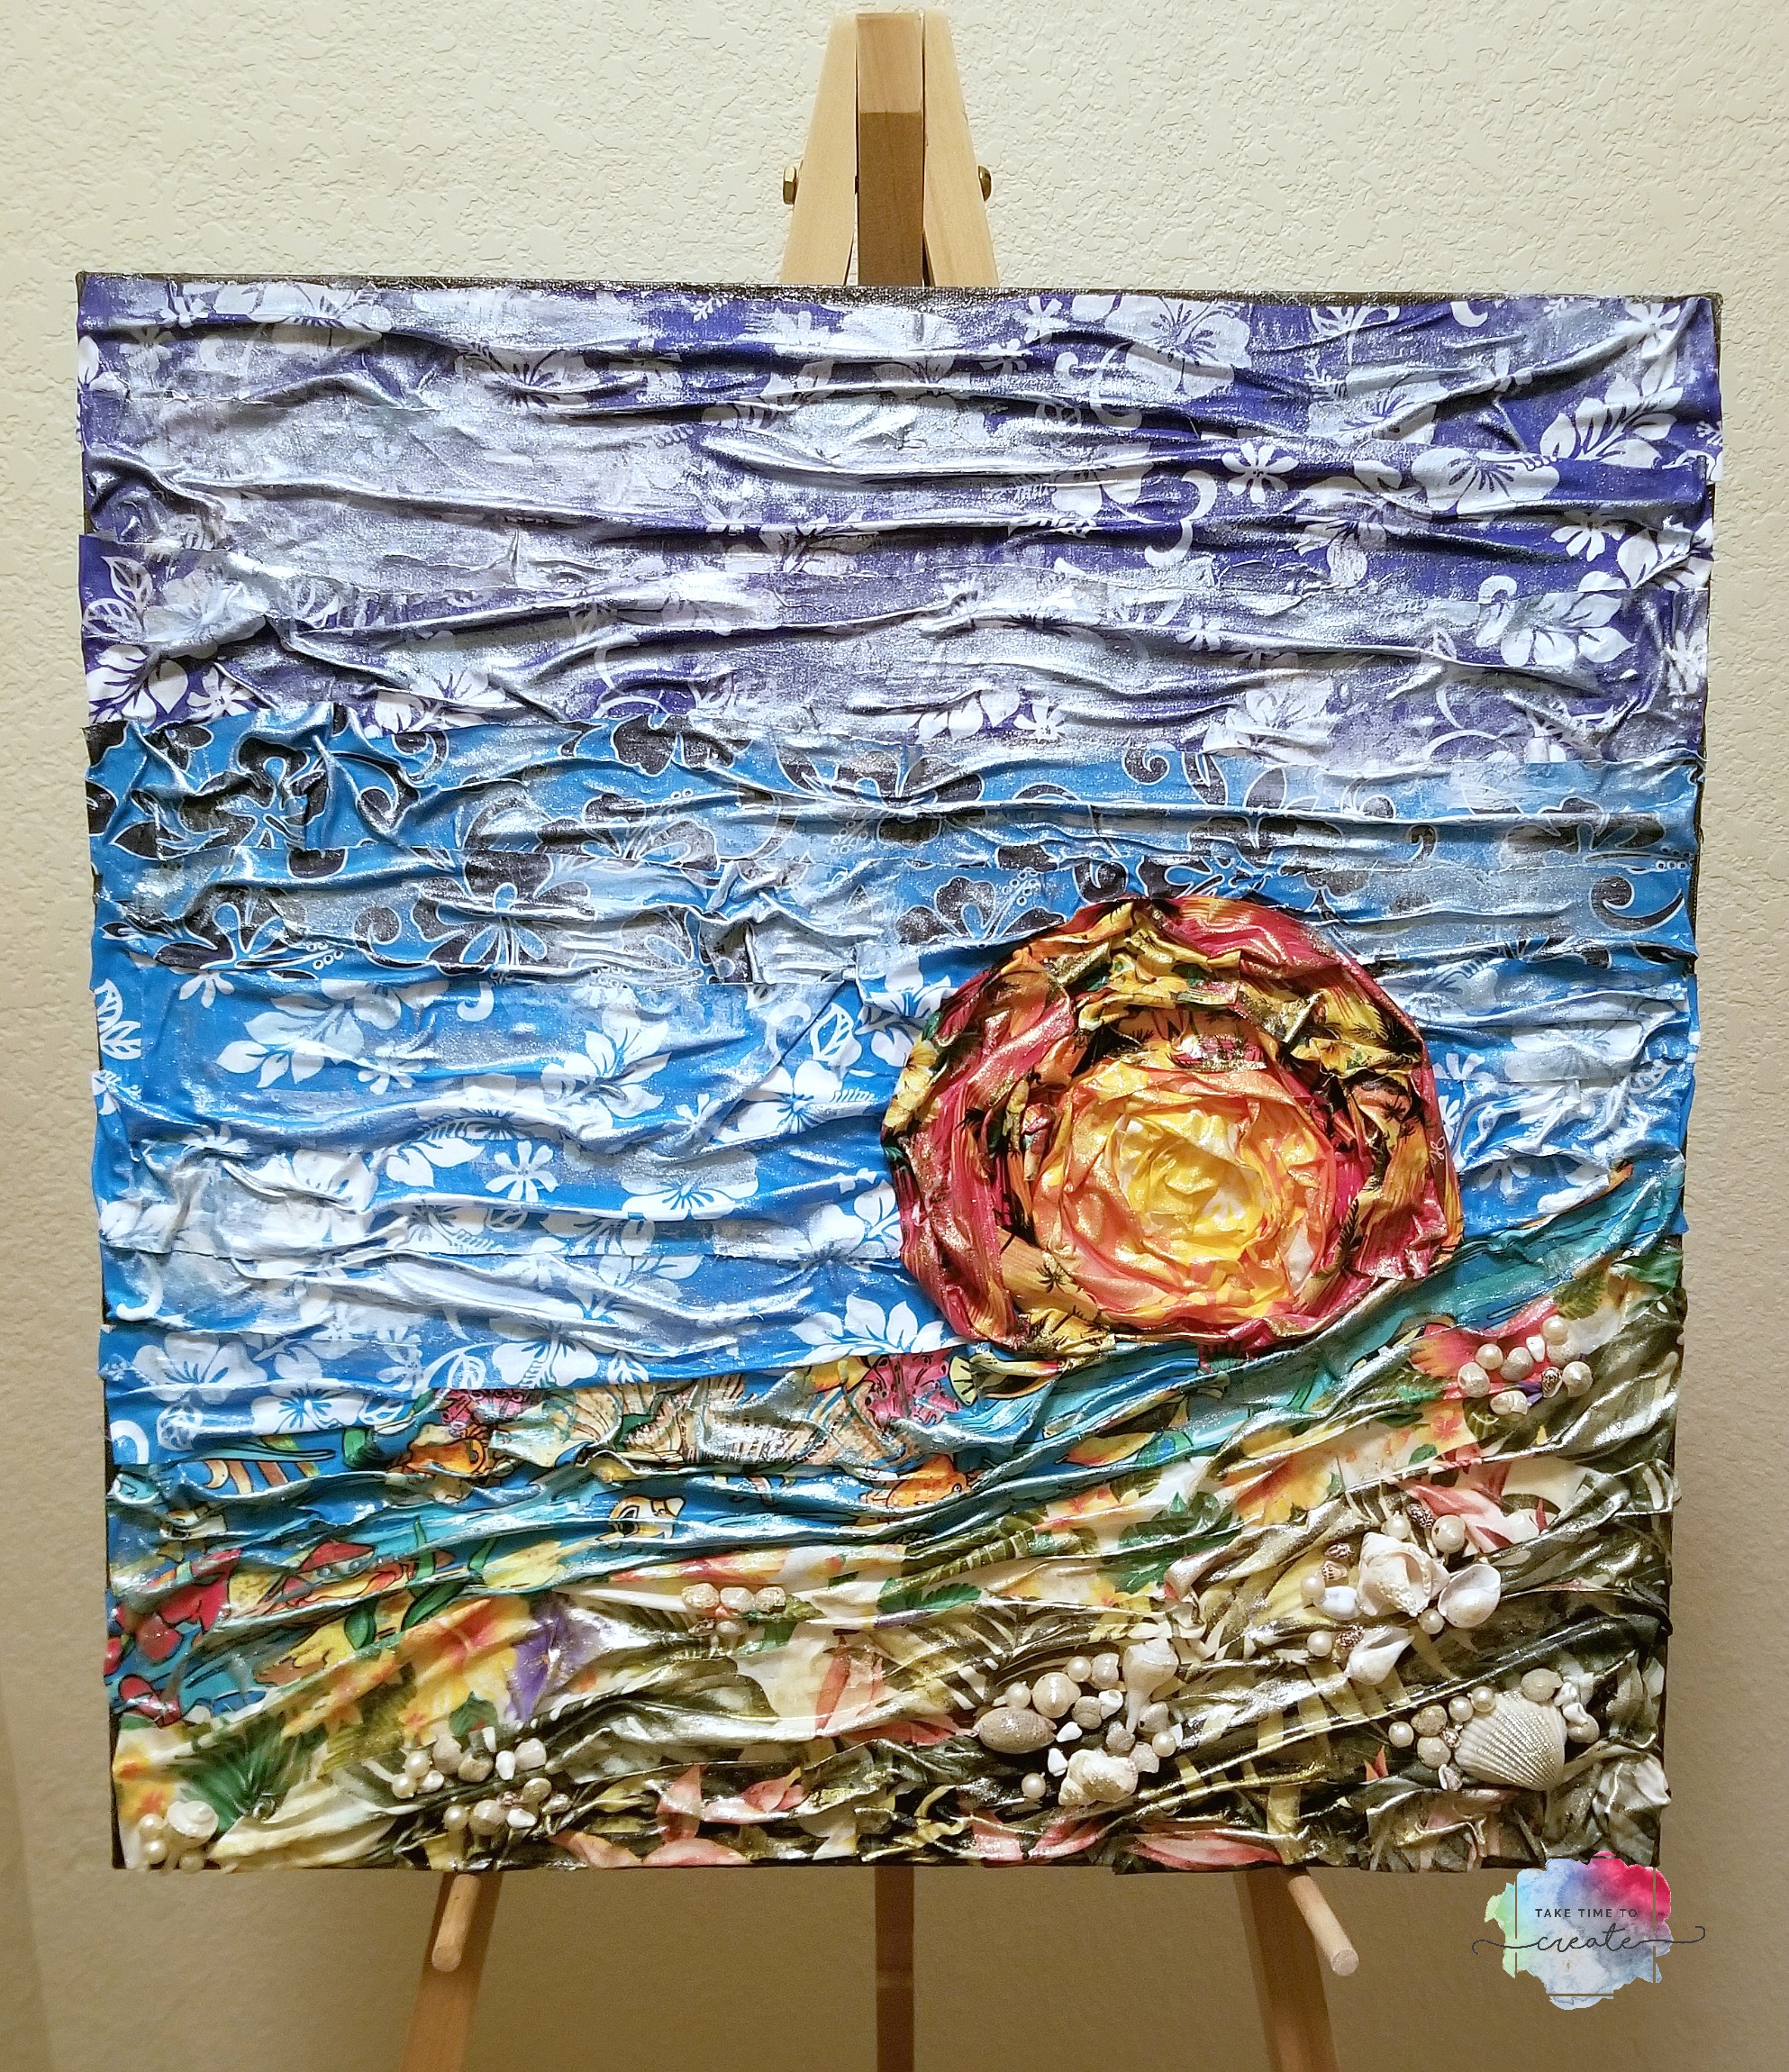
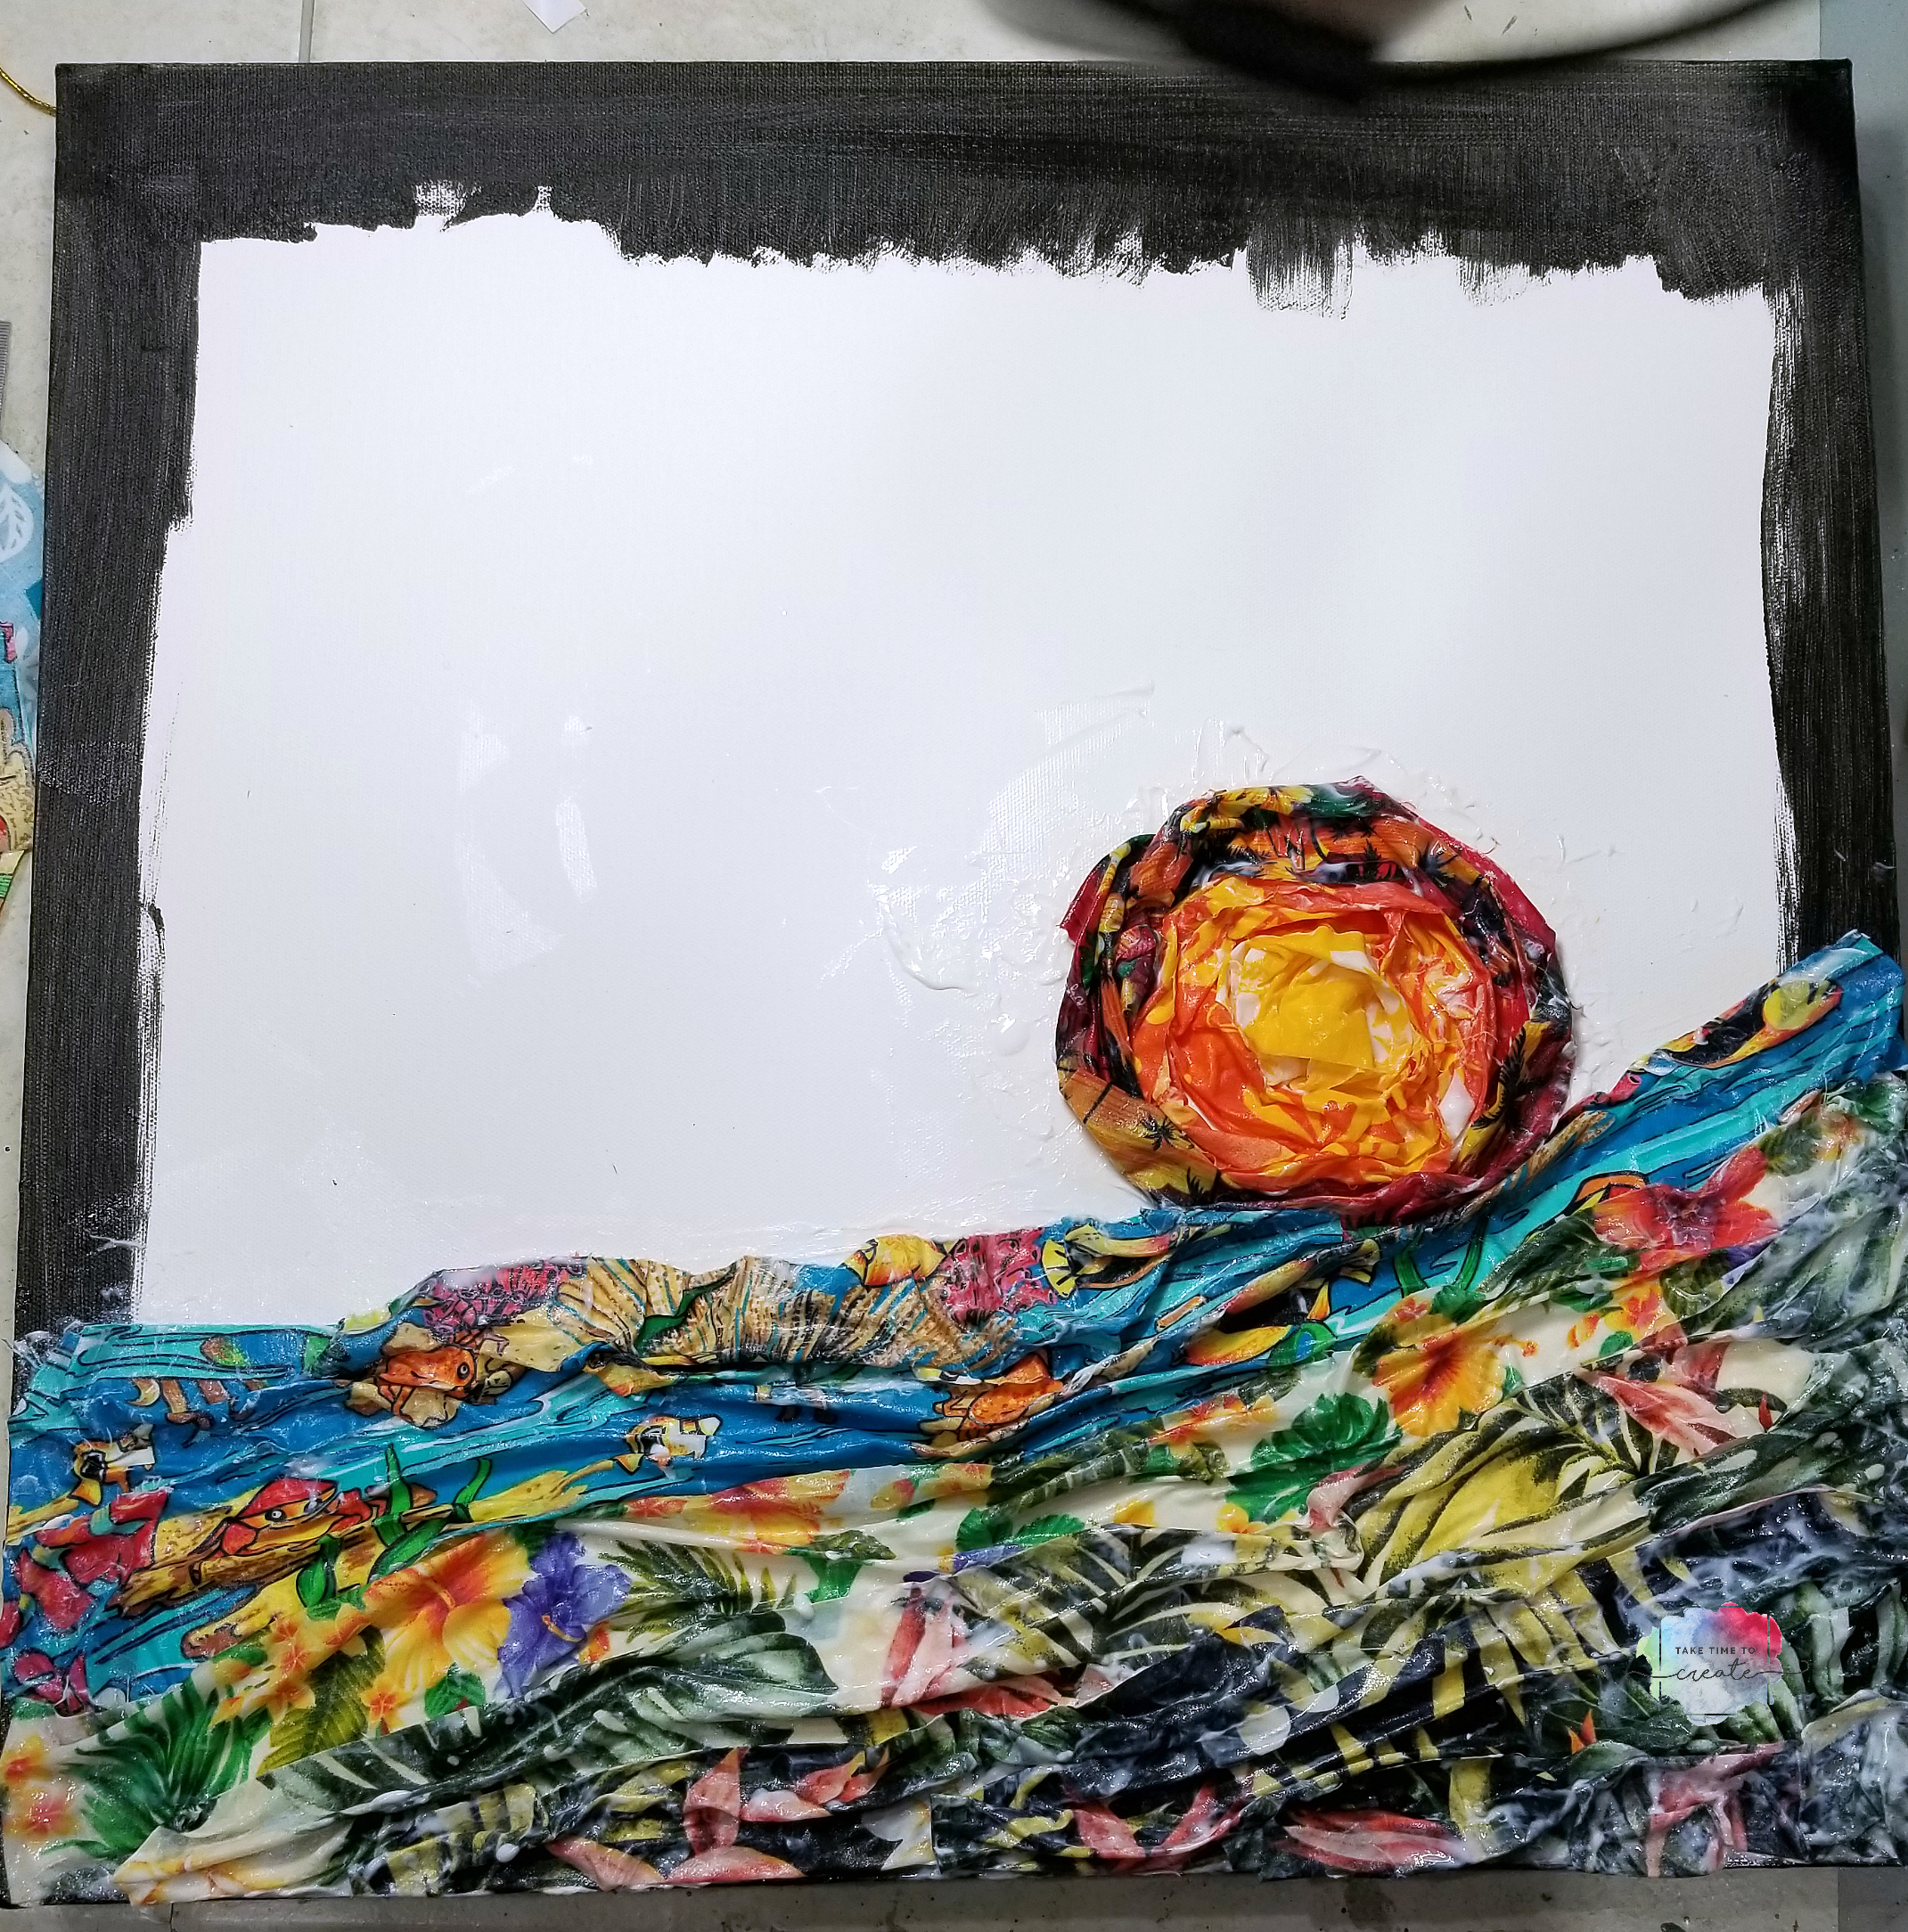
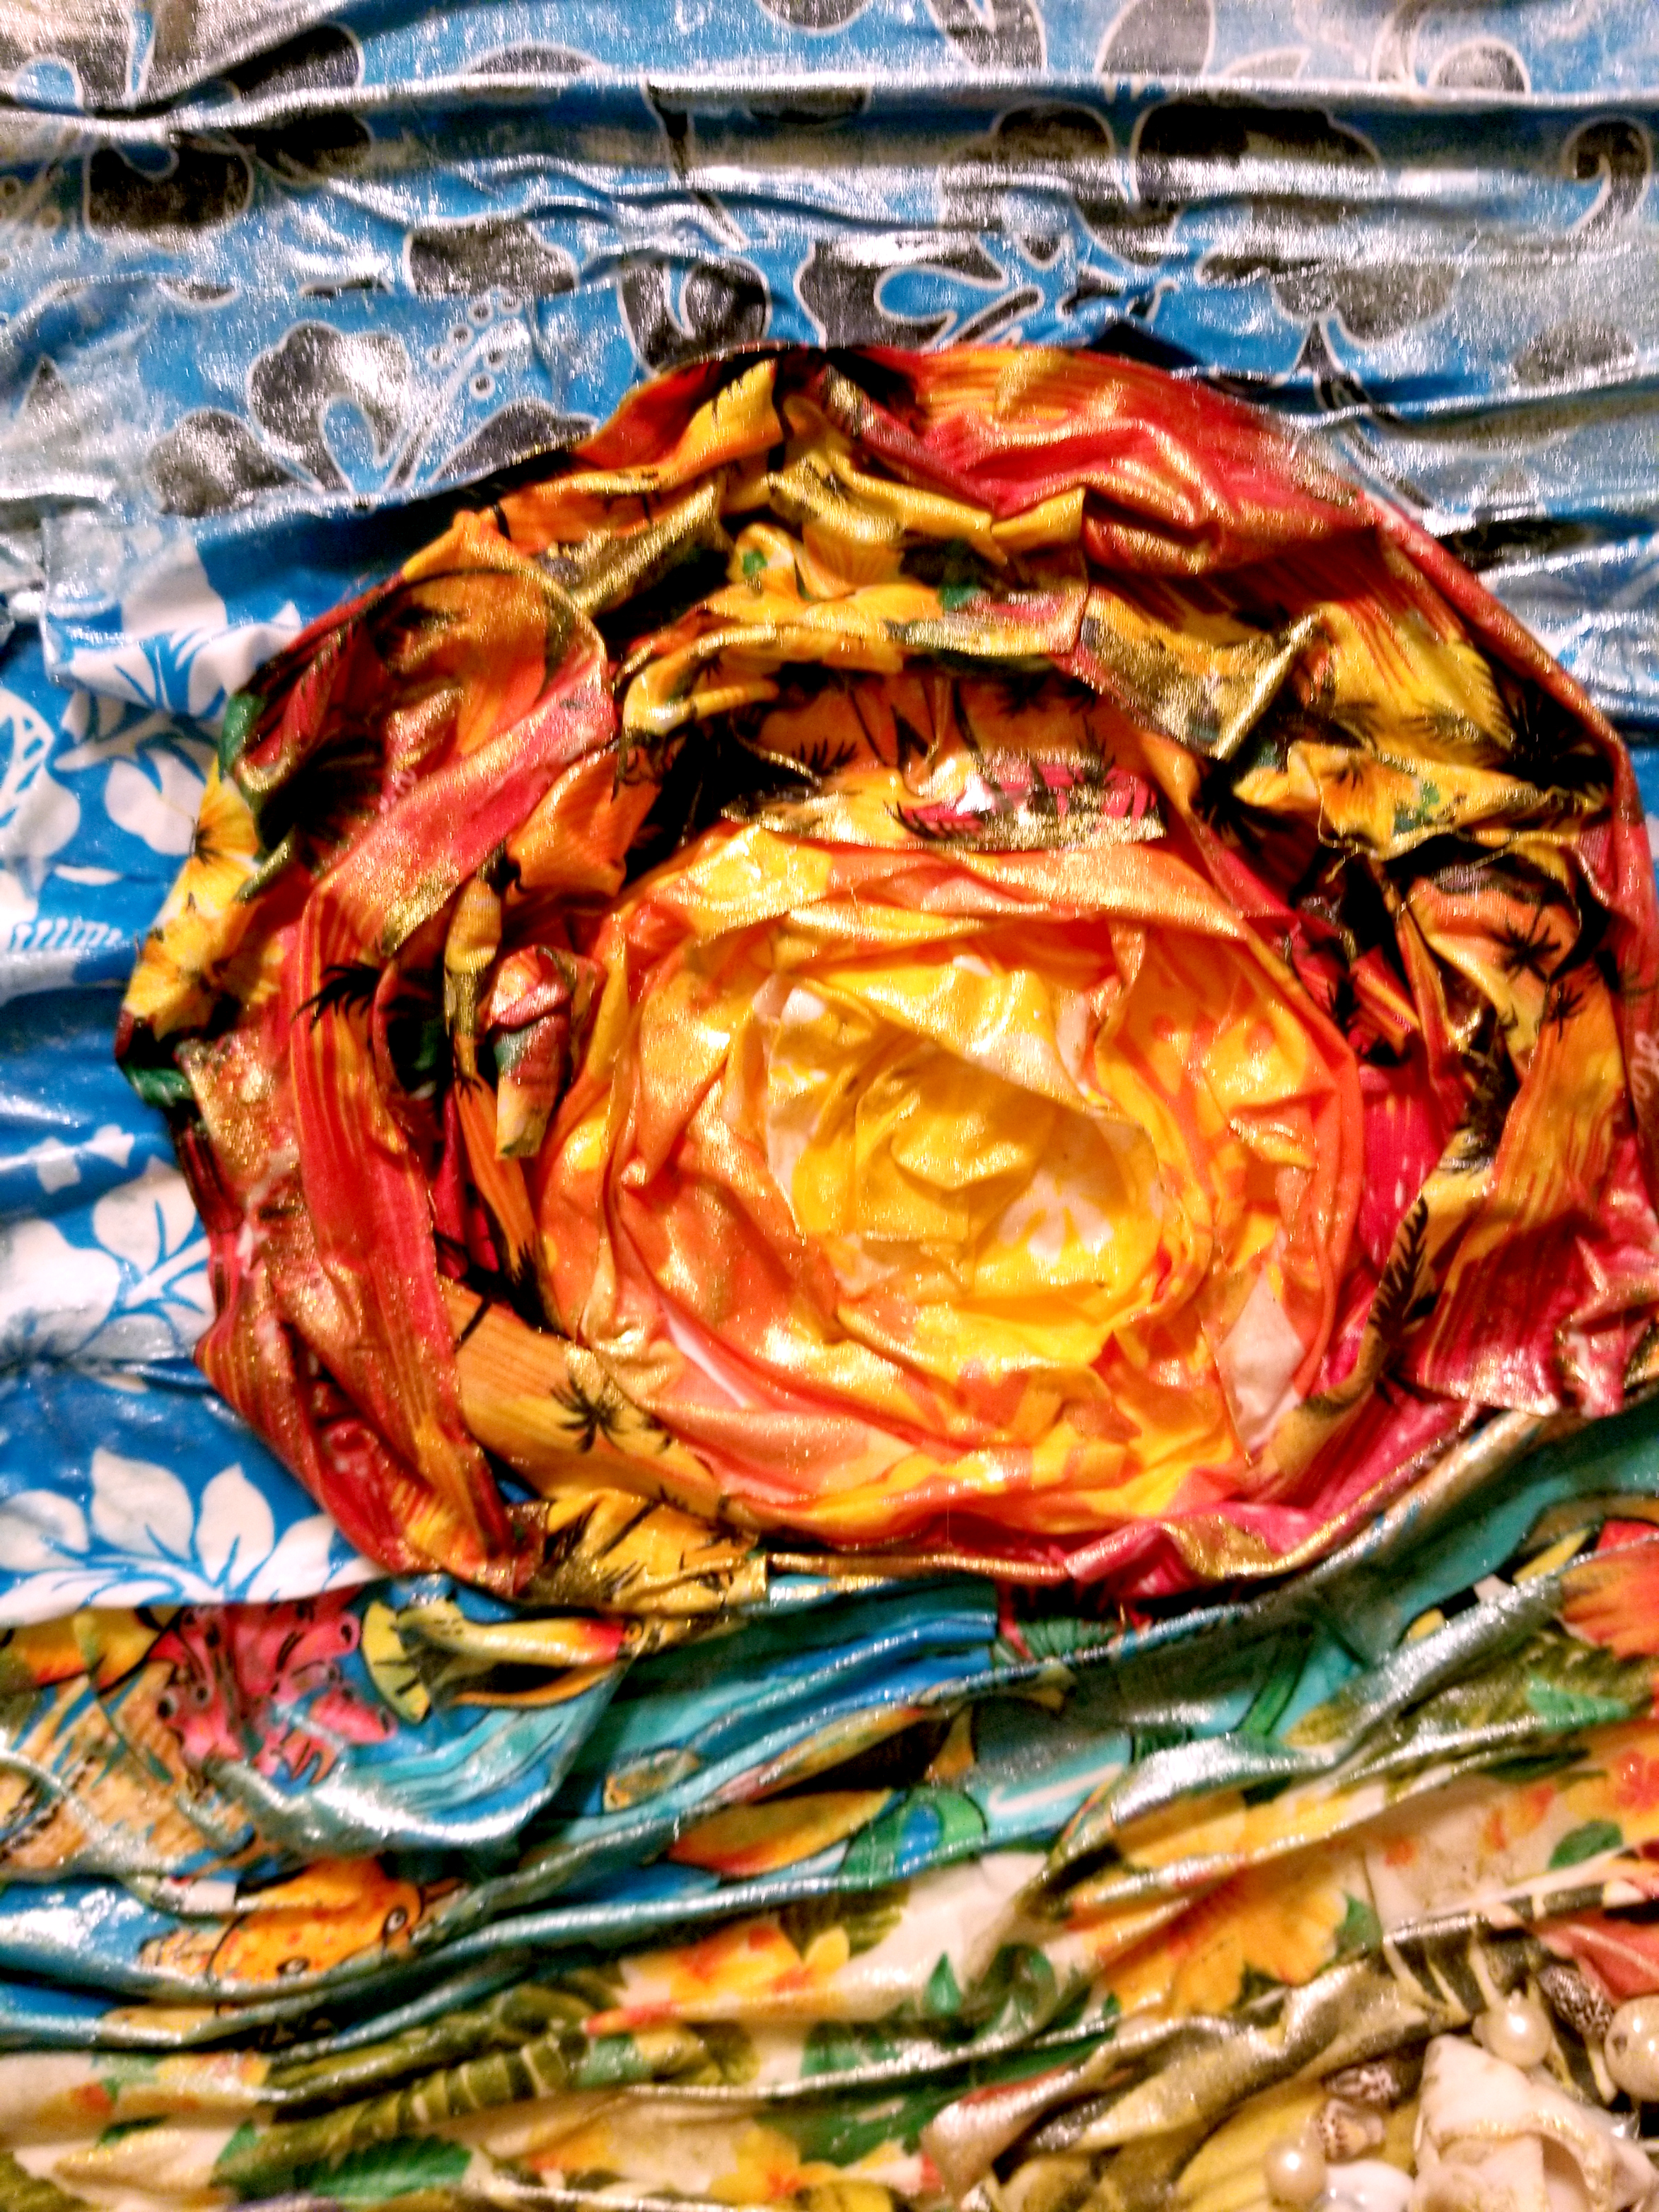
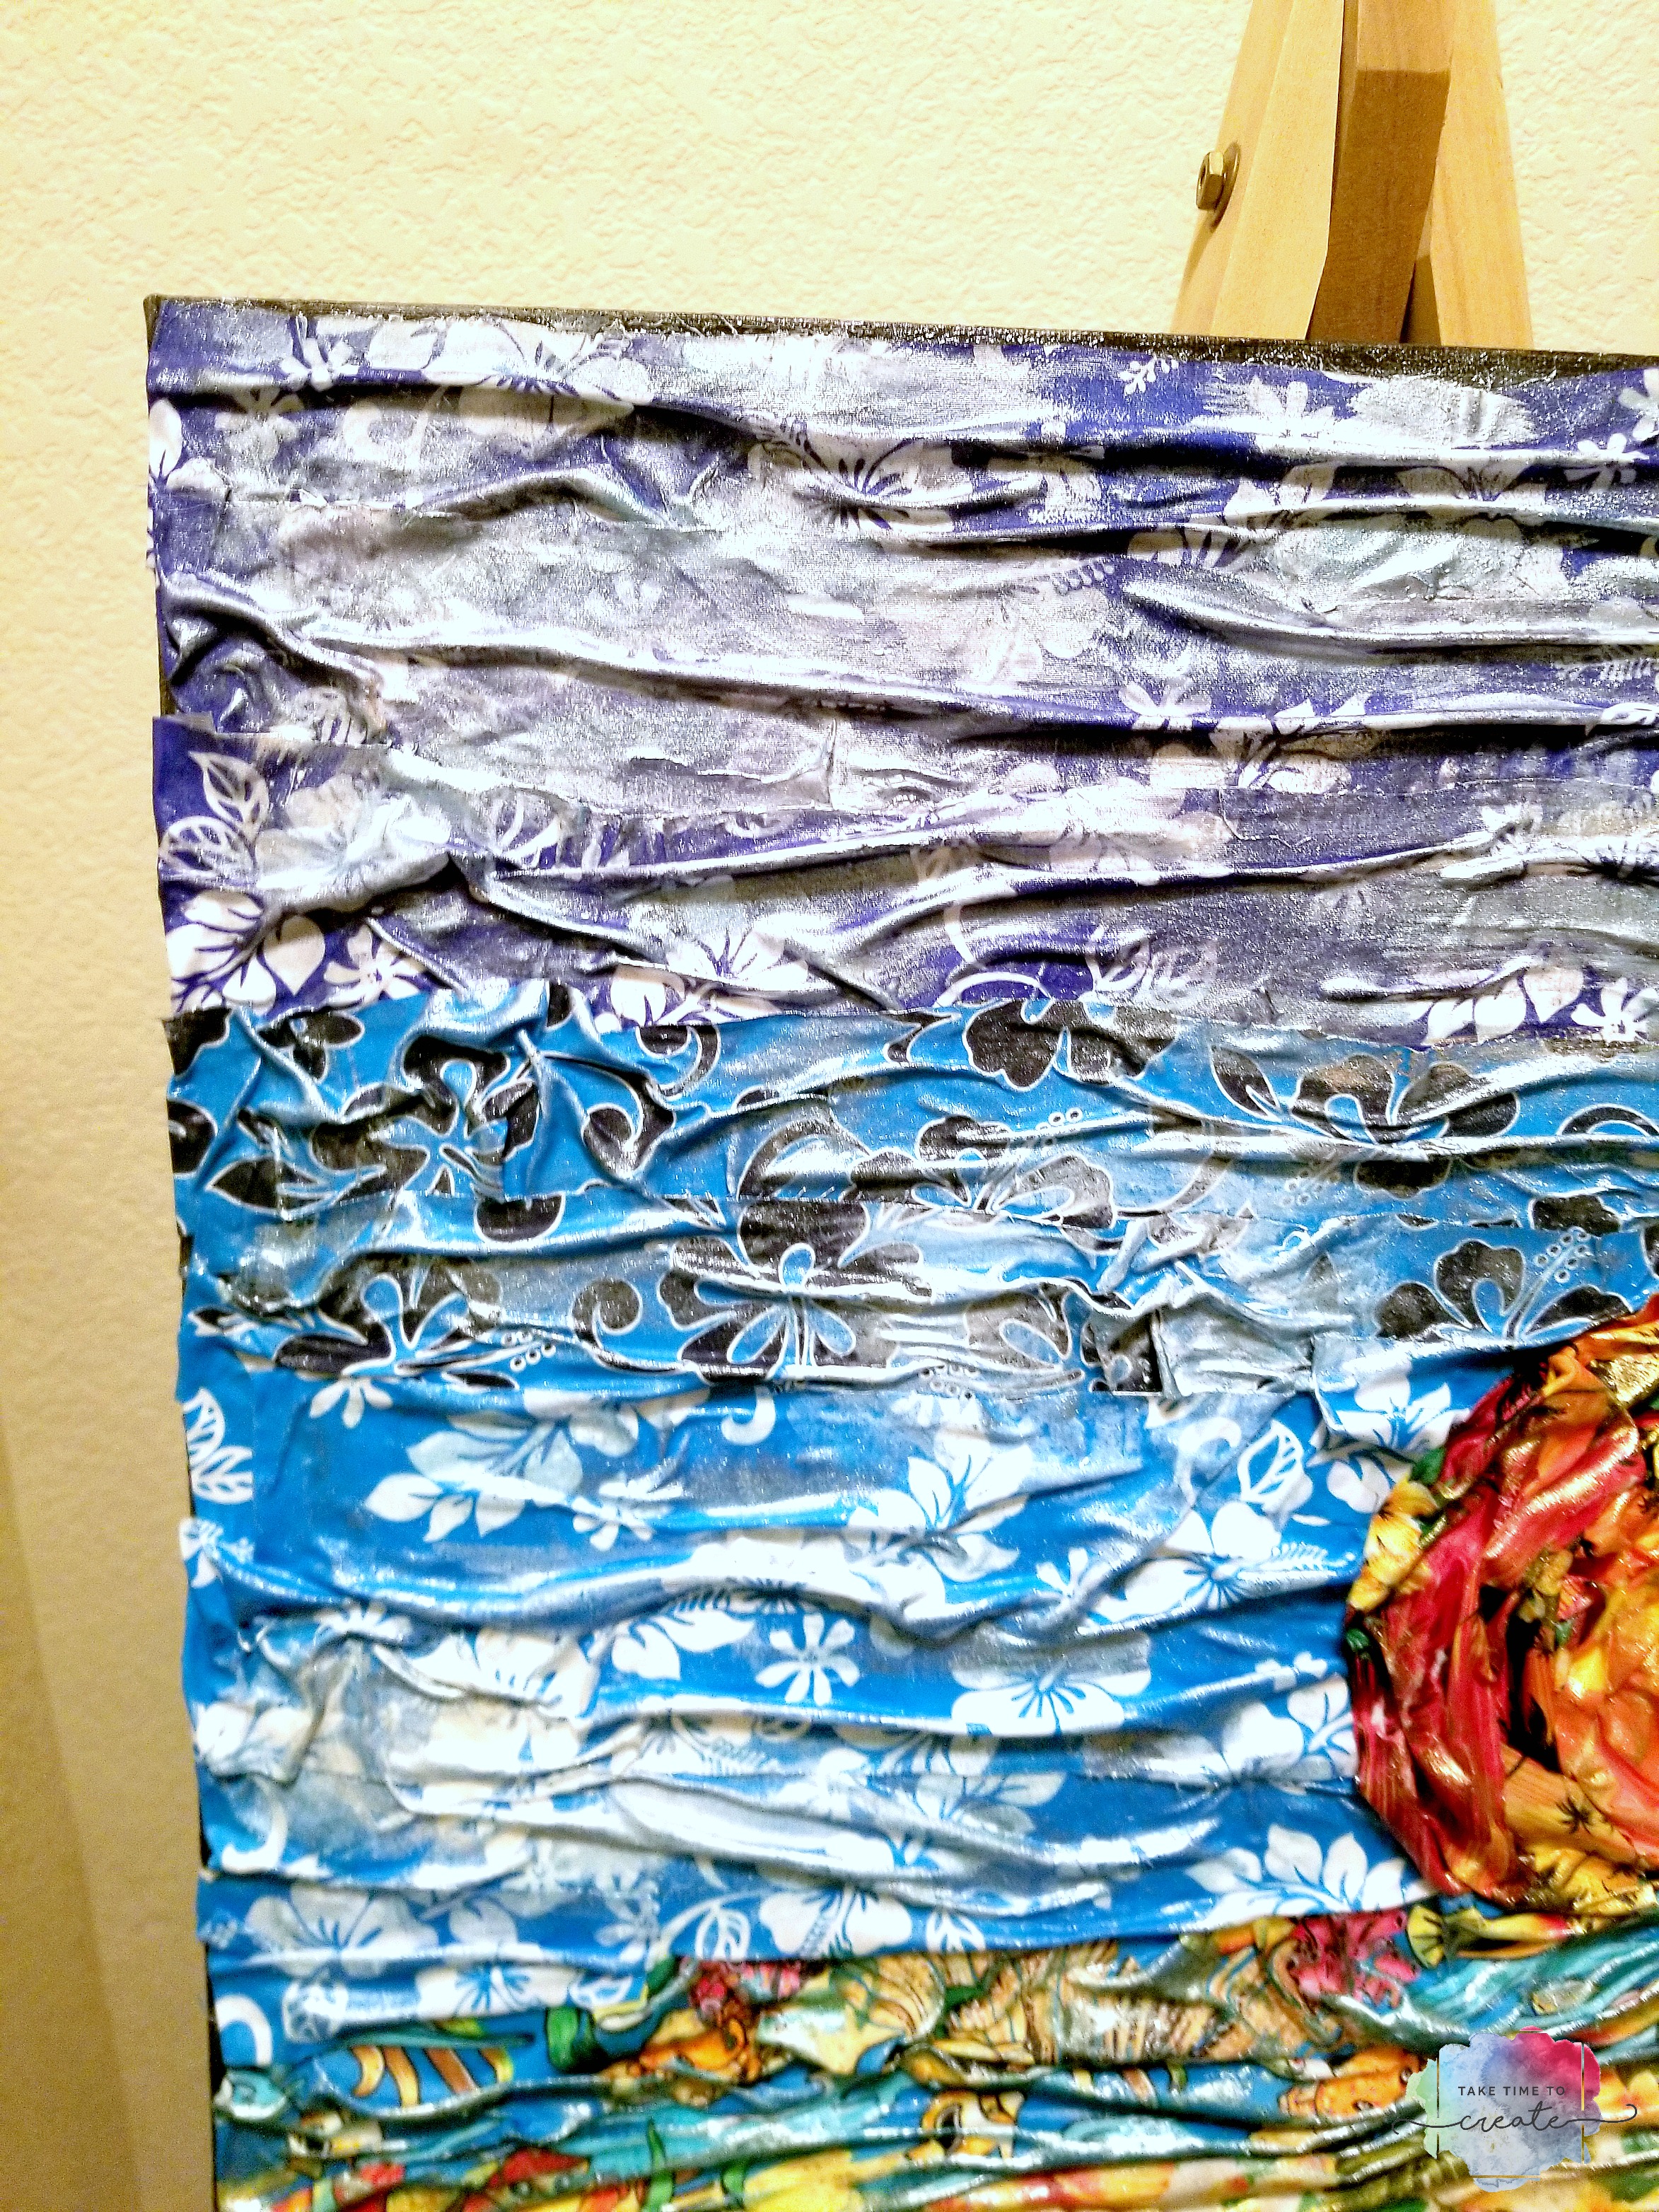
Then we have MGM, no I am sorry Hollywood Studios, lol. I think I will always call it MGM. And I loved the giant sorcerer’s hat that was in the middle of the park for the longest time. I know they removed the hat, but I loved it so much and that reminds me the most of the park, so I thought I would use the hat to depict MGM.


WDW Park Icons

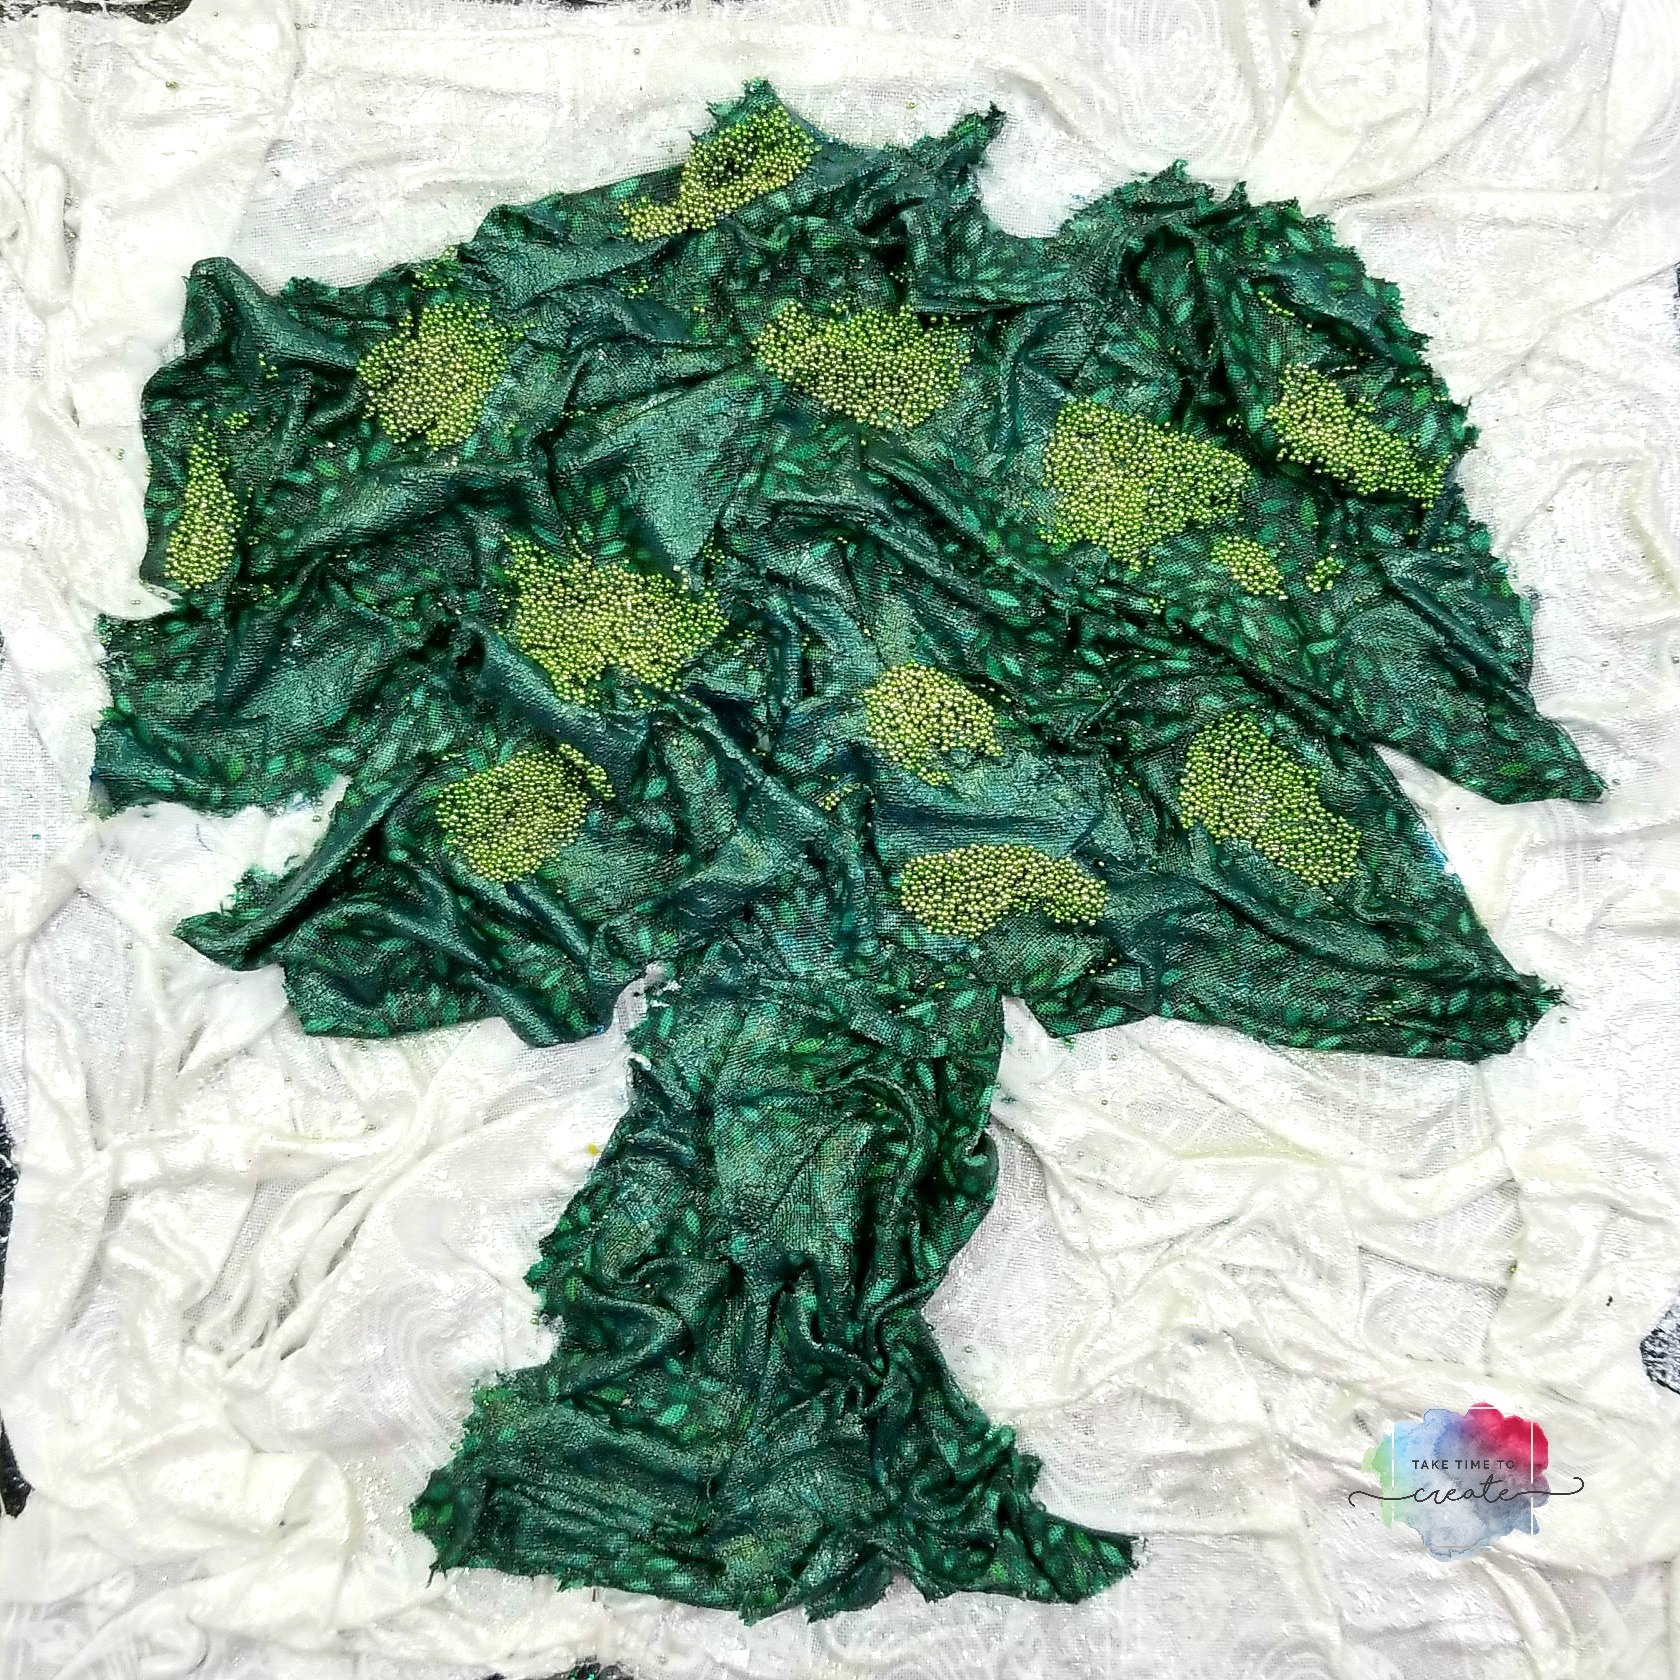
Last but not least is the Animal Kingdom. I love going to this newer park and I have to say the new Avatar section is amazing!

WDW Park Icons


Overall these were so much fun to create and reminisce about going to Disney and I am eager to start my next canvas!


Affiliate Links
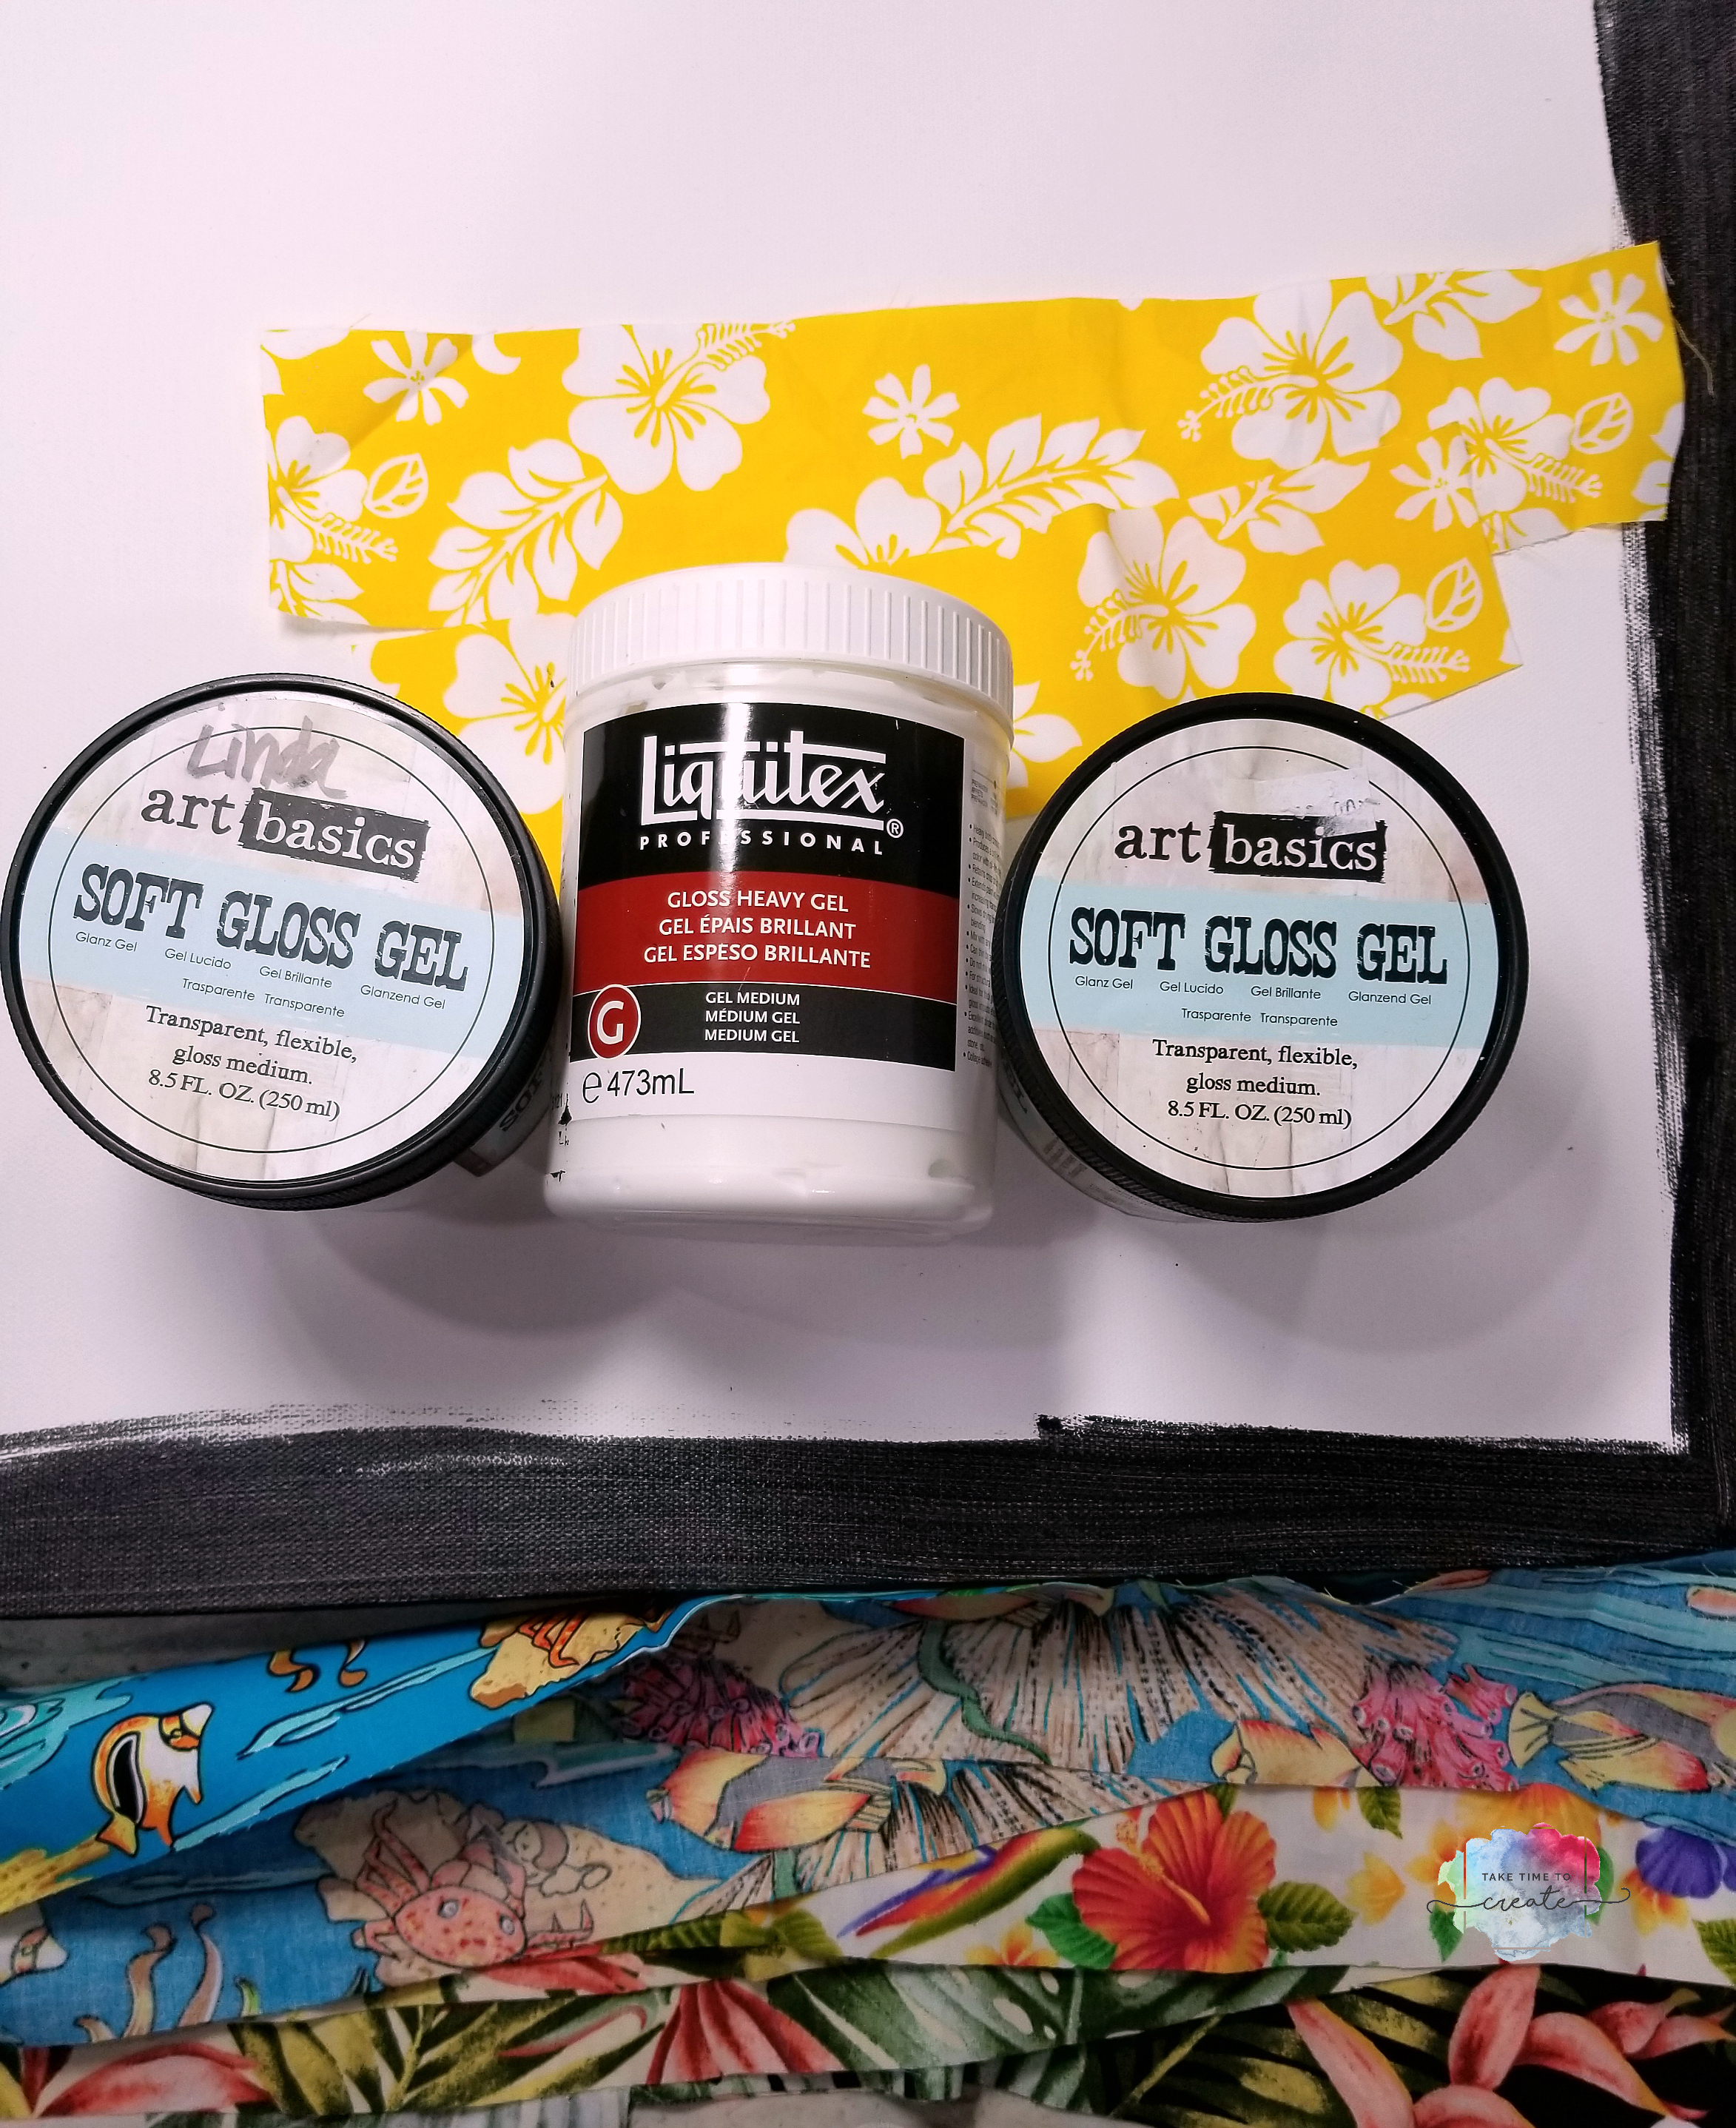
Liquitex heavy Gel- https://amzn.to/2DDcWbp
Liquitex gloss gel- https://amzn.to/2JZRSfq
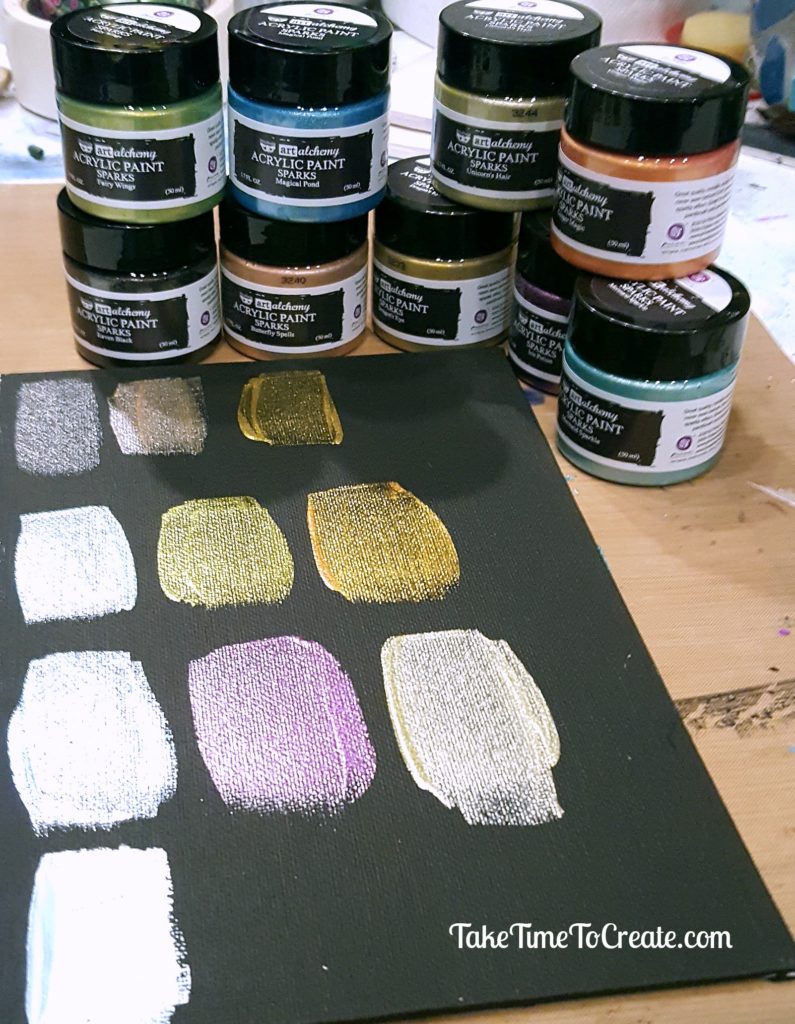
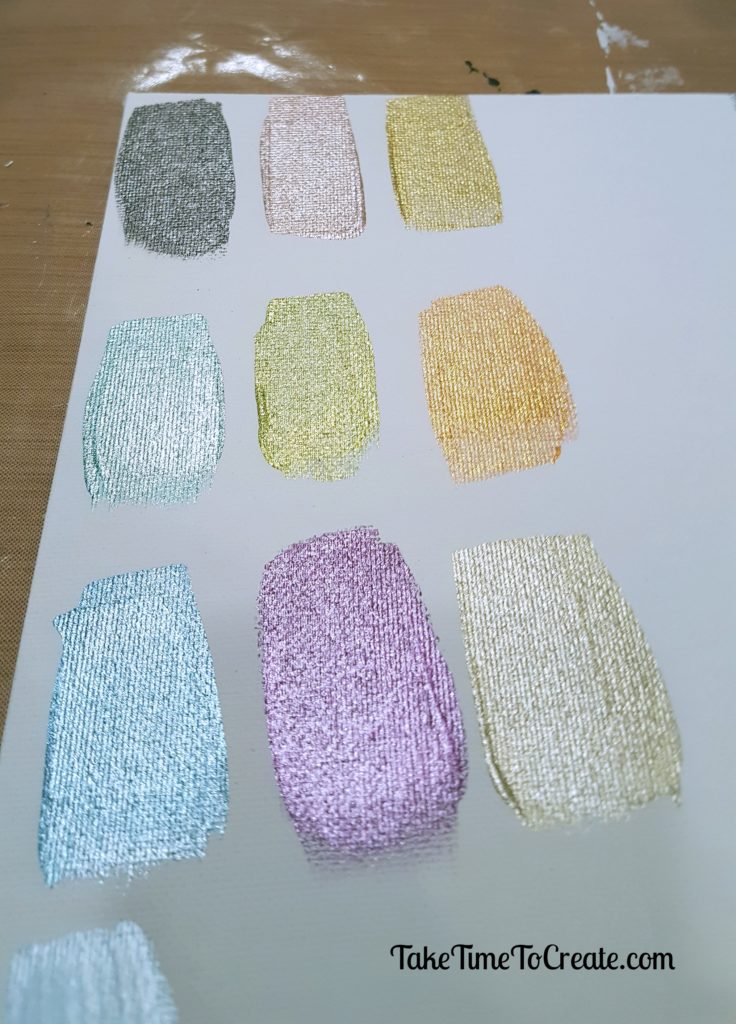
Finnabair Sparks https://amzn.to/2DDkJG2
Finnabair Metallique https://amzn.to/2qJbRGn
Micro beads-https://amzn.to/2DD9opK and https://amzn.to/2B3KjSj
8×8 canvas https://amzn.to/2B3KmgX
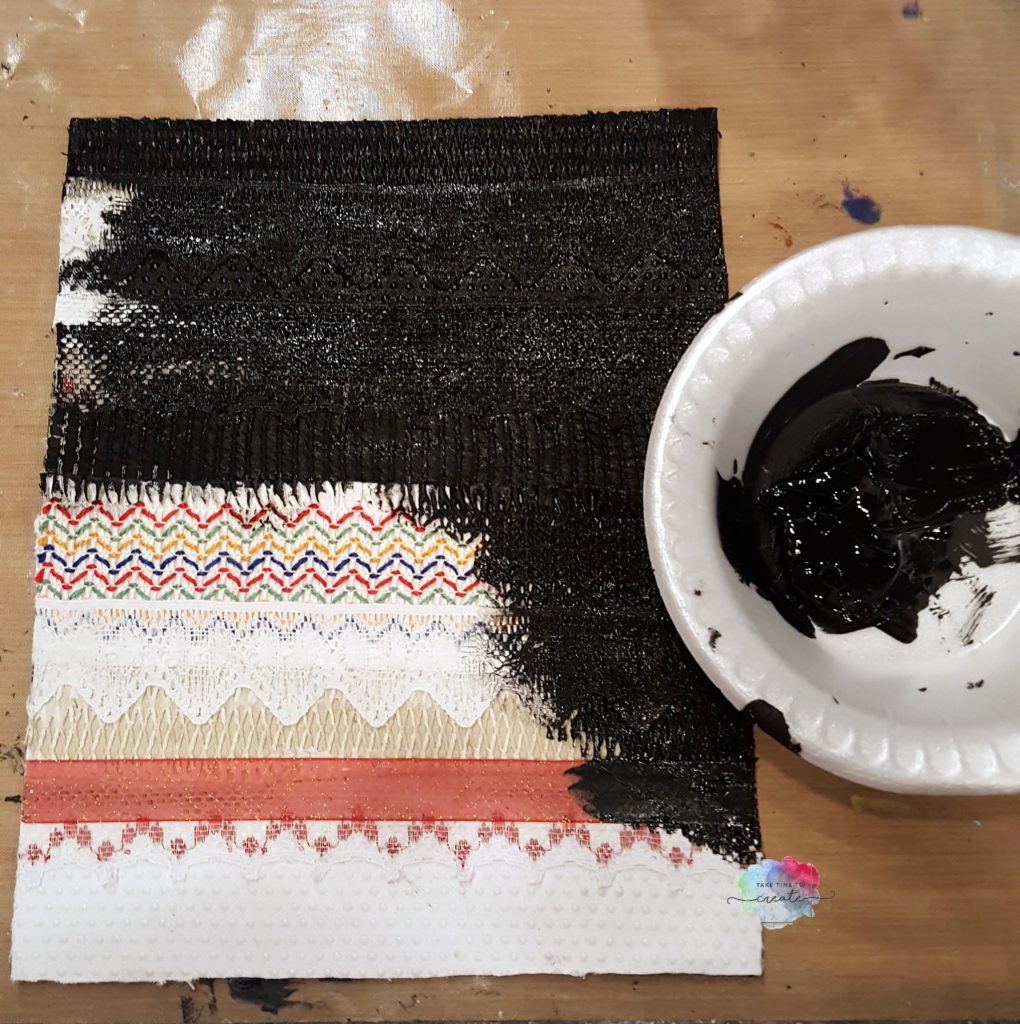
Fabric roll (similar) https://amzn.to/2DCF1zF

The post WDW Park Icons Canvas- Mixed Media appeared first on Take Time To Create.

Weekend Mixed Media Classes with Finnabair

Hello Everyone!

A couple of weekends ago I had the most magical, special weekend! I was able to take 4 mixed media classes from the amazing Finnabair! She is so wonderful and sweet and patient, and I learned a ton from her!

I did a try to keep my squeals and fan girling to a minimum, but I am not sure I succeeded, lol. It was just so awesome!

See here we are, bffs now, lol.


I am only kidding, but just a little bit. It was so nice to spend the time with her at Mojito Creek, a retreat in Colorado. I have been there before, and I love it there! You can read my review on the retreat here: Mojito Creek Review Link

You can check out Finnabair here: Finnabair’s website

And you can check out Mojito Creek here: Mojito Creek’s website

I did a video of the projects we completed and you can see that here:

At the end of this post I will add affiliate links to some of the supplies we used, but there was just too many to list all of them.

The first project we did is the Book of Rust. I loved learning more about the rust paste and how to use it and just to get better with it. I am going to incorporate more rust into my projects because I love the look of rusty old things.

The next project is the long skinny canvas with rust paste and patina. I loved learning about how to use the patina, I have the paint at home but I never use it. Now I know what it can do and I am excited to add this medium to my projects!

That wrapped up the classes for Friday. It was a long day full of learning and exploring and I was ready for bed that night! The next day we got up not too early and started our day learning how to do 2 more projects.

The first one was the journal. This picture is the cover we made, I don’t have a pic of it reassembled. But it did go back together nicely, lol. I love this journal and I have been using it to make art journal pages, which is so nice because I have missed making art journal pages.


The last project is the moonlight one. I have to say this is the one I was most excited to learn! I love the technique and the final canvas is just so pretty.

All of these projects were so much fun to make! And I actually finished all the projects while I was at Mojito Creek, so that was nice to actually come home with finished projects! If she comes to Colorado again I will be sure to sign up for her classes! This a dream come true and I can wait to incorporate what I learned into my projects!

Here is the list of some of the products I used (they are all affiliate links)

The post Weekend Classes with Finnabair appeared first on Take Time to Create.

Dollar Tree DIY Easter Decor

Hello Everyone!

Can you believe that Easter is just right around the corner? Where is this year going? Anyway, I have a fun and easy Dollar Tree DIY Easter Decor project for you.

FTC Disclaimer:

I was compensated for this post. This post also contains affiliate links and I will be compensated if you make a purchase after clicking on my links.

So, to do this project you will need a few supplies, most of them can be picked up at the Dollar Tree.

Materials (affiliate links)

Bulk Special Moments Frameless Canvas Art, 8.5 in. atcom

from: DollarTree

Bulk Iridescent Easter Grass, 1.75-oz. Bags atcom

from: DollarTree

Bulk Colorful Fillable Metallic Plastic Easter Eggs, 6-ct. Packs atcom

from: DollarTree

Instructions:

First you will want to paint your canvas. I used a gold Folk Art paint. You can use any color you want, but it will take a few coats to cover up the canvas.  You might not be able to find the exact canvas I am using, but look around they seem to always have some great choices for canvases, and you might want to experiment with different sizes.


Dollar Tree Easter DIY

Once your paint is dry you can add the grass. Take as much as you want and shape it into a nest shape and hot glue it to the canvas.

Dollar Tree Easter DIY

Then you add your eggs, add a single one in the middle, or a grouping of 3. If you can’t find any eggs look around for another spring related item that would fit on your canvas. Be creative and experiment with your center piece.


Dollar Tree Easter DIY

These are just so cute when they are all finished. These would look great in a grouping of 3. Also, this would be a fun project for kids or a church group. There are so many great options for these canvases.

Dollar Tree Easter DIY


What Easter project are you working on?

The post Dollar Tree DIY Easter Decor appeared first on Take Time To Create.


Beach Landscape with Fabric- Mixed Media Canvas

Hello Everyone!

Fabric Beach Landscape Mixed Media Canvas

Don’t you just love it when a plan comes together? Recently I went to Hawaii with my family and I went to Quilt and Fabric land and I picked up a pile of fat quarters (with complete honesty, I don’t sew but I do glue things onto canvases, lol) I knew I wanted to make a beach landscape mixed media canvas. I am so thrilled with how it turned out, just how I imagined it!

You can see the video here in case you need more in depth instructions:


Materials:

Affiliate links to products I used (or similar)


Instructions:

Use any sized canvas you want, I used a 20×20 and painted the edges with black acrylic paint.


Fabric Beach Landscape Mixed Media Canvas

First cut your fabric into strips then plan out what you want you canvas to look like. I wanted a beach landscape with a sun set, so I used a lot of blues for the sky, turquoise for the water, tans for the beach, and yellow, reds, and oranges for the sun. This will give you a rough idea of what it will look like, but things will move and shift and you will change your mind throughout the process, which is perfectly fine.

Fabric Beach Landscape Mixed Media Canvas

Now, we need to adhere everything down. So I took a heavy gloss gel (modeling paste would work as well) and spread a thin layer on to the canvas. Then I dipped a strip of fabric into the soft gloss gel and soaked the fabric (make sure you ring it out out) then I crinkled it up and put it on the canvas.  I wanted to to stay in place and this seemed to work great.

Fabric Beach Landscape Mixed Media Canvas

I started with the sun, which was my focal point and then I built the scenery up from there. This does take a while, but be patient and take breaks if needed. Then let it dry completely before moving on to the next step.

Fabric Beach Landscape Mixed Media Canvas

Once it was all dry I adhered sea shells on to the fabric with the heavy gel. I wanted to add more texture and interest to the canvas.

Then I dry brushed on different paints in metallic and sparks colors to add even more detail.

Fabric Beach Landscape Mixed Media Canvas

Fabric Beach Landscape Mixed Media Canvas

Fabric Beach Landscape Mixed Media Canvas


Fabric Beach Landscape Mixed Media Canvas

I love how this turned out and I can’t wait to create more landscapes with fabric!

What scene should I create next?

The post Beach Landscape with Fabric- Mixed Media Canvas appeared first on Take Time to Create.

Christmas Tree Mixed Media Canvas

Hello Everyone!

Christmas is almost here! In anticipation I created this Christmas Tree Mixed Media Canvas. I just love everything about the Christmas season and this canvas put me in the holiday spirit!

I did a video tutorial that goes over all the steps and I will try and describe what I did in the instructions below (but the video might be easier to follow along with all the steps, lol).


Materials: (Affiliate links)

  • Canvas: http://amzn.to/2BaGRH
  • Dina Wakley Stencil: http://amzn.to/2ySBrKY
  • Liquitex Glass beads: http://amzn.to/2ySpaWR
  • Artists Loft Paint: http://amzn.to/2zjU3qA
  • Blue Mica Powder: http://amzn.to/2B9JVDc
  • Deep Water Mica Powder: http://amzn.to/2yThMdN
  • Finnabair silver wax: http://amzn.to/2jcRaz7
  • Finnabair bronze wax: http://amzn.to/2yTtqFD
  • Laser cut snowflakes (Similar): http://amzn.to/2jcRVYU
  • Gel Sticks: http://amzn.to/2BtzMyk
  • Gel Pen: http://amzn.to/2oC3Rsy

Instructions:

Start with an 11×14 canvas and cover it with old music. This is a great way to break up the background and start a canvas.

Now it is time to add color and texture. I used the Dina Wakley stencil and added glass beads to the bottom. Then I painted the sky with a few different blues and the snow with white. Don’t forget to paint the edges. for sparkle I added Mica powders and spread them out with water and let it drip to the bottom. Let this all dry before going on to the next step.

Christmas Tree Mixed media Canvas


Now it is time to prep the tress. Find 3 different Christmas papers that will work for trees and cut them into triangles.


Christmas Tree Mixed media Canvas

Then I used a gel stick to add color to the edges and smeared it in then I added a white line on top with a gel pen. This added dimension to the trees.

For the snowflakes I painted the wood cut out with liquid watercolors and then added some Finnabair wax on top. For the tree trunk I painted them with a Finnabair wax.

Christmas Tree Mixed media Canvas

I glued it all on the canvas with hot glue then I added white splashes with watered down white acrylic paint.  Seal it all with a spray sealer when you are done then hang it up and you decor is now complete!


Christmas Tree Mixed media Canvas


Christmas Tree Mixed media Canvas


Christmas Tree Mixed media Canvas


Christmas Tree Mixed media Canvas

What season or holiday should I do next for my next canvas?

The post Christmas Tree Mixed Media Canvas appeared first on Take Time to Create.

Art Journal from Junk Mail

Hello Everyone!

It is that time of year when all the junk mail comes to your house. I recycle what I can, but sometimes it is just too pretty to throw away. So I save it.

And that is were the problem comes in, I have a stack of junk mail that needs to be dealt with, so I turned a few pieces into art journals.

This is just the tutorial on how I created the art journal, if you want to see what I did to the inside let me know in the comments and I will show you the art (when I am finished with it, lol)

Here is the video tutorial:


So what you do is start with really great junk mail. I had one from Capital One and Tiffany’s. Side note: I have only been to Tiffany’s once and I bought the cheapest pair of earrings there about 10 years ago and I still get their mailers, lol. And their mailers are beautiful!

art journal from junk mail

Once you decided on what you want to alter grab some gesso. I used white, black and clear. The black is fun so I can use some light colors, it breaks up the book. I also added clear gesso over some of the images, that way I keep the image but the page is prepped to take all sorts of mediums.

art journal from junk mail

The cover of the Tiffany book is so pretty and festive! This will be my holiday 2017 art journal. When looking for junk mail to make into an art journal look for mailers that have slightly thicker paper. If it is too thin then the pages will buckle and it won’t hold up.


art journal from junk mail

The white gesso didn’t cover all the images completely, but that is ok, I will fill the page with other art and it won’t get in the way. But if you want the image to be completely gone, the add a few layers.

I left some words uncovered, I thought they we fun and it will help me start the page.

art journal from junk mail

art journal from junk mail

The Capital One mailer was a great size and it will be fun to do more landscape journal pages. I kept the images and some words, and it makes for a great starting point.

art journal from junk mail

art journal from junk mail


It was a lot of fun to prep my new art journals. What piece of junk mail do you have that is too beautiful to recycle? And did you just keep it or did you re purpose it?


The post Art Journal from Junk Mail appeared first on Take Time To Create.


Harry Potter Mixed Media Canvas

Hello Everyone!

Is there anyone out there still obsessed with Harry Potter? I love all the books and movies, and when I found the lantern that I used in this mixed media I knew what quote would work perfectly for it.

You will want texture, so for the grid stencil I used a dish mat and stenciled it on the background.

The find everything you can get your hands on and glue it down with modeling paste. I found broken toys (there are Hex Bugs and Bakugan and more in there) broken necklaces, bracelets, lace glow sticks, beads, buttons, and more. The lantern was a night light that I disassembled and added a cork for the bottom.

Remember, colors don’t matter because we will cover it all with black gesso.

Harry Potter Mixed Media Canvas


Once you are happy with the placement cover everything with black gesso. Make sure you get in all the nooks and crannies and cover it well.

Harry Potter Mixed Media Canvas

Now it is time to paint. I used metallic paints and painted near the light with brighter colors and went darker from there. I wanted to make sure the light was coming from the lantern and casting a glow on the rest of the painting.

For the quote I just printed it on  my computer and adhered it to the painting. When everything was dry I sealed with a spray sealer.

And there you have it, a Harry Potter Mixed Media Canvas to show off your love of all things Harry Potter.

Harry Potter Mixed Media Canvas

Harry Potter Mixed Media Canvas


In case you missed my other Harry Potter inspired crafts you can see it here:


The post Harry Potter Mixed Media Canvas appeared first on Take Time To Create.


Sunflower Mixed Media Canvas

Hello Everyone!

Fall is in the air and I am just loving it! I especially love seeing all the sunflowers, they are my favorite flowers! They are so pretty, and bright. Seeing all the sunflowers I was inspired to make a Sunflower Mixed Media Canvas.

Sunflower Mixed Media

Let me tell you how I made this canvas!

First I started with a canvas board and covered it with different ribbons (I adhered it with modeling paste), then I covered it all with black gesso.

Sunflower Mixed Media

I painted the canvas with a few different shades of blue acrylic paint.  I loved how it looks like a sky, but it was a little bright,  I did end up toning it down by the time I was finished.

Sunflower Mixed Media

Now it is time to add all the goodies!! I had this pack of rusty nails that I found in my Grandpa’s shop, I couldn’t pass up this great texture. (be careful if you are using rusty nails, I wore gloves and washed my hands often)

I added book pages, burlap, other metal items, flowers, hinges, clear round dots, keys, brads, hot glue, and anything else I could find. Just use what you have in your stash and around the house. I  adhered it all with modeling paste (I tinted the paste with some brown acrylic paint).

Sunflower Mixed Media

Once everything was all dry I primed the elements with clear gesso then I sprinkled mica powder on (yellow in the flowers, green in the grass and stems, and blue in the sky) I added water to activate it and I loved the look. Once that was all dry I dry brushed acrylic paint all over to add more color and details.

I am in love with how it turned out! I used such a random assortment of products, I will list them all below for you. As always, let me know if you have and questions on this project.

Sunflower Mixed Media

Sunflower Mixed Media

Sunflower Mixed Media


Materials used: (affiliate links)

The post Sunflower Mixed Media Canvas Appeared first on Take Time To Create.

Mixed Media Altered Bottle

Hello Everyone!

I love looking at wine bottles and any other bottle with a great shape.  They are just so beautiful and I have a hard time sending them to recycling, lol.

So with this bottle I decided to alter it using basic mixed media techniques. Now it is ready to be on display instead of heading to recycling.

You can watch the altered bottle process here:


Materials:

  • Bottle (cleaned and ready for painting)
  • Gesso, soft gloss gel, glue
  • brushes
  • buttons, raffia, and any other bits and bobs that you want to stick on
  • charm bracelet or necklace
  • tissue paper (or old patterns)

Instructions

Find a really great bottle. I love the shape of this one! Make sure it is clean before you start altering it.

altered bottle

For my base layer of texture I added crinkled up tissue paper from old pattered and adhered them with Soft Gloss gel. I will admit that I am still getting the hang of taking pictures and filming at the same time. I don’t have a pic of this but it is the same technique that I used in in these posts:

Mixed Media Box

Tissue Paper Rose

Once the paper is down and dry give everything a coat of black gesso. Once that first layer is dry, now it is the fun part, start adding buttons, ribbon, raffia to the neck, and anything else you want to add detail and interest.

altered bottle

Once all the glue is dry cover everything is black gesso. Make sure you get in all the nooks and crannies. altered bottle

Dry the gesso completely and then dry brush on the colors you want. I did a base layer of gun metal gray and highlighted the details with a pretty metallic purple.  I added an old bracelet to the neck for additional interest.

Spray seal it and you are done!

A beautiful new bottle to add to your decor! altered bottleThe post Mixed Media Altered Bottle appeared first on Take Time To Create.

Product Review-Finnabair Sparks Acrylic Paint

Hello Everyone!

Today I have something a bit different, a product review. This will be a new feature on my blog and You Tube Channel. I think it is fun to review new products and see what is out there and how it compares to the current products.

FYI I did buy all of these paints with my own money and this is not a sponsored post.

Recently I saw this really sparkly, beautiful paints from Prima Marketing. They are called Sparks Acrylic paints from Finnabair. I love anything that sparkles so I figured this was right up my alley.

Sparks Paint

I did a swatch of all 9 colors on a black gessoed canvas board and a white gessoed canvas board just to see how they looked on each background. I have to say they are very pretty, but some looked better on the white and some looked better on the black.

Acrylic Sparks

The paint is a little thinner than a regular acrylic, but a little goes a long way. It is great for dry brushing and adding details and emphasis to certain areas. And it does live up to its name, it does sparkle. They are beautiful paints!

So I had to try them out on a project. I found this dragon at Goodwill (sorry I don’t have a before picture, but believe me it was ugly. It was almost every color of the rainbow, and the paint was chipping) So I added a layer of black gesso and then added the sparks paint on top. Much better, lol. The pictures don’t show all the beautiful sparkly nature of the paint, but it is there.

Painted Dragon

painted Dragon

I think I am in love with the paint, I am glad I did purchase them and I can see using them a lot in the future.

I did a video review on them as well and you can check that out here:

What would you like me to review next? I love trying new products, it seems like there is always something new coming out

The post Product Review- Finnabair Sparks Paint appeared first on Take Time To Create.

« Older posts

© 2024 Take Time To Create

Theme by Anders NorenUp ↑

Follow

Get the latest posts delivered to your mailbox:

%d bloggers like this: