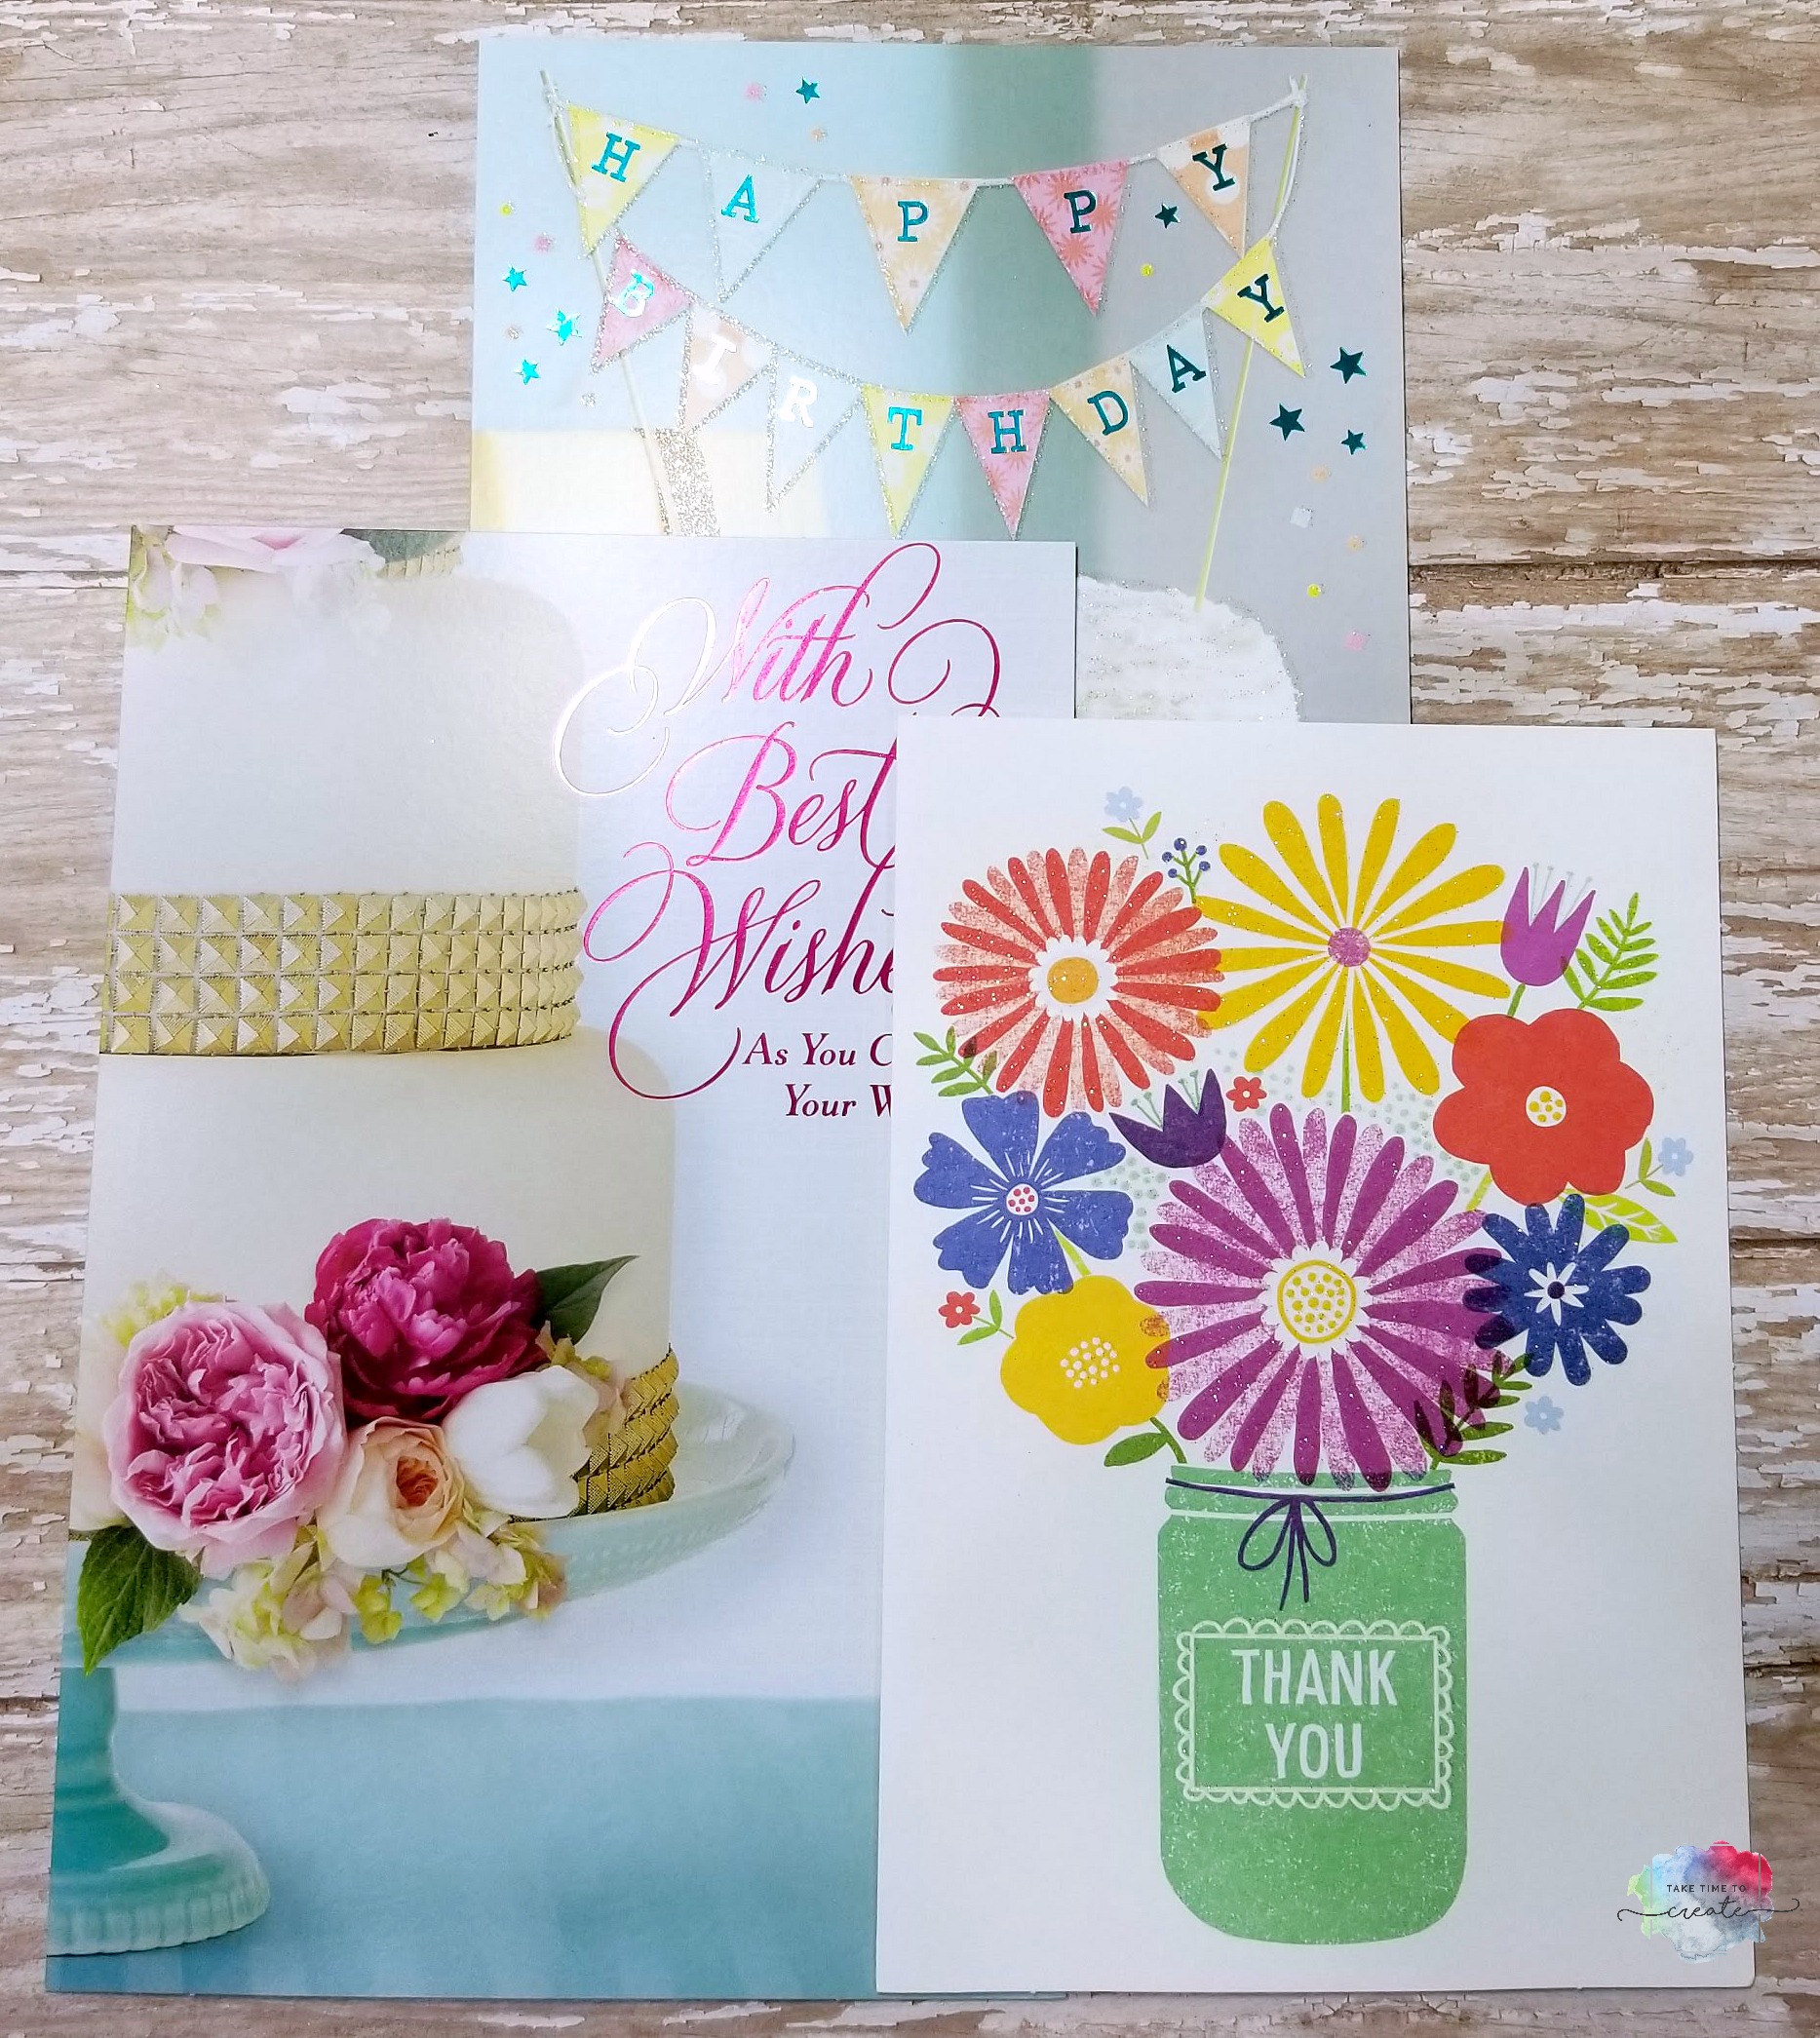
Recently I realized that I ran out of card! I know, I know, how did that happen? So I need to make some new ones and I thought I would show you what I made.
I am still trying to use items in my stash, so I started with old dictionary pages and went from there.
handmade cards
I used paper from my stash and embellished with stamps, ink, washi tape, and stickles.
The result is 3 fun, and easy cards to make and to send.
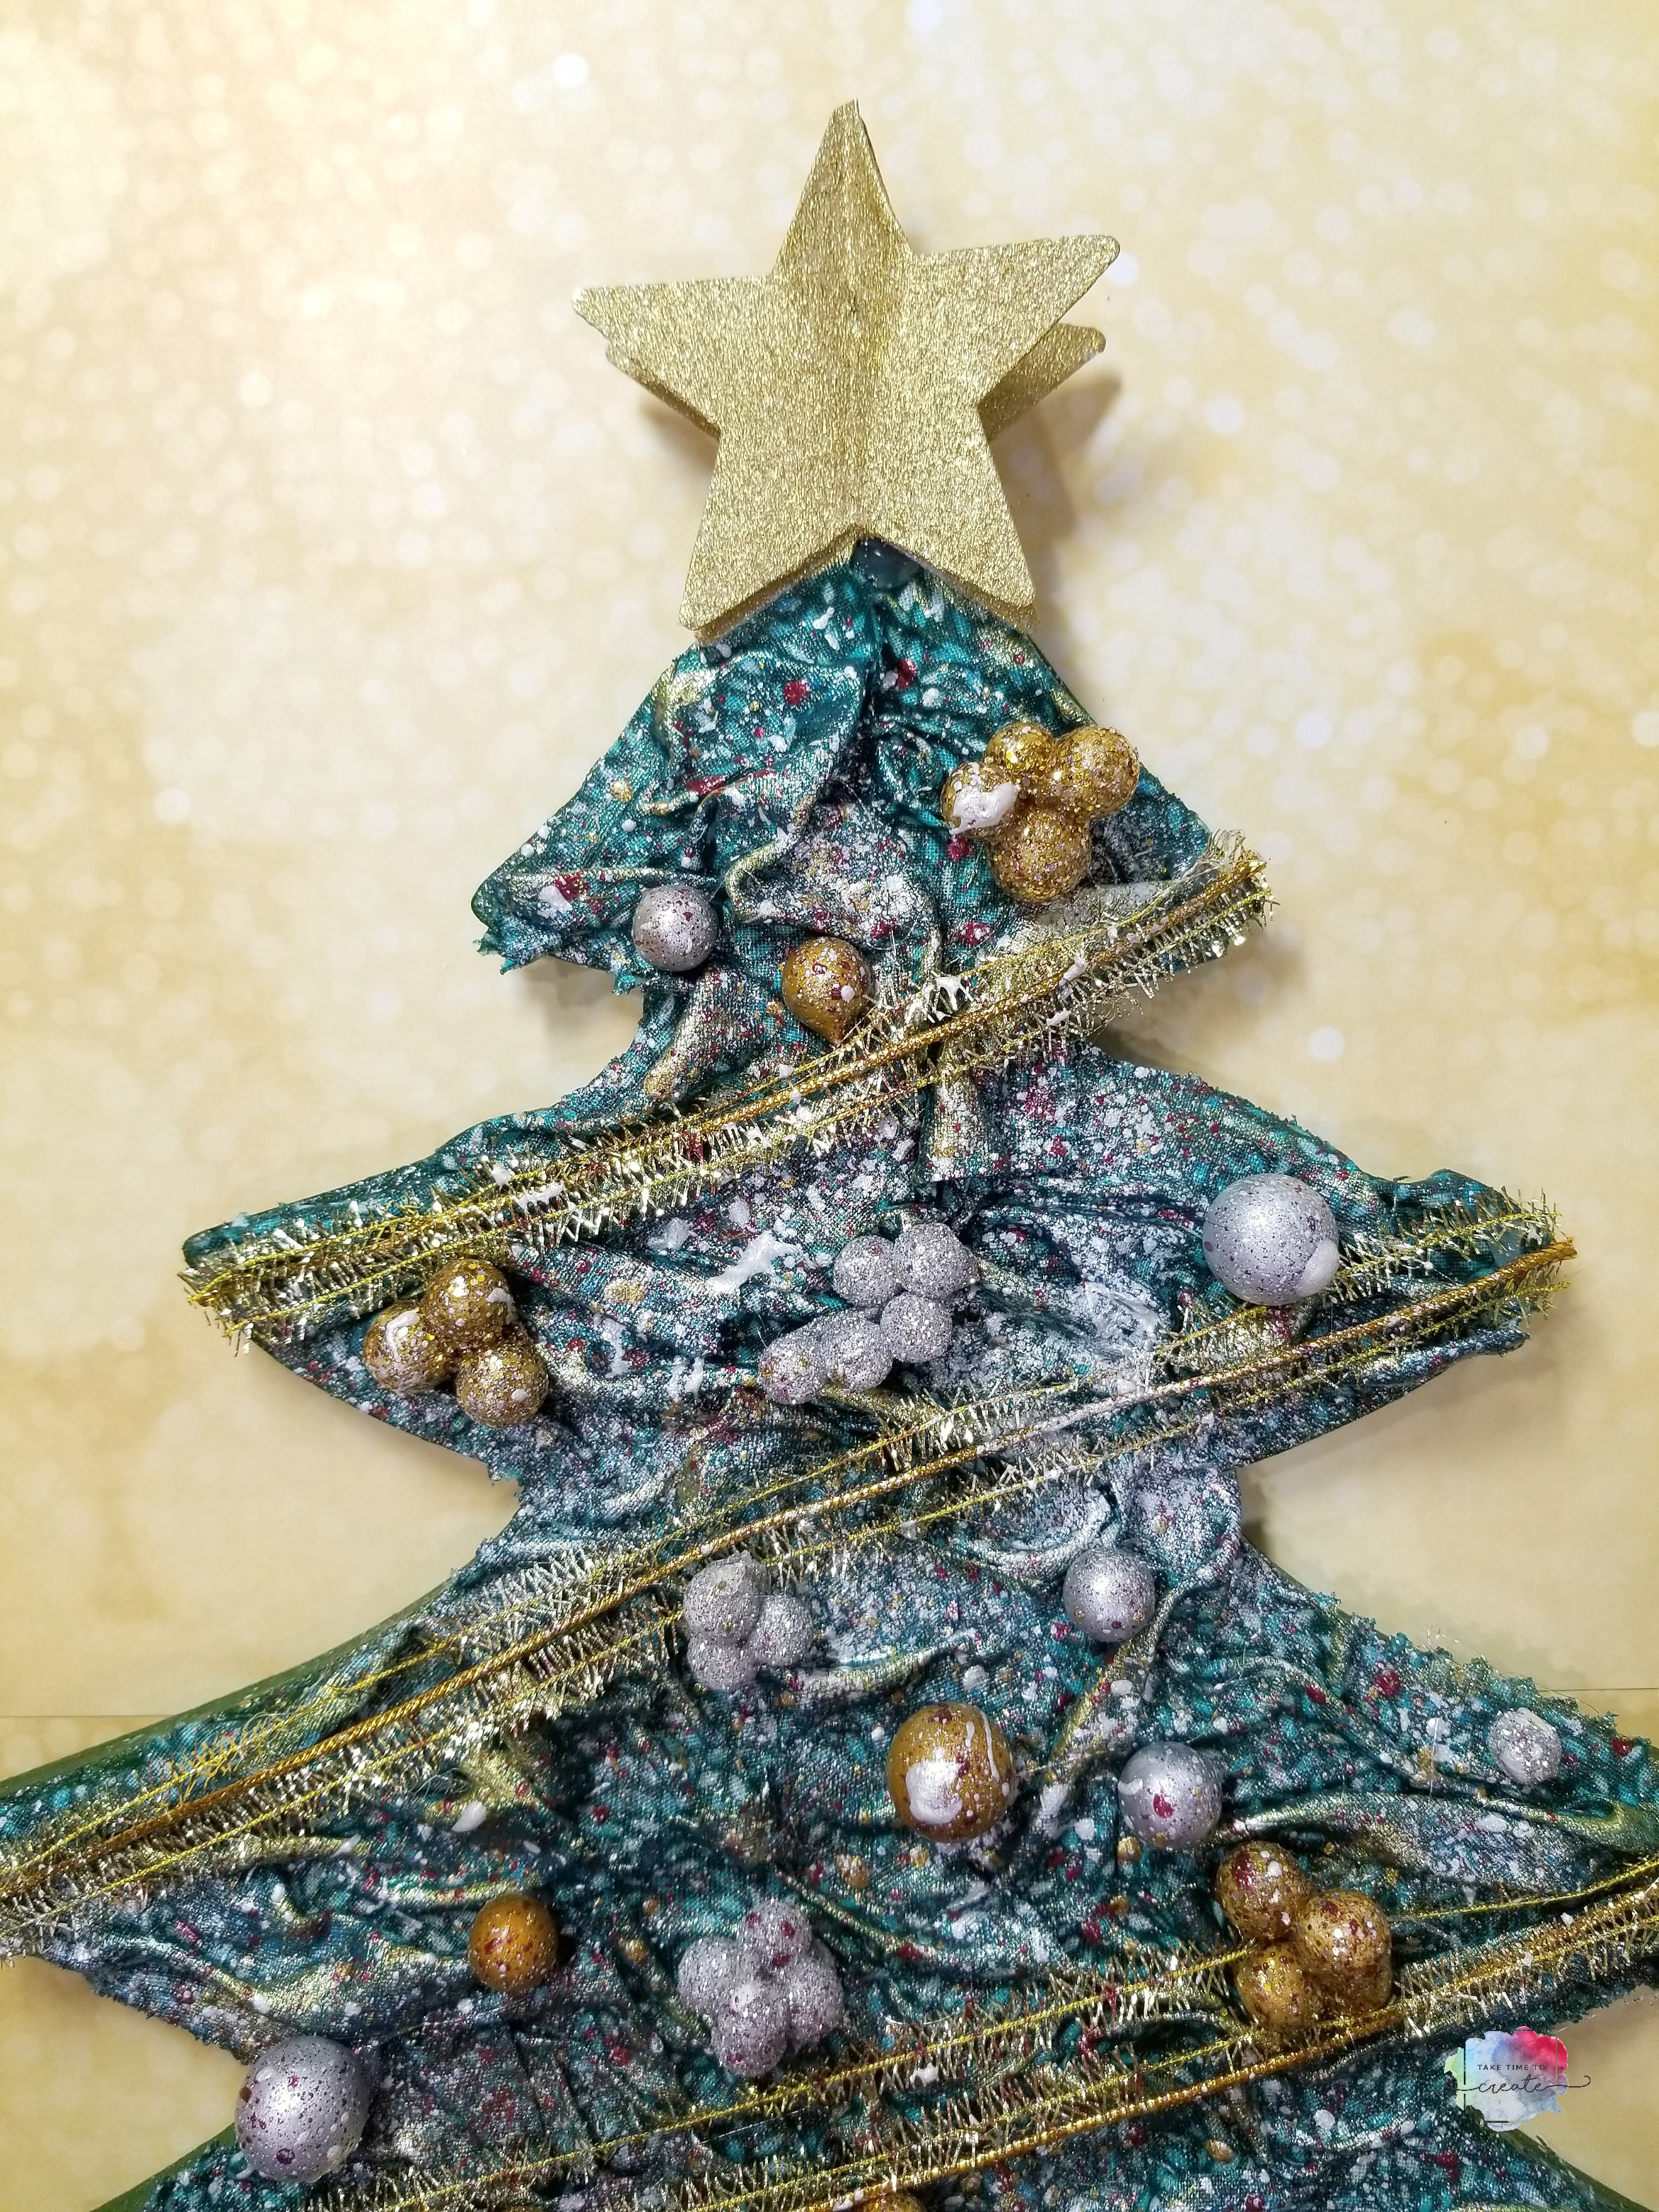
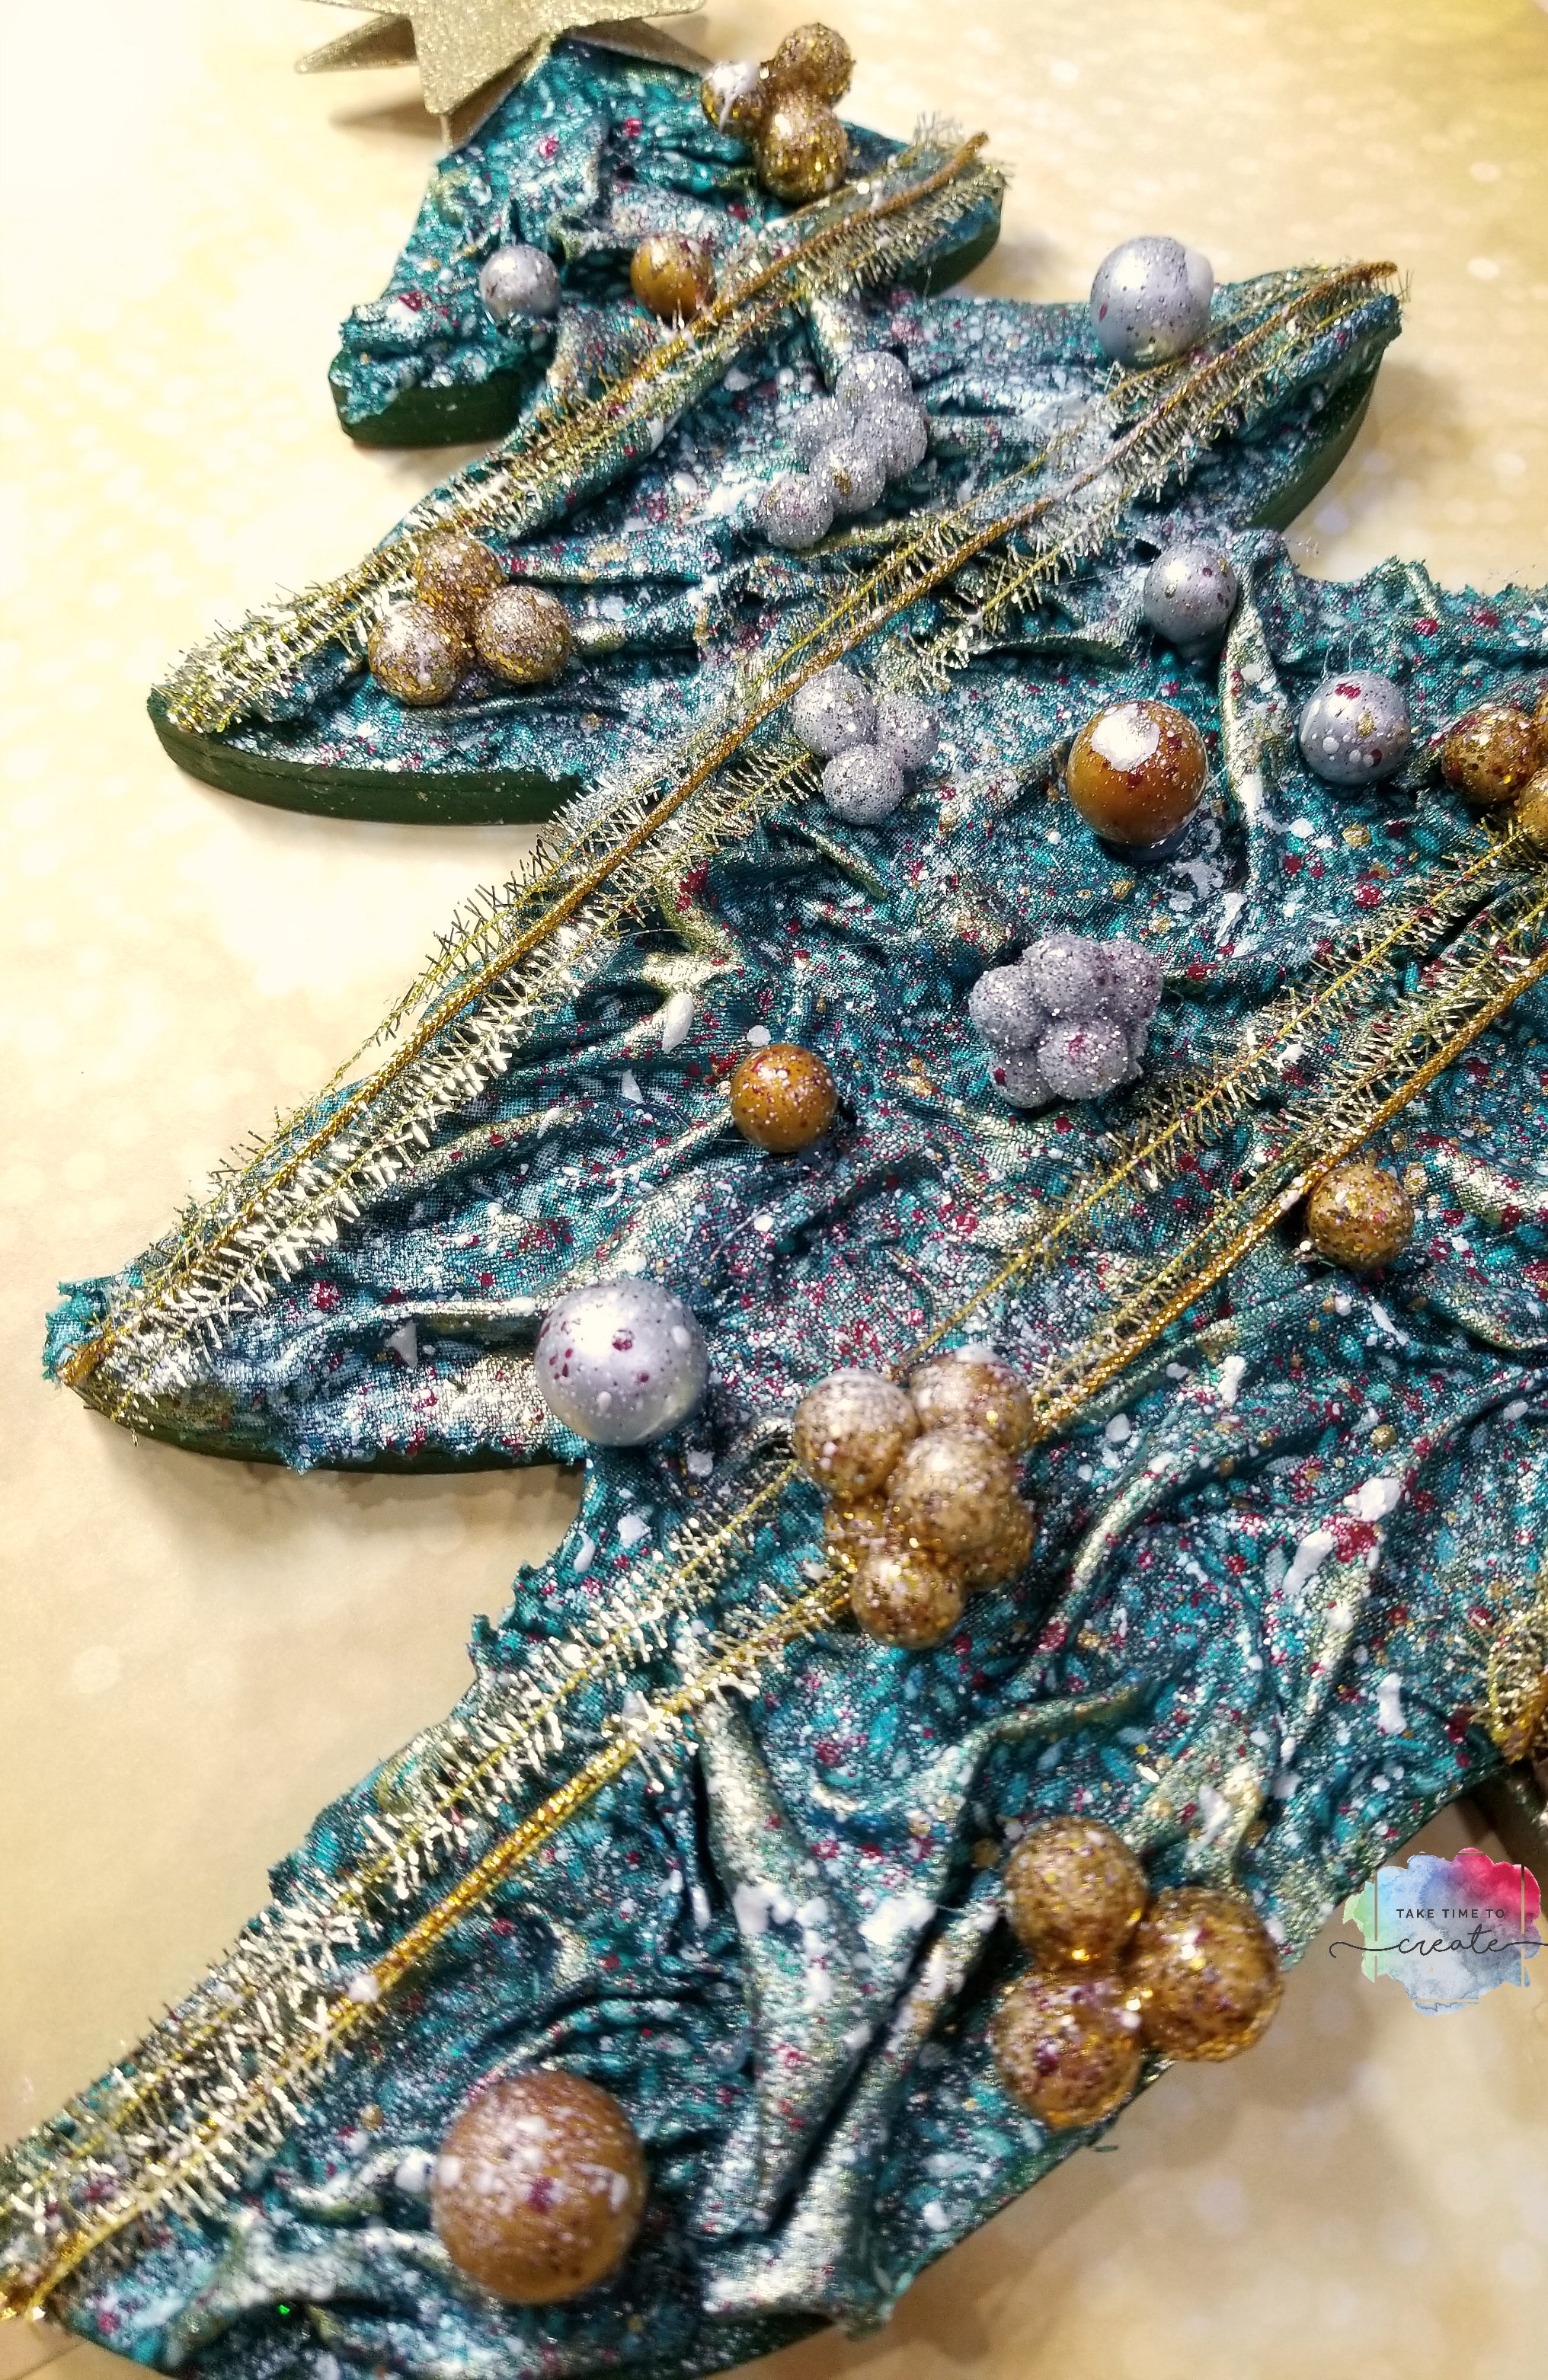
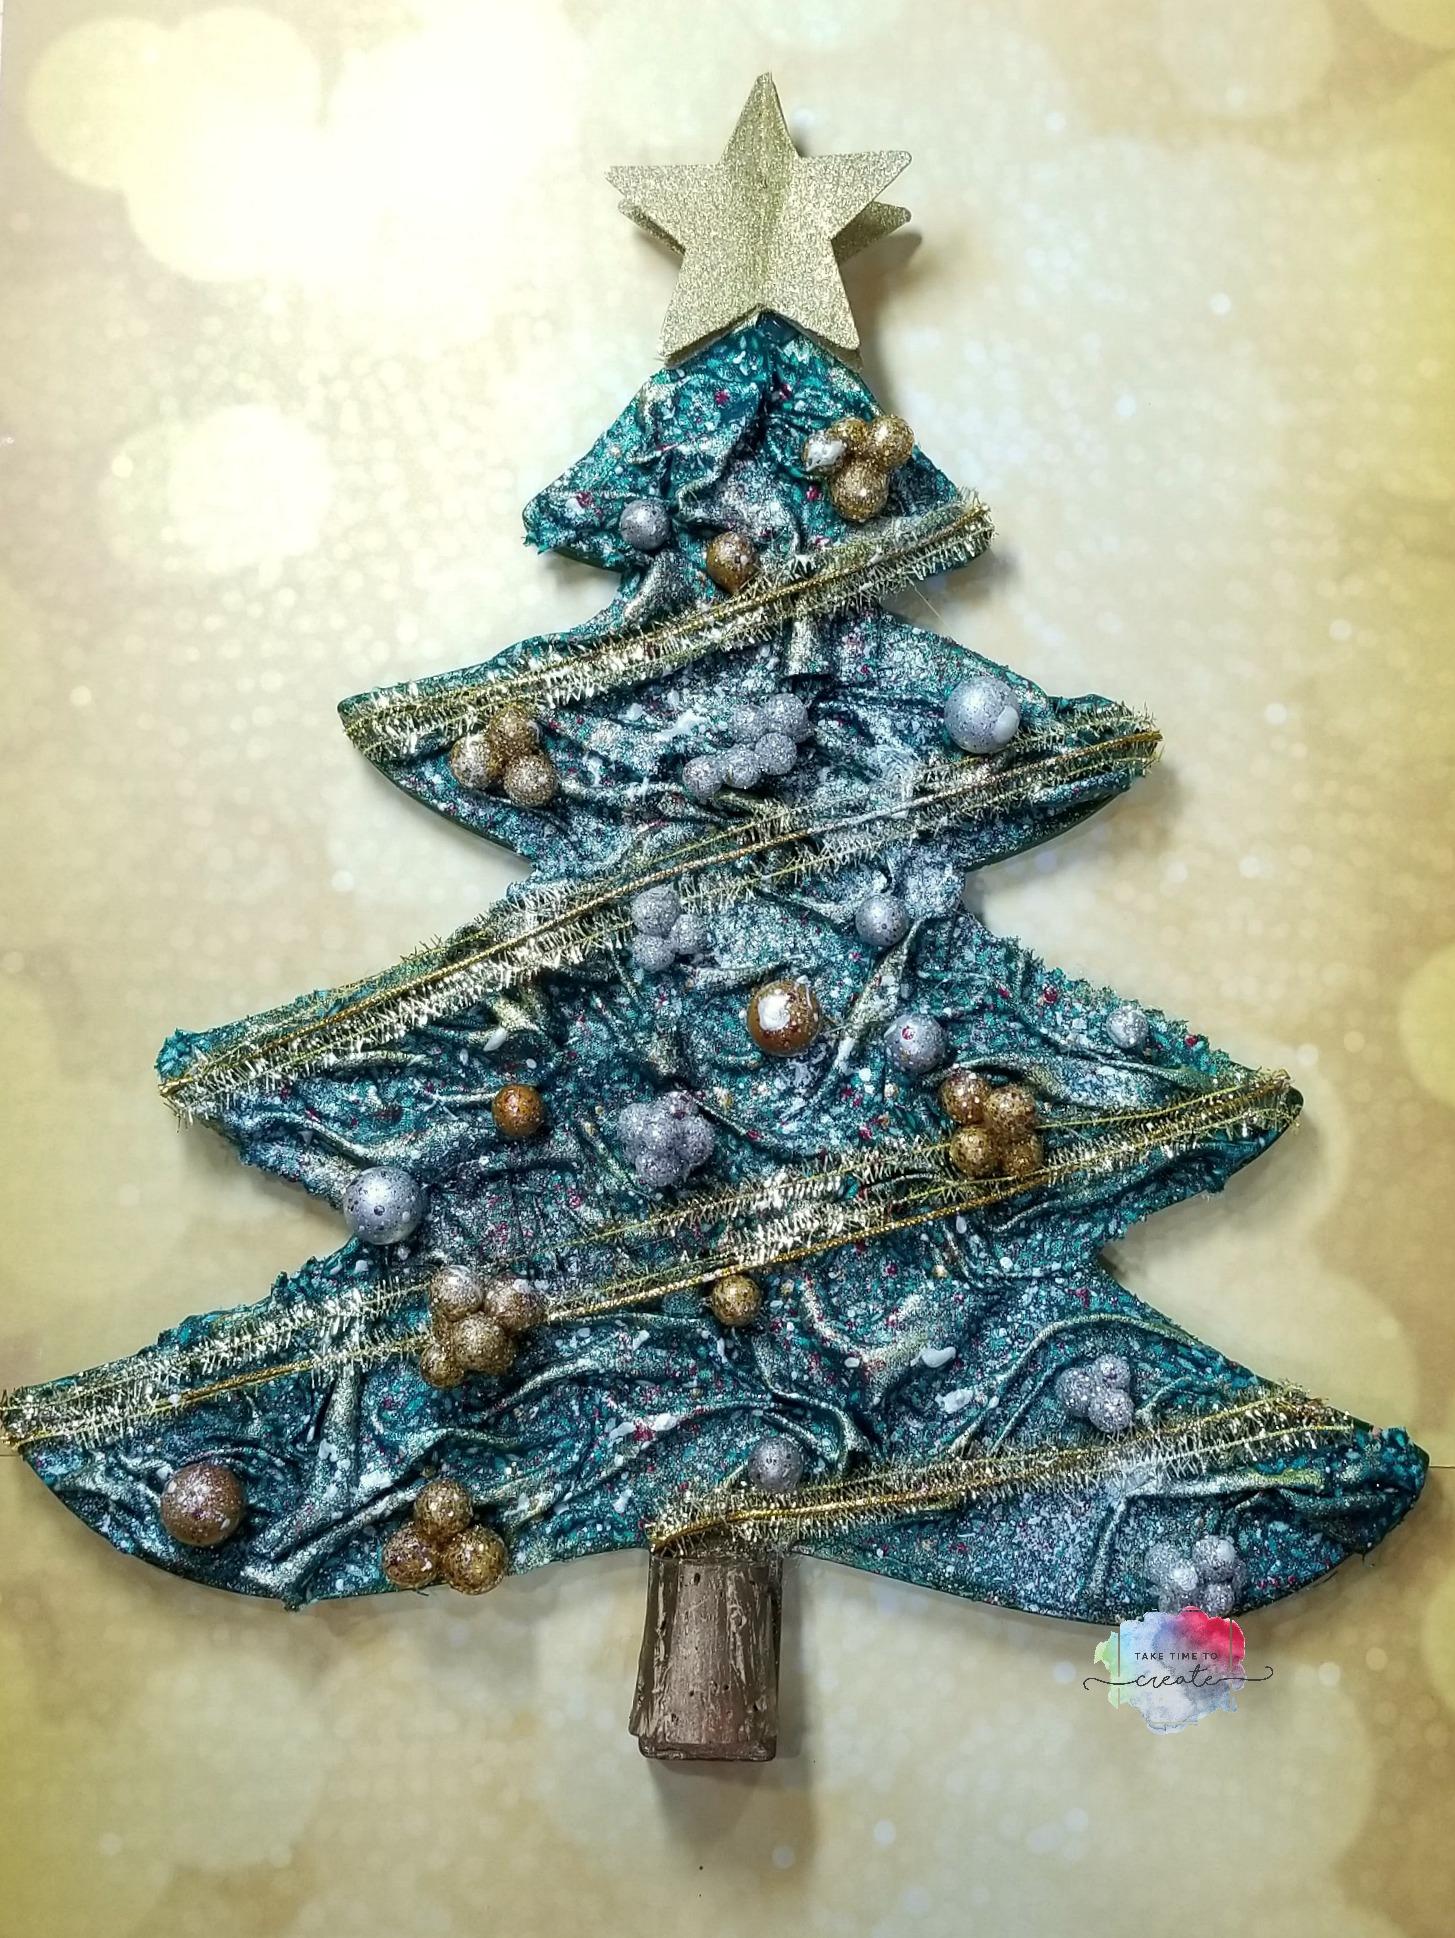
Christmas is fast approaching and now is the perfect time to make some new Christmas decor!
I found this chipboard tree at my local creative reuse center and I knew it would be perfect for a fabric mixed media project. It is a Paper Studio brand, I think you can find similar items at your local craft stores.
The first layer is paint. I wanted to make sure the tree was green just in case the fabric didn’t cover it all. Then I added the fabric layer. This added a lot of texture and interest.
Once the fabric was dry it was time to start painting. I have found that these fabric mixed media projects work best if you let the fabric dry overnight rather than using a heat tool.
Once the fabric is dry it is time to add paint. I dry brushed on a few of the Finnabair Metallique and Sparks paint. Then I added the decorations. I used items I found at the Dollar Store and adhered them with hot glue.
Once that was all dry I flicked paint on with a toothbrush. I love how it turned out! This was a lot of fun to create and it will look great in my home. What decor projects are you working on?
Affiliate links:
Liquitex super heavy gel- https://amzn.to/2Px3flj
Liquitex Heavy Gel-https://amzn.to/2RXTQ2O
Gloss Mod Modge-https://amzn.to/2PZxr7R
Corks-https://amzn.to/2zfepkg
Finnabair sparks-https://amzn.to/2DHSq9F
Finnabair Metallique-https://amzn.to/2DHqjXX
Finnabair Paint brushes-https://amzn.to/2TjbgrZ
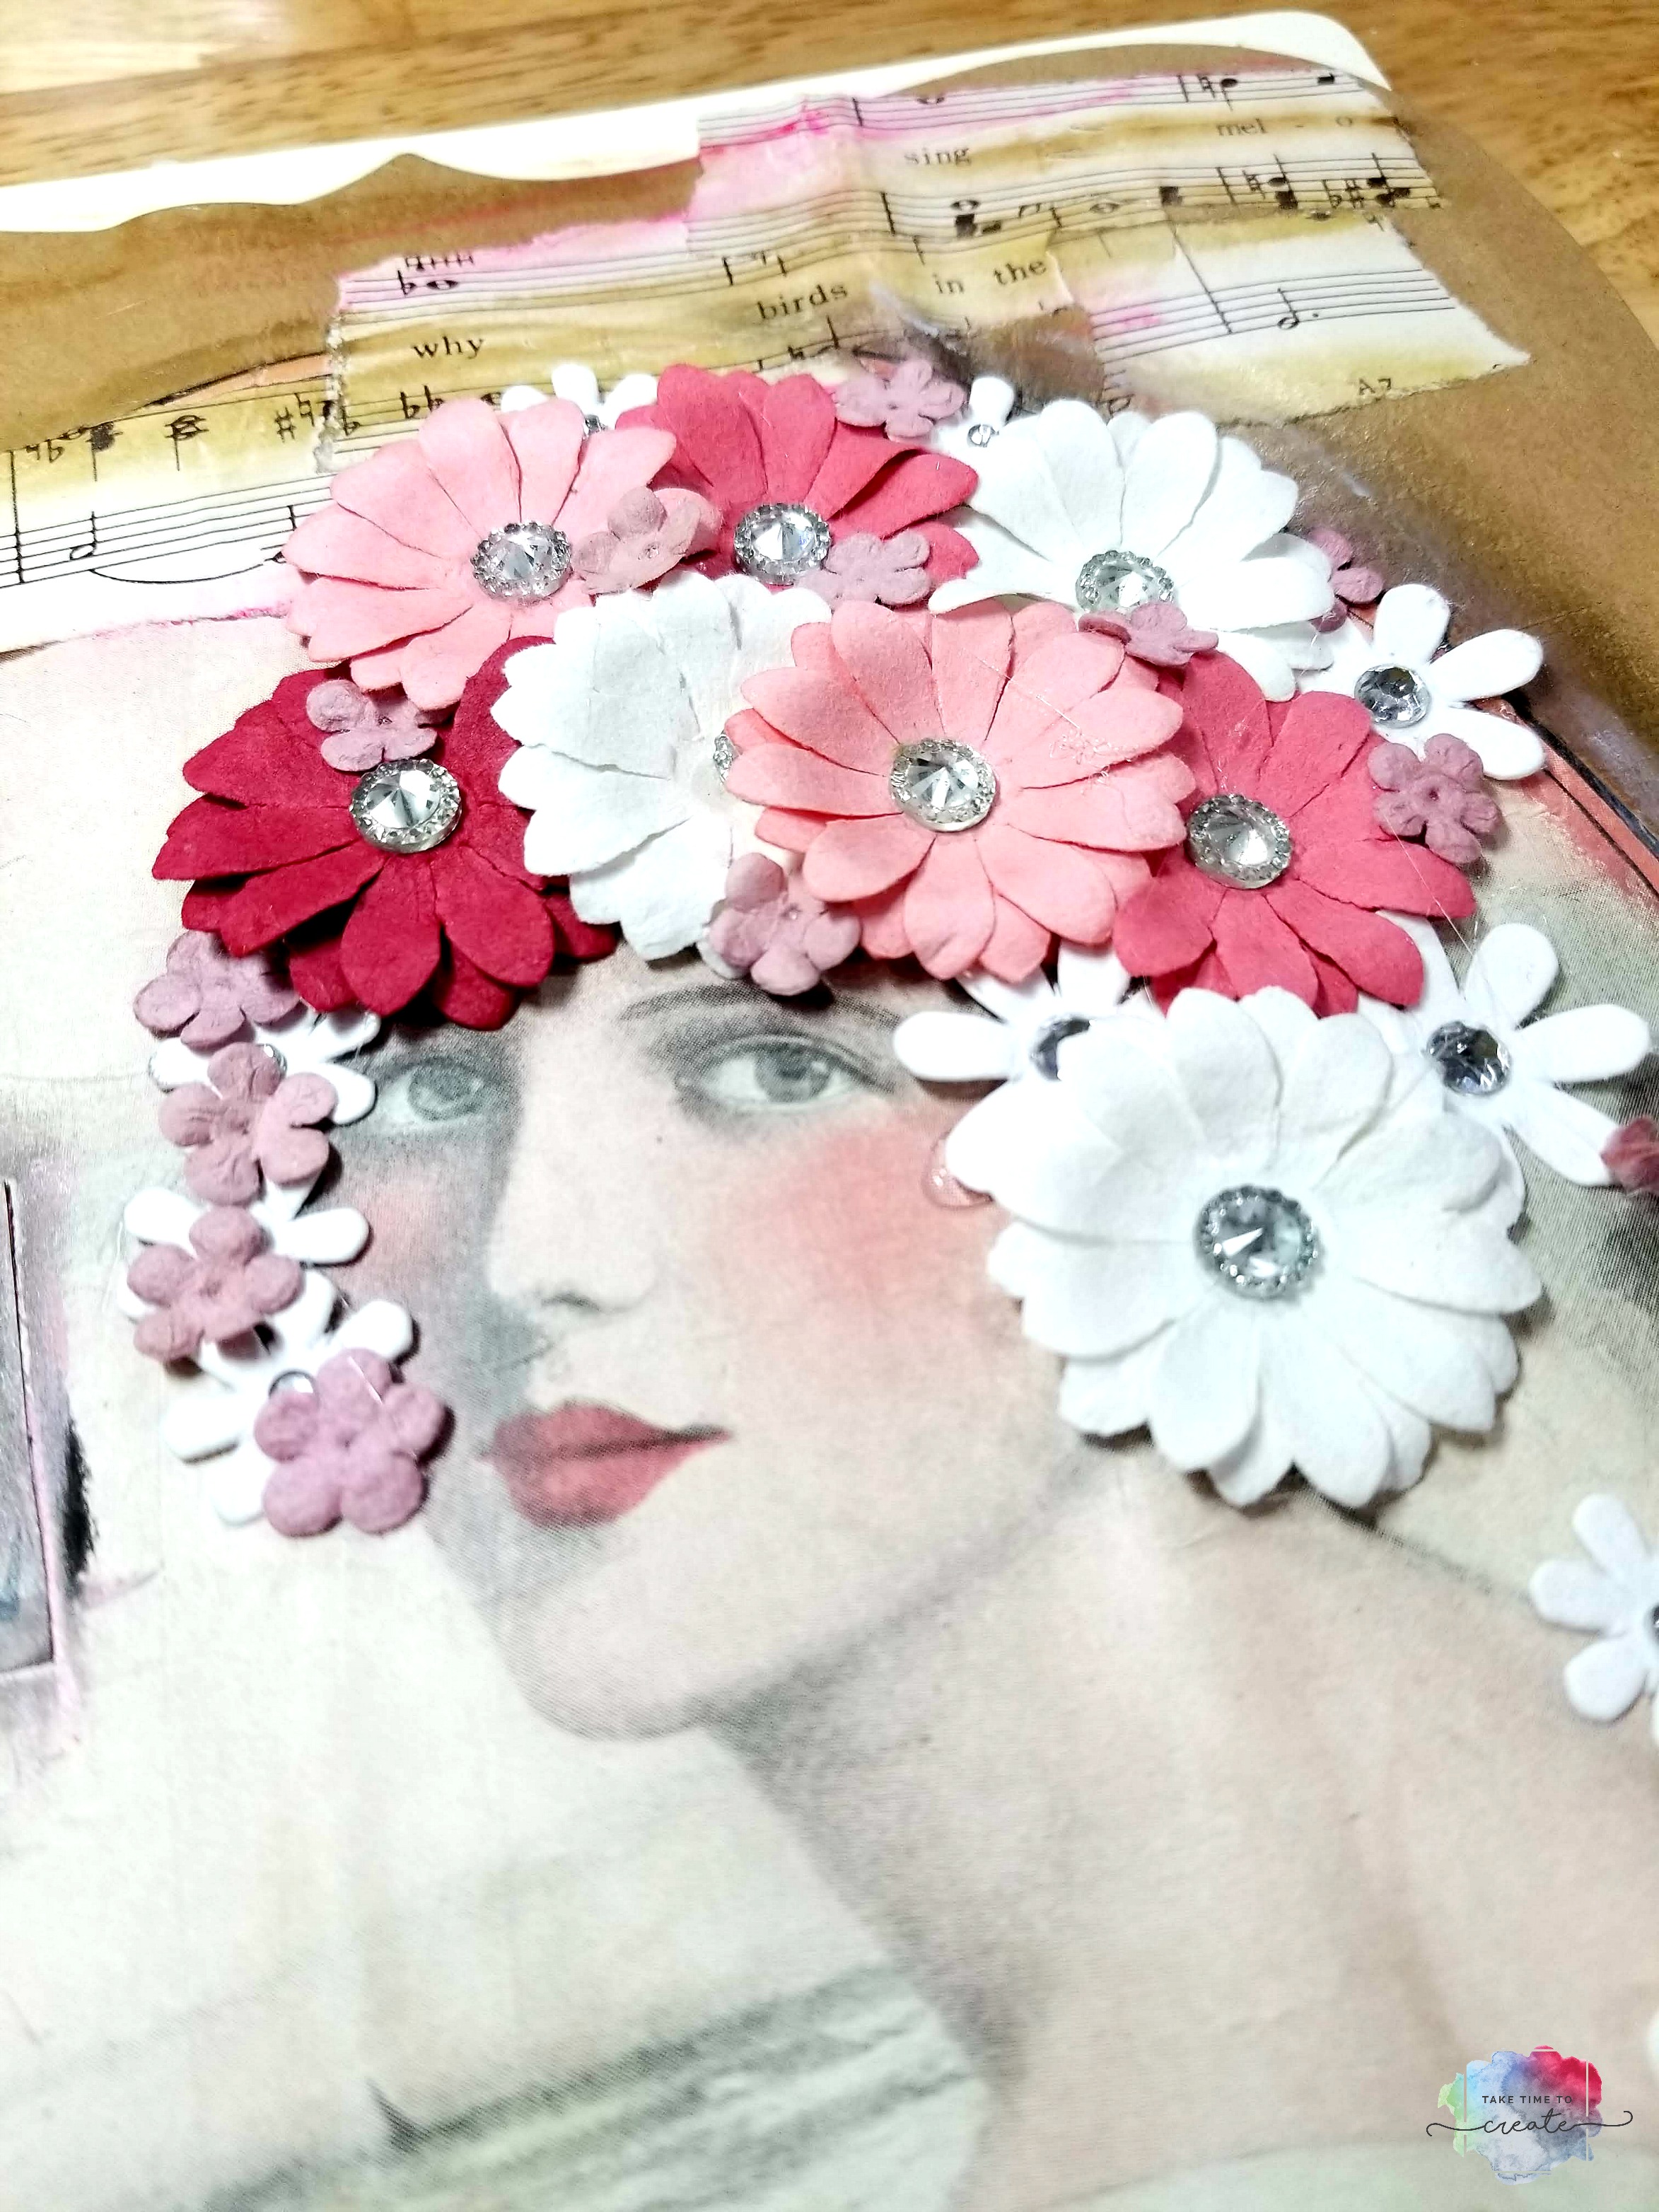
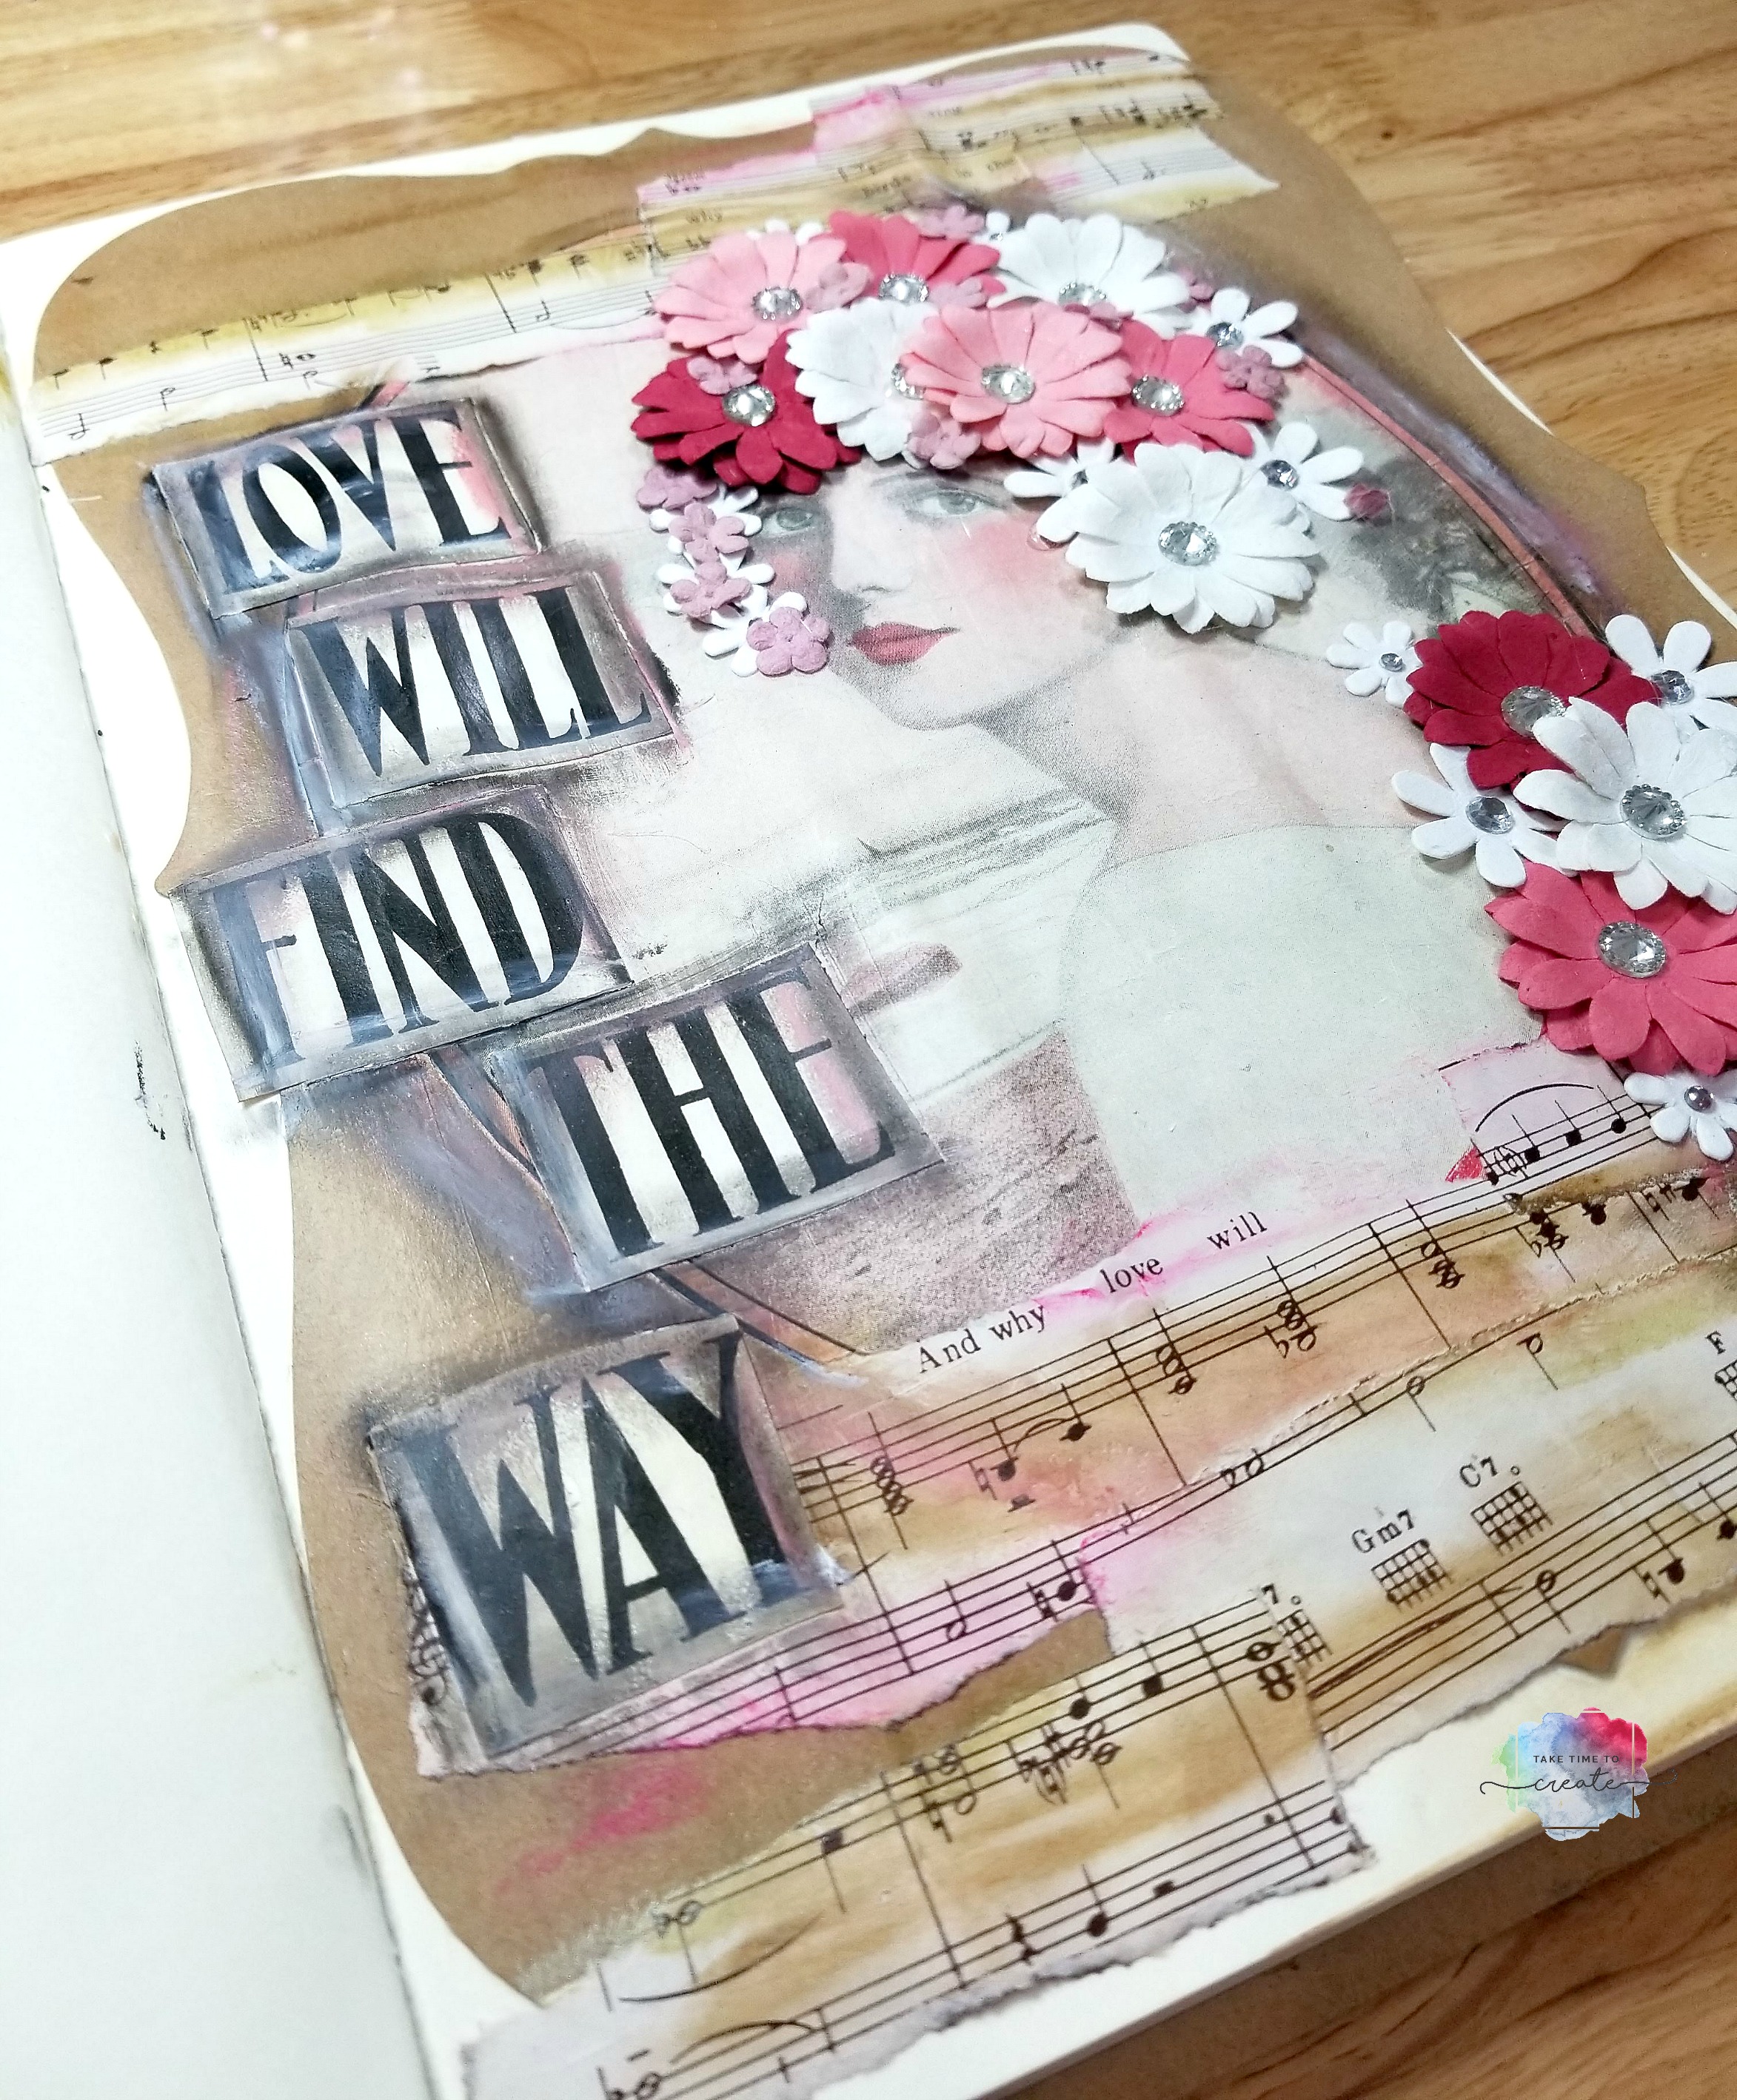
I found this really great page, it was the cover of some music sheets. When I saw here I knew that she would be beautiful in my art journal with flowers in her hair.
I love the soft look of the girl so I knew that I didn’t want to add to much to the page.
I started with a shaped paper for the background, I had it in my stash, but you could easily make one by cutting a piece of brown paper into any shape you want.
I added the girl and some strips of music. Then I used gelatos to add some color and dimension to the page.
Once I had all the flat elements down I started to add some flowers I had in my stash. I hot glued on a variety of pink and white flowers.
I really like how she turned out when I was finished. It was really fun to create a simpler page than what I have been creating lately. I wanted the girl to stand out and speak for herself and I think that is what I got.
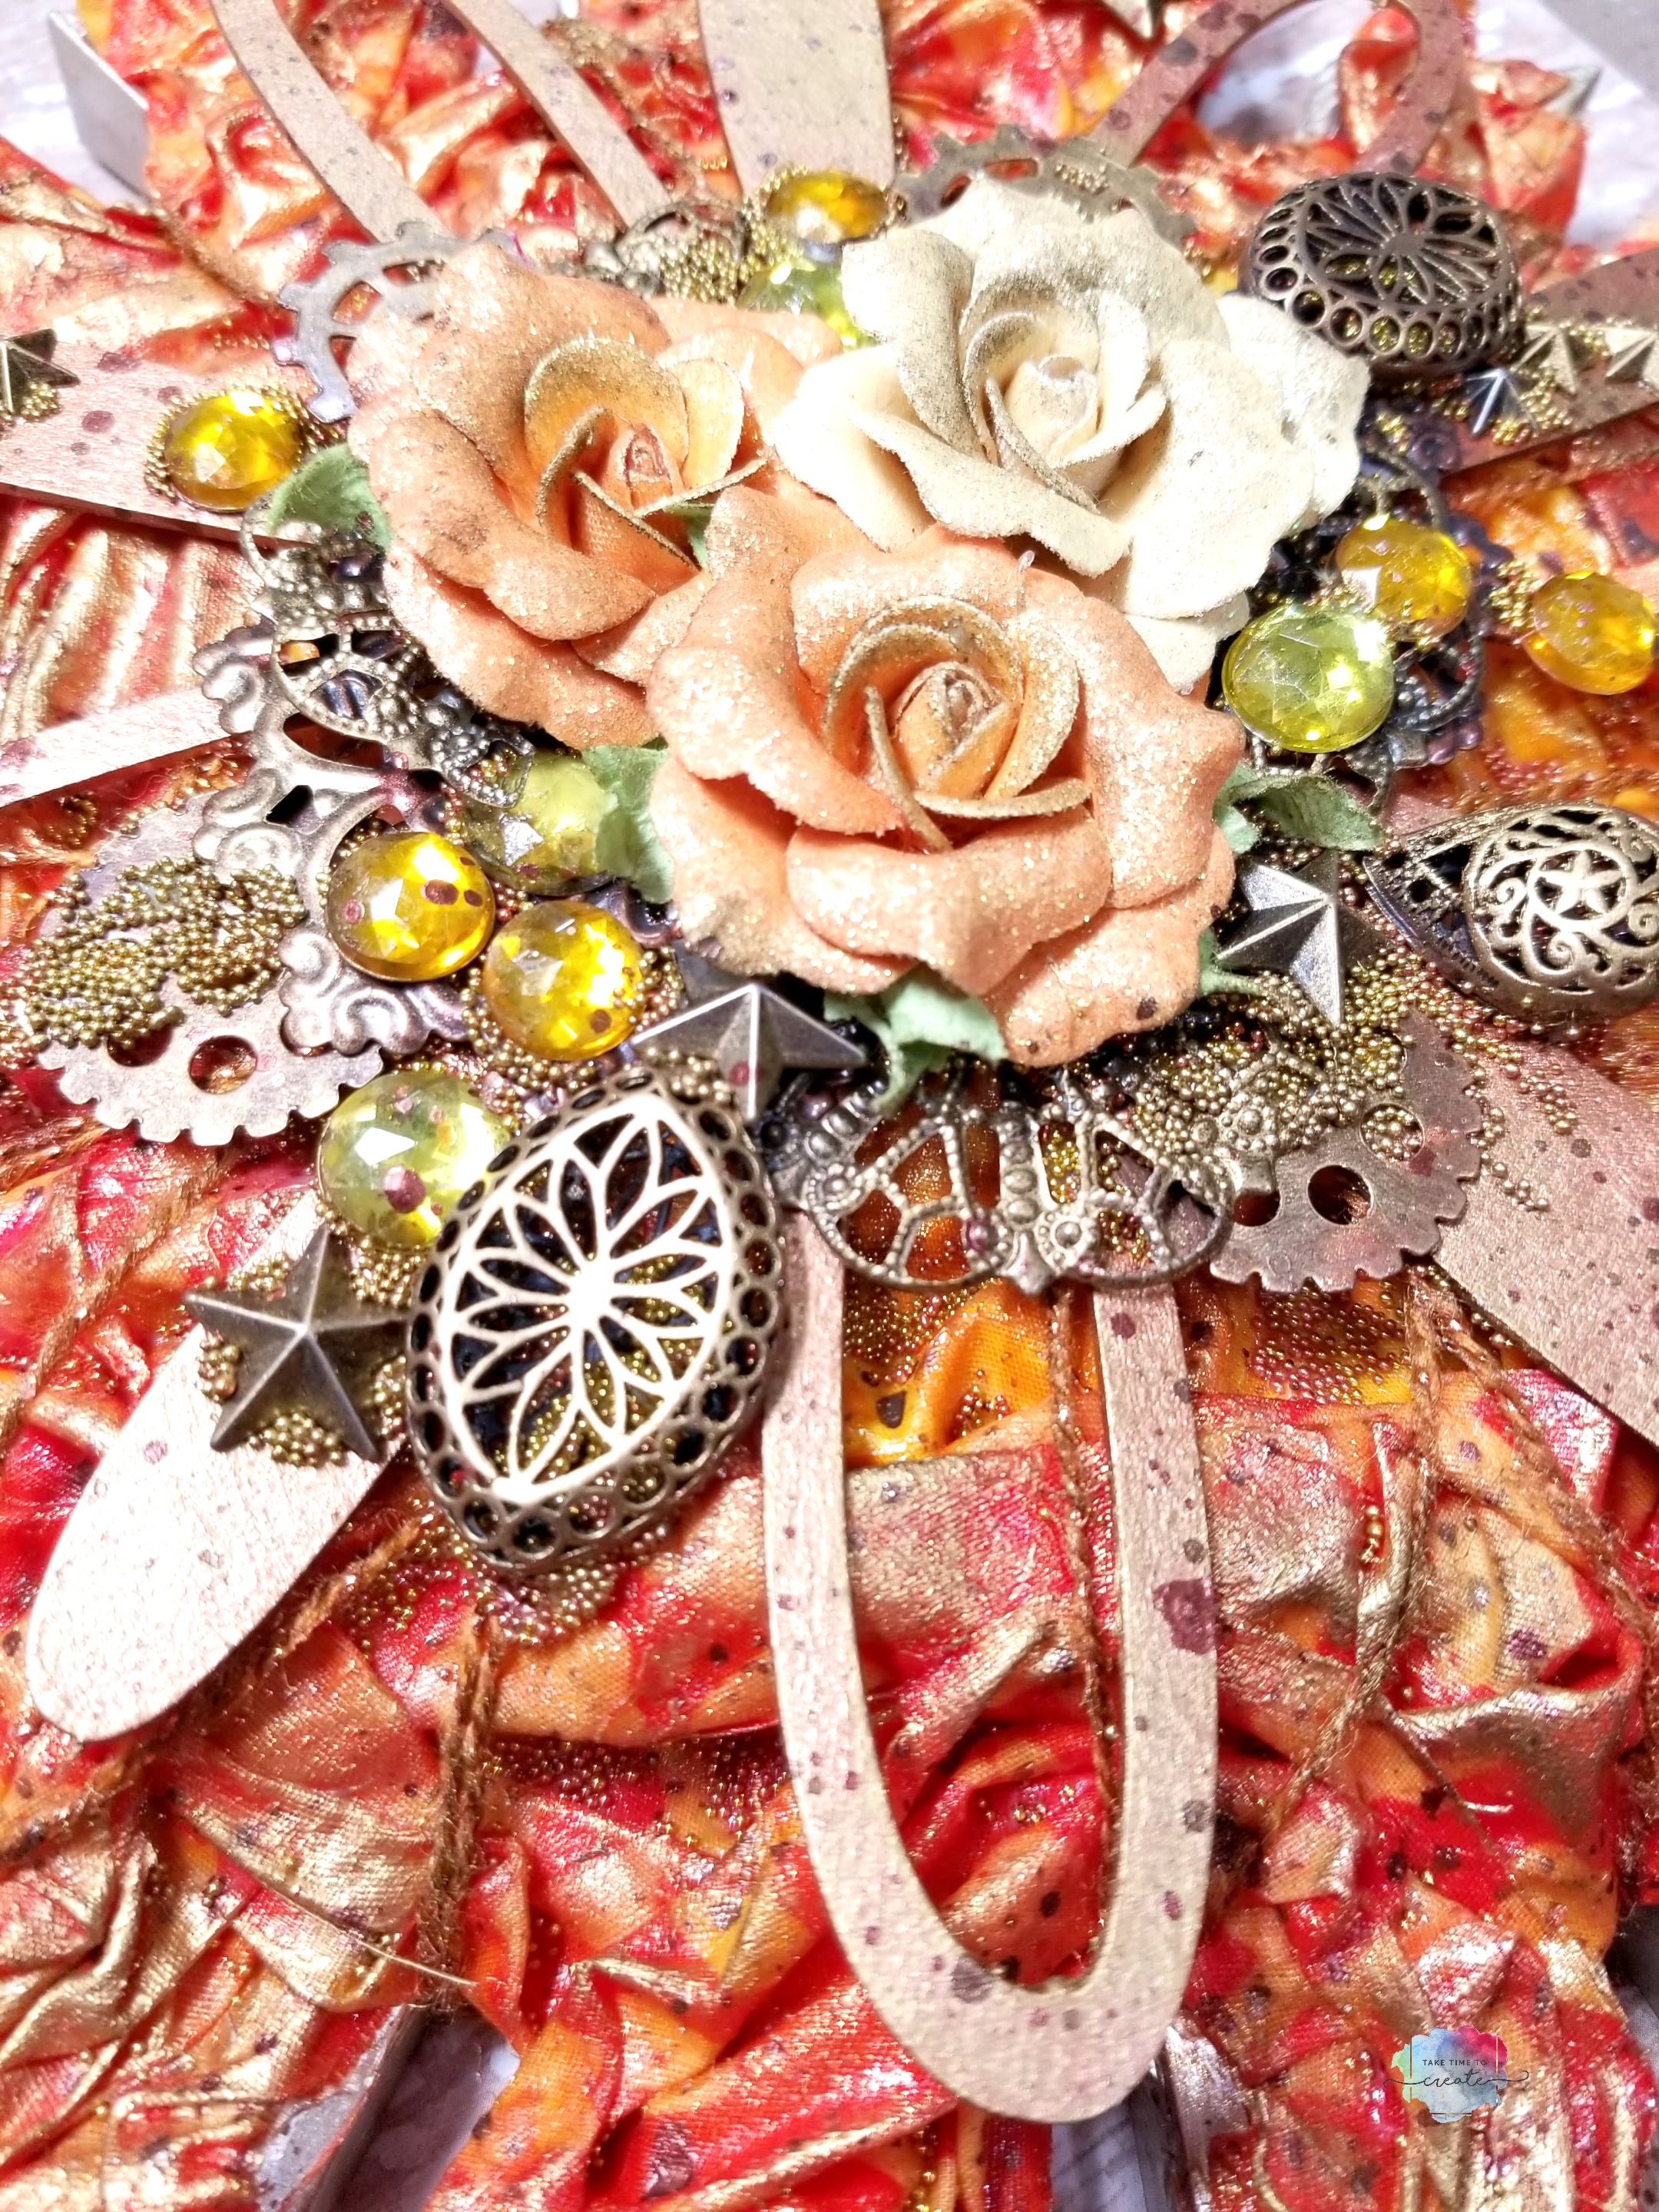
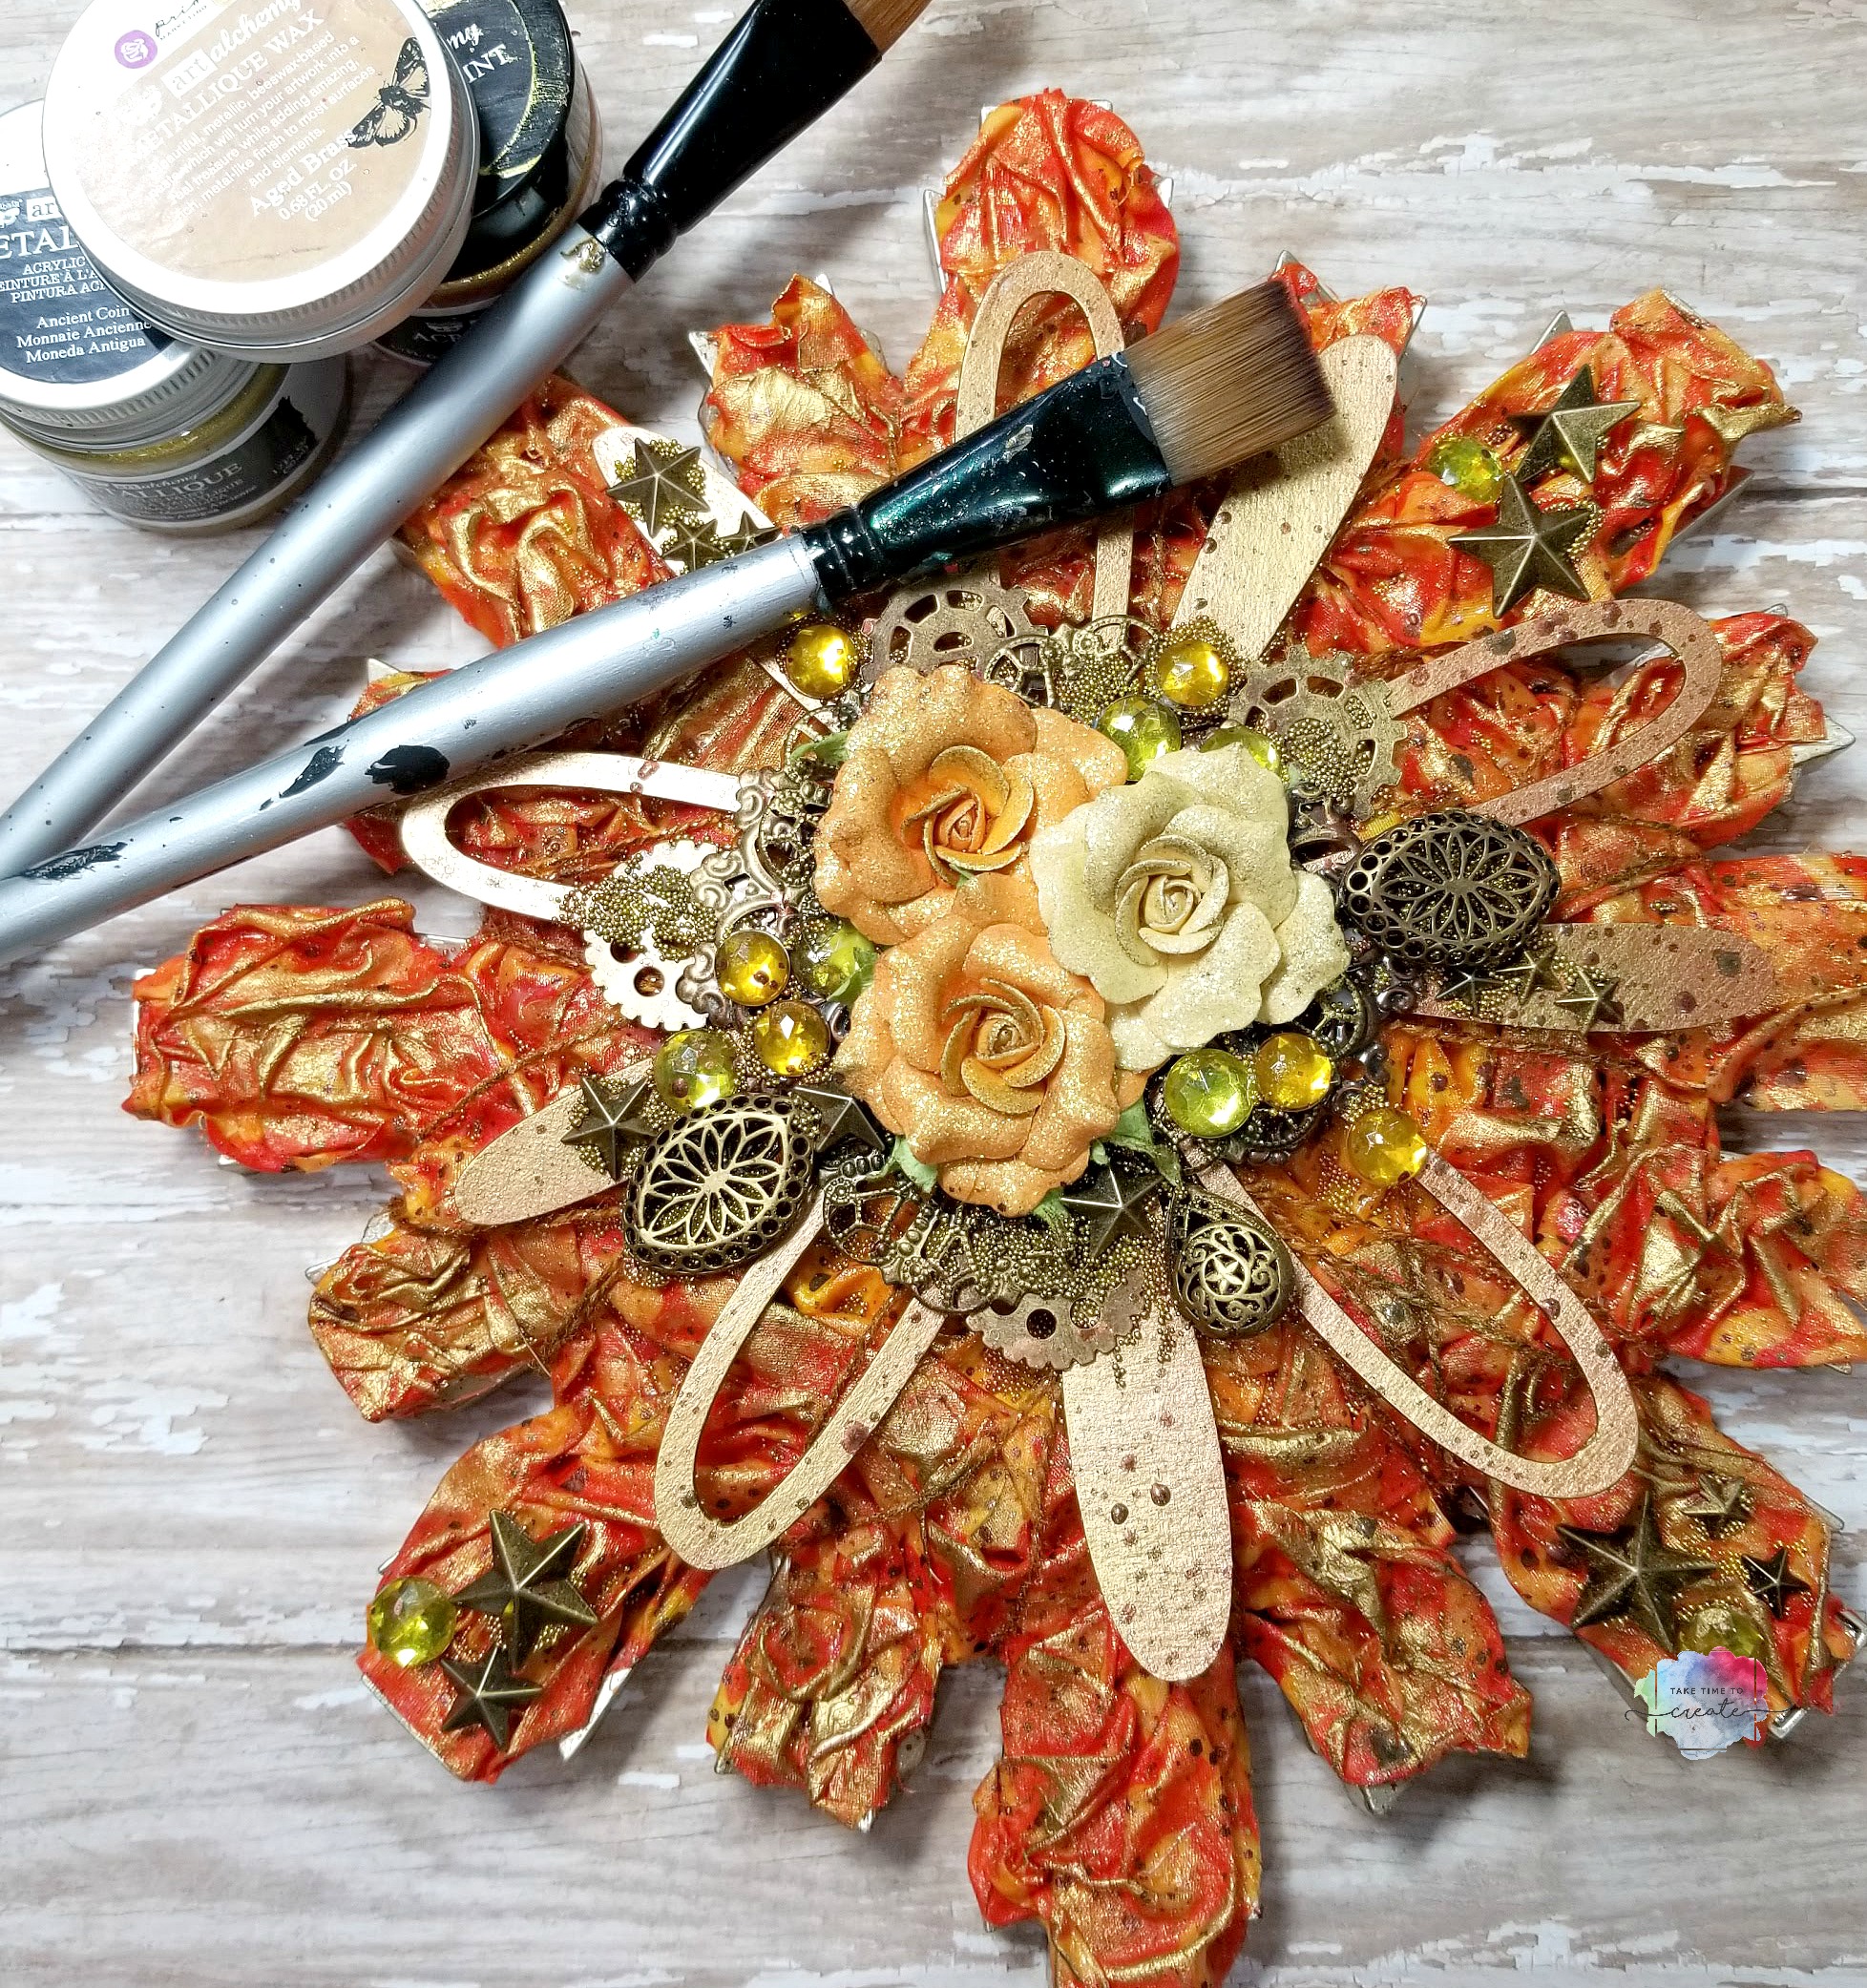
Have you ever found something at a thrift store that you knew you could make into something new? That is how I felt when I saw a sun shaped mirror, in my mind I saw it as a fabric sun mixed media project. I had the perfect fabric and element to put on it!
I had the perfect fabric in reds and yellows to use as the base. I love how the fabric gives the piece texture and movement.
Once the fabric was dry I was able to layer on more goodies. I wanted to keep my composition centered and build from there, but I did add some elements to the edges just to keep it interesting.
To top it all off I used my favorite Finnabair paints and waxes. I just love how her products add shine and interest to my projects. They are always the perfect touch for any mixed media project I do.
So what item have you reimagined as a mixed media project?
Affiliate Links
Liquitex Gloss heavy gel https://amzn.to/2xW9qVb
Liquitex Gloss Gel https://amzn.to/2xSlwi3
Red and orange Fat quarters (not the same as I used, but similar) https://amzn.to/2QxsgsH
Finnabair Sparks https://amzn.to/2DTS6pd
Finnabair Brass Hardware https://amzn.to/2DUuz7n
Finnabair Wax https://amzn.to/2zOVE84
Finnabair Star Mechanicals https://amzn.to/2xZDE9F
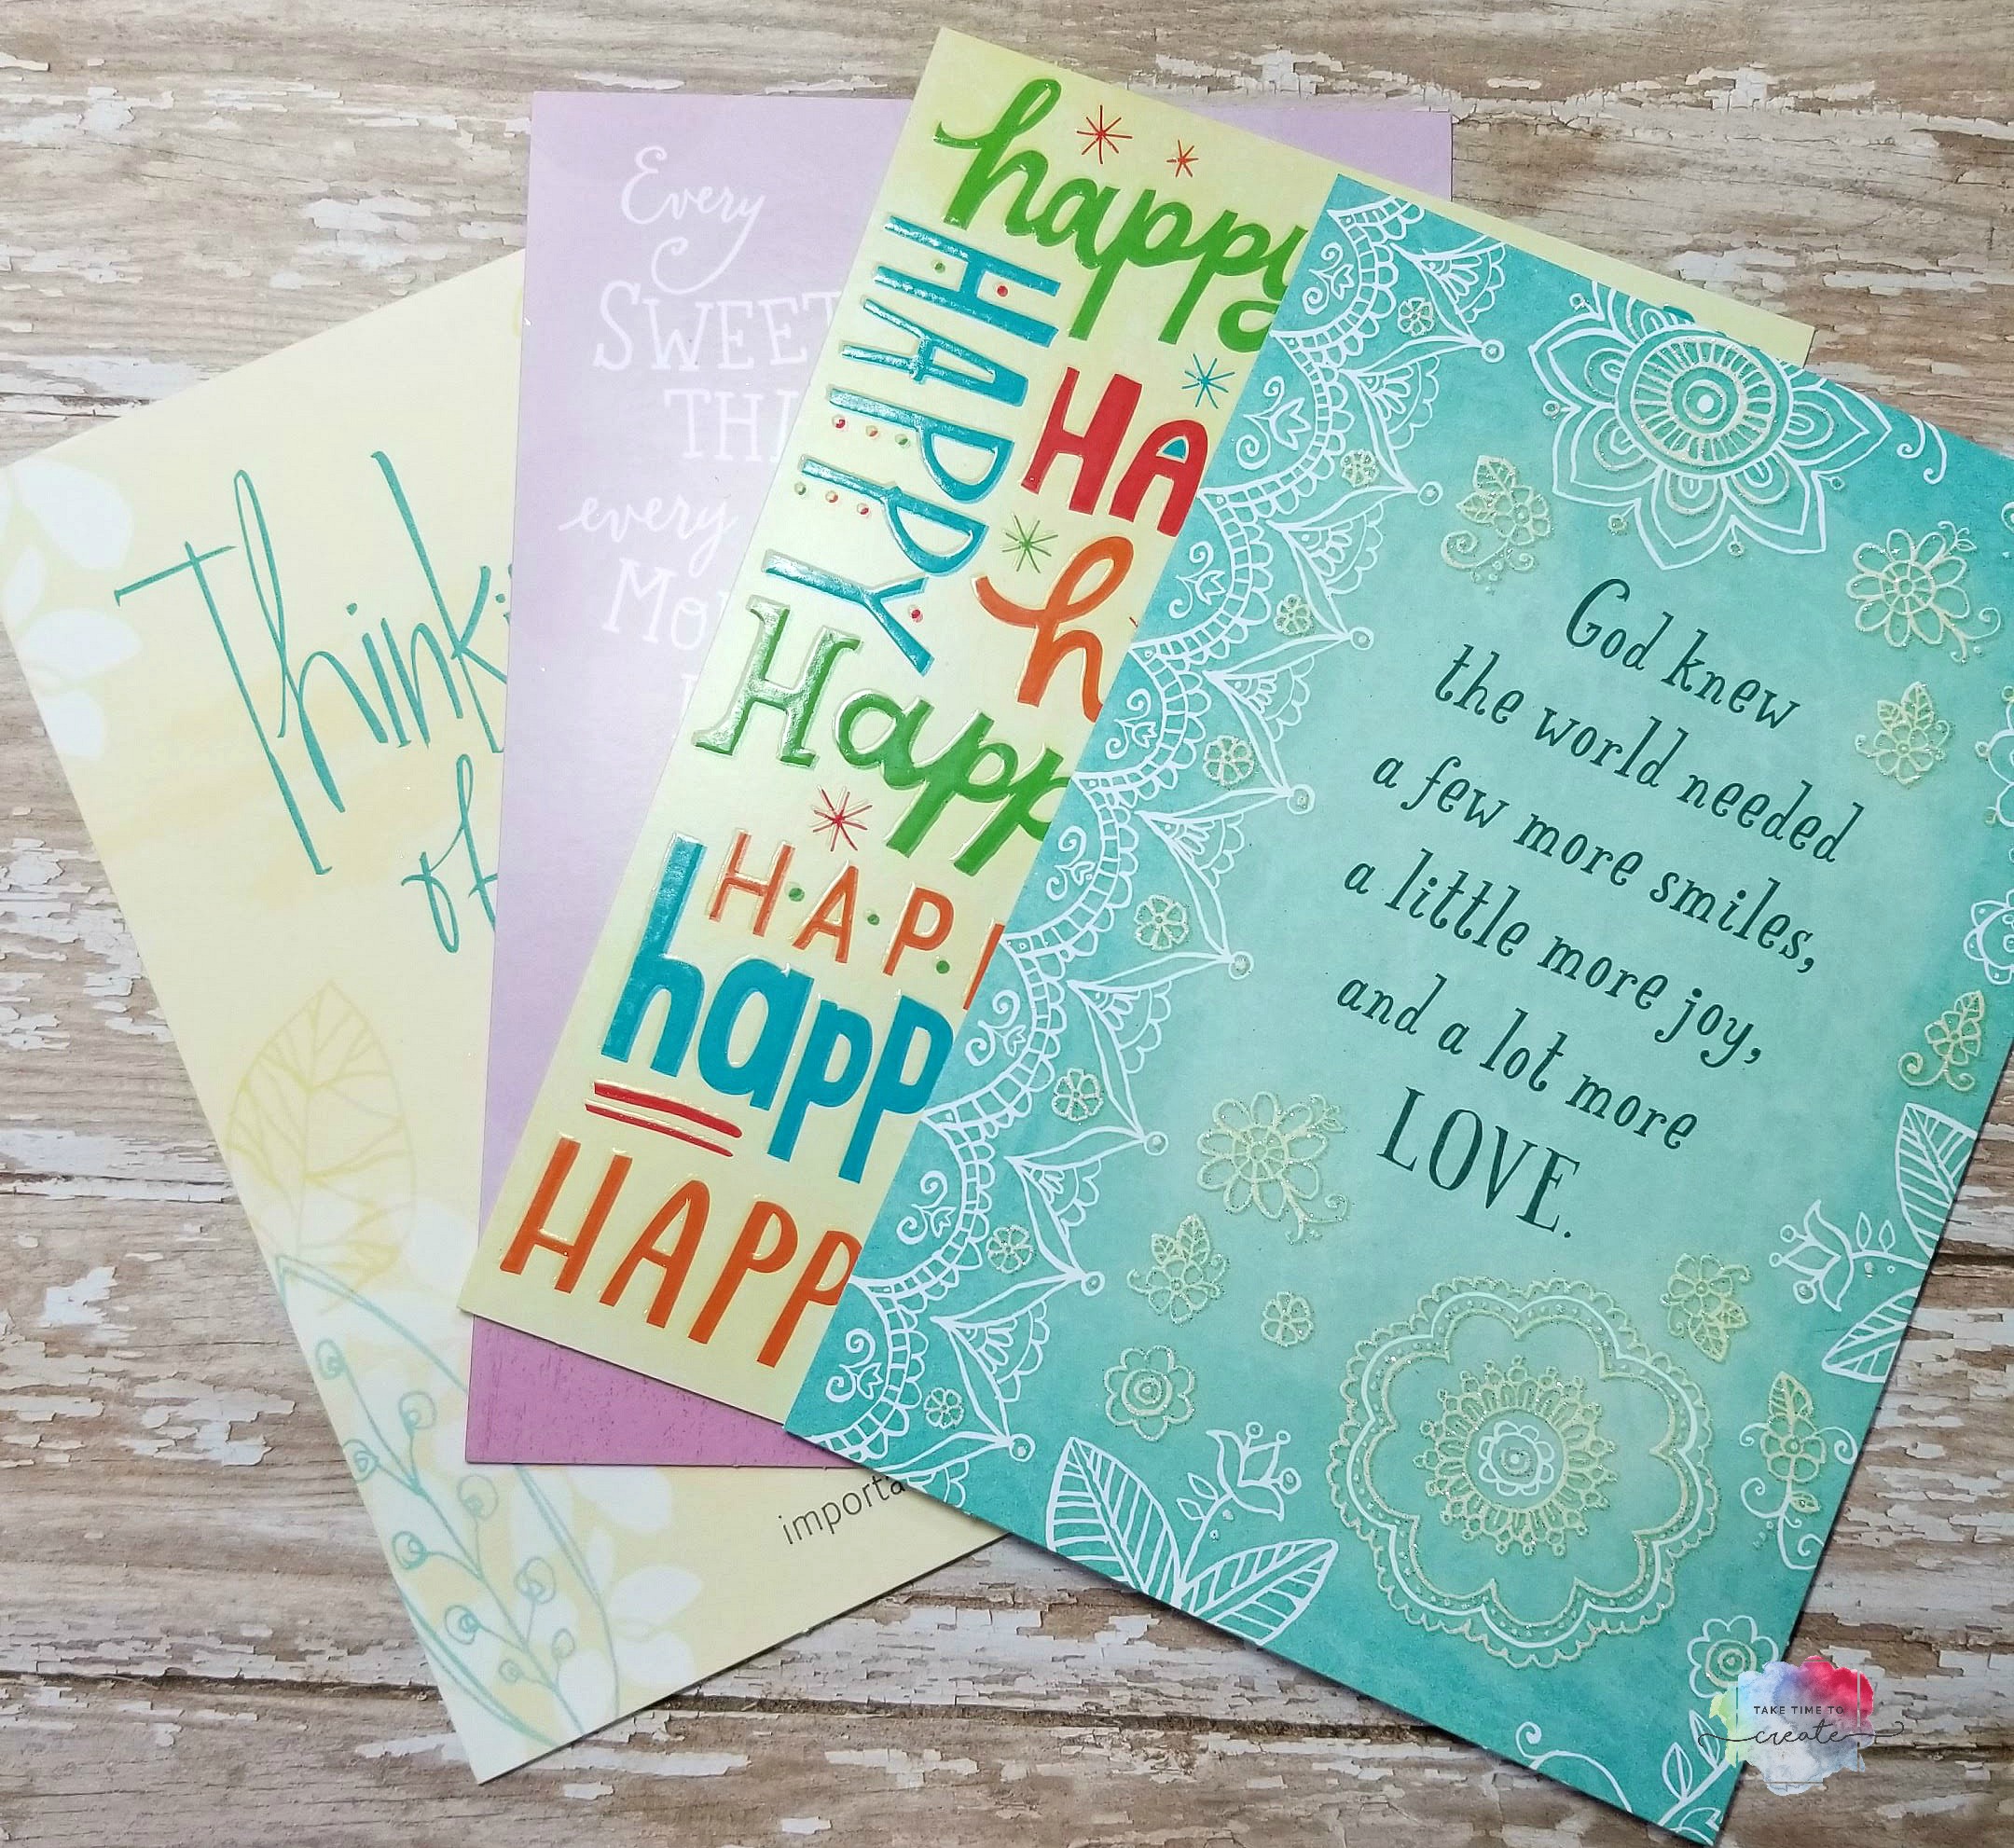
I am excited to tell you that as of today the Dollar Tree will be selling Expression from Hallmark cards! Now, I usually like to make my greeting cards, but sometimes I am in a pinch and so I need a good place to purchase them, and the Dollar Tree really came through with these cards!
There are over 6,500 Dollar Tree stores nationwide and on August 30th every store will carry Expressions from Hallmark, $1 each and Heartline a Hallmark company, 2 for $1. With hundreds of new greeting cards to choose from, you can celebrate every moment with your friends and family without breaking the bank!
I received a pack of cards from the Dollar Tree and I have to say, they are wonderful. Great colors and designs and some glitter (of course I am a fan of glitter, lol) and they are printed on nice heavy card stock.
They a few different varieties, like the Joyfully Yours line (that is the teal one on the right in the above photo) Joyfully Yours lets family and friends express their faith in just the right way during holidays, special occasions, and moments big and small.
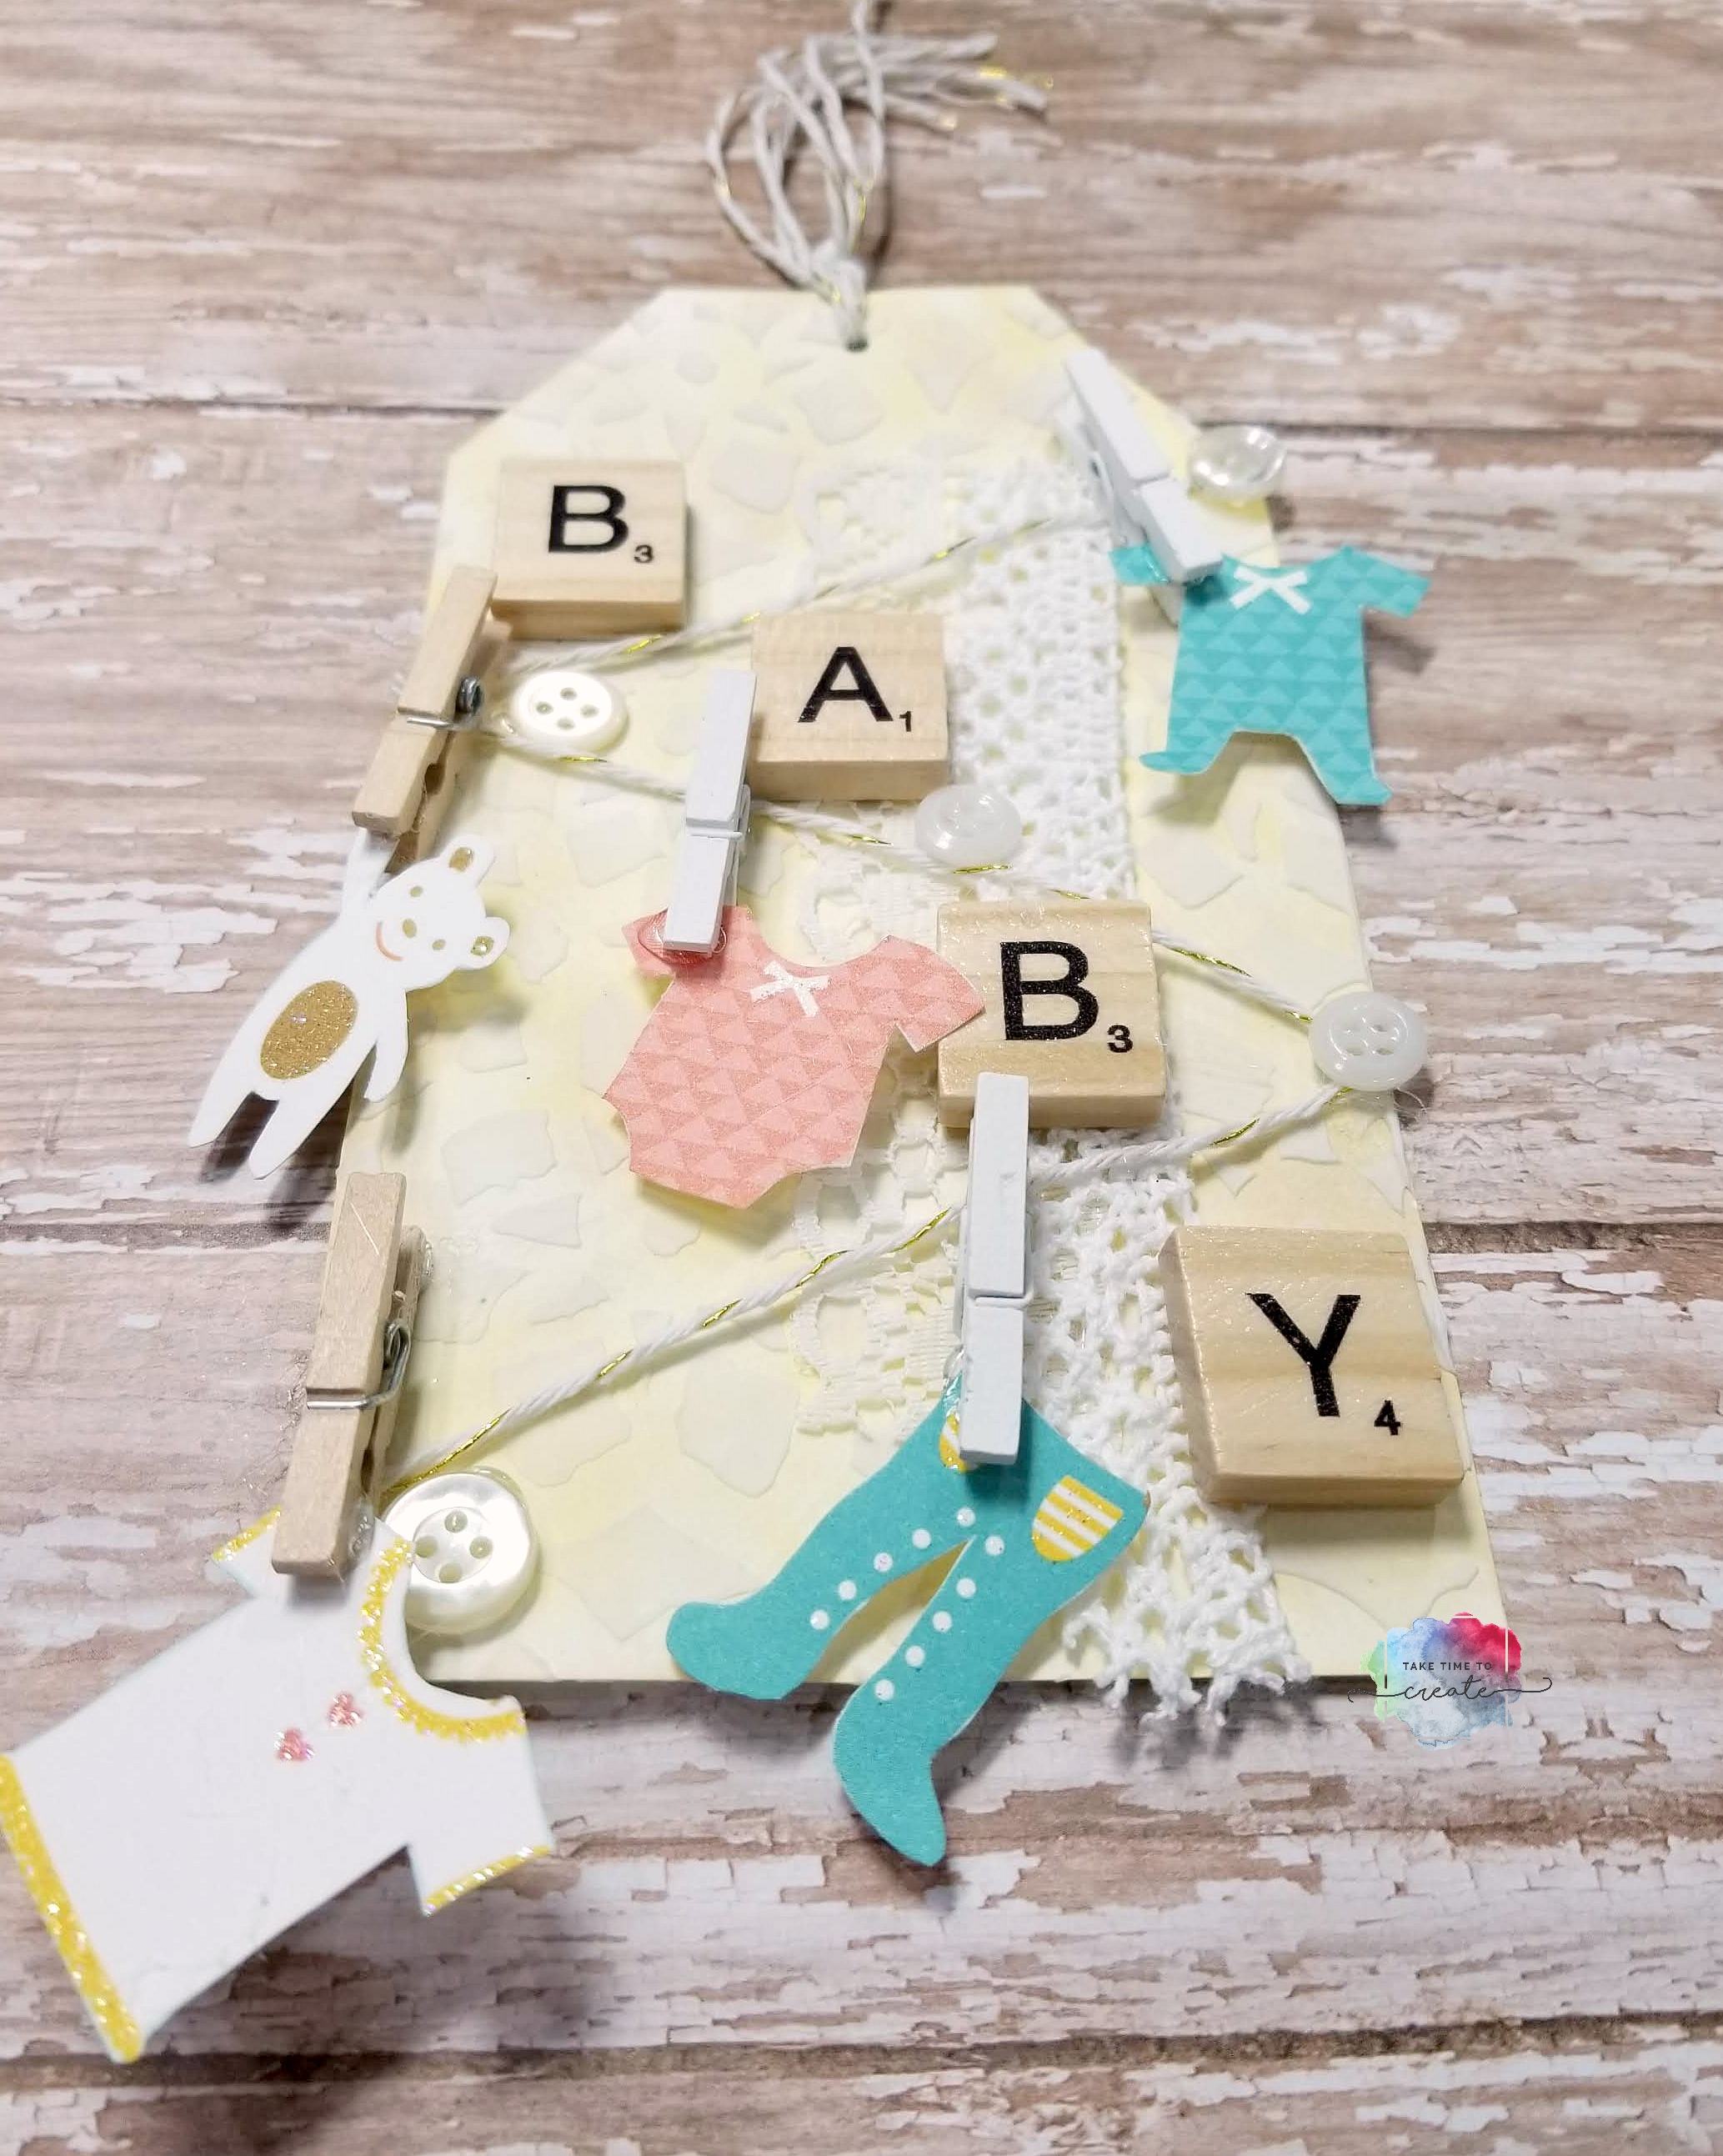
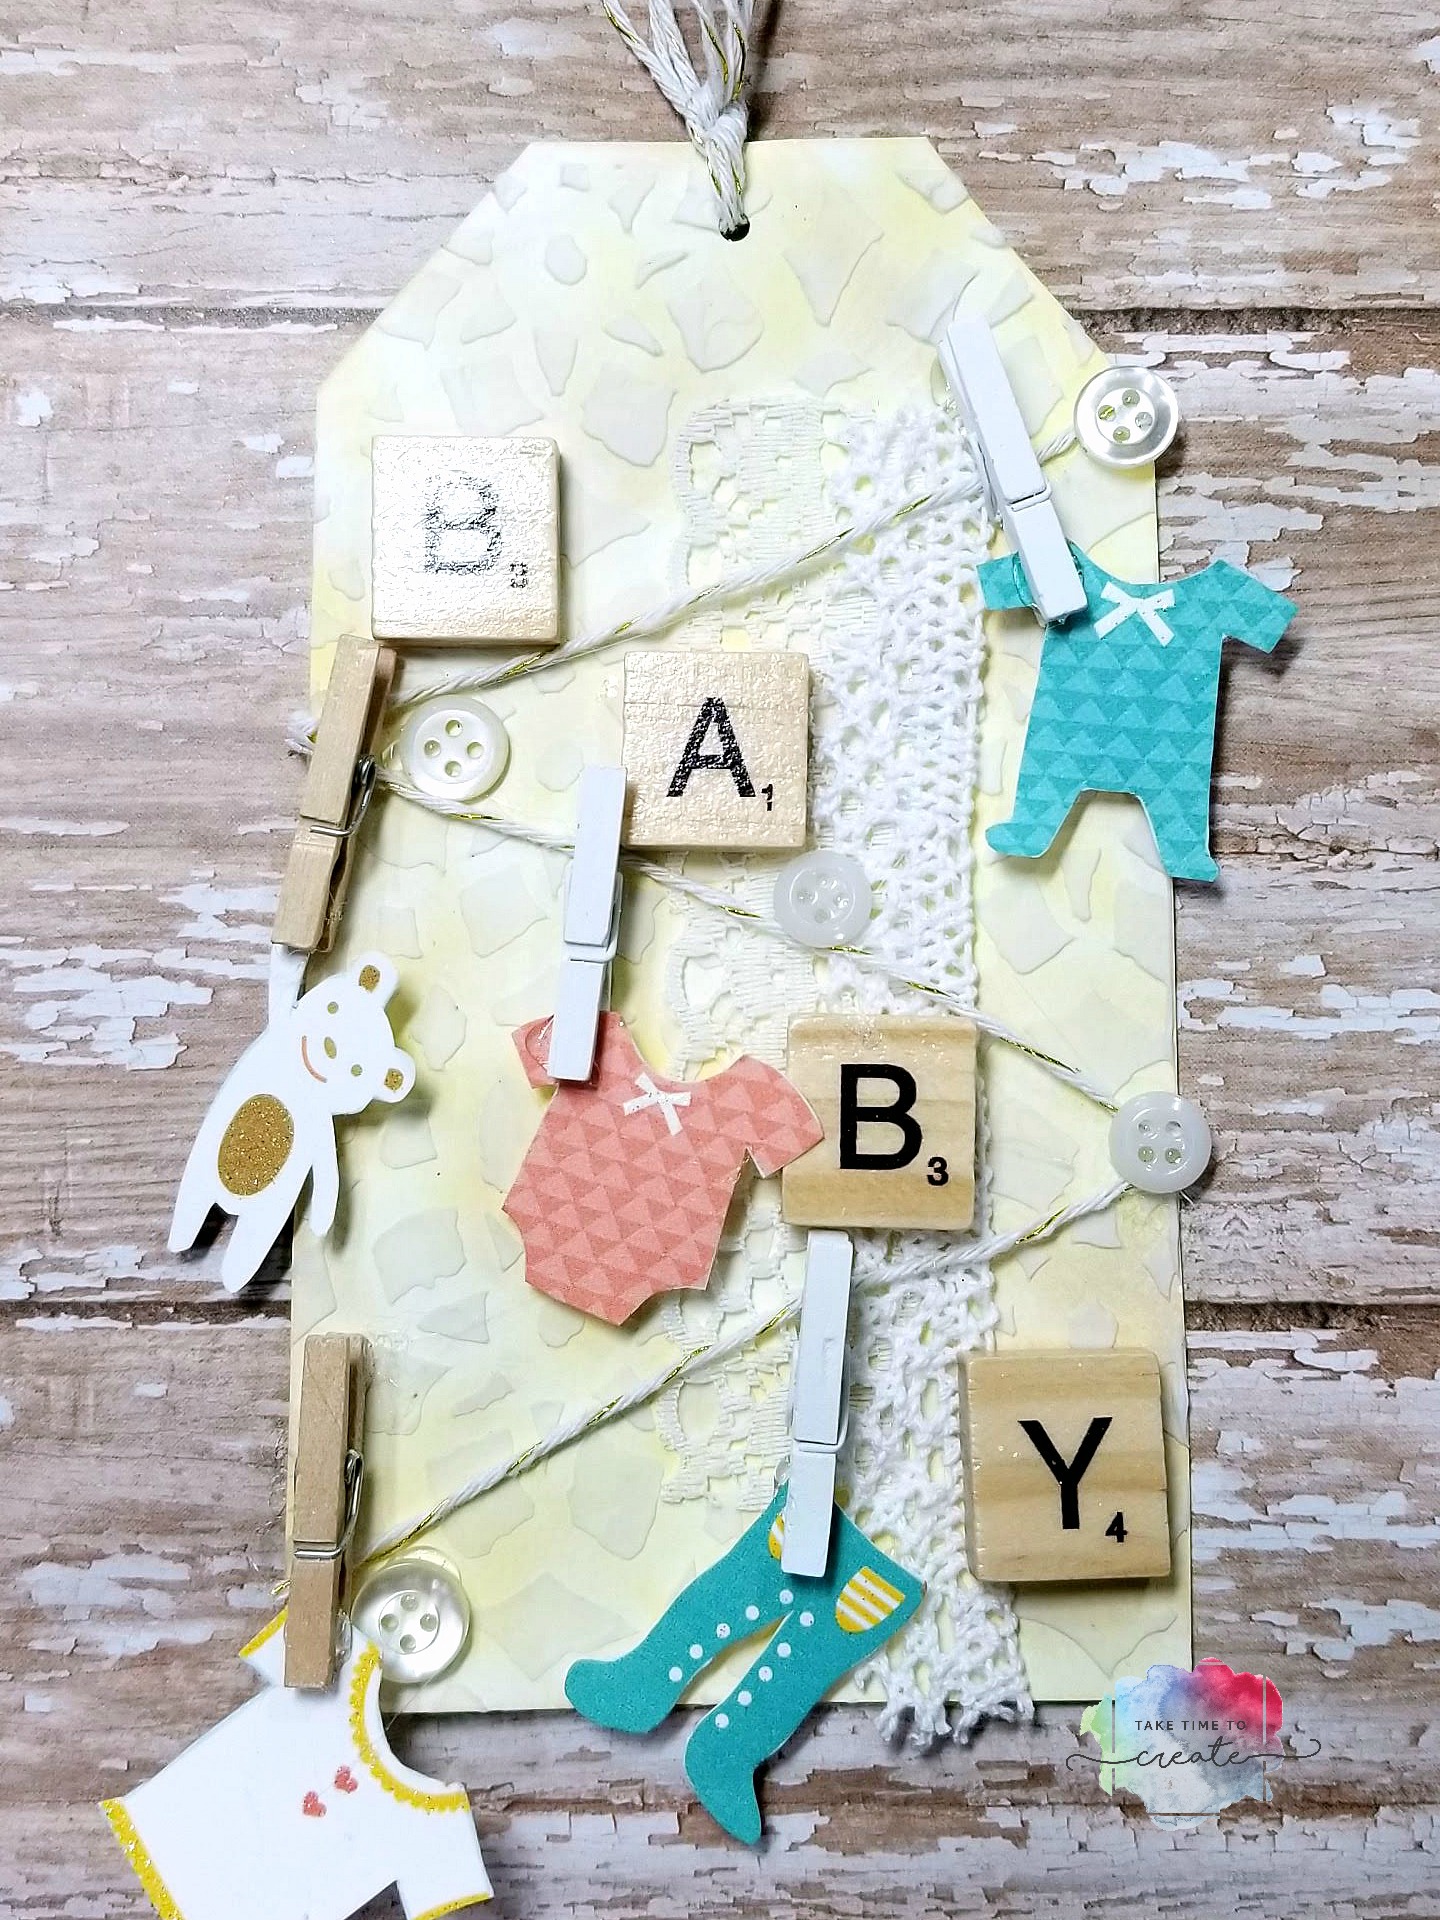
I was please with the selection and I am excited to use the cards. You all know I am a big fan of upcycling and repurposing items in my art. Since the cards are on nice paper it is easy to reuse them and make cards and tags from old greeting cards.
In the video at the beginning of the post I show you how to take the baby card and make this cute mixed media tag. I used some ink, stencils, scrabble tiles, bakers twine, and other elements.
Such a cute little tag and easy to make and have on hand. You can do this technique for any occasion!
I was compensated for this post. This post also contains affiliate links and I will be compensated if you make a purchase after clicking on my links.
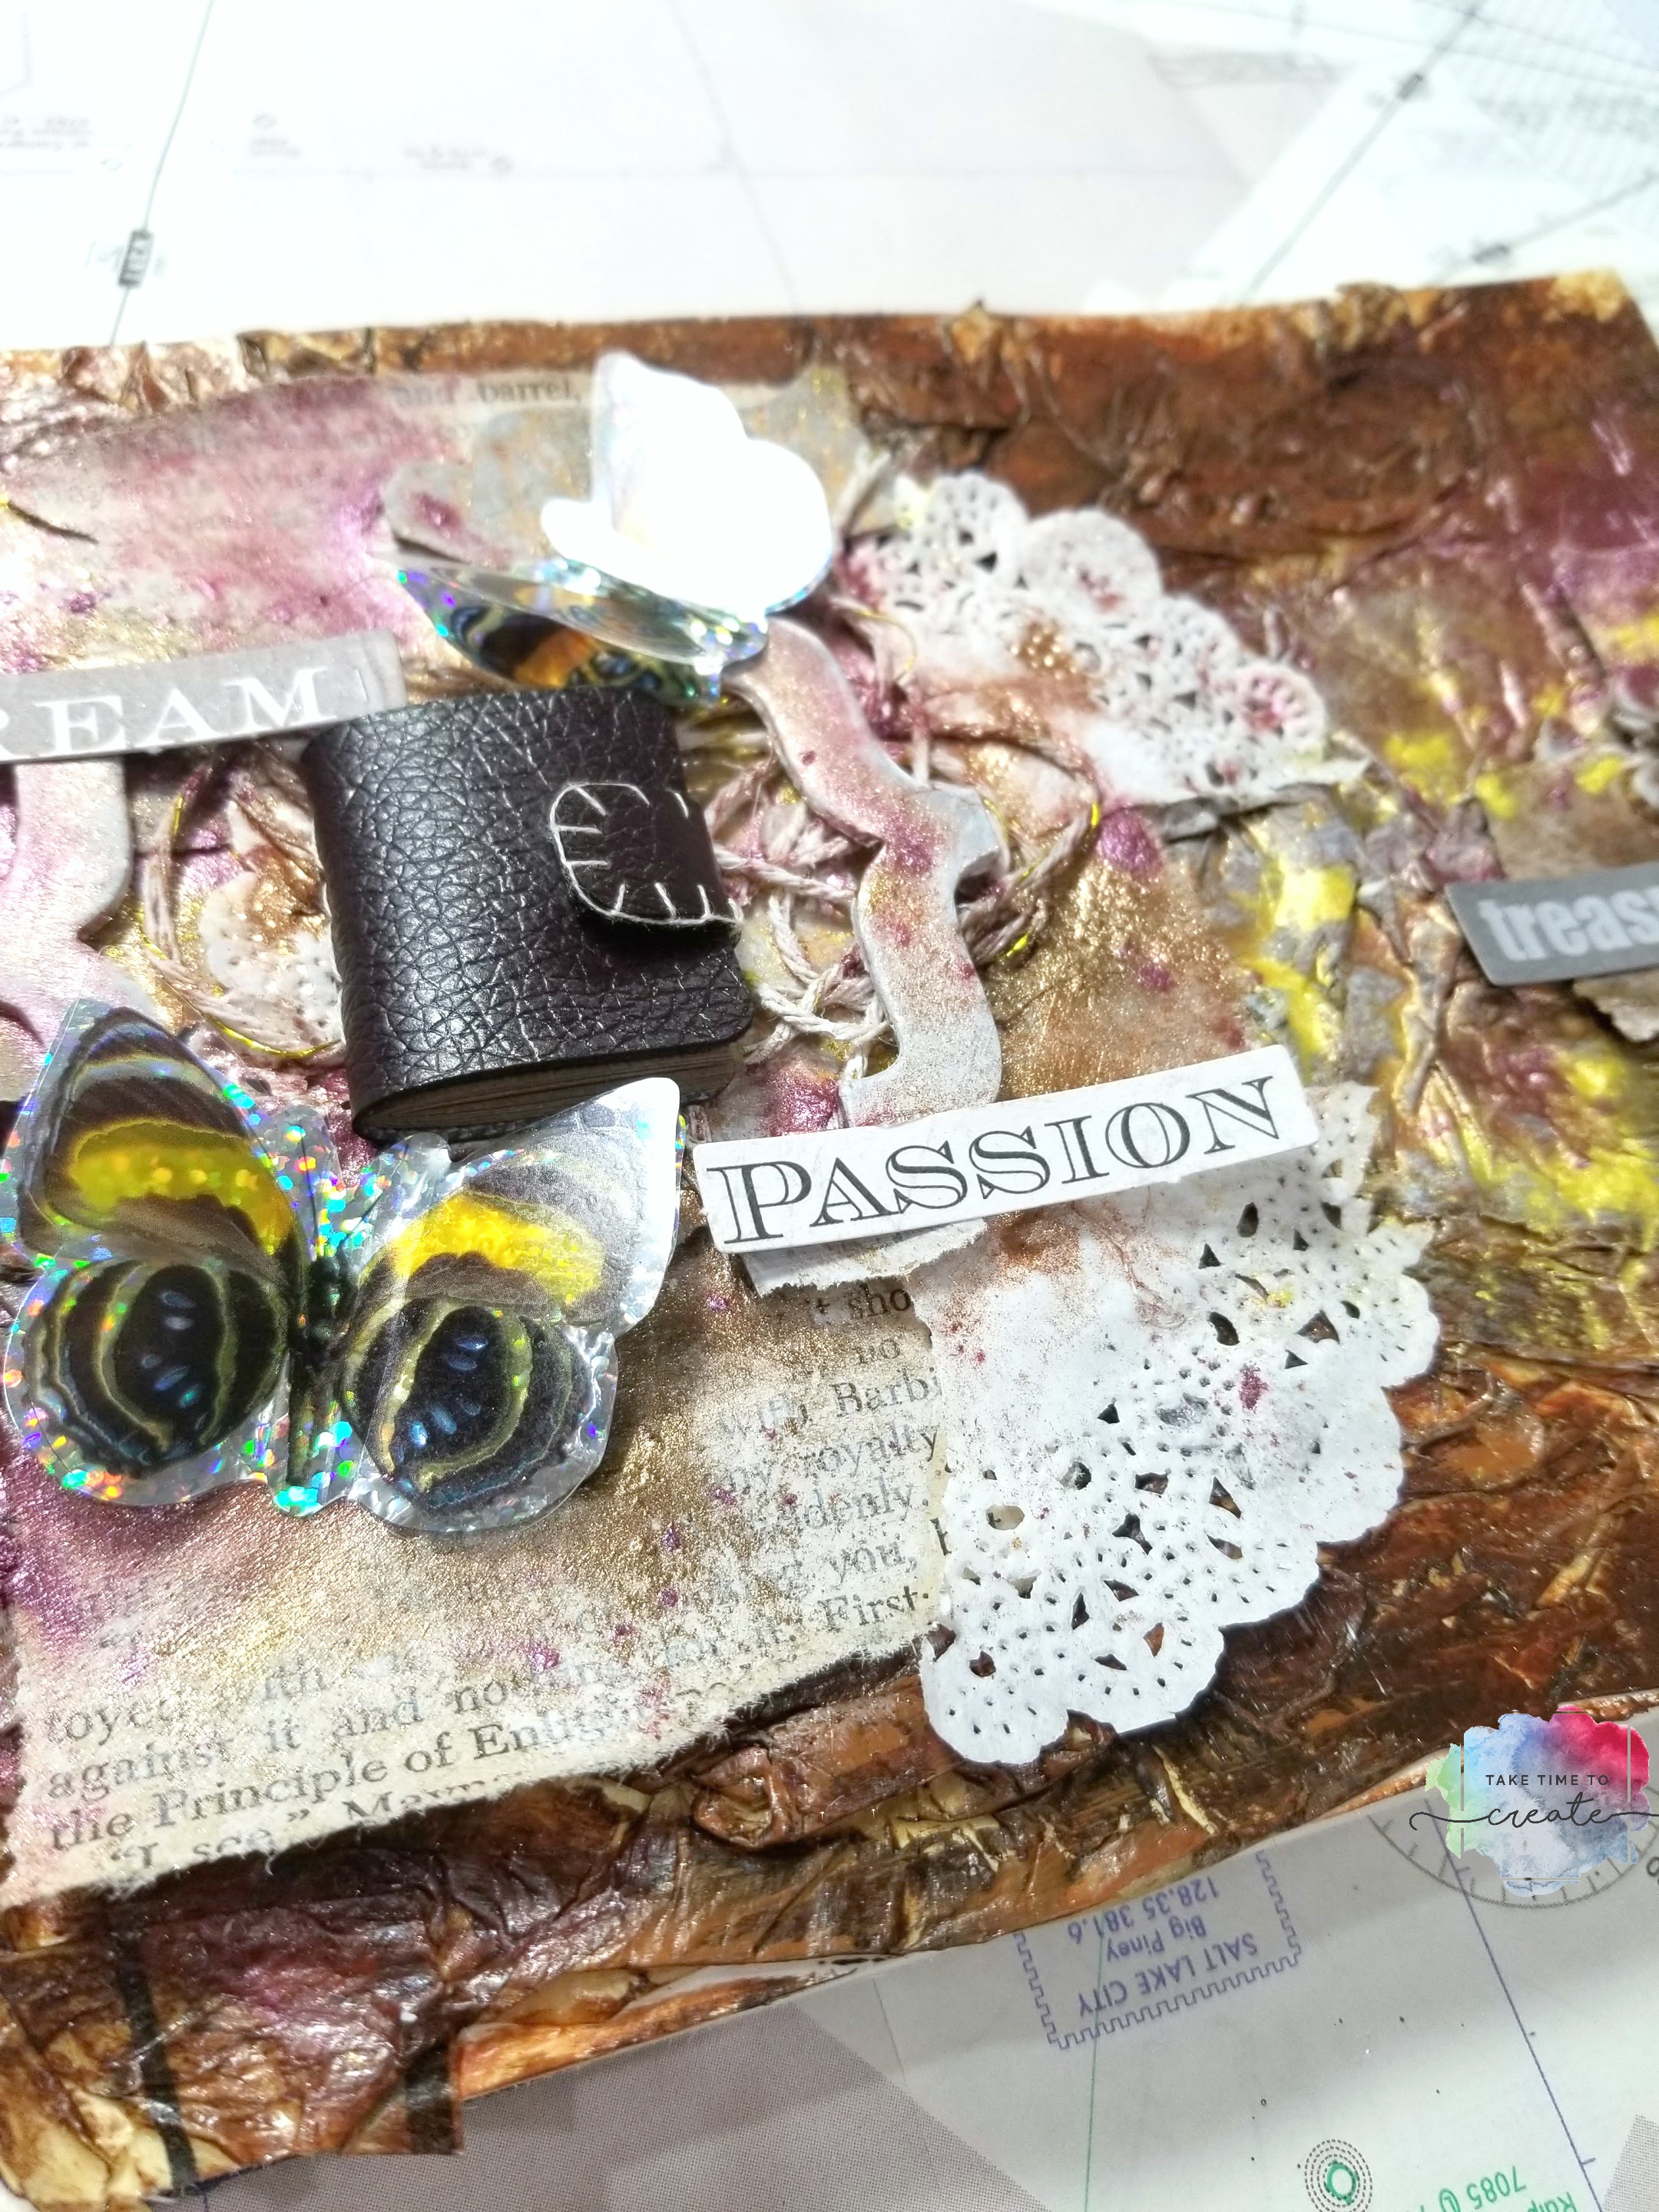
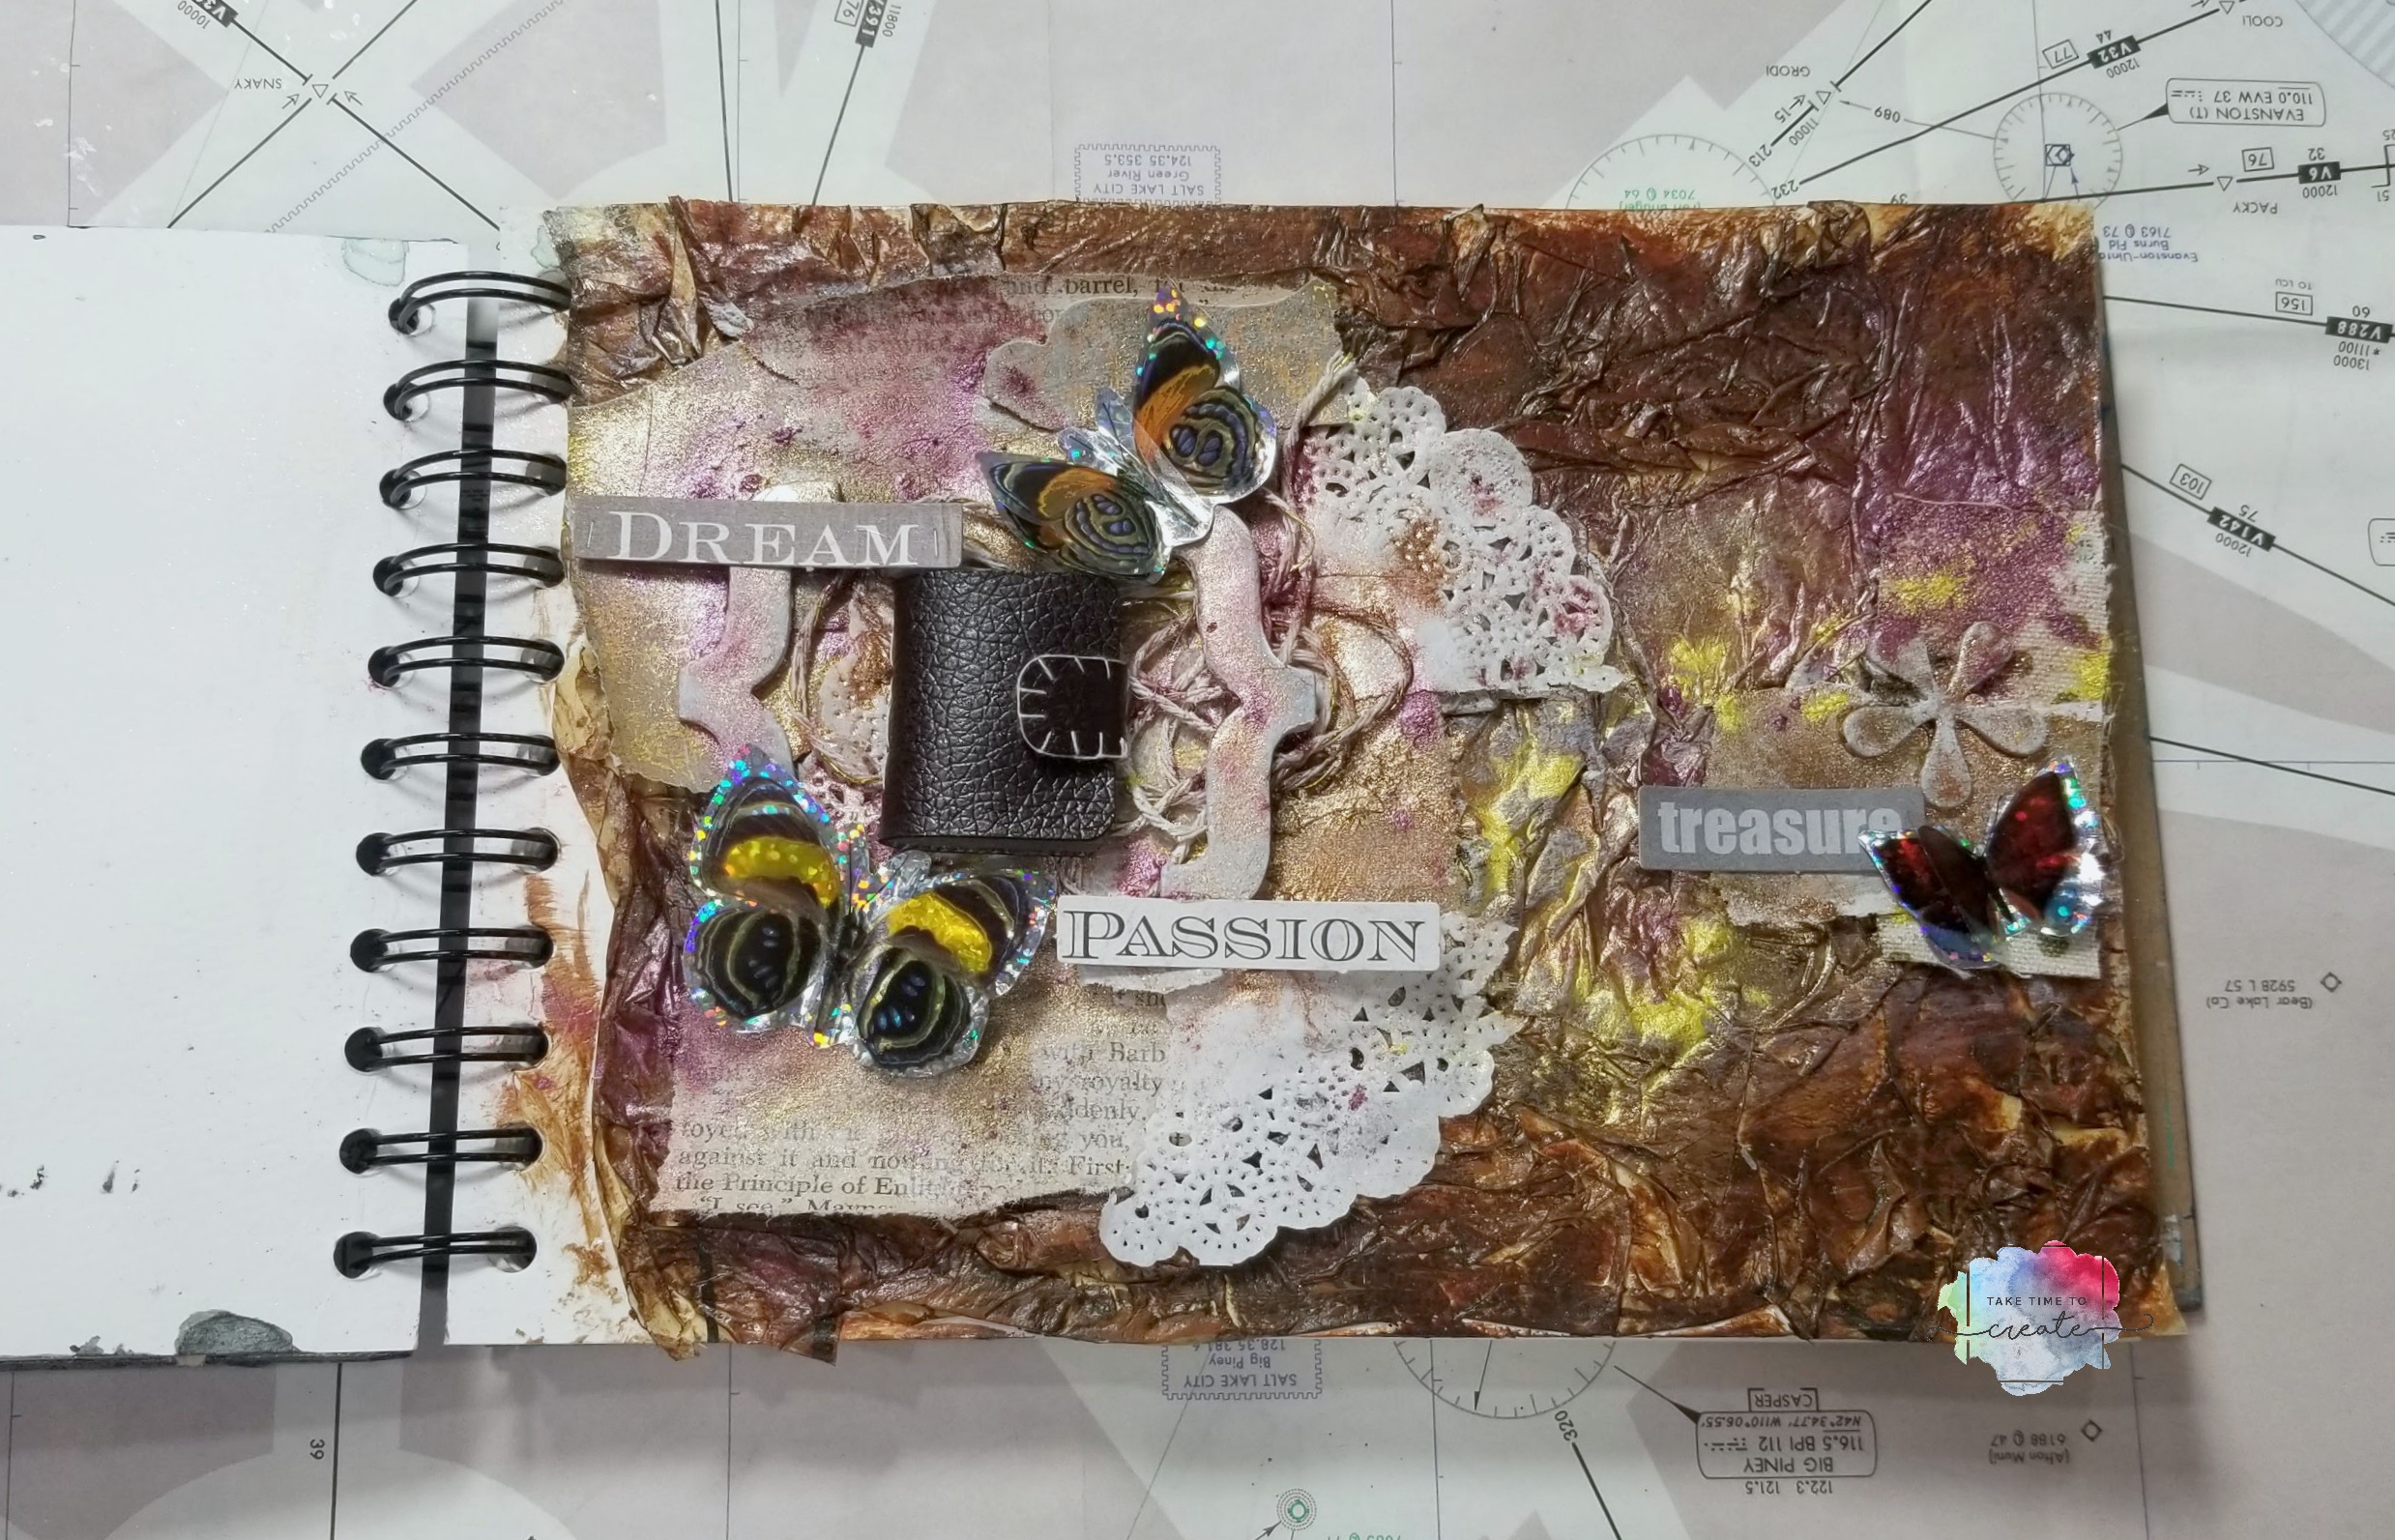
Art journaling is quickly becoming one of my favorite activities! I love creating quick little projects that help me grow and expand my abilities. I have this faux leather art journal page that I wanted to share with you.
I really wanted to start with a faux leather look for the background. So I took the tissue paper inserts from old patterns and Mod Podged that onto the page. Once it was dry I painted it all in browns and yellows to make it look like leather.
You can use different colors to create different looks, and you very the “wrinkly-ness” of the tissue paper to create different looks as well.
Once everything was dry I started to add all the details. I wanted the tiny book to be the focal point. You can see the video tutorial for the book here: Tiny Book
That tiny book was so much fun to make, and the perfect addition to my page.
I added string, torn up old book pages, doilies, chip boards, words, and butterflies. I added color with Finnabair’s mica flakes and a little water, that was really fun because it brought out the texture of the tissue paper and brought the page to life. Once everything was dry I light sprayed everything with some cheap hairspray to help seal the mica powders (otherwise it could all be brushed off)
There you go, a very easy faux leather journal page. I am thinking about doing this same technique on an old trunk. What else can I faux leather?
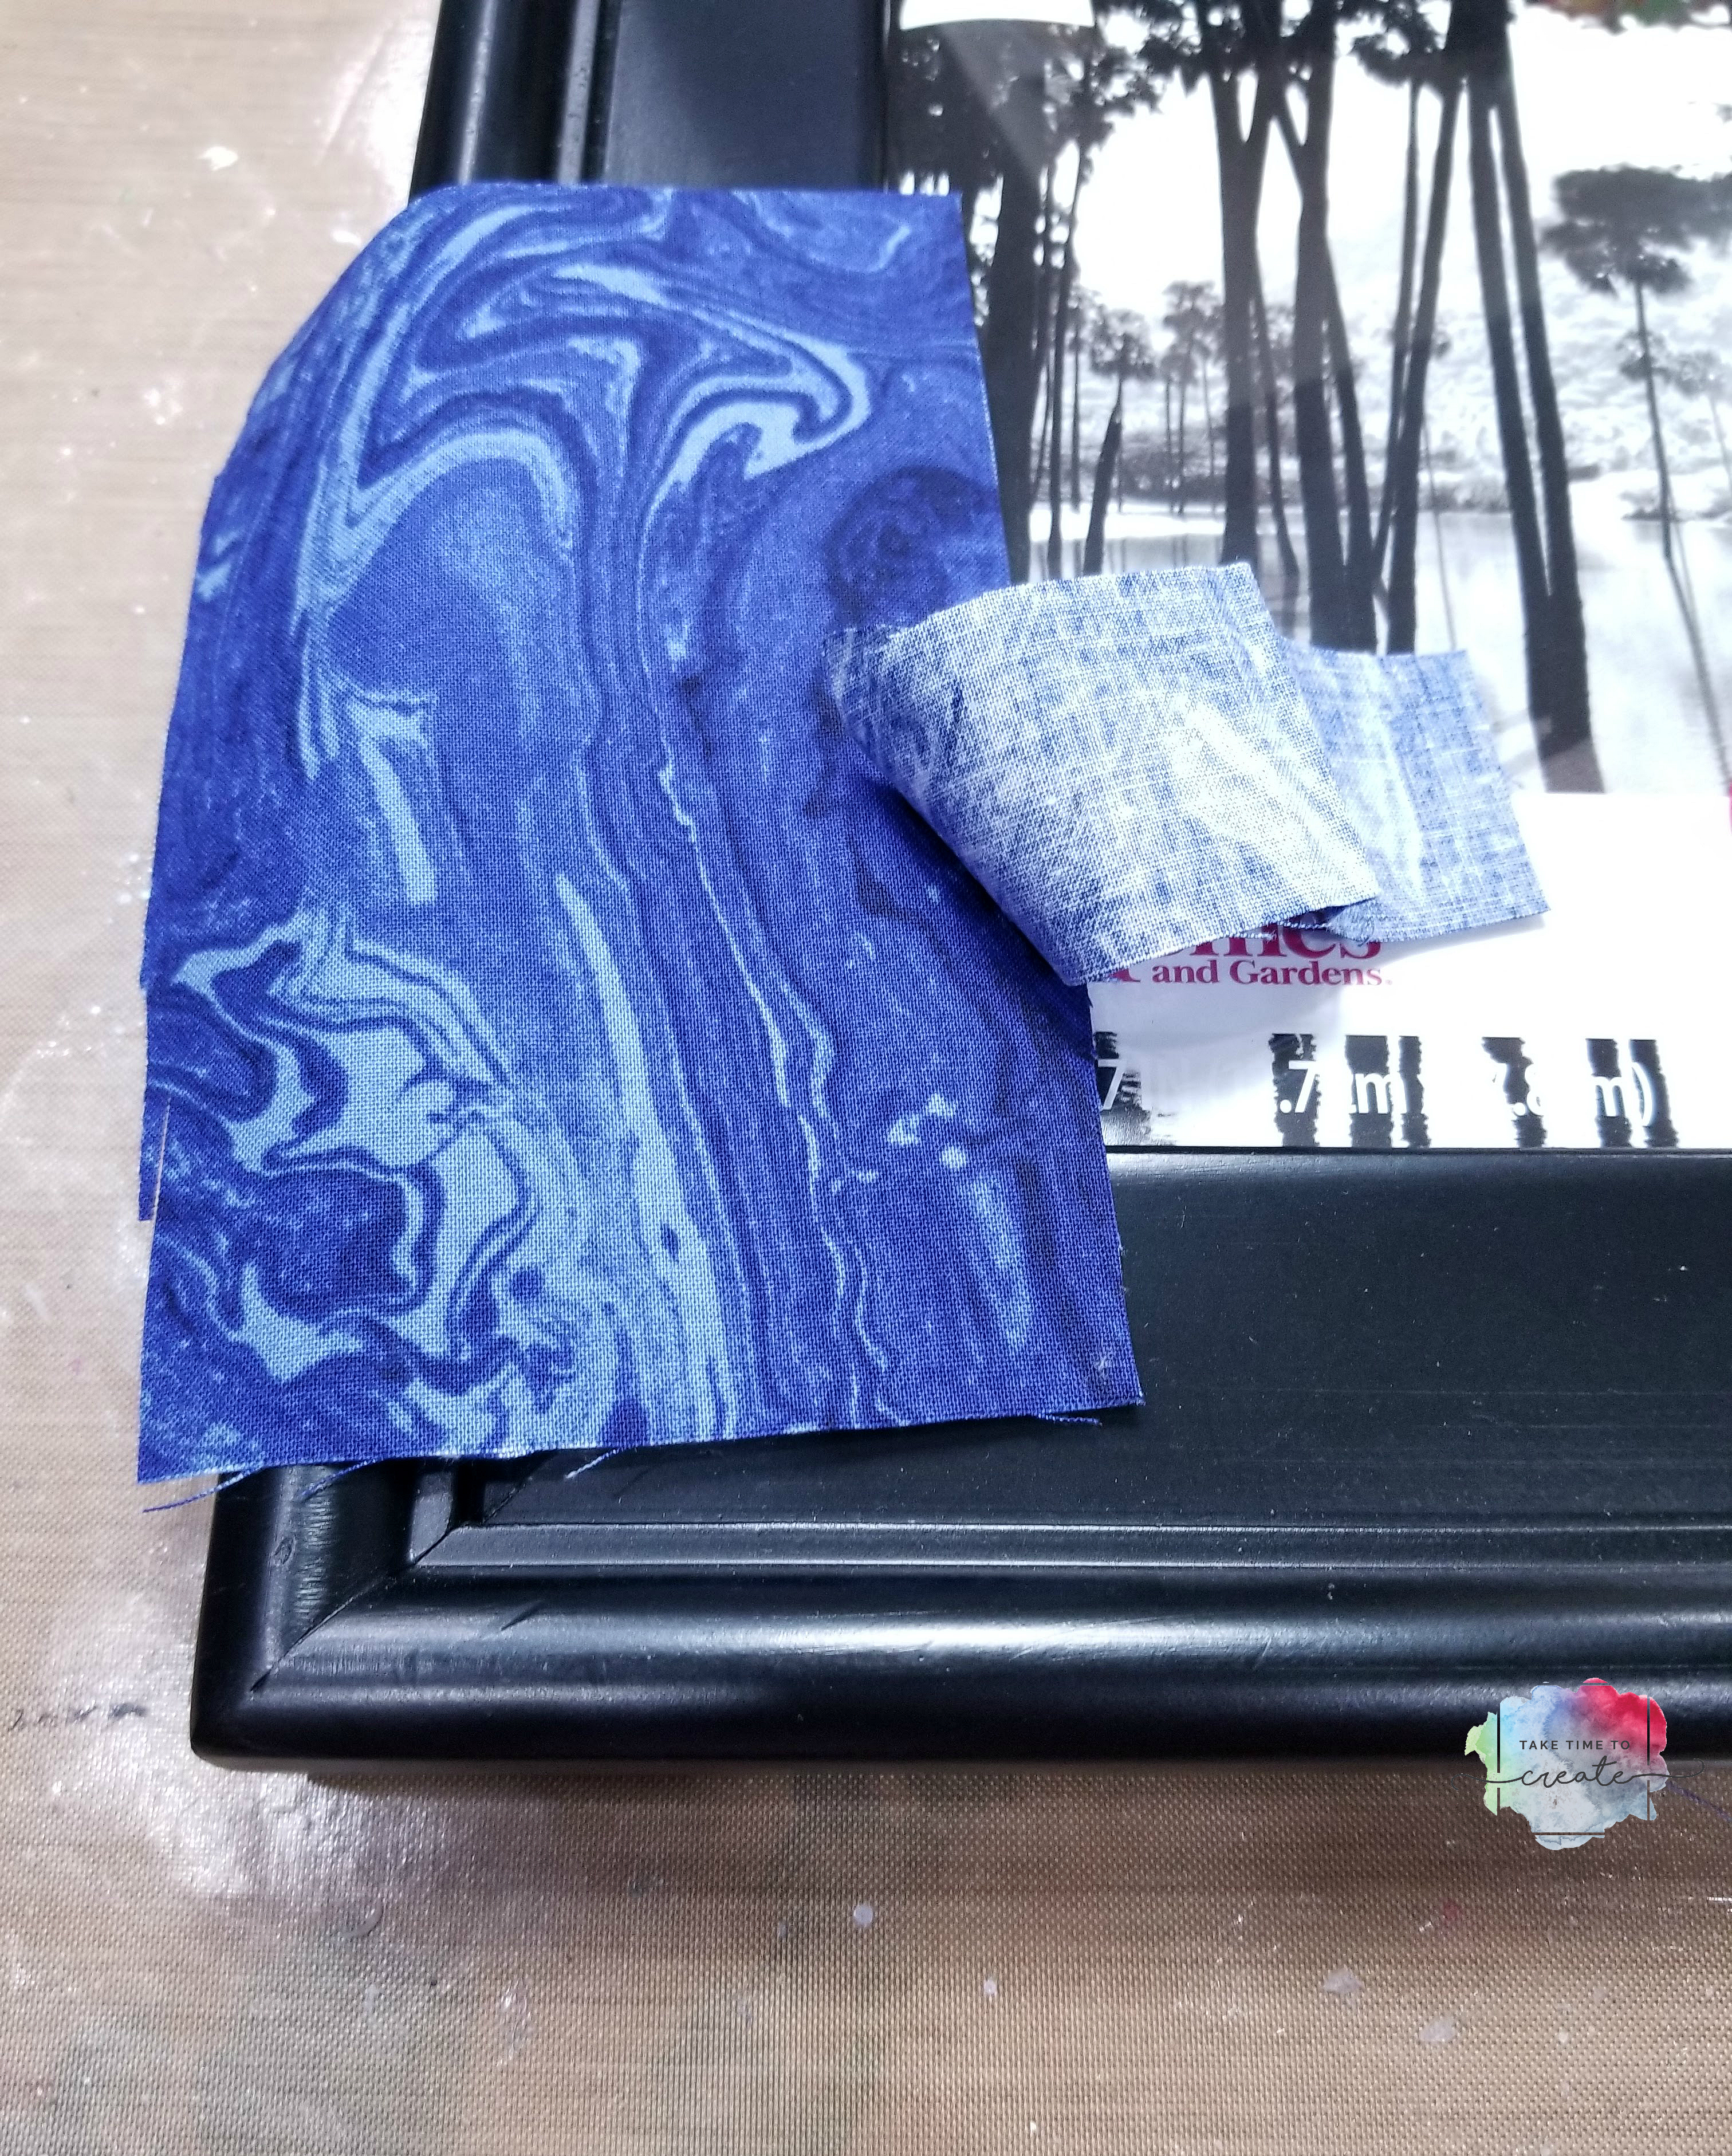
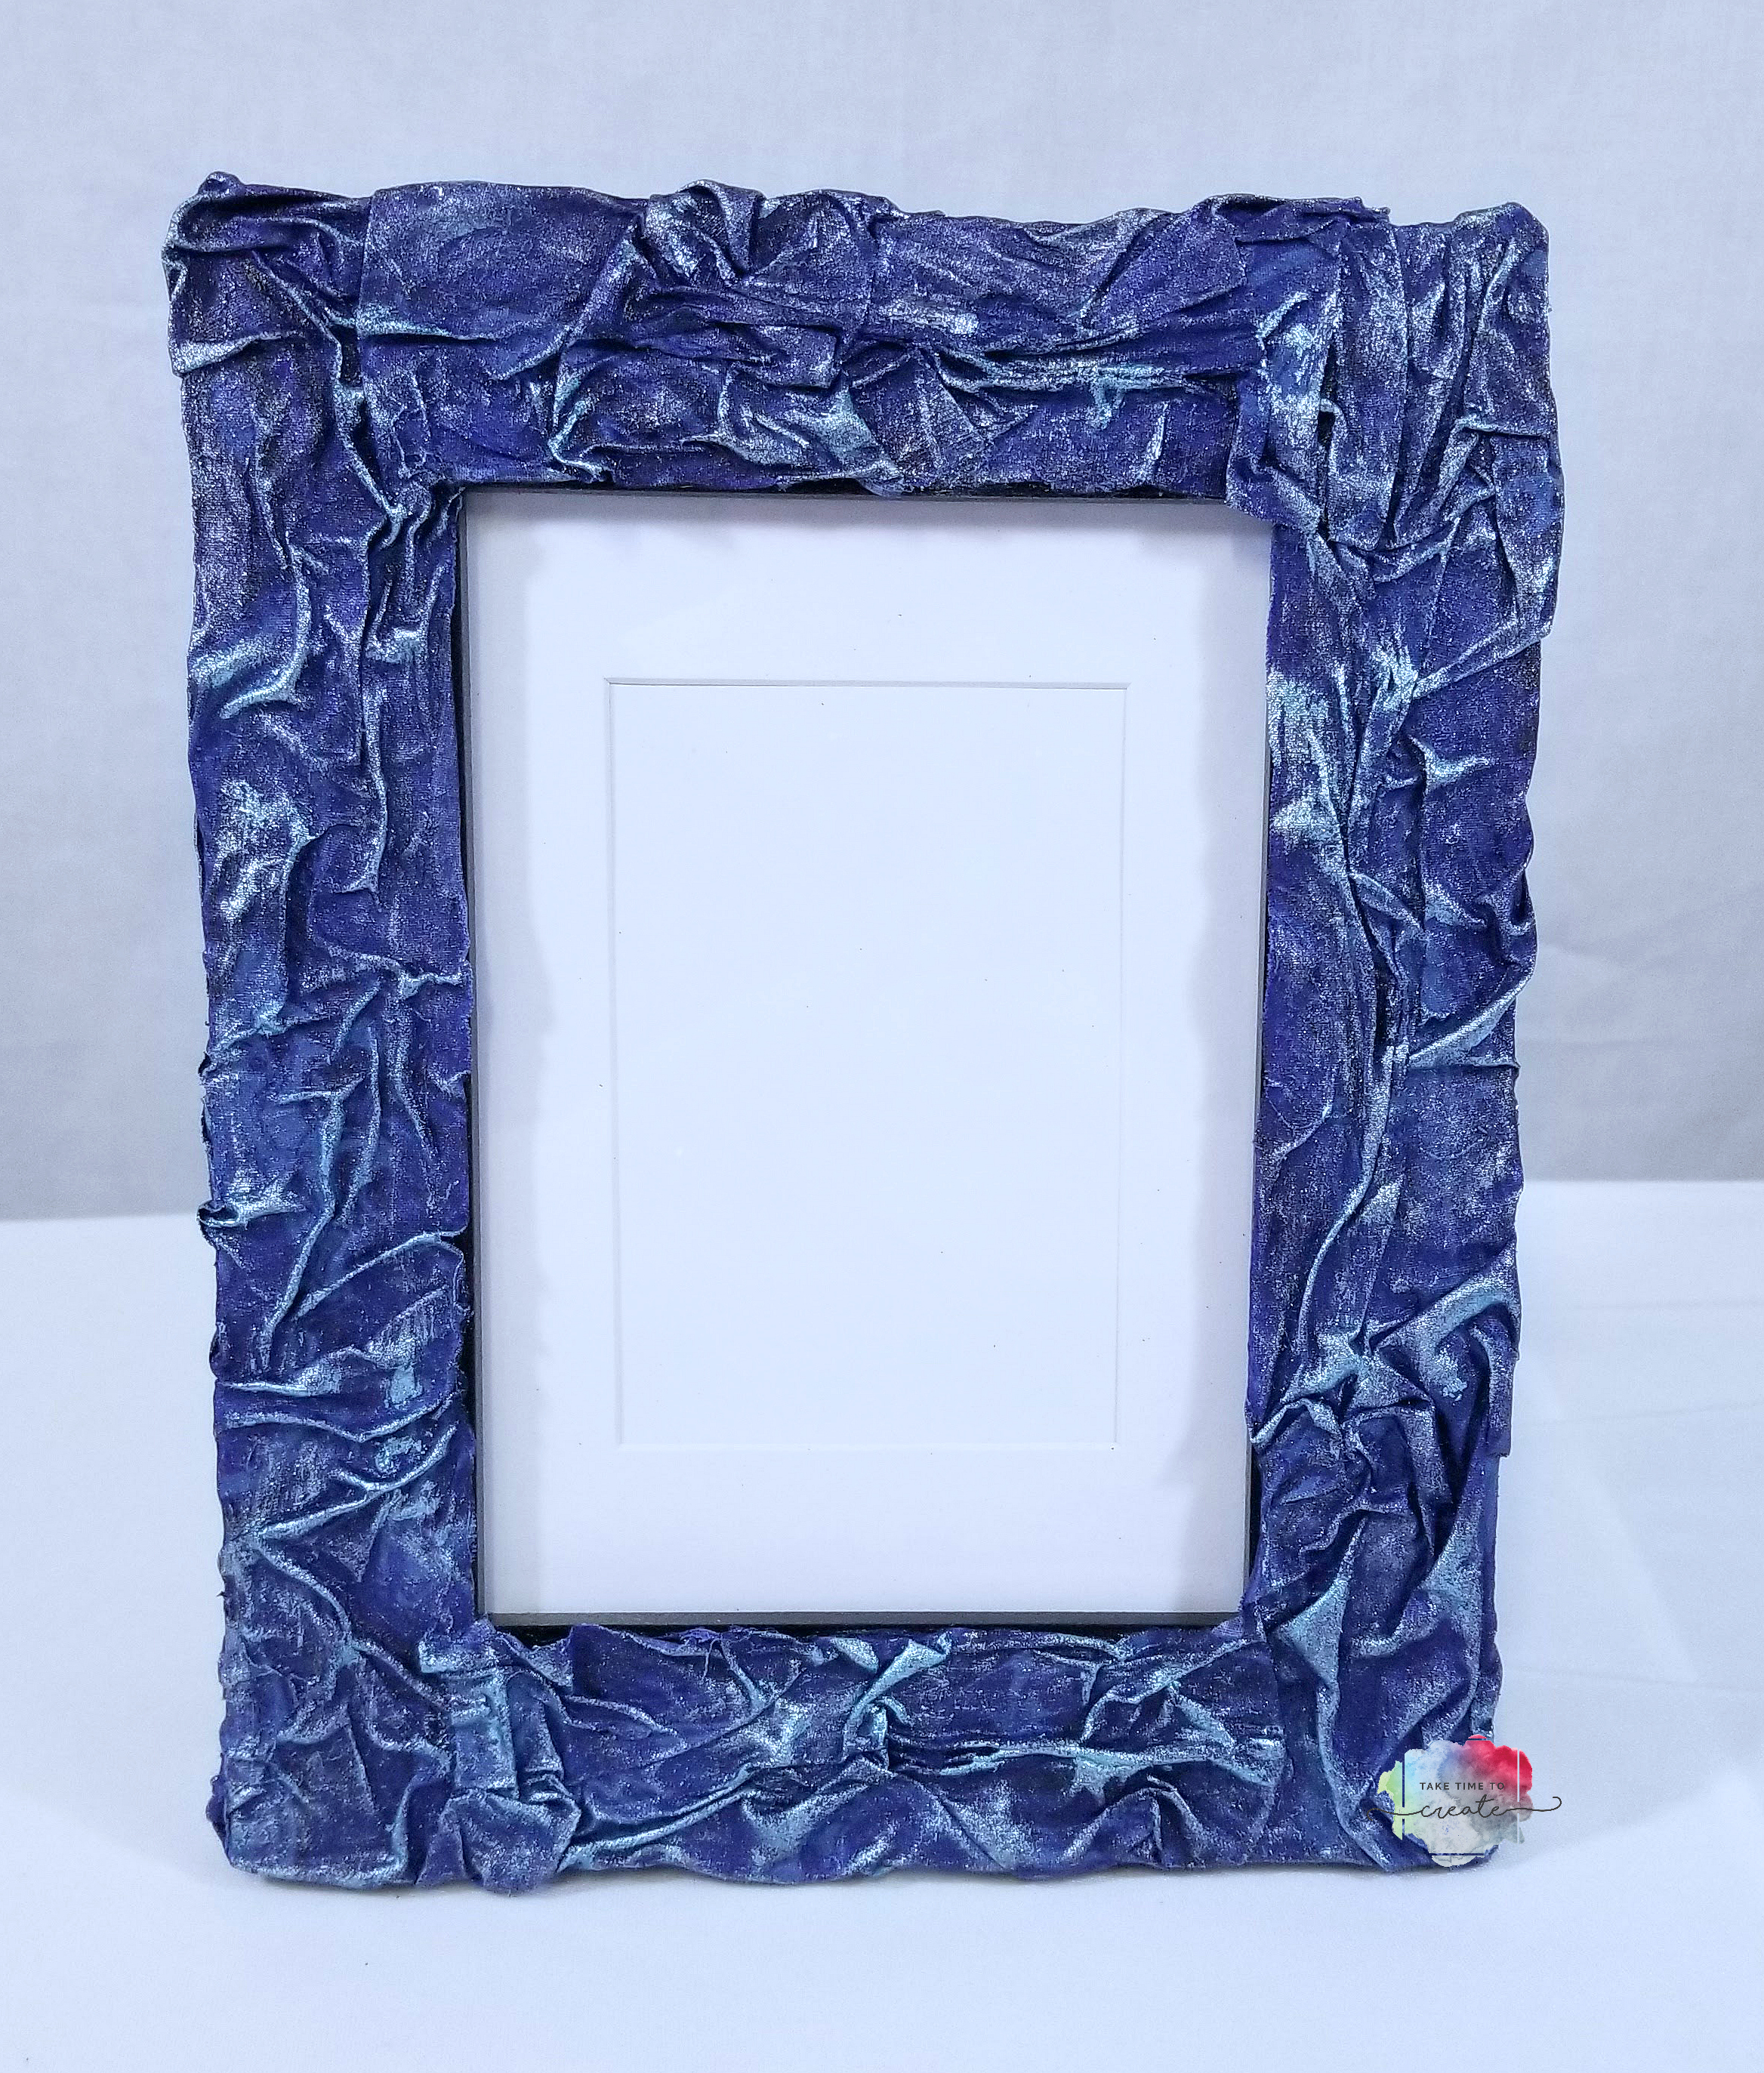
Today I have a fun, easy fabric frame project for you. I am still on a fabric kick, I have so many ideas using fabric and I can’t wait to share them with you.
For this project I used fabric I got from Annie’s Fabric Club. This is not sponsored, but I really like the fabric I got, and I am looking forward to next month’s fabric. Here is the link to the club if you are interested in joining: https://www.creativequiltersfabricclub.com/
This is such a fun, easy project that only takes a few materials
Gather all your material including the fabric and your frame. The frame should have a wide enough border that gives you plenty of room to add fabric. The color of the frame doesn’t matter a lot because you will be covering it in fabric.
To get started cut your fabric in strips that are a little wider than your frame. Spread heavy gloss gel on the frame. Coat your fabric strip in Gloss gel and add to frame, crinkling it up as you go. While everything is wet take the time to get all the wrinkles and texture you are wanting.
Take your time and make sure it looks like what you are going for. Before you let your frame dry clean up the edges and back with a baby wipe. Let the frame dry. Once dry you can leave it at this step if you want, or you can go on to the next step which is adding paint.
After the fabric dried (leaving it over night is best) I dry brushed on a Finnabair Metallique and a Finnabair Sparks paint to add some detail and sparkle. I really love her paints and they add that bit of interest that I am looking for. .
And that is it, the frame is done! These are so much fun and easy to make, I think I will be making a lot more as gifts this year.
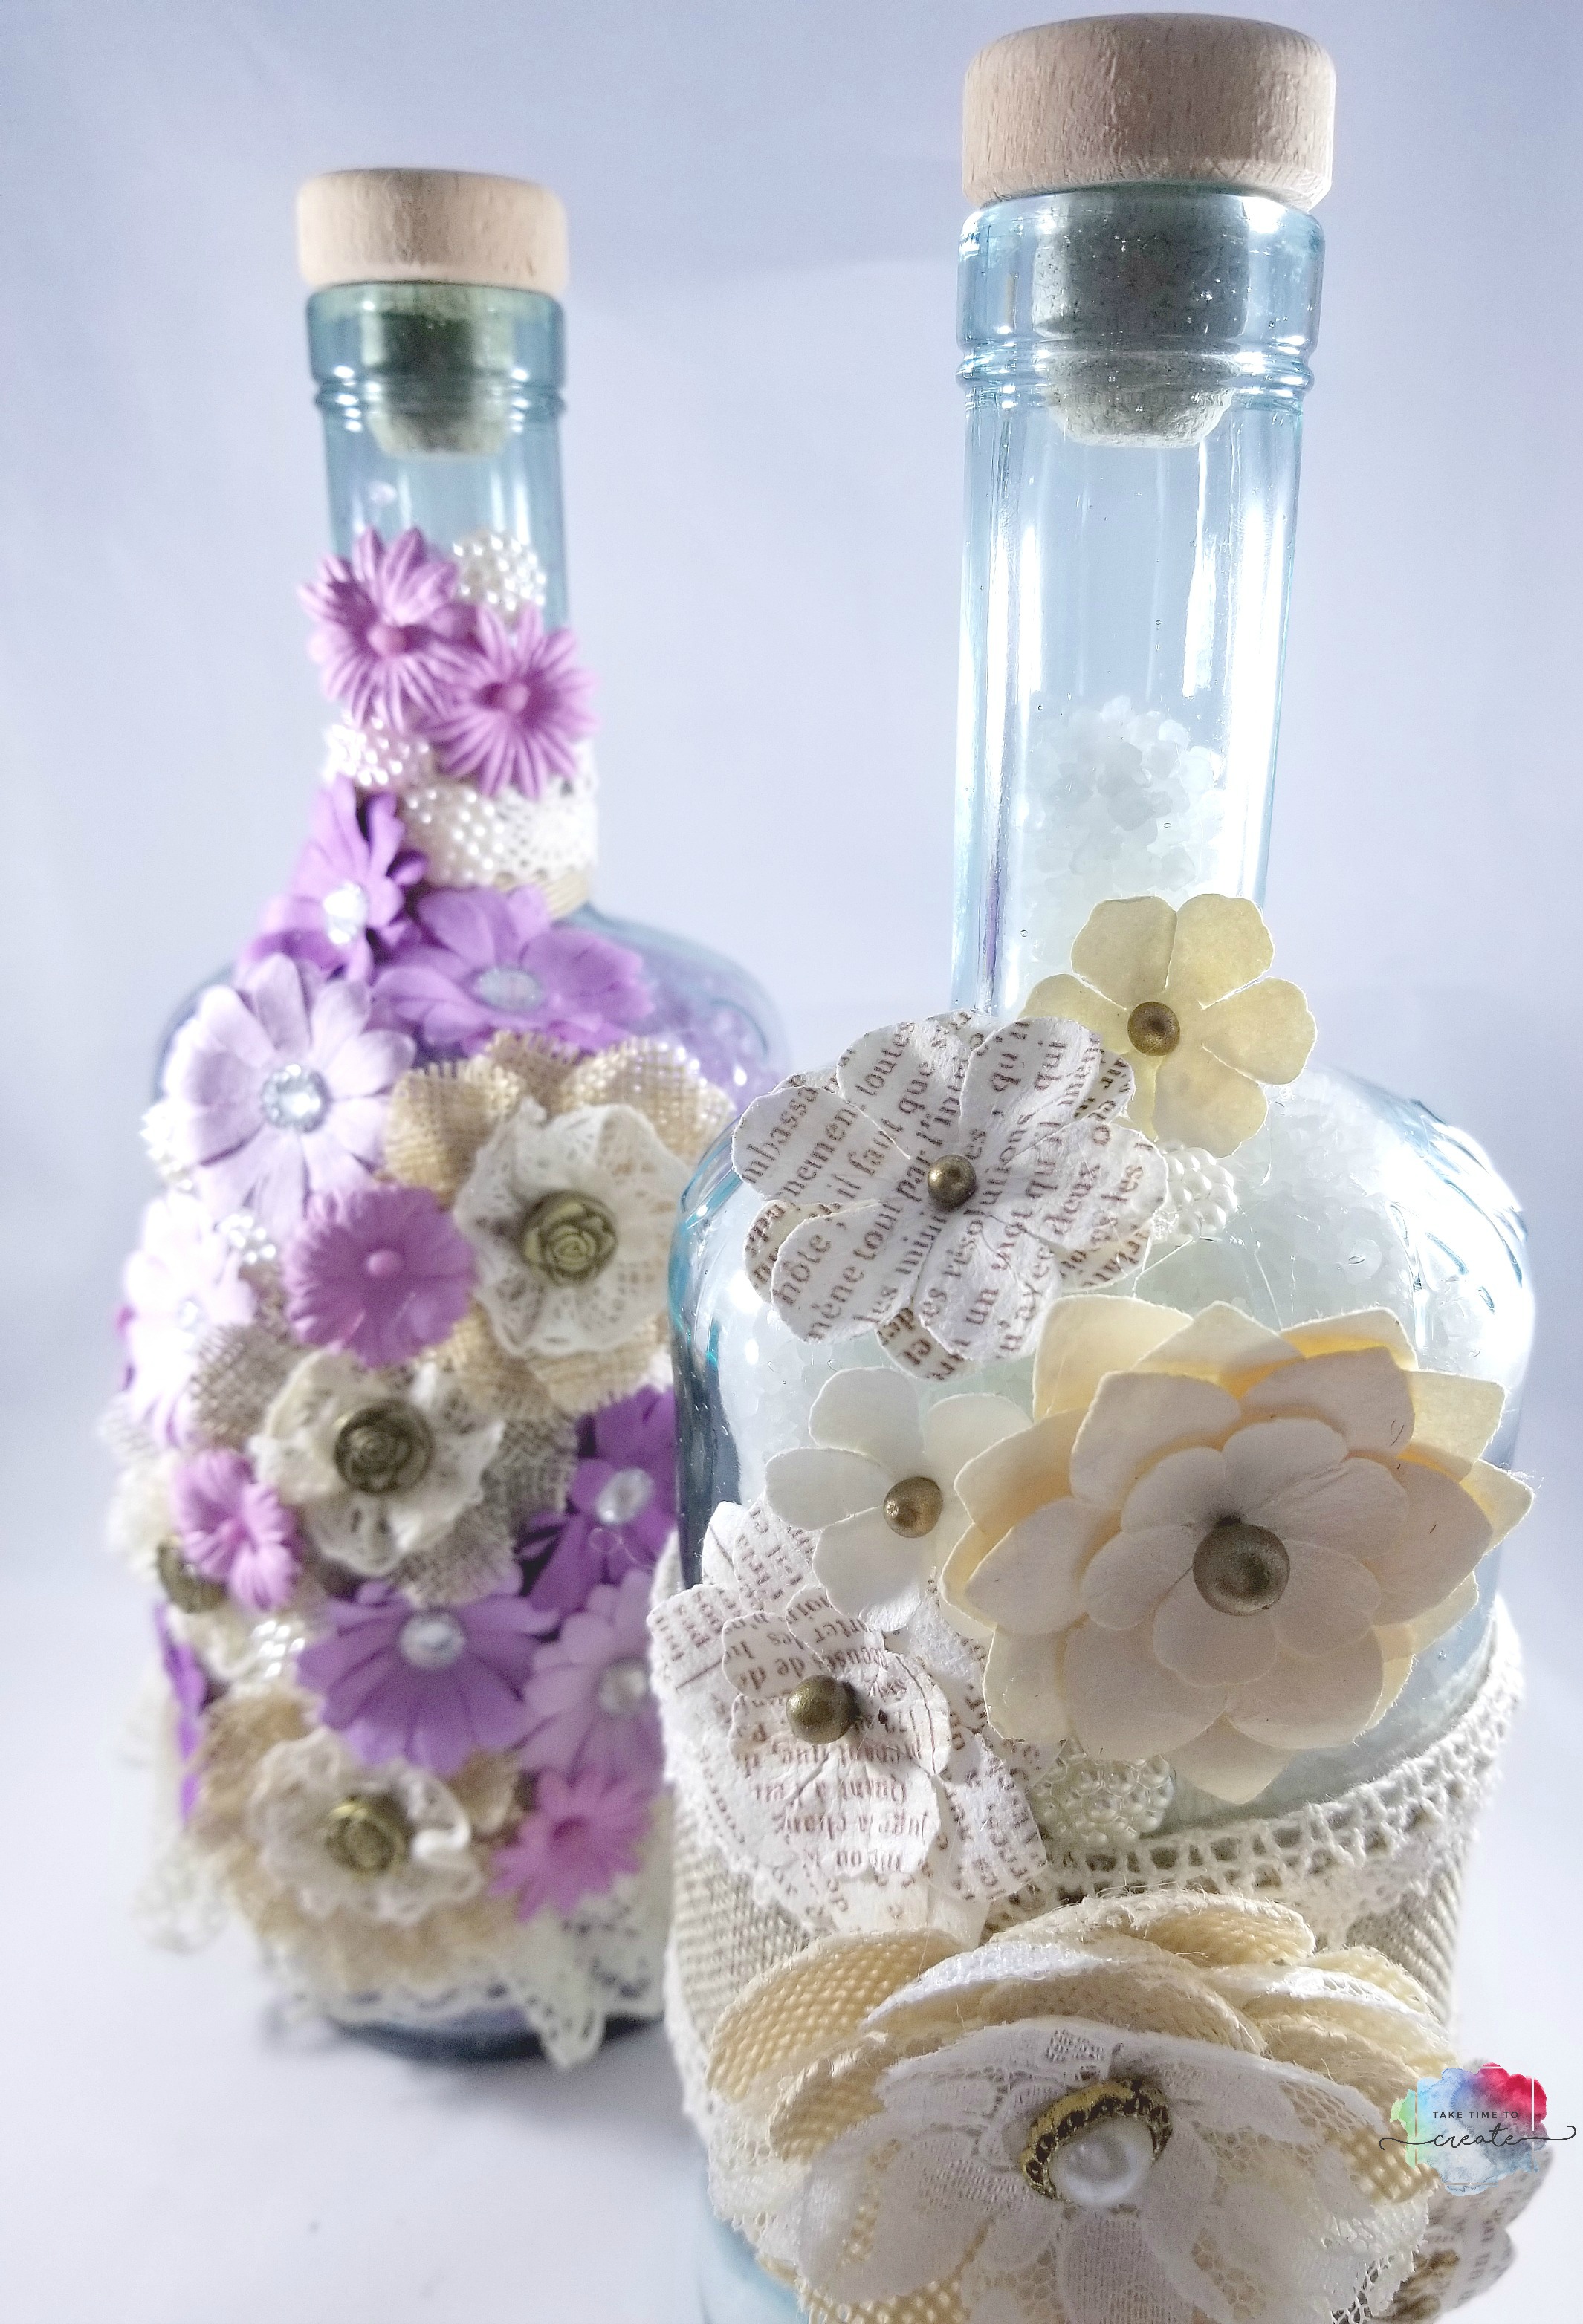
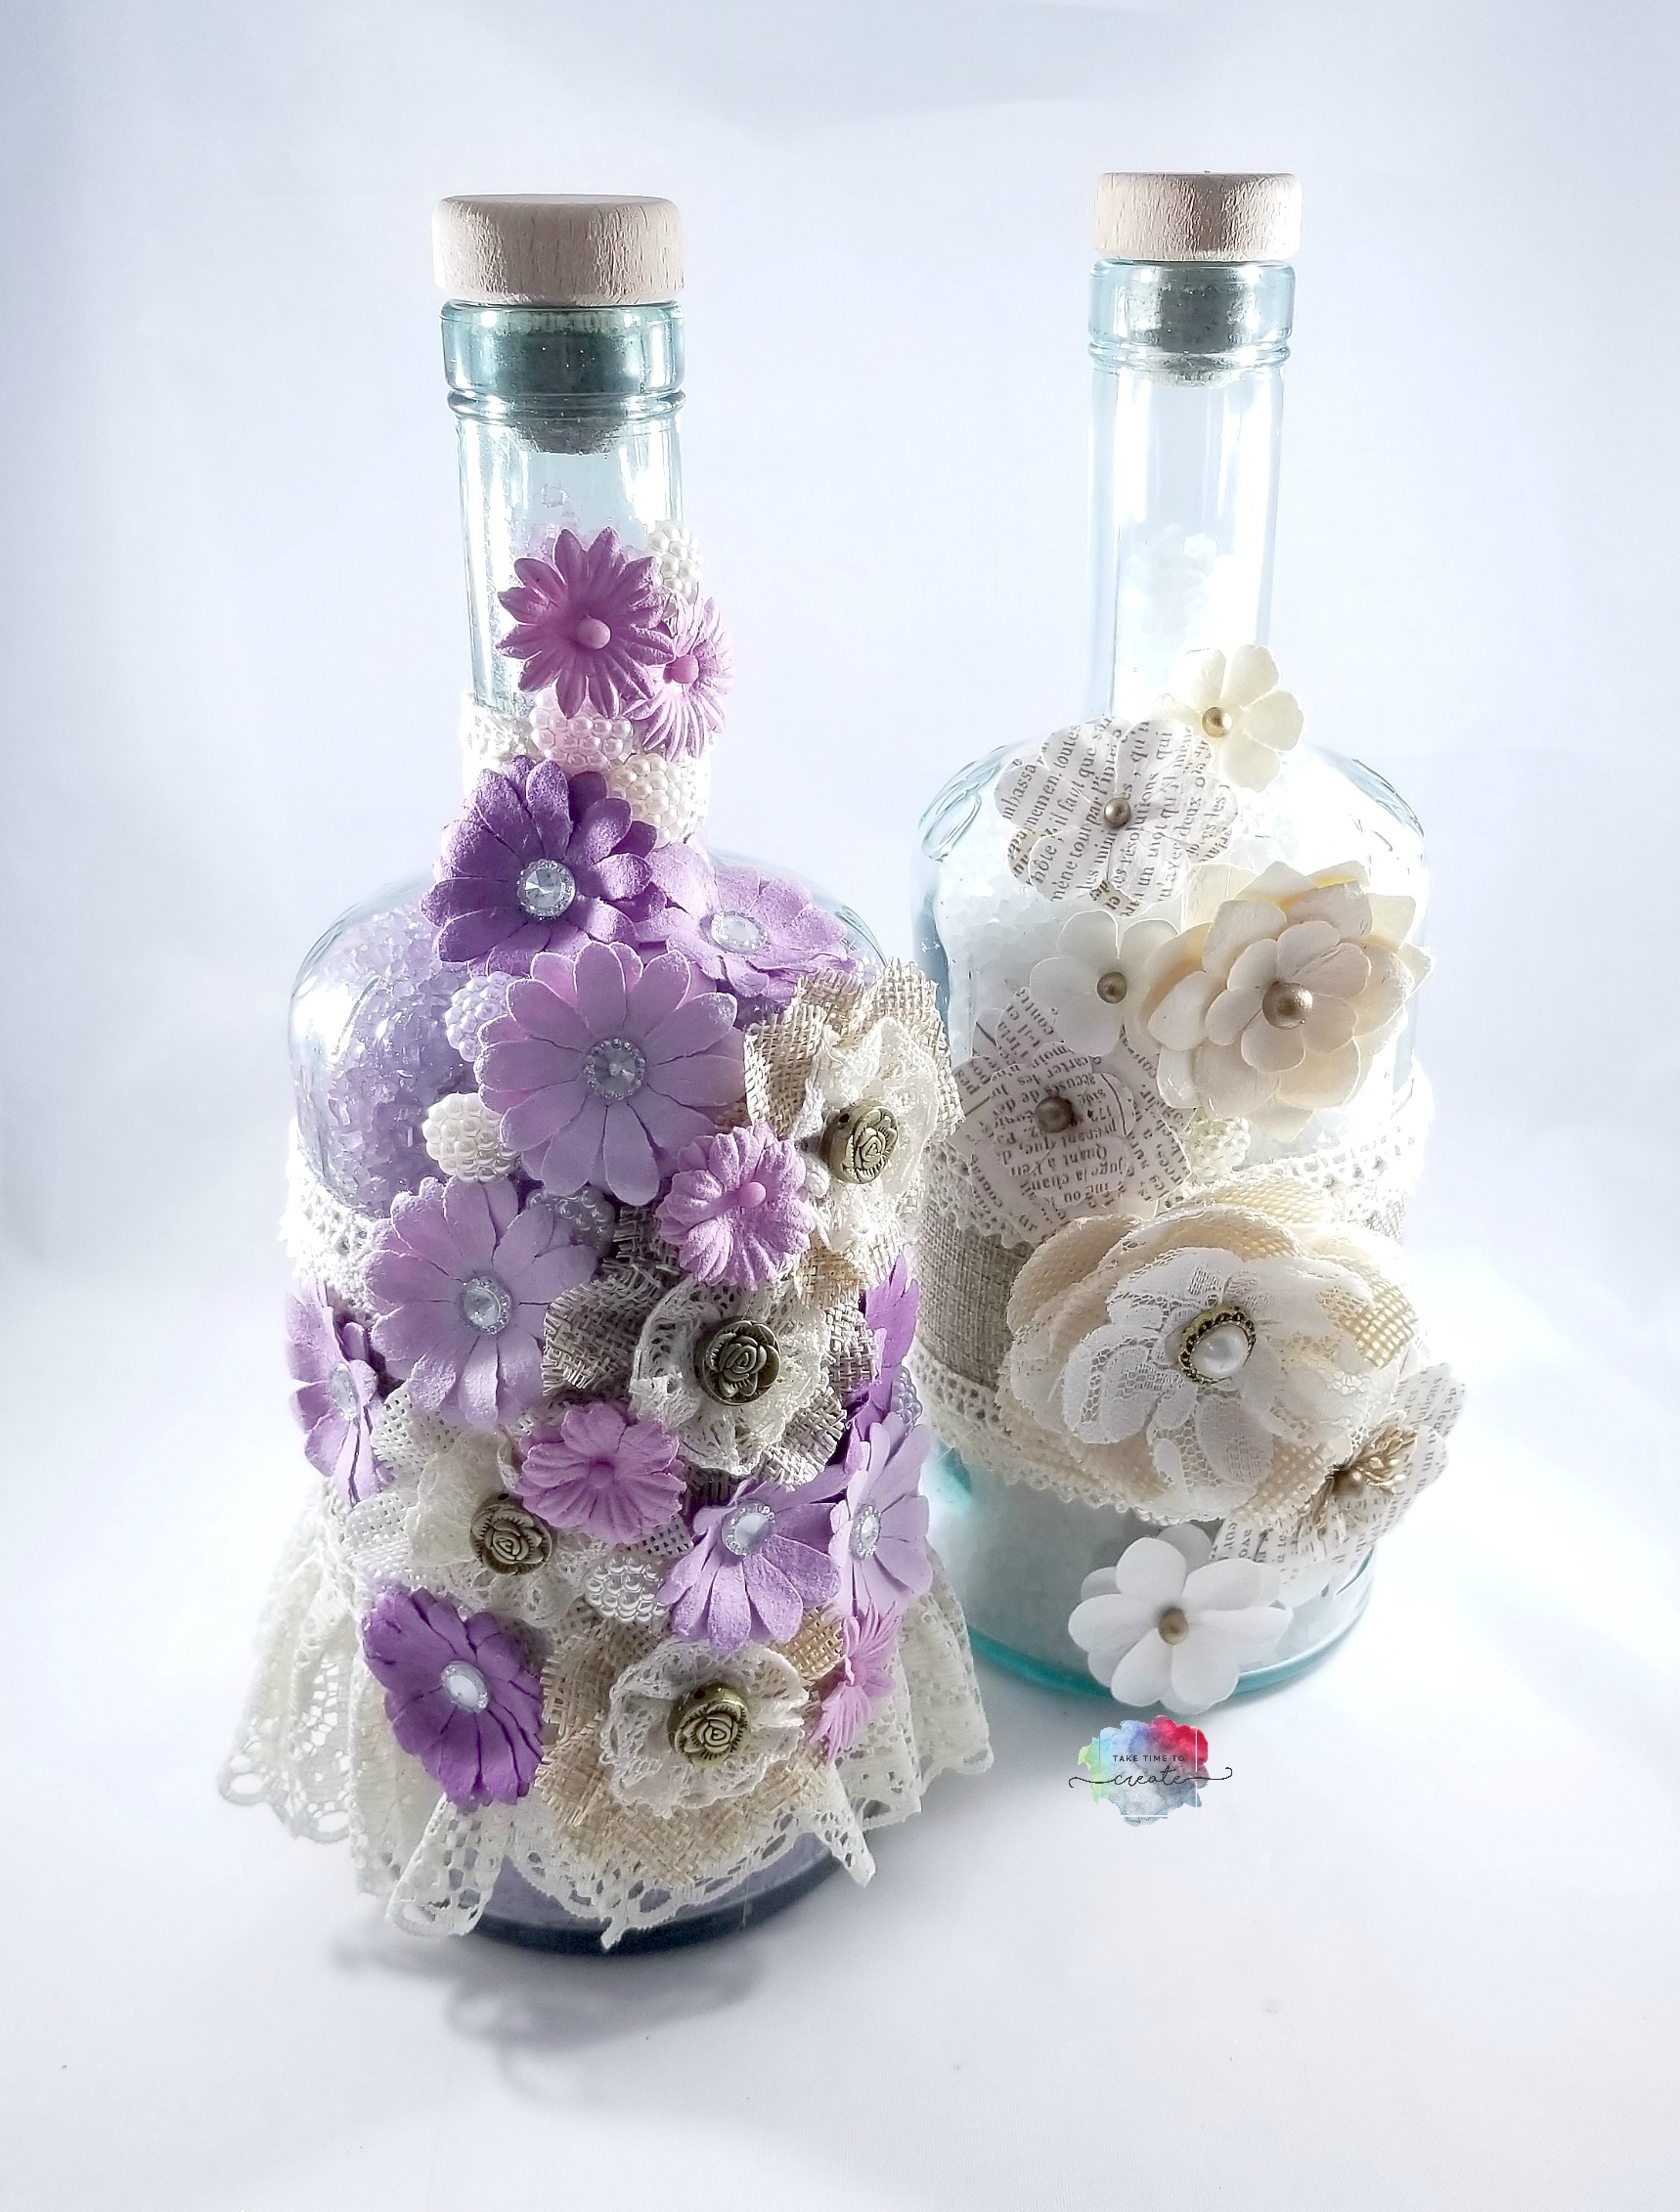
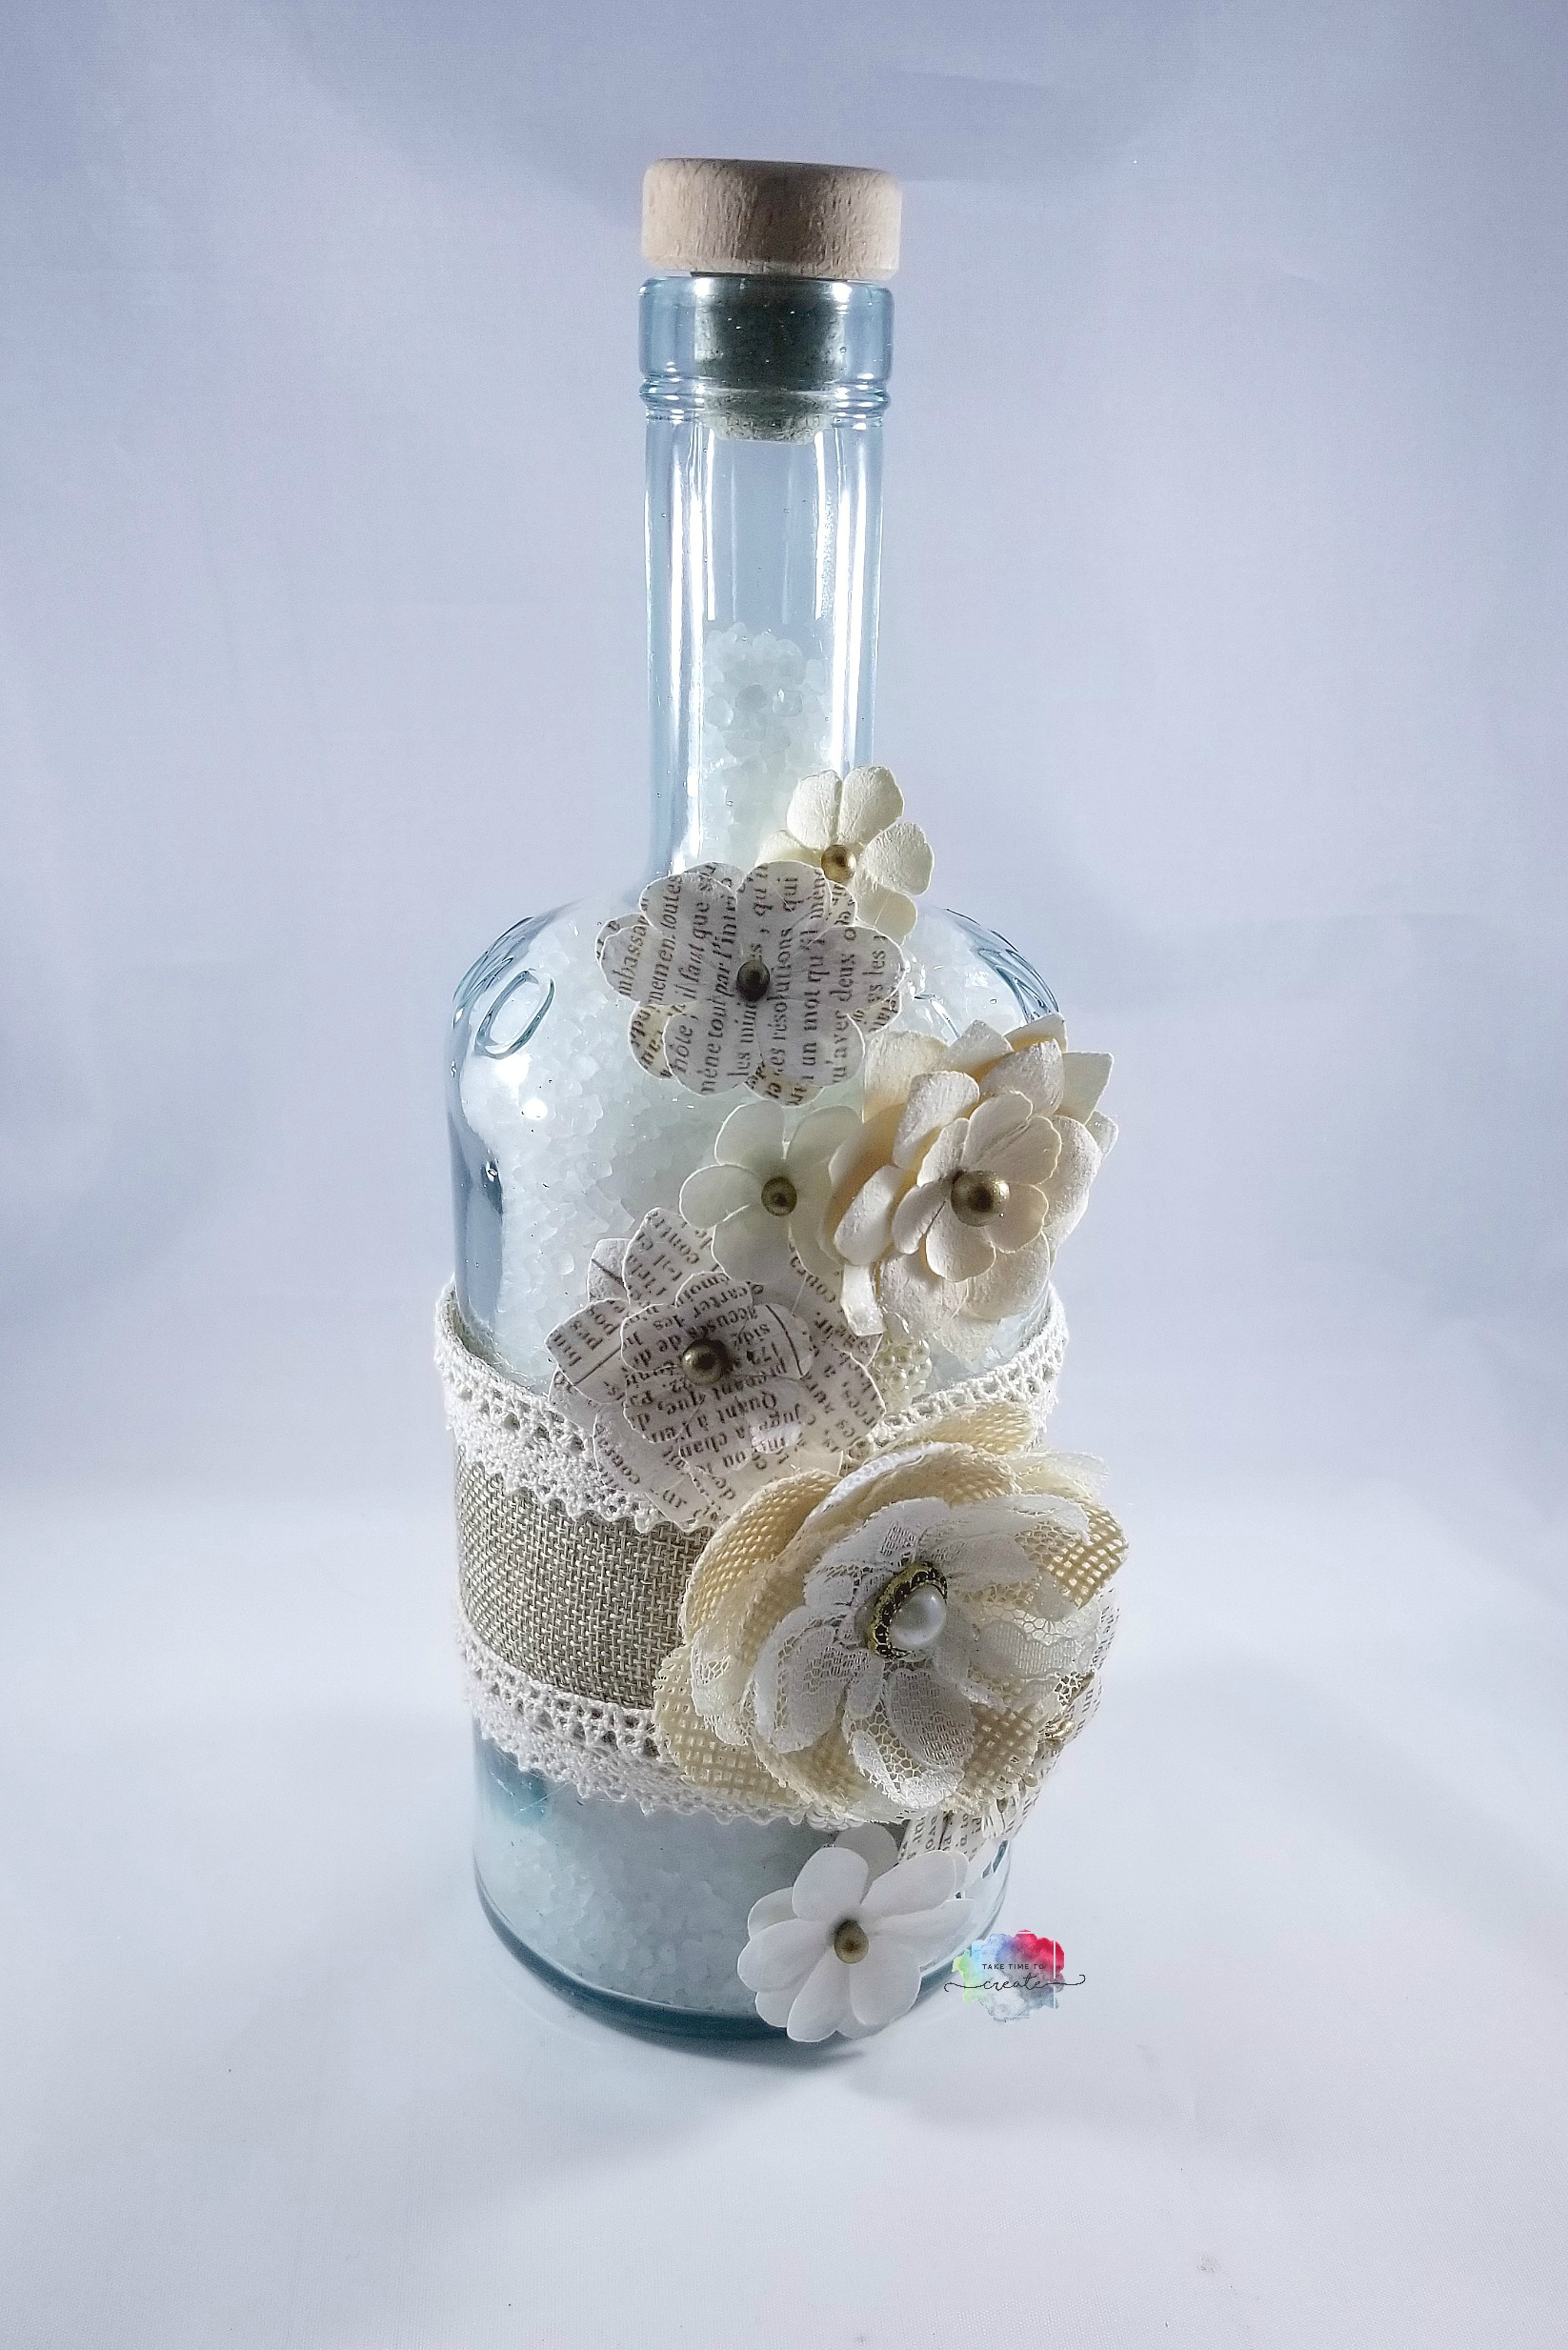
With the holidays approaching it is important to take time to relax and a bath is perfect for relaxing! I made these altered bottles for bath soaks which look great in your bathroom!
They are easy to make and they can also make a perfect handmade gift, or you can sell them at a craft fair.
For this project find a really great bottle. I found mine at Who Give a Scrap. It is on on the larger size, that worked perfectly for me. Make sure it has a lid and that you clean it thoroughly.
Once the bottle is clean and dry add your embellishments. I added burlap and lace around the bottle to start.
Then I added a lot of flowers and beads to create the look I was going for. You can add flowers, buttons, keys, and found objects. Anything would look great on the bottle.
Once it was all decorated I added the bath salts and the cork. Now I have a great gift, or even something for me.
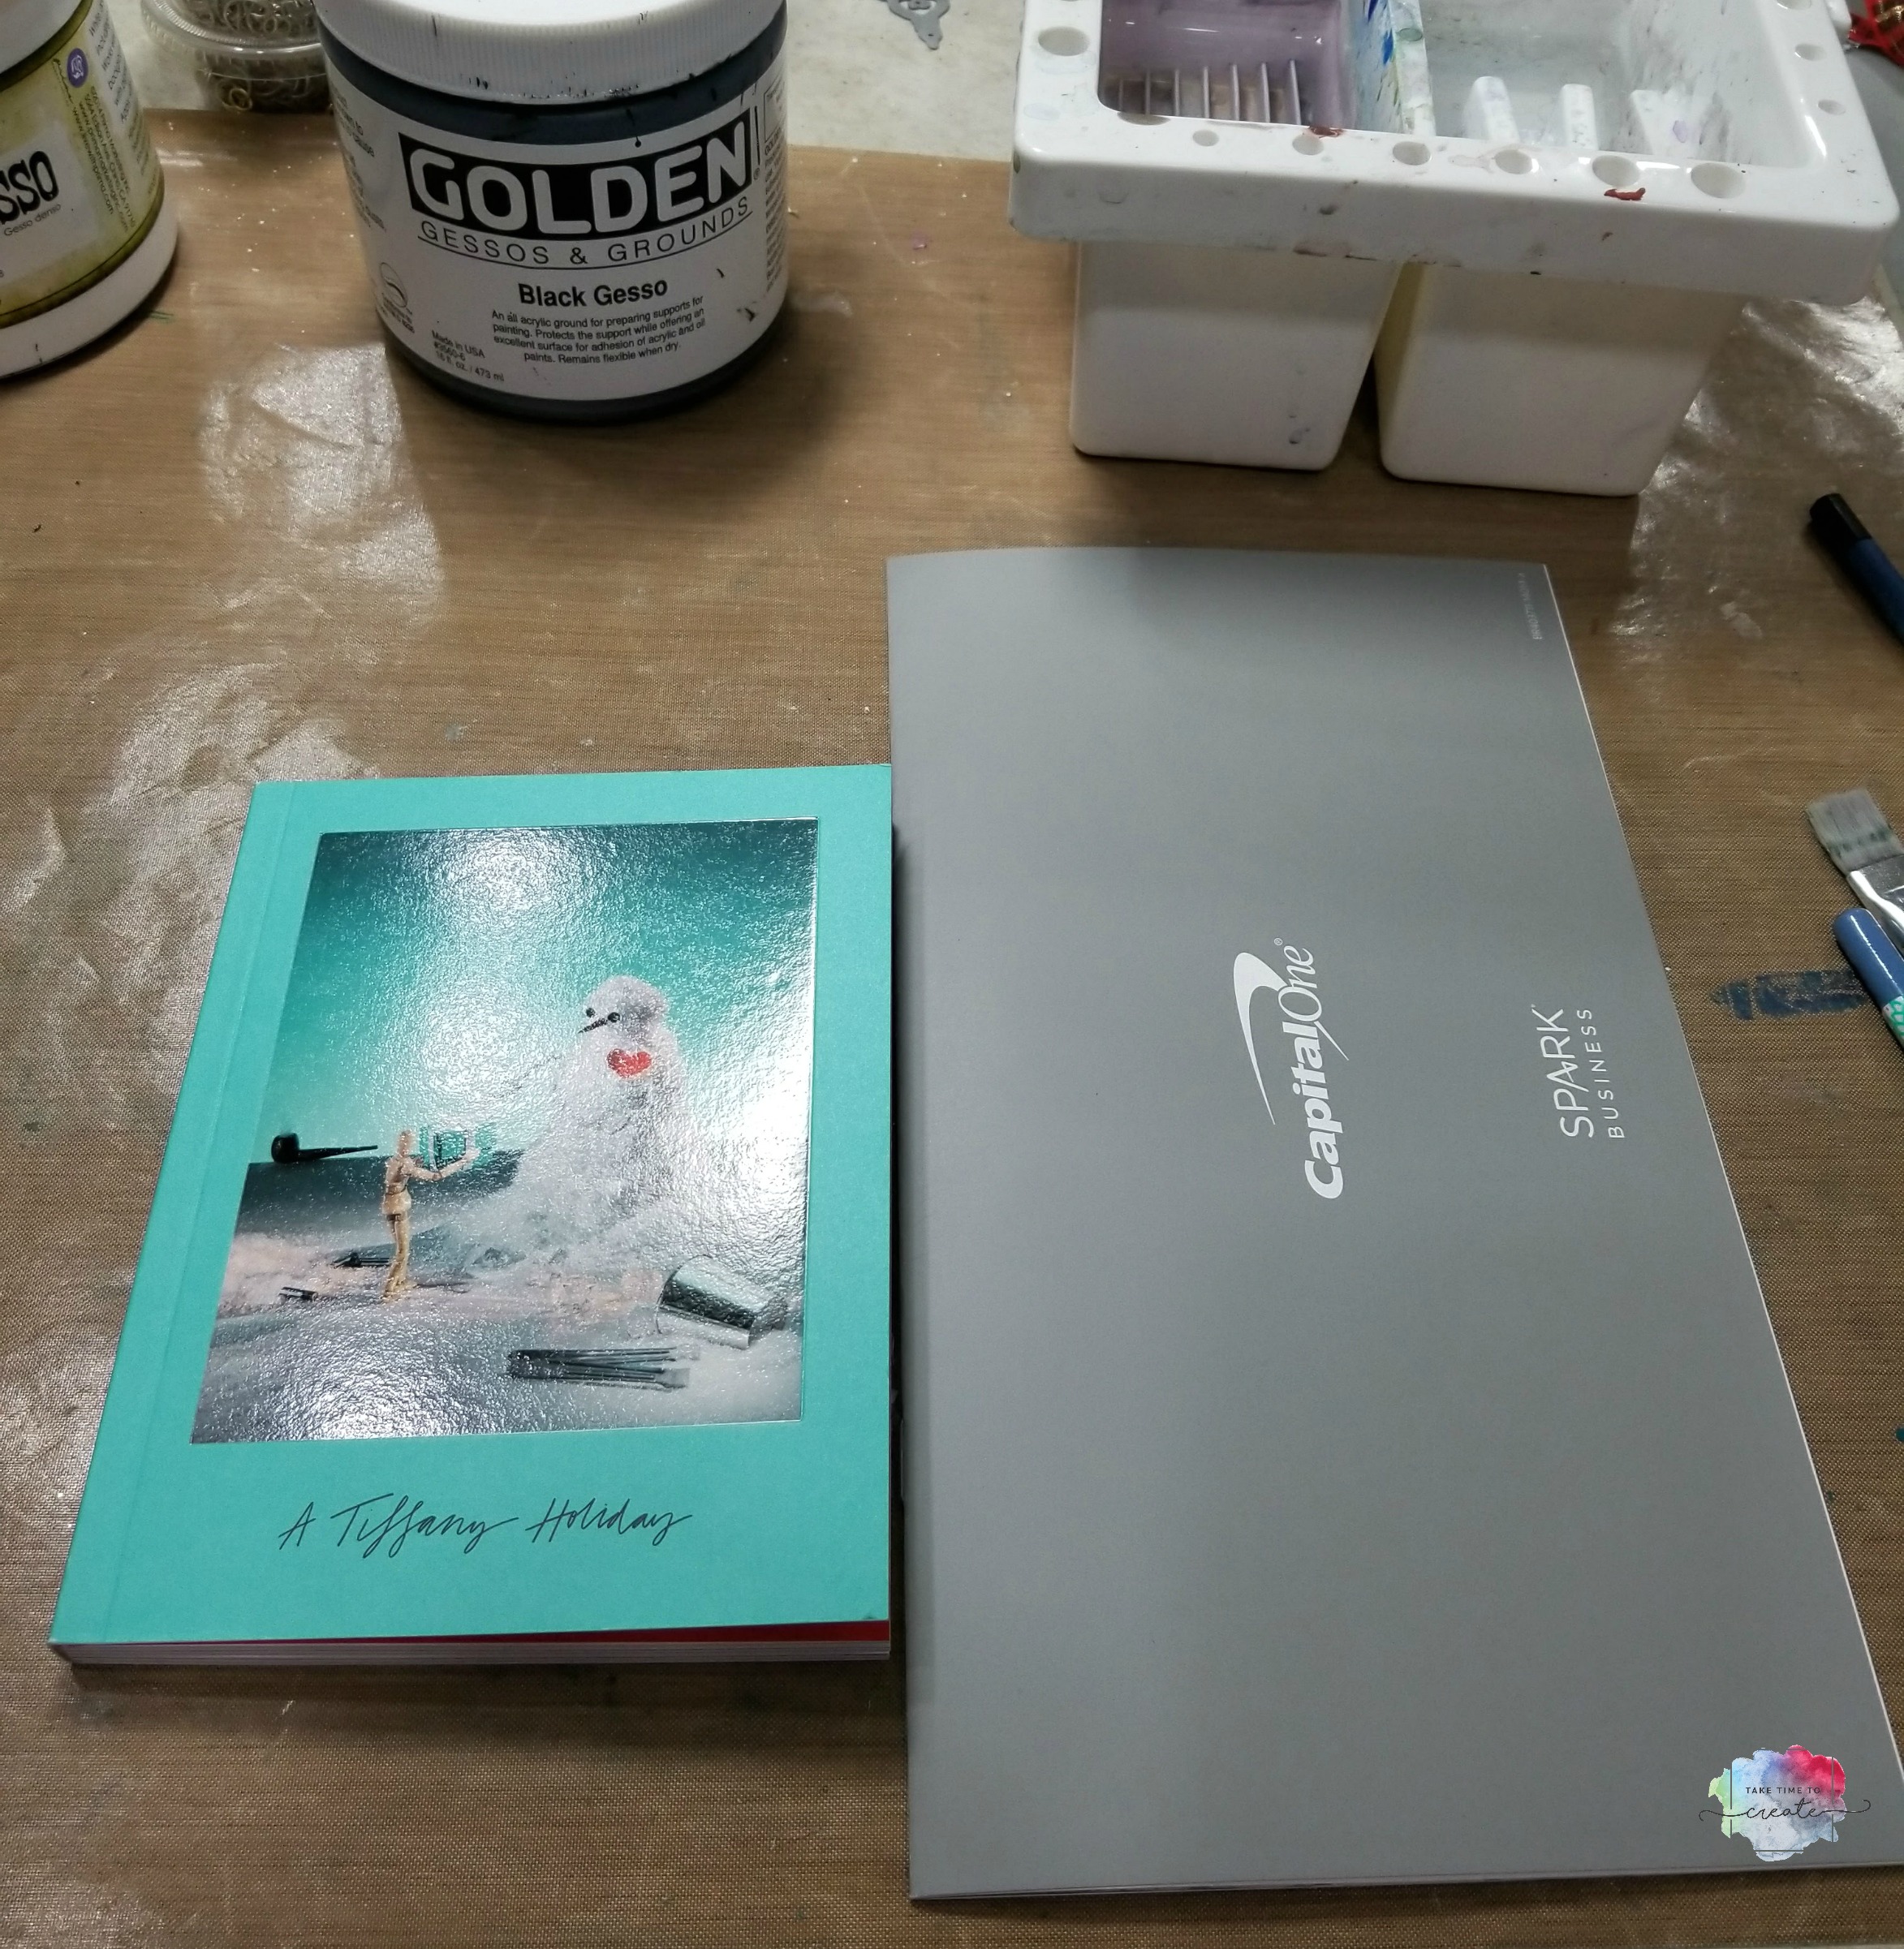
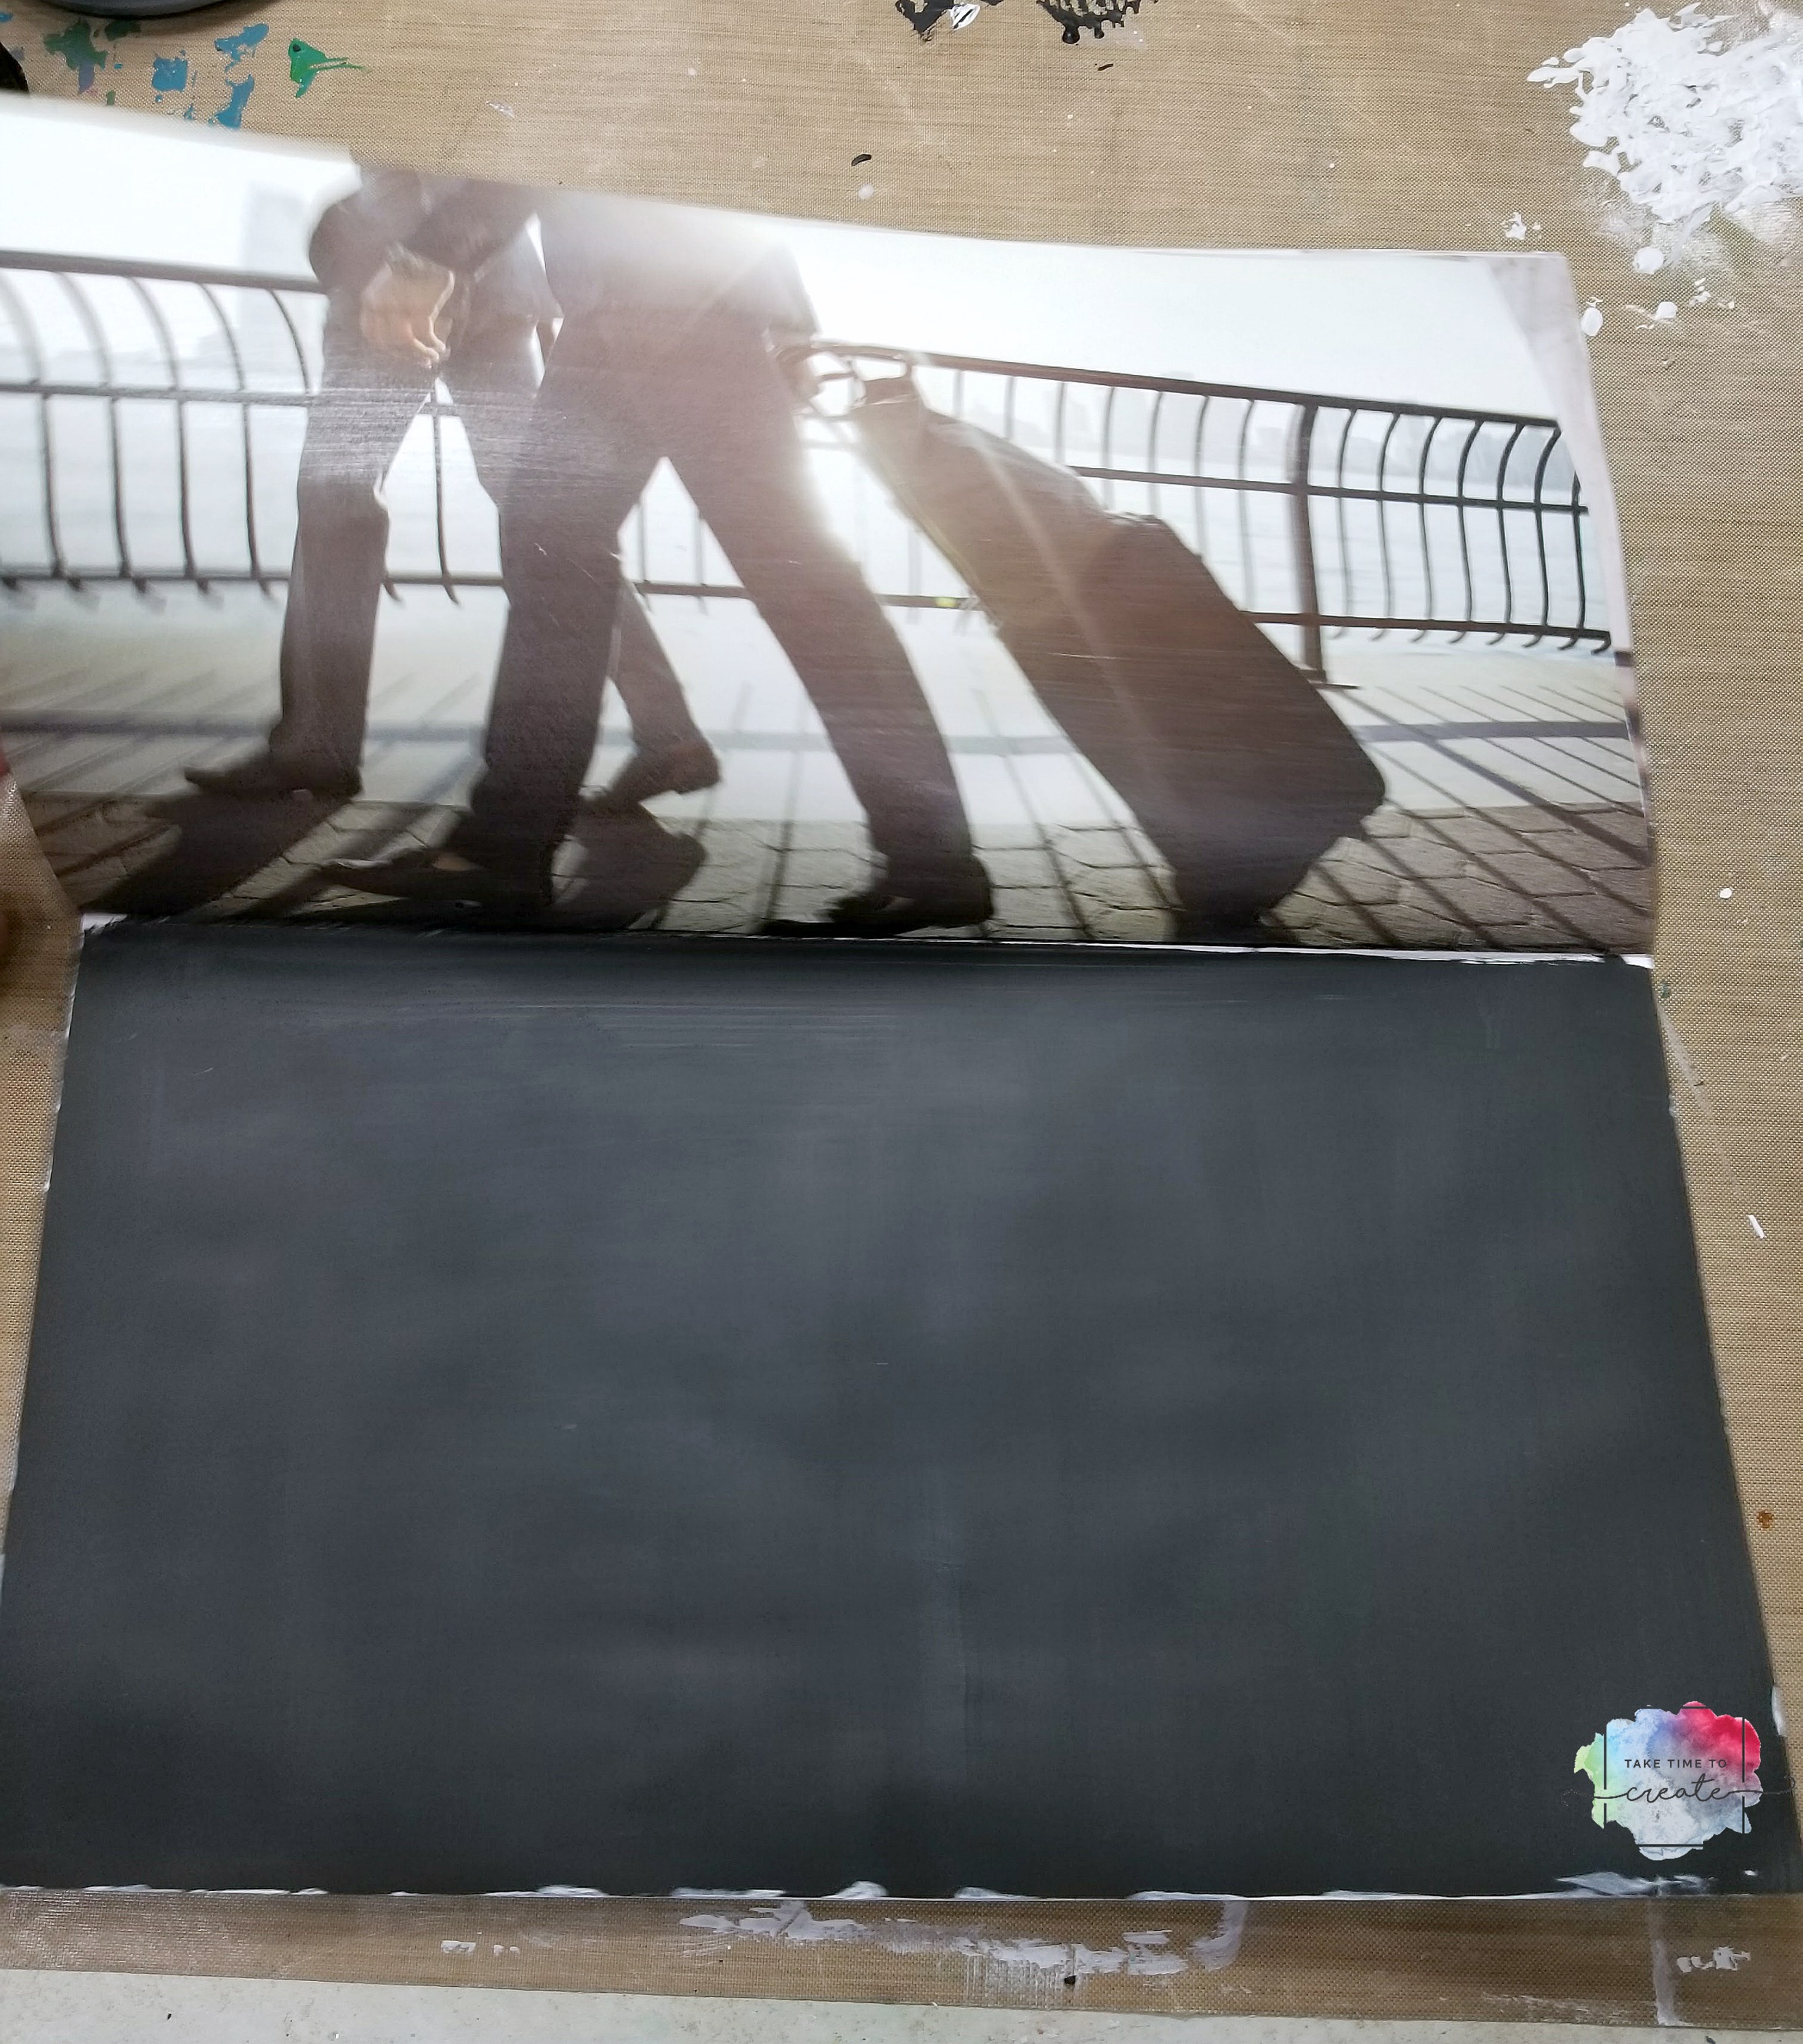
It is that time of year when all the junk mail comes to your house. I recycle what I can, but sometimes it is just too pretty to throw away. So I save it.
And that is were the problem comes in, I have a stack of junk mail that needs to be dealt with, so I turned a few pieces into art journals.
This is just the tutorial on how I created the art journal, if you want to see what I did to the inside let me know in the comments and I will show you the art (when I am finished with it, lol)
Here is the video tutorial:
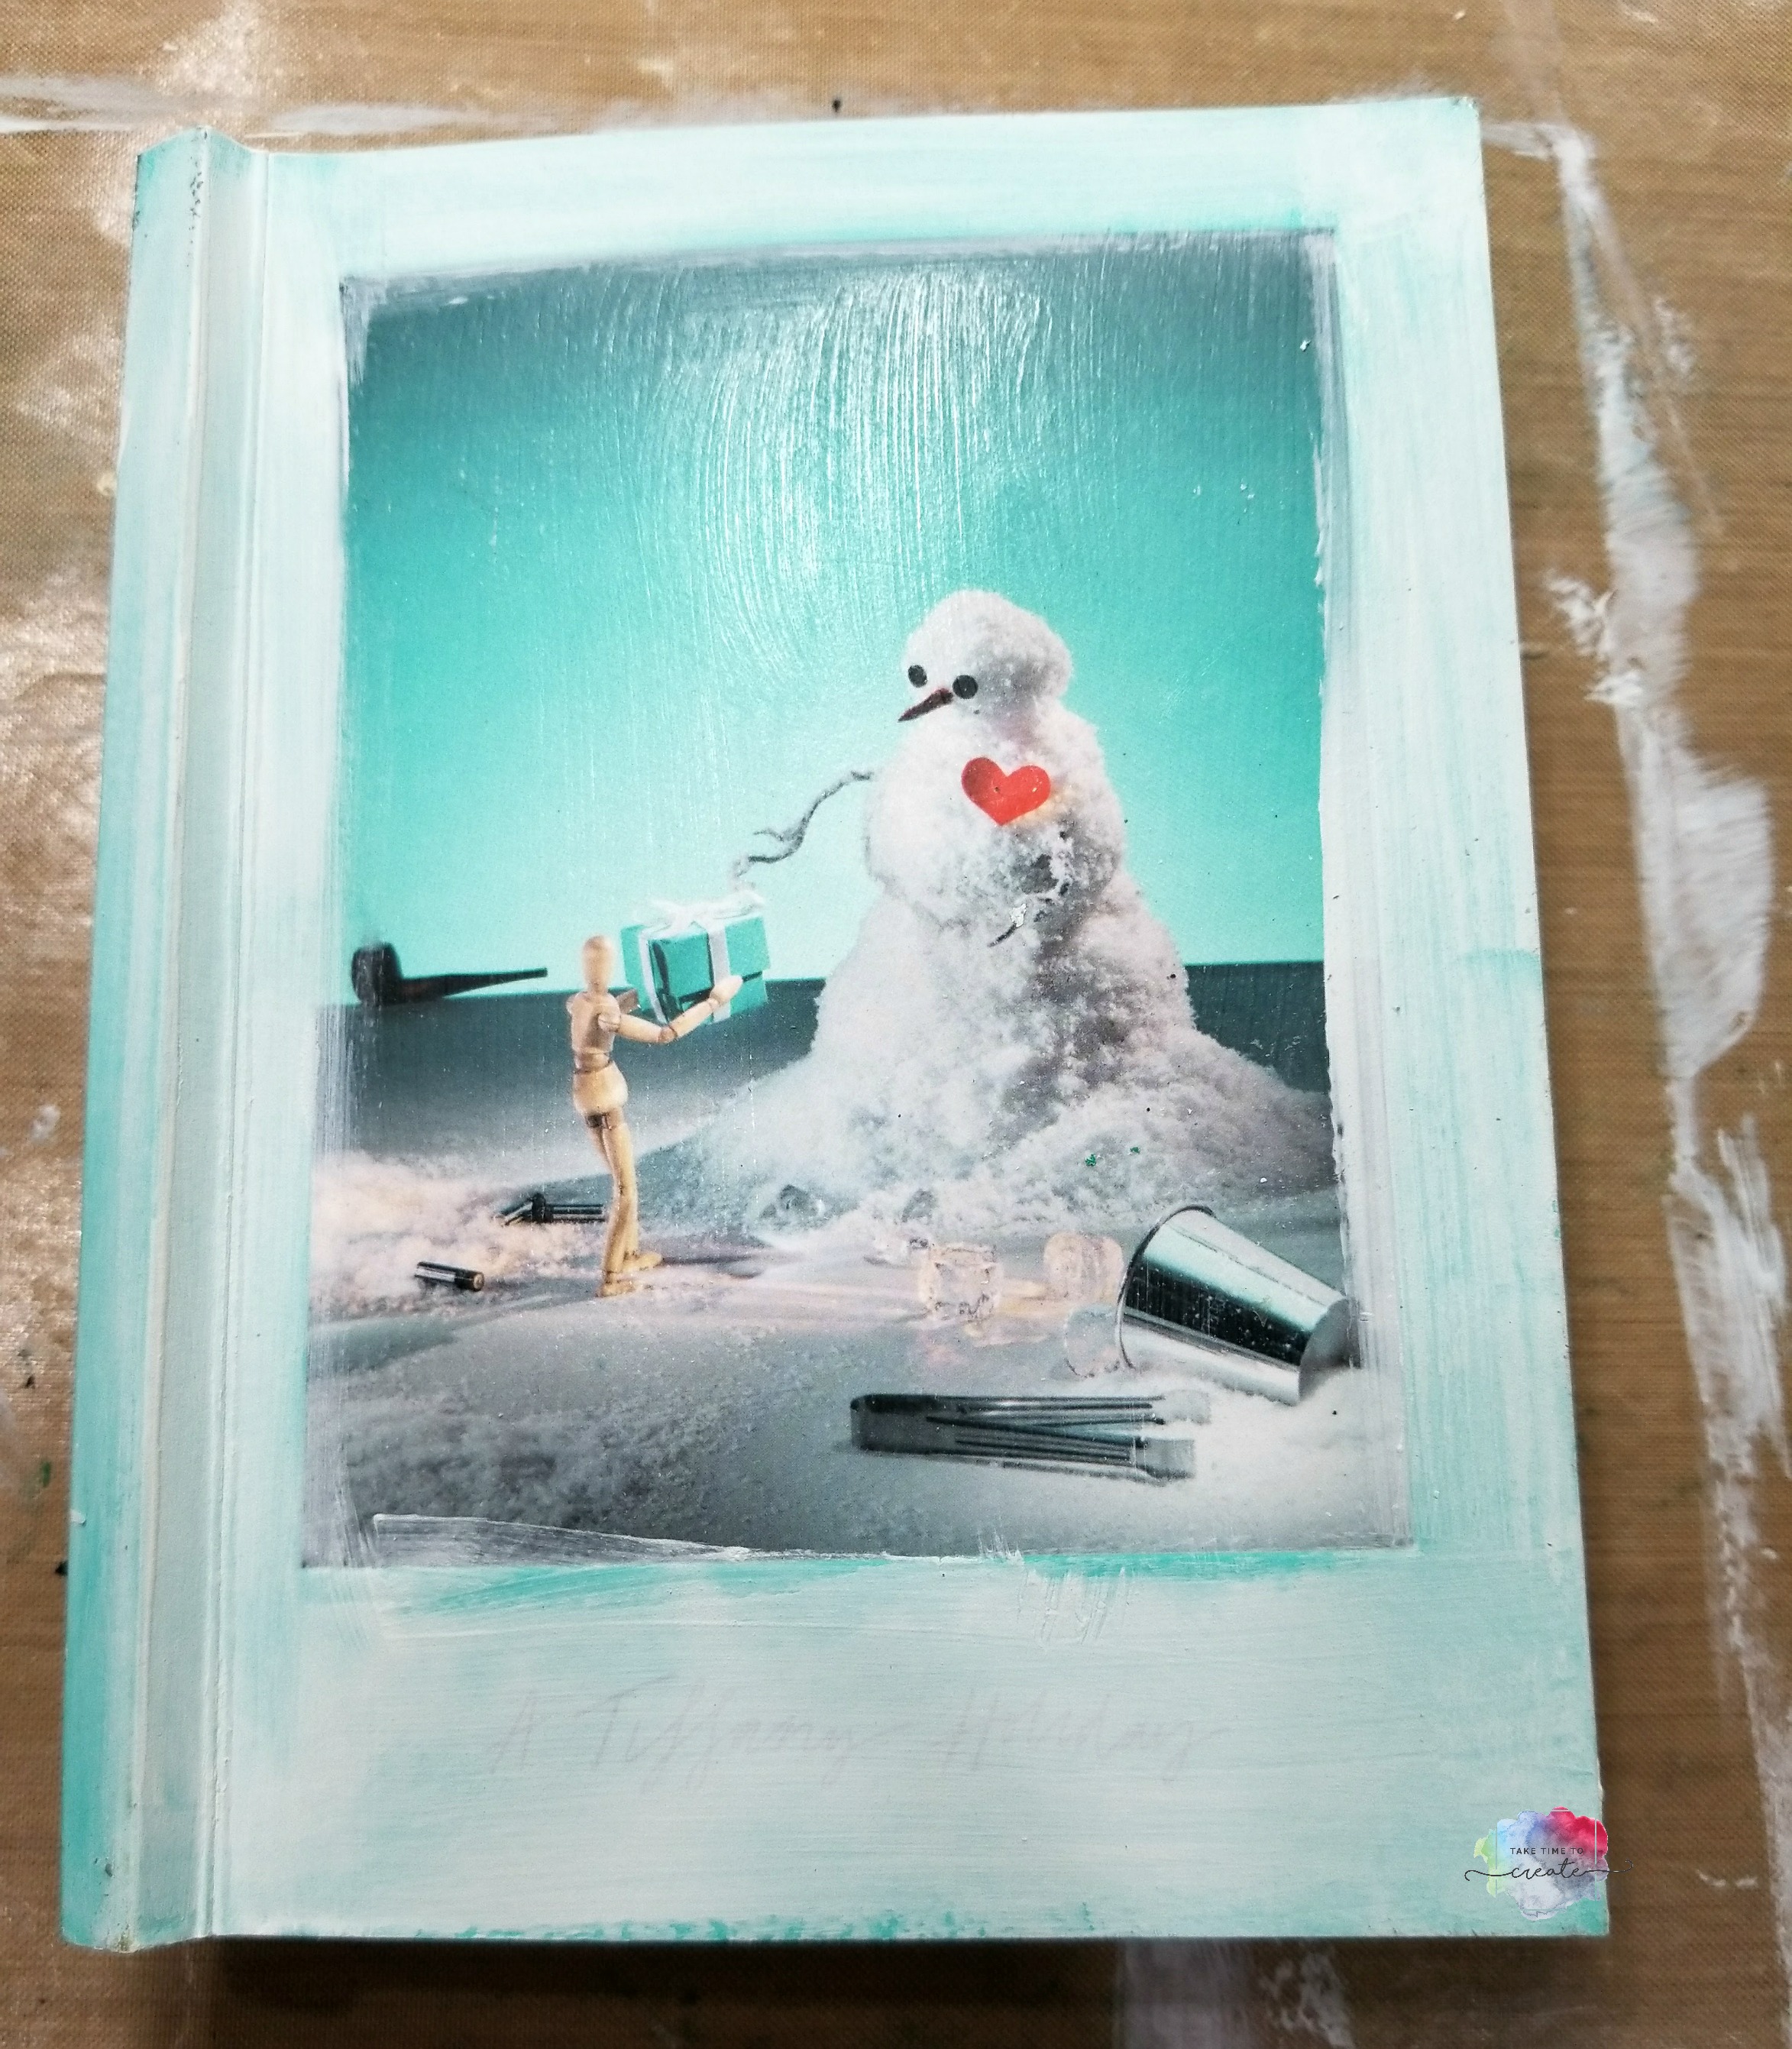
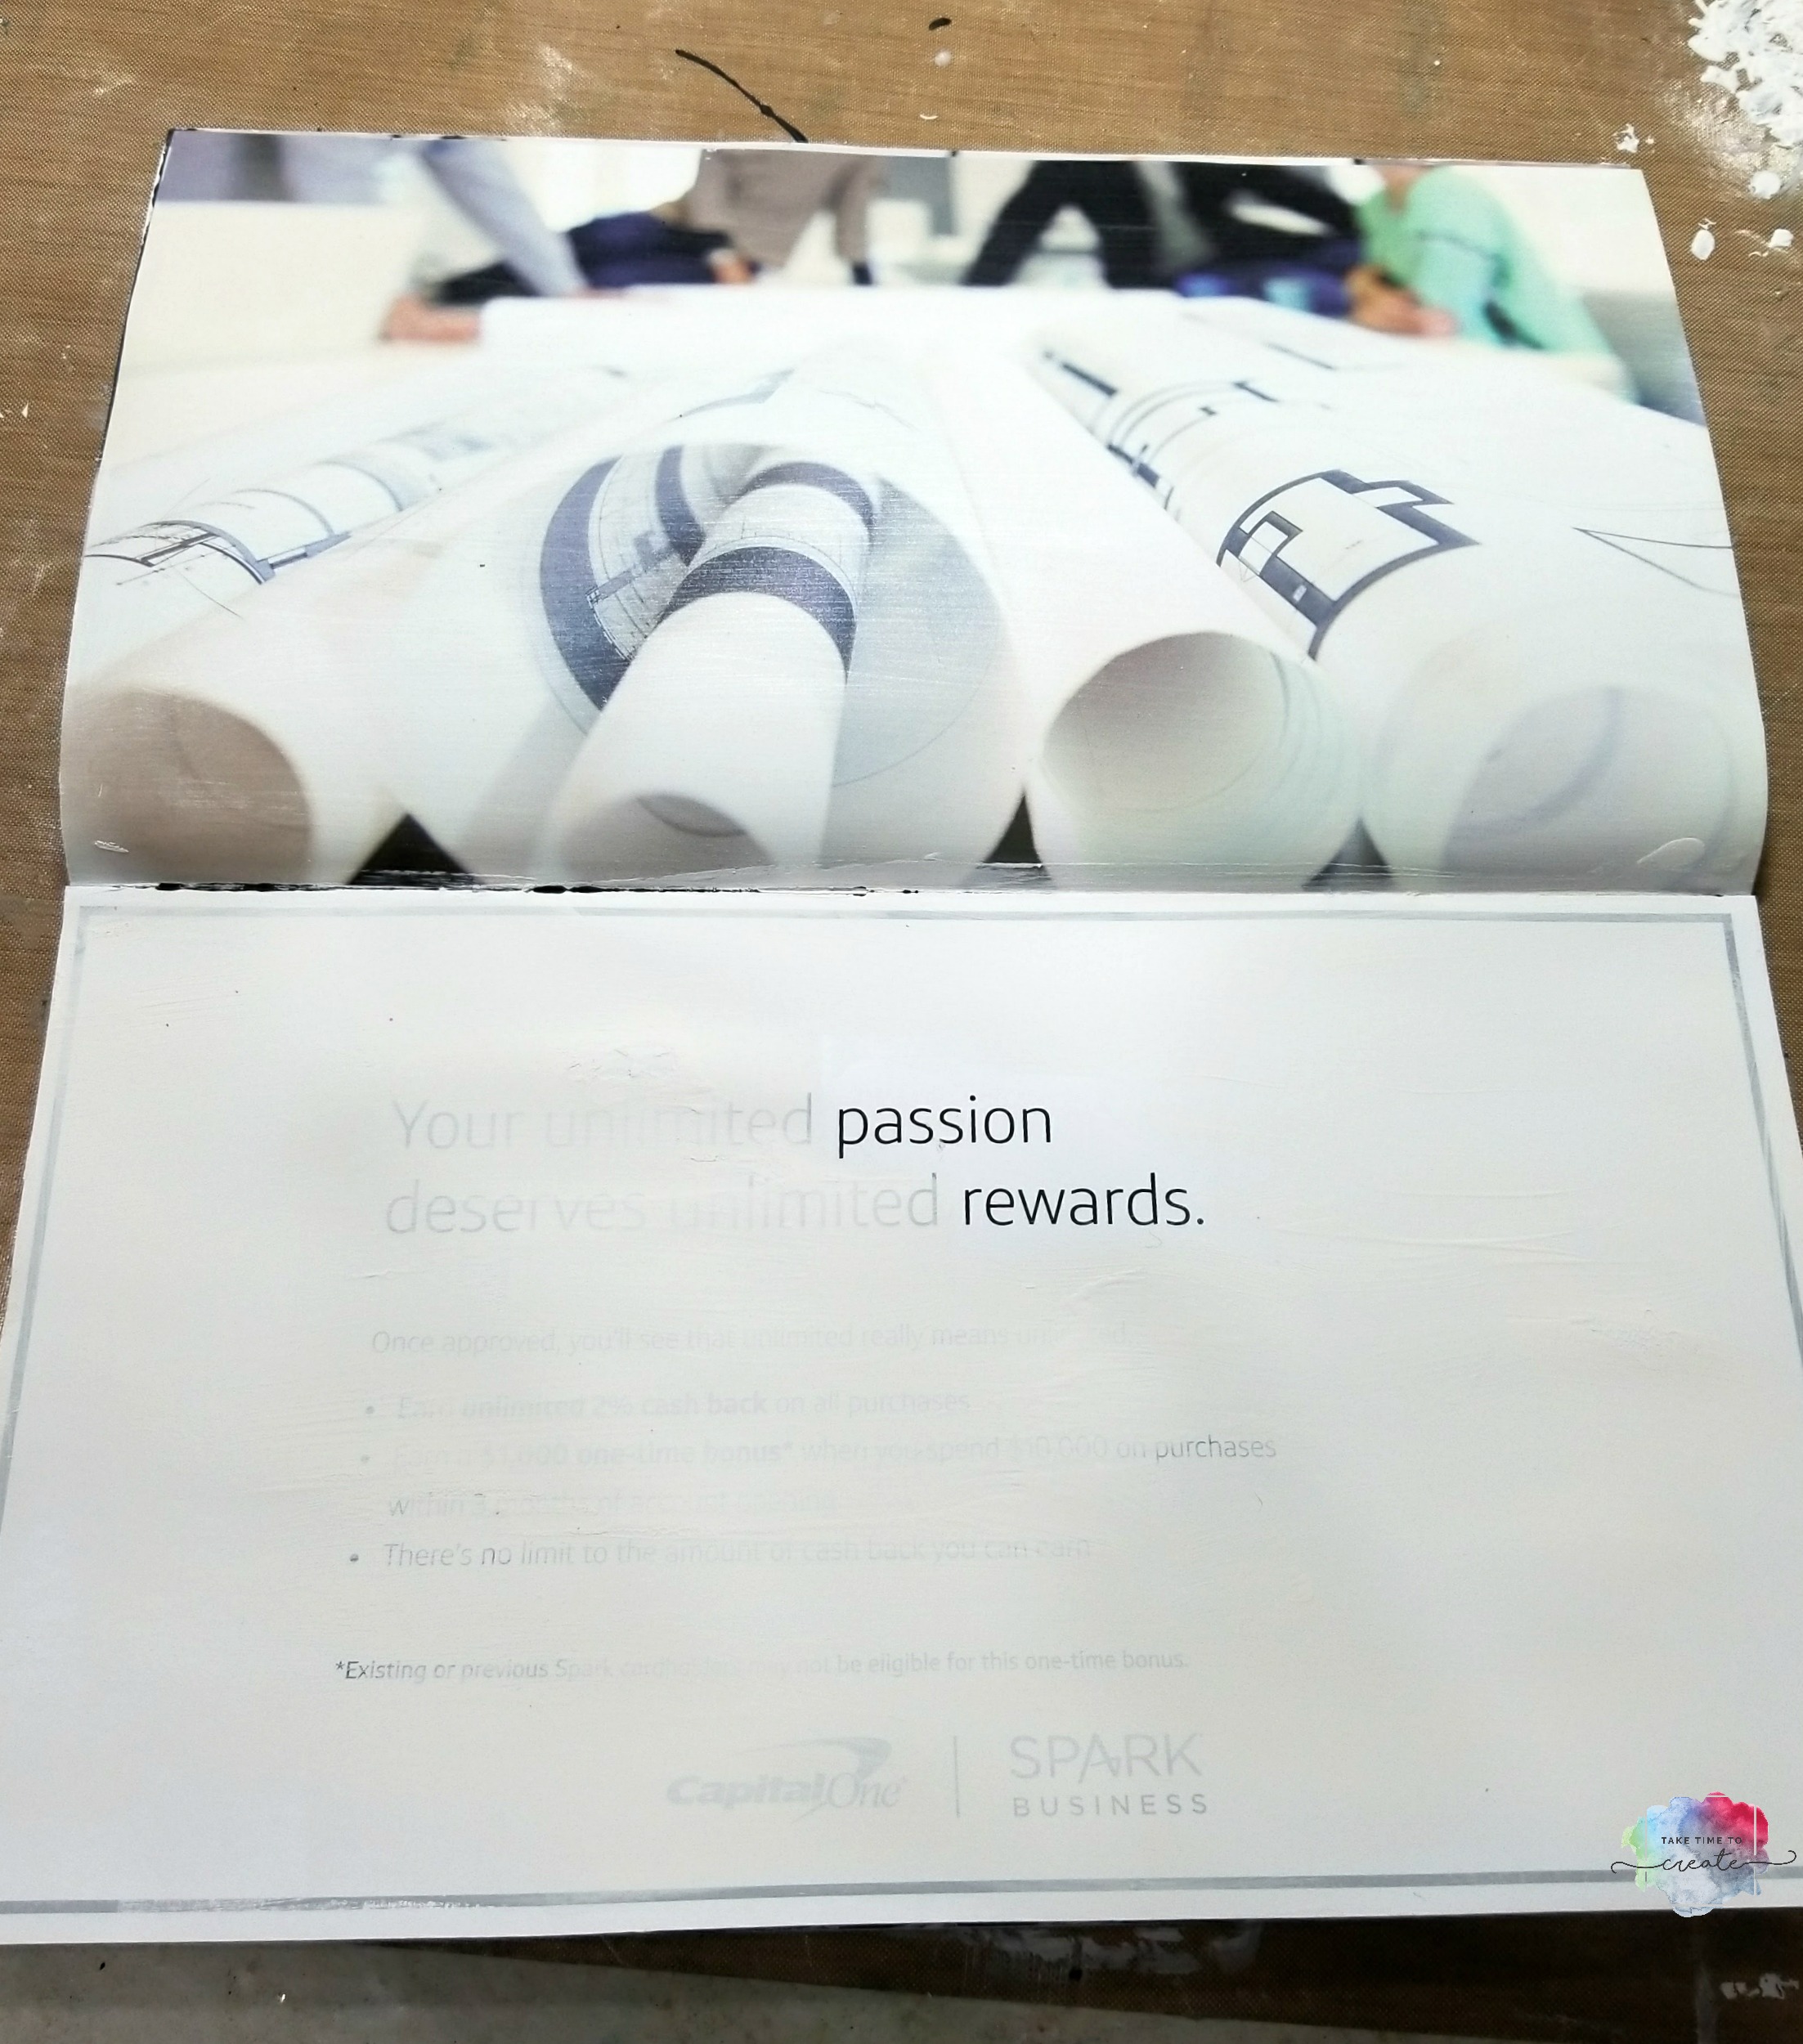
So what you do is start with really great junk mail. I had one from Capital One and Tiffany’s. Side note: I have only been to Tiffany’s once and I bought the cheapest pair of earrings there about 10 years ago and I still get their mailers, lol. And their mailers are beautiful!
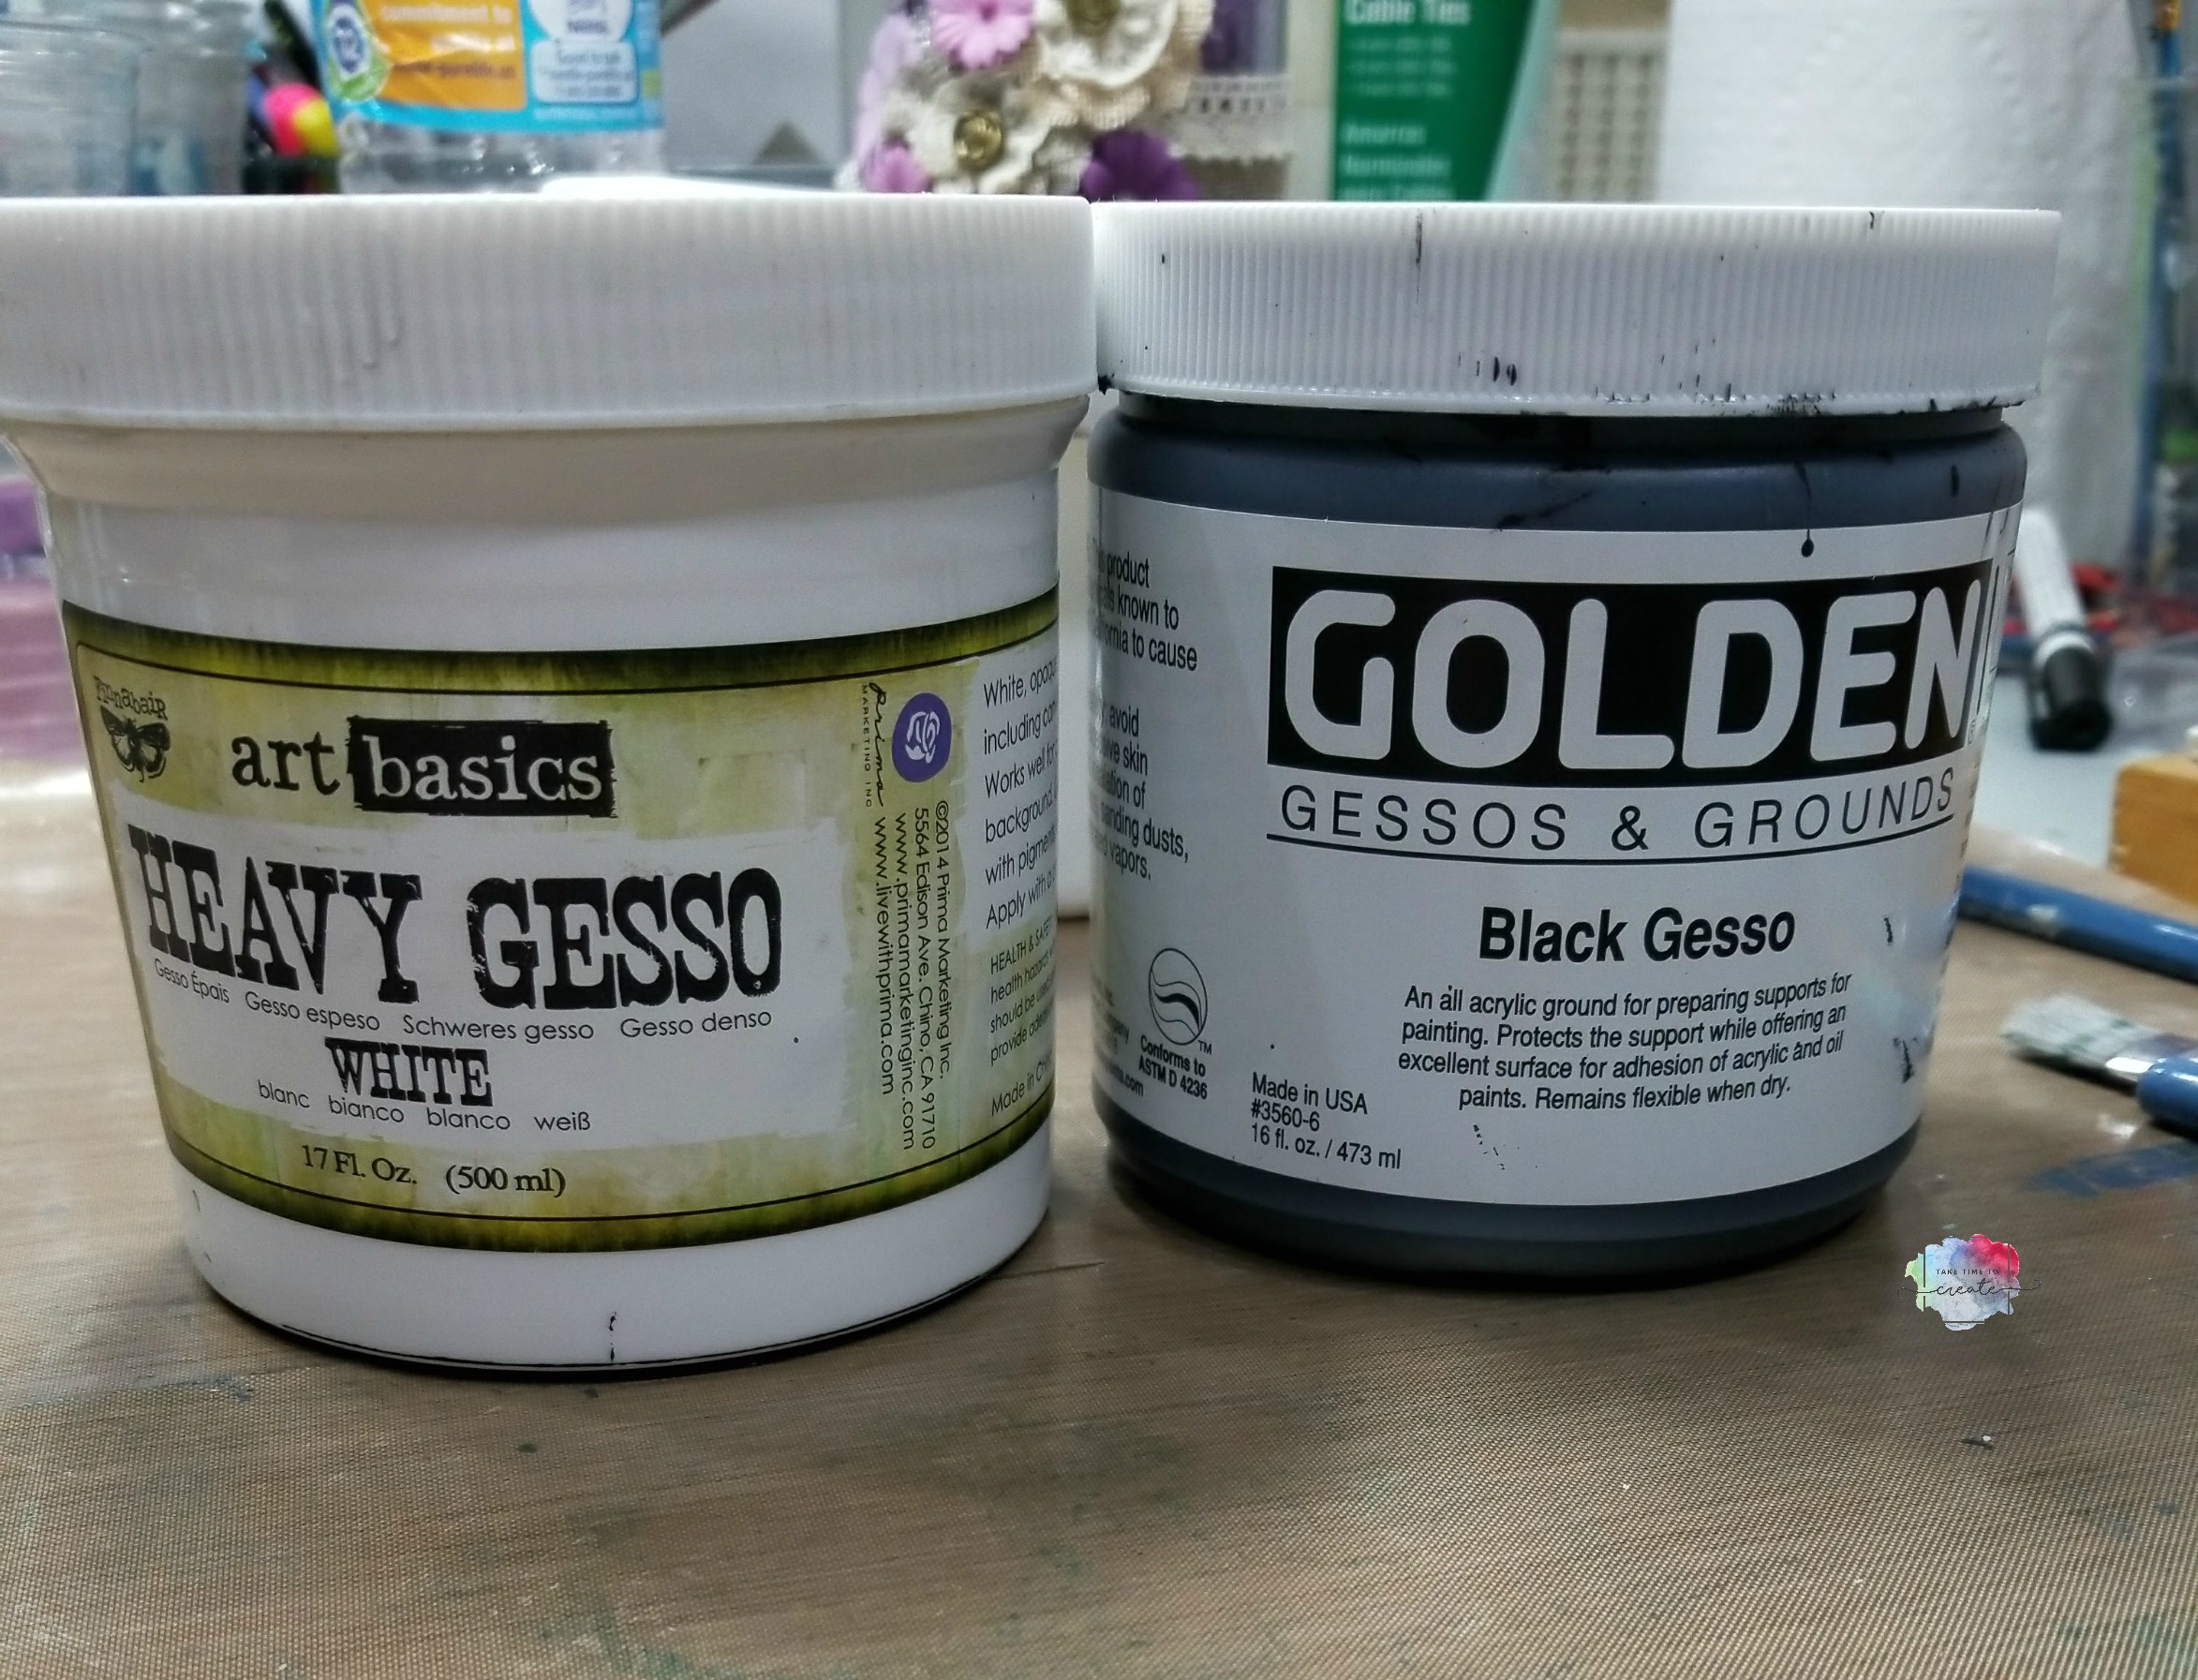
Once you decided on what you want to alter grab some gesso. I used white, black and clear. The black is fun so I can use some light colors, it breaks up the book. I also added clear gesso over some of the images, that way I keep the image but the page is prepped to take all sorts of mediums.
The cover of the Tiffany book is so pretty and festive! This will be my holiday 2017 art journal. When looking for junk mail to make into an art journal look for mailers that have slightly thicker paper. If it is too thin then the pages will buckle and it won’t hold up.
The white gesso didn’t cover all the images completely, but that is ok, I will fill the page with other art and it won’t get in the way. But if you want the image to be completely gone, the add a few layers.
I left some words uncovered, I thought they we fun and it will help me start the page.
The Capital One mailer was a great size and it will be fun to do more landscape journal pages. I kept the images and some words, and it makes for a great starting point.
It was a lot of fun to prep my new art journals. What piece of junk mail do you have that is too beautiful to recycle? And did you just keep it or did you re purpose it?
Christmas craft fair season is upon us! Yikes, I am not ready! Anyone else doing craft fairs and are you ready?
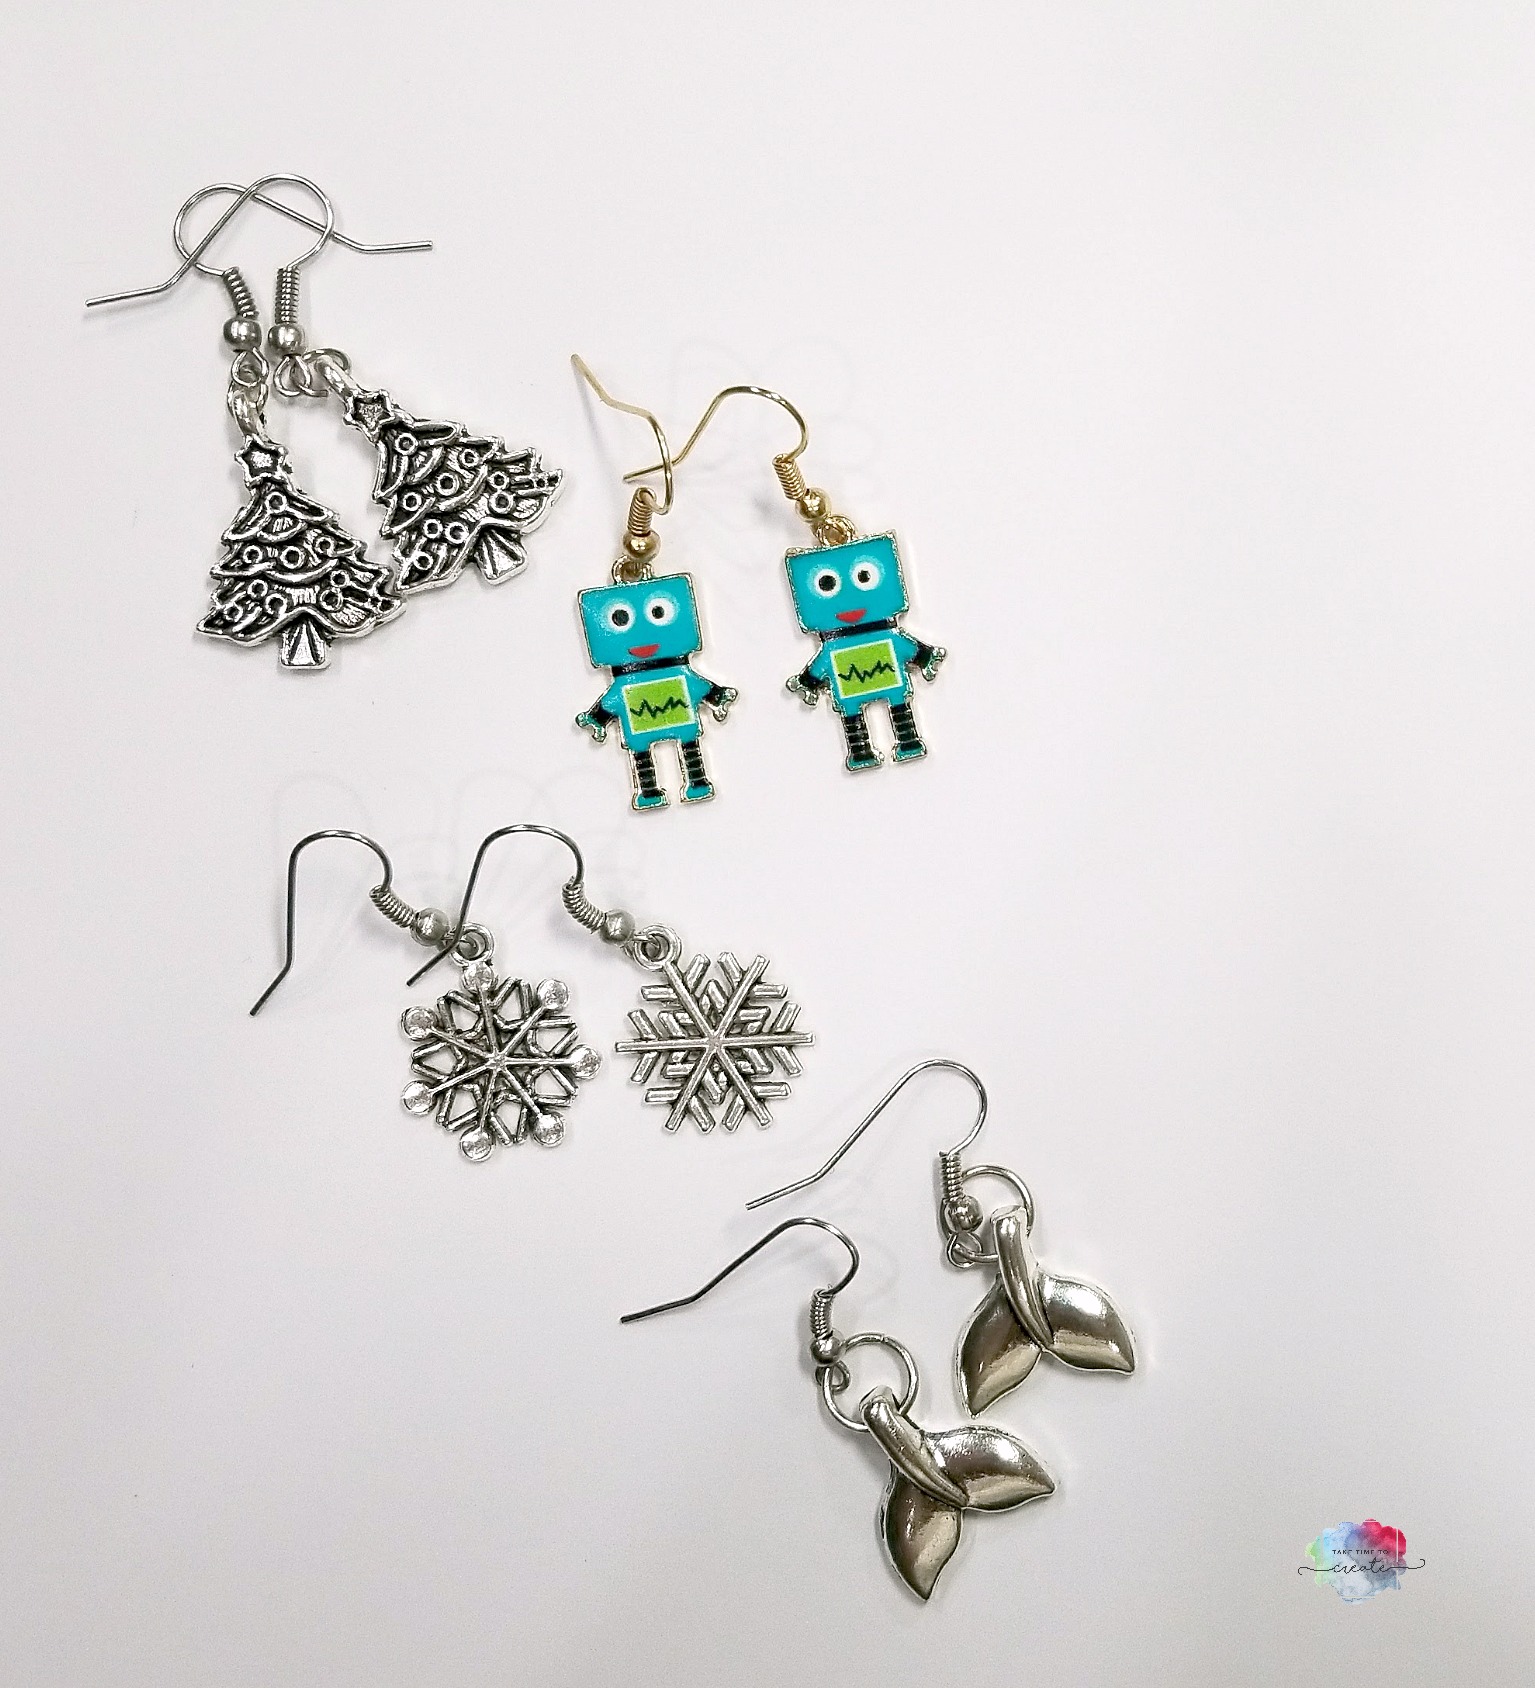
One item I like to see are earrings. On a side note I only make and sell things I will use/wear/display in my home. Too often people try to make only what they think will sell and not what they actually like or that they would wear or use. This is my opinion, and I sure it is different from other opinions. Now I want to sell it all, but I know some things won’t sell and that is ok. And since I like it I will be more likely to use in my daily life.
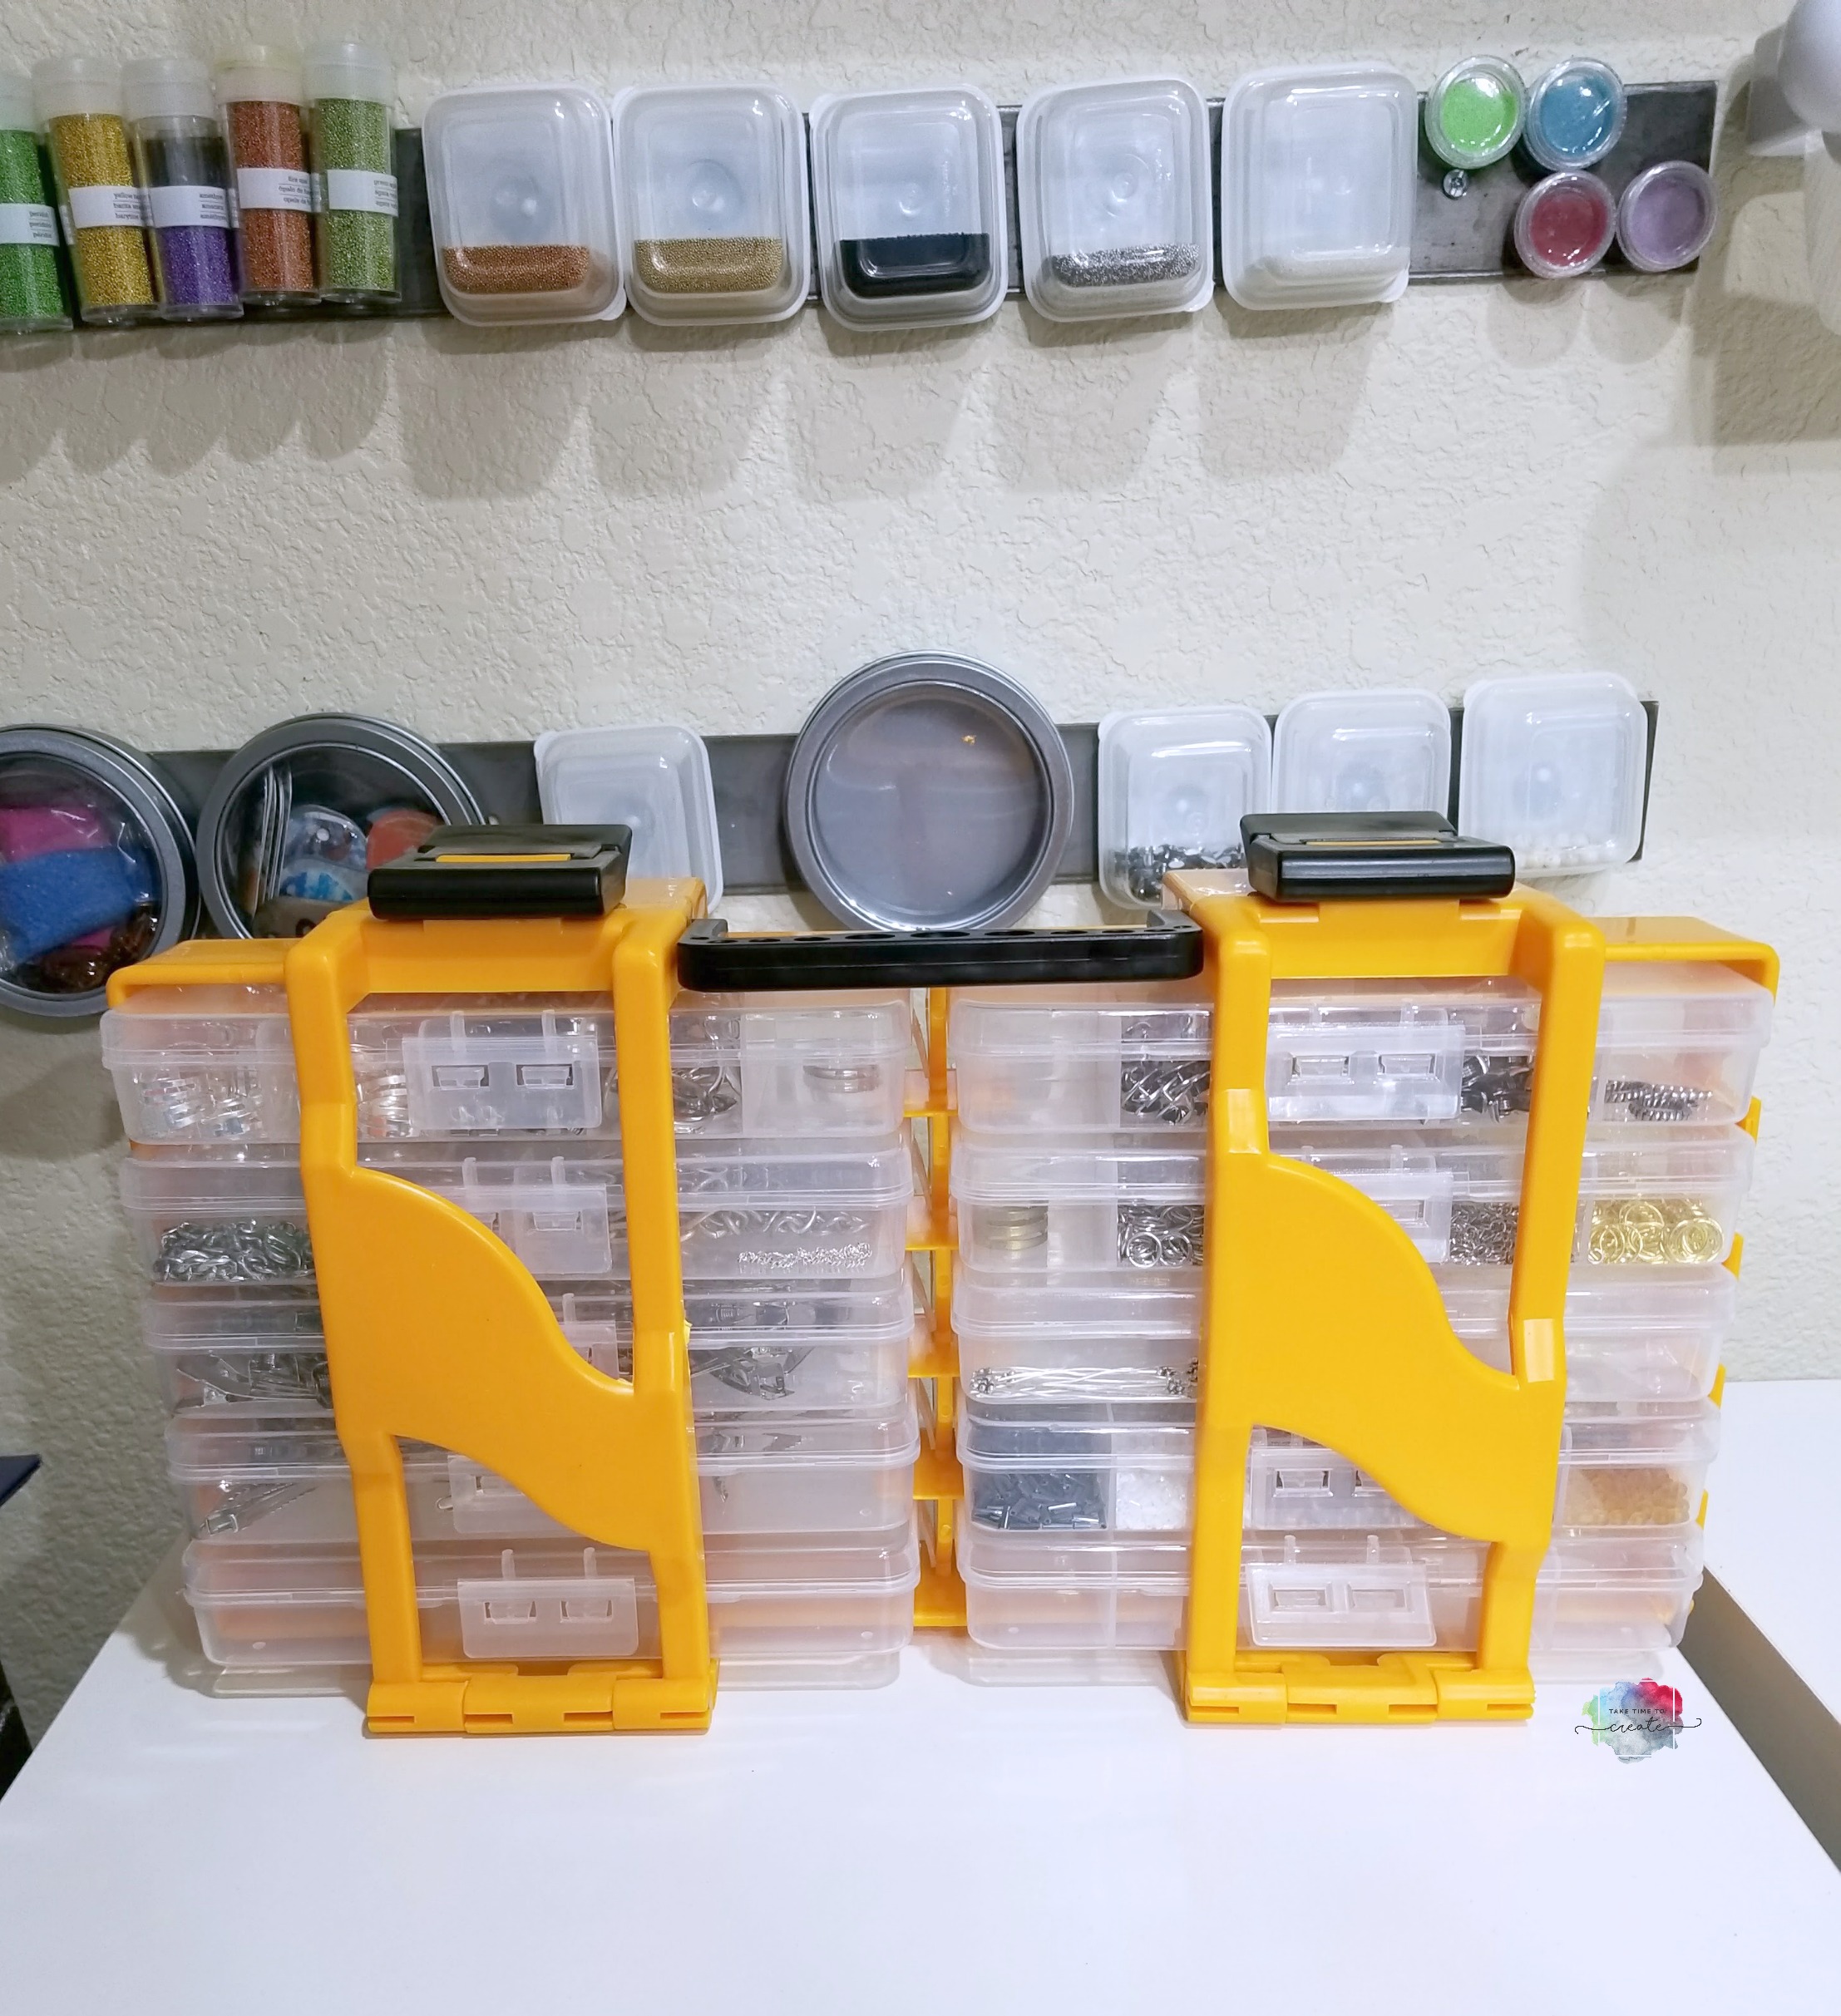
They are fantastic, I love how portable they are with the handle and each bin comes out so I take out what I need. There is a lot of room and they fit my needs perfectly.
The organizational bins behind the plastic storage is the metal strip my husband hung along with the magnetic containers from the dollar store. You can read the blog post here: Organizers
The earrings are really cute and fairly simple to make. All you do is add a French hook to a cute charm. I used a zipper pull and some other charms I had in my stash.
I like to use a variety of charms, not just Christmas ones. You never know what people will need or want.
Once I have a pile made I will package them and get them ready for the craft fair. If you are interested in seeing how I make my packaging and how I display my earrings let me know and I will write a post about it.