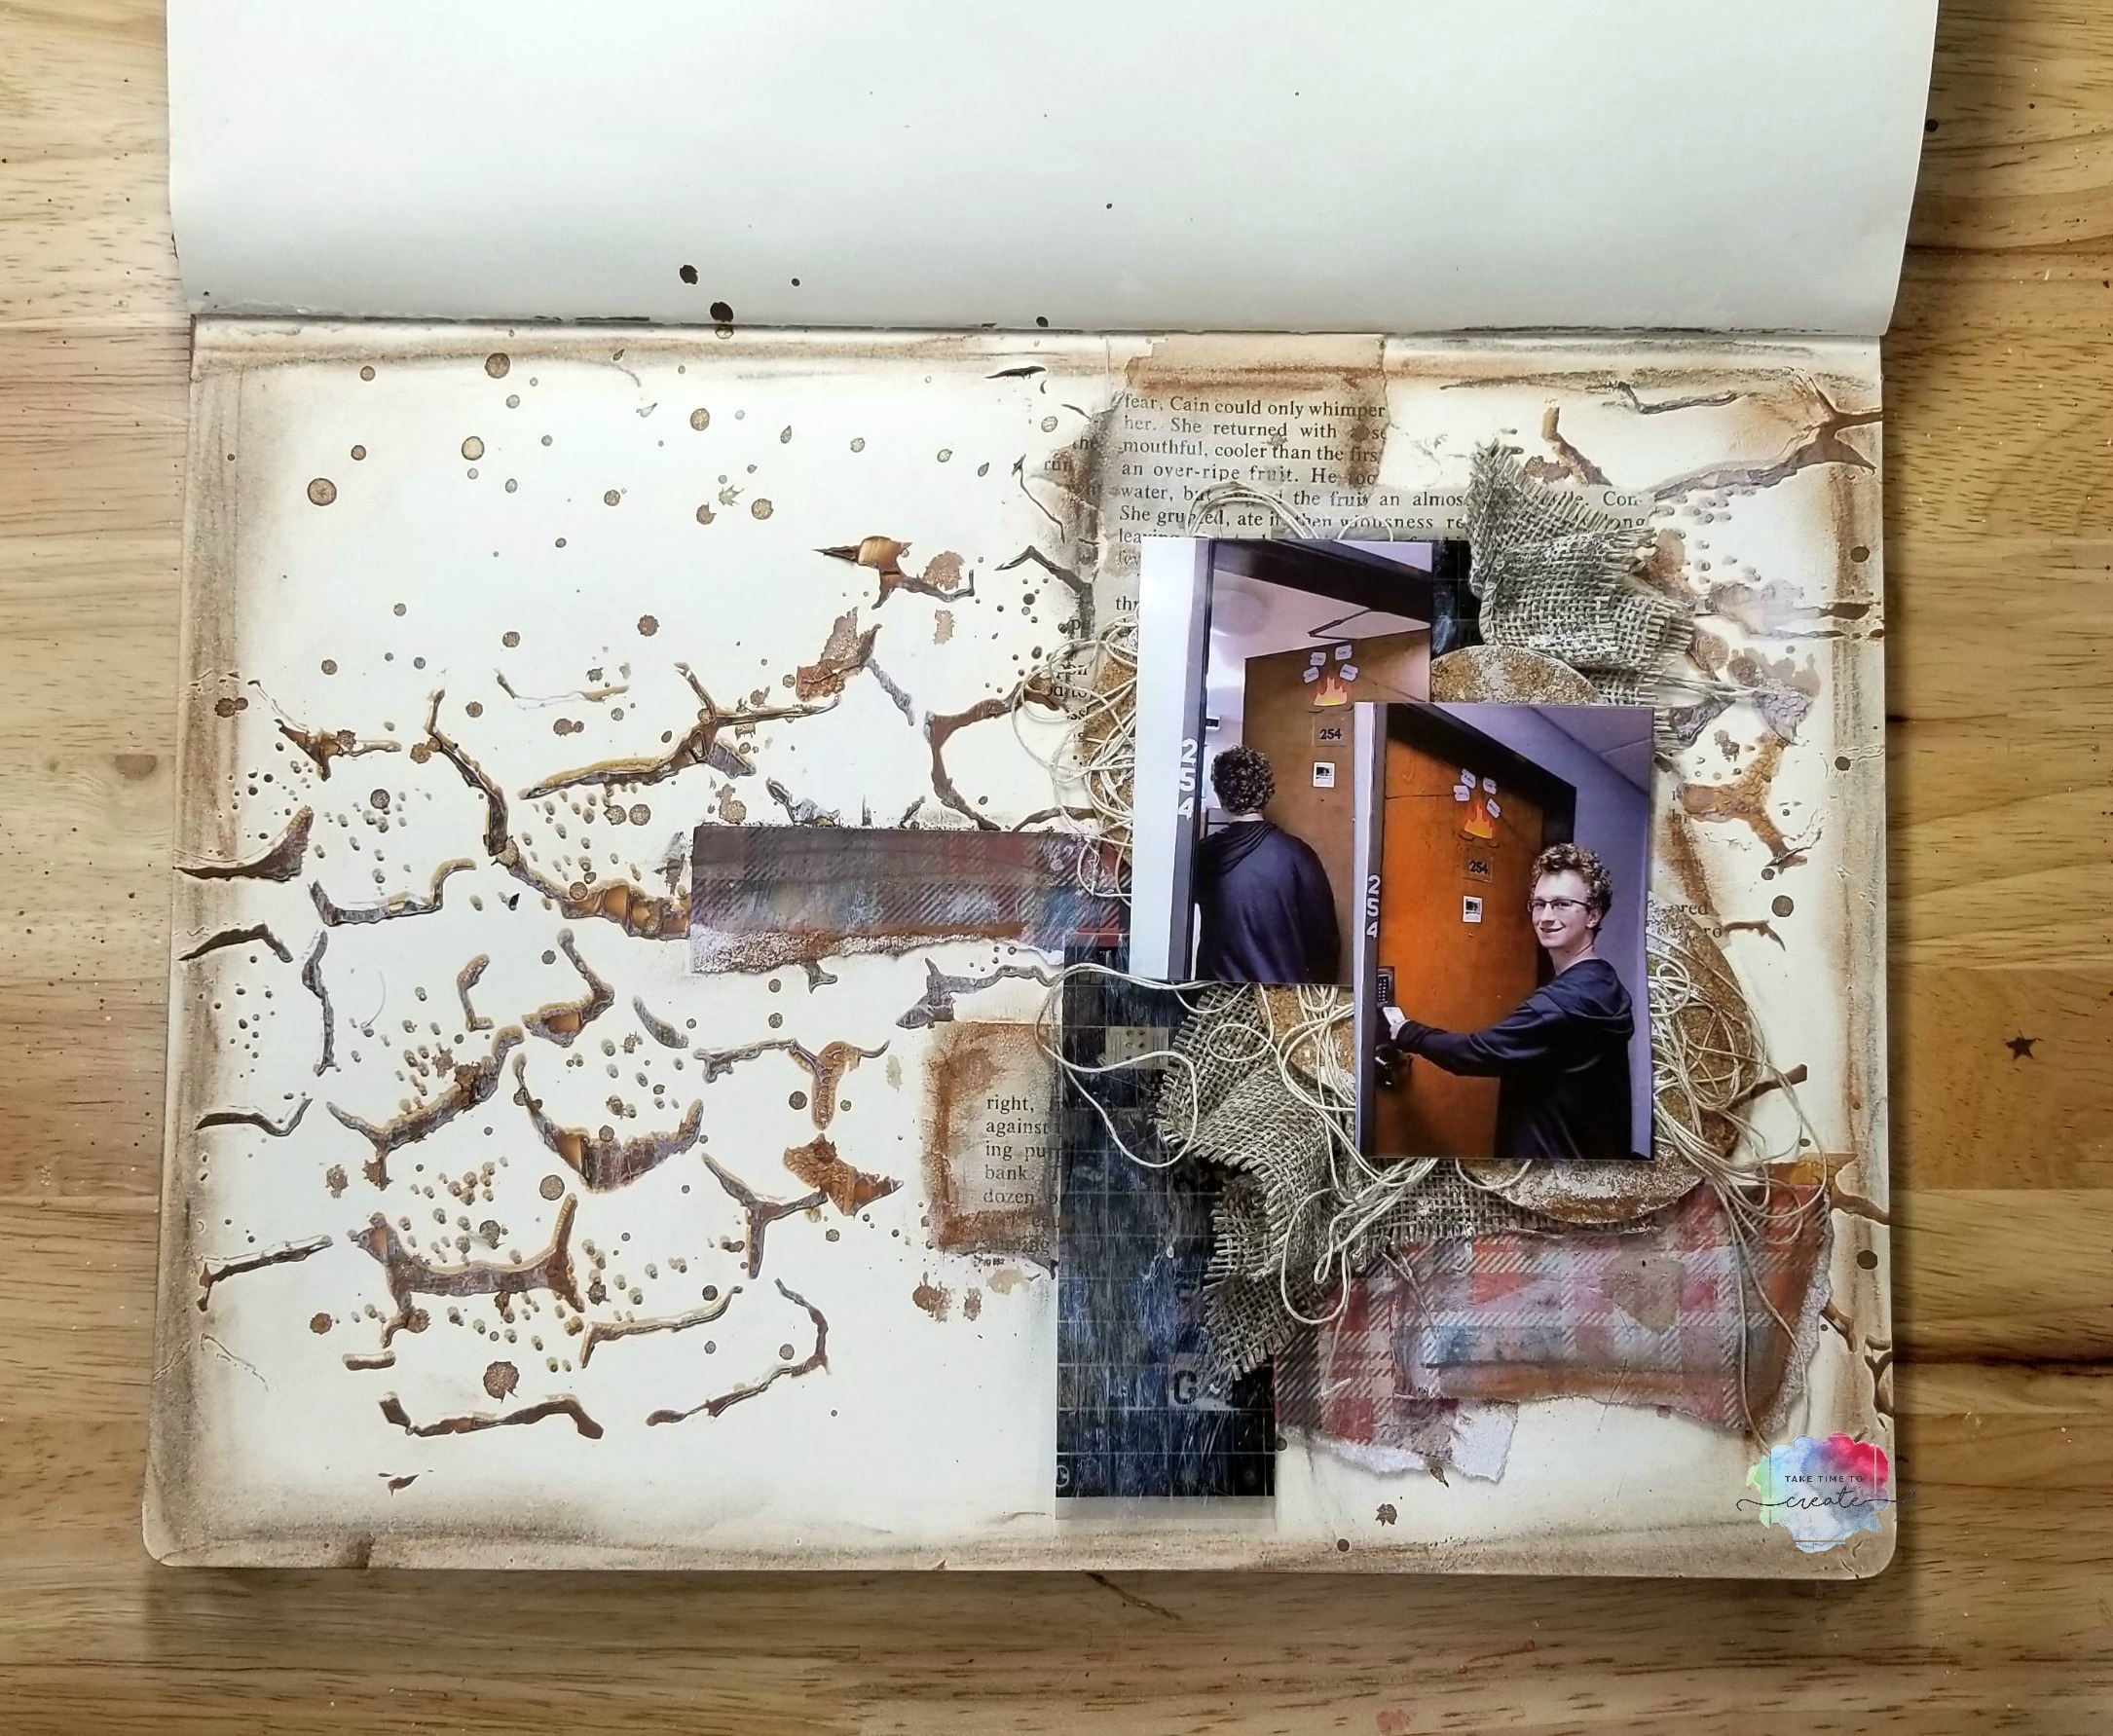
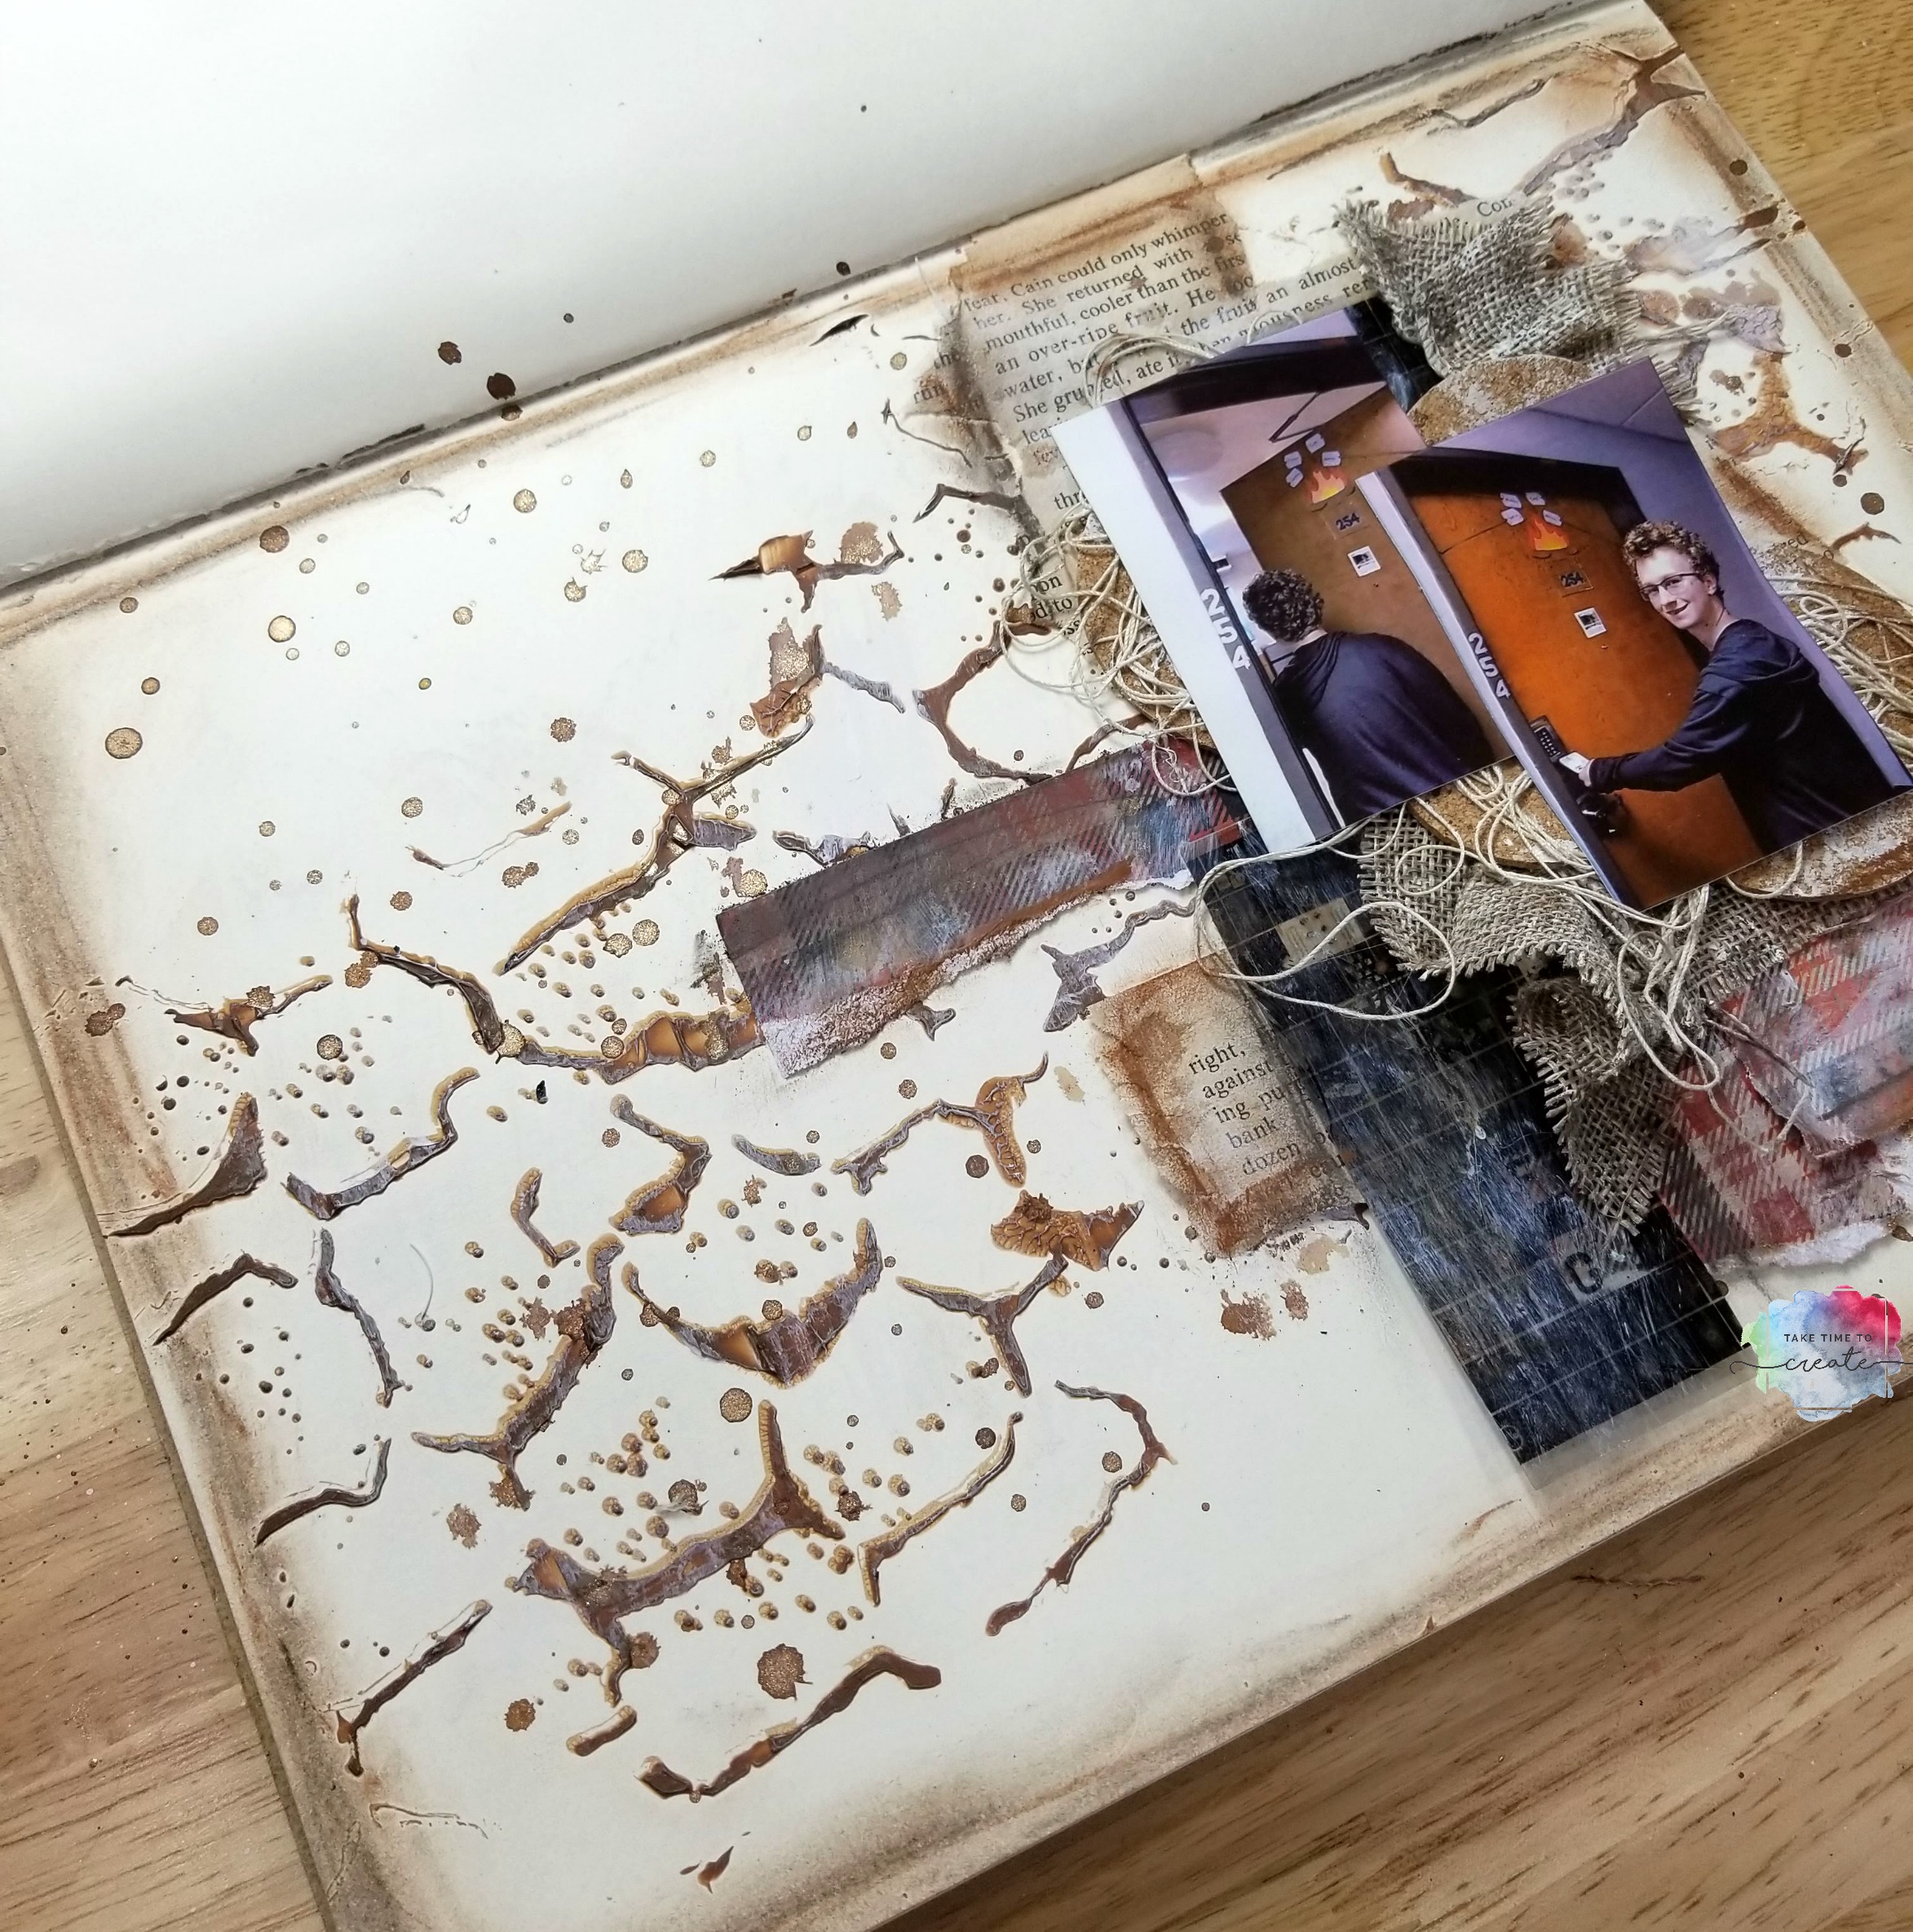
This fall we had a momentous occasion, our son started college! We miss a lot, but he loves it and is having the time of his life.
I wanted to create an art journal page of him entering his dorm room. Recently I purchased an HP Sprocket to print photos for my art journal pages.
I like the Sprocket, it is a handy little printer and is fun to use. The quality is not the best, but it is fun to use and perfect for art journal pages.
We captured this moment as he was going to his dorm room for the first time and the photos were just perfect for this page.
I used a lot of other elements like stencils, and papers and burlap to finish out the look of this page.
Overall I am happy with the Sprocket and I can’t wait to see what other pages I will create with the photos I print
It is no secret how much I love Disney and visiting Disney World is one of my favorite things to do! When I began my journey into fabric mixed media I just knew that I would need to create some canvases that paid homage to Disney World.
So I created these 4 canvases celebrating each of the 4 parks at WDW.
The first is a pretty pink castle, this is for the Magic Kingdom. It is hard to tell in the photo but there is a lot of glitter and shine on the canvas, especially on the white background.
Then there is EPCOT with an image of Spaceship Earth. This is one of my favorite rides, probably because it is slow and relaxing with lots of air conditioning, lol. Perfect break in the middle of a hot day in Florida, lol
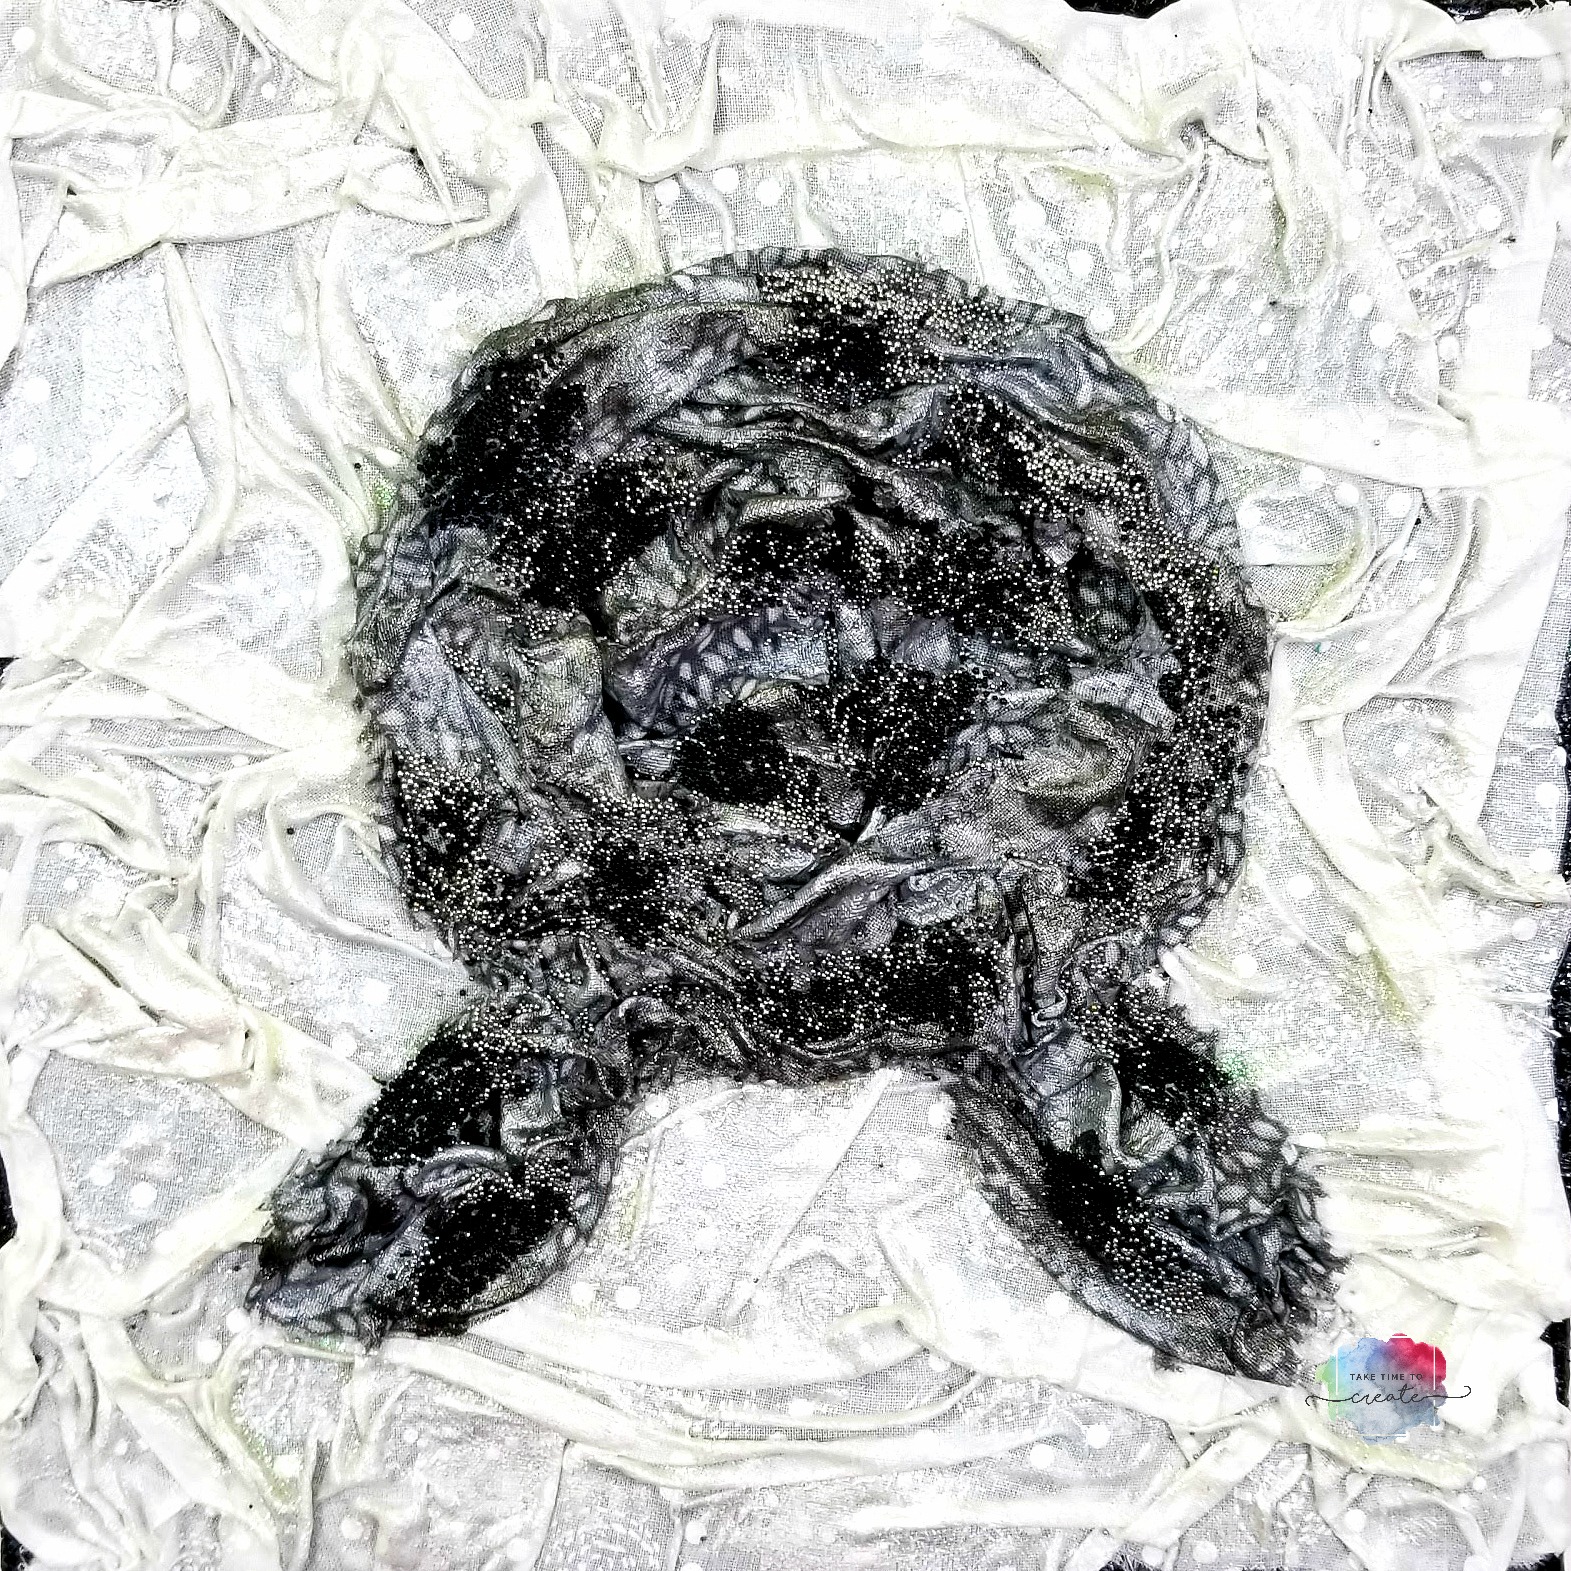
Then we have MGM, no I am sorry Hollywood Studios, lol. I think I will always call it MGM. And I loved the giant sorcerer’s hat that was in the middle of the park for the longest time. I know they removed the hat, but I loved it so much and that reminds me the most of the park, so I thought I would use the hat to depict MGM.
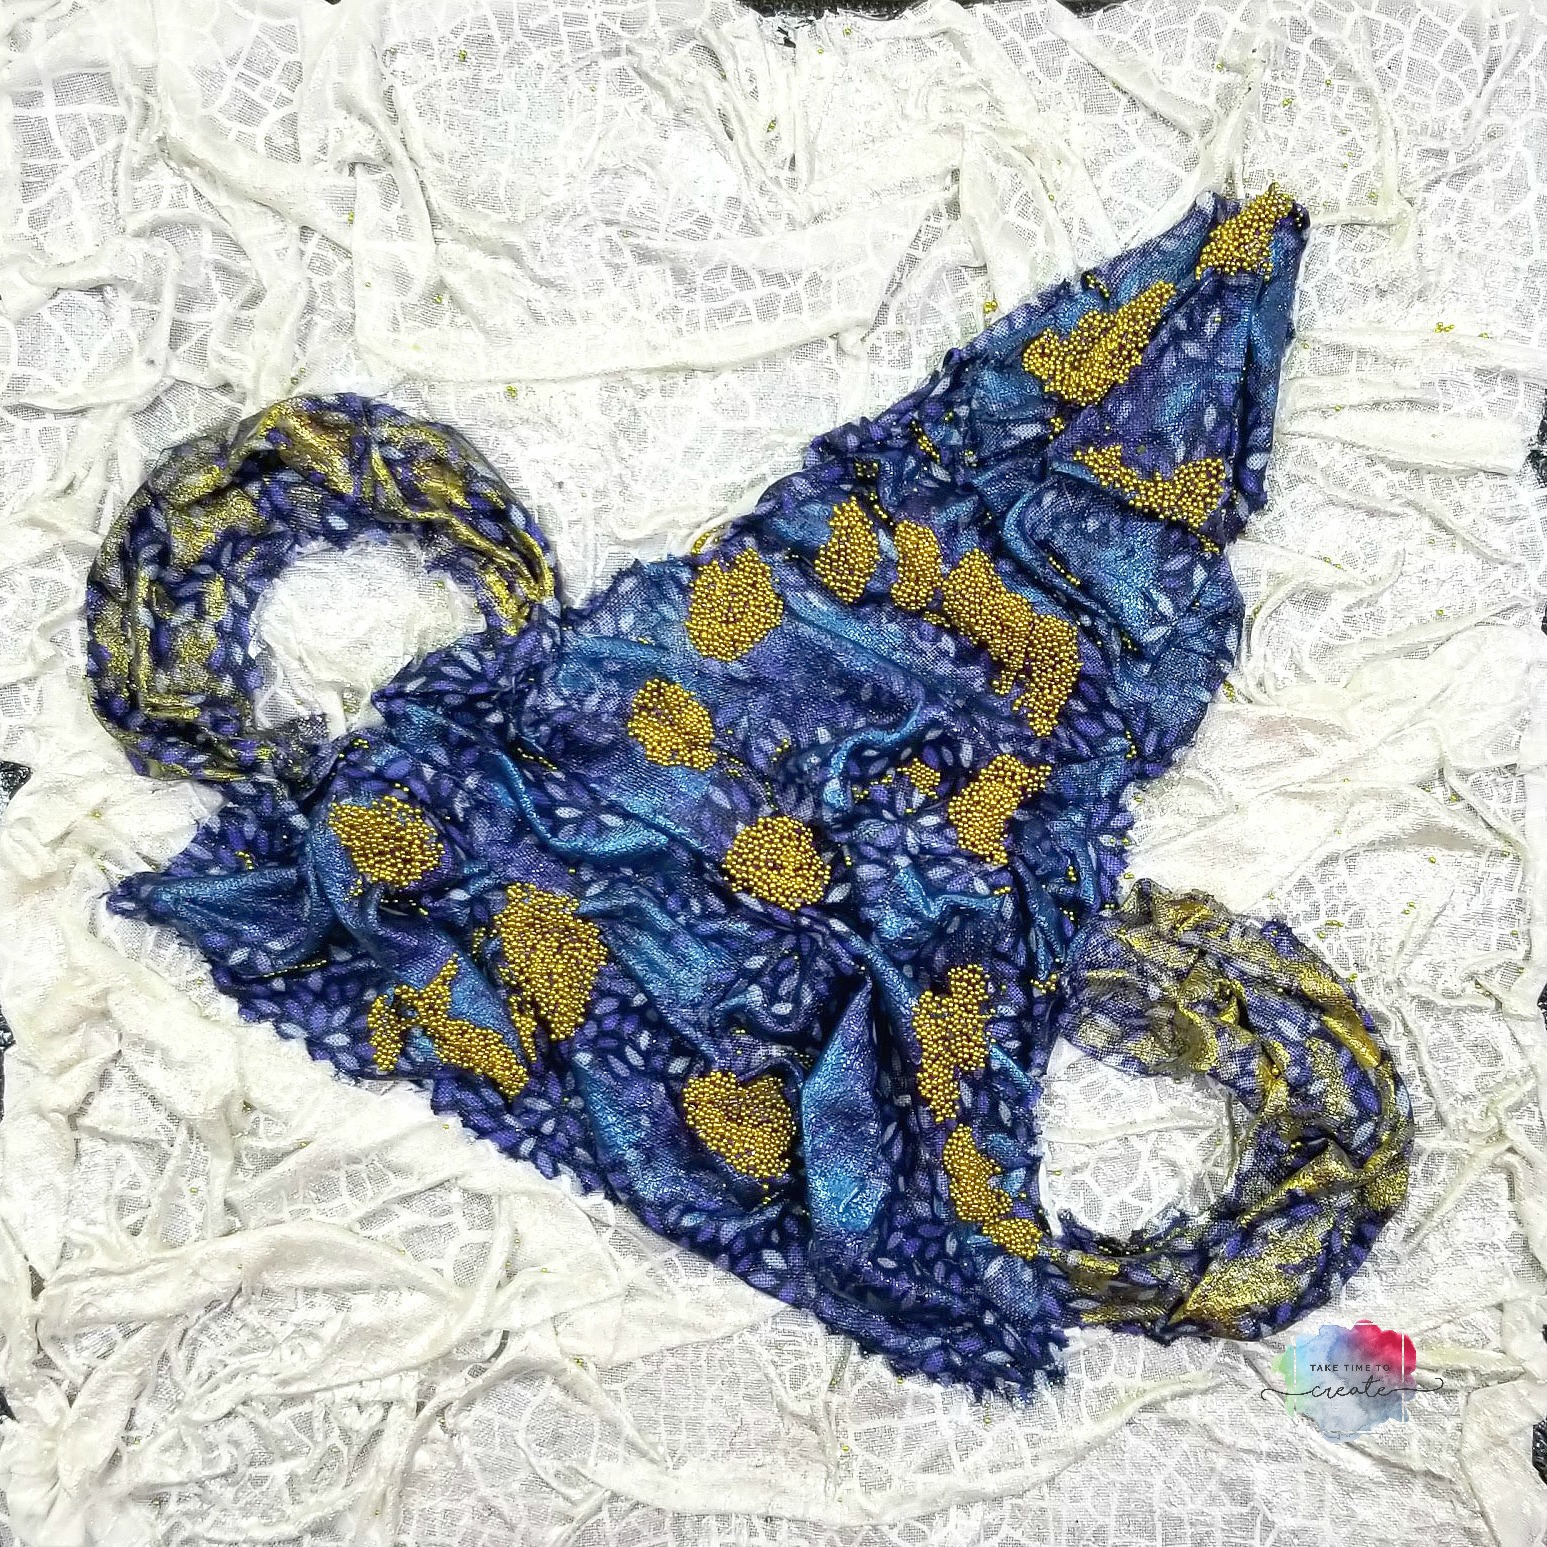
Last but not least is the Animal Kingdom. I love going to this newer park and I have to say the new Avatar section is amazing!
Overall these were so much fun to create and reminisce about going to Disney and I am eager to start my next canvas!
Affiliate Links
Liquitex heavy Gel- https://amzn.to/2DDcWbp
Liquitex gloss gel- https://amzn.to/2JZRSfq
Finnabair Sparks https://amzn.to/2DDkJG2
Finnabair Metallique https://amzn.to/2qJbRGn
Micro beads-https://amzn.to/2DD9opK and https://amzn.to/2B3KjSj
8×8 canvas https://amzn.to/2B3KmgX
Fabric roll (similar) https://amzn.to/2DCF1zF
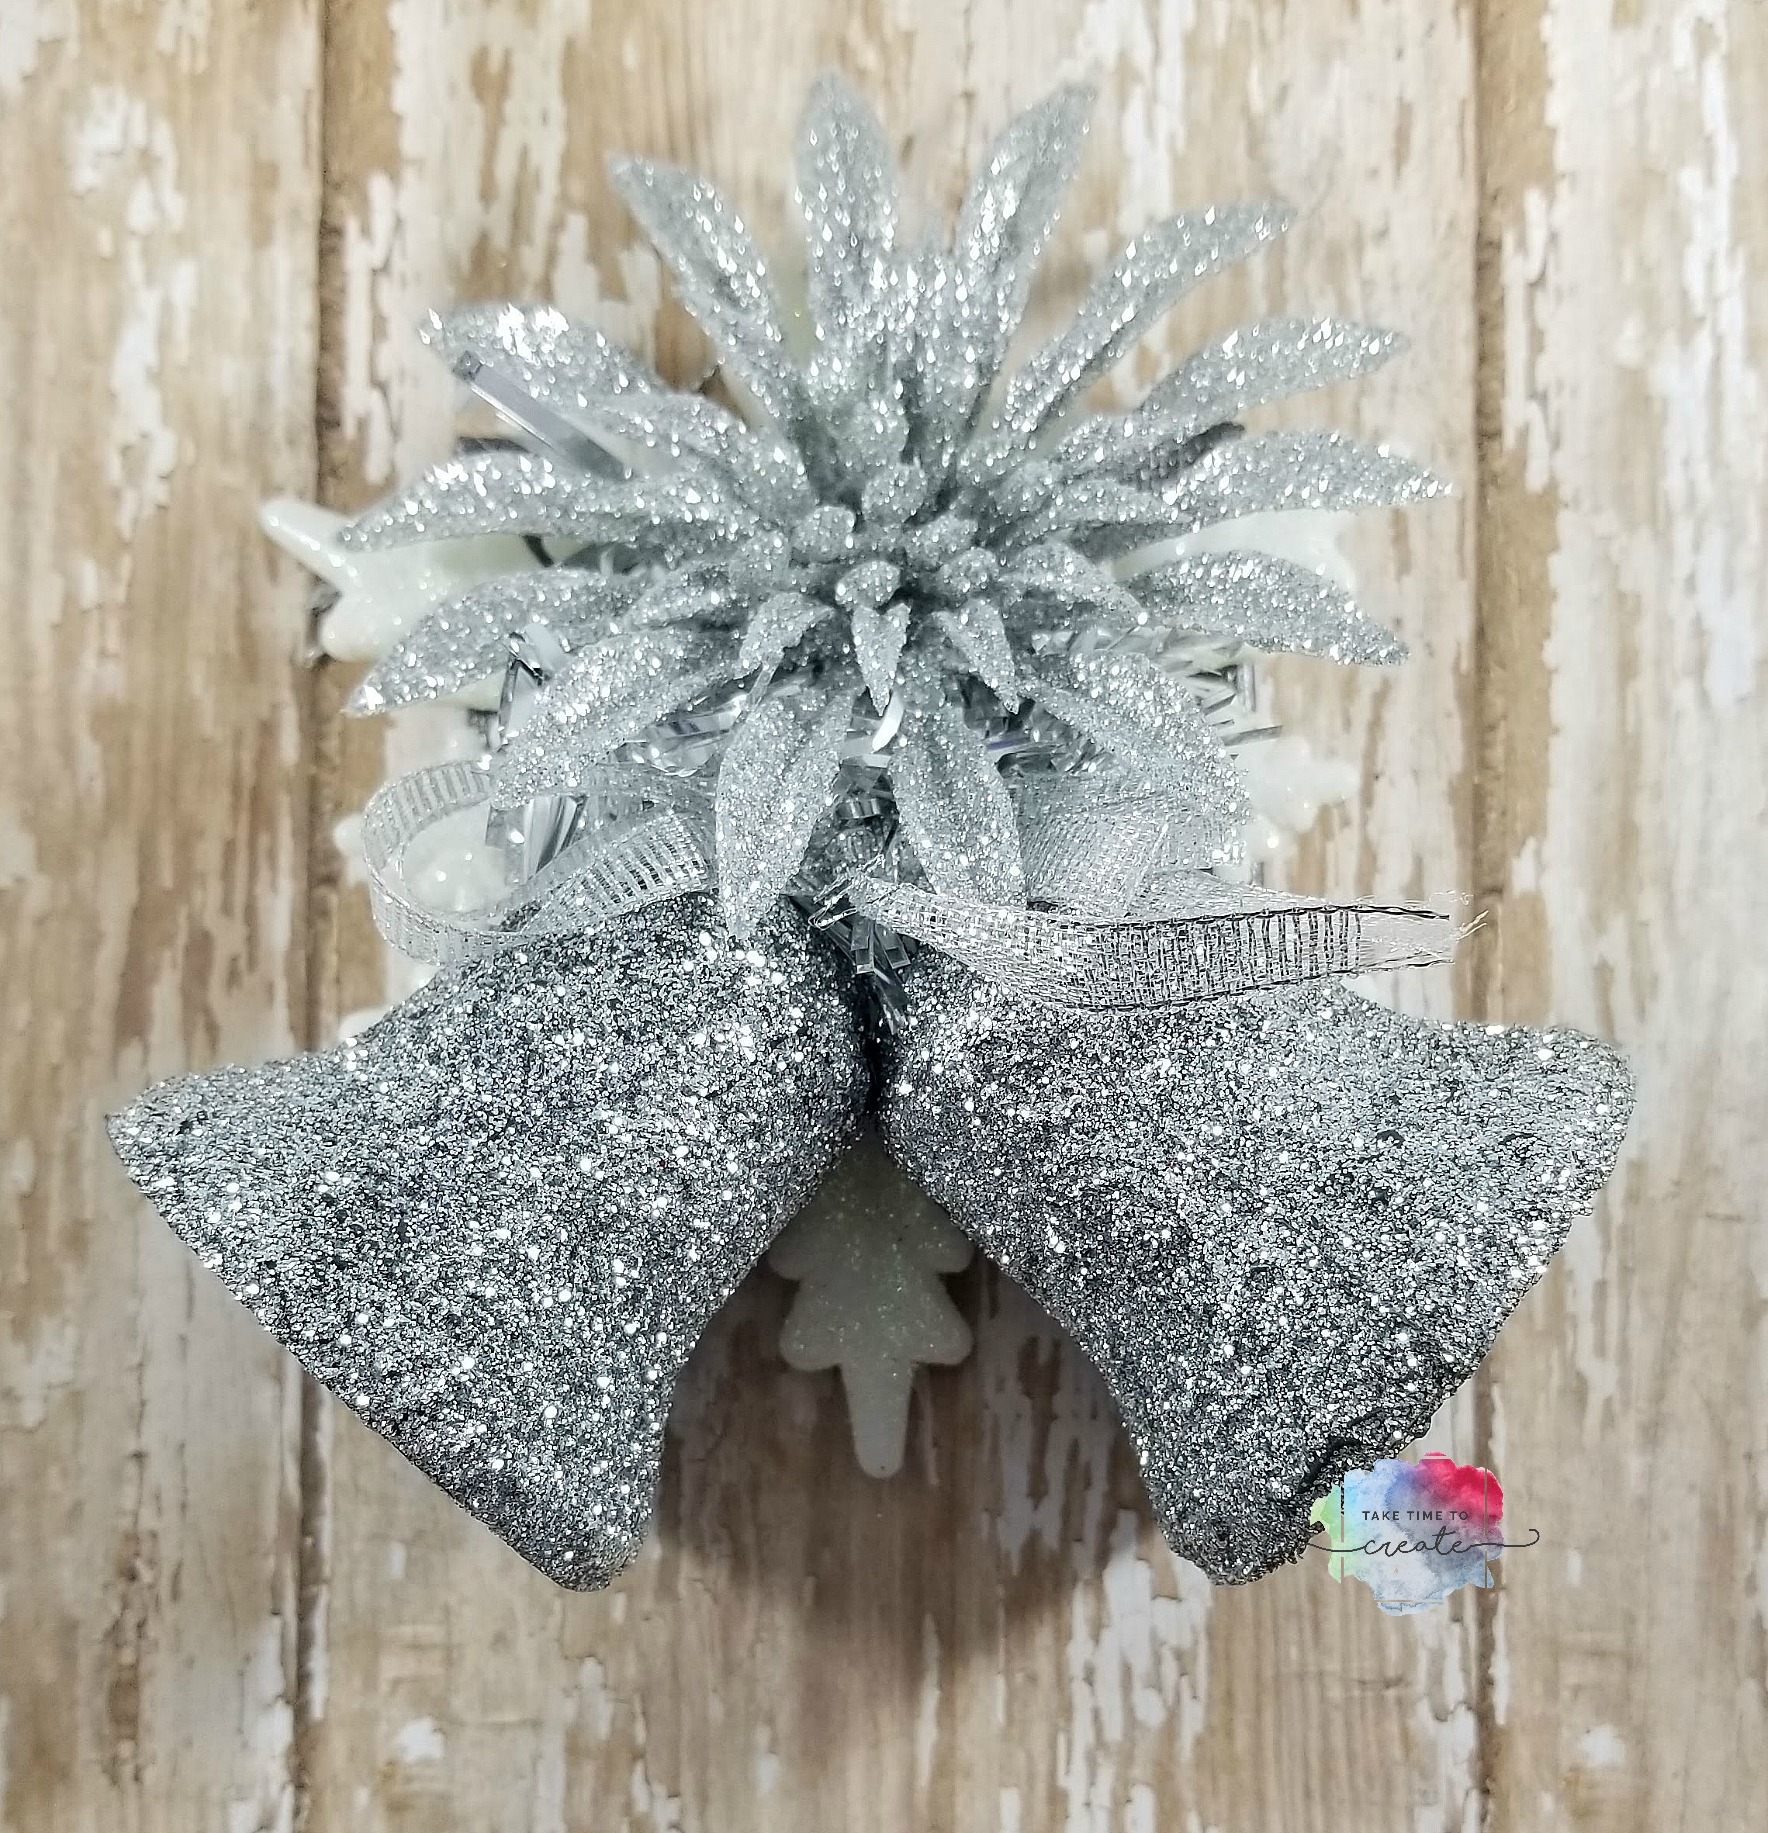
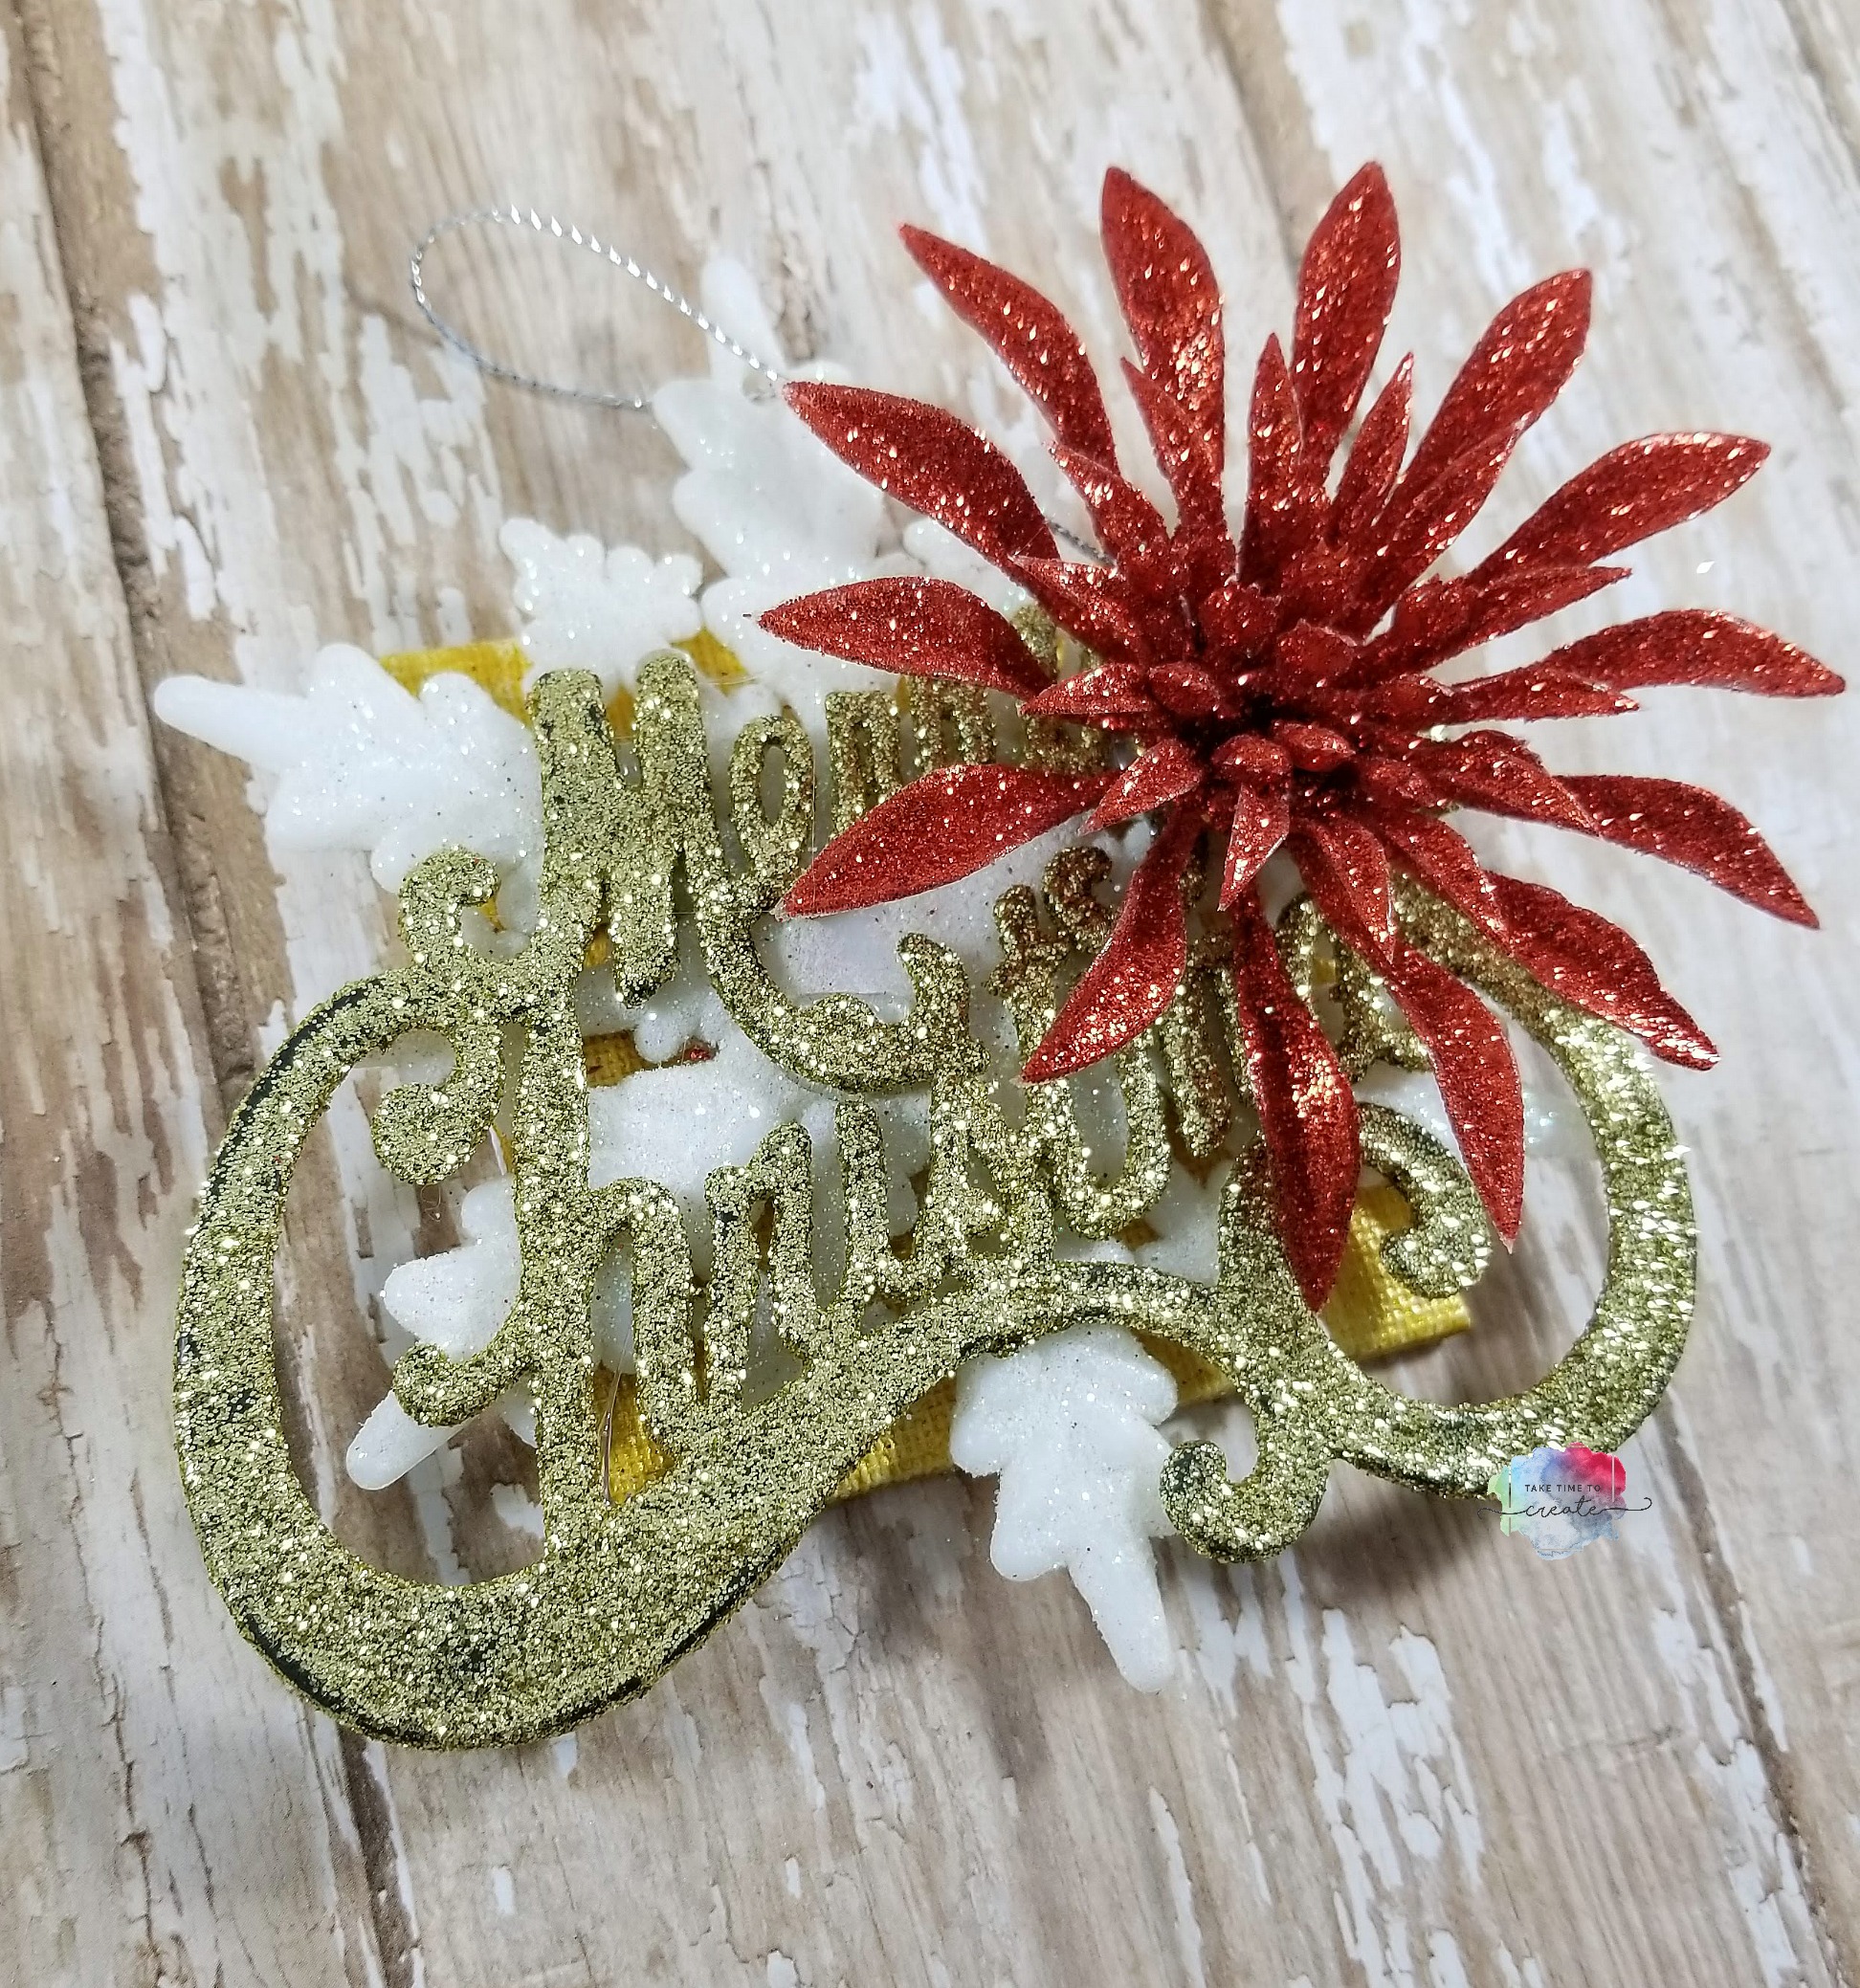
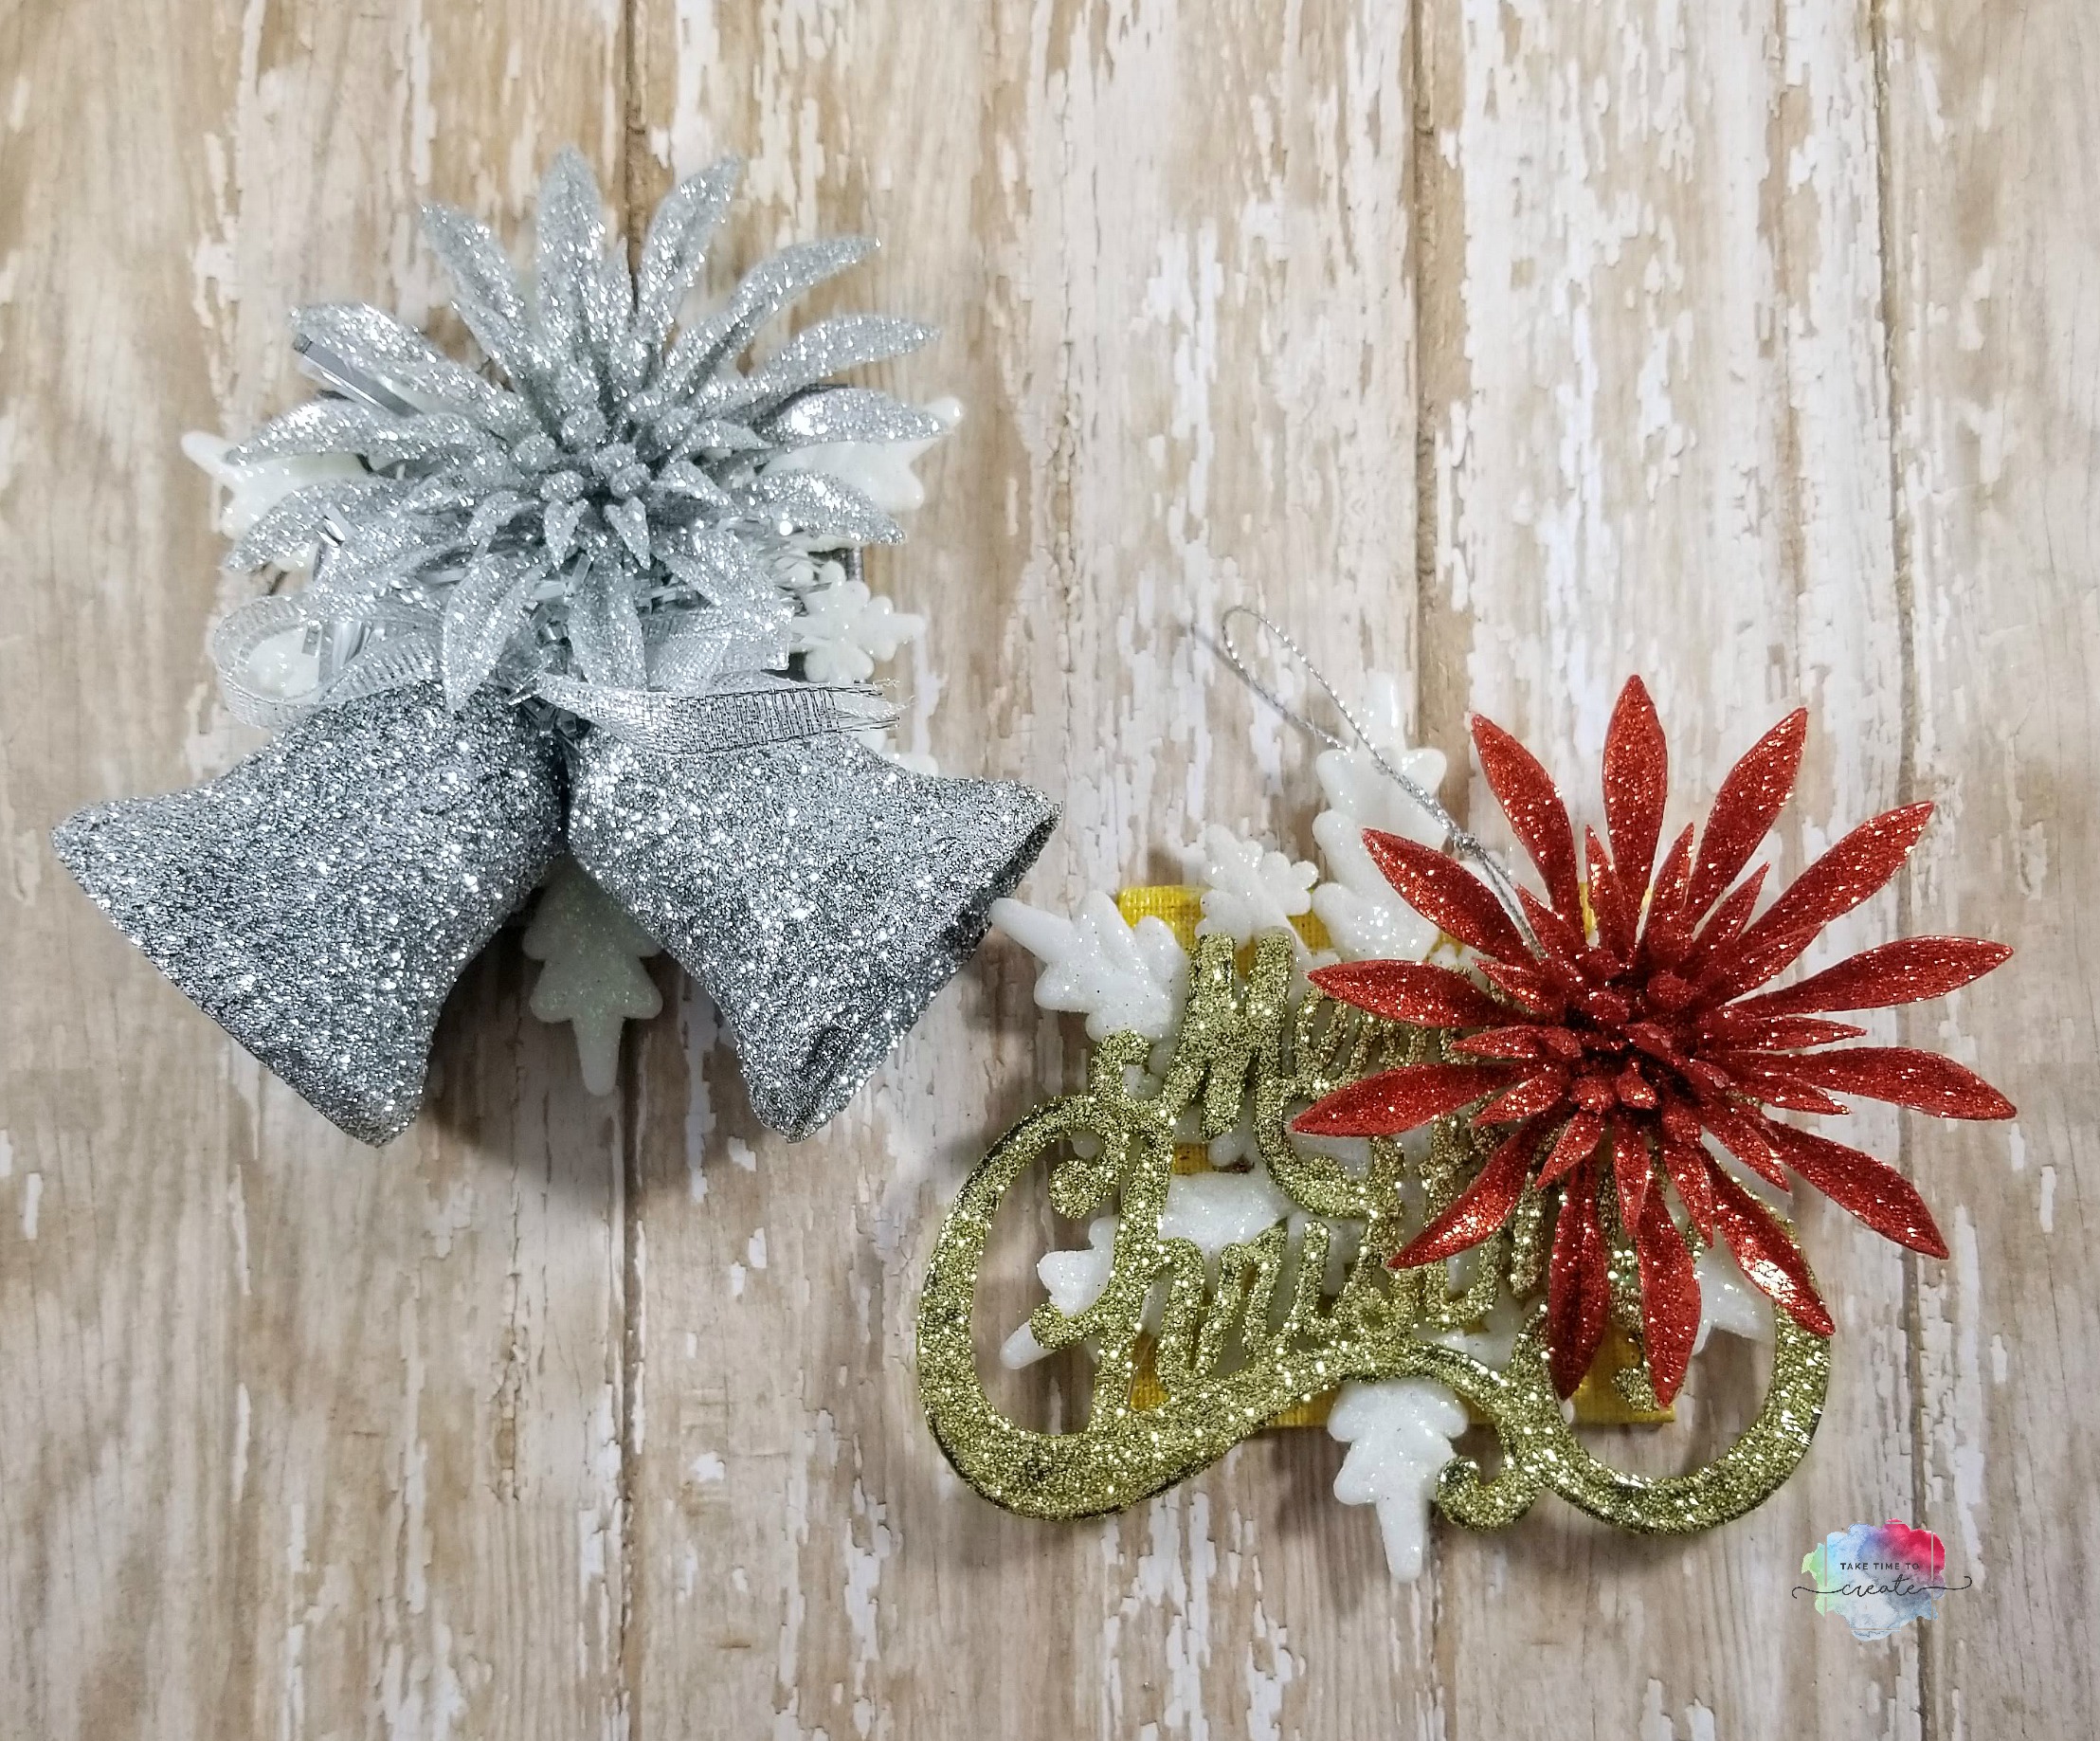
I know it seems early, but Christmas is right around the corner. I created these ornaments using goodies from the Dollar Tree.
FYI: I was compensated for this post. This post also contains affiliate links and I will be compensated if you make a purchase after clicking on my links.
This was such a fun project to complete. I had a lot of ornaments and Dollar Tree goodies in my stash for this project, but they have a lot of the same ornaments year after year, along with some new ones.
I love how glittery the Dollar Tree Christmas items are, they make the perfect decorations.
For this project grab a tiny canvas and paint it in any color you want, I used a silver and a gold. (if you don’t have a canvas a piece of study cardboard or foam board will work)
Once the paint is dry you can start layering your ornaments. I used hot glue to attach it. I used 3 ornaments on each canvas to create an interesting look.
Just build your layers until you get what you are looking for and you are done! Add a string or ribbon to the back if needed.
This project is great to make unique ornaments for your tree, or you can use them as gift tags or gifts to just about anyone on your list.
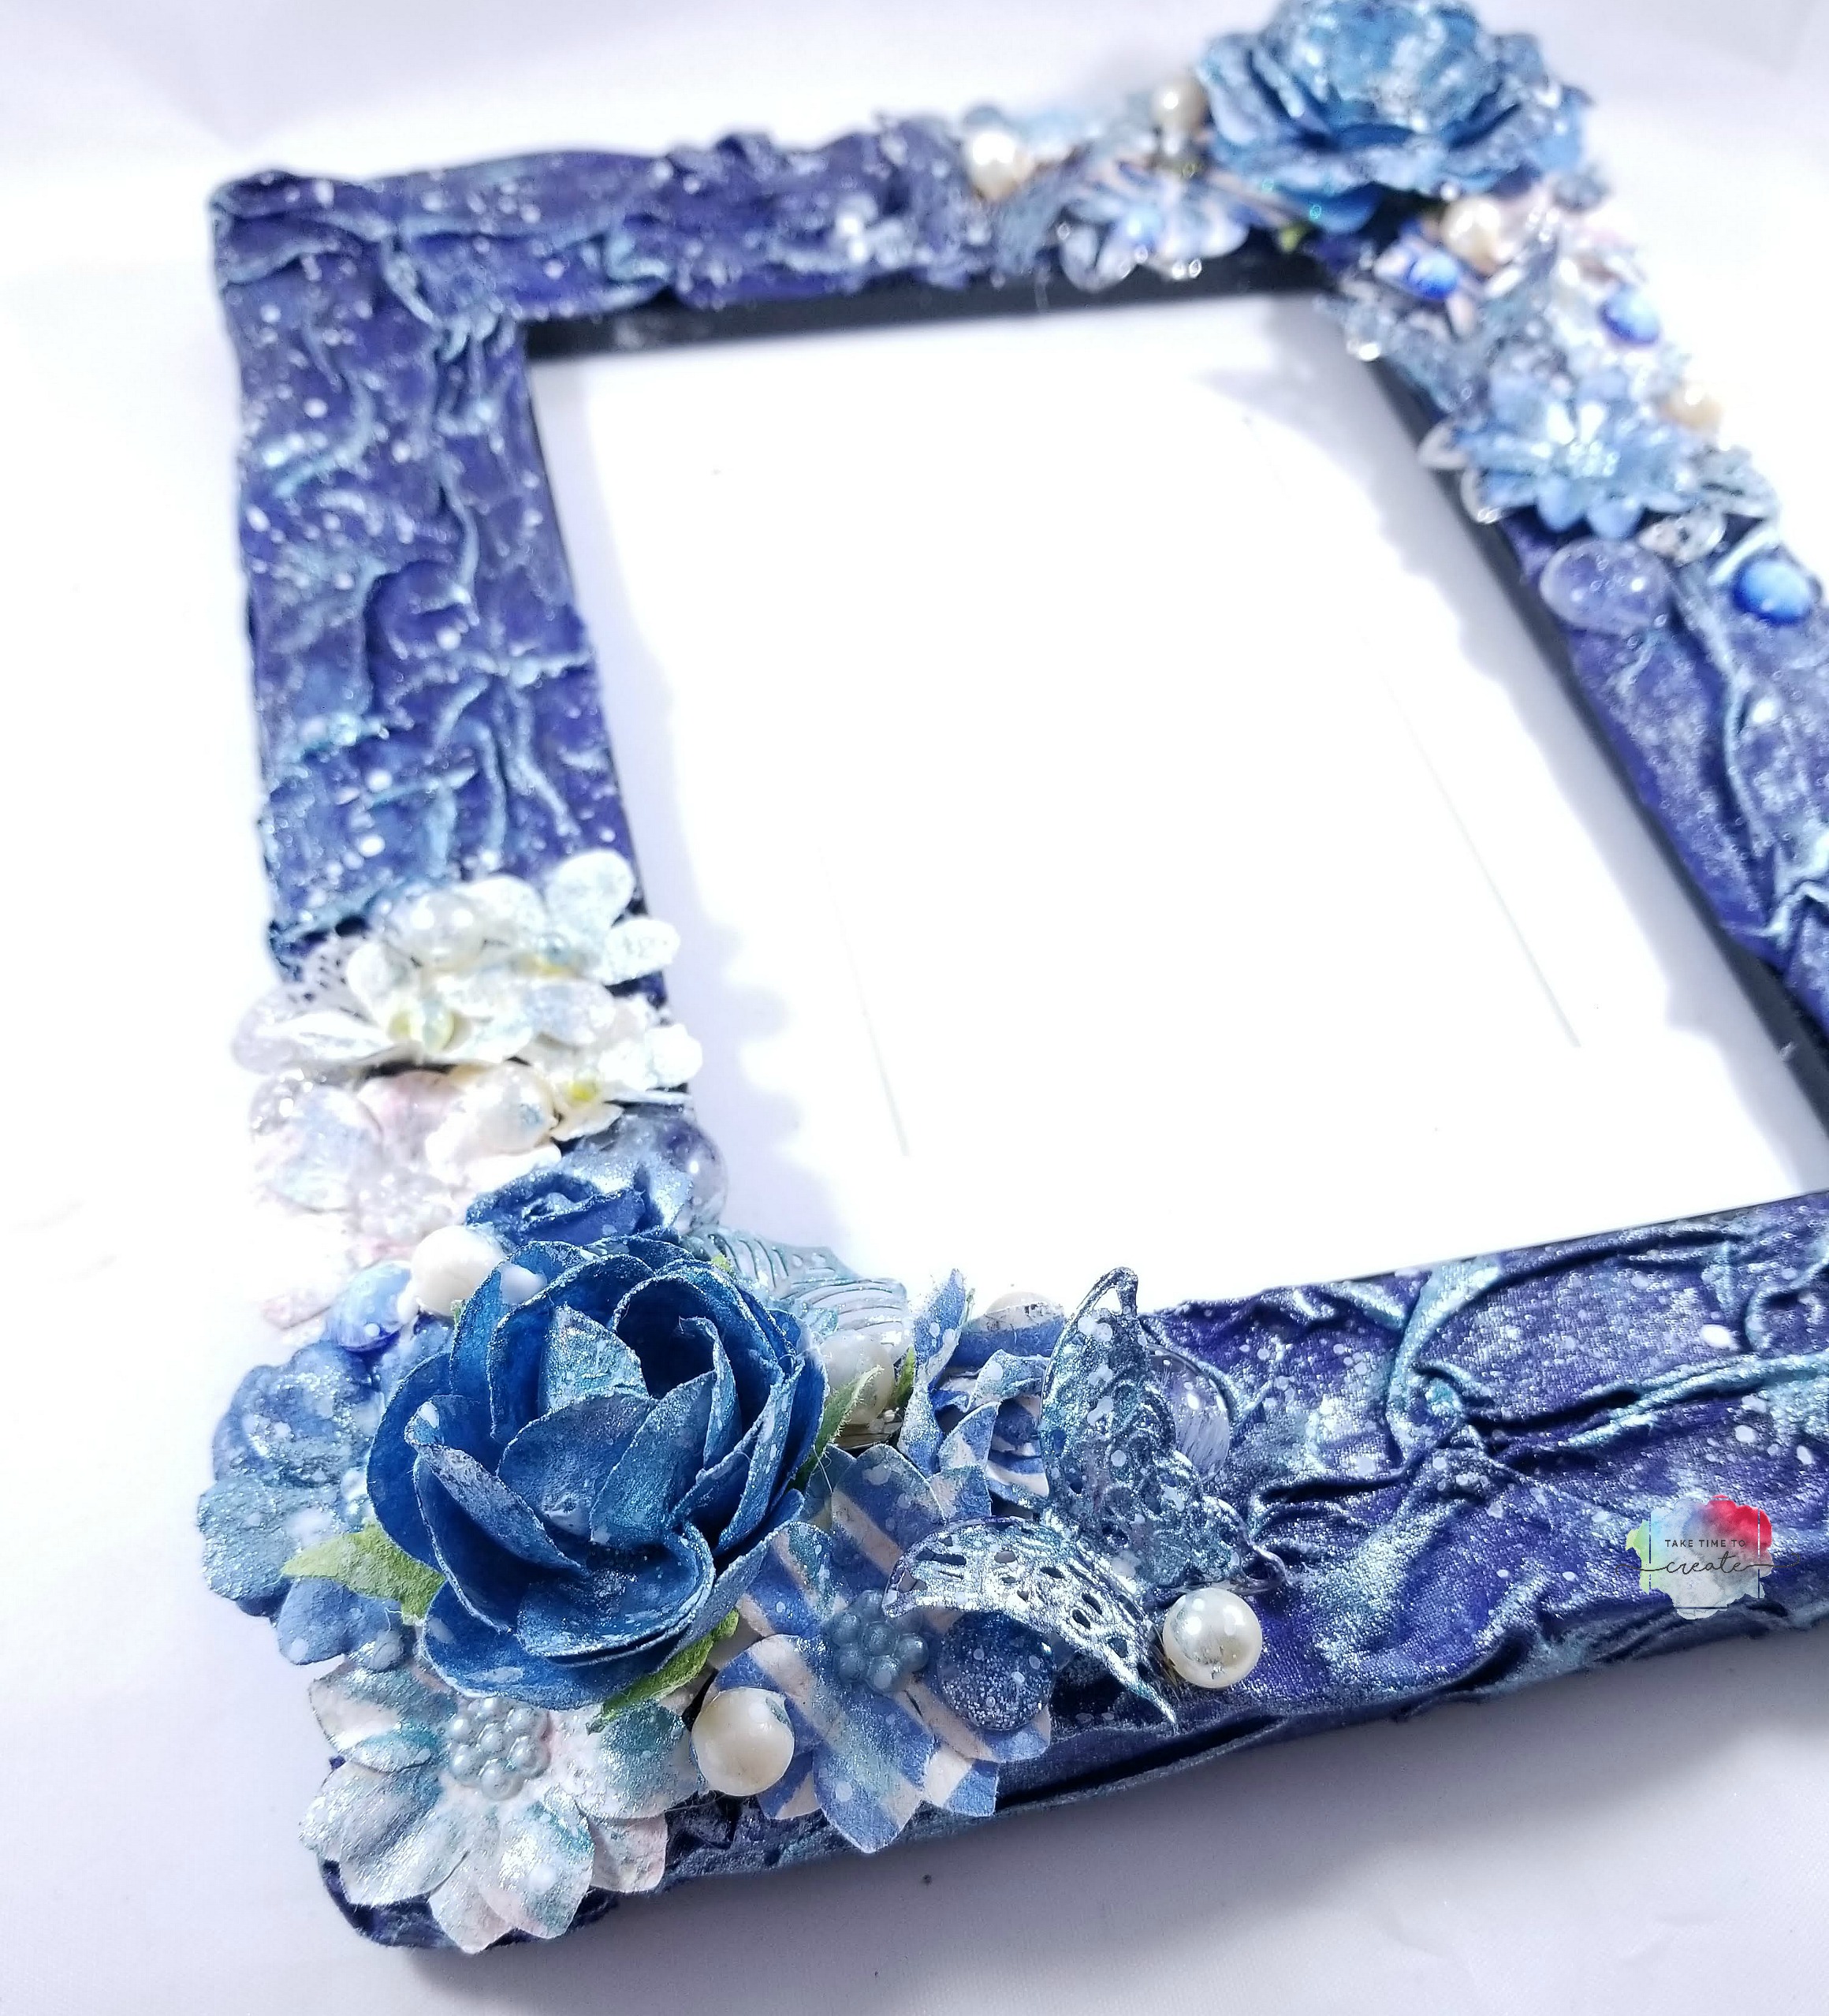
Have you ever finished a project and thought you were done only to realize that you weren’t? Well that is exactly what happened to me with this Blue Mixed Media Fabric Frame.
A little while ago I created the fabric frame and I thought it was pretty cute as is. If you missed that blog post you can catch it here: Fabric Frame
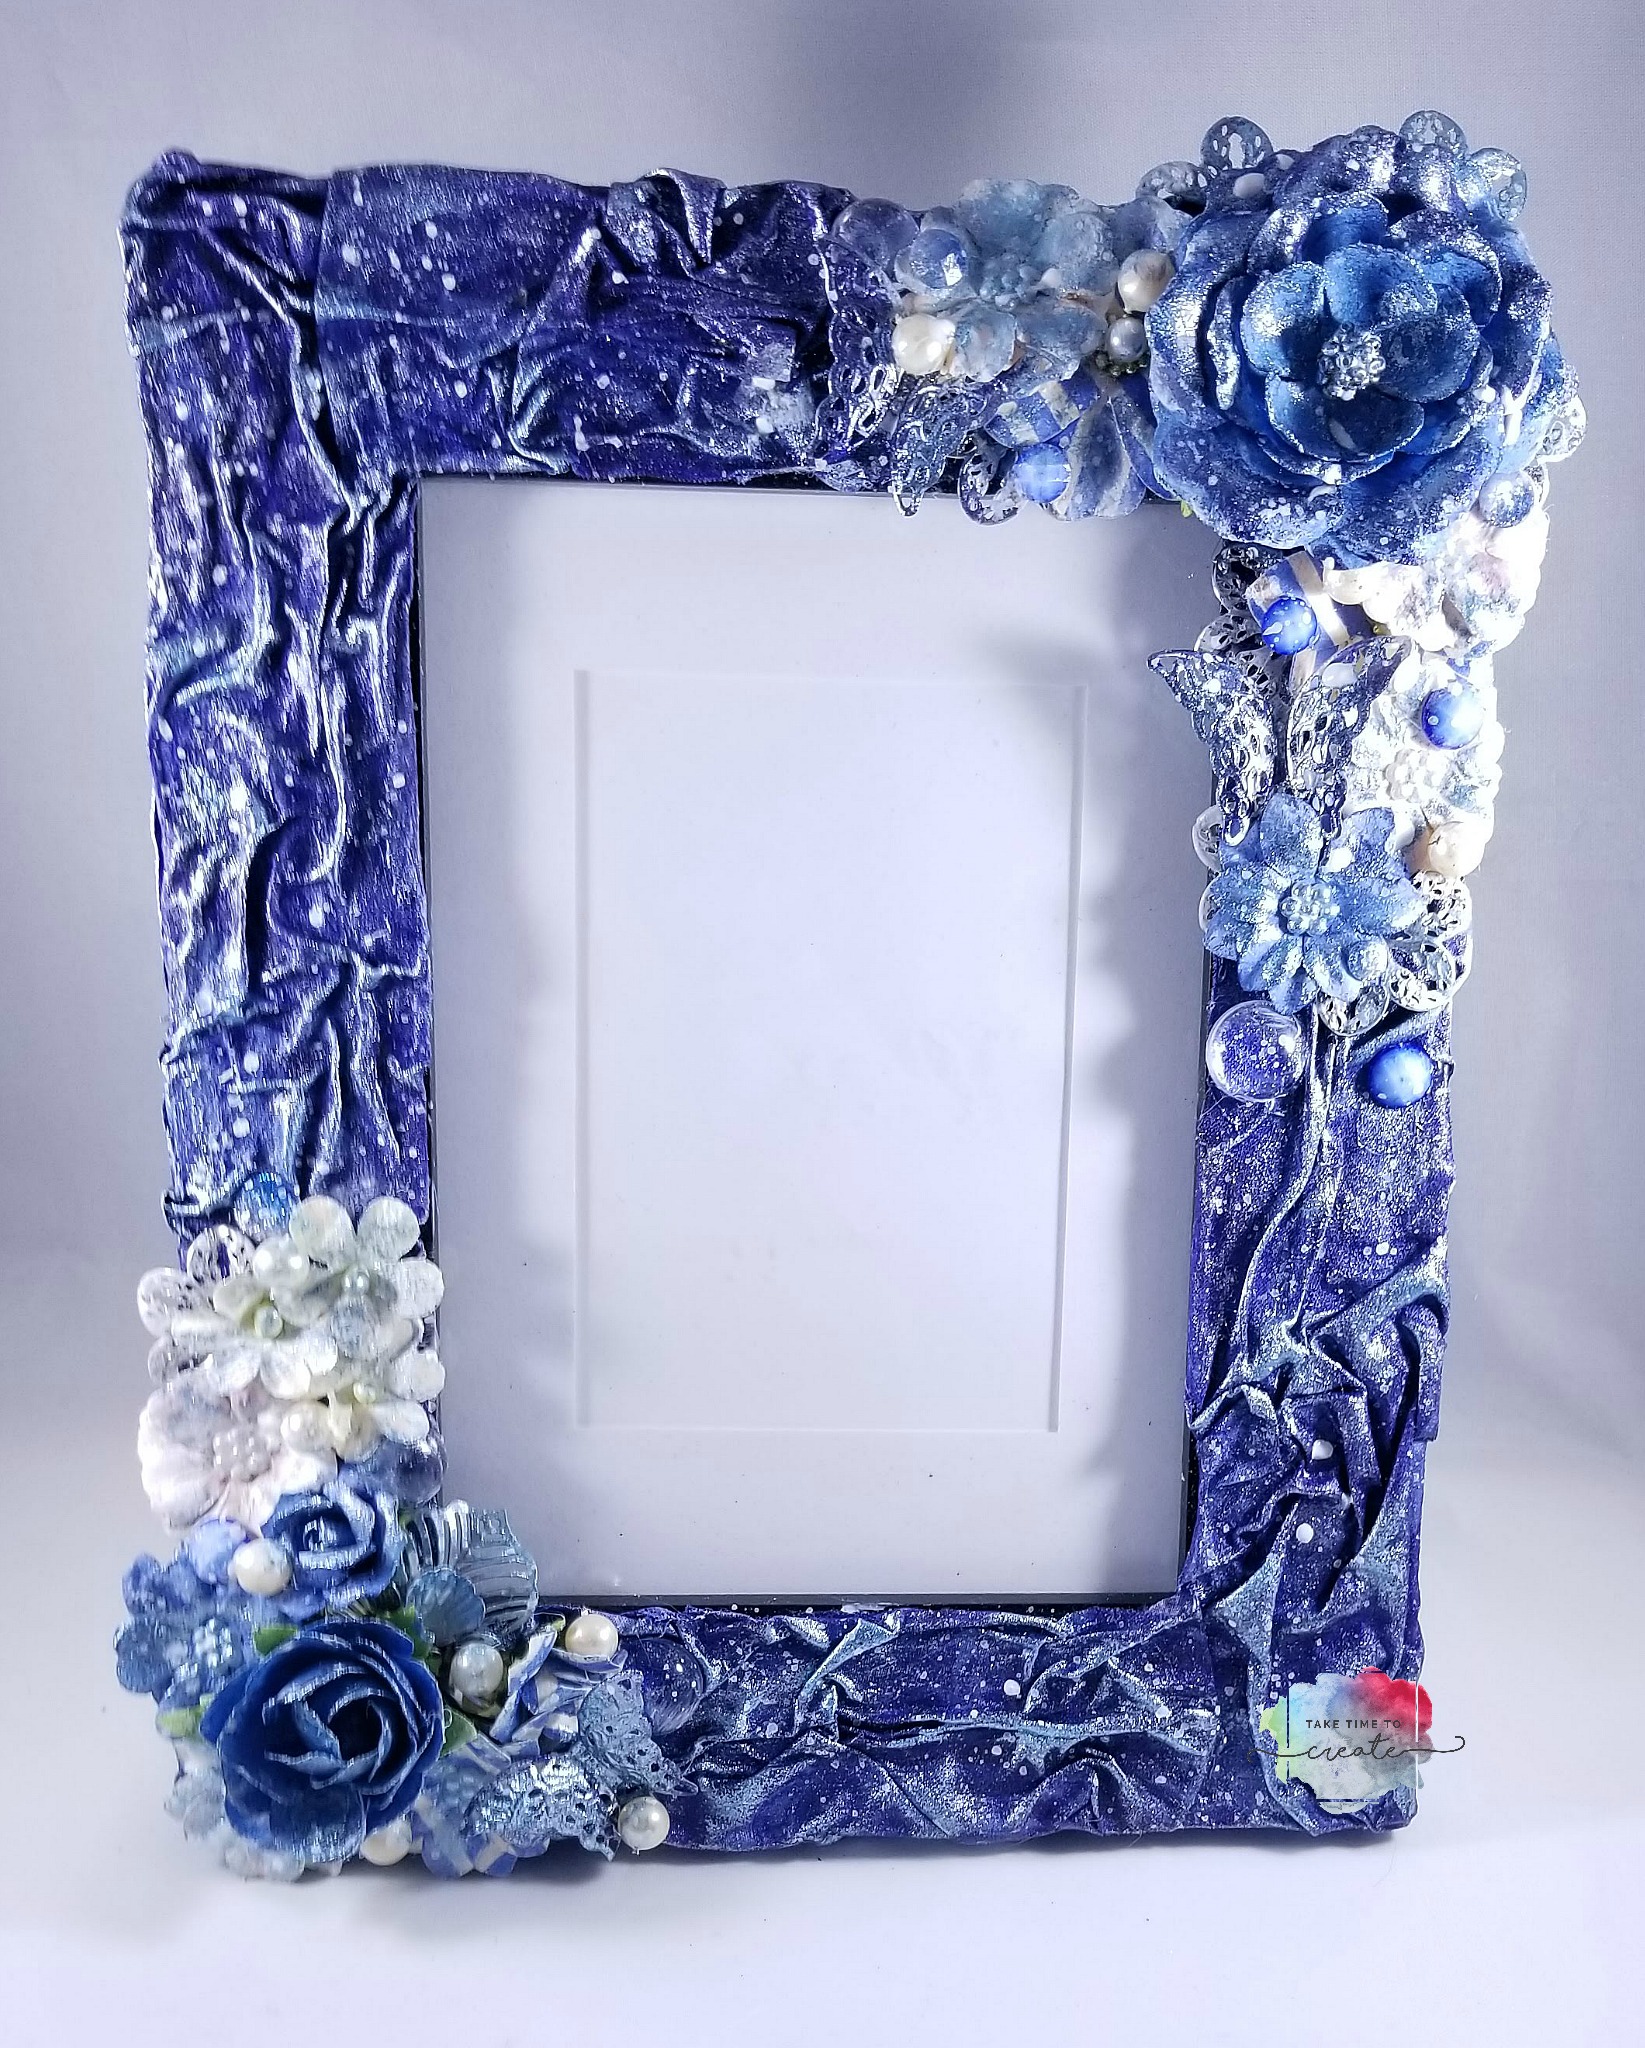
And the original frame was really cute and I did love it, but as I thought about it I thought it needed more. And by more, I mean a lot, lol. So I embellished it, and painted it some more. I love how it turned out and it is a personal choice how much or how little you add to your frame.
As you can see the original just has fabric and paint, but the embellished one has flowers, pearls, metal elements, and more added to the frame.
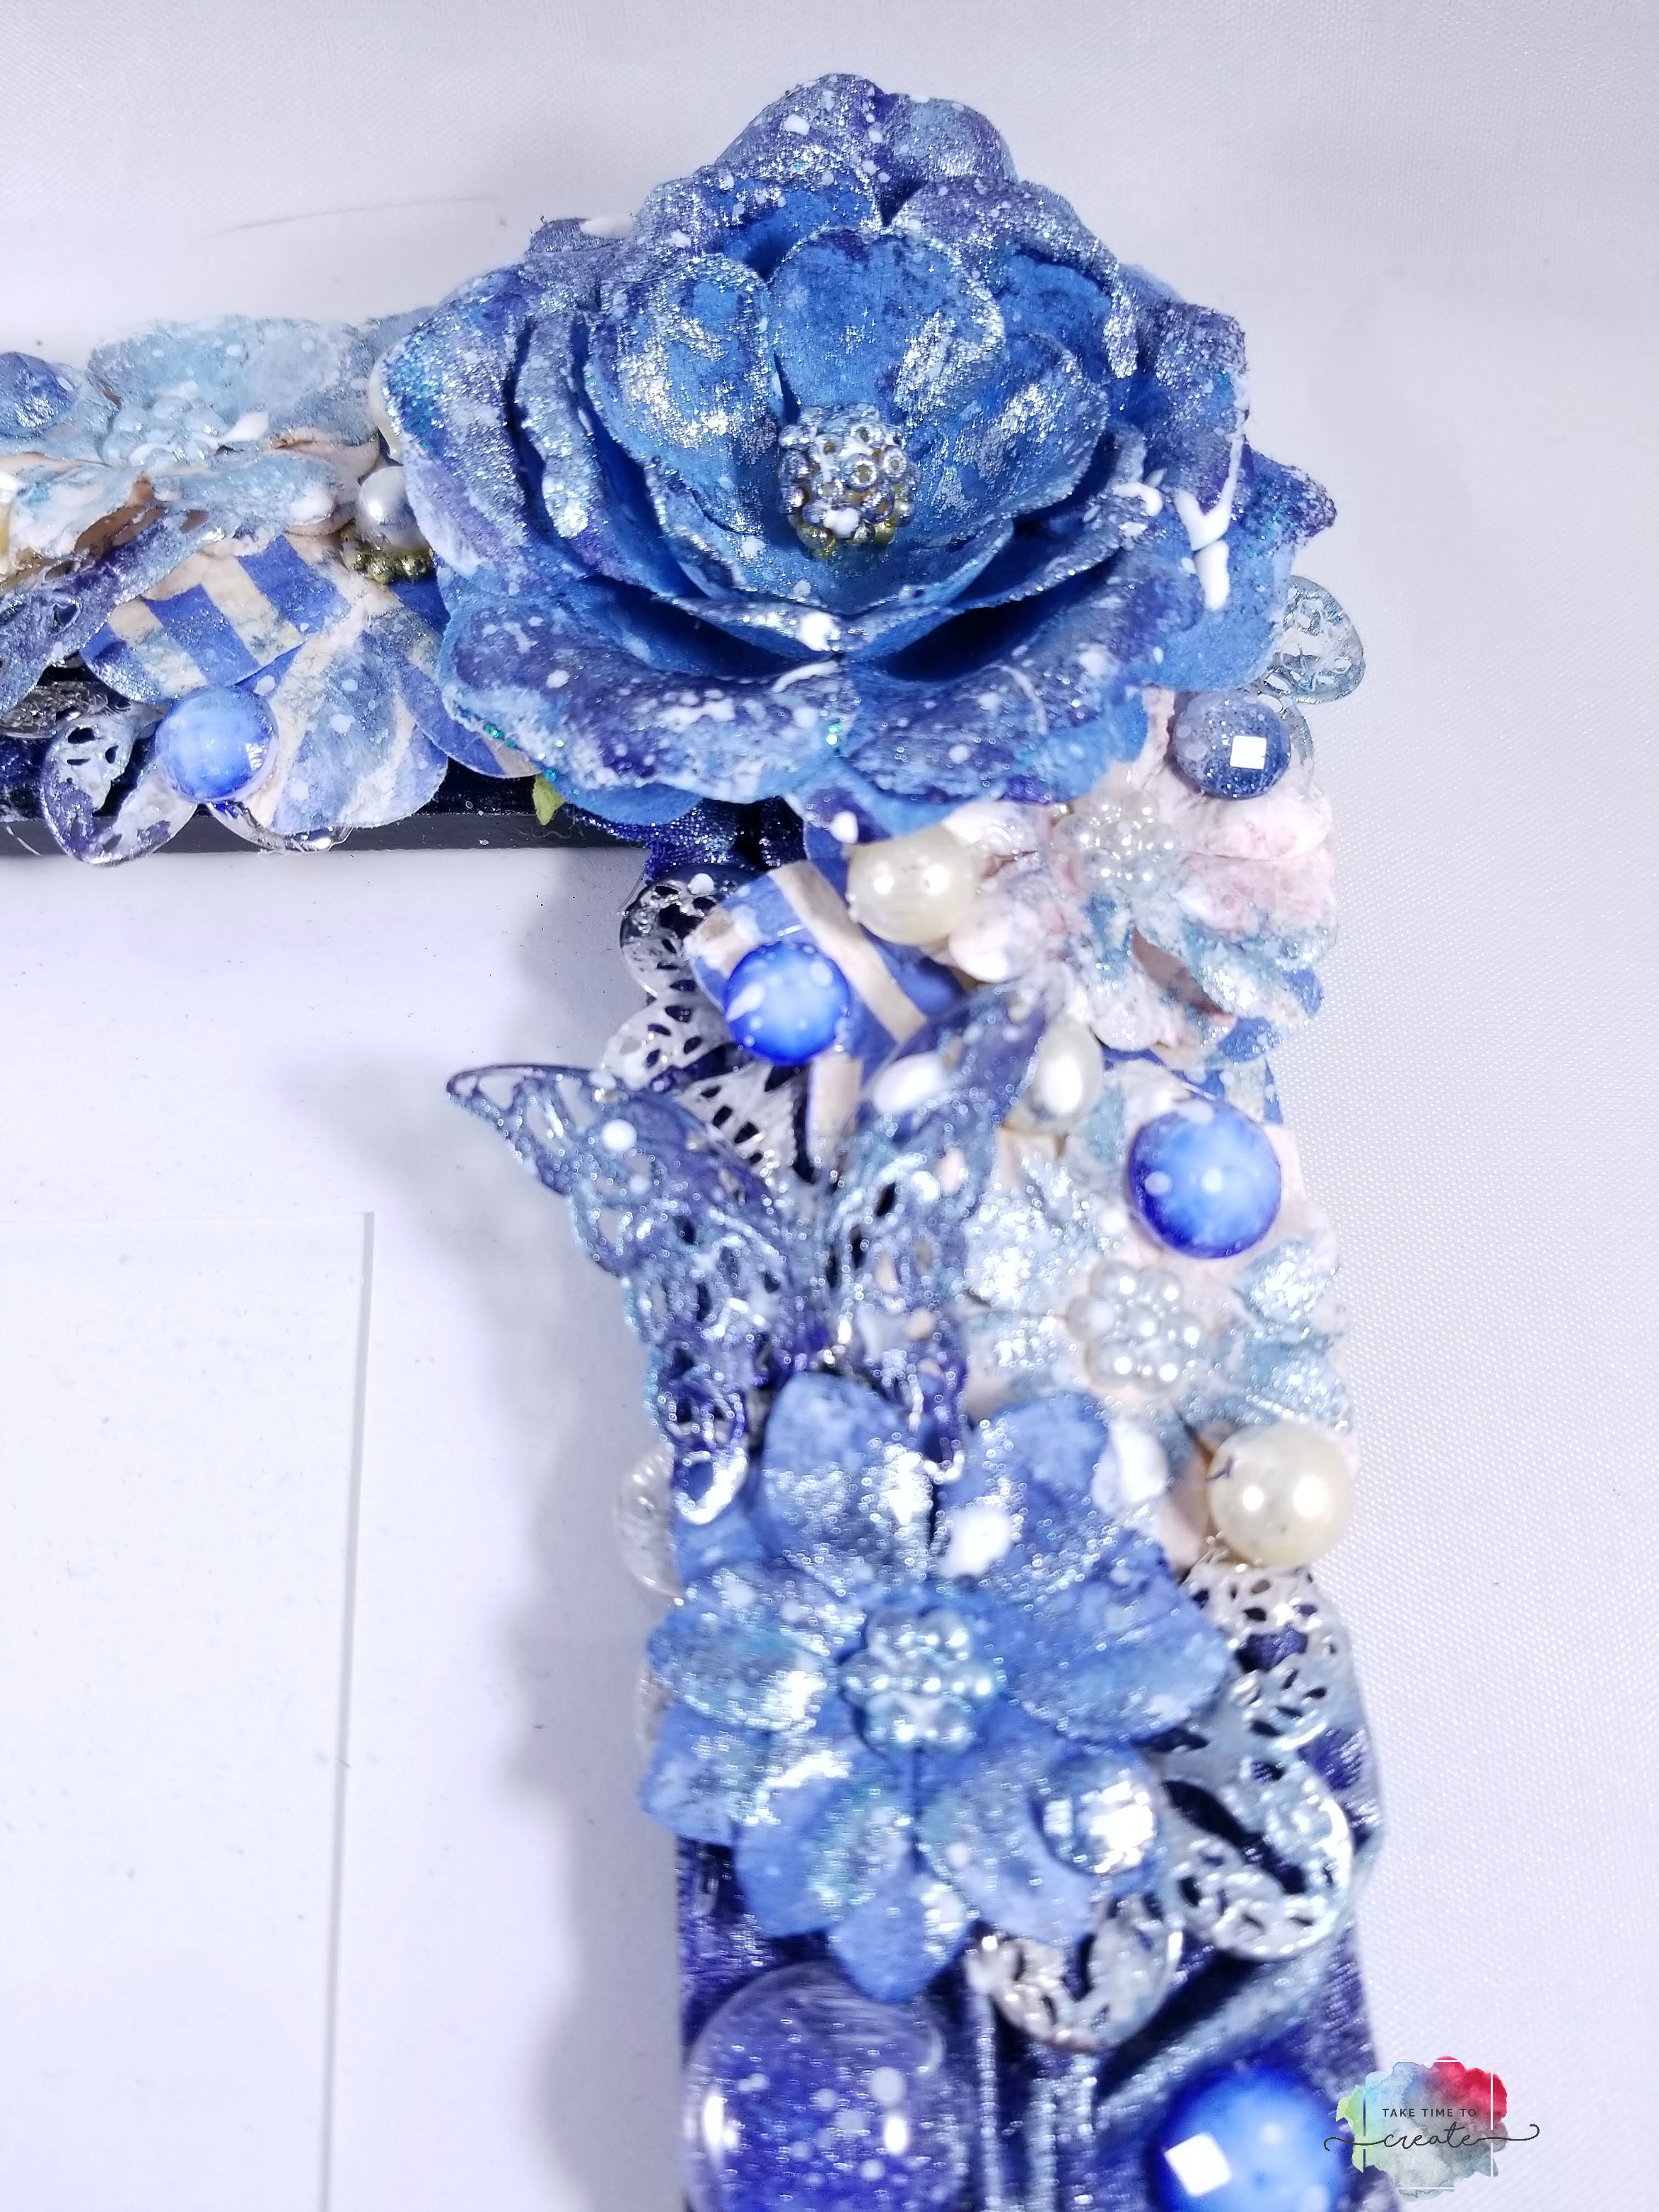
I clustered 2 groupings on opposite corners of the frame. I added a variety of elements to create interest and texture to the frame. If you know what photo you will be putting in the frame you can tailor the elements to the photo, I think that would look amazing.
After the gesso was all dry I painted over everything with Finnabari Sparks and Metallique paints. They were the same colors as the original frame and I thought that would help make it all cohesive.
The last step was adding splashes all over to really blend the original and the new elements together. I wanted it to look like I planned it all at once, lol.
I really like how this all came together. I love adding new elements on top of project I thought I had finished.
What project did you think you finished but went back later to add embellishments to? Share in the comments.
Affiliate Links (similar product if actual one can’t be found)
The Sisterhood of the Traveling Art Journal strikes again, lol. New month, new theme! This month’s journal’s theme is sewing and I love it. There is a wonderful quote at the beginning of the books that states “My soul is fed by needle and thread.” and I just love that quote. The previous pages are wonderful and a huge inspiration for me.
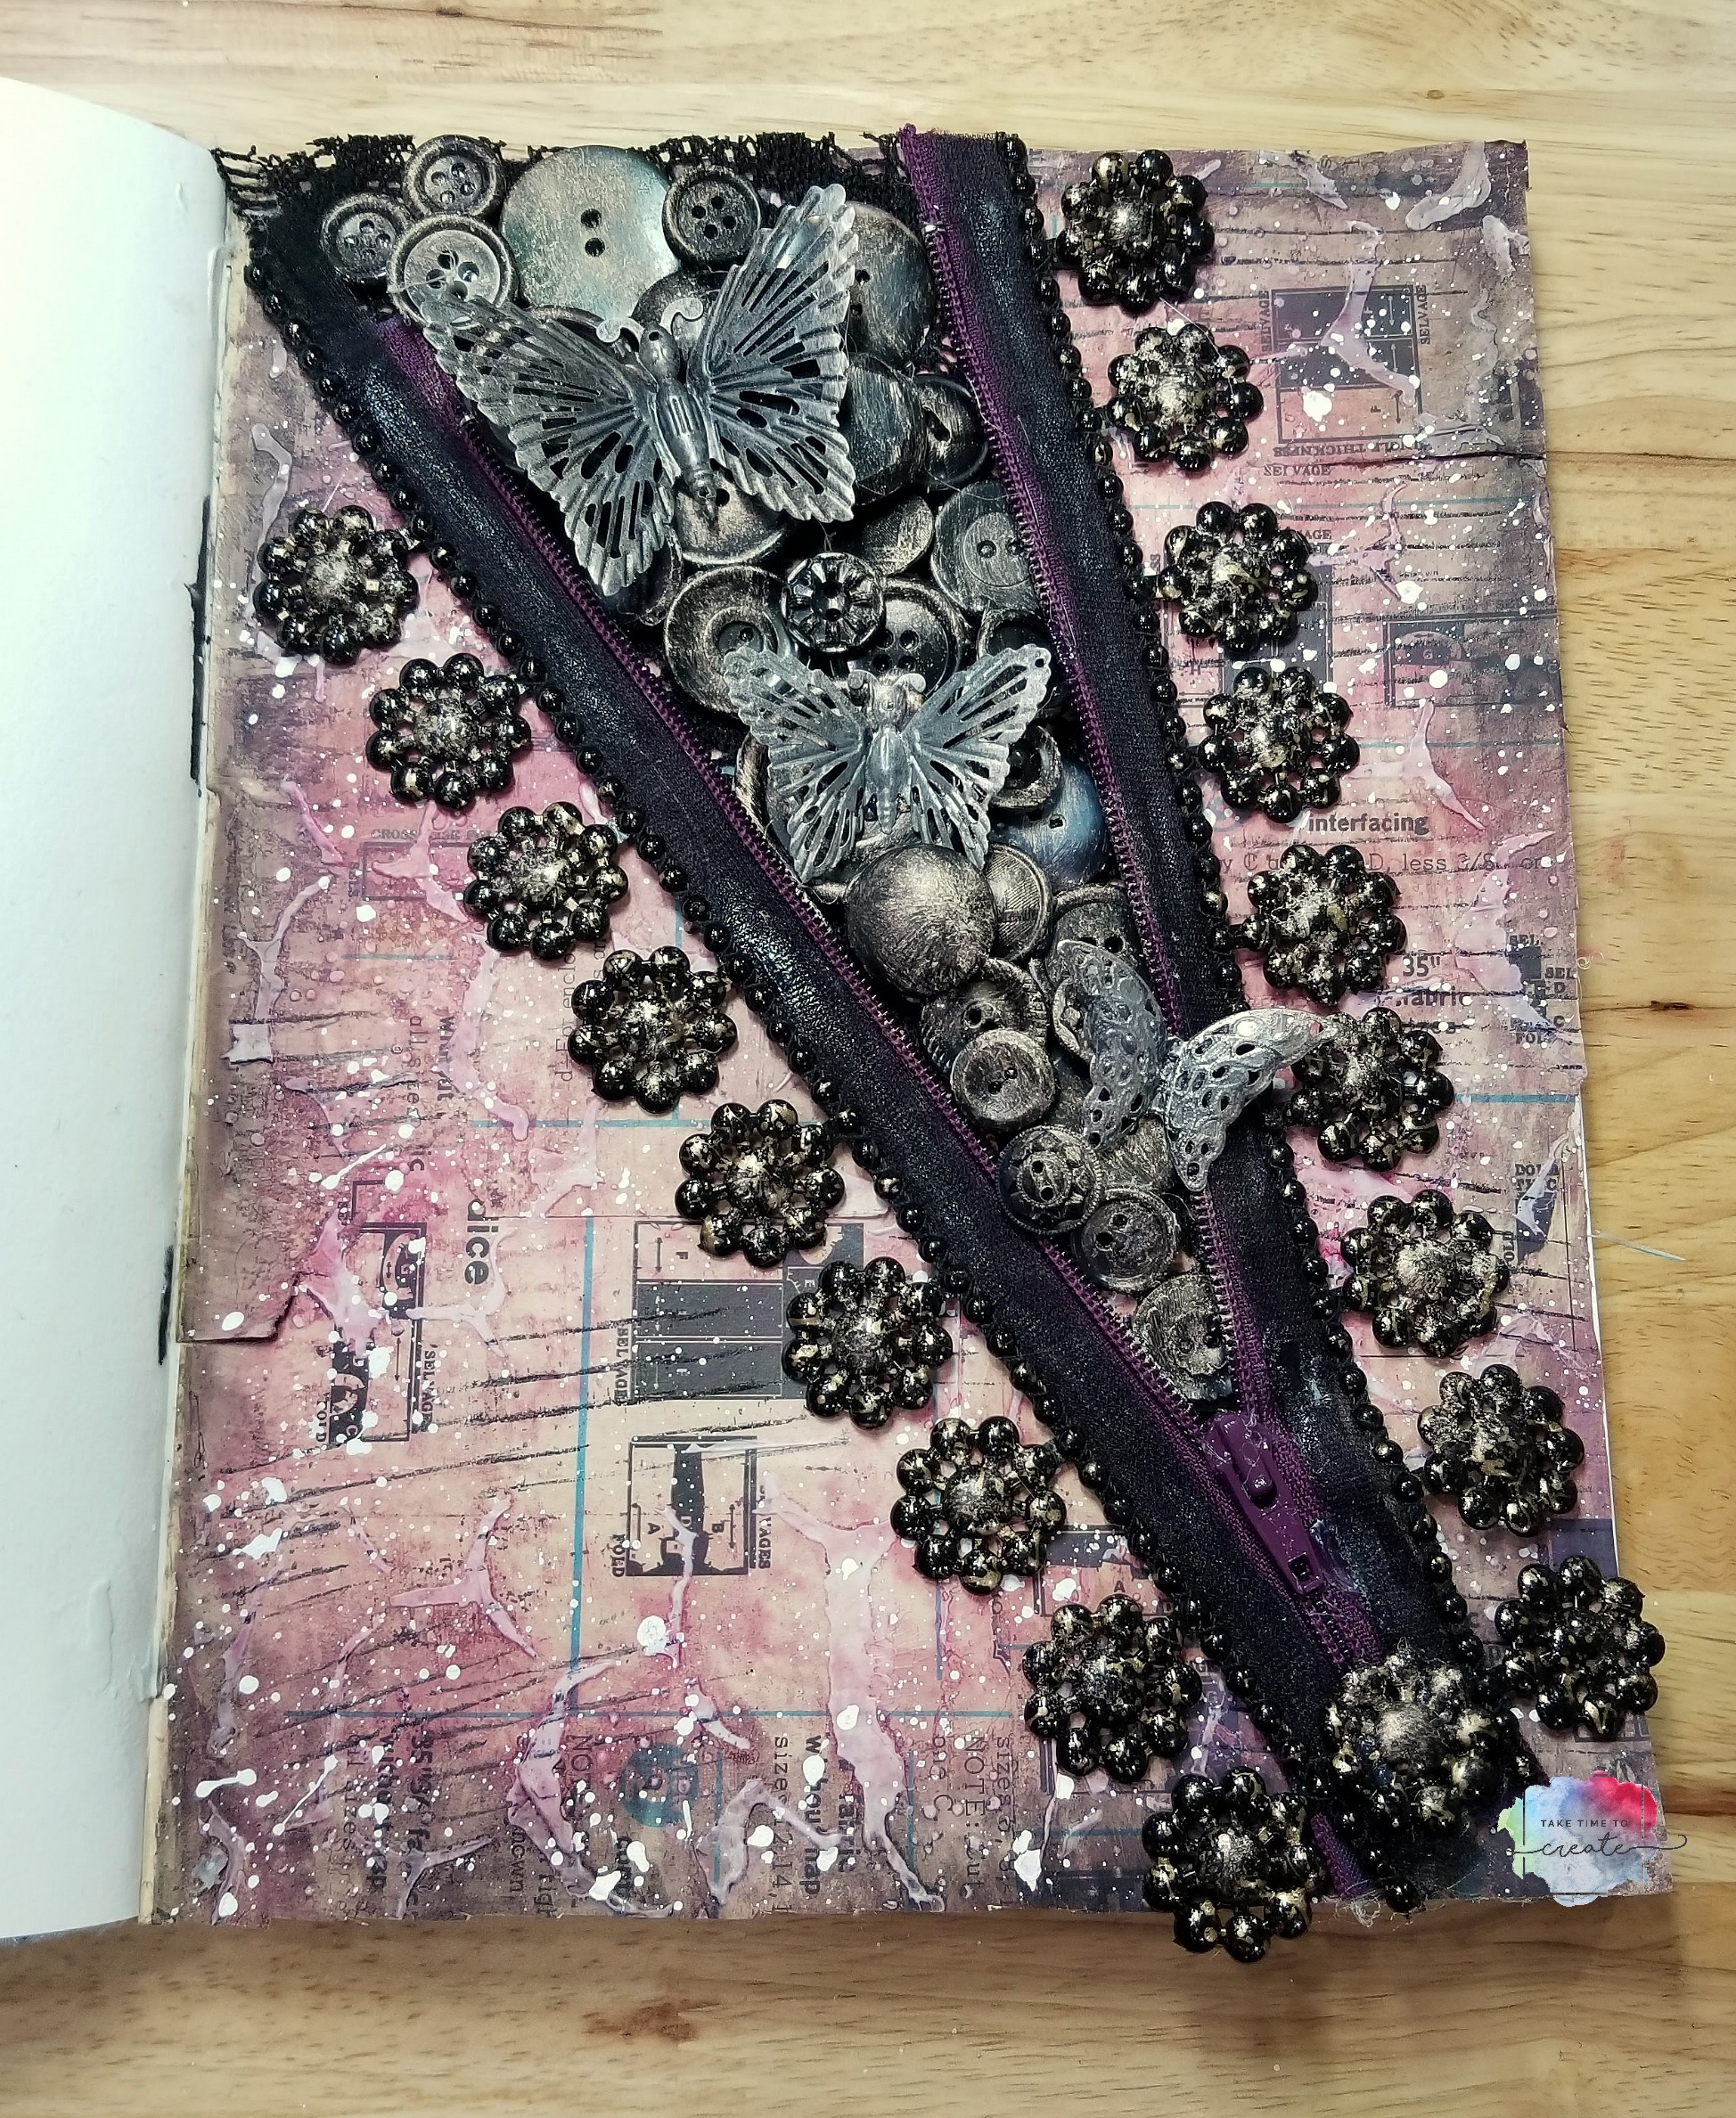
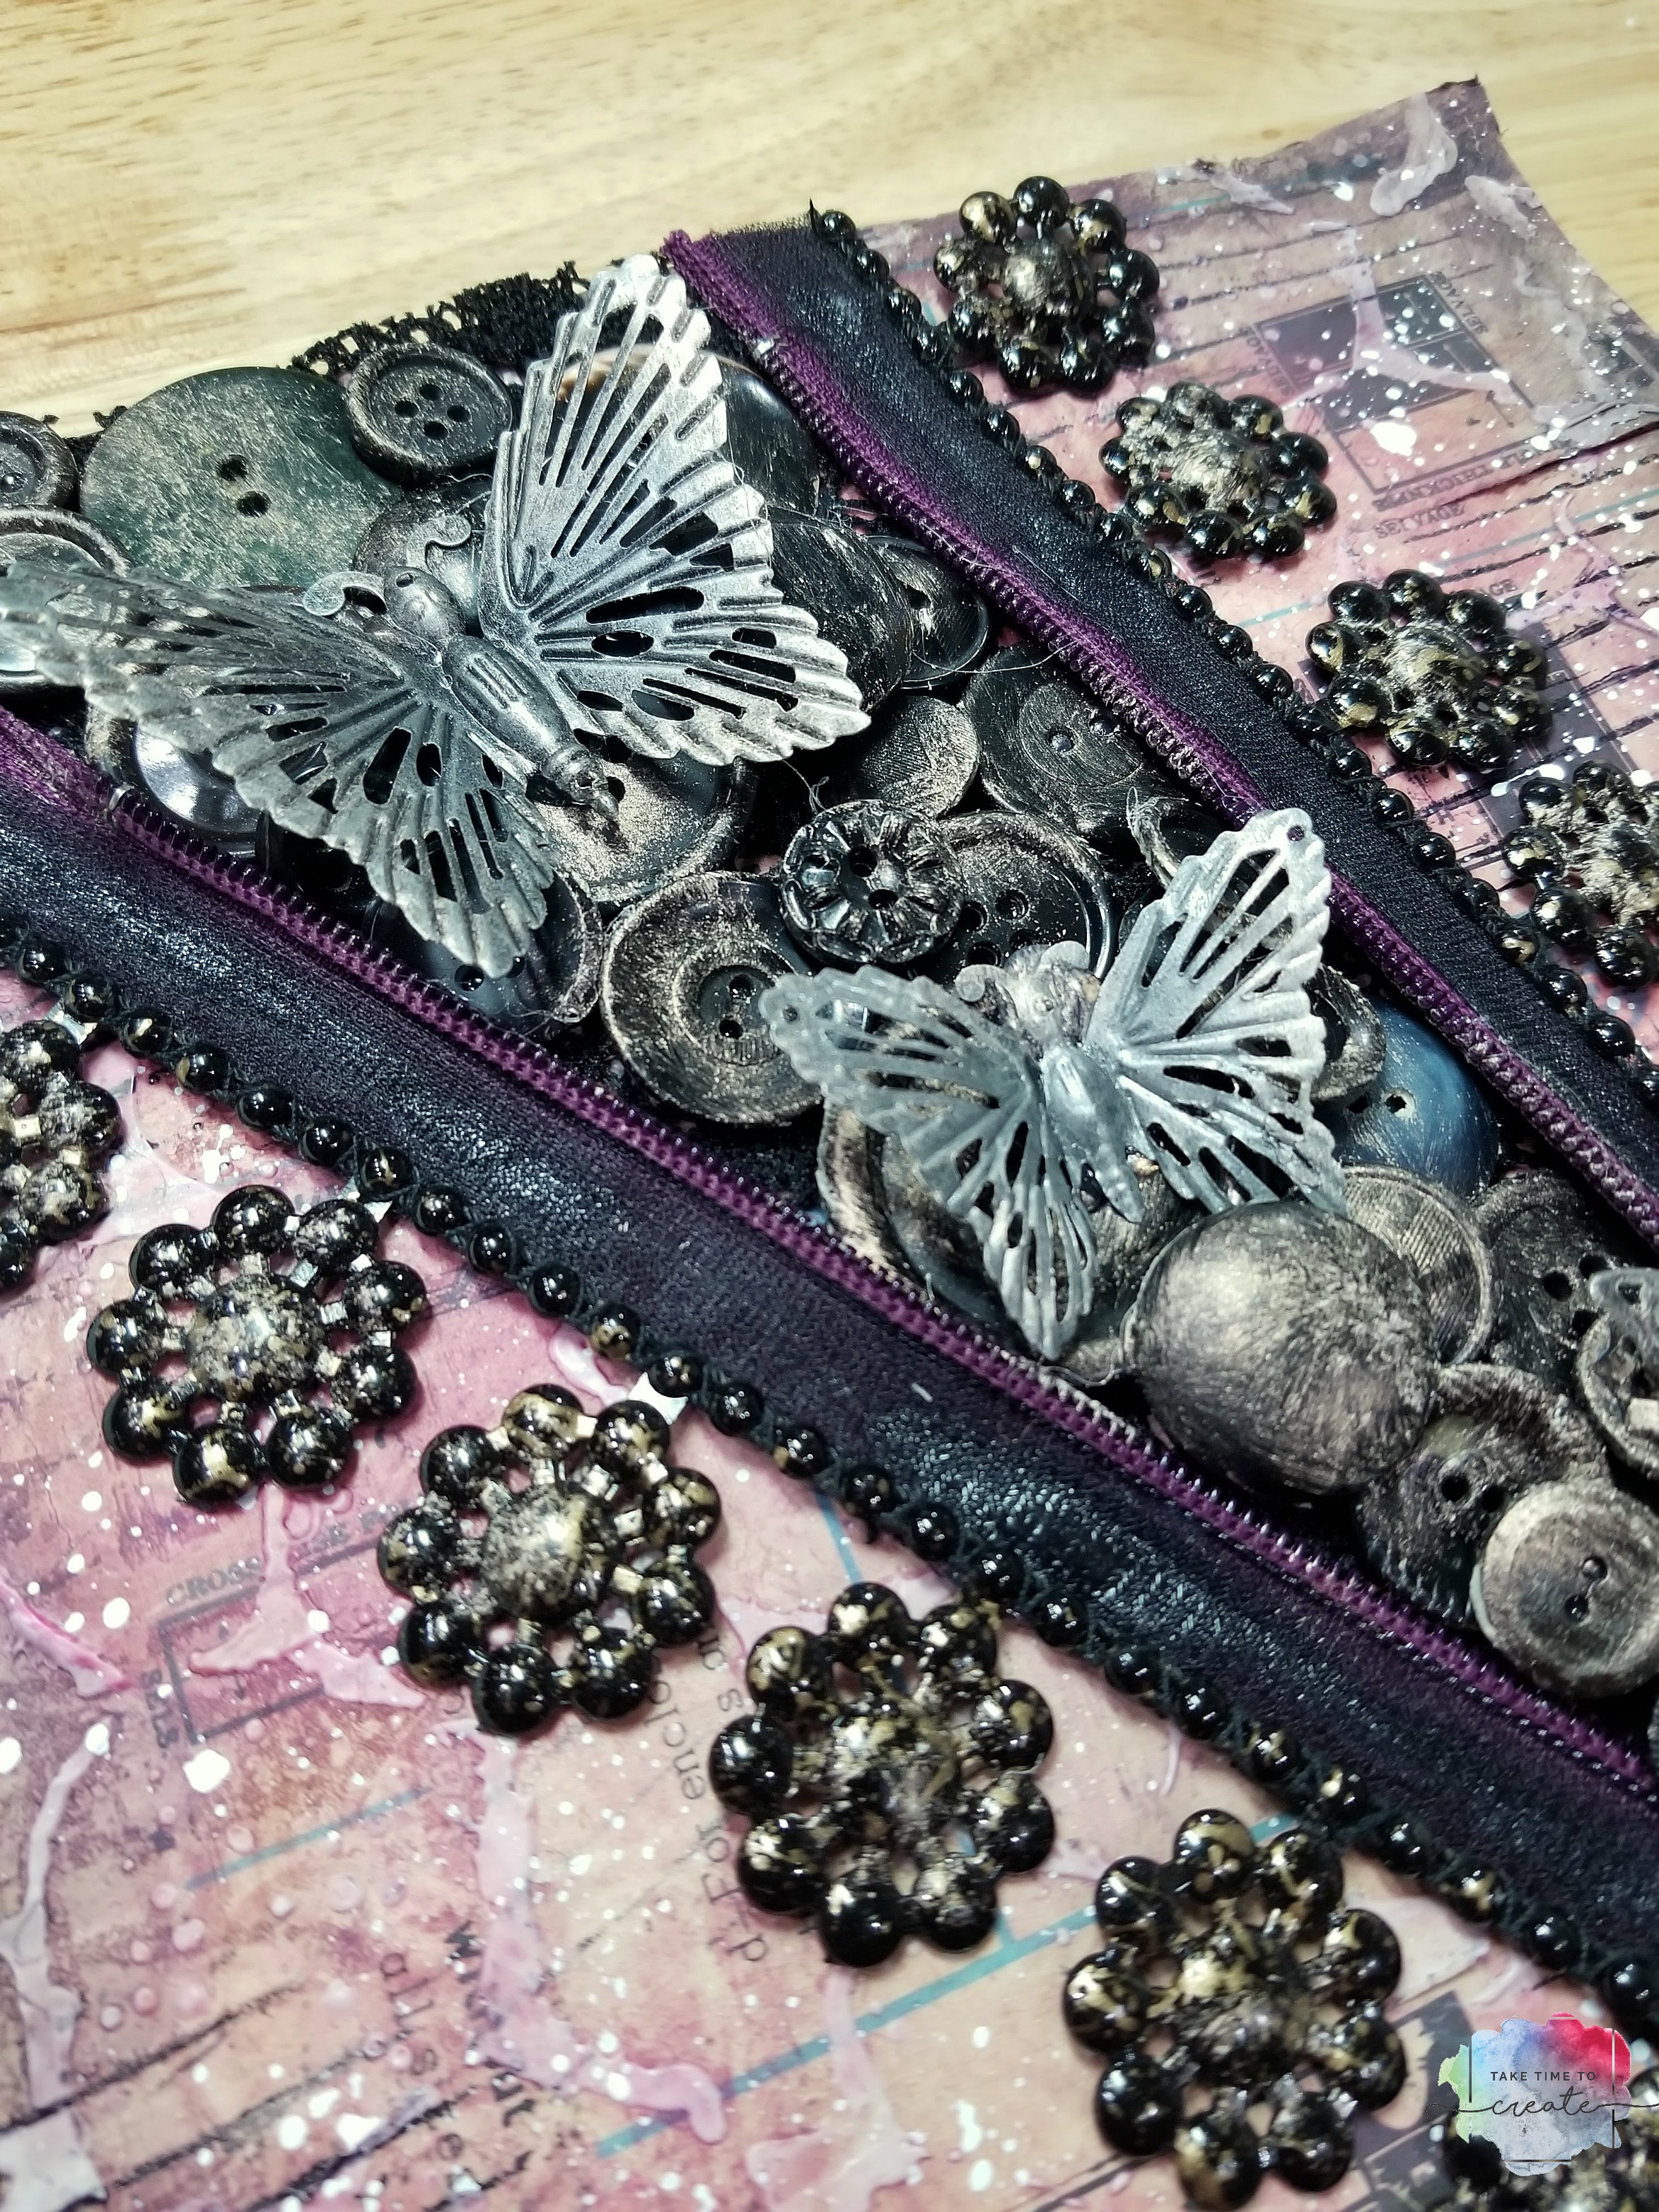
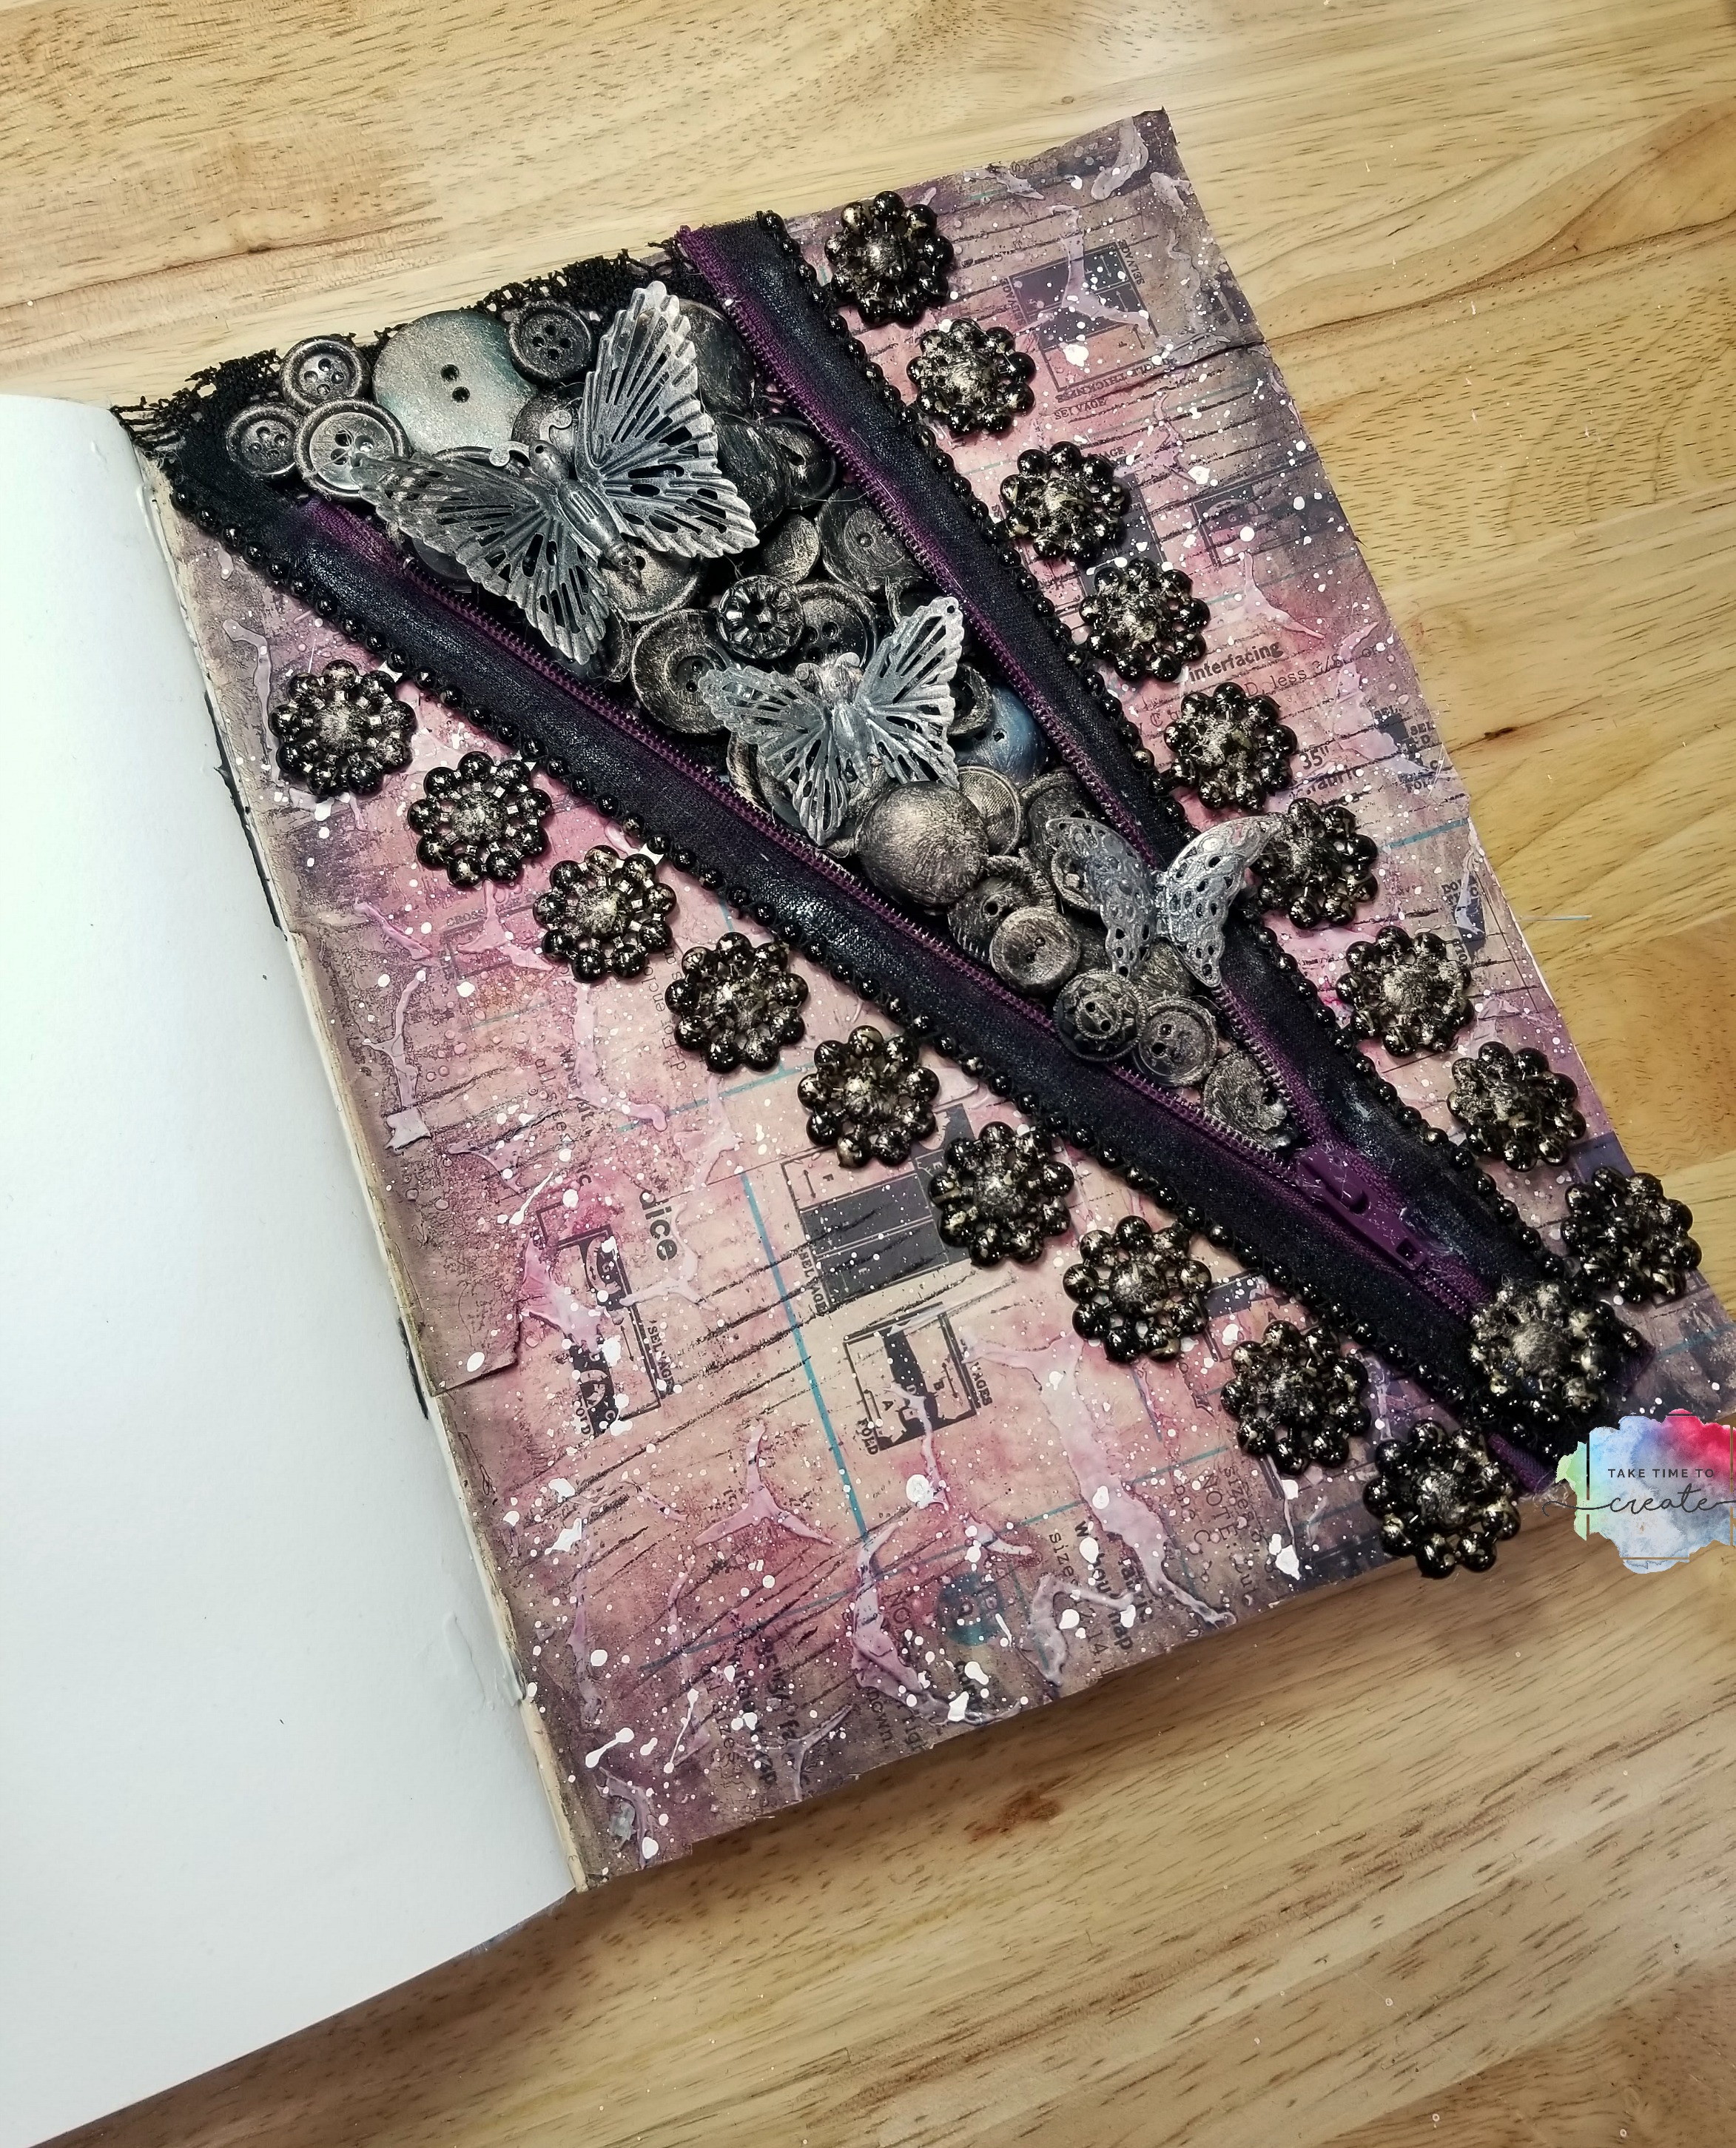
I decided to take my page in a little different direction and create a page around buttons bursting out of a zipper.
I have done this technique in the past on a bottle, but not a journal page. I did a blog post using a Mason Jar and sea shells, I think it turned out really cute, lol. You can see that post by clicking here — Sea Shell Mason Jar.
This was such a fun page to create! I added texture, paint, stamps, and other interest to the background. I played with my Dylustions paint for the background, I just love the way that paint applies.
Then I added the zipper, buttons, and butterflies to the page. Then I painted everything with Finnabair waxes to create the aged look I was going for.
The only problem is that techniques like this can make your journal really bulky, lol. But I love when that happens because it just means that I am using my journal even more and doing even more creating! The bigger the better, lol.
I have to say I am still really loving my art journal group! I love working on different pages and trying new things. I can’t wait to see what next month will bring!
Also, don’t forget to check my events page to see when and where I am teaching, I would love to have you join me in my class!
Affiliate Links to products I used (or similar ones)
Ranger Journal: https://amzn.to/2A0ZjQ6
Dylusions Paint https://amzn.to/2IMwQR1
Zipper https://amzn.to/2E9miwt
Finnabair Mechanicals Butterflies https://amzn.to/2Eafuim
Finnabair Stencil https://amzn.to/2C3ZoUS
Finnabair stamp and stencil set https://amzn.to/2QEgvR3
Ranger Archival Ink https://amzn.to/2yaQv93
Finnabair modeling paste https://amzn.to/2ypTpGw
Finnabair Wax https://amzn.to/2C48jWi
pack of black buttons https://amzn.to/2y9MCBt
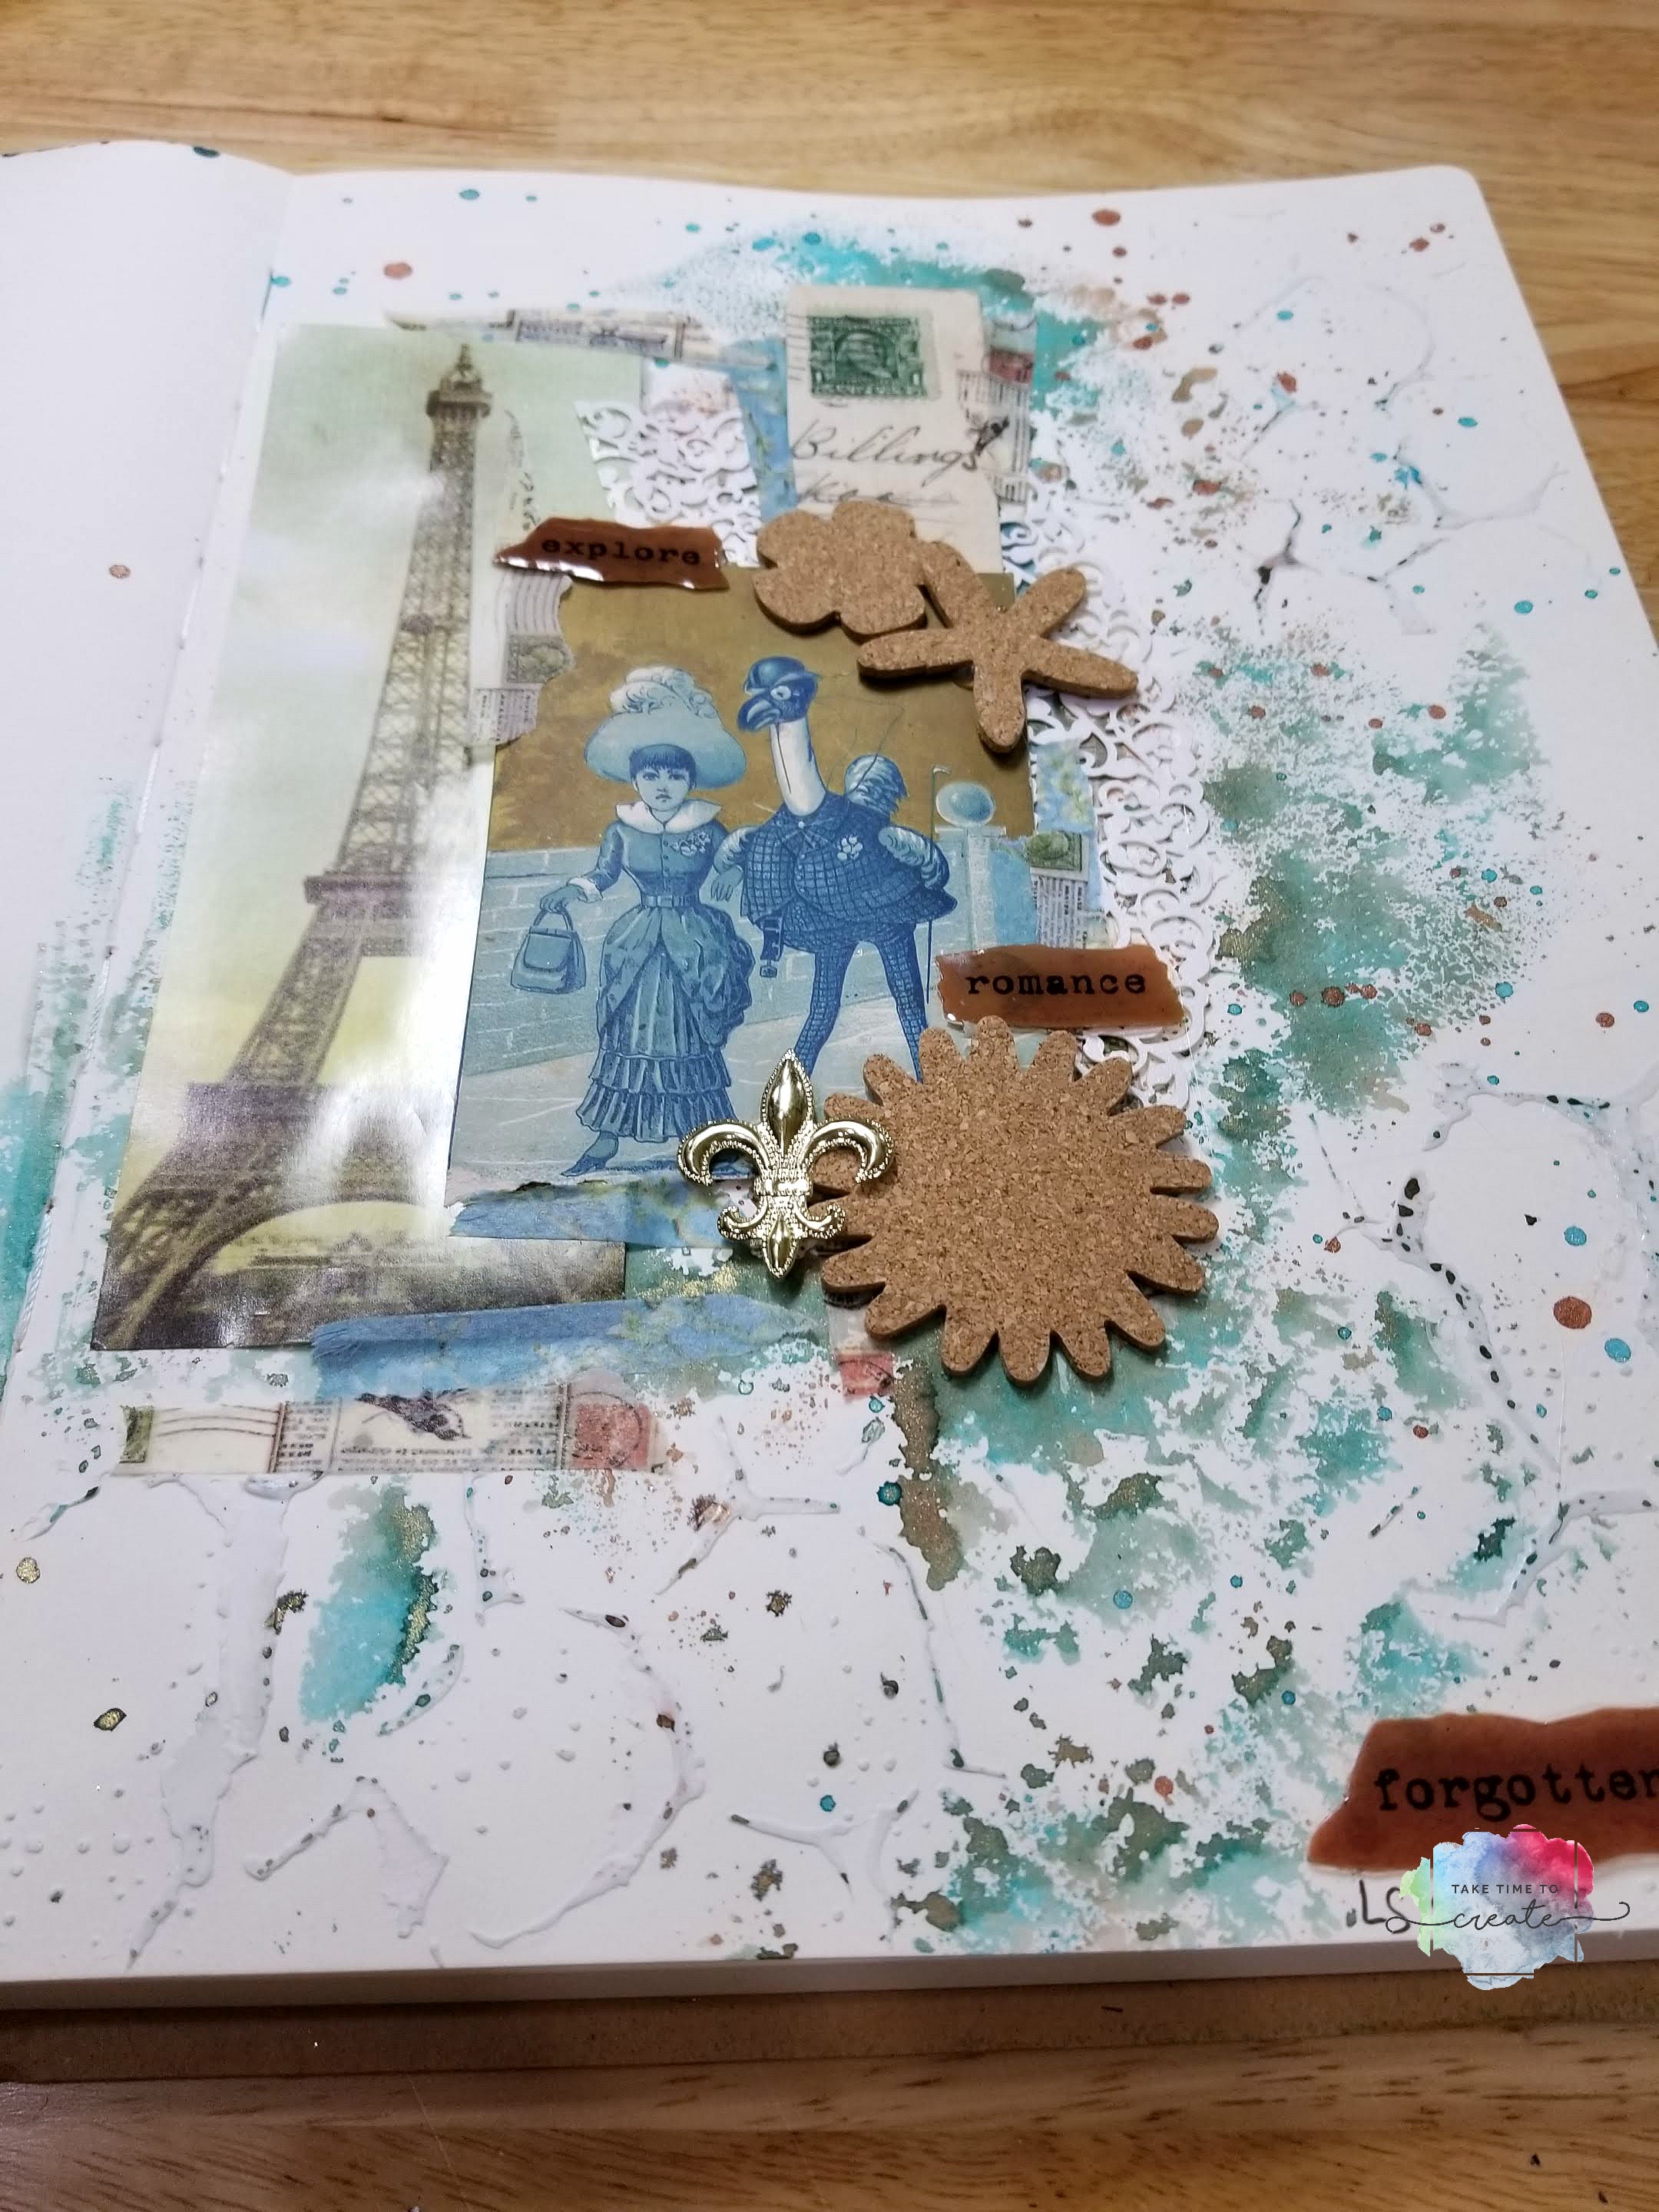
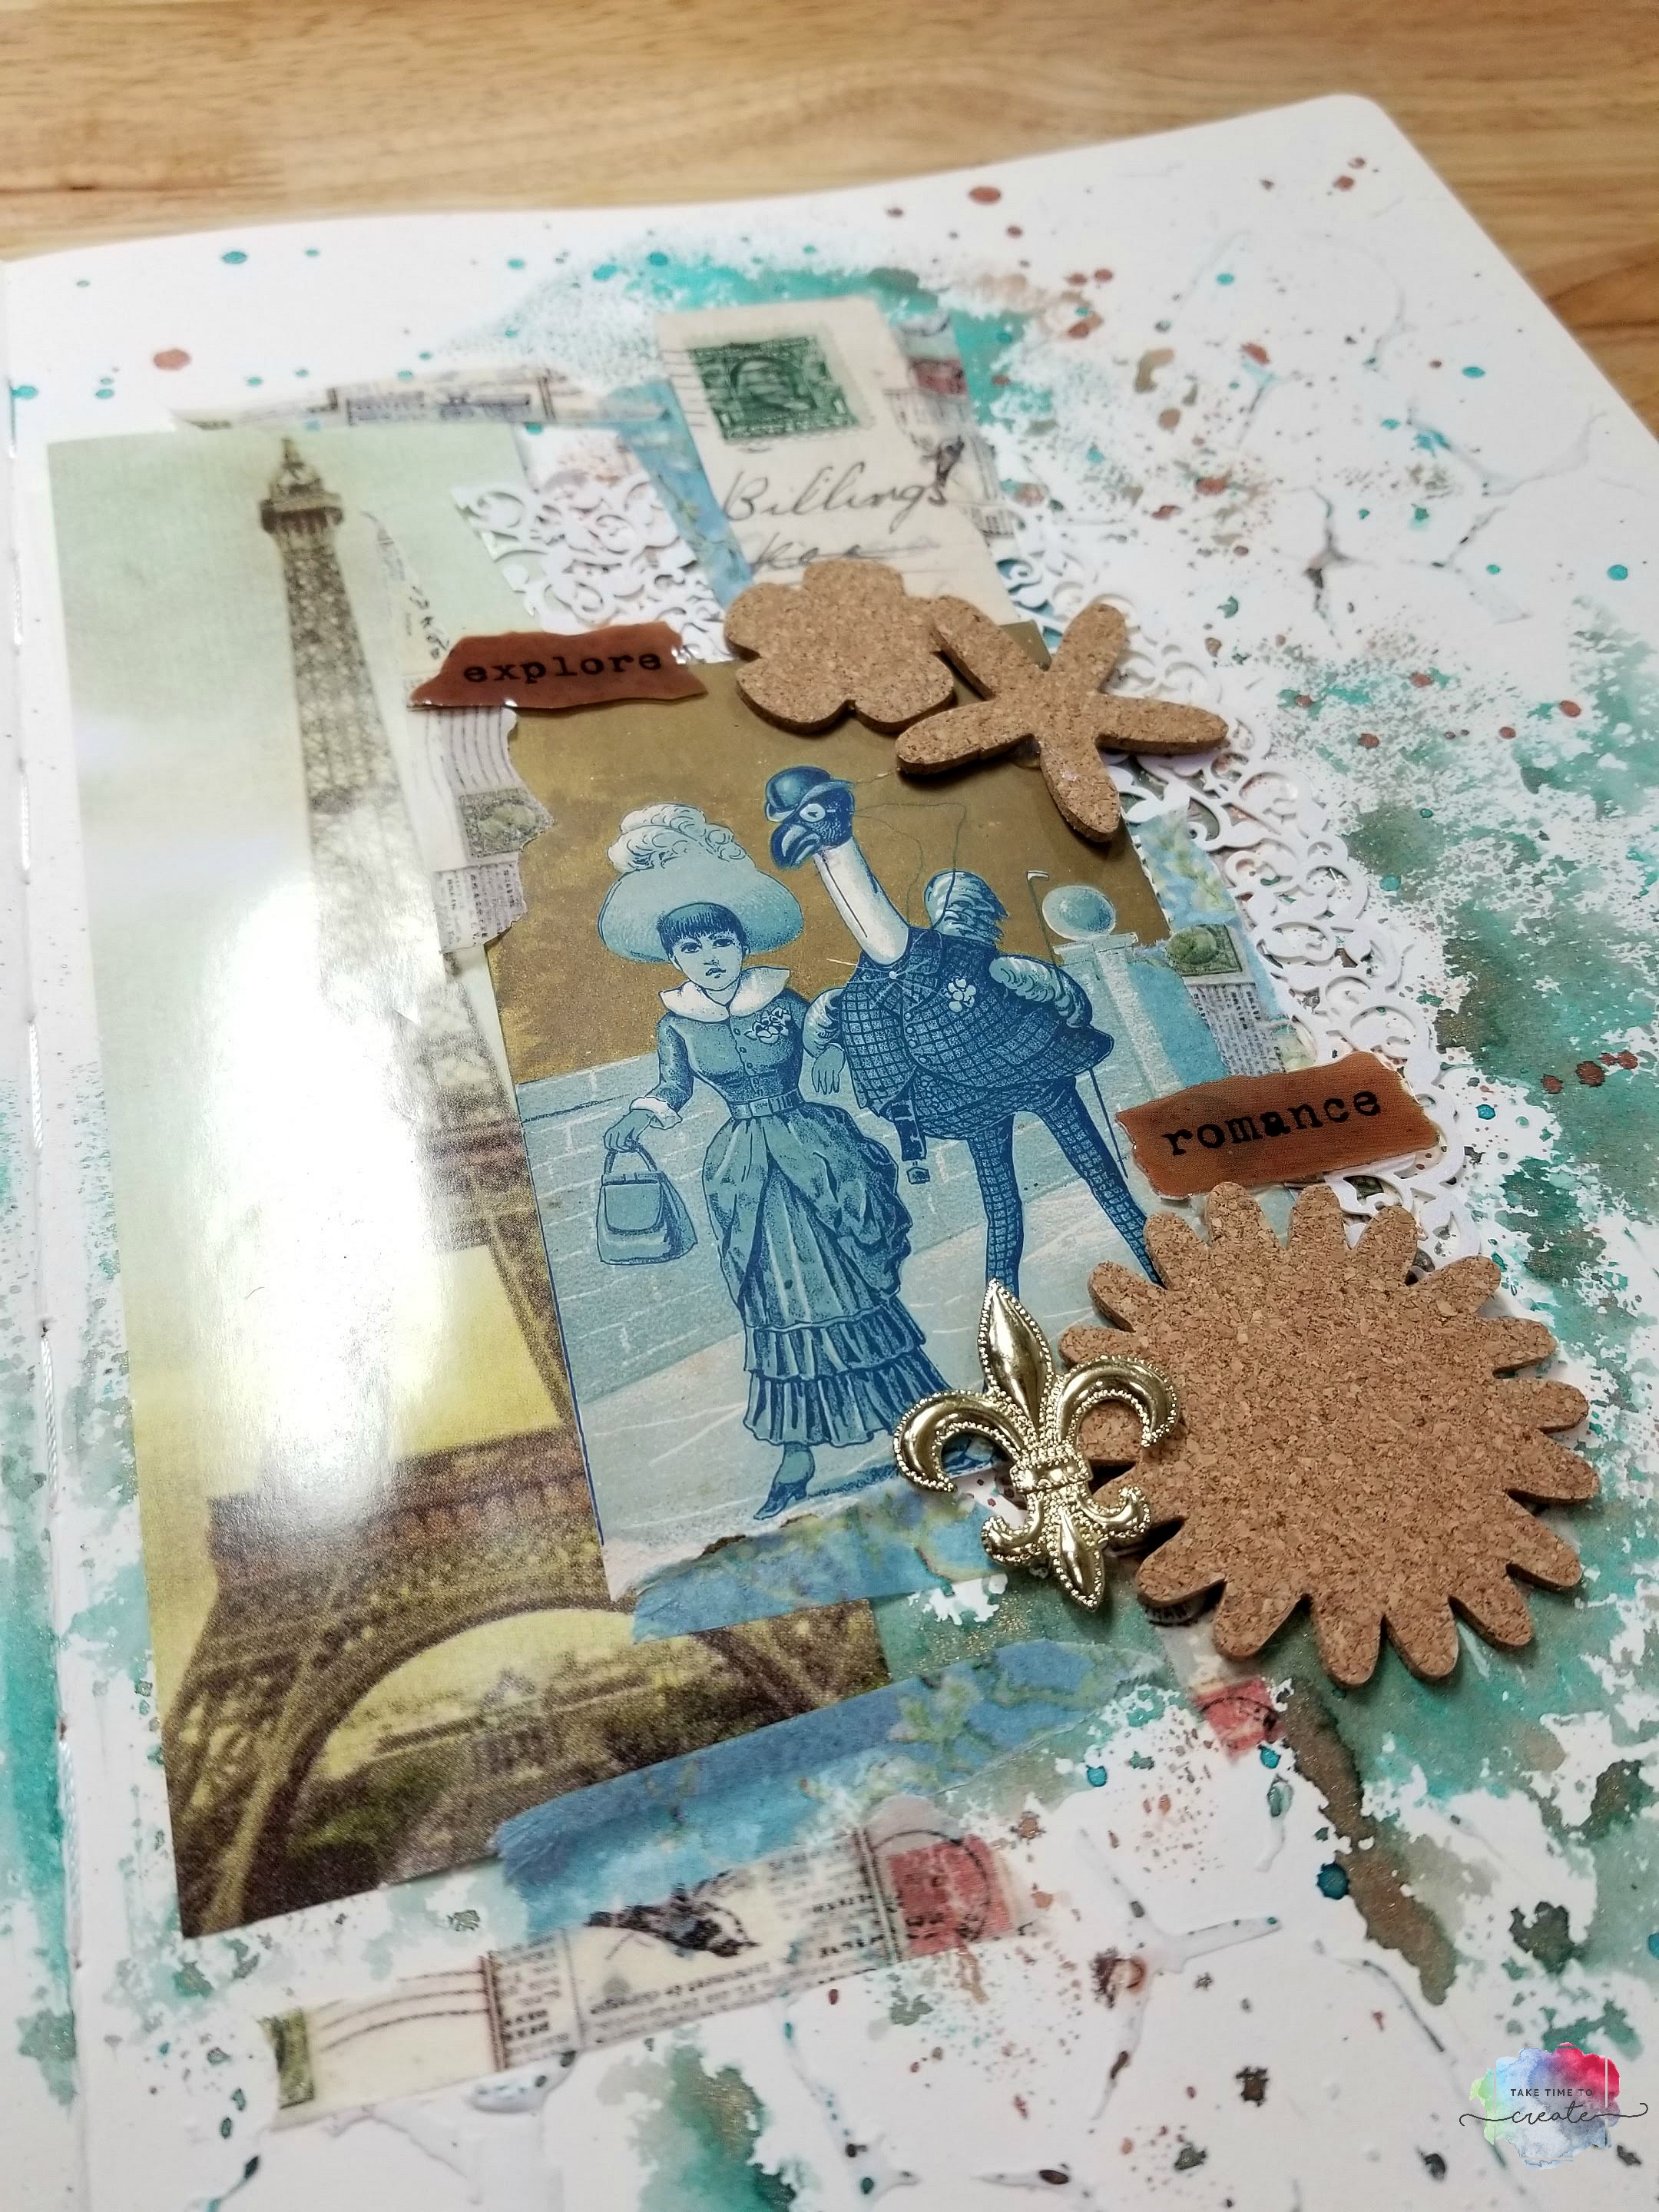
I am still on an art journal kick, lol. I love that I can finish a page relativity quickly and I can practice new techniques and try out new mediums. This page was especially fun! I found this old pic of a woman and an ostrich in a suit. I laughed when I saw it. I am not exactly sure what is going on but I knew I had to make a page around this pic.
I got this picture in a pack of papers and random items from Who Gives a Scrap. There was a ton of really cool items in the pack, including this picture. The woman does not look too happy, but the ostrich looks happy enough. I just love it, lol. I figured it might be in Paris, so that is why I added some French elements.
I wanted to keep the journal a bit more neutral than I usually do, lol. So I kept with brown and teal and some neutrals. I also like to play with different textures, so I added paper, washi tape, metal, some cork, and a lacy stencil. All the various textures go together to make a fun, interesting page.
And on this page I used Lindy’s Sprays. This is a relatively new product to me, and I am in love. The sprays are perfect for adding the right amount to color and there are a ton of ways to add the color. I love exploring new mediums and adding new elements to my art.
Now I am excited to rummage through the rest of the papers and elements i picked up to see what other goodies are there!
Affiliate link disclaimer: “We are a participant in the Amazon Services LLC Associates Program, an affiliate advertising program designed to provide a means for us to earn fees by linking to Amazon.com and affiliated sites.”
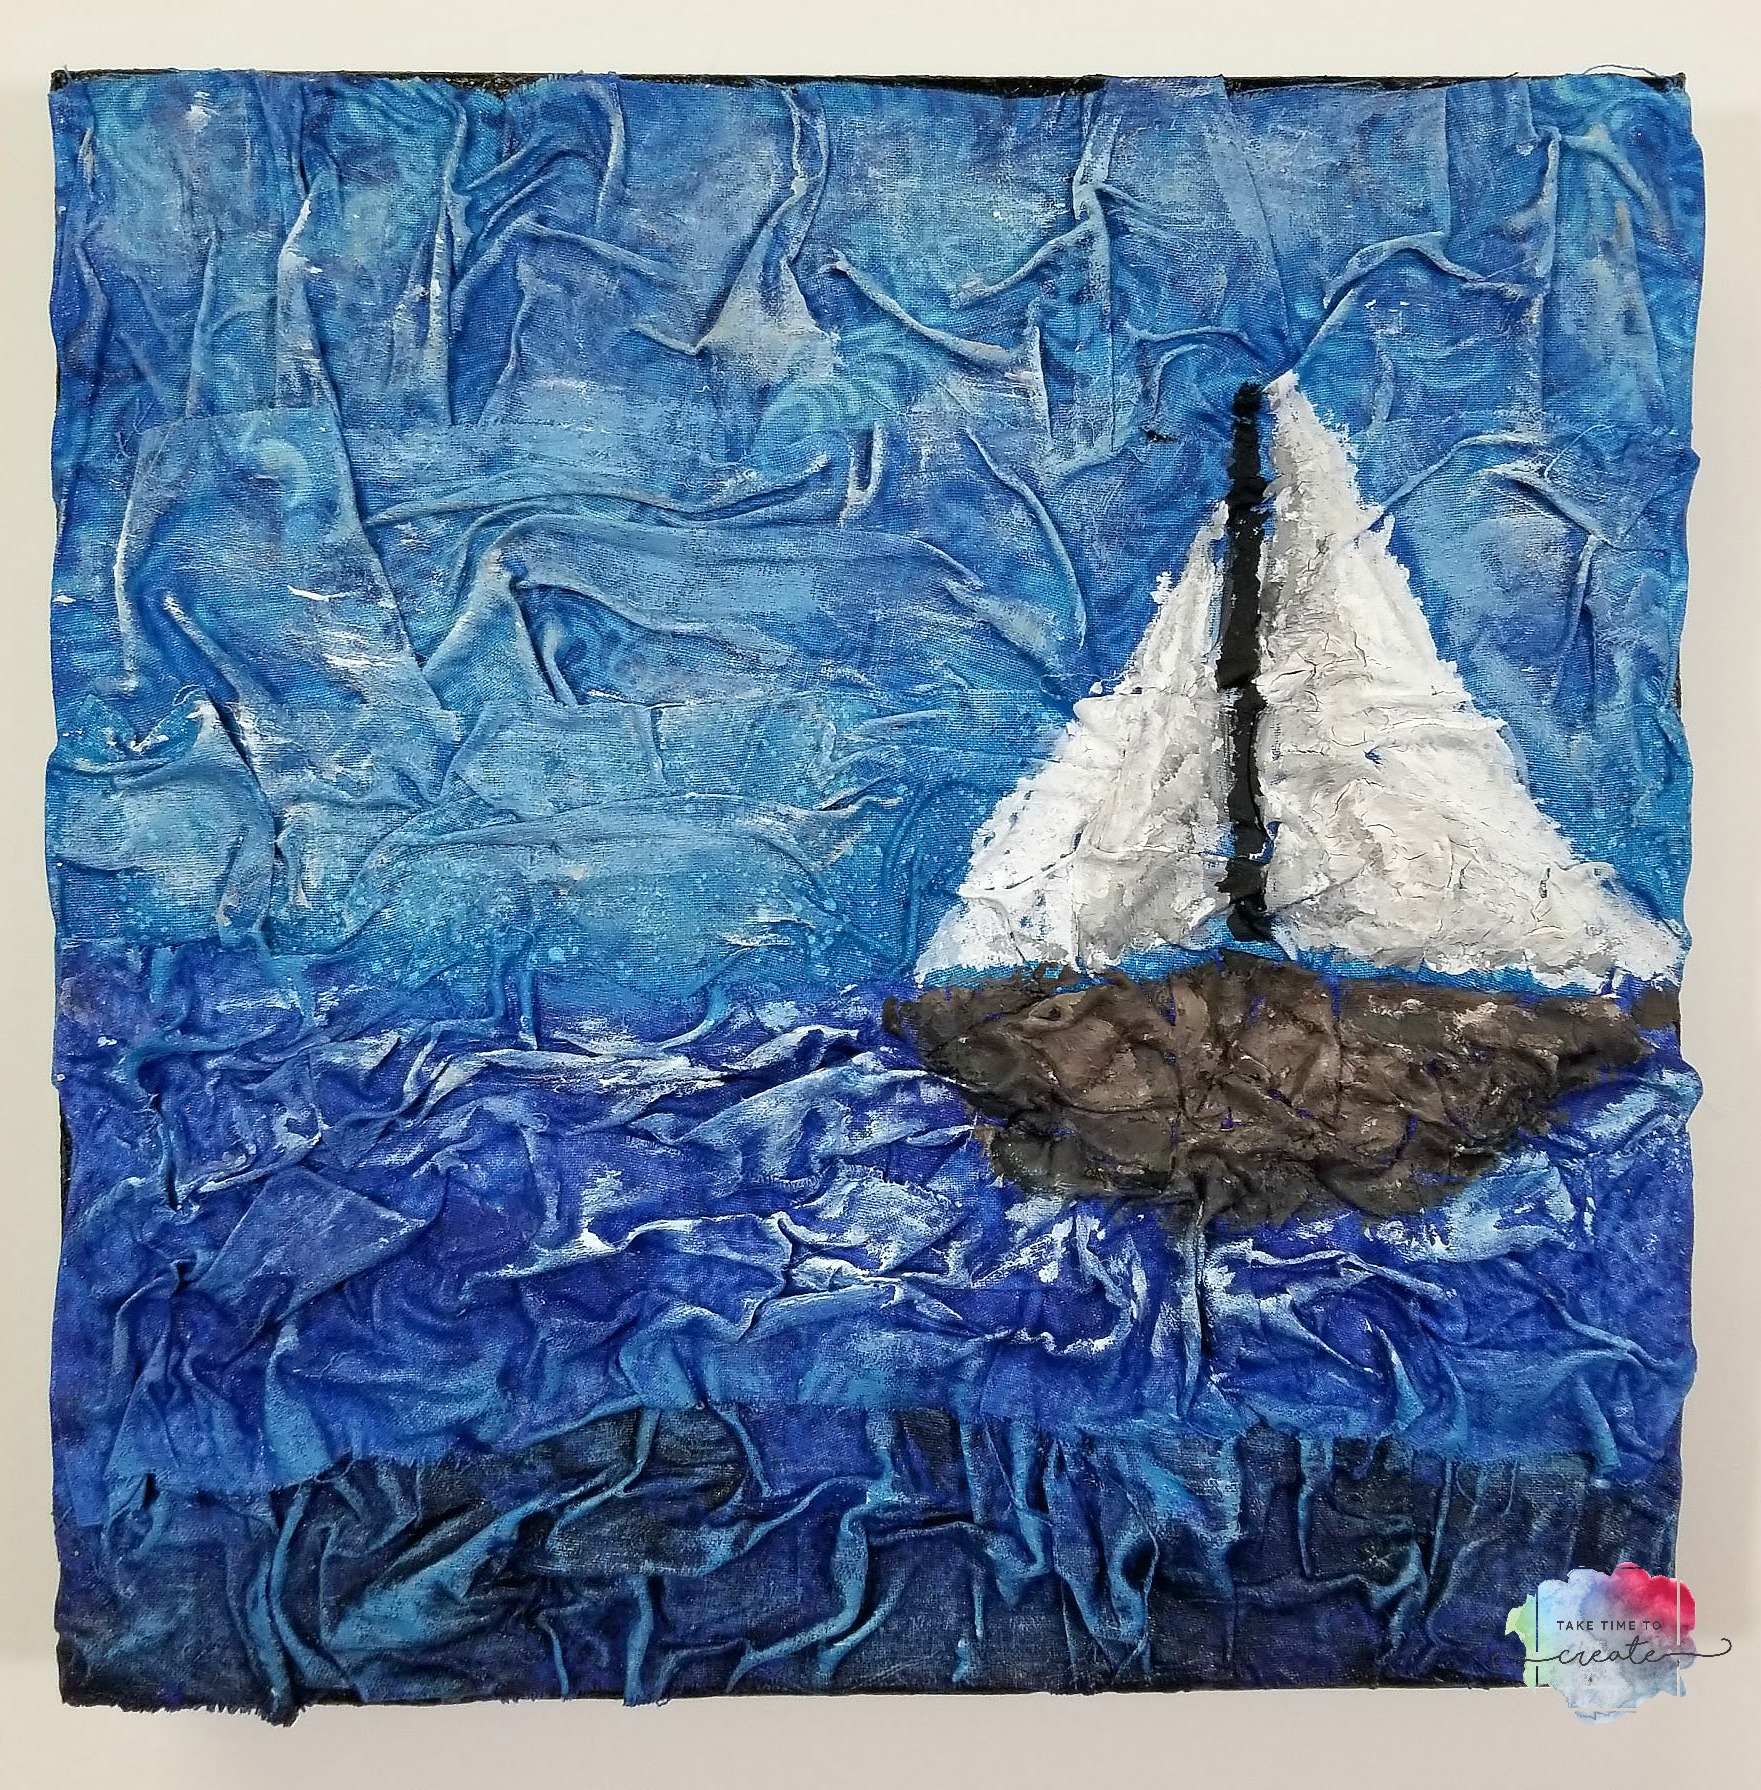
Are you ready for another Fabric Canvas? I am still loving the fabric and the process of creating a canvas with fabric.
This scene was inspired by our recent vacation to Ft Lauderdale. We saw a lot of boats on the water and they looked so peaceful and wonderful that I knew I had to create one on a canvas with fabric.
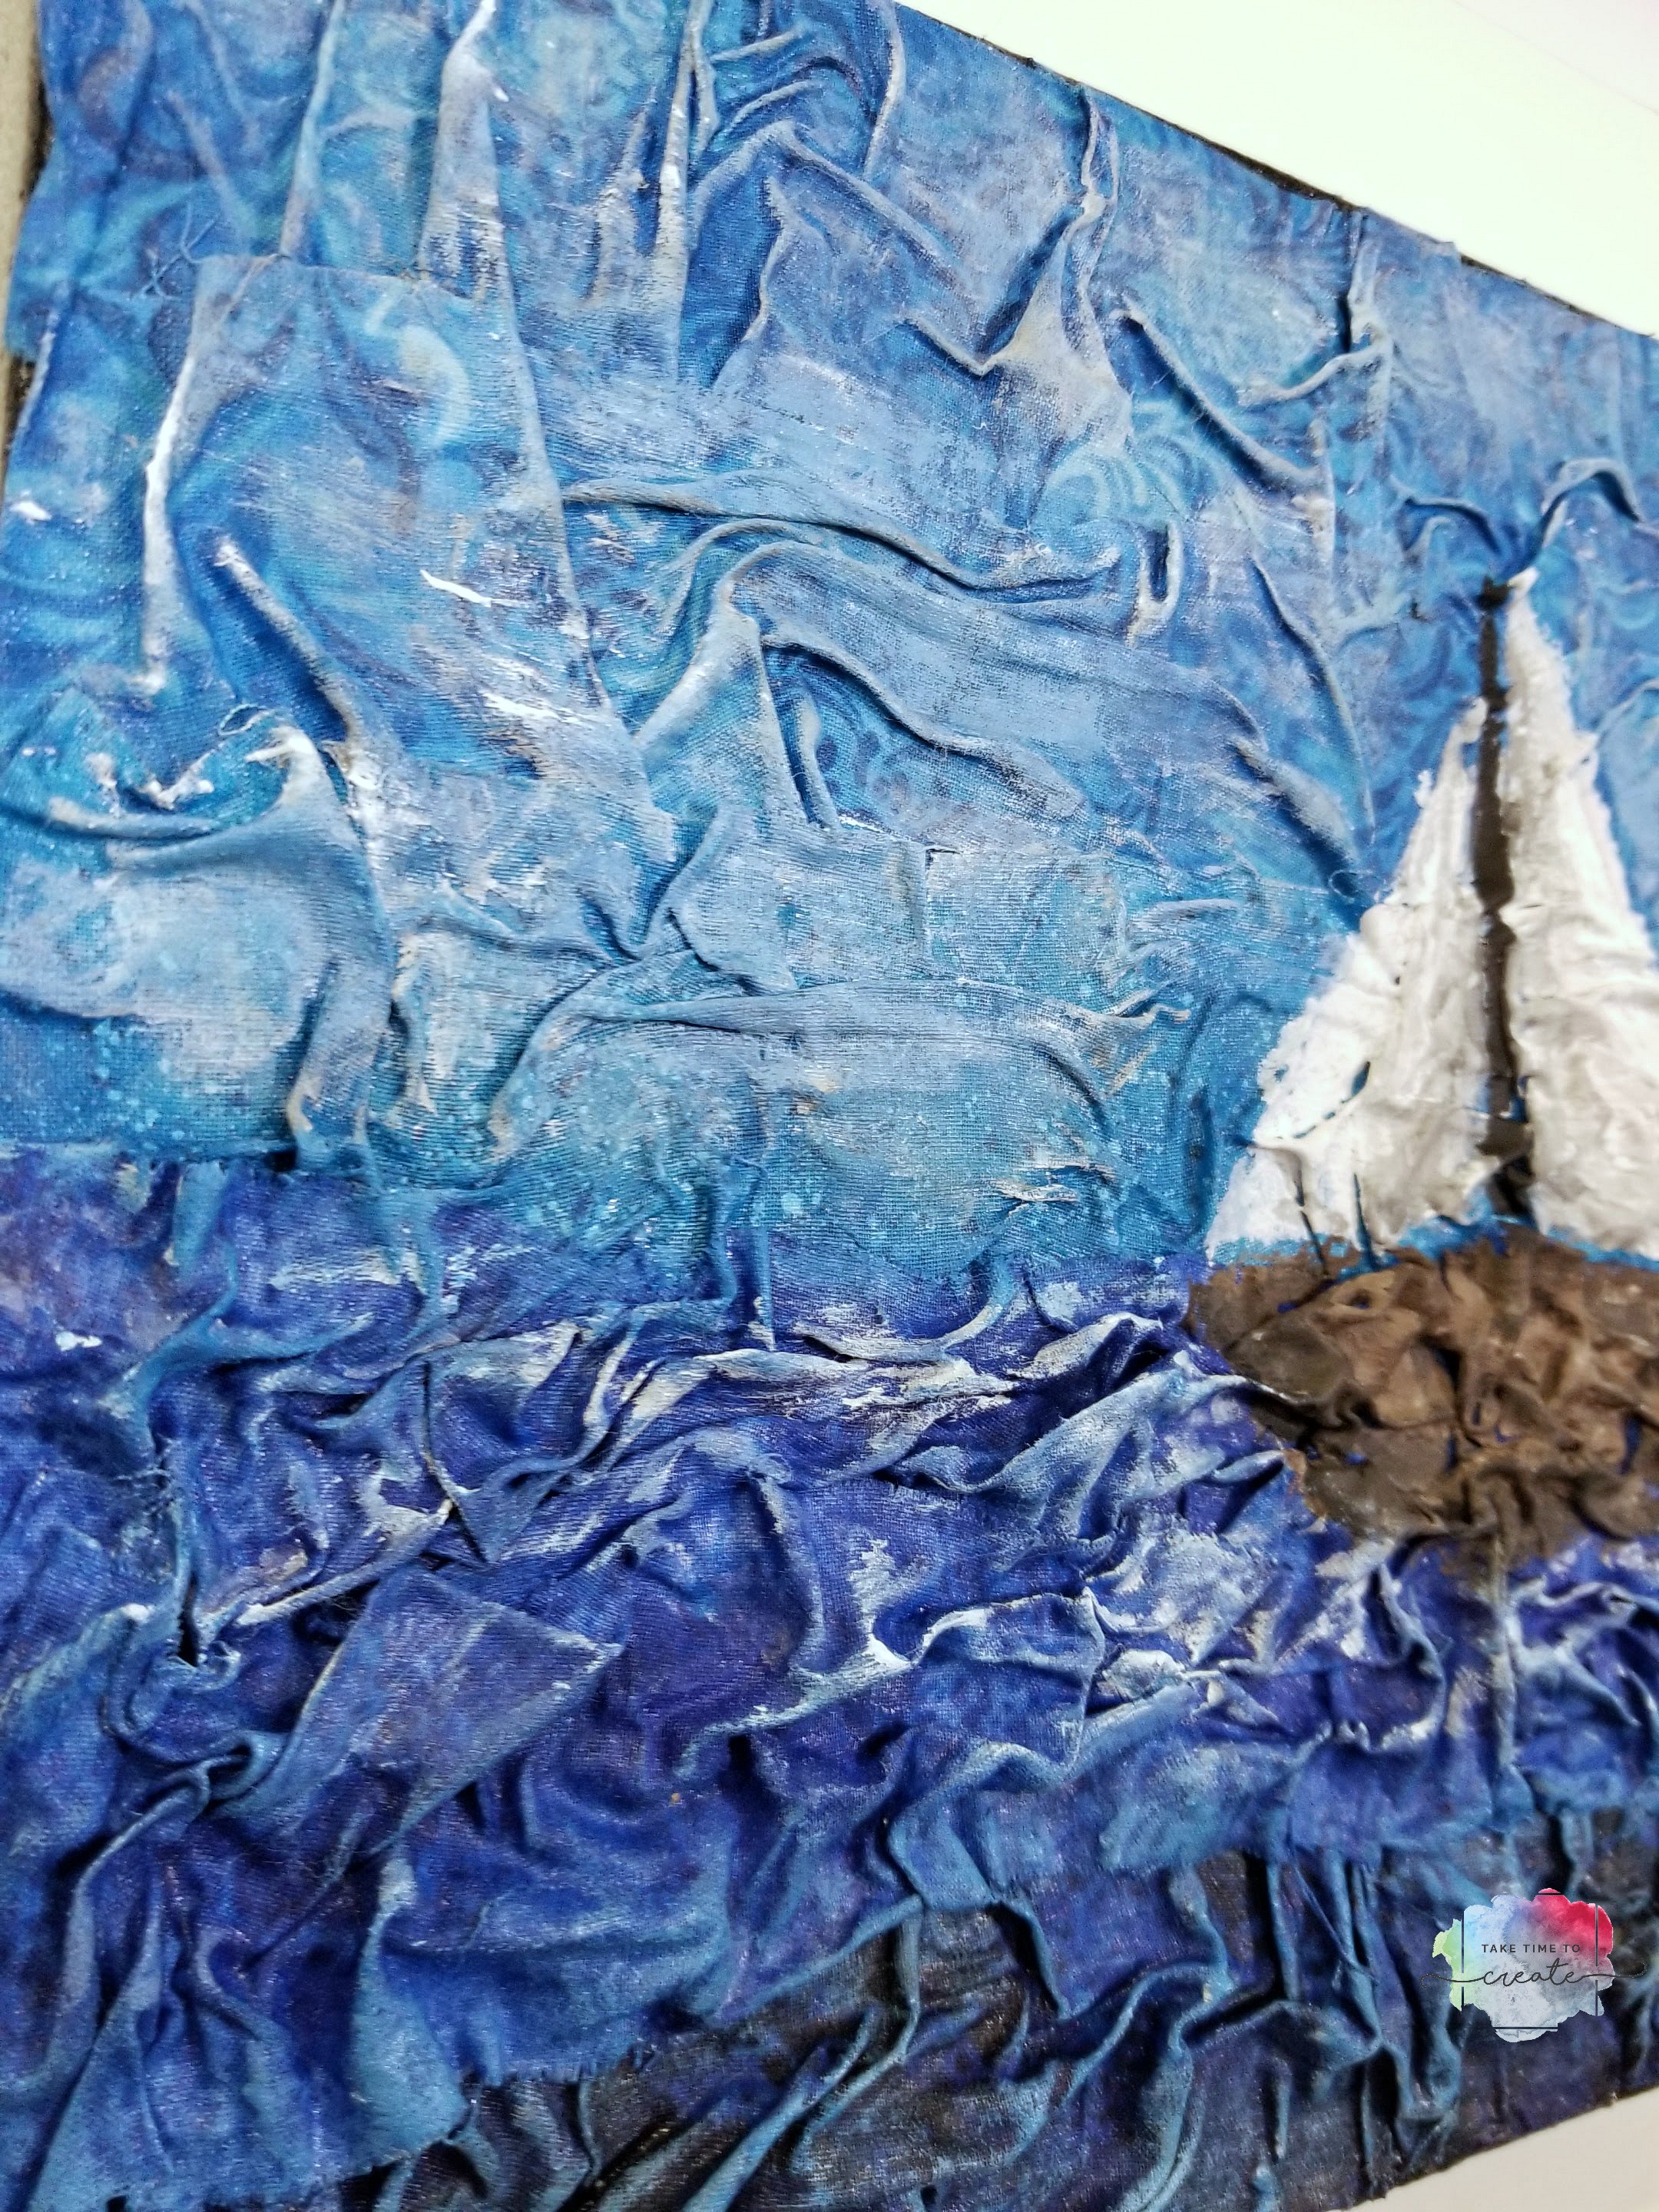
I did use a smaller canvas than normal, but I really liked how it turned out. And I used a variety of blues for the water and sky. I wanted to create depths and dimension with just one color. There are so many blues out there it was fun to pick and choose which one to use to get the look I was going for.
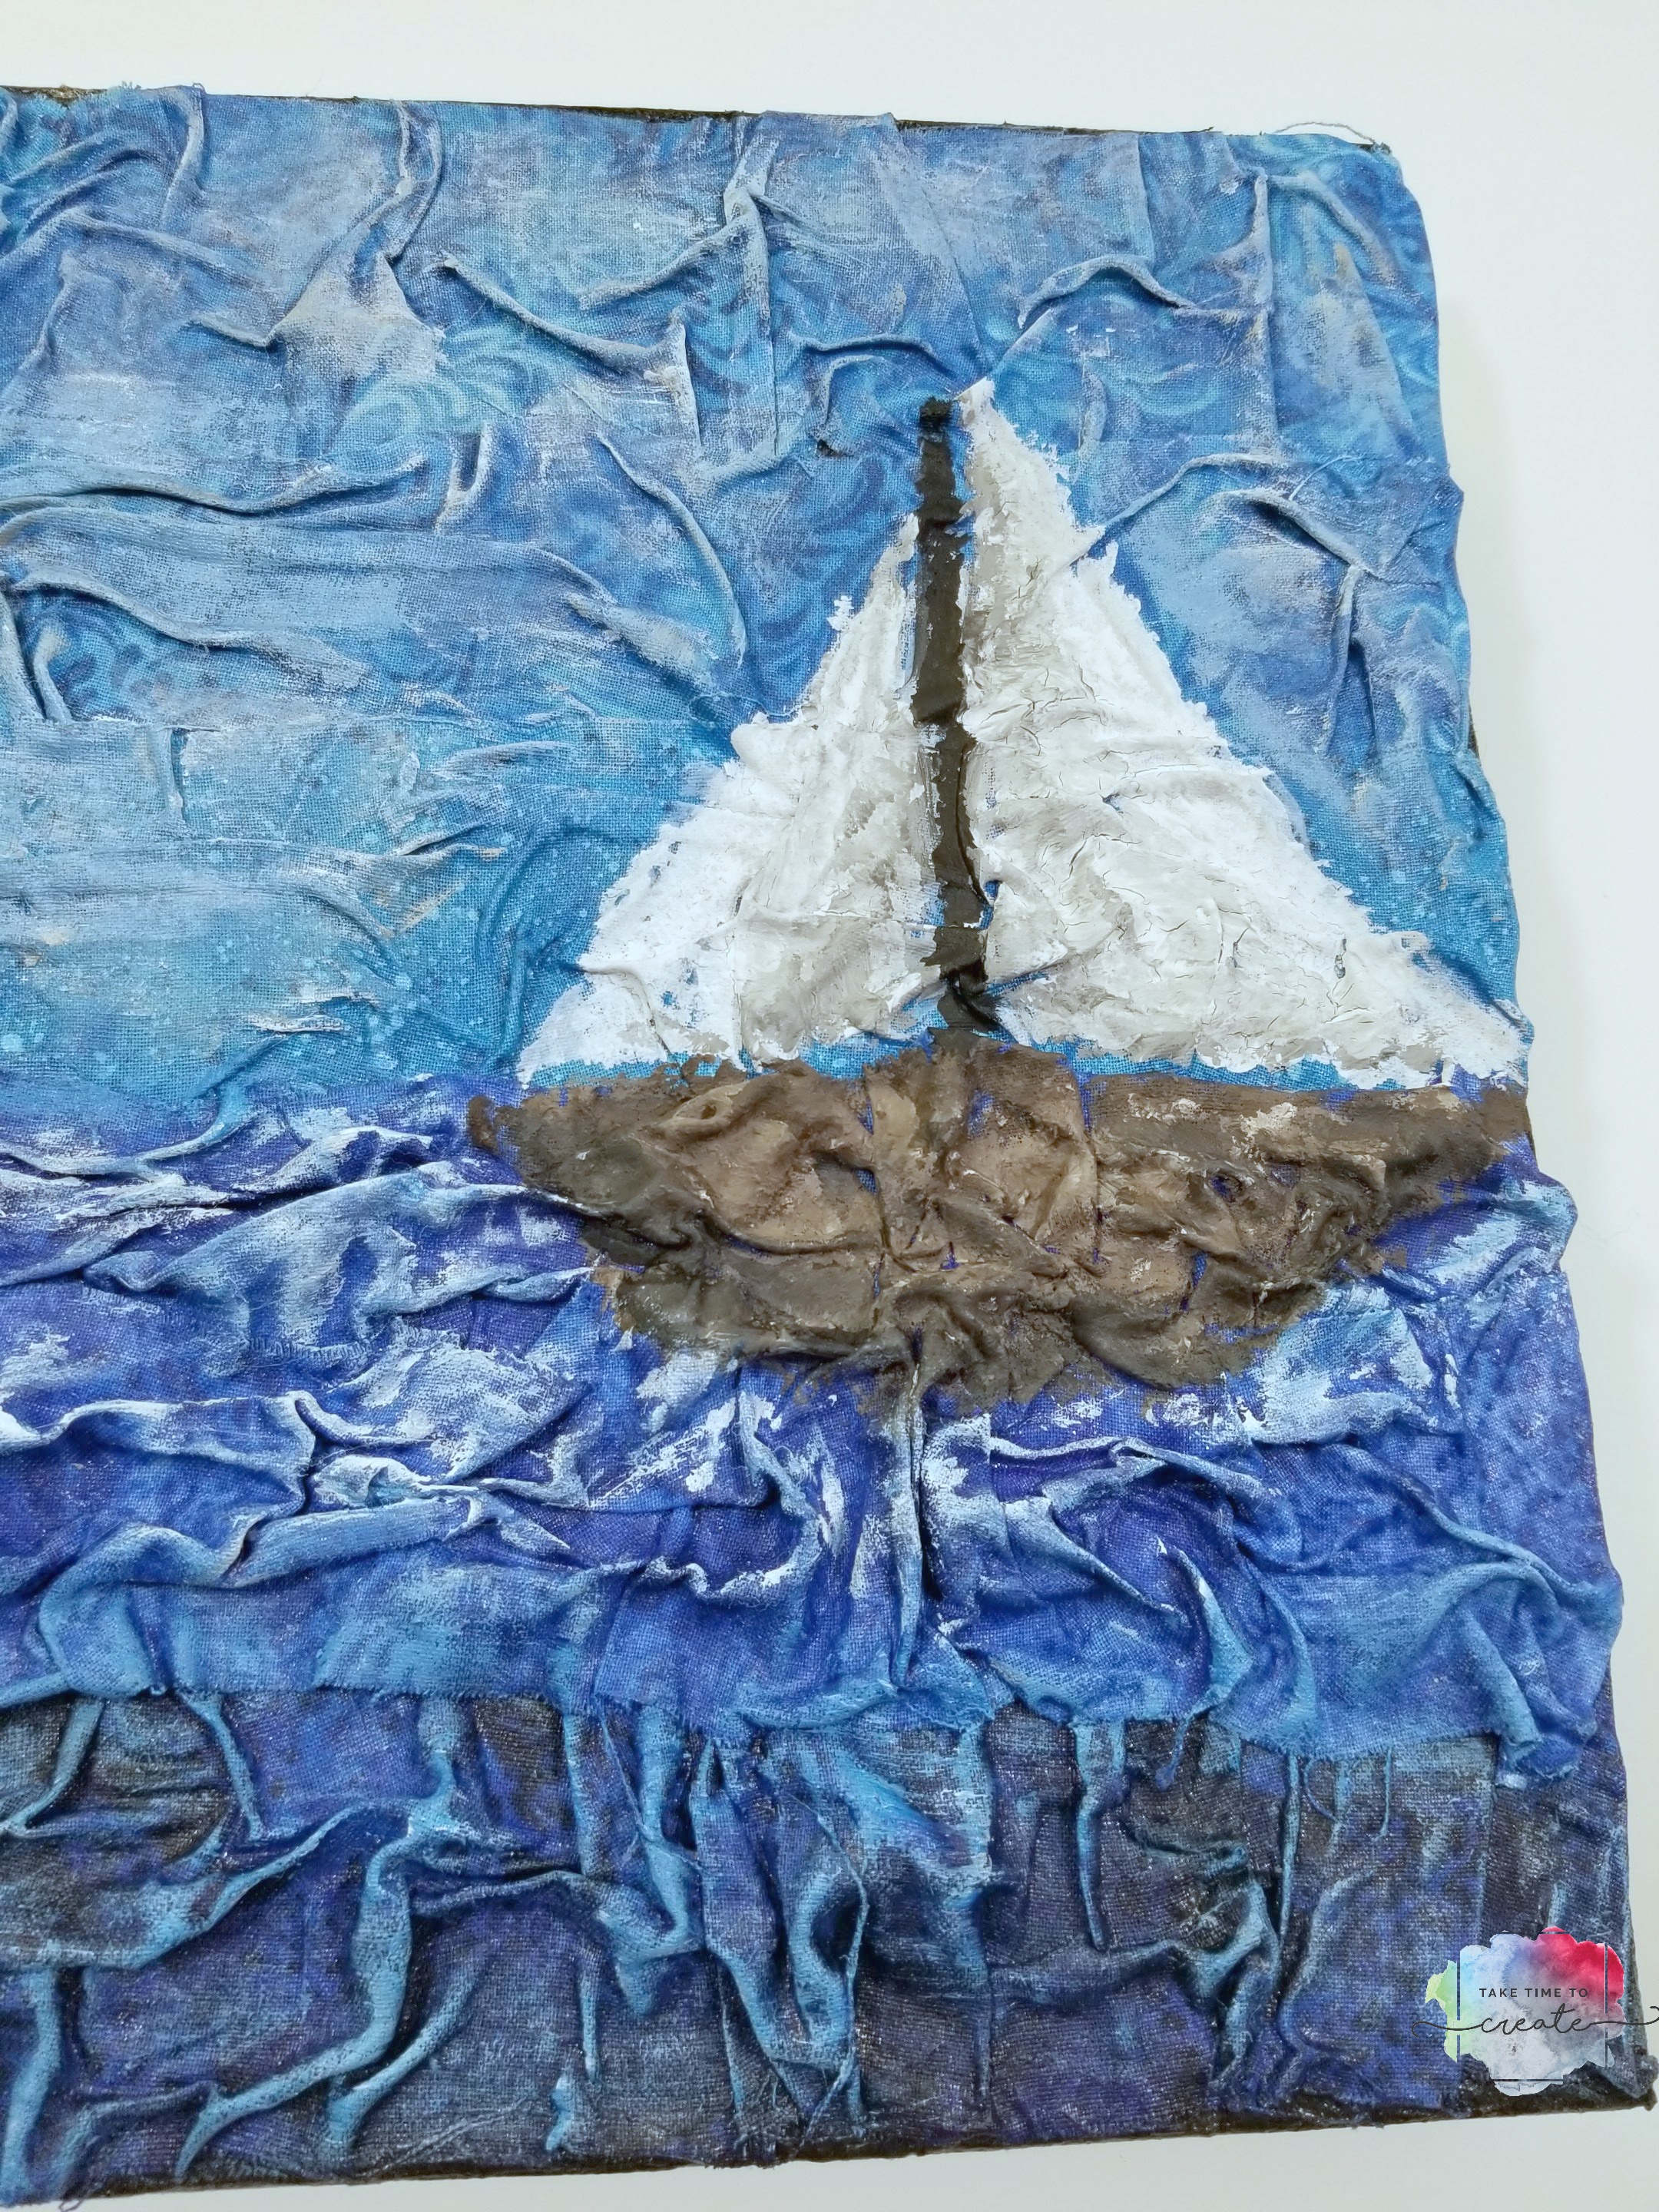
I used a heavy body paint from Finnabair to paint the boat, and that added additional texture and dimension to the boat. I really enjoyed that paint and I am looking forward to using it even more.
The last details were painted on to the sky and water with regular acrylic paint and that is what the painting needed. I didn’t add any metalic paints or sparks or glitter to this canvas. I kept it all matte and I think that was the right choice for this piece of art.
This was such a fun piece to create and it was a great way to commemorate a wonderful vacation.
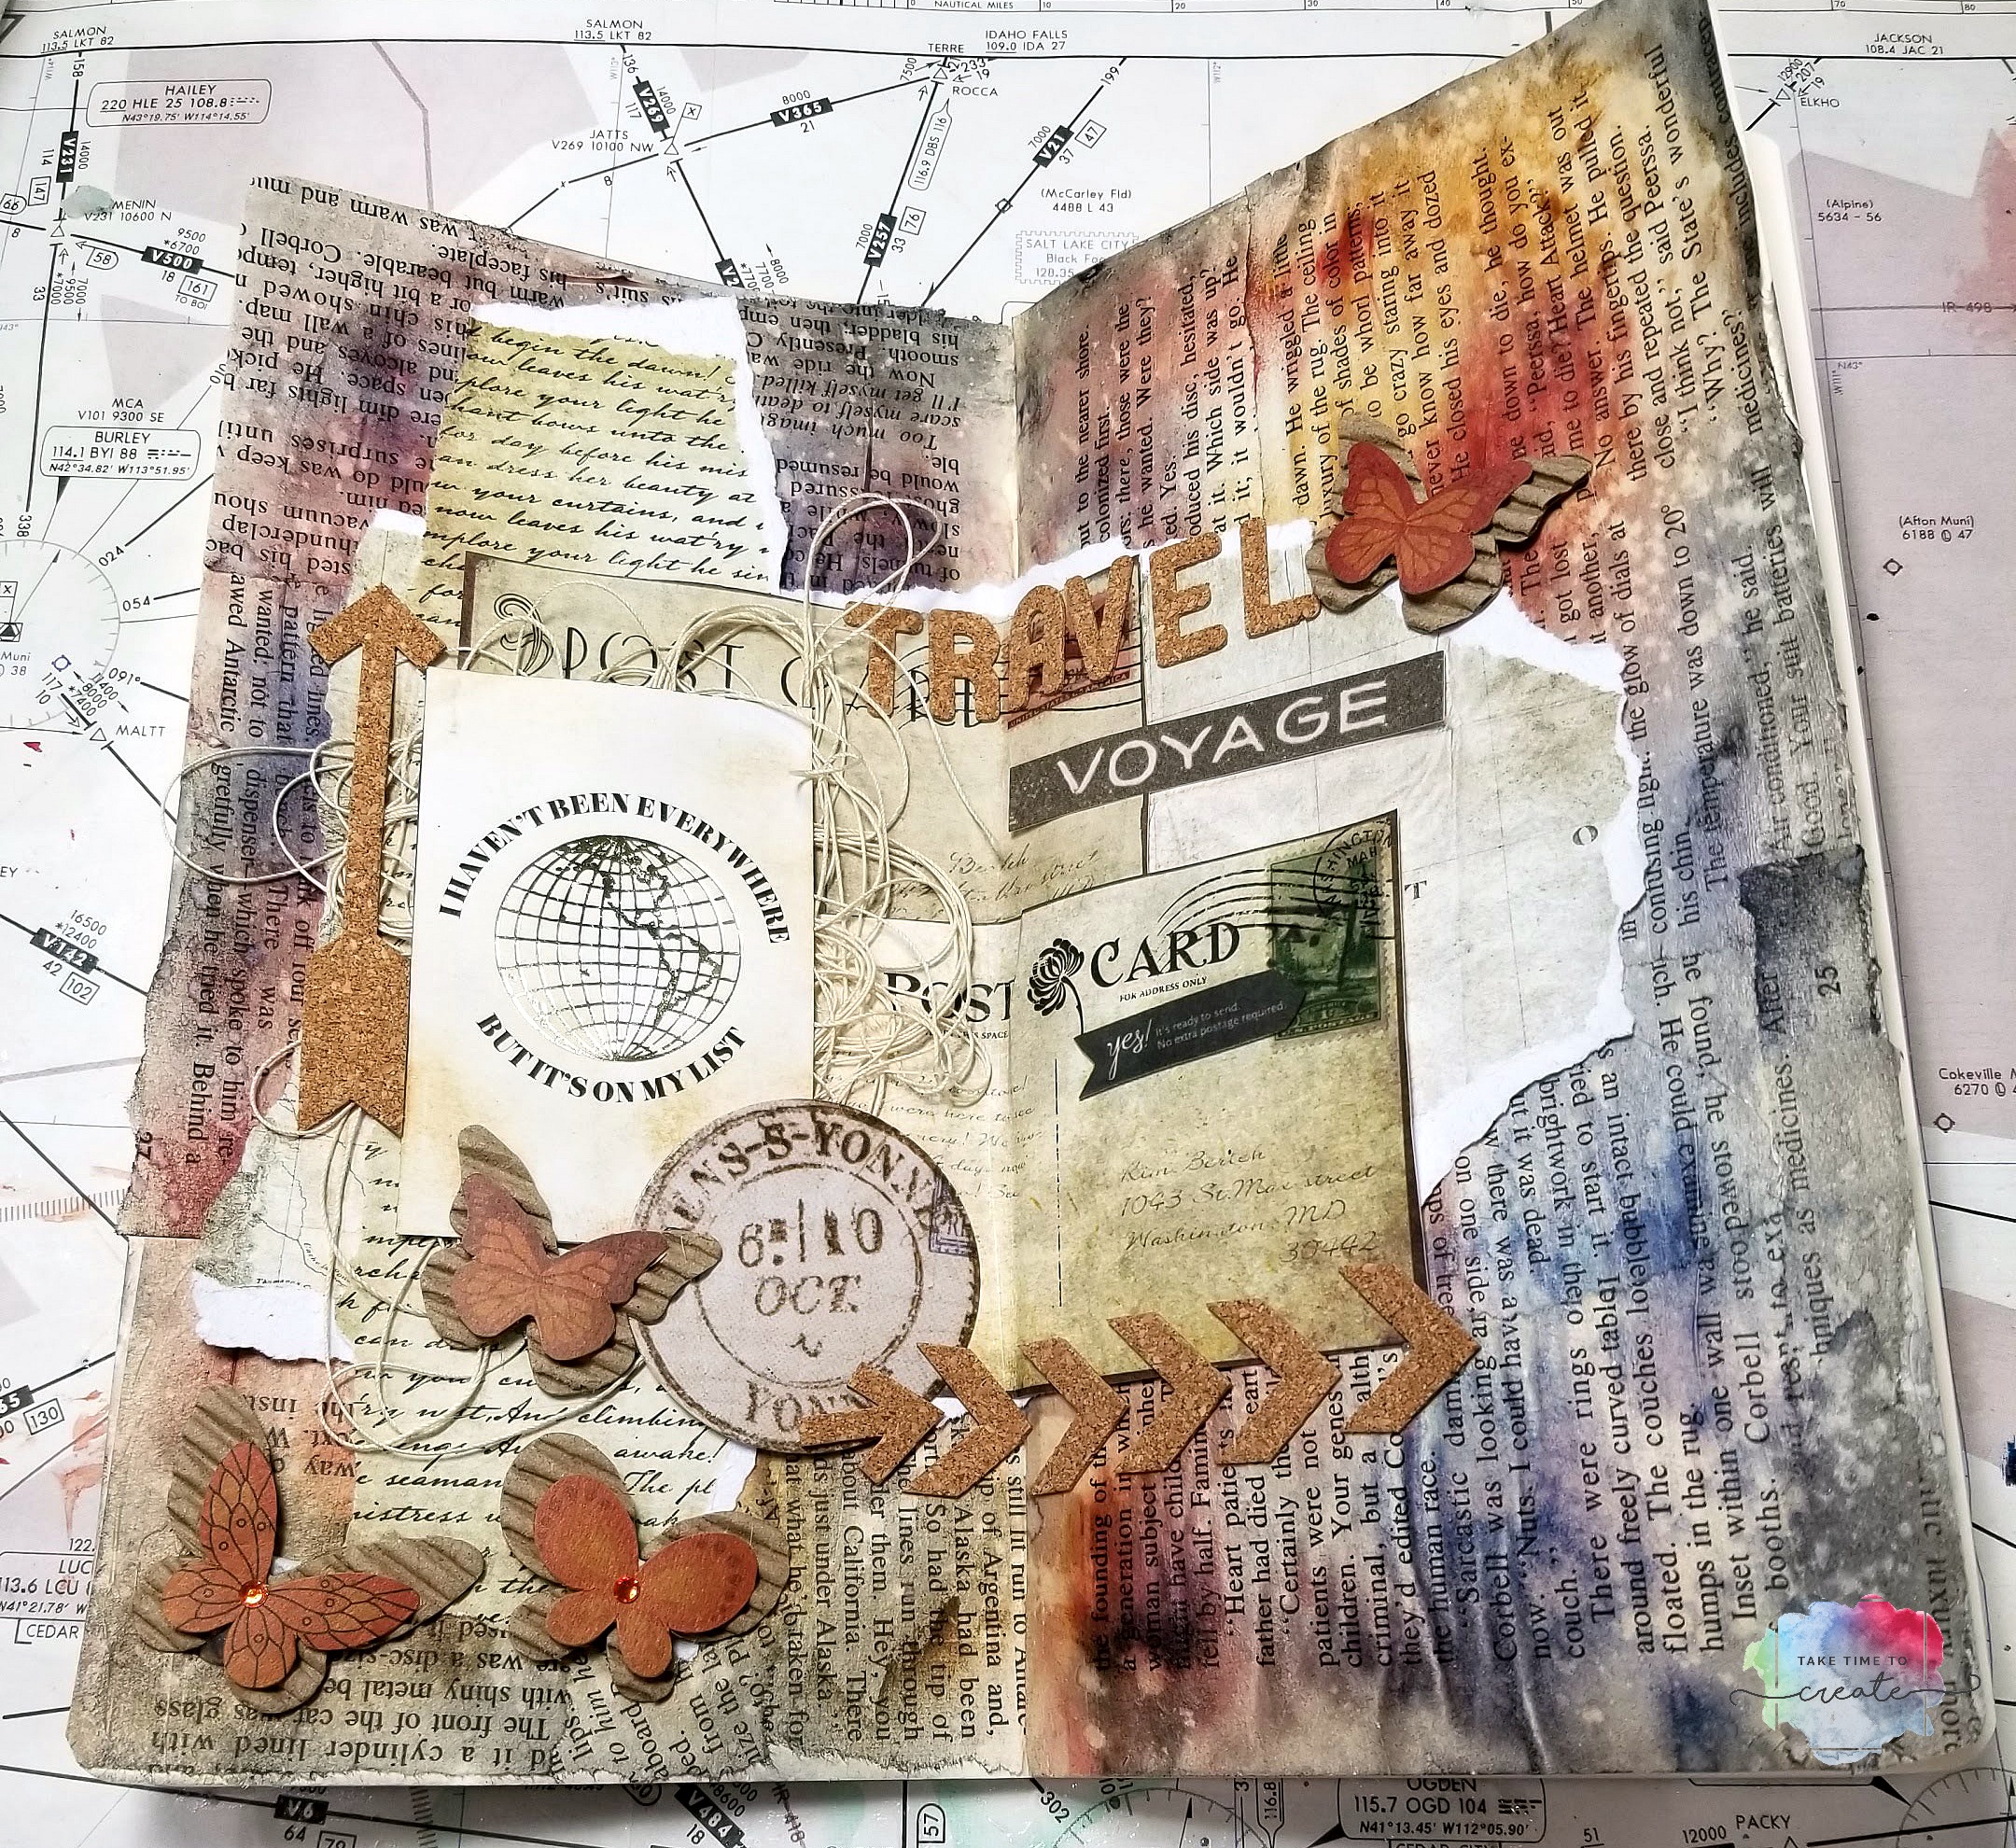
It is time for another art journal page! I am part of a group of artists, we call ourselves the Sisterhood of the Traveling Art Journal, lol. And what we do is everyone creates a page and then mails it to the next person on the list. Then when I get the next journal in the mail I add to it, using the theme they decided on. My journal is a travel theme, I love to travel so I figured this would be the best theme for my journal.
I am excited to see what people come up with and what their themes will be. I think this will take over a year to complete, so it is a long term project. I will share the pages when I get the next journal in and I will do tutorials on the pages I create.
I attached the video where I explain how I created my first page.
I did a generic travel page rather than an individual place or country. I thought this would really show my love of travel, no matter where I go, or who it is with.
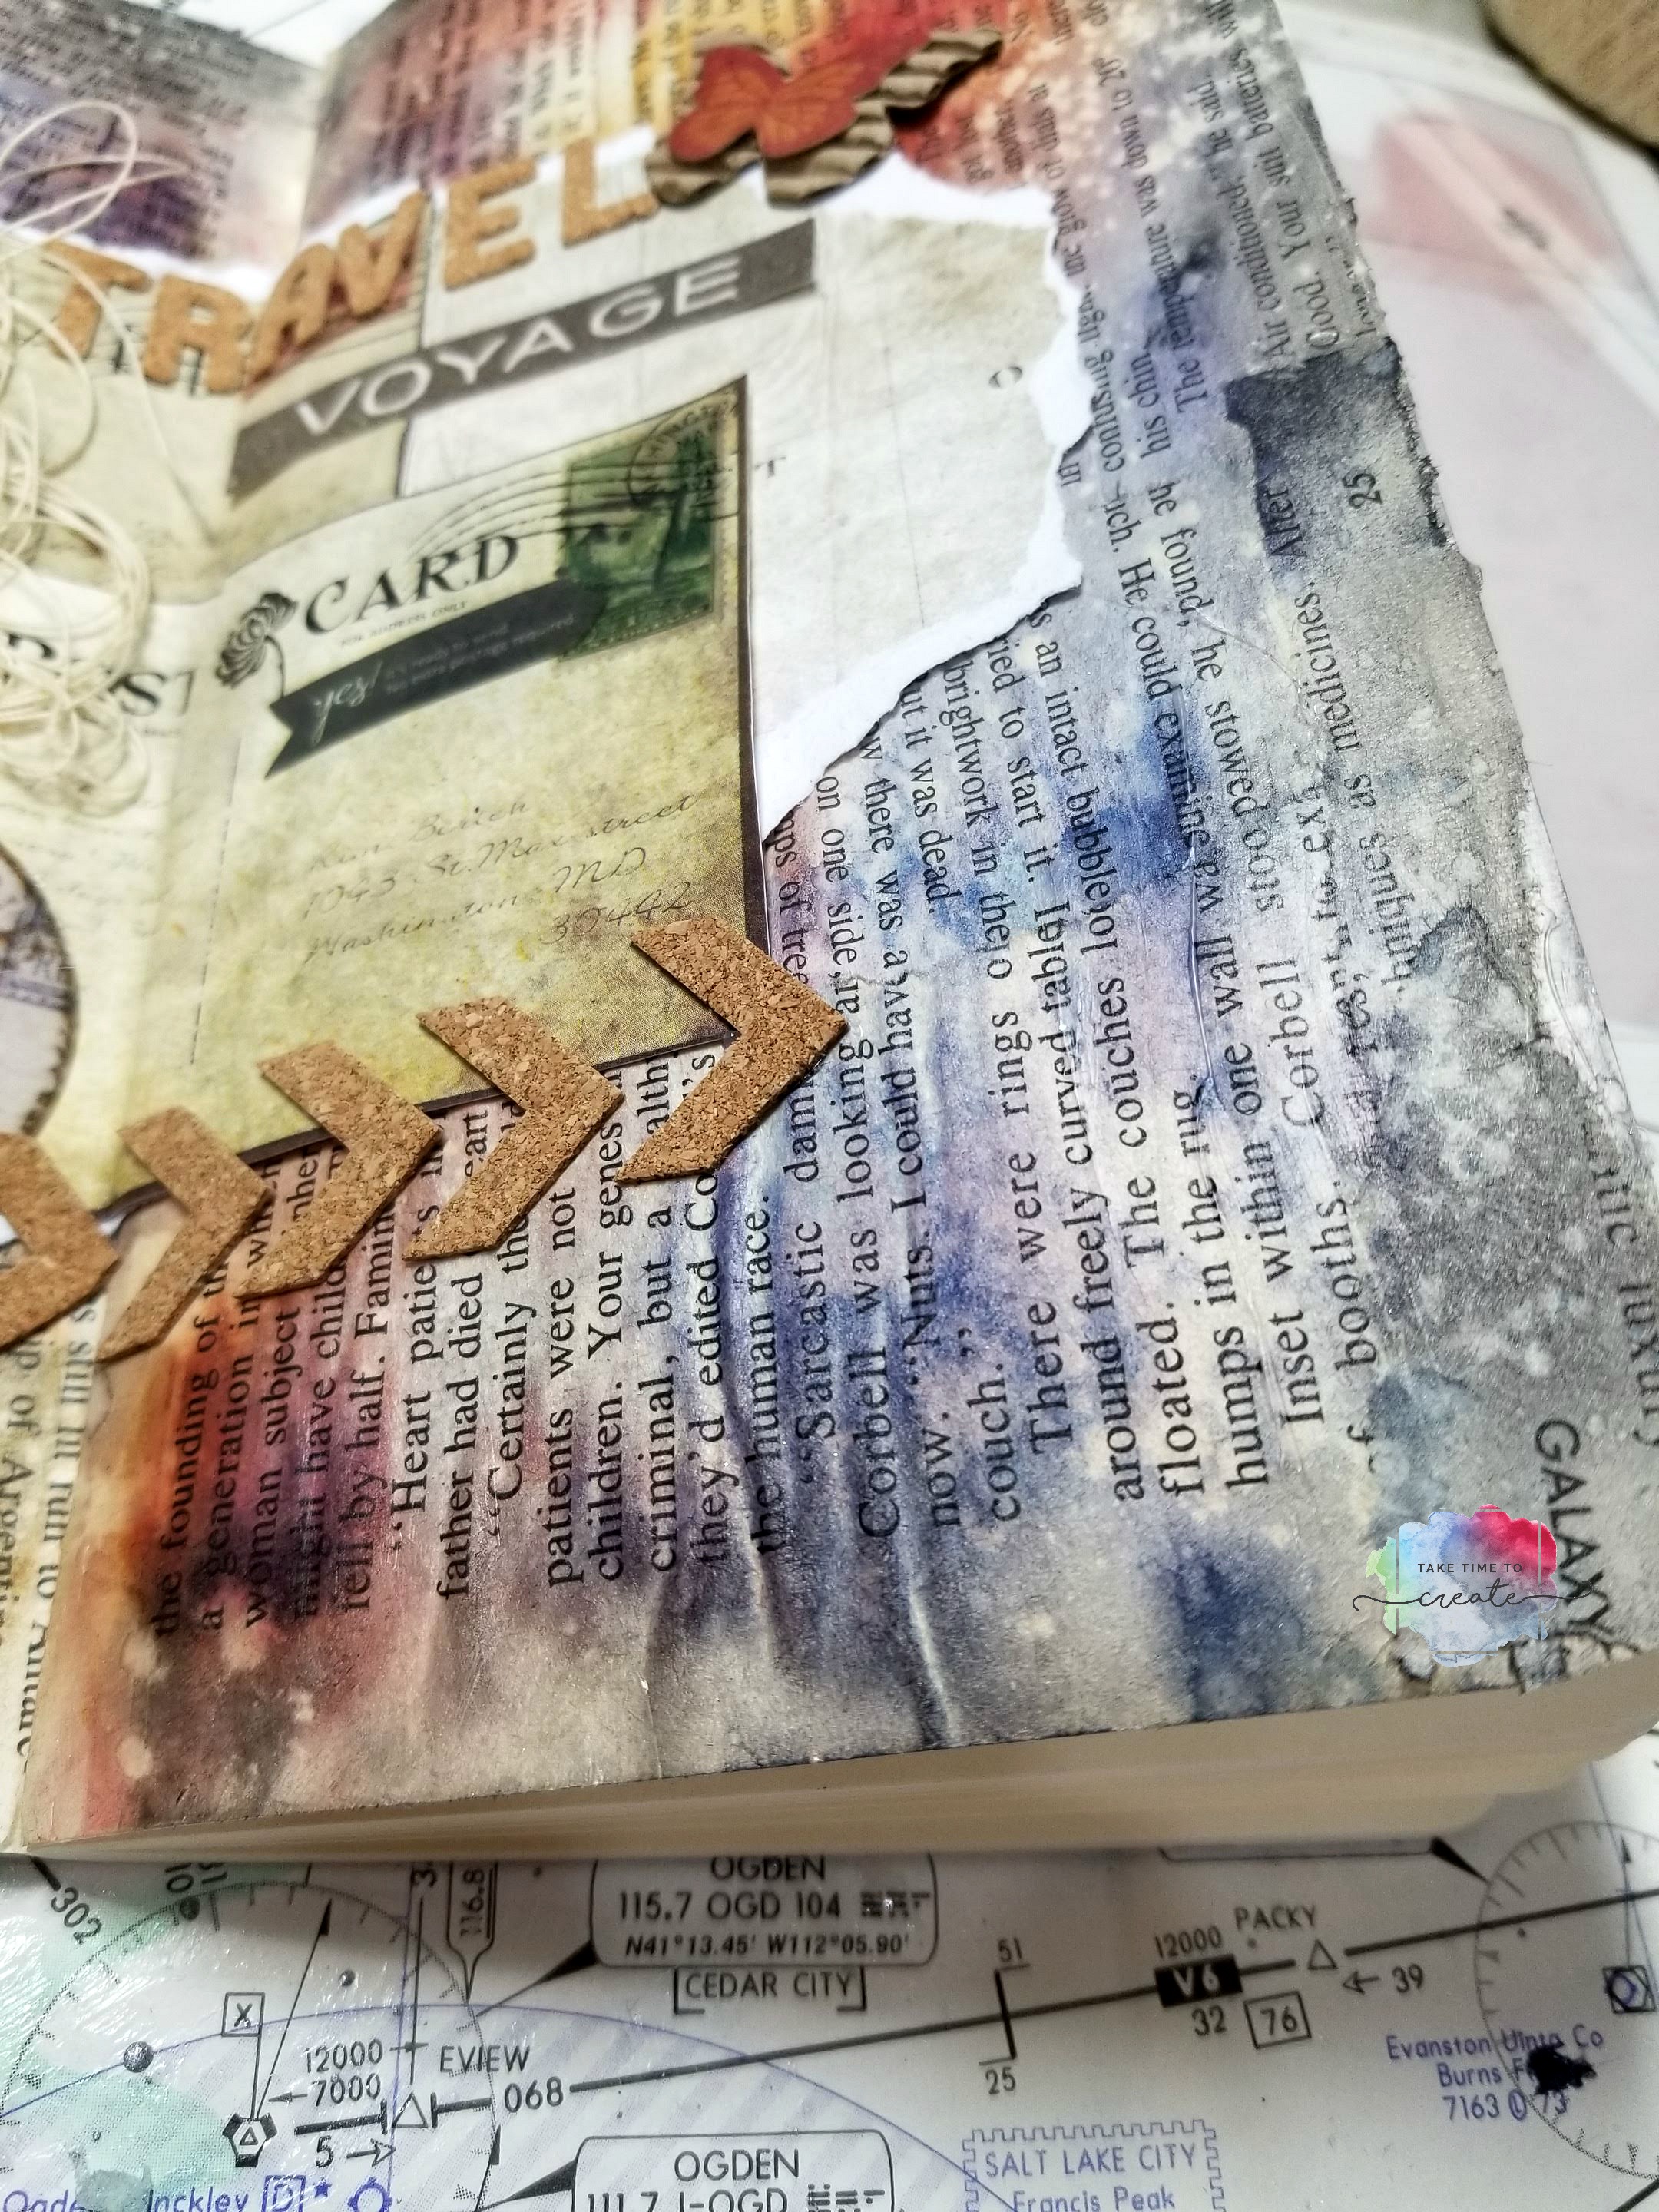
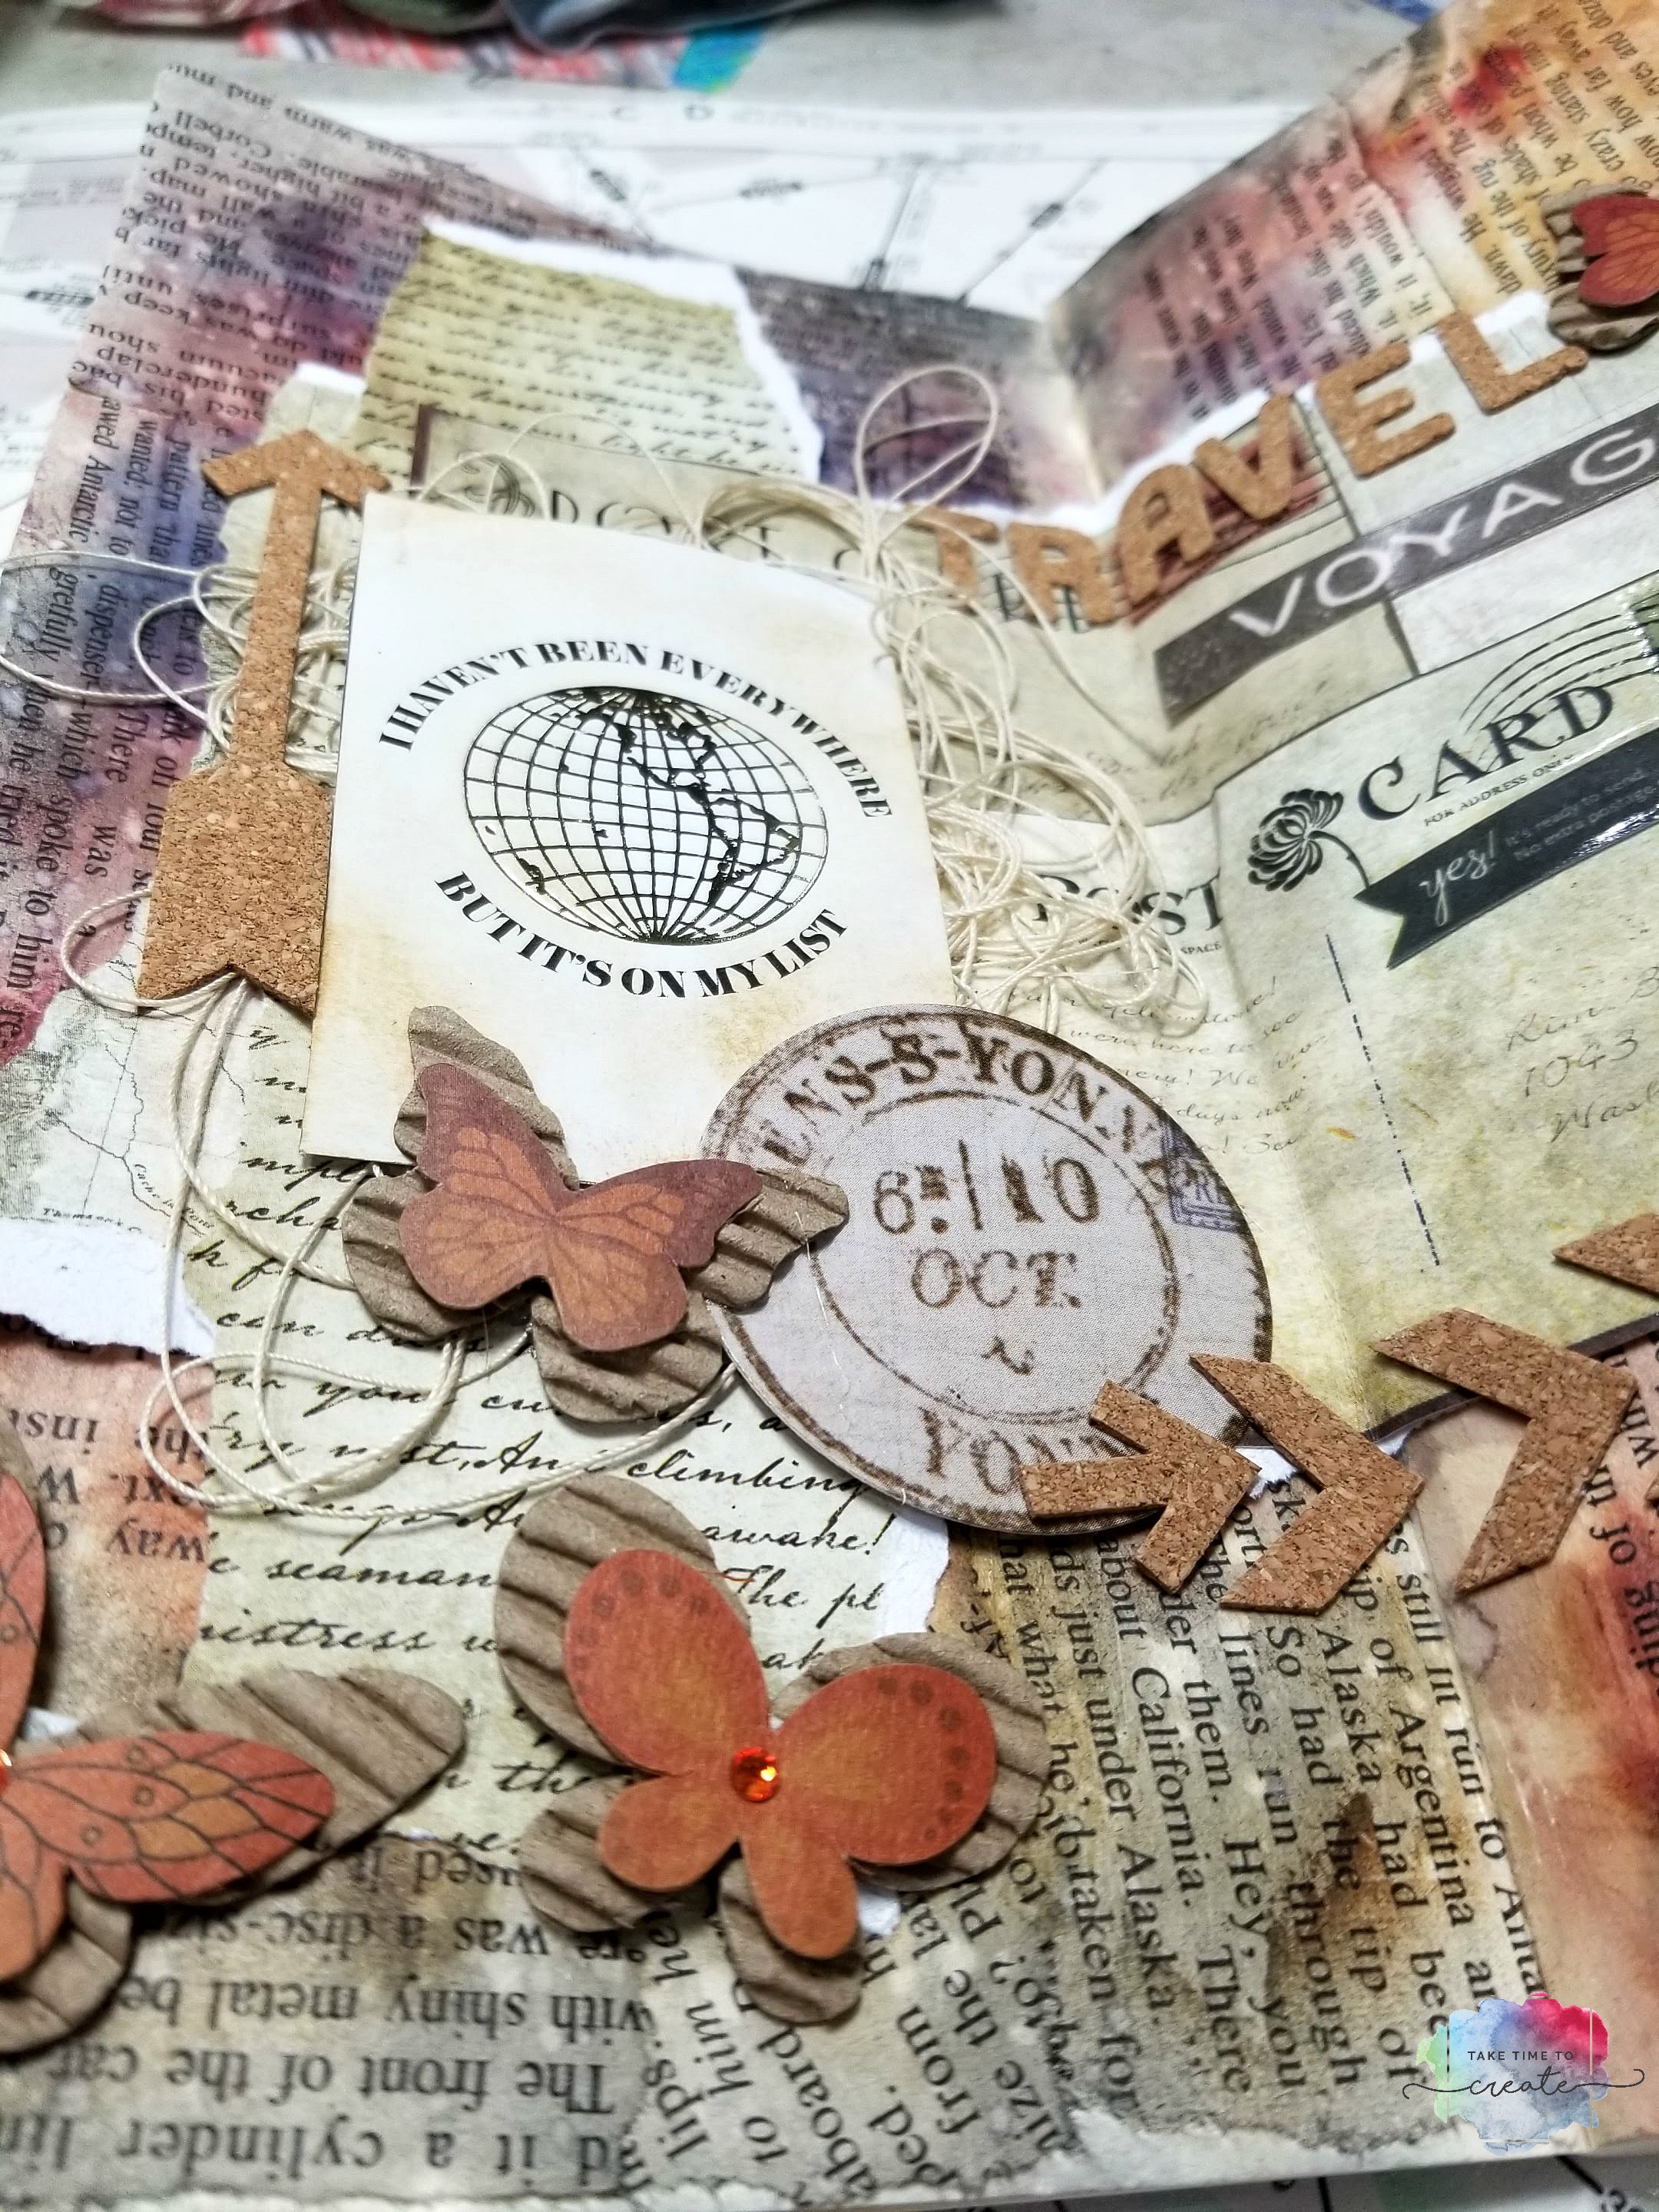
I used a ton of products to create a layered look, all surrounding the focal point. I really enjoyed going through my stash and finding vintage looking papers, stickers, and embellishments.
The journal I picked is the Dylusions art journal. It is the perfect size and easy to transport. I added a cover to protect it and a pocket in case someone wants to add goodies to send to the next person.
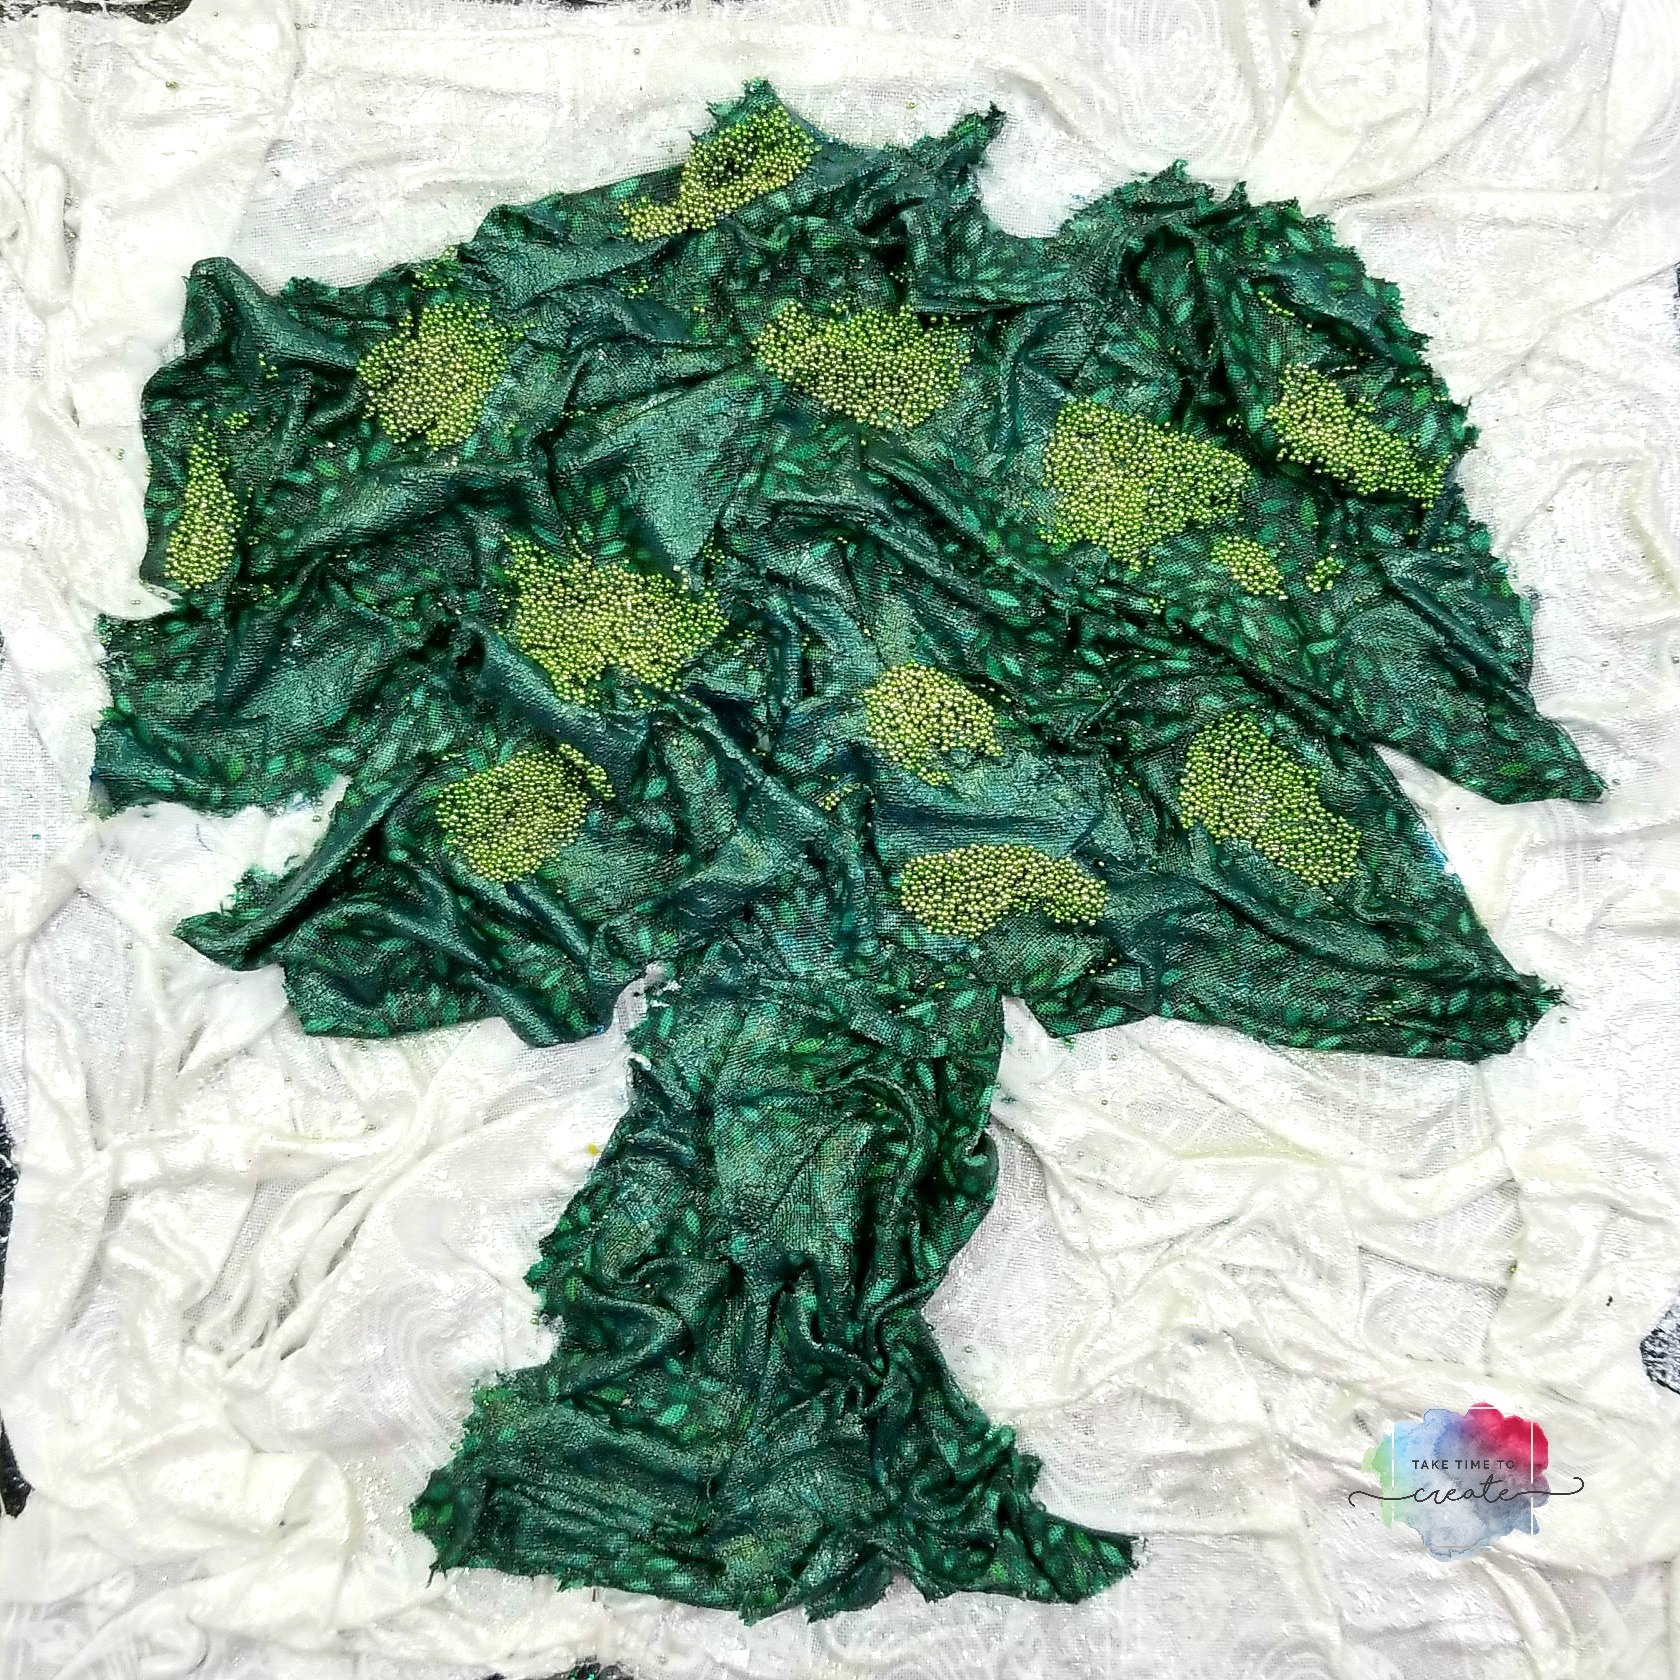
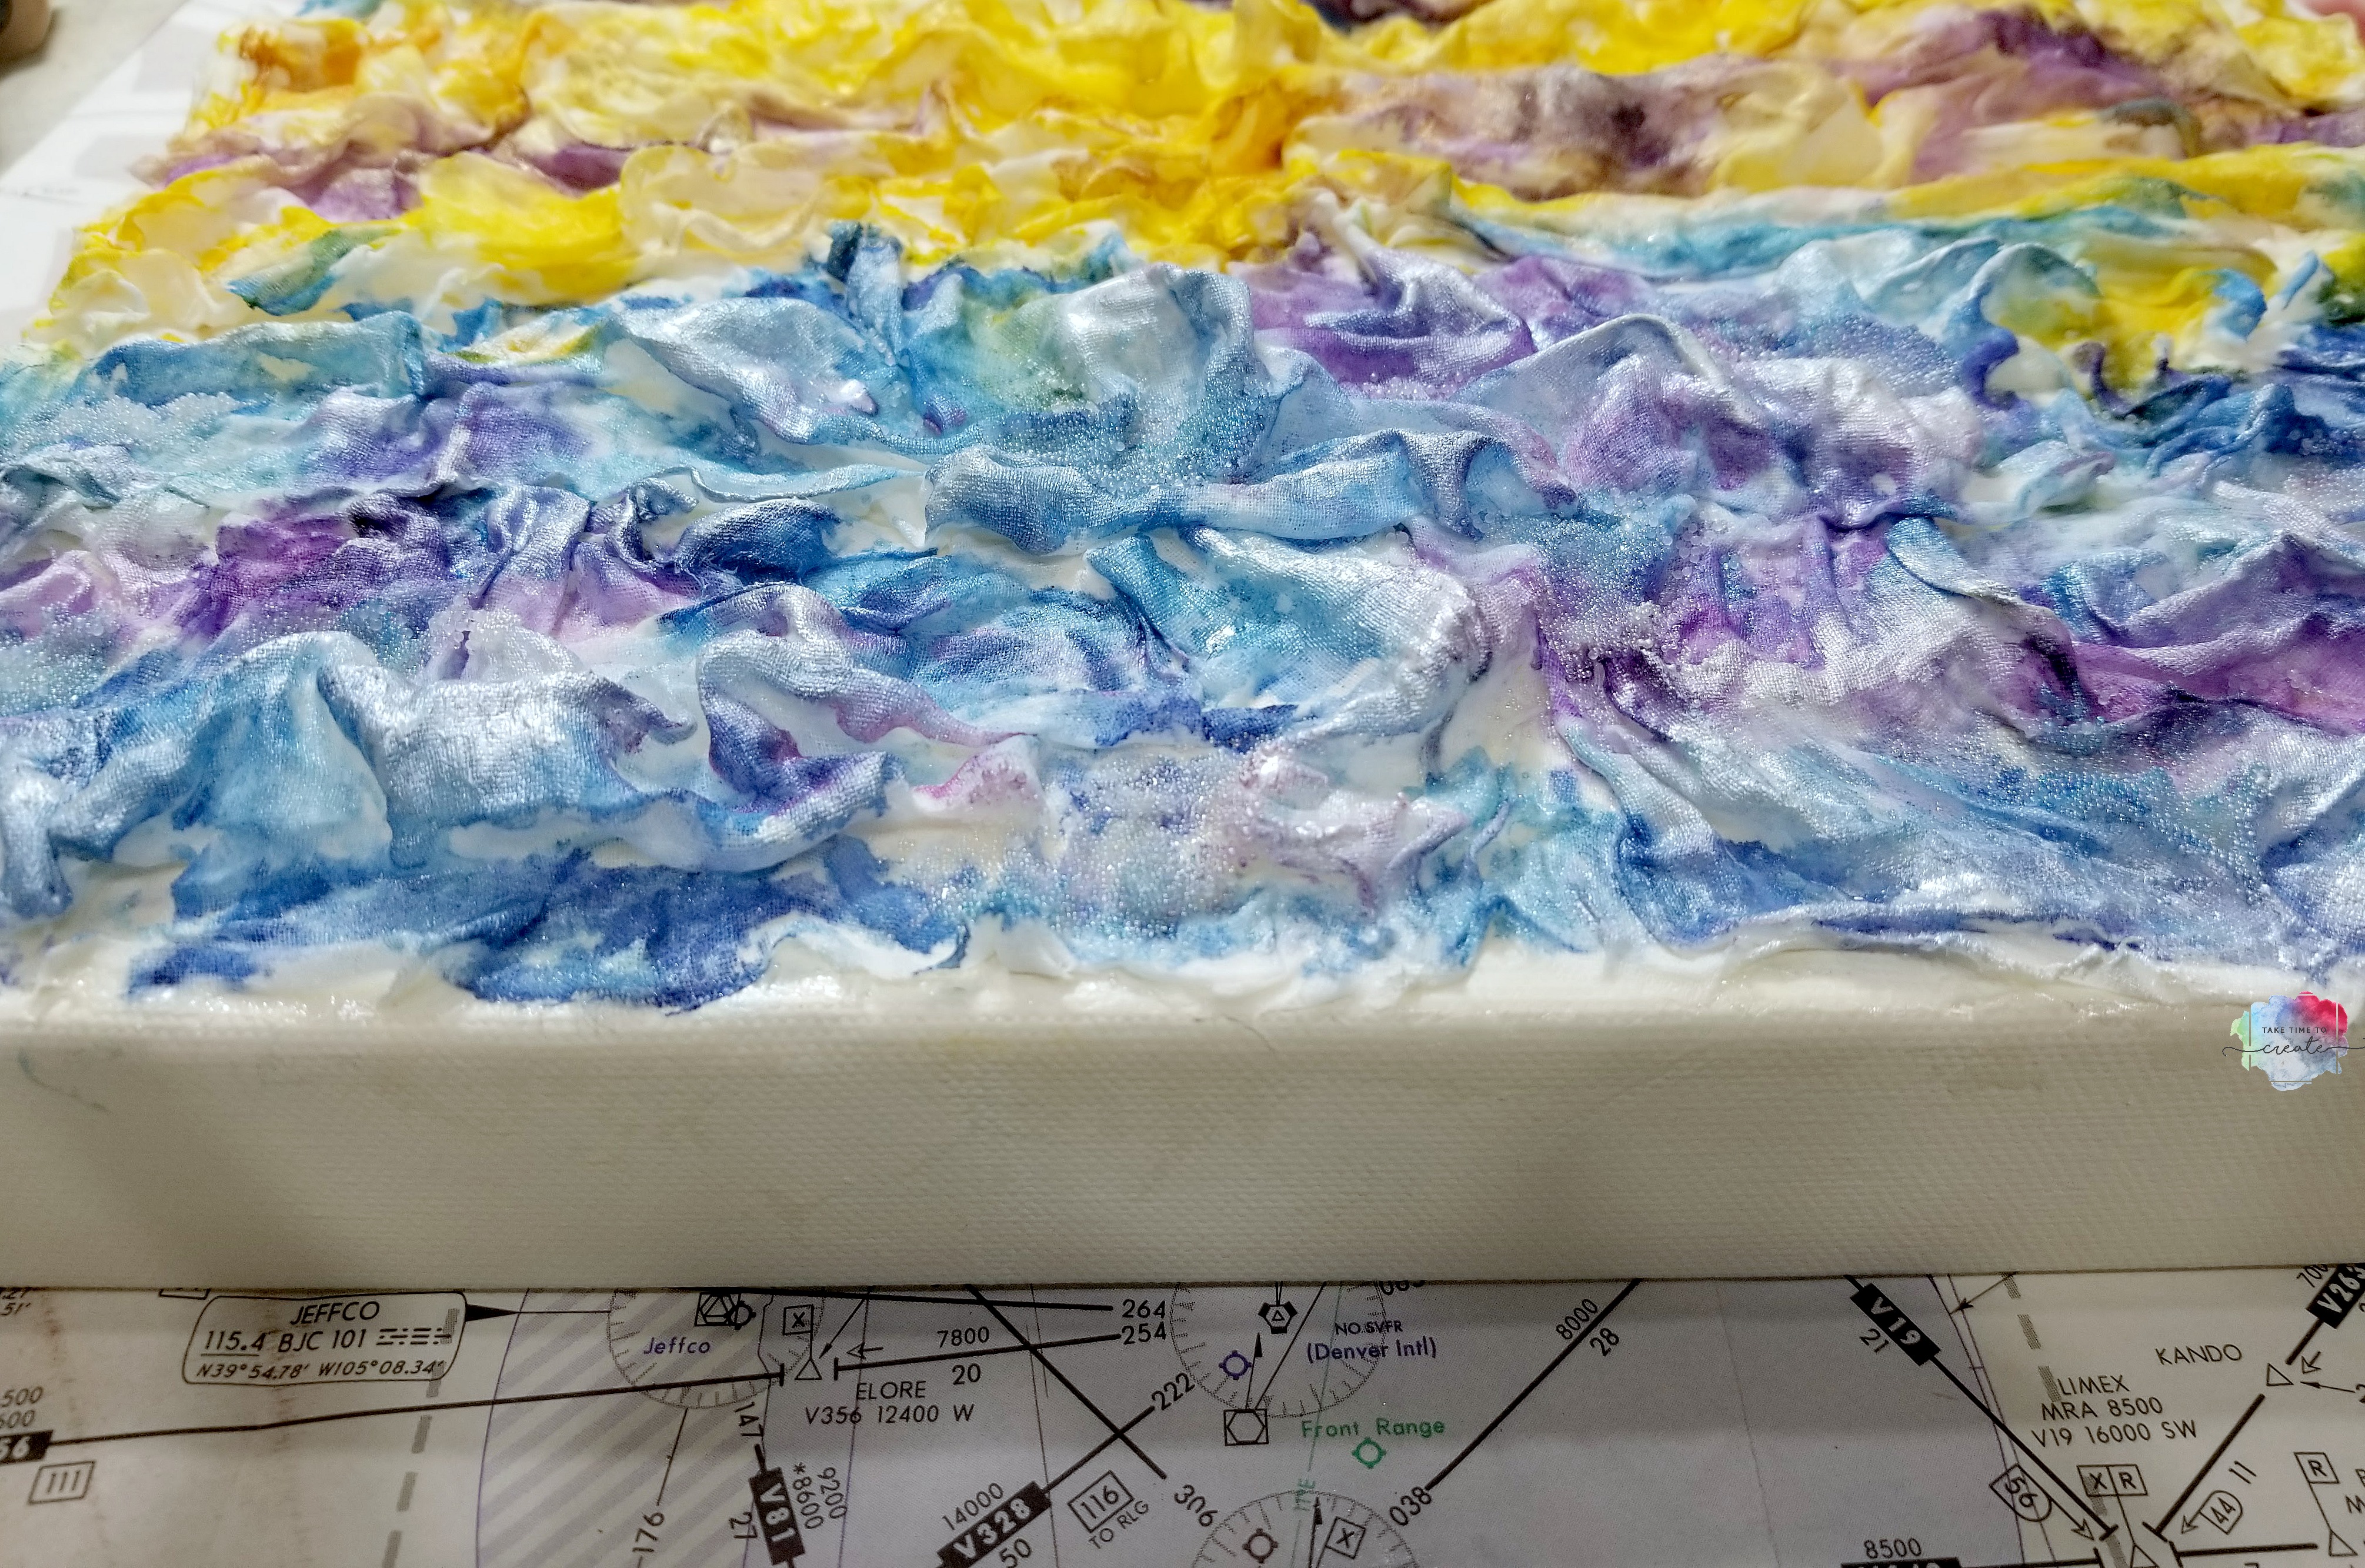
Sometimes an experiment turns out really cool, and this just so happens to be one of those times! I did a class at ArtVenture in January of this year that taught us how to watercolor on fabric. Not quite like this example, but it got my creative juices flowing! I really wanted to explore this method and develop my own technique, and this is what I came up with- A Fabric Watercolor Landscape (actually the ocean, and it is abstract…. lol)
As always the video goes over all the steps, and it is a good companion to the blog post.
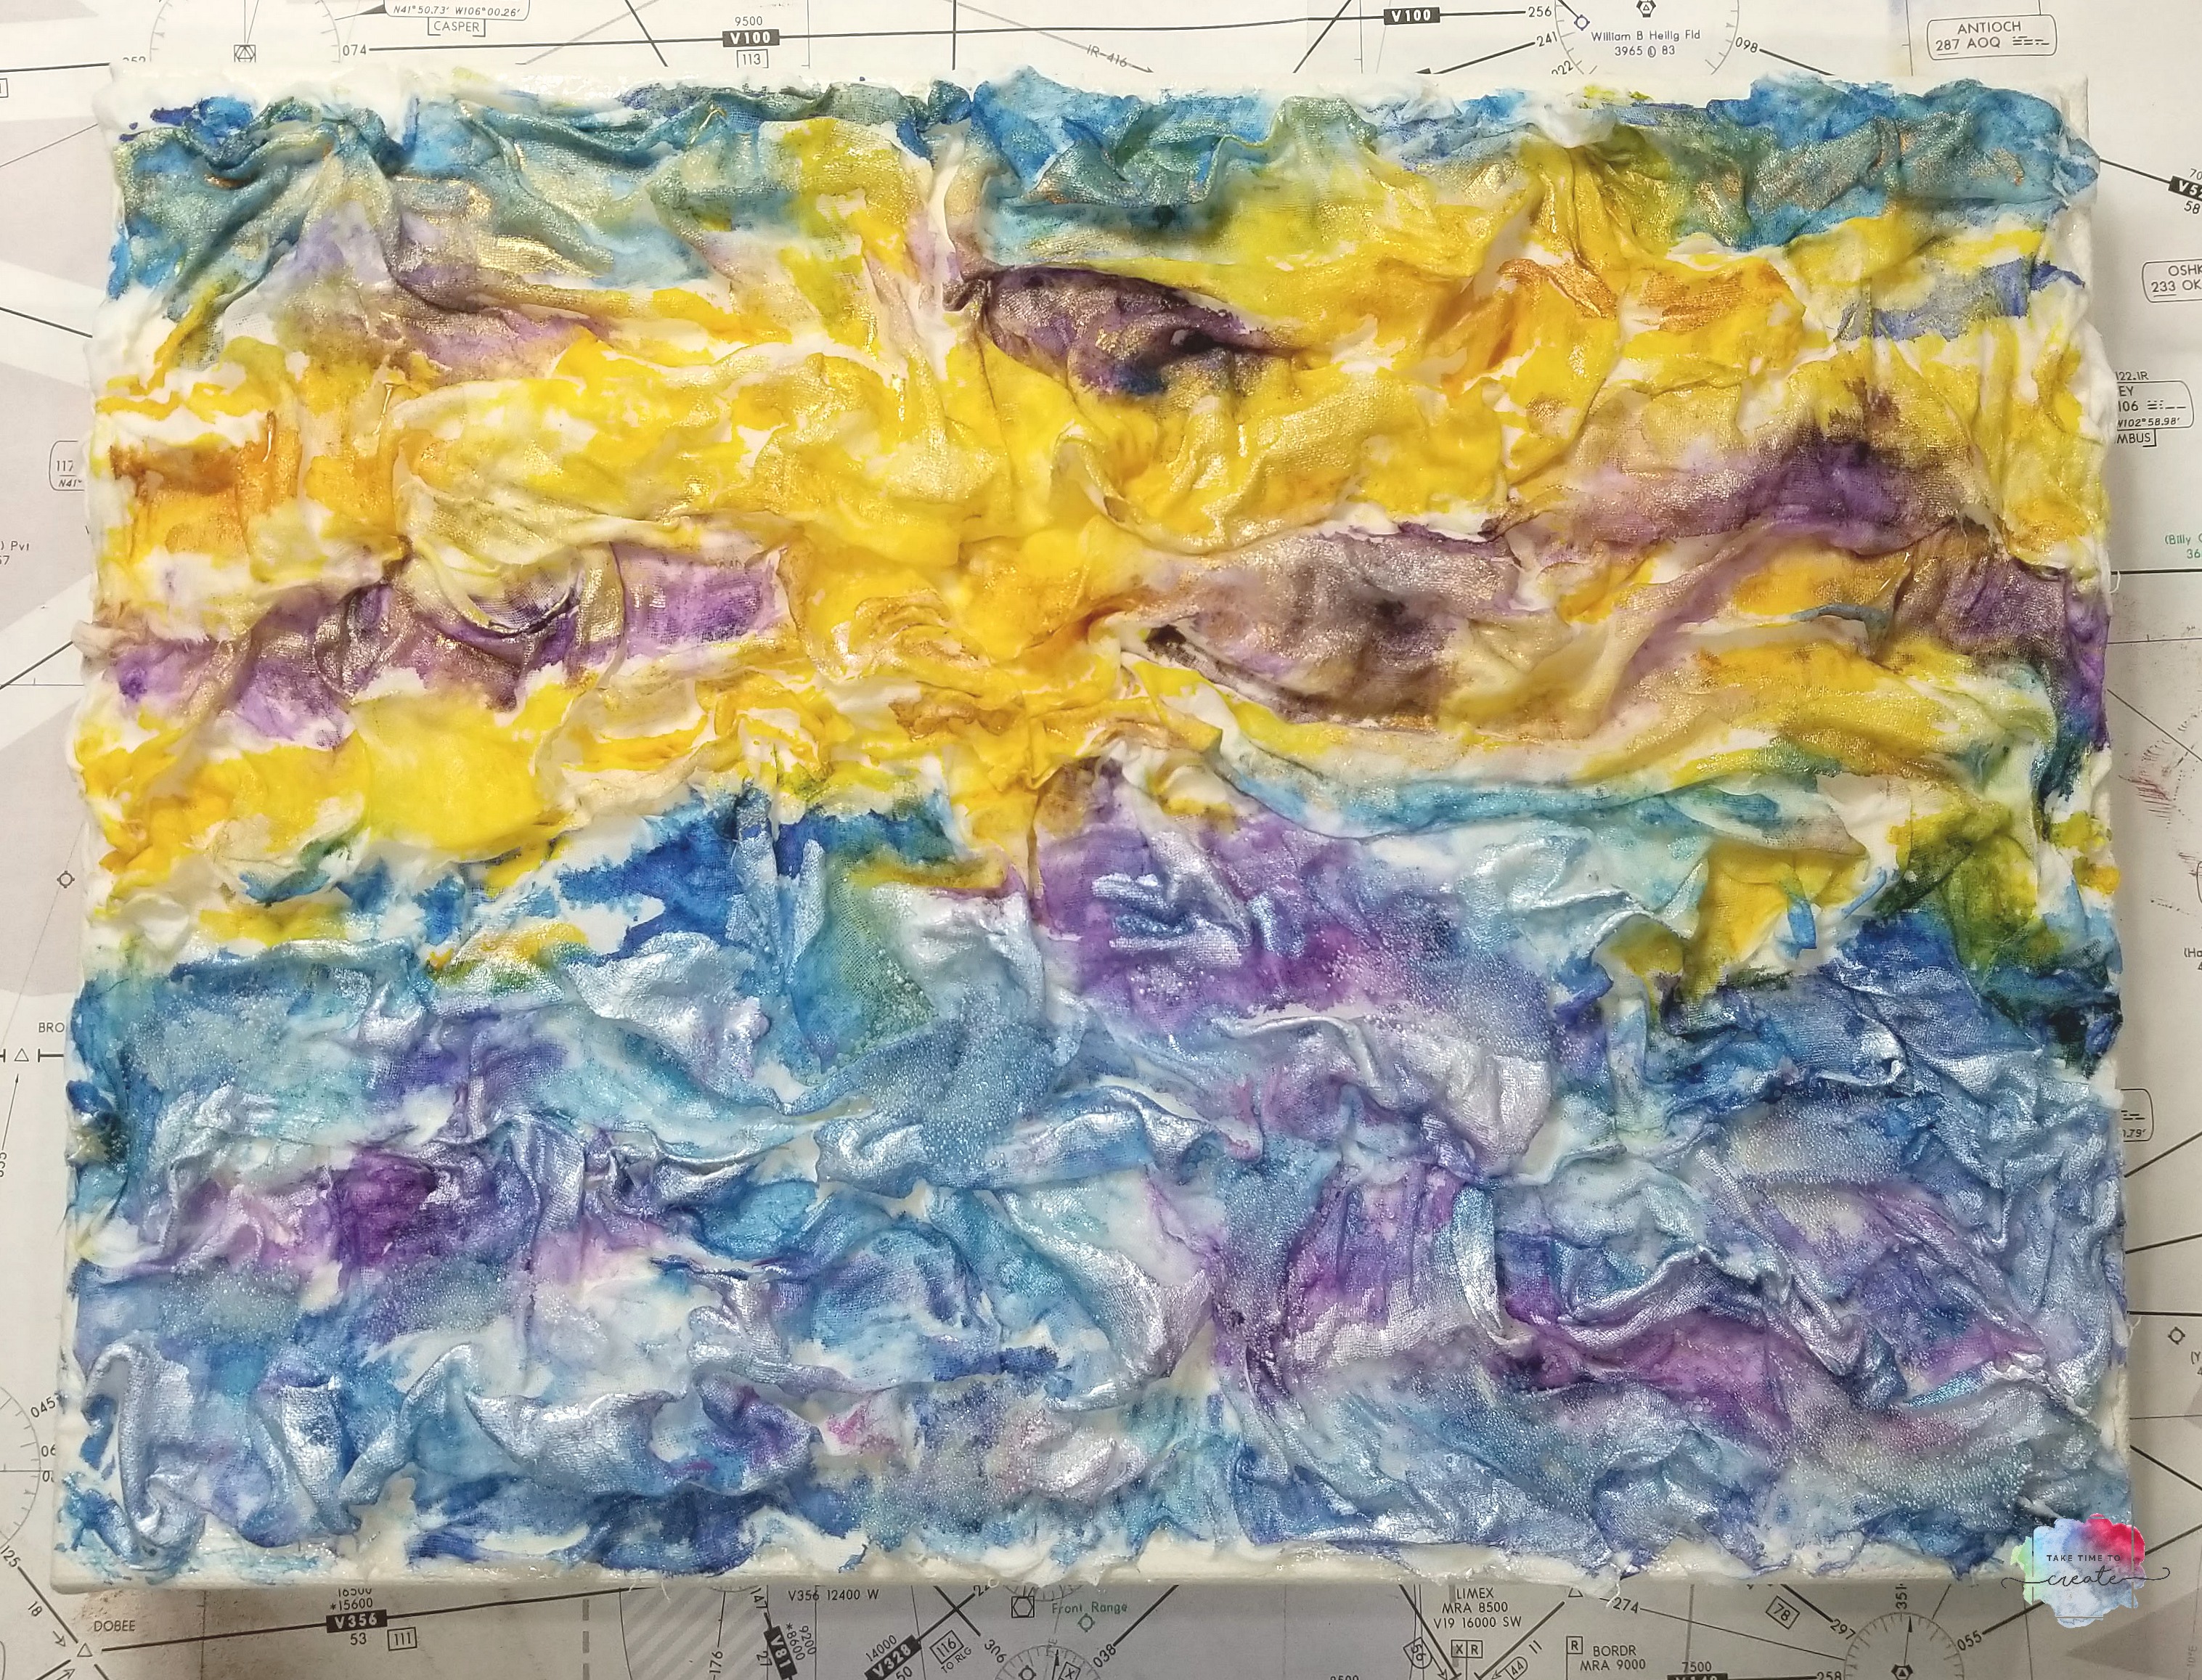
To start prep your canvas by painting it a light color, I used a slightly off white and painted the top and sides.
you will need a light gauzy fabric for the base layer. I had some in my stash, so use what you have, as long as it is a very light fabric. Take a Heavy gel and spread that all over the canvas, then coat each strip of fabric with a gloss gel. (this is the same procedure that I use on all my canvases) Once the strip is coated adhere it to the canvas. Add as many wrinkles as you want and create the texture you are going for. (I have to say I really like this stage, in fact I almost stopped here because it is so pretty, an all white fabric canvas. I might have to make one and just leave it as is. Some thing to think about, lol)
Once you are done with the fabric, let is step dry. I usually leave it over night just to make sure.
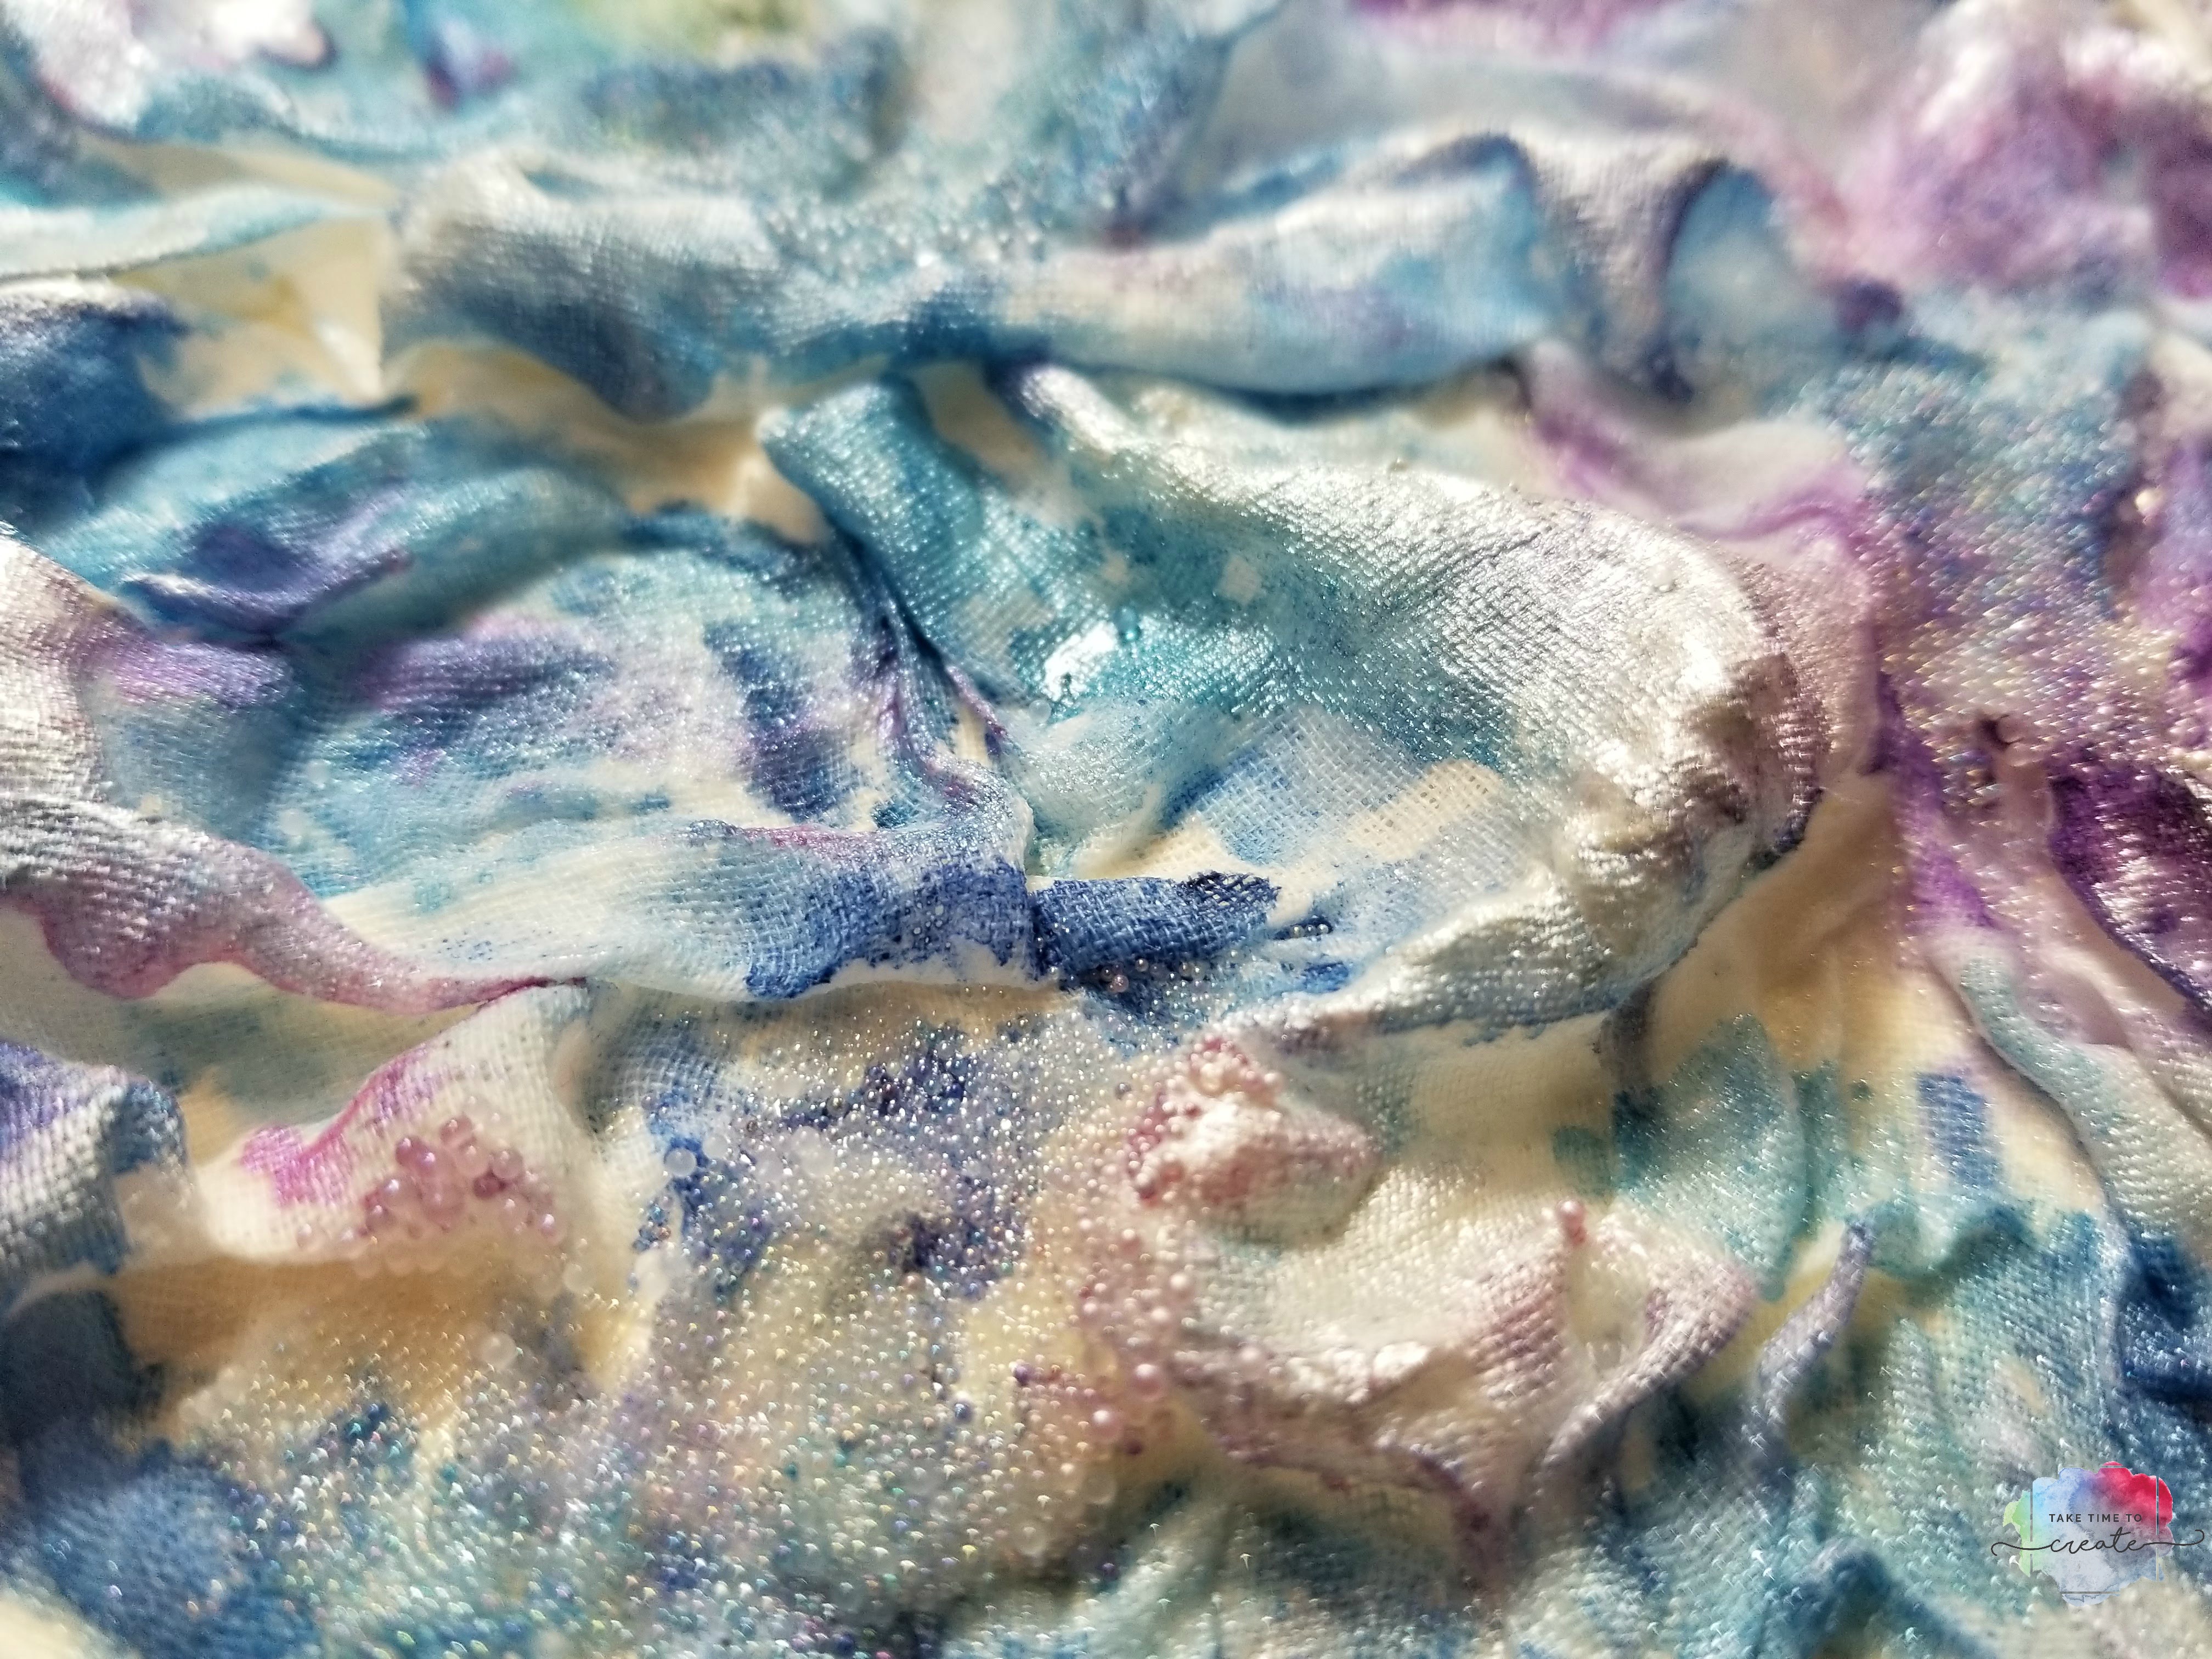
After it is dry it is time to start watercoloring! gently spray the canvas with water (this allows the watercolors to move freely on the canvas) and then start watercoloring! Slowly add colors and see where they go and blend to create new looks. You can dry in between layers if you want and just keep building until you get the look you are going for. I wanted to create a sunset on the water, it is a little abstract, but that is ok, I really like how it turned out.
Once the watercolors are dry you can start adding in texture. I added some iridescent micro bead to add some more shimmer and shine to the water. Just apply some gloss gel and pour on some beads. Let it dry over night before removing the excess beads.
Once the beads are dry you can add even more shimmer and shine by adding Metallic watercolors. I thought this would be the perfect way to add some more details. It is a little hard to see in the photos, but up close the metallic really added that perfect final touch.
Let everything dry completely and then spray it with a spray protector.
I really like how this turned out and I can’t wait to try this technique on another canvas! What should I try to watercolor next? I love experiementing with my supplies and I would love suggestions on what to do next!
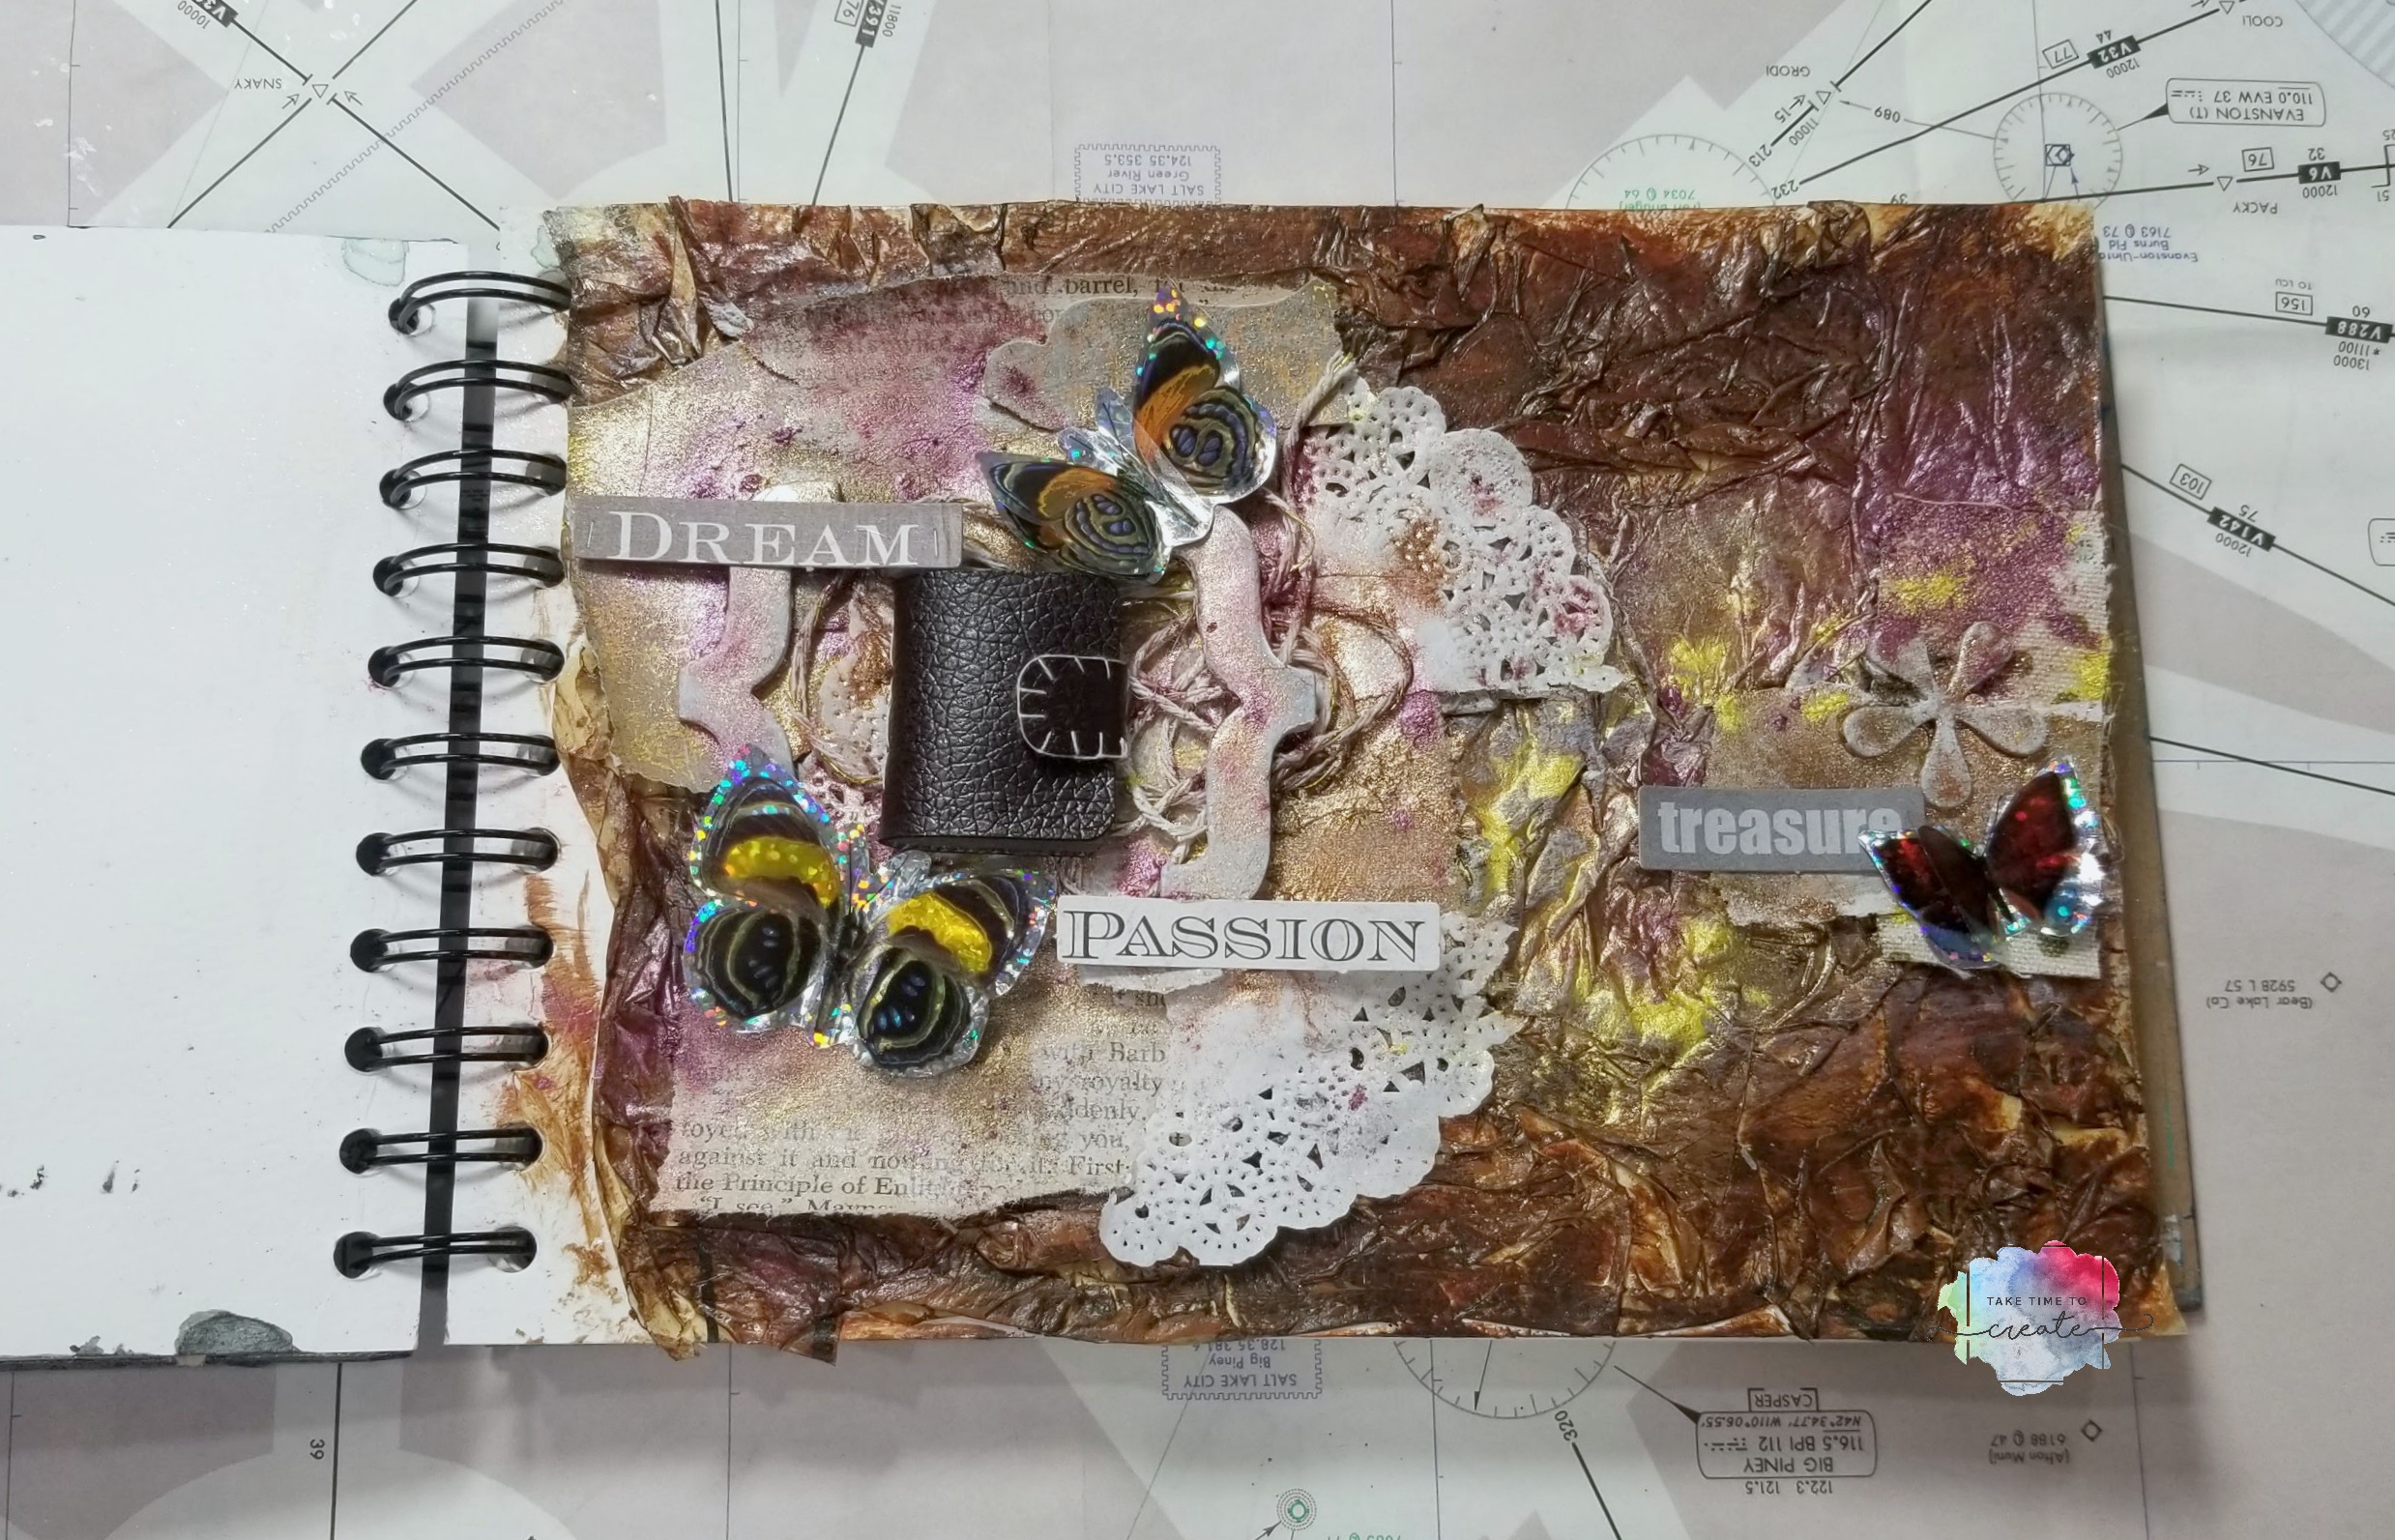
Art journaling is quickly becoming one of my favorite activities! I love creating quick little projects that help me grow and expand my abilities. I have this faux leather art journal page that I wanted to share with you.
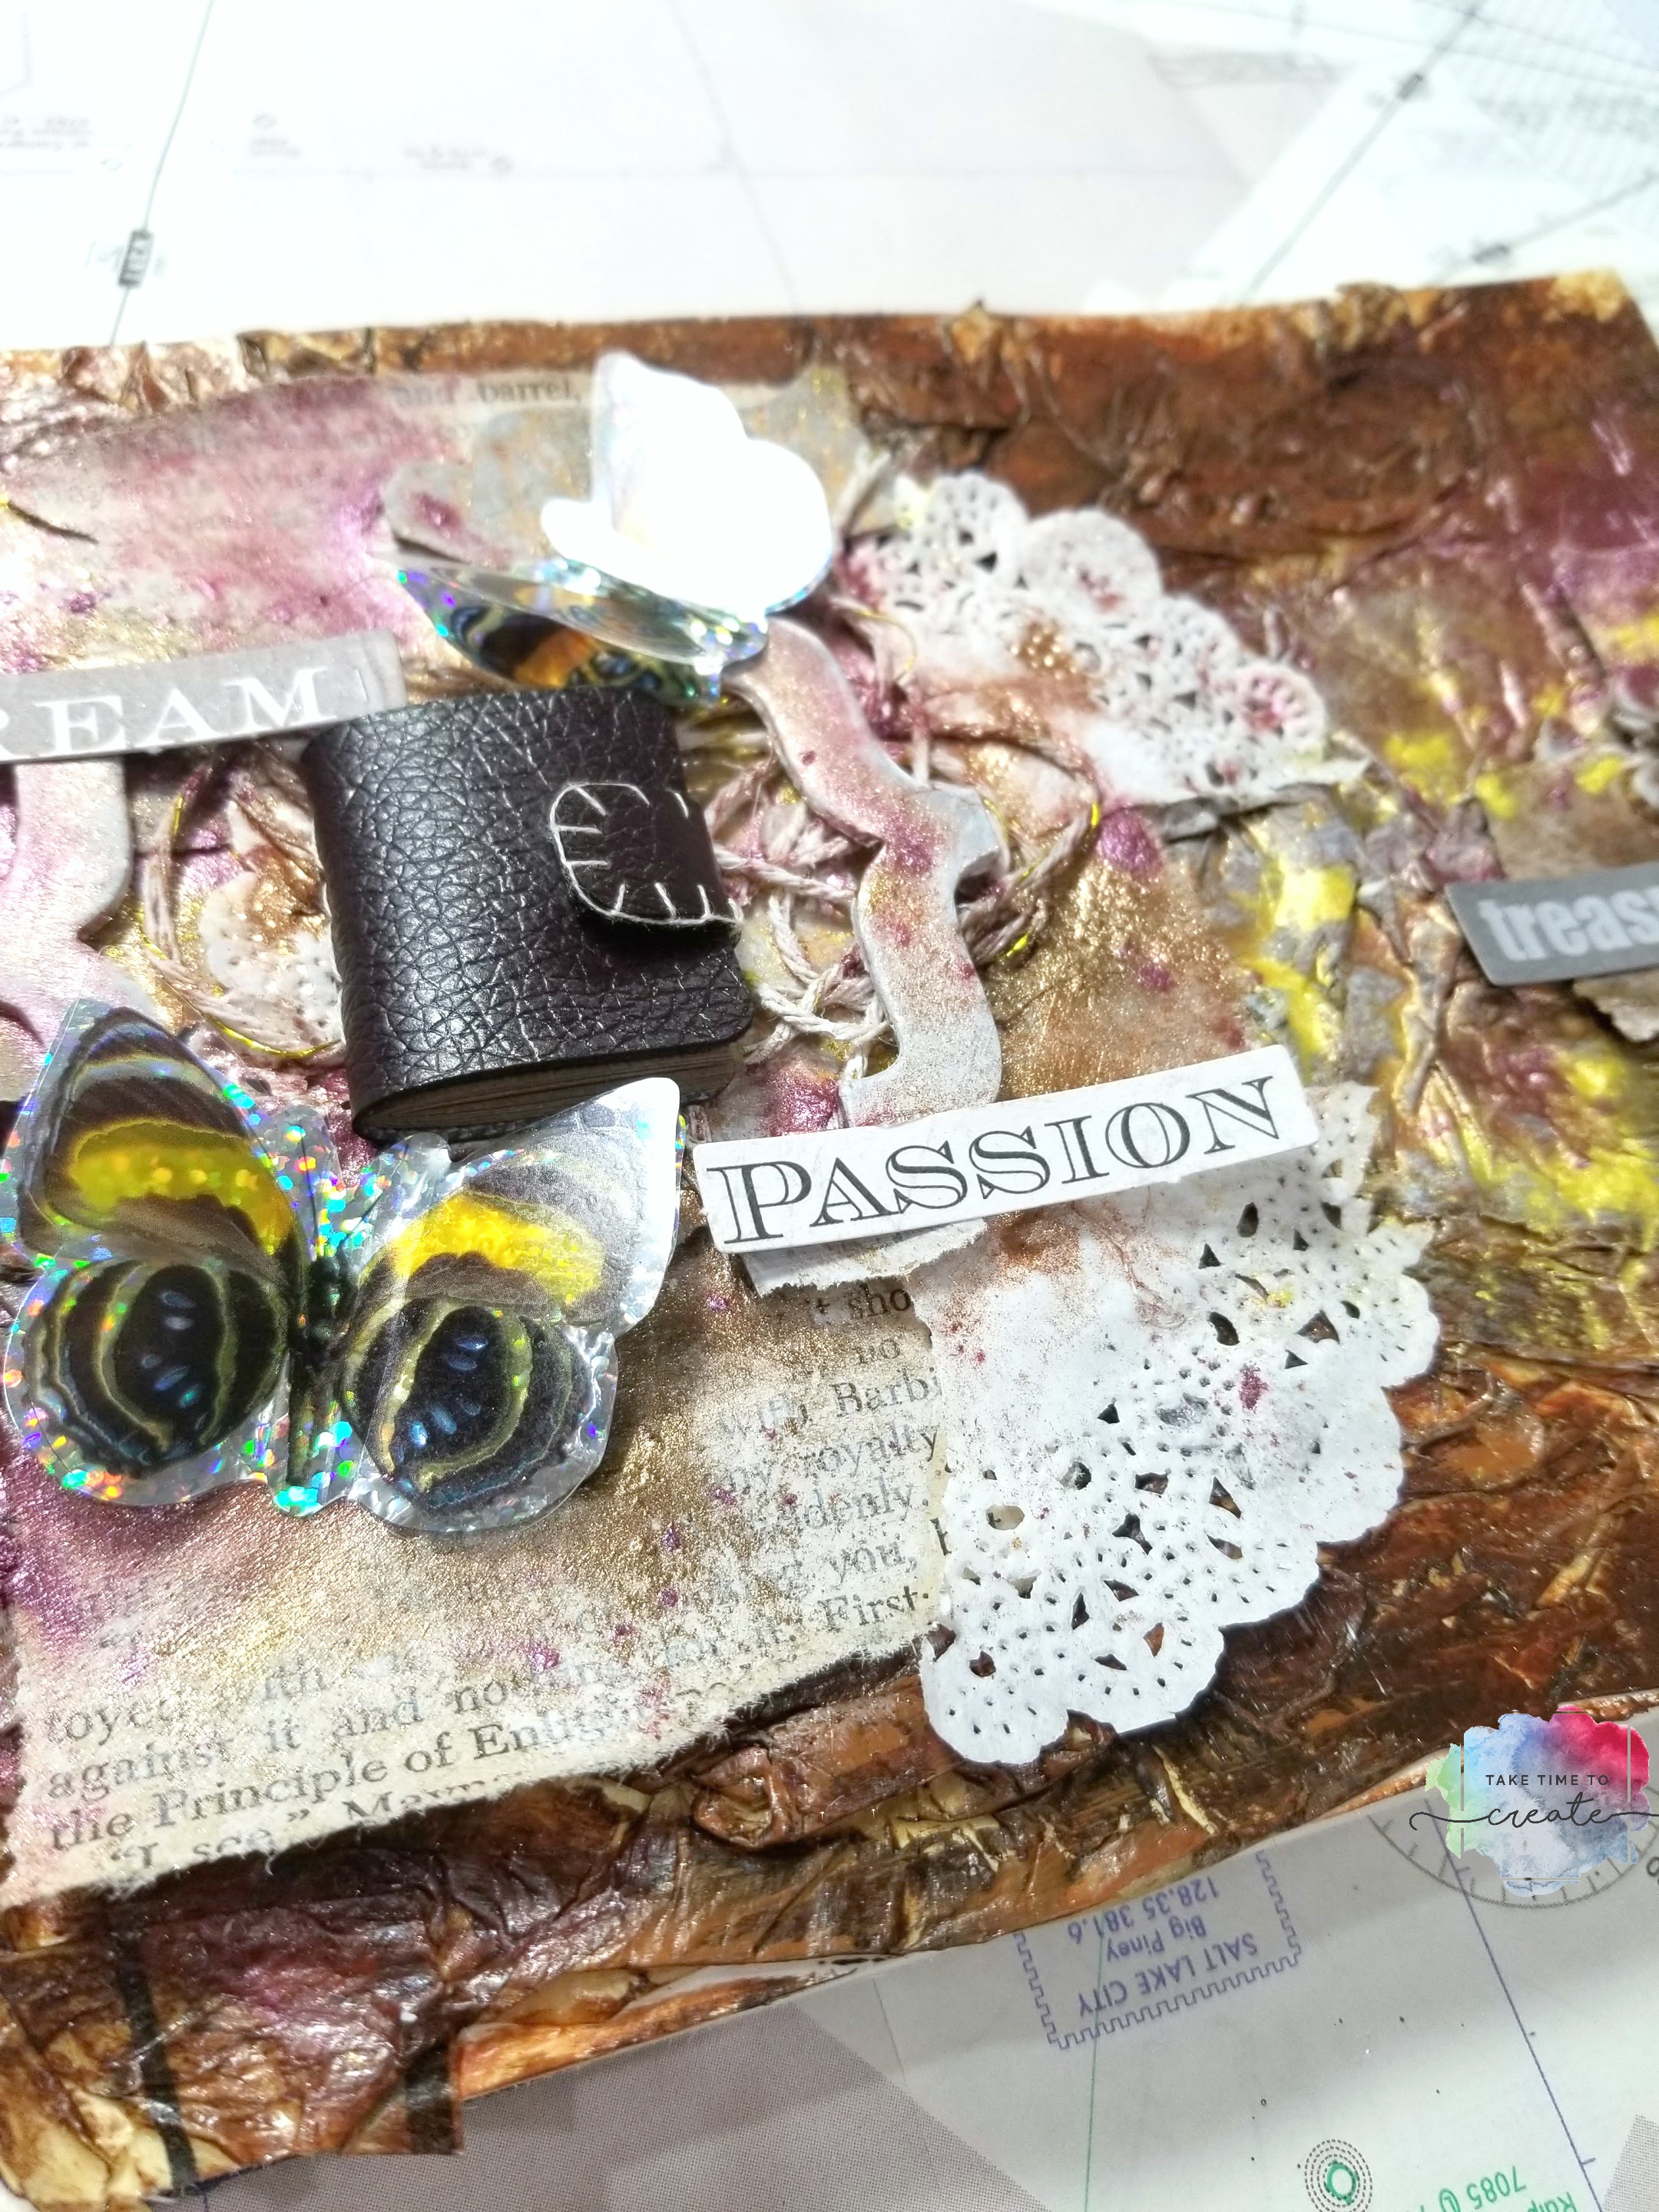
I really wanted to start with a faux leather look for the background. So I took the tissue paper inserts from old patterns and Mod Podged that onto the page. Once it was dry I painted it all in browns and yellows to make it look like leather.
You can use different colors to create different looks, and you very the “wrinkly-ness” of the tissue paper to create different looks as well.
Once everything was dry I started to add all the details. I wanted the tiny book to be the focal point. You can see the video tutorial for the book here: Tiny Book
That tiny book was so much fun to make, and the perfect addition to my page.
I added string, torn up old book pages, doilies, chip boards, words, and butterflies. I added color with Finnabair’s mica flakes and a little water, that was really fun because it brought out the texture of the tissue paper and brought the page to life. Once everything was dry I light sprayed everything with some cheap hairspray to help seal the mica powders (otherwise it could all be brushed off)
There you go, a very easy faux leather journal page. I am thinking about doing this same technique on an old trunk. What else can I faux leather?