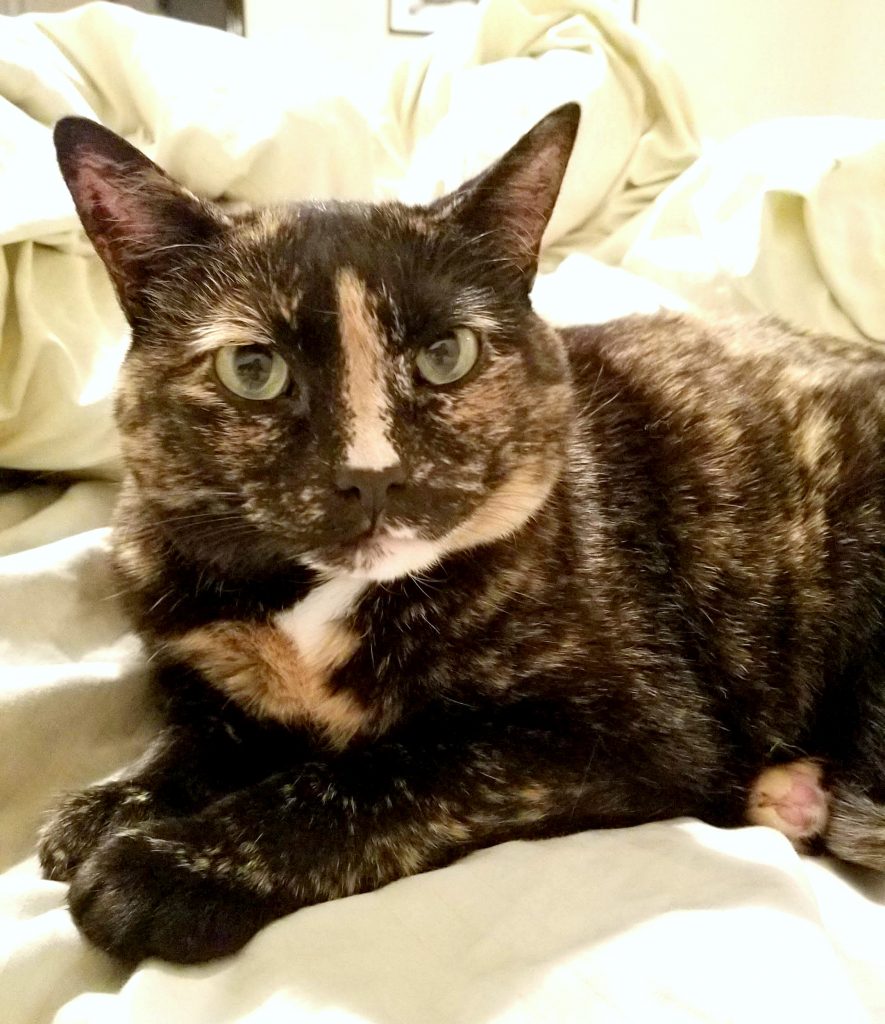
I have a cat that thinks she is a princess, and since she is a princess she needed a pink velour bed with gold trim. And since I don’t sew, I had to create a no sew version.
Our cat rules the house, lol. And since she does this pretty pink pillow is perfect for her.
Starlight
This pillow is easy to create. Take 2 pieces of fabric and glue them together with fabric glue. If you want trim add it now. Make sure you leave a hole so you can stuff the pillow with ploy fill.
Stuff your pillow and then glue the hole shut. That is it. Such a fun, easy way to create a new space for your pet.
No sew cat bed
I placed the bed on the trunk that Starlight sleeps on. The trunk is super hard and I thought she would appreciate the soft pillow. In true cat form she refused to pose for a picture, lol
But at least she has a new bed when she is ready to sleep on it. What other no sew projects do you work on?
Christmas is fast approaching and now is the perfect time to make some new Christmas decor!
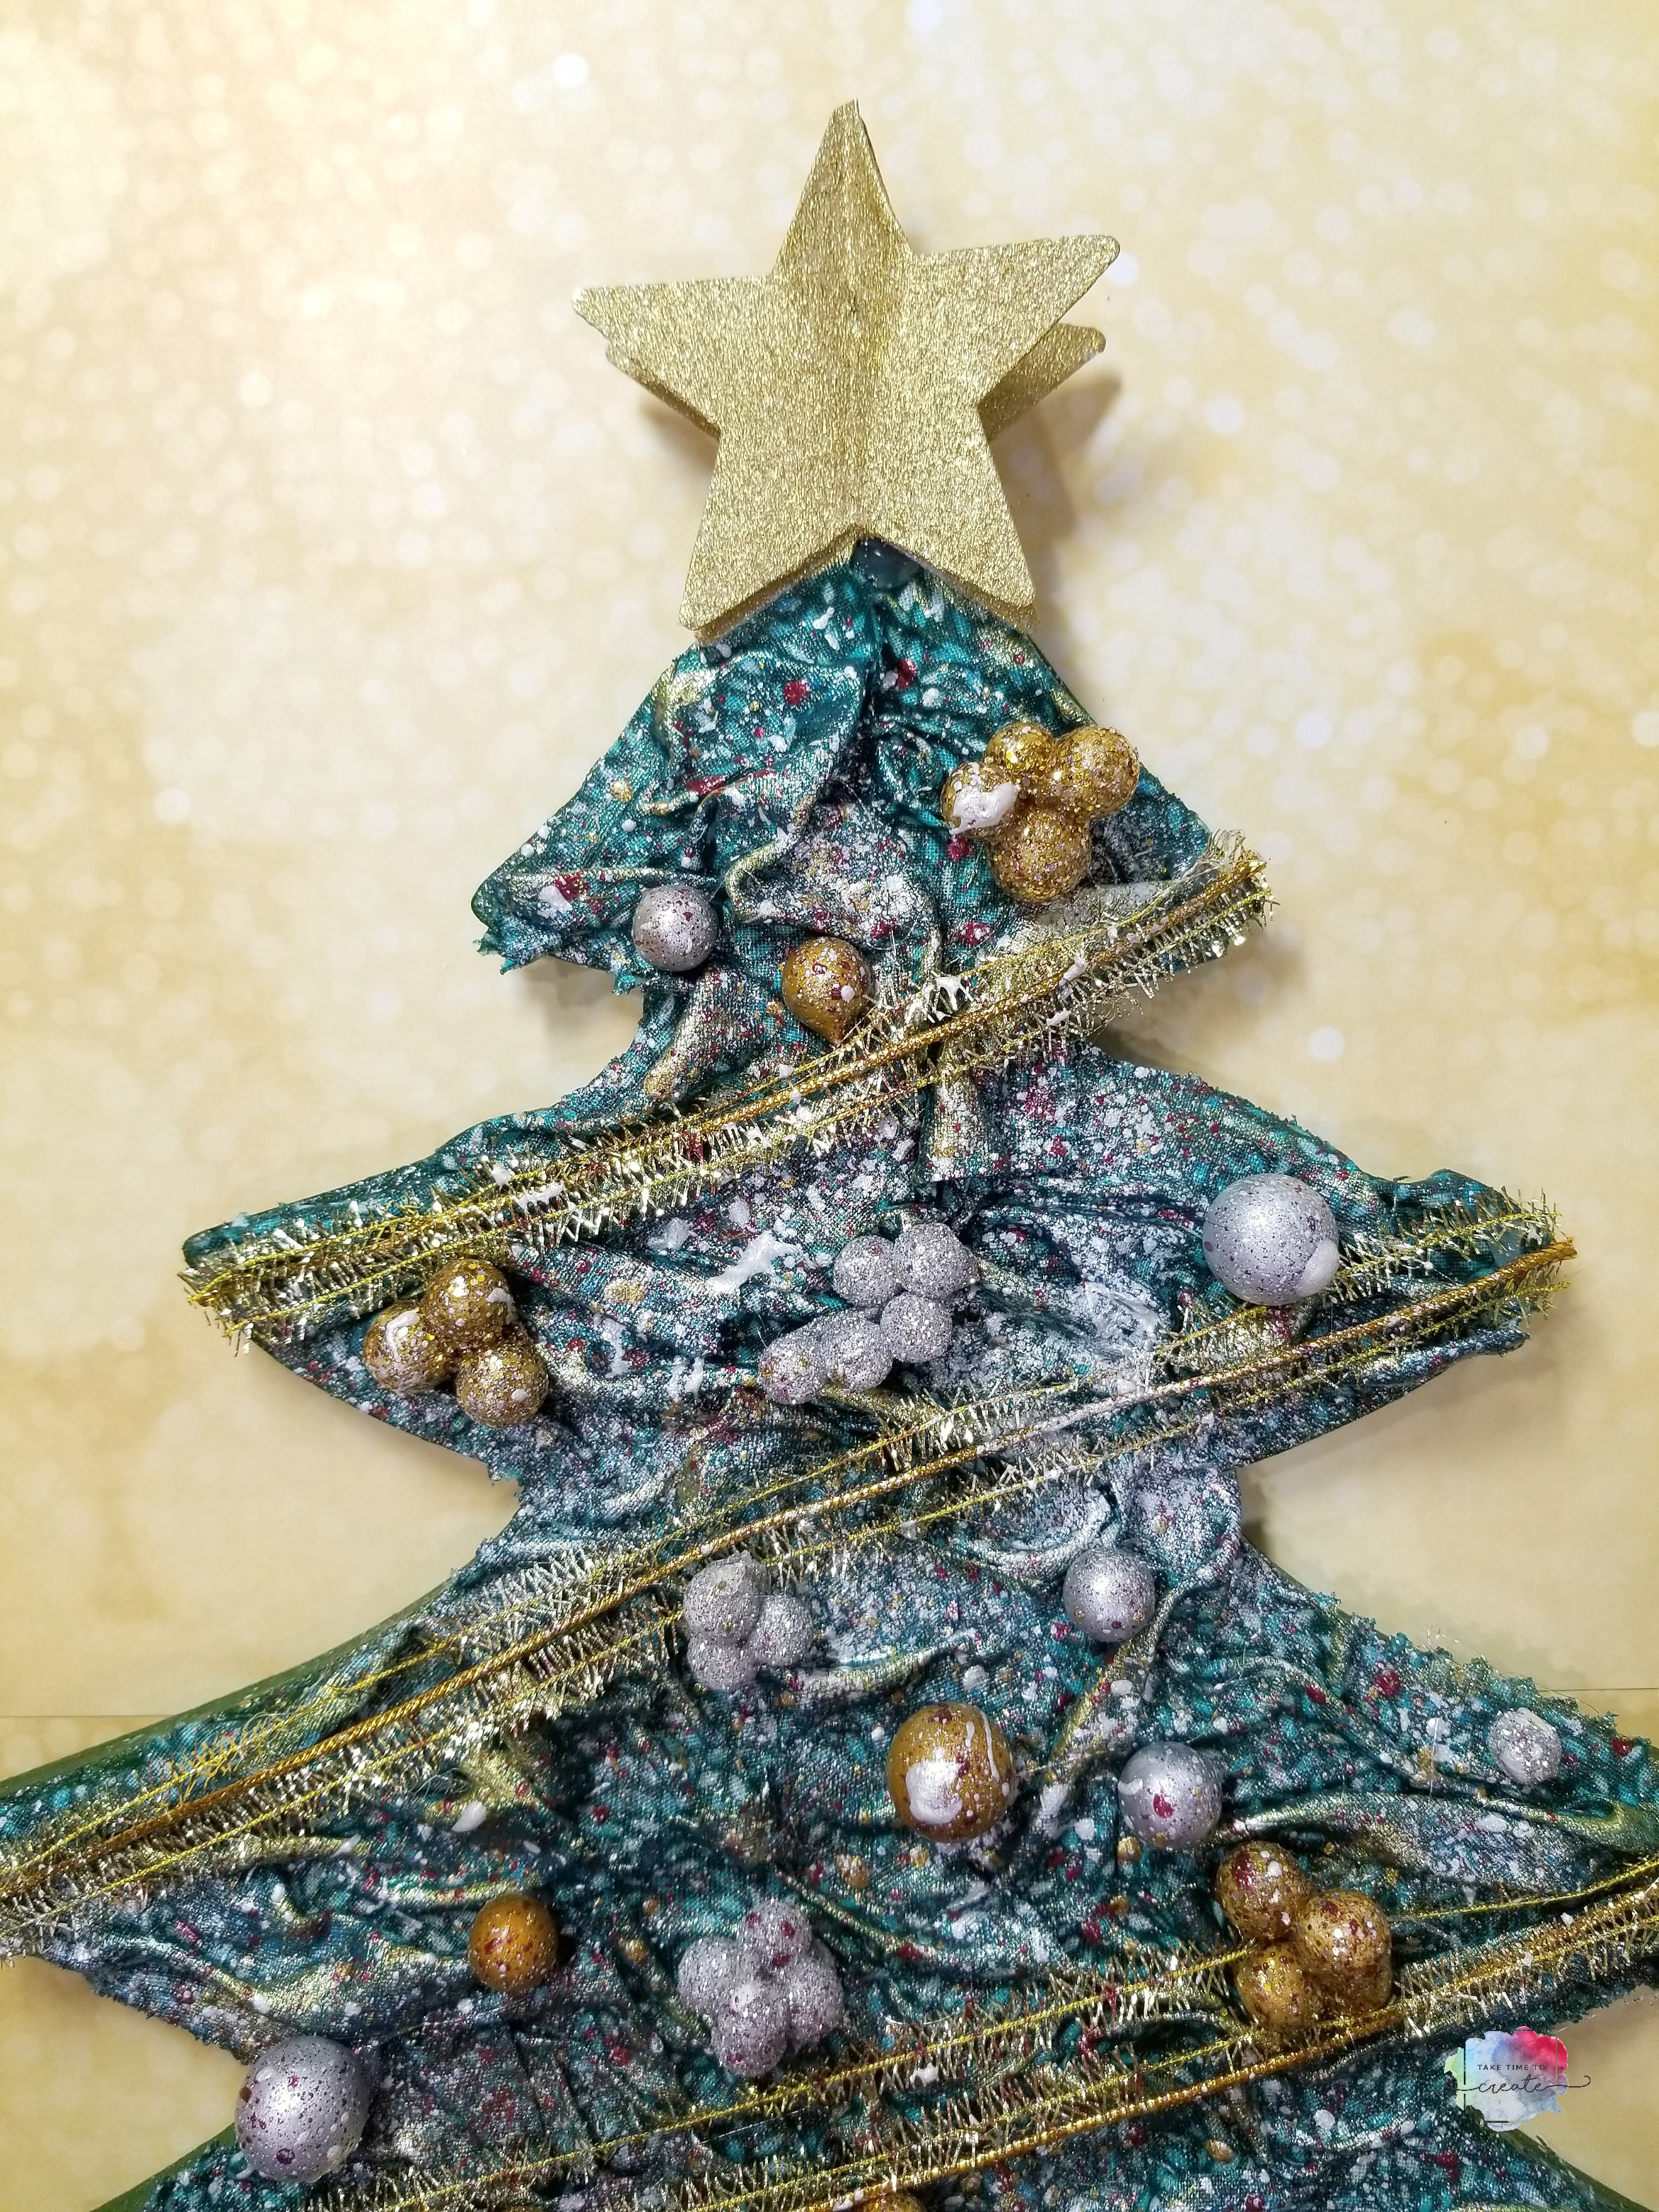
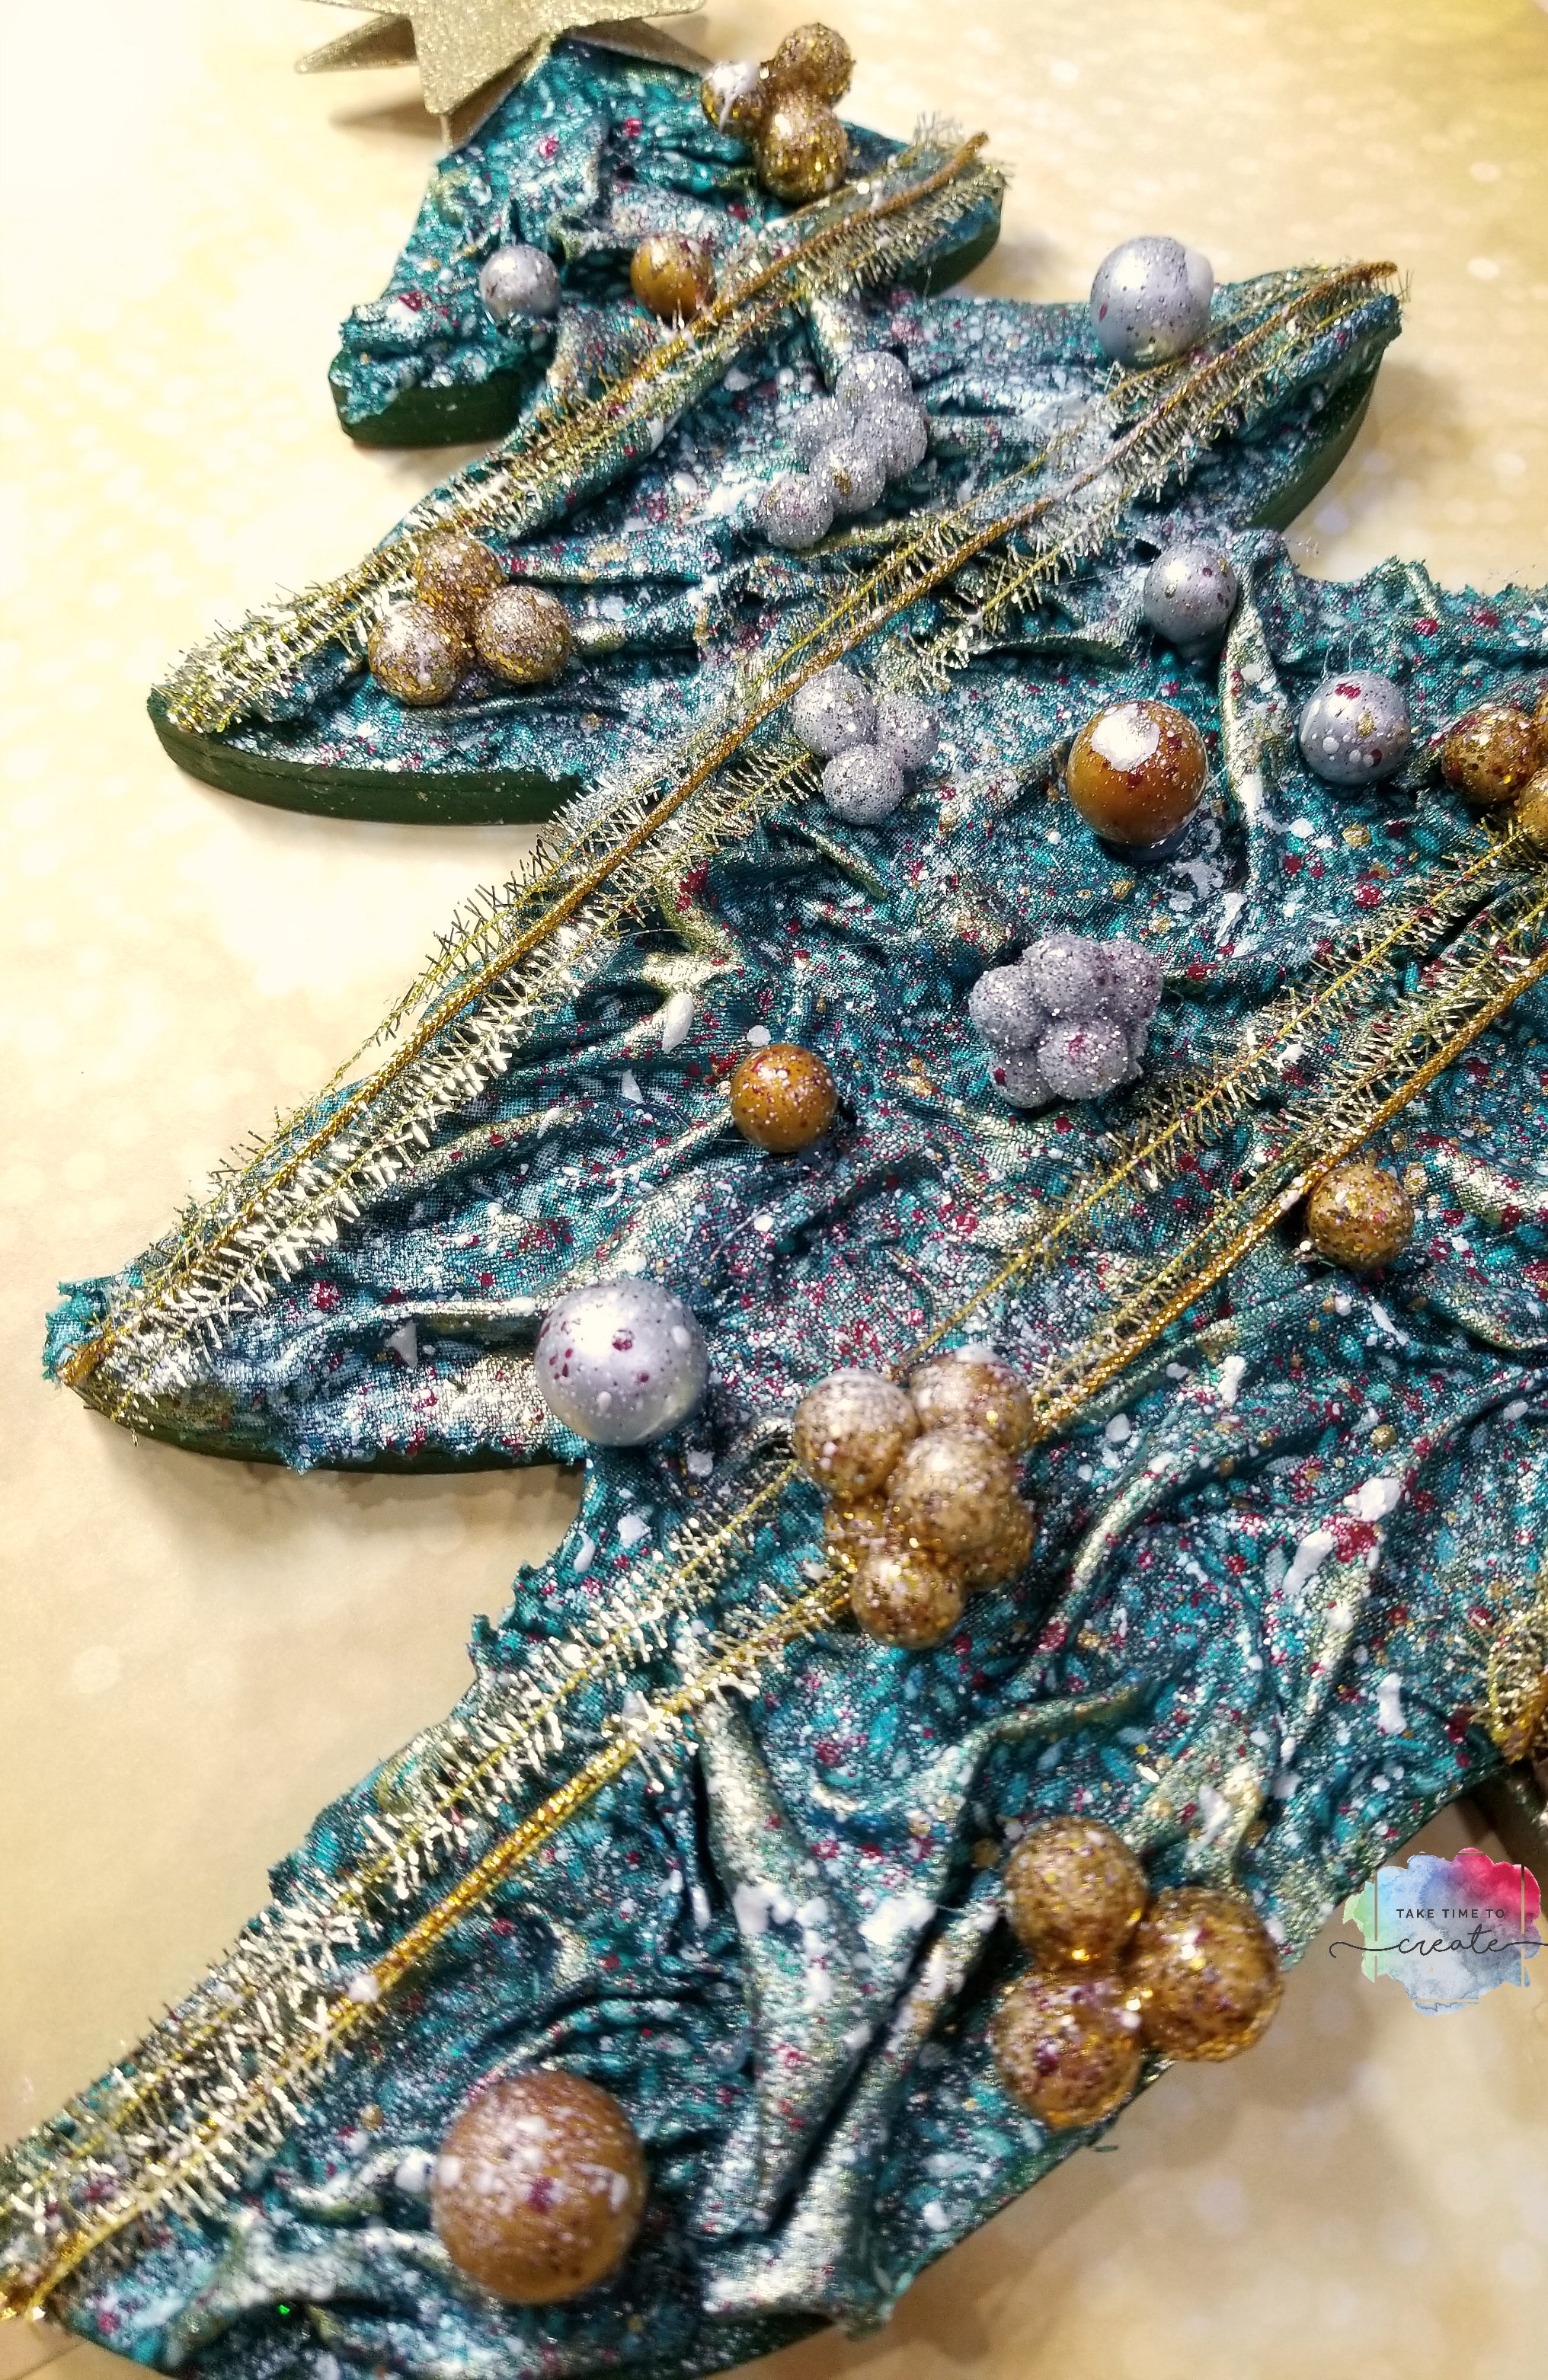
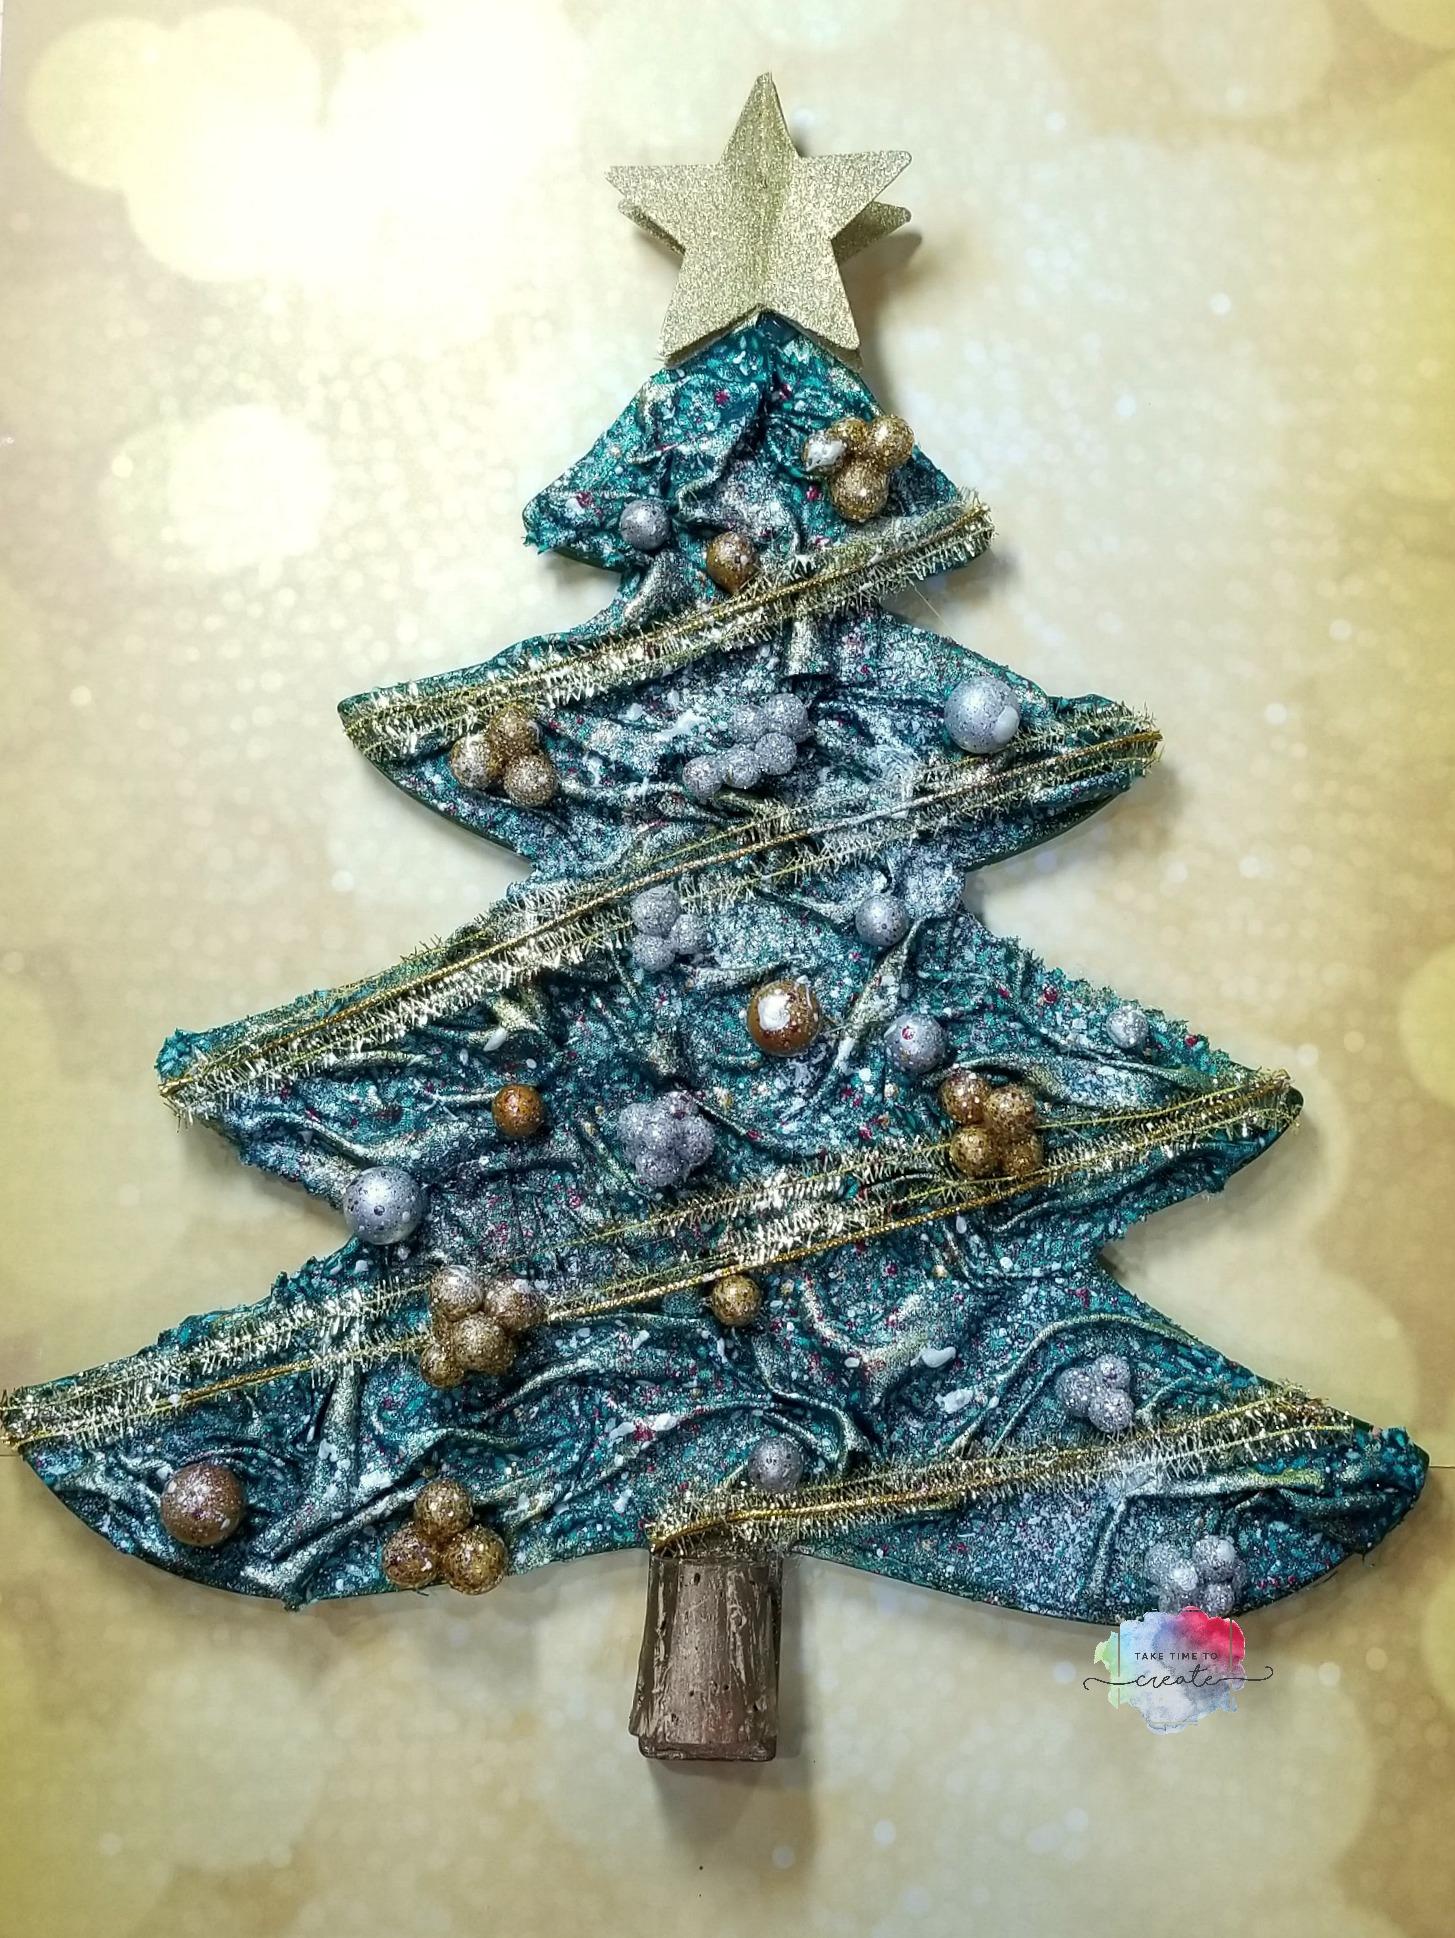
I found this chipboard tree at my local creative reuse center and I knew it would be perfect for a fabric mixed media project. It is a Paper Studio brand, I think you can find similar items at your local craft stores.
The first layer is paint. I wanted to make sure the tree was green just in case the fabric didn’t cover it all. Then I added the fabric layer. This added a lot of texture and interest.
Once the fabric was dry it was time to start painting. I have found that these fabric mixed media projects work best if you let the fabric dry overnight rather than using a heat tool.
Once the fabric is dry it is time to add paint. I dry brushed on a few of the Finnabair Metallique and Sparks paint. Then I added the decorations. I used items I found at the Dollar Store and adhered them with hot glue.
Once that was all dry I flicked paint on with a toothbrush. I love how it turned out! This was a lot of fun to create and it will look great in my home. What decor projects are you working on?
Affiliate links:
Liquitex super heavy gel- https://amzn.to/2Px3flj
Liquitex Heavy Gel-https://amzn.to/2RXTQ2O
Gloss Mod Modge-https://amzn.to/2PZxr7R
Corks-https://amzn.to/2zfepkg
Finnabair sparks-https://amzn.to/2DHSq9F
Finnabair Metallique-https://amzn.to/2DHqjXX
Finnabair Paint brushes-https://amzn.to/2TjbgrZ
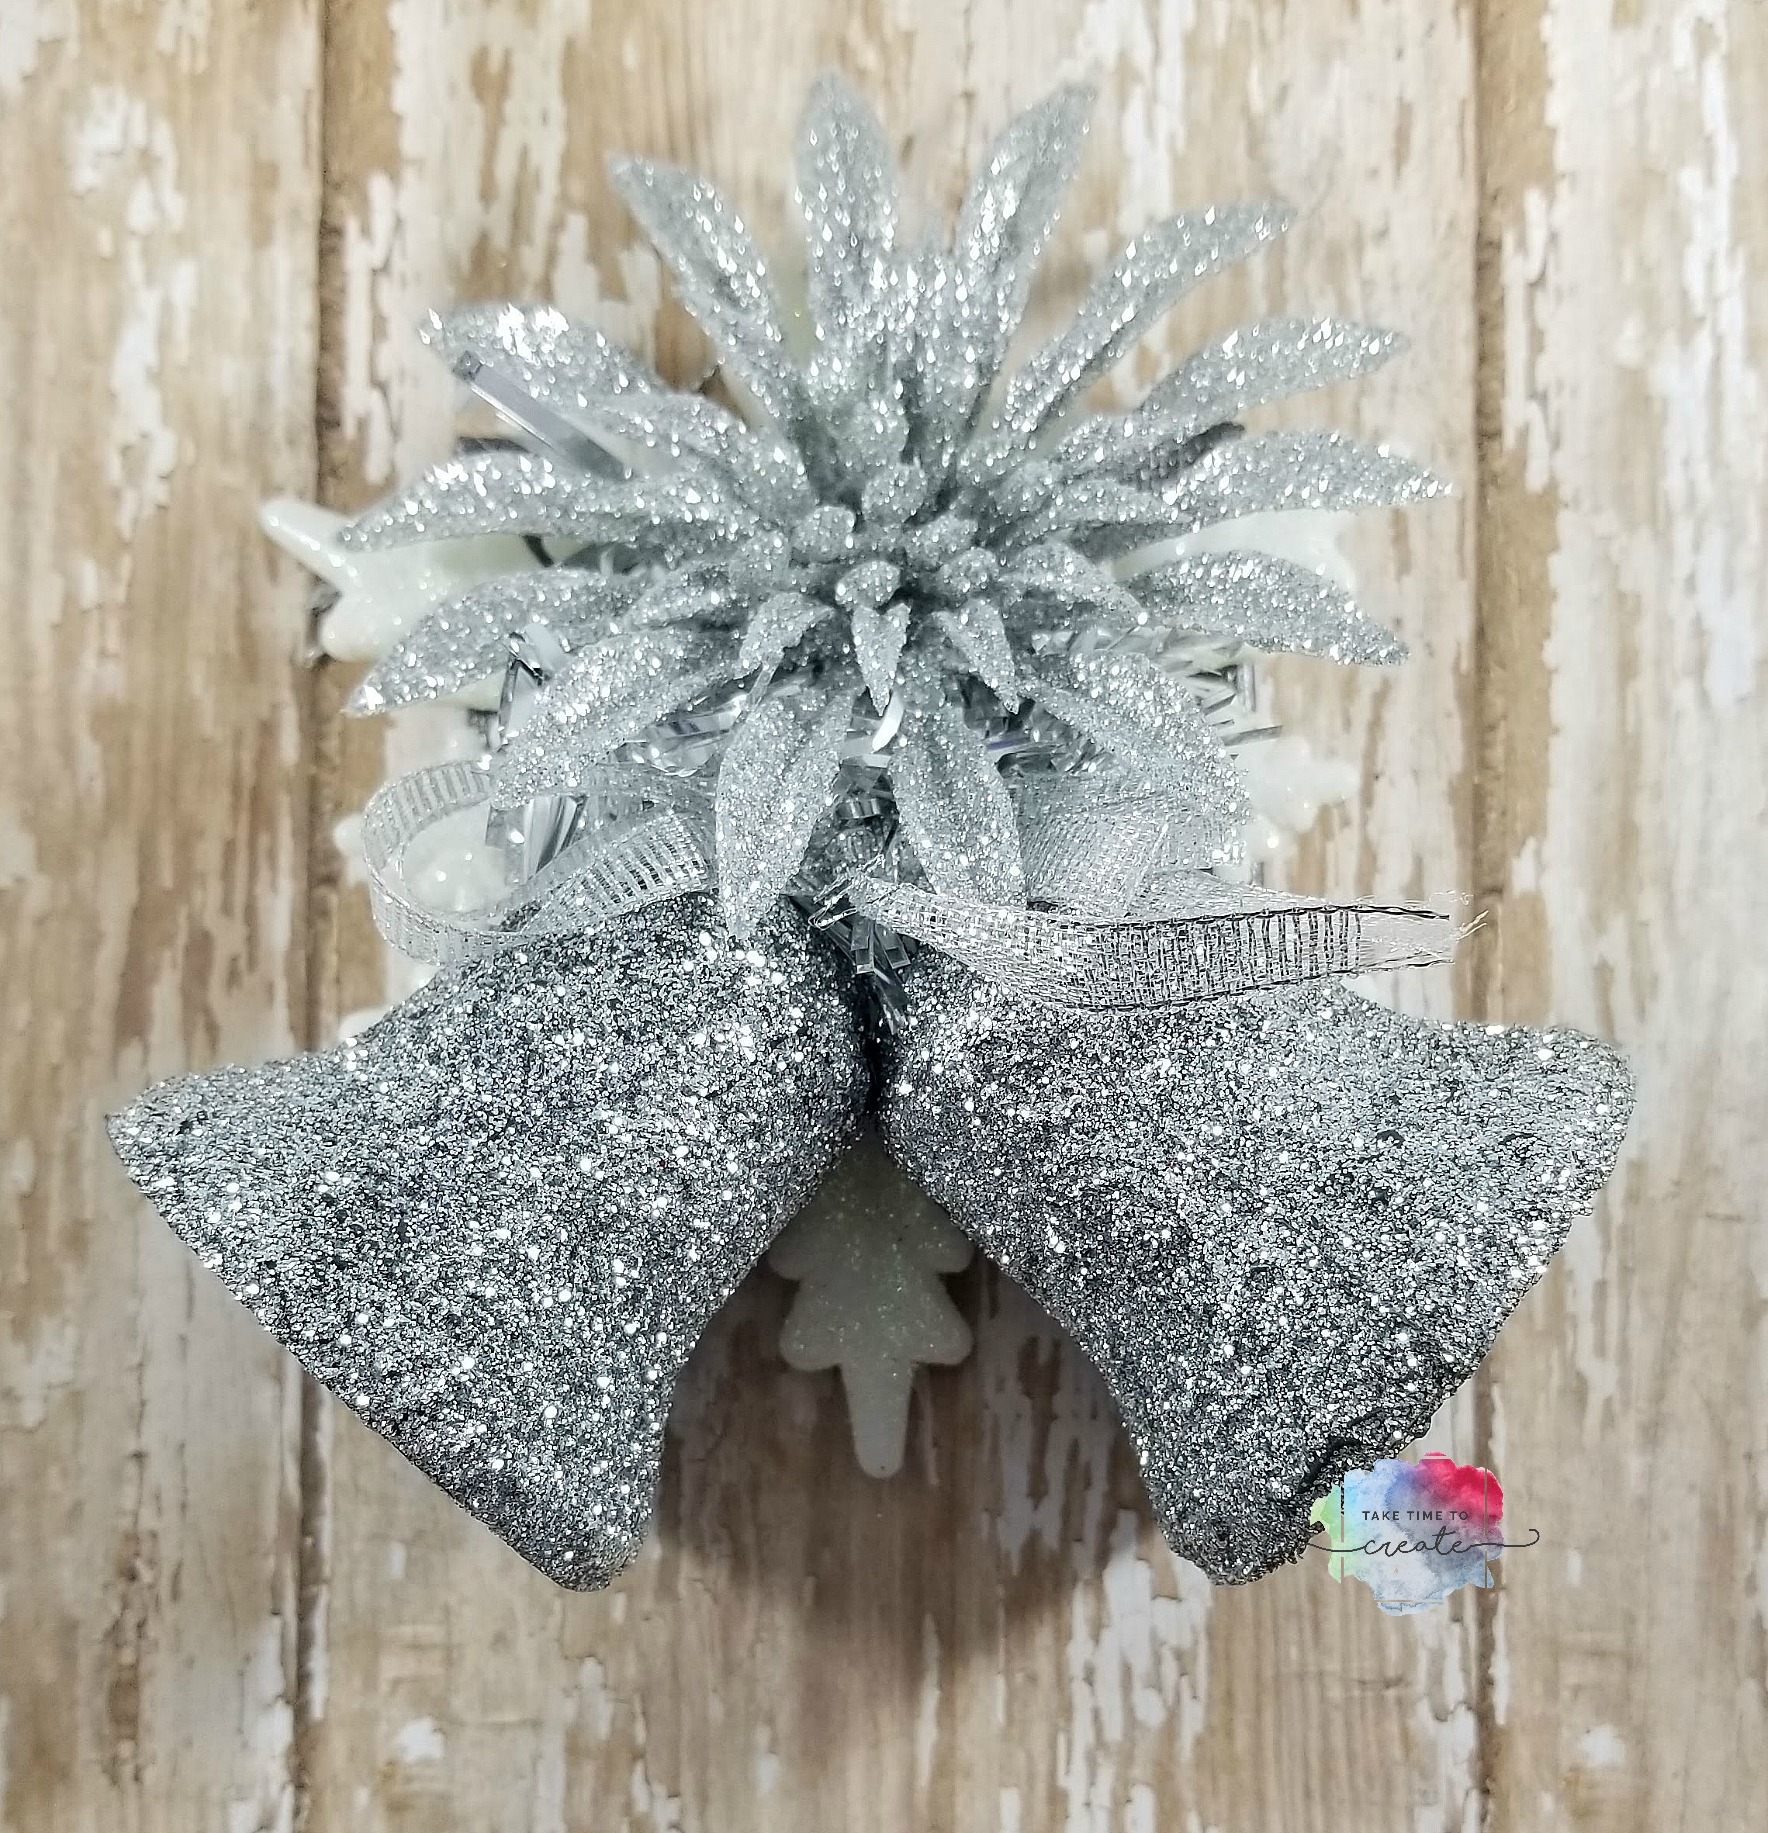
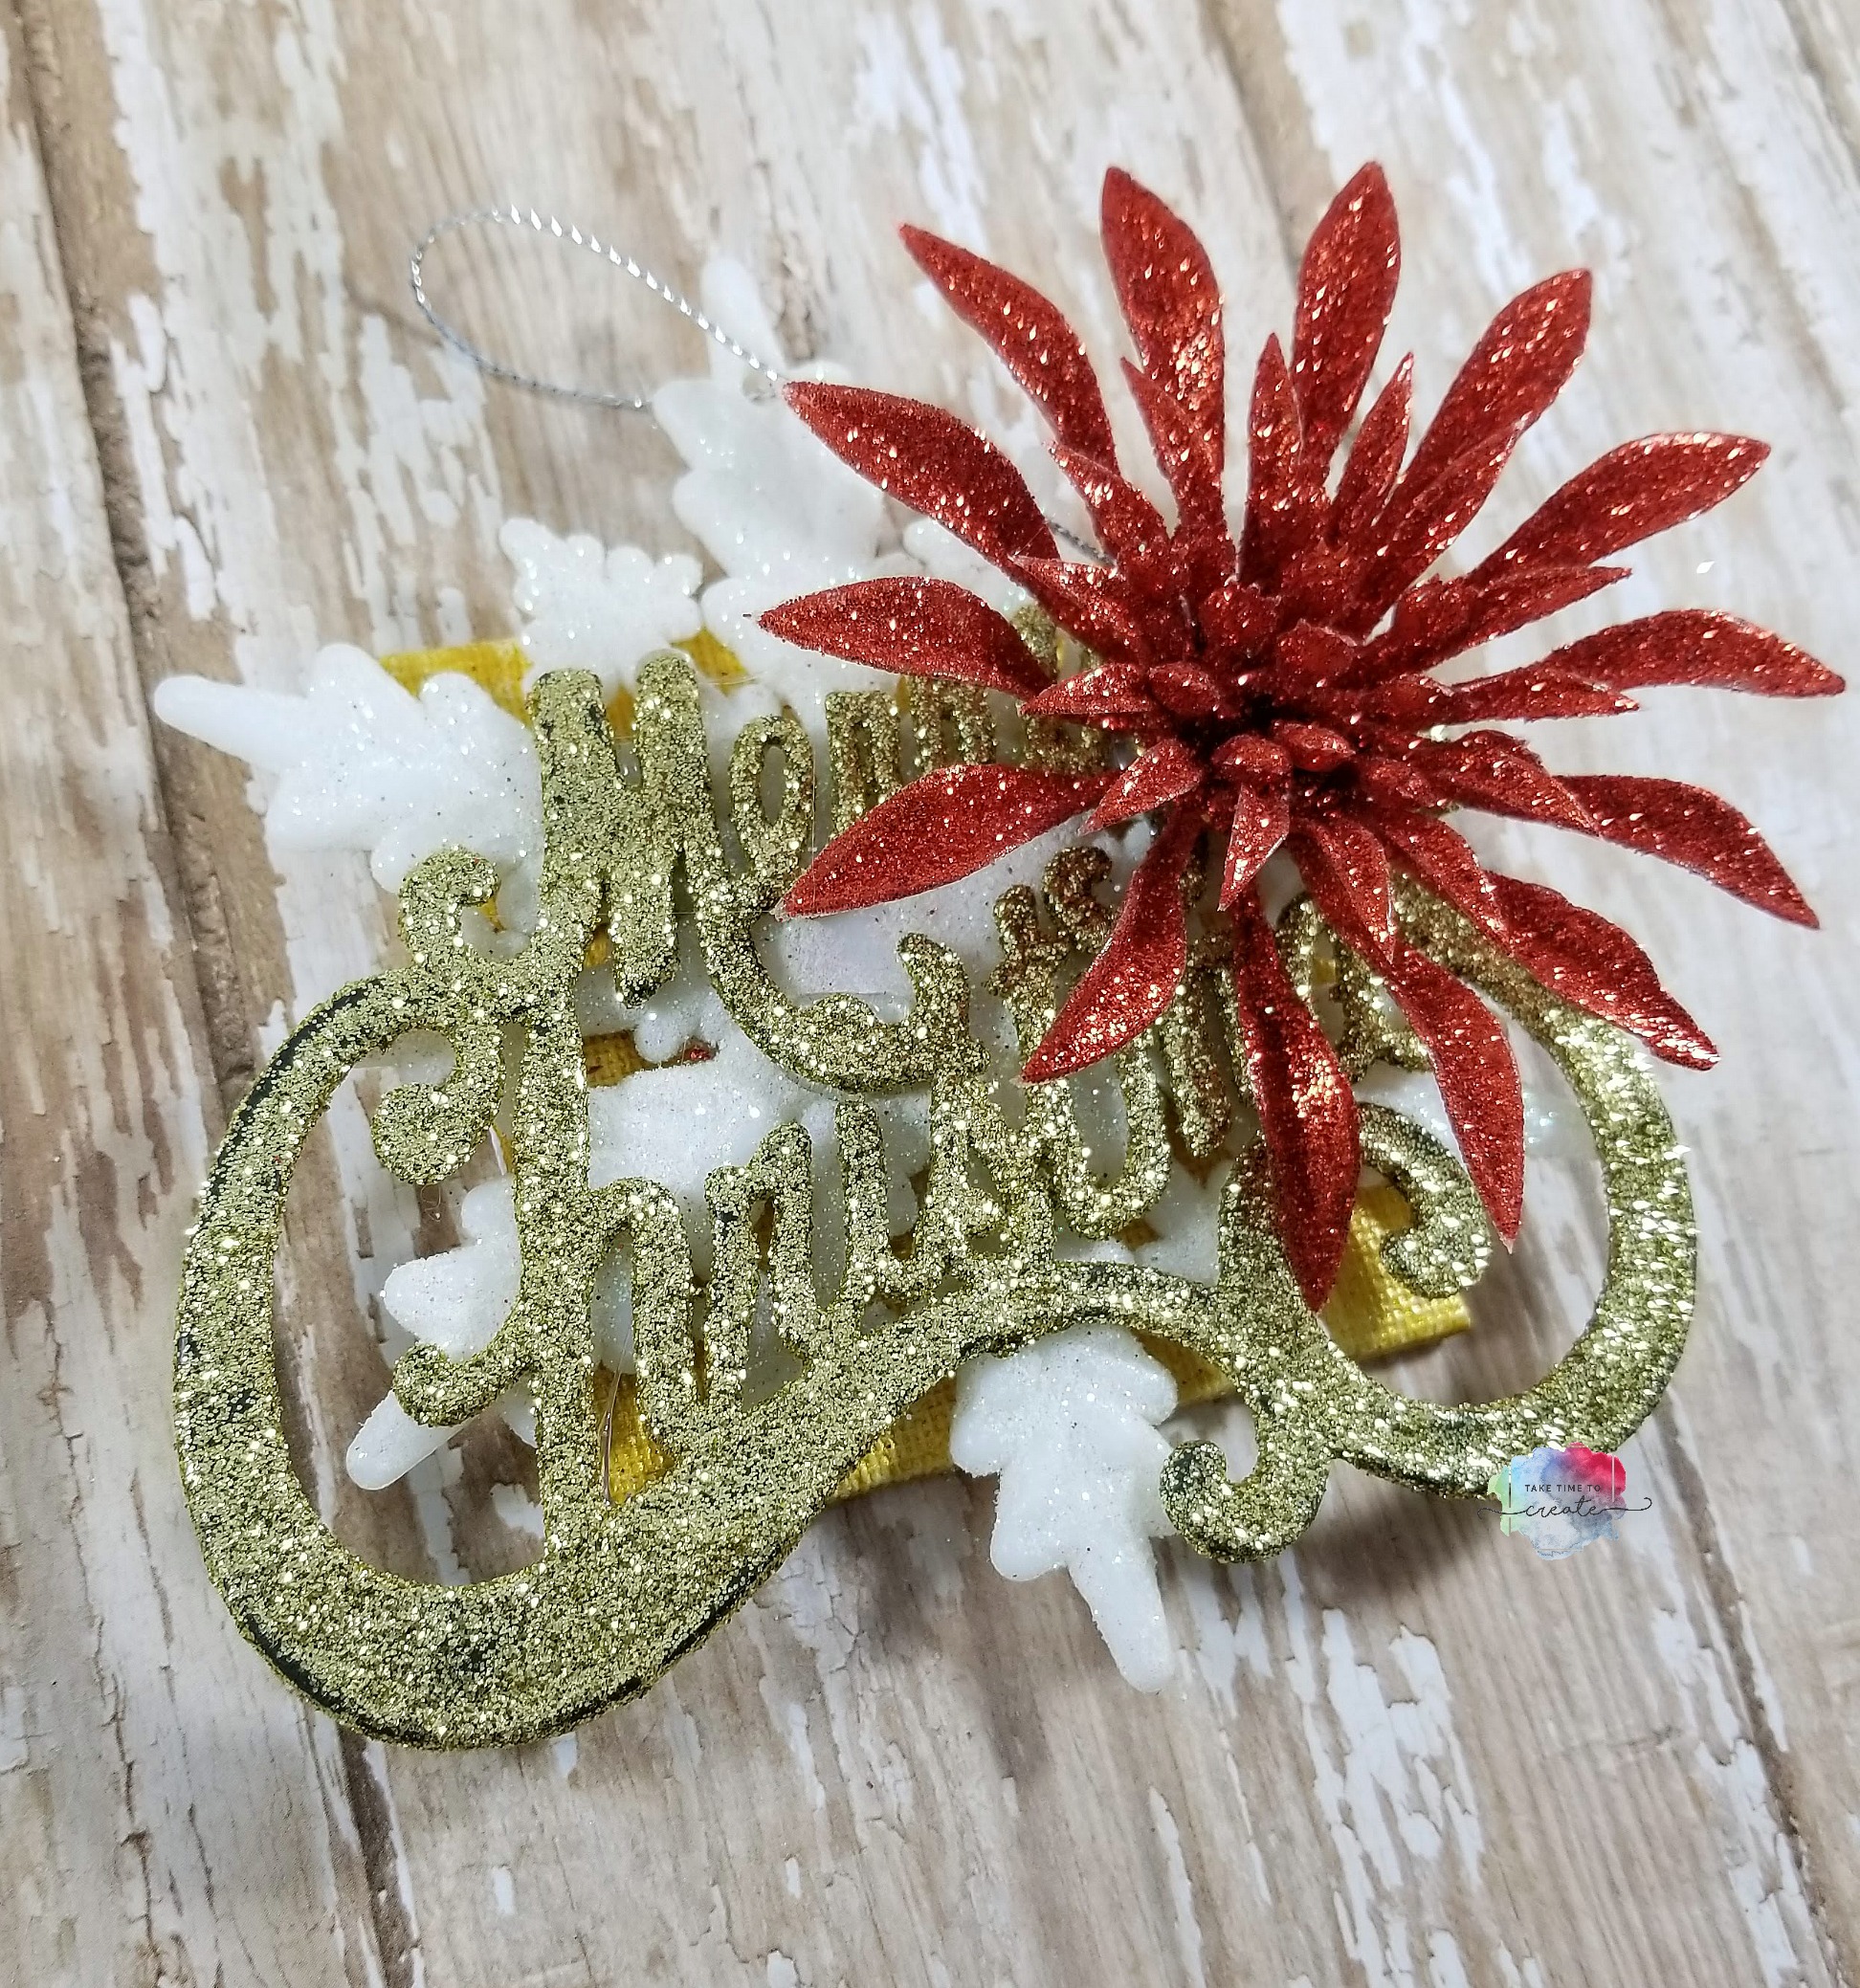
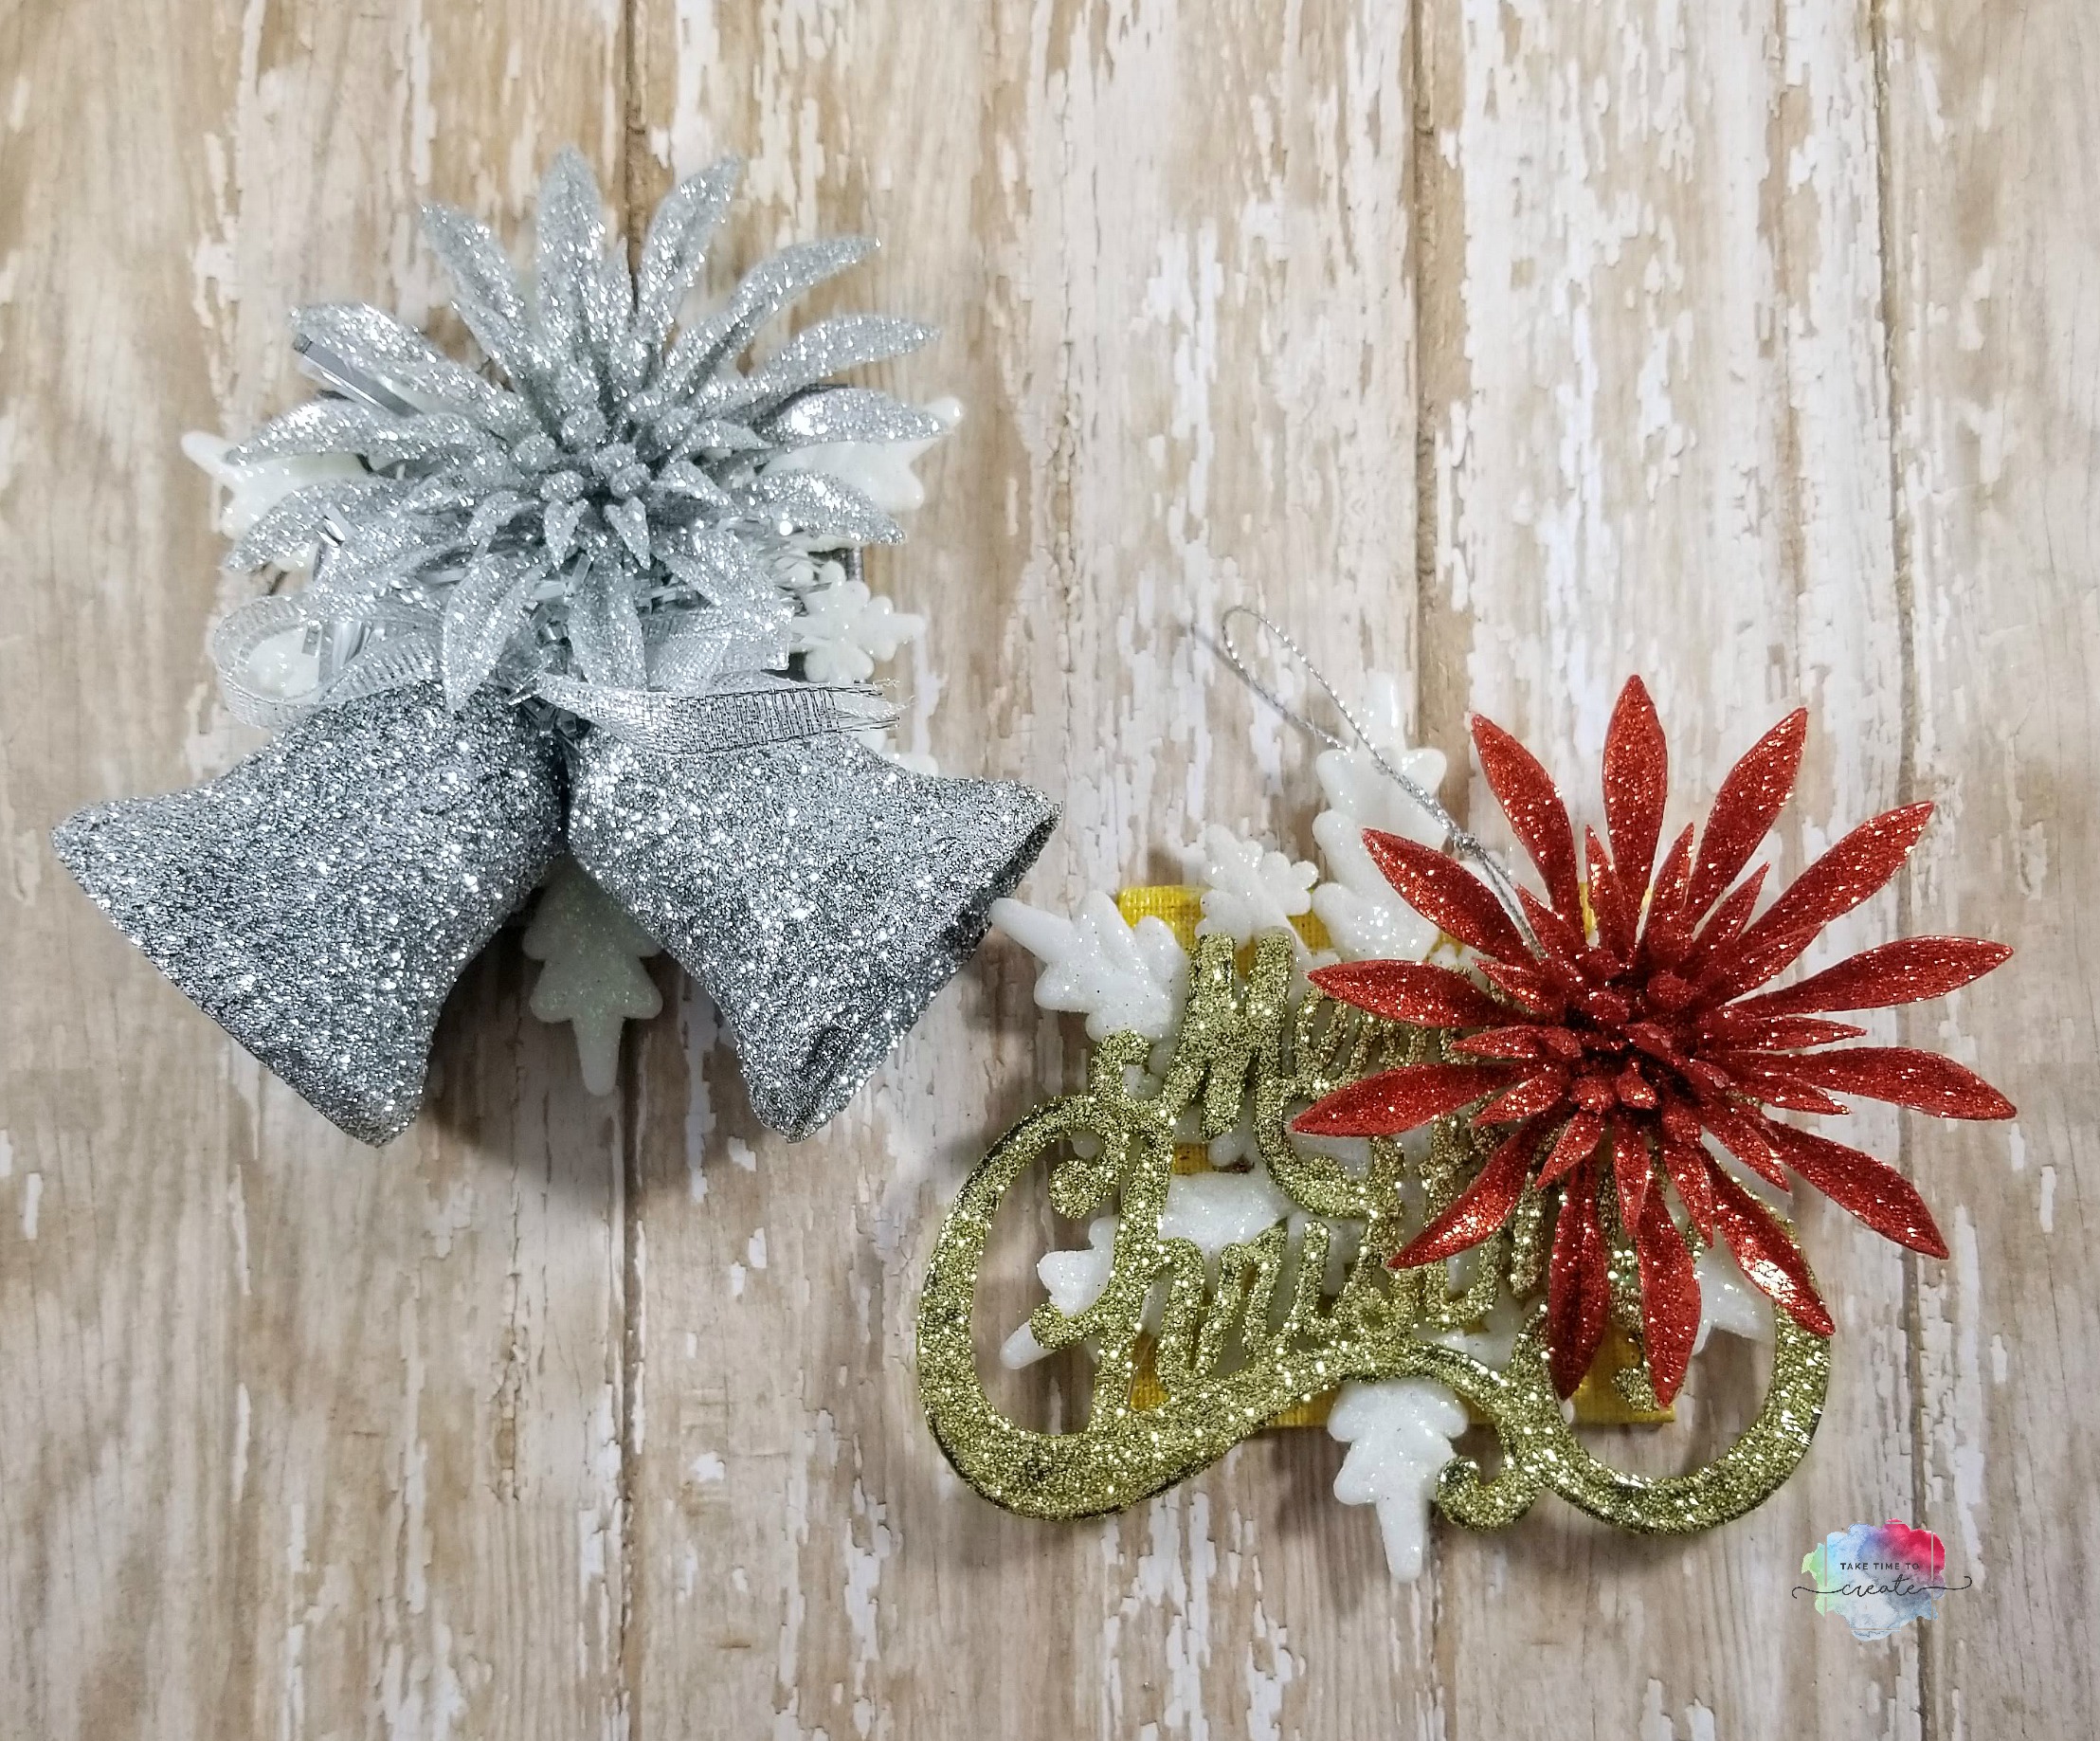
I know it seems early, but Christmas is right around the corner. I created these ornaments using goodies from the Dollar Tree.
FYI: I was compensated for this post. This post also contains affiliate links and I will be compensated if you make a purchase after clicking on my links.
This was such a fun project to complete. I had a lot of ornaments and Dollar Tree goodies in my stash for this project, but they have a lot of the same ornaments year after year, along with some new ones.
I love how glittery the Dollar Tree Christmas items are, they make the perfect decorations.
For this project grab a tiny canvas and paint it in any color you want, I used a silver and a gold. (if you don’t have a canvas a piece of study cardboard or foam board will work)
Once the paint is dry you can start layering your ornaments. I used hot glue to attach it. I used 3 ornaments on each canvas to create an interesting look.
Just build your layers until you get what you are looking for and you are done! Add a string or ribbon to the back if needed.
This project is great to make unique ornaments for your tree, or you can use them as gift tags or gifts to just about anyone on your list.
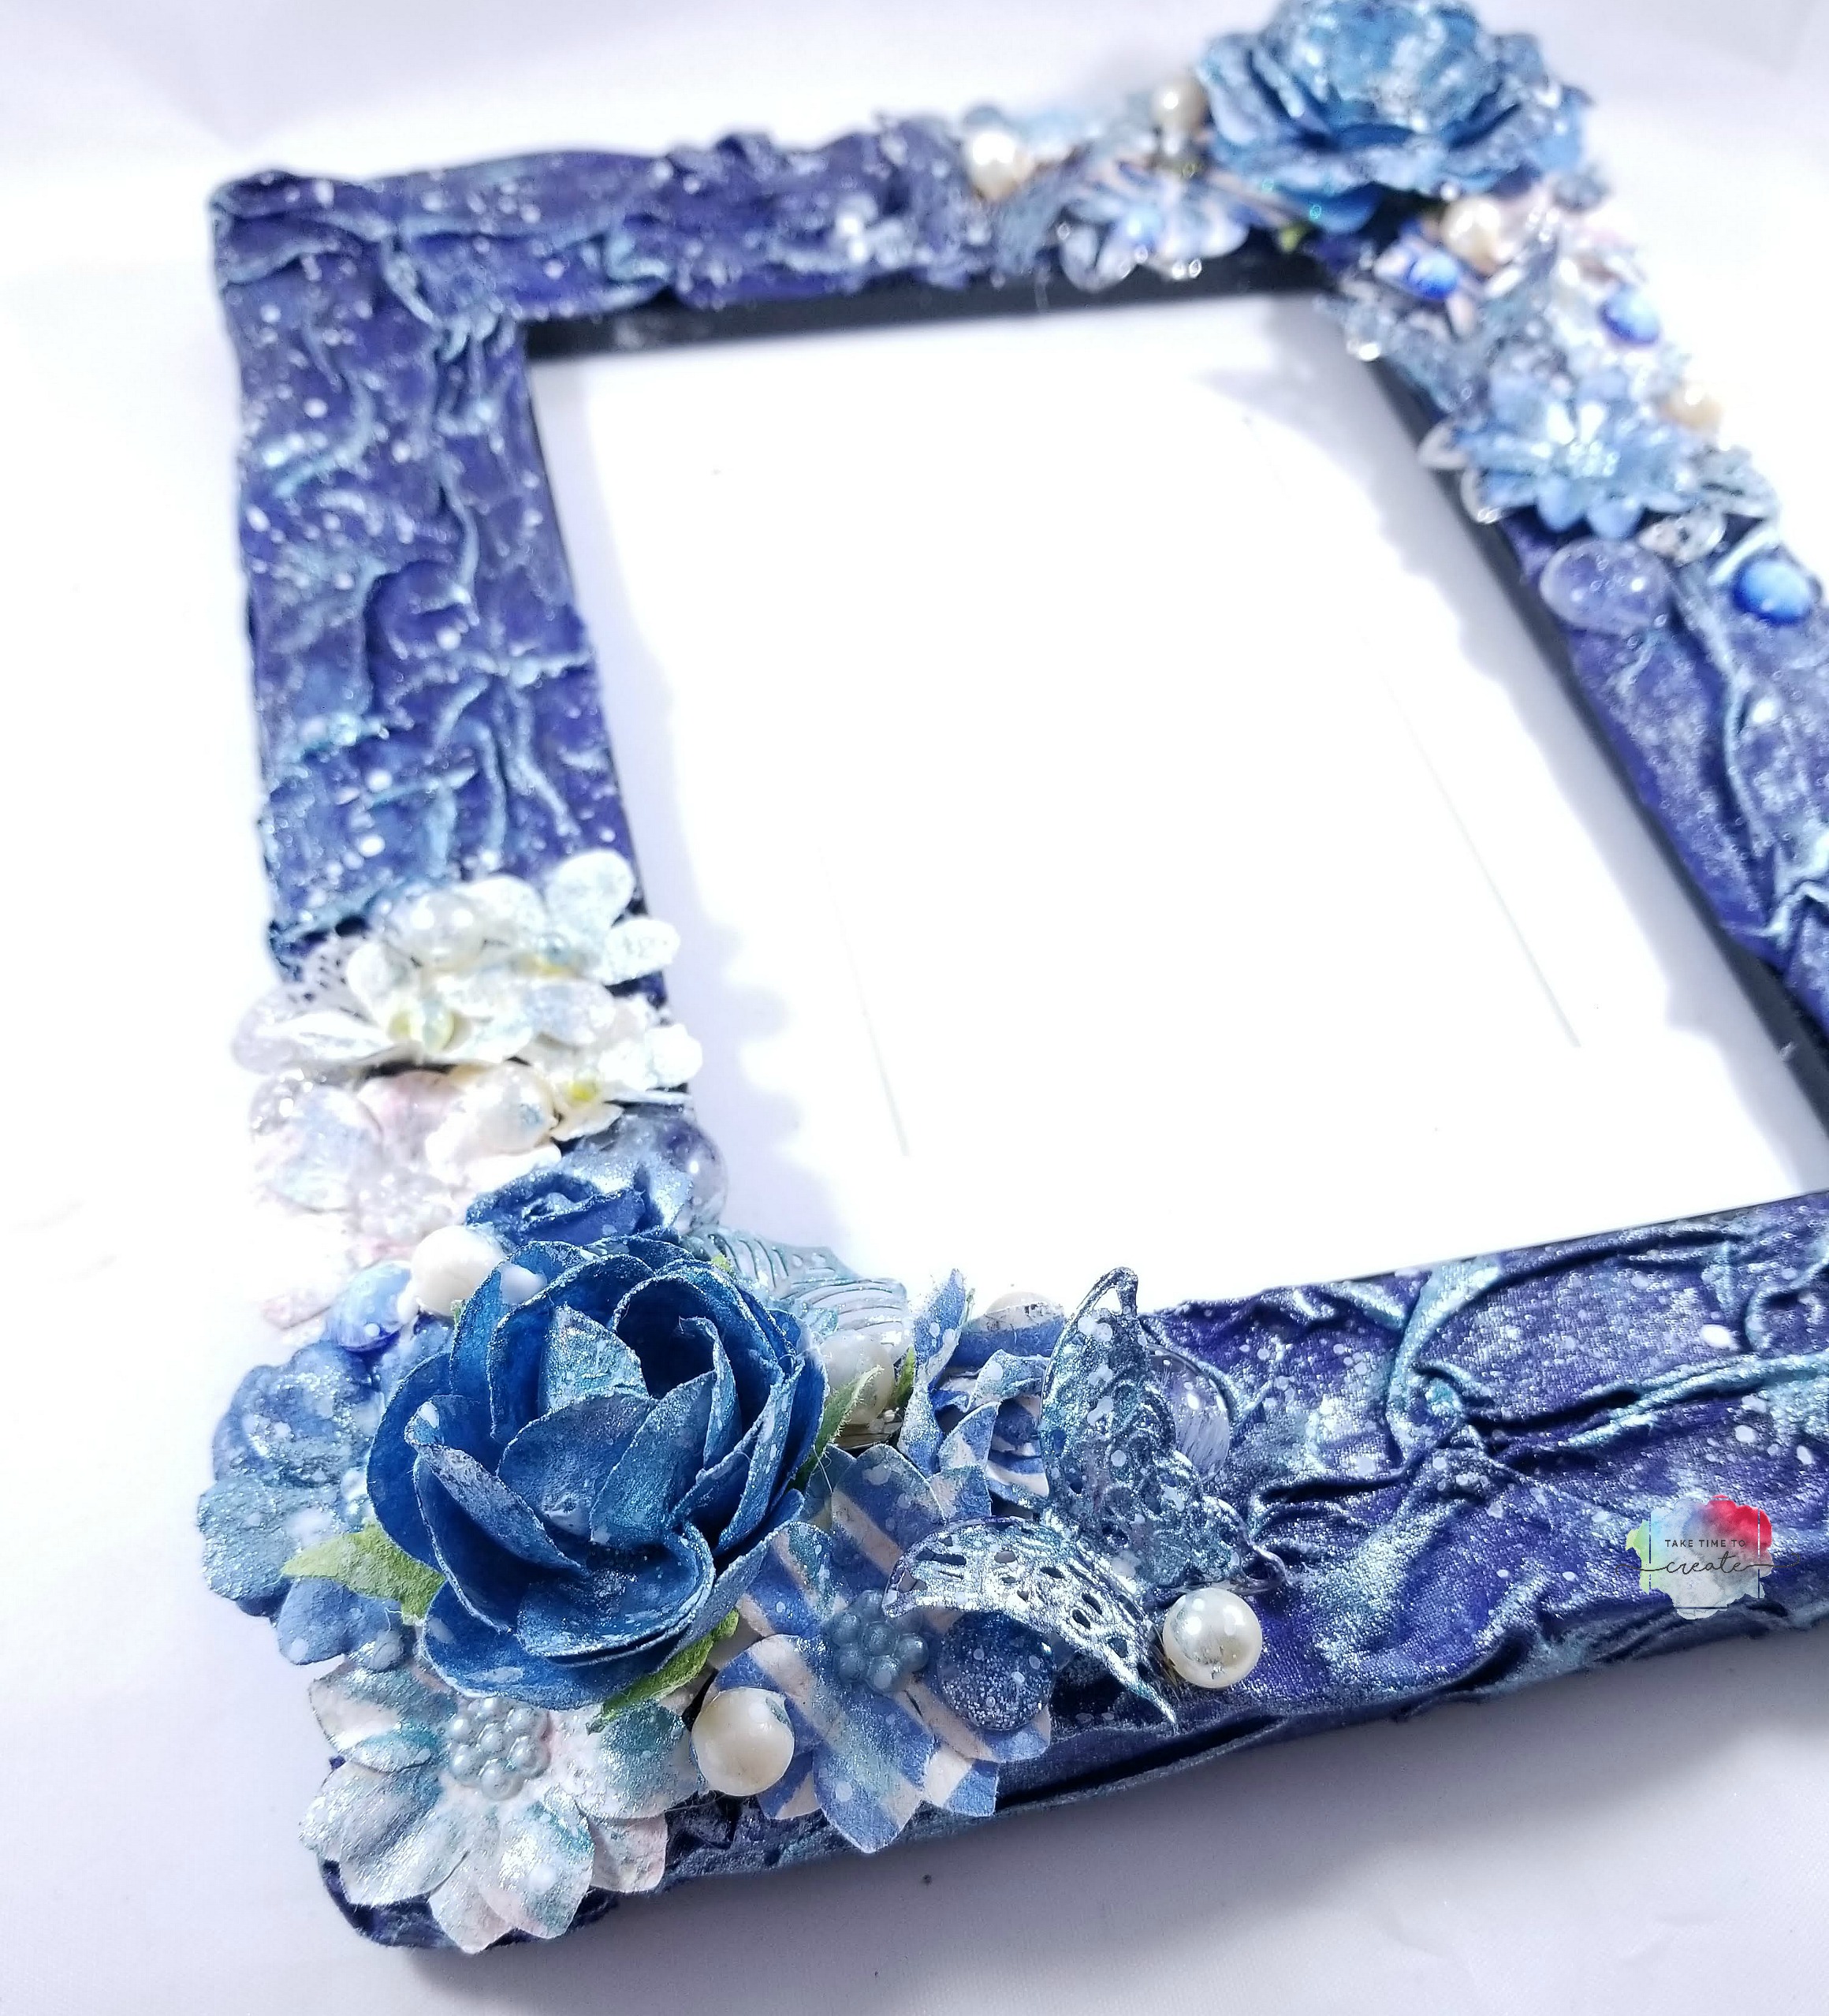
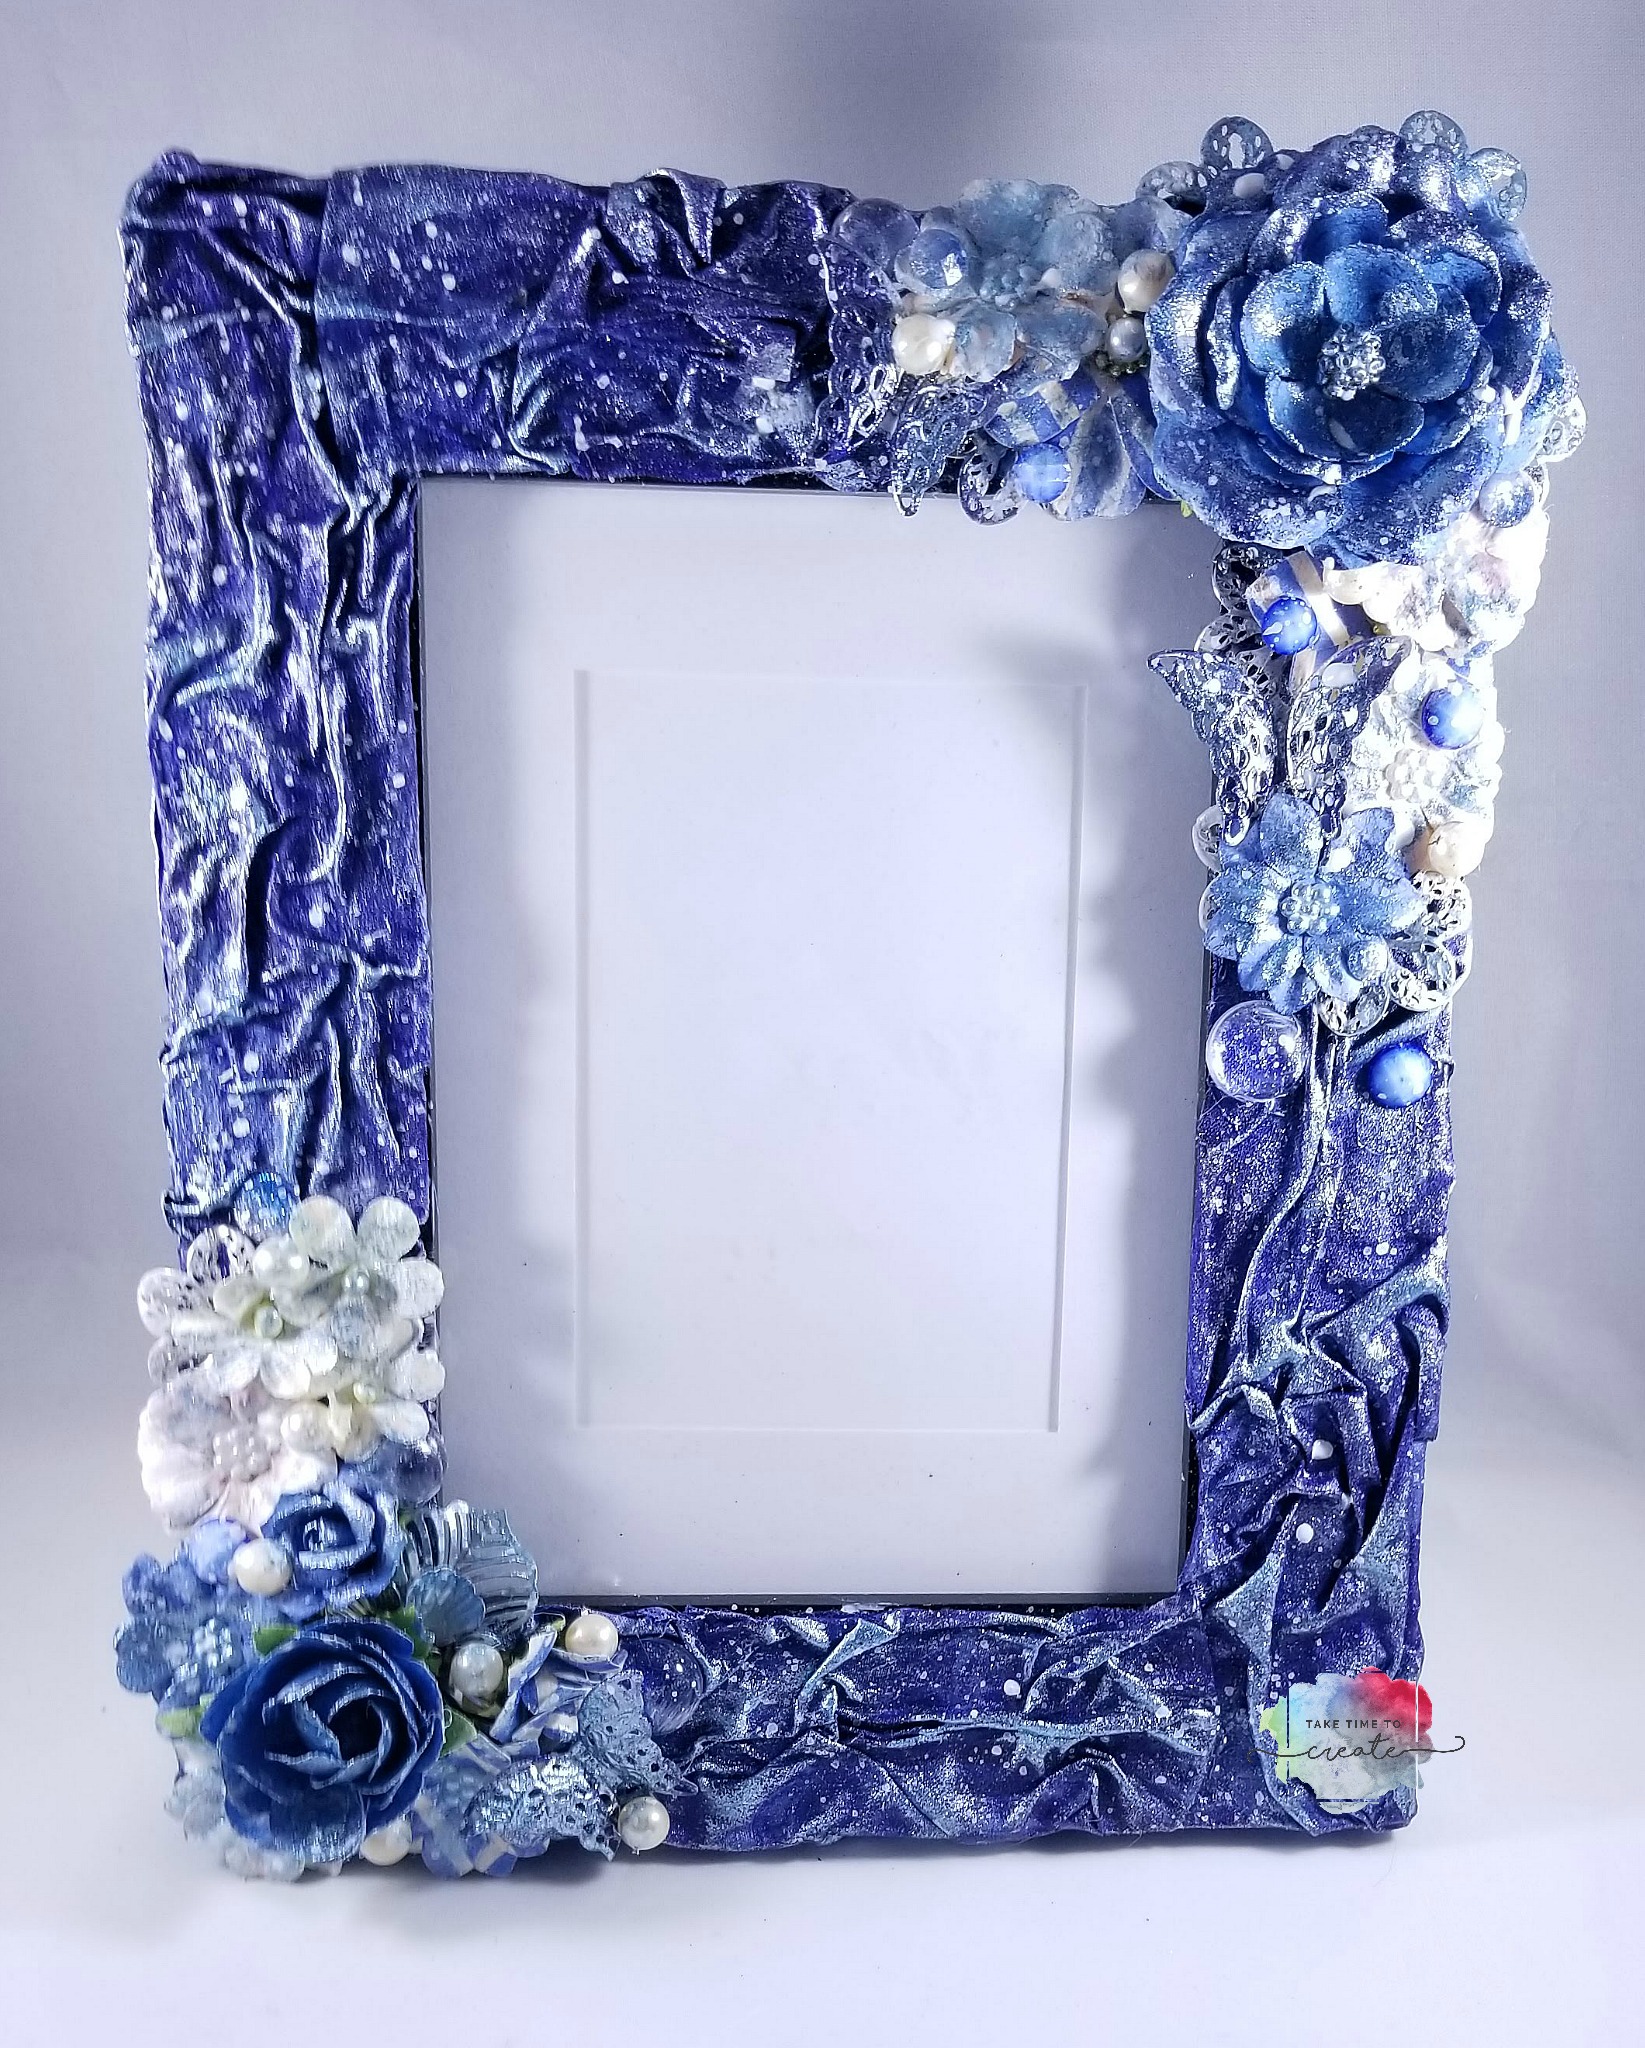
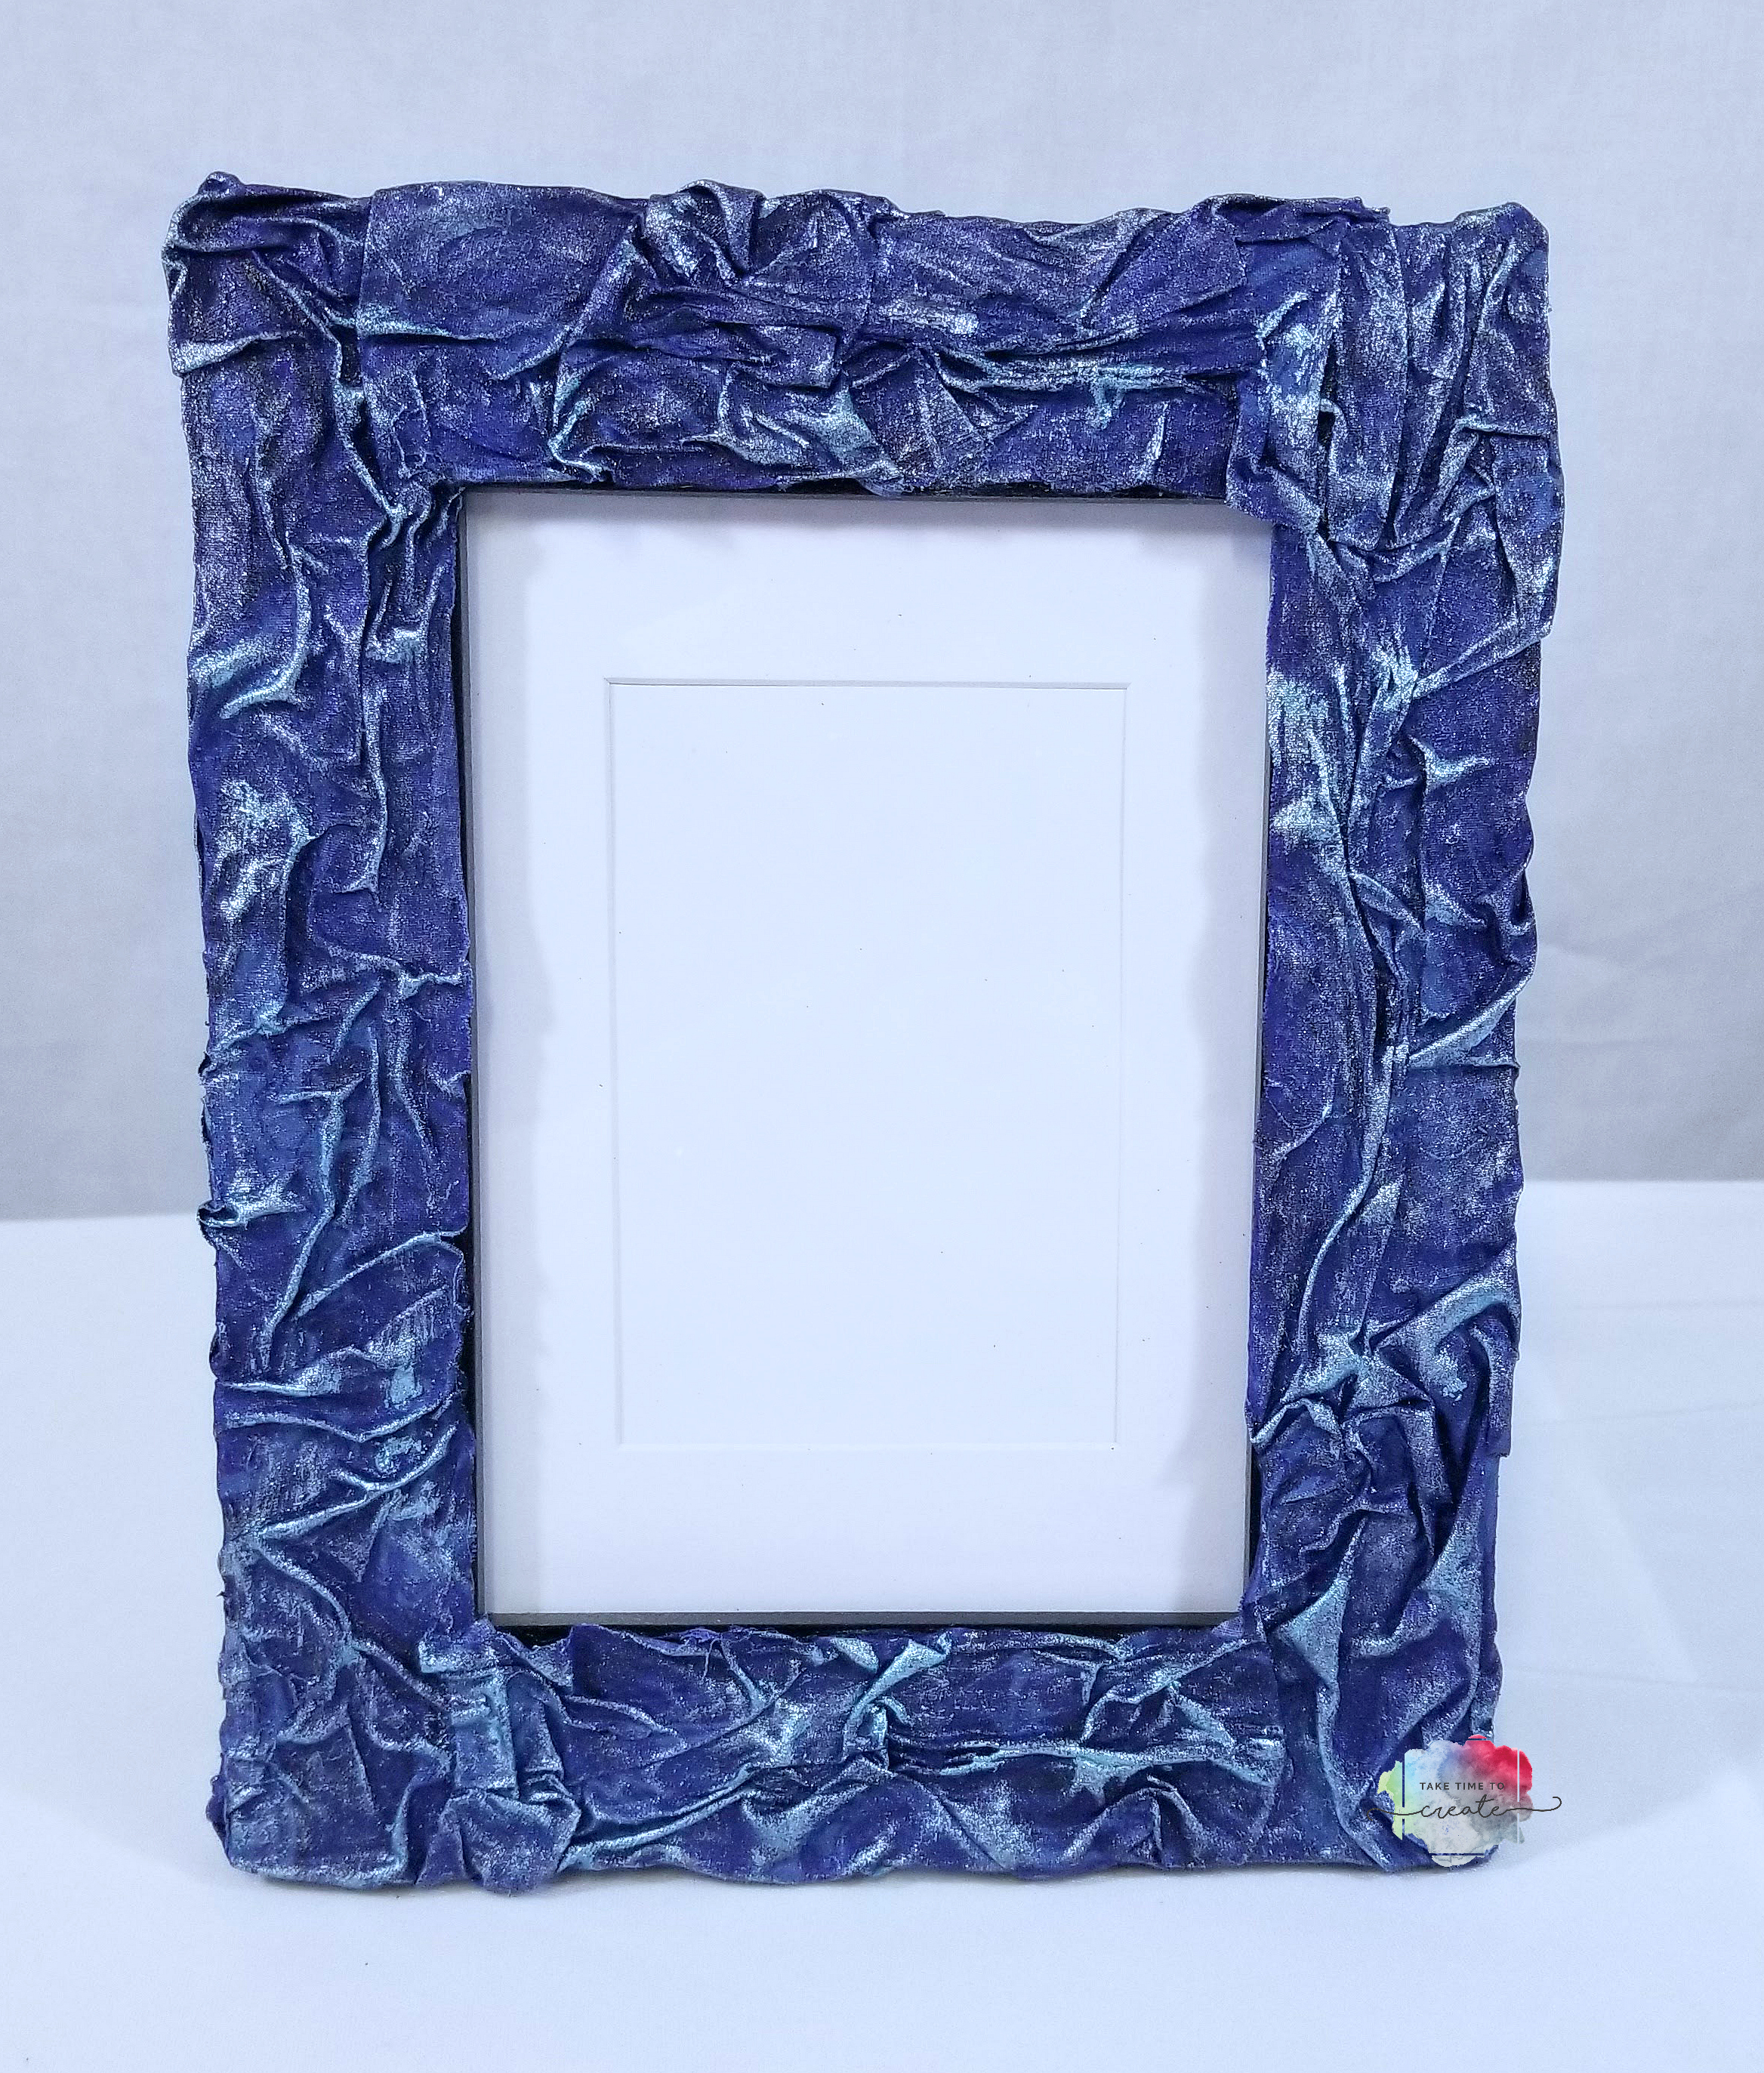
Have you ever finished a project and thought you were done only to realize that you weren’t? Well that is exactly what happened to me with this Blue Mixed Media Fabric Frame.
A little while ago I created the fabric frame and I thought it was pretty cute as is. If you missed that blog post you can catch it here: Fabric Frame
And the original frame was really cute and I did love it, but as I thought about it I thought it needed more. And by more, I mean a lot, lol. So I embellished it, and painted it some more. I love how it turned out and it is a personal choice how much or how little you add to your frame.
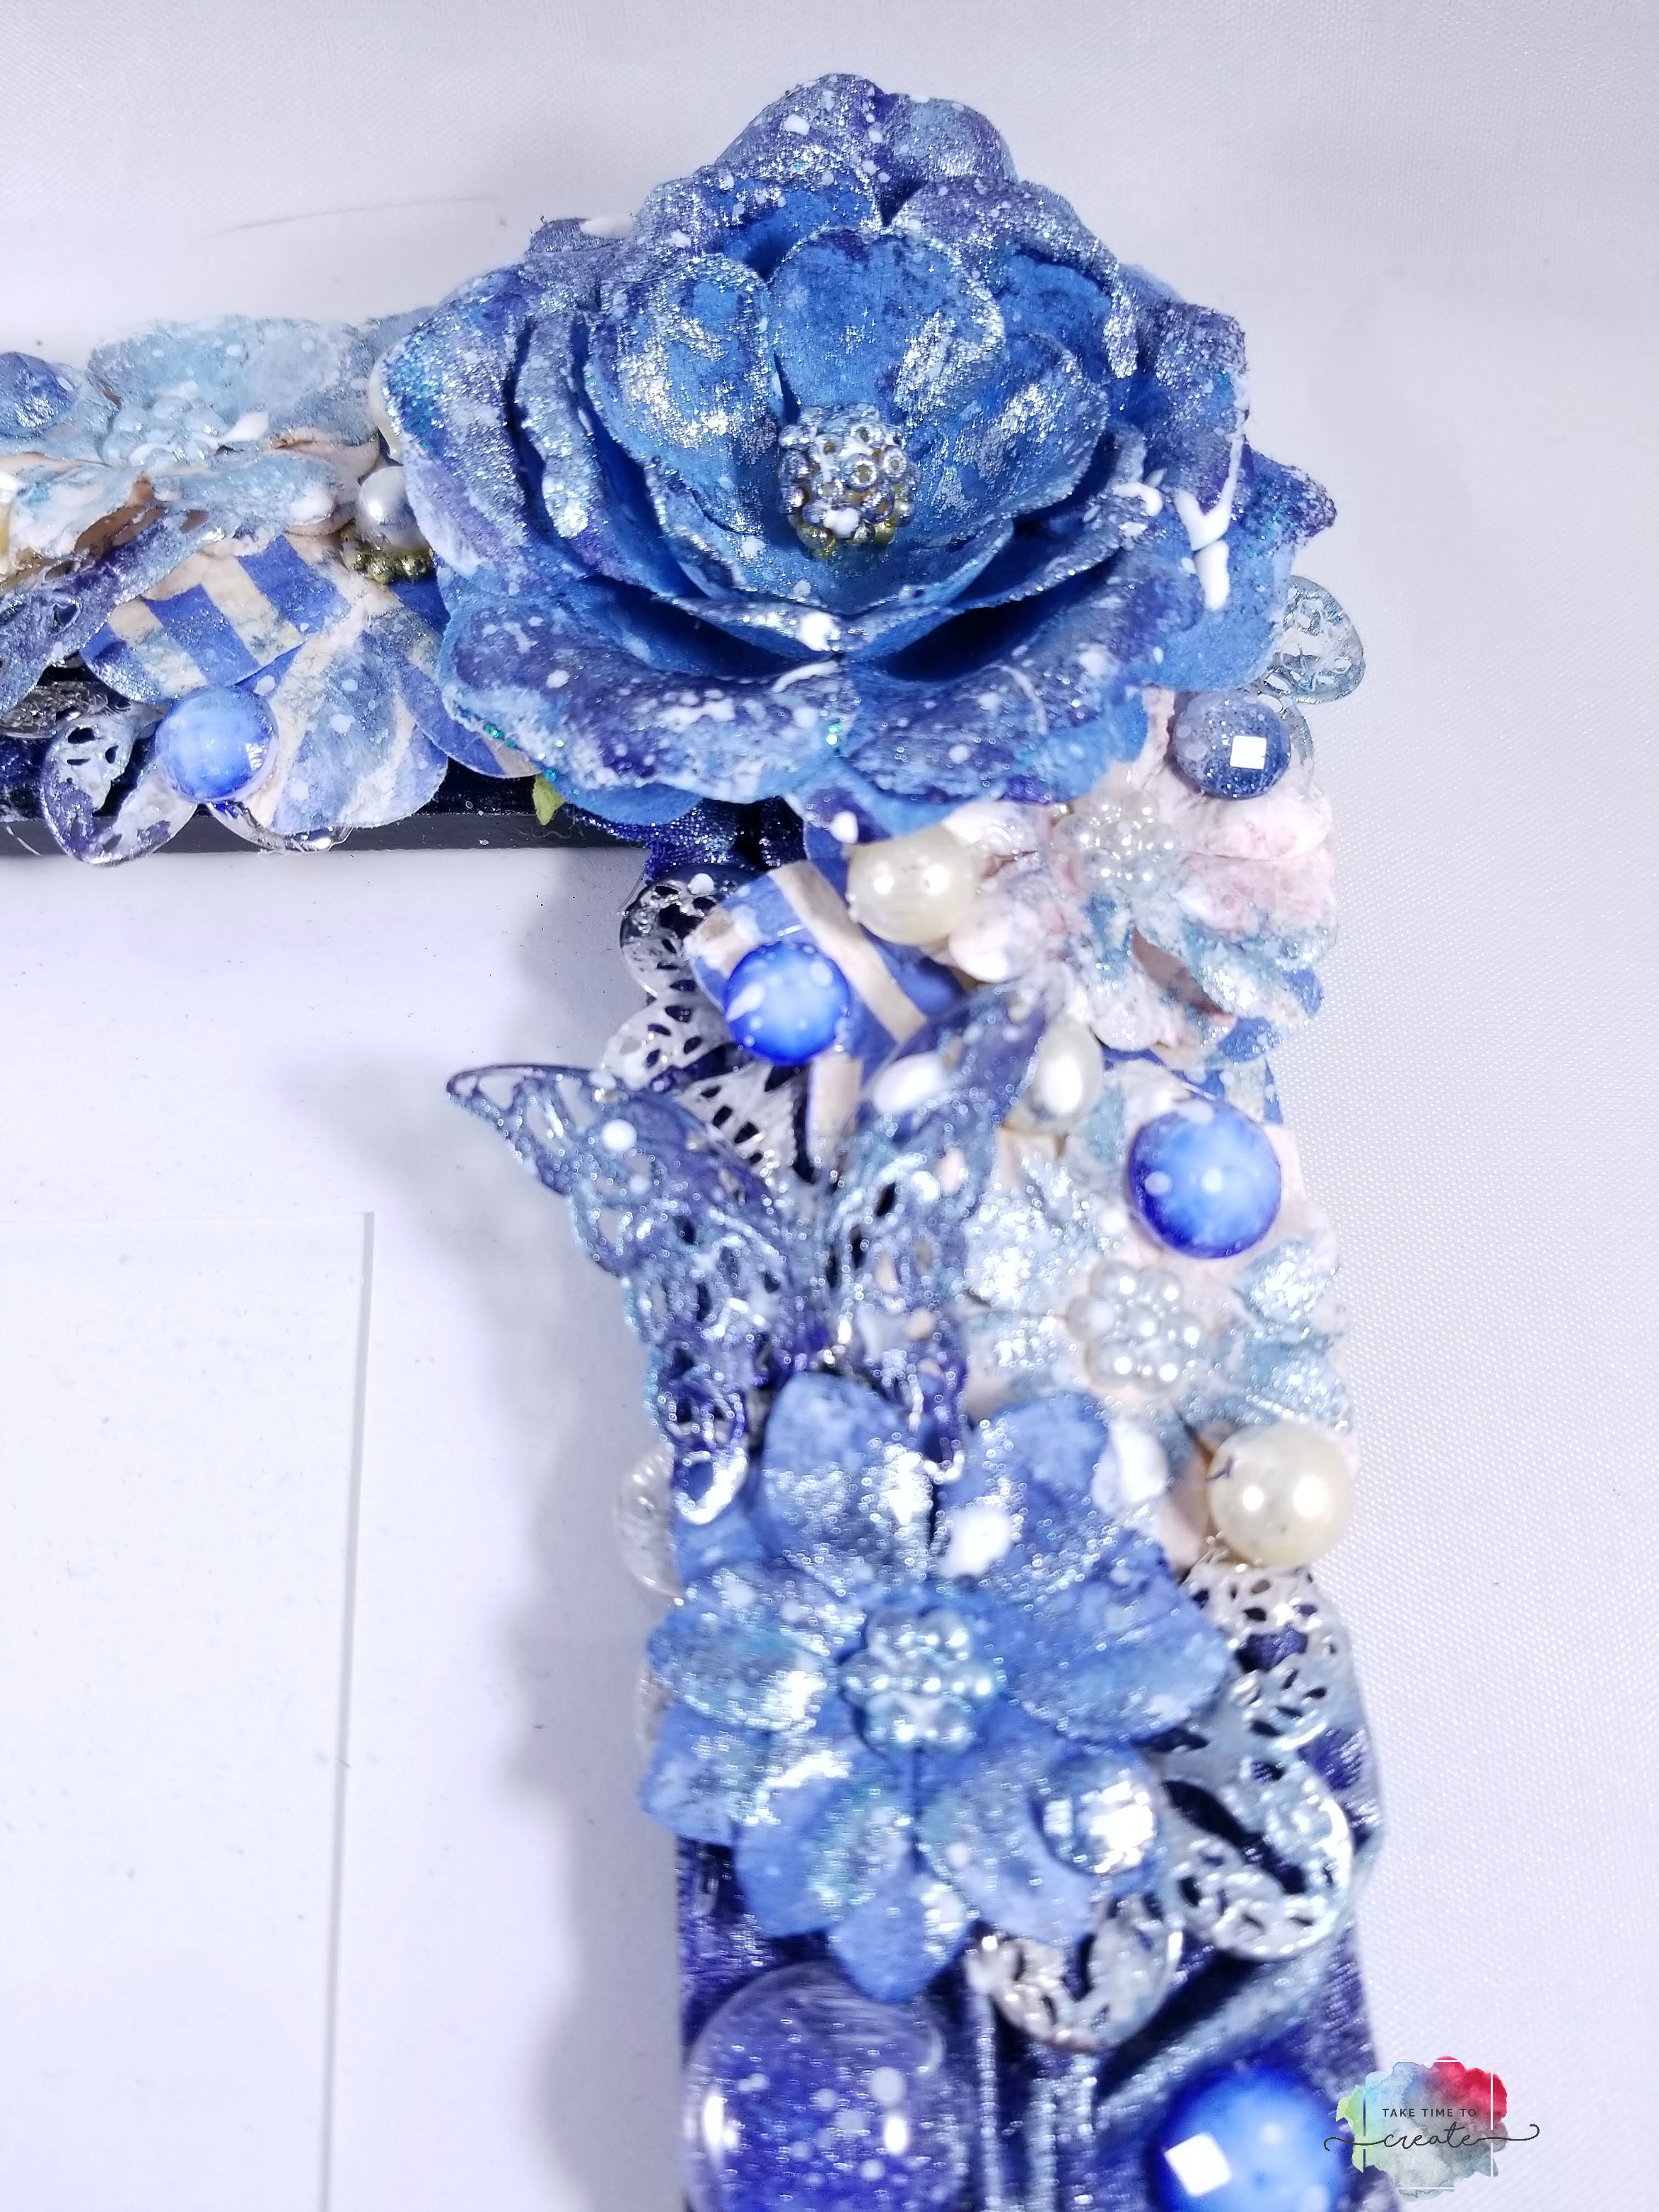
As you can see the original just has fabric and paint, but the embellished one has flowers, pearls, metal elements, and more added to the frame.
I clustered 2 groupings on opposite corners of the frame. I added a variety of elements to create interest and texture to the frame. If you know what photo you will be putting in the frame you can tailor the elements to the photo, I think that would look amazing.
After the gesso was all dry I painted over everything with Finnabari Sparks and Metallique paints. They were the same colors as the original frame and I thought that would help make it all cohesive.
The last step was adding splashes all over to really blend the original and the new elements together. I wanted it to look like I planned it all at once, lol.
I really like how this all came together. I love adding new elements on top of project I thought I had finished.
What project did you think you finished but went back later to add embellishments to? Share in the comments.
Affiliate Links (similar product if actual one can’t be found)
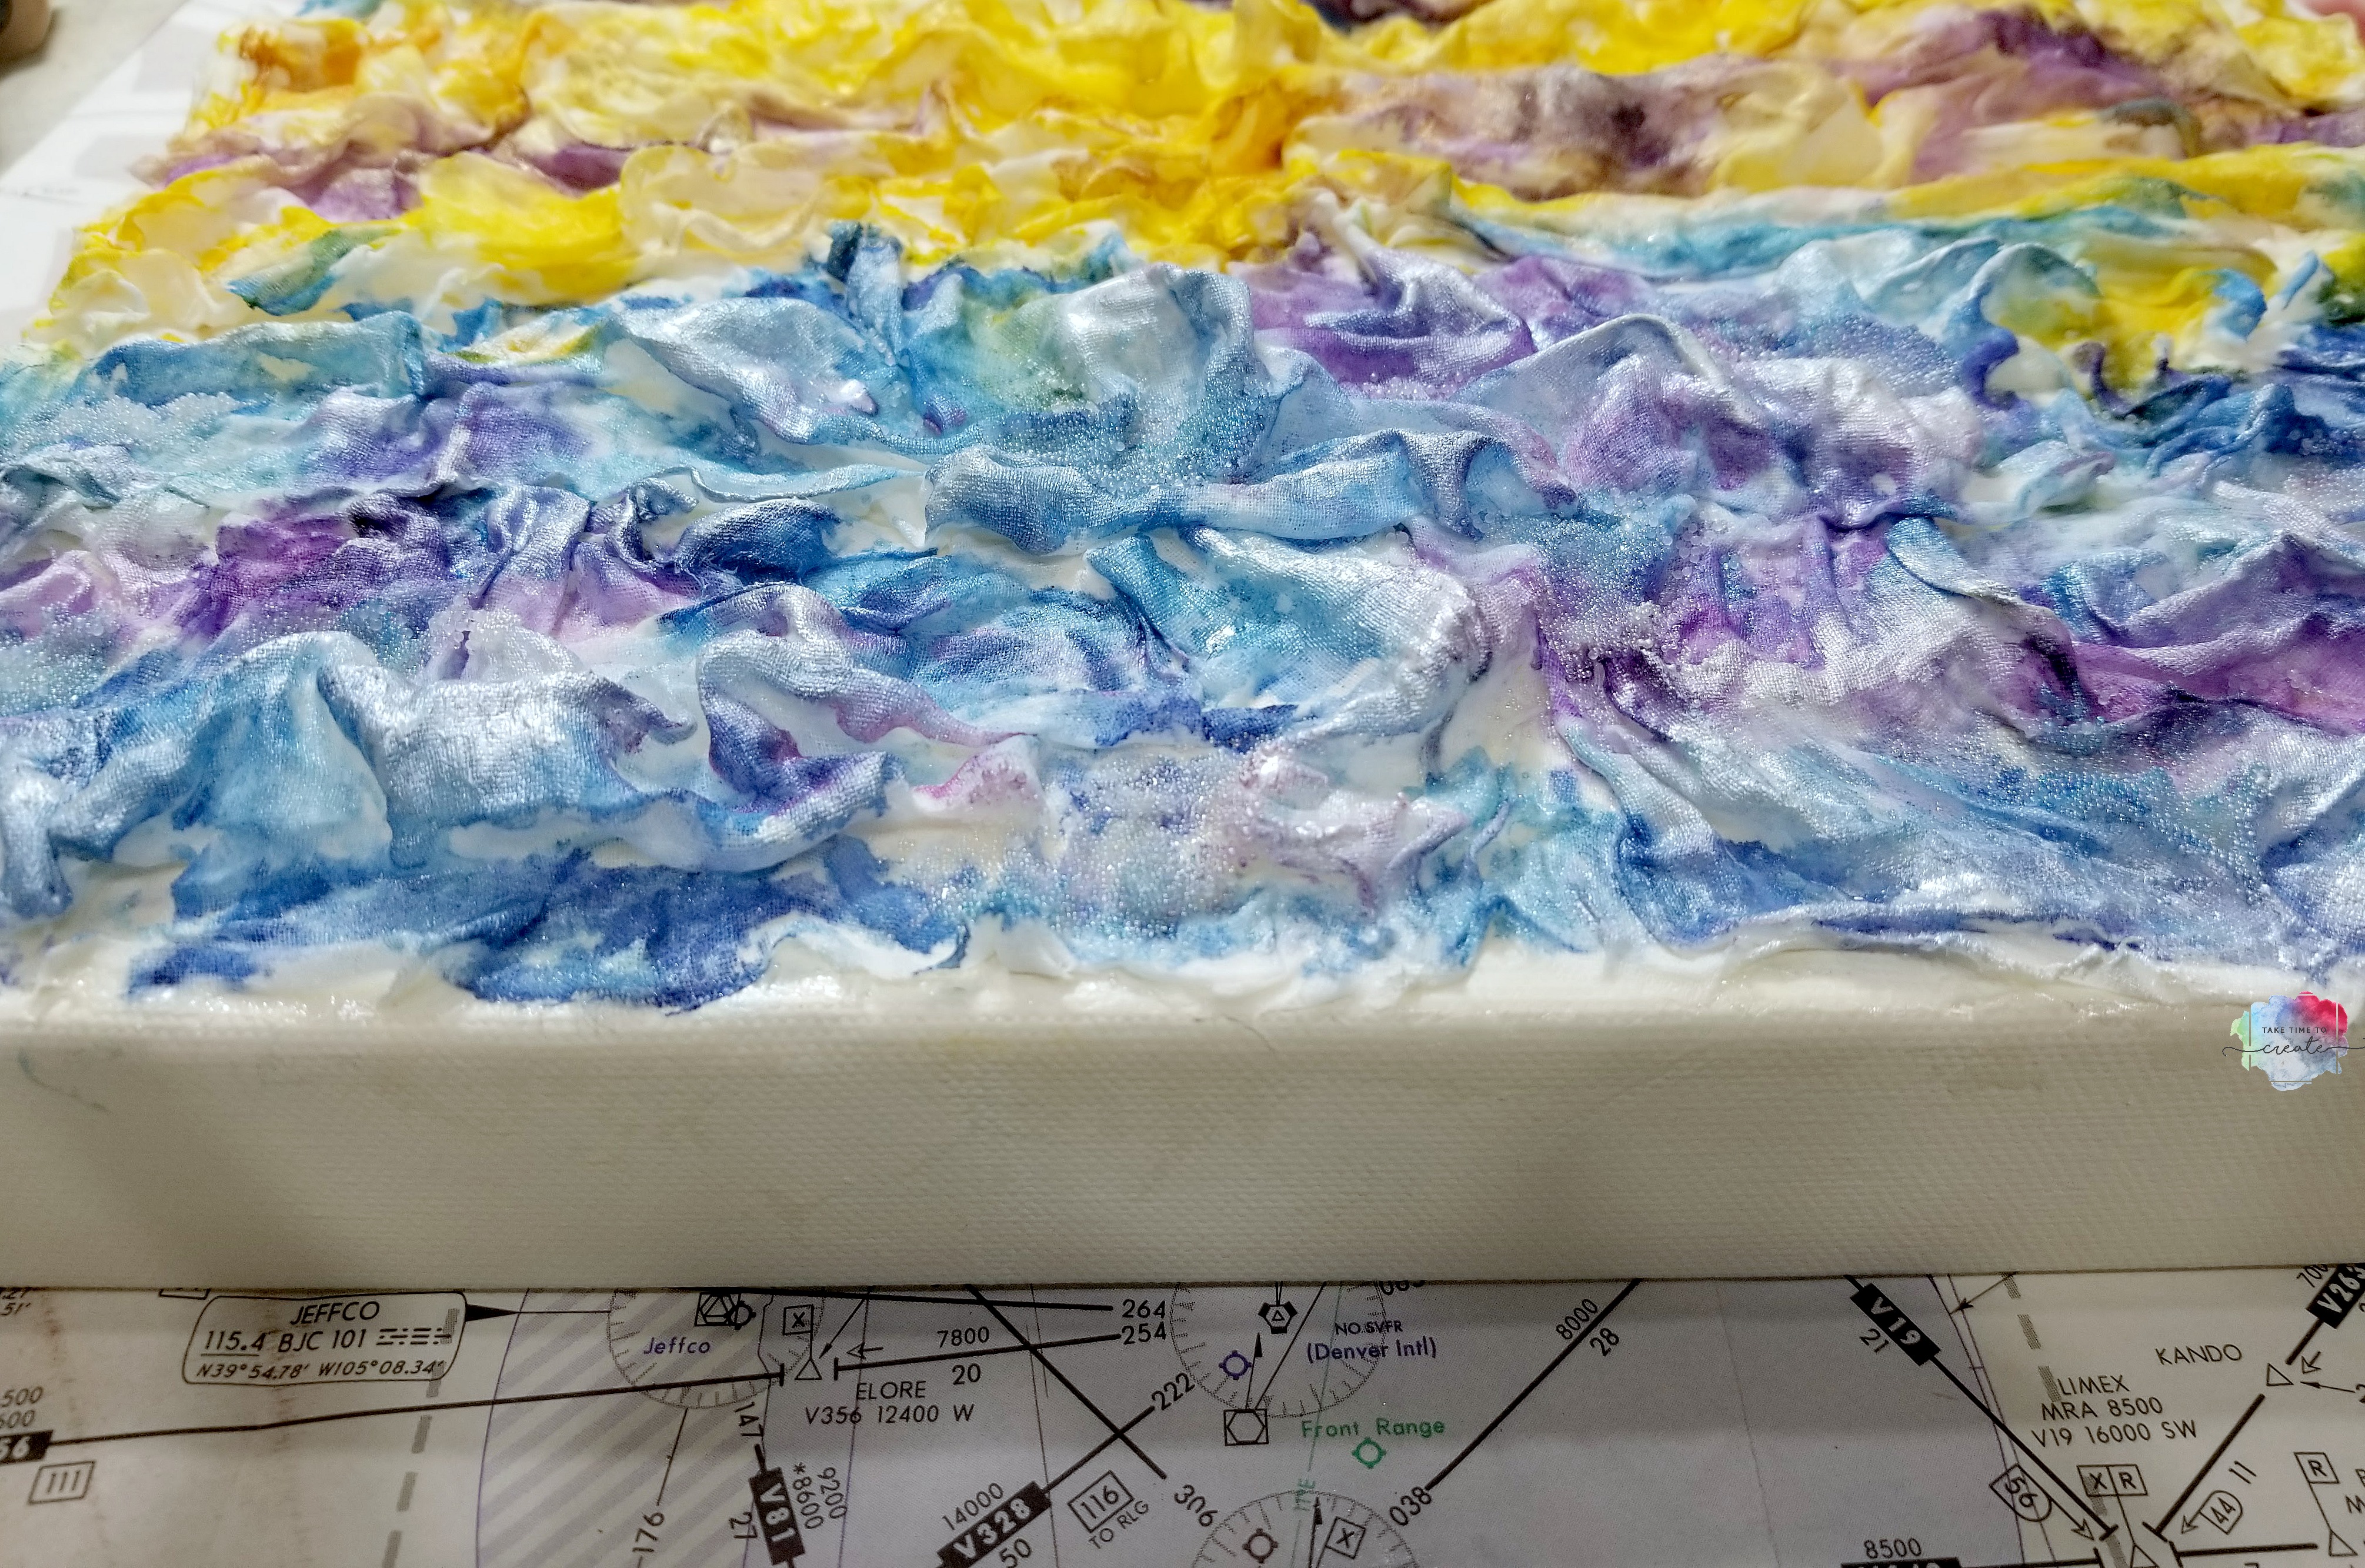
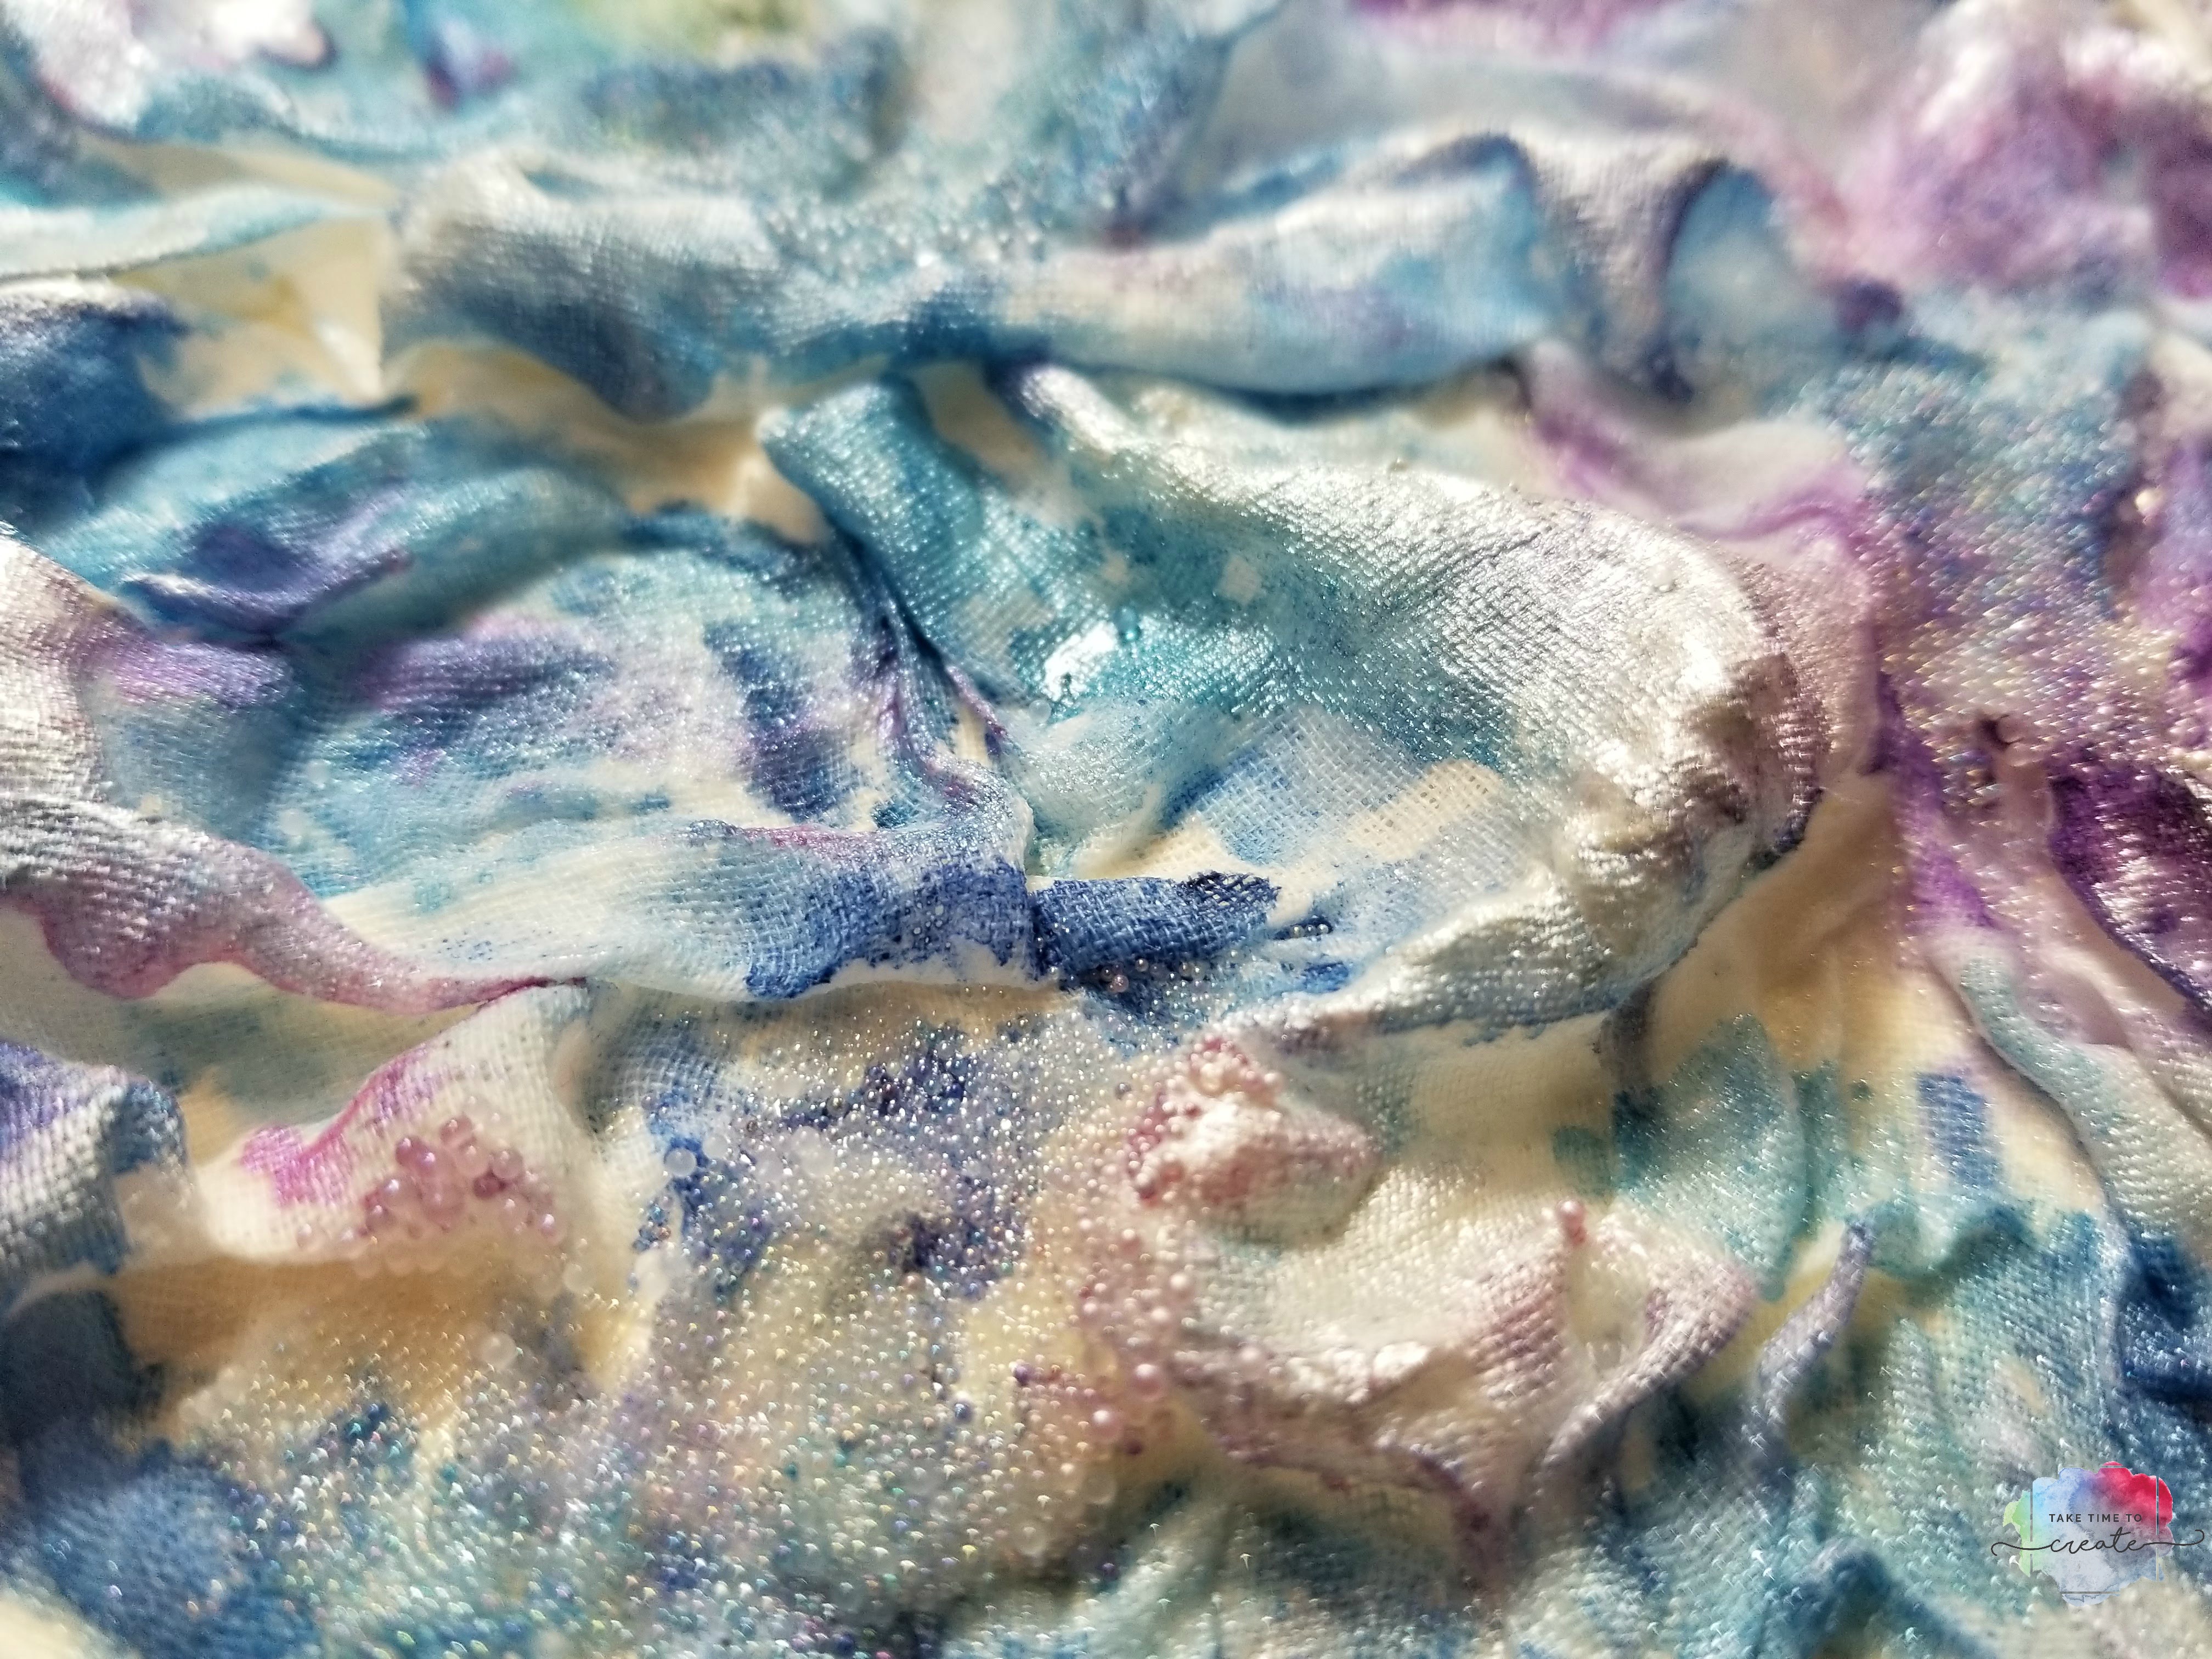
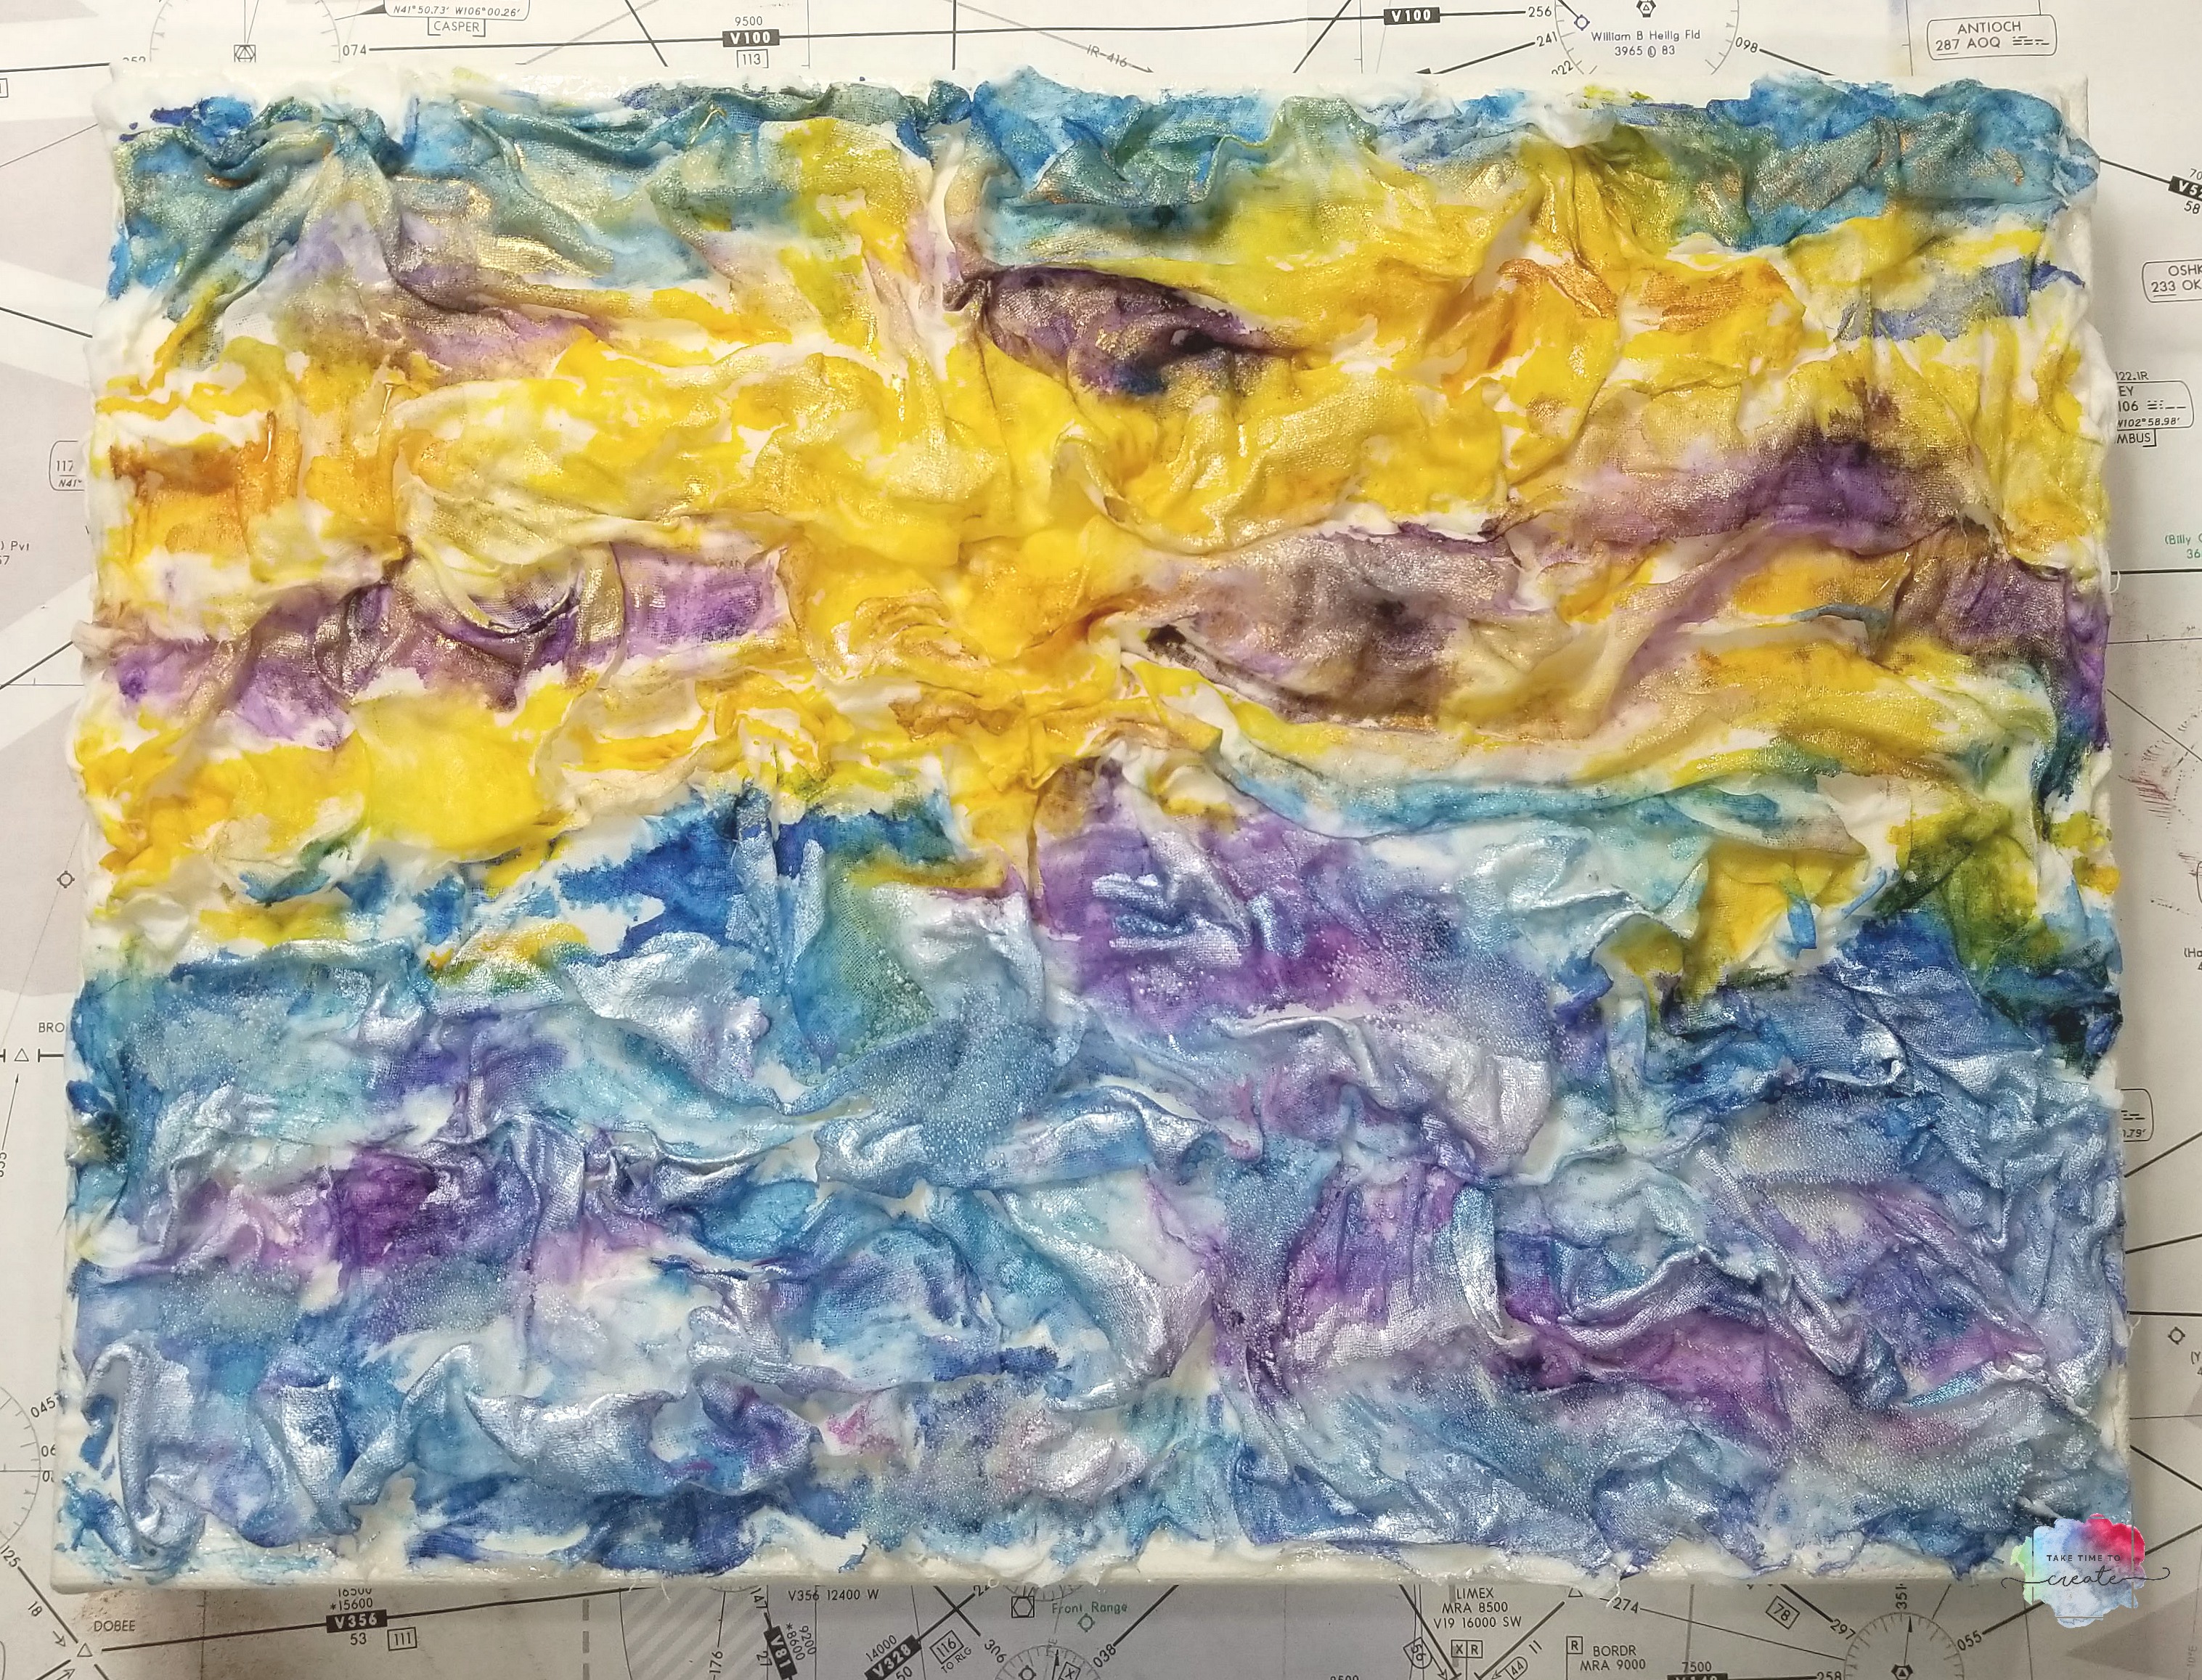
Sometimes an experiment turns out really cool, and this just so happens to be one of those times! I did a class at ArtVenture in January of this year that taught us how to watercolor on fabric. Not quite like this example, but it got my creative juices flowing! I really wanted to explore this method and develop my own technique, and this is what I came up with- A Fabric Watercolor Landscape (actually the ocean, and it is abstract…. lol)
As always the video goes over all the steps, and it is a good companion to the blog post.
To start prep your canvas by painting it a light color, I used a slightly off white and painted the top and sides.
you will need a light gauzy fabric for the base layer. I had some in my stash, so use what you have, as long as it is a very light fabric. Take a Heavy gel and spread that all over the canvas, then coat each strip of fabric with a gloss gel. (this is the same procedure that I use on all my canvases) Once the strip is coated adhere it to the canvas. Add as many wrinkles as you want and create the texture you are going for. (I have to say I really like this stage, in fact I almost stopped here because it is so pretty, an all white fabric canvas. I might have to make one and just leave it as is. Some thing to think about, lol)
Once you are done with the fabric, let is step dry. I usually leave it over night just to make sure.
After it is dry it is time to start watercoloring! gently spray the canvas with water (this allows the watercolors to move freely on the canvas) and then start watercoloring! Slowly add colors and see where they go and blend to create new looks. You can dry in between layers if you want and just keep building until you get the look you are going for. I wanted to create a sunset on the water, it is a little abstract, but that is ok, I really like how it turned out.
Once the watercolors are dry you can start adding in texture. I added some iridescent micro bead to add some more shimmer and shine to the water. Just apply some gloss gel and pour on some beads. Let it dry over night before removing the excess beads.
Once the beads are dry you can add even more shimmer and shine by adding Metallic watercolors. I thought this would be the perfect way to add some more details. It is a little hard to see in the photos, but up close the metallic really added that perfect final touch.
Let everything dry completely and then spray it with a spray protector.
I really like how this turned out and I can’t wait to try this technique on another canvas! What should I try to watercolor next? I love experiementing with my supplies and I would love suggestions on what to do next!
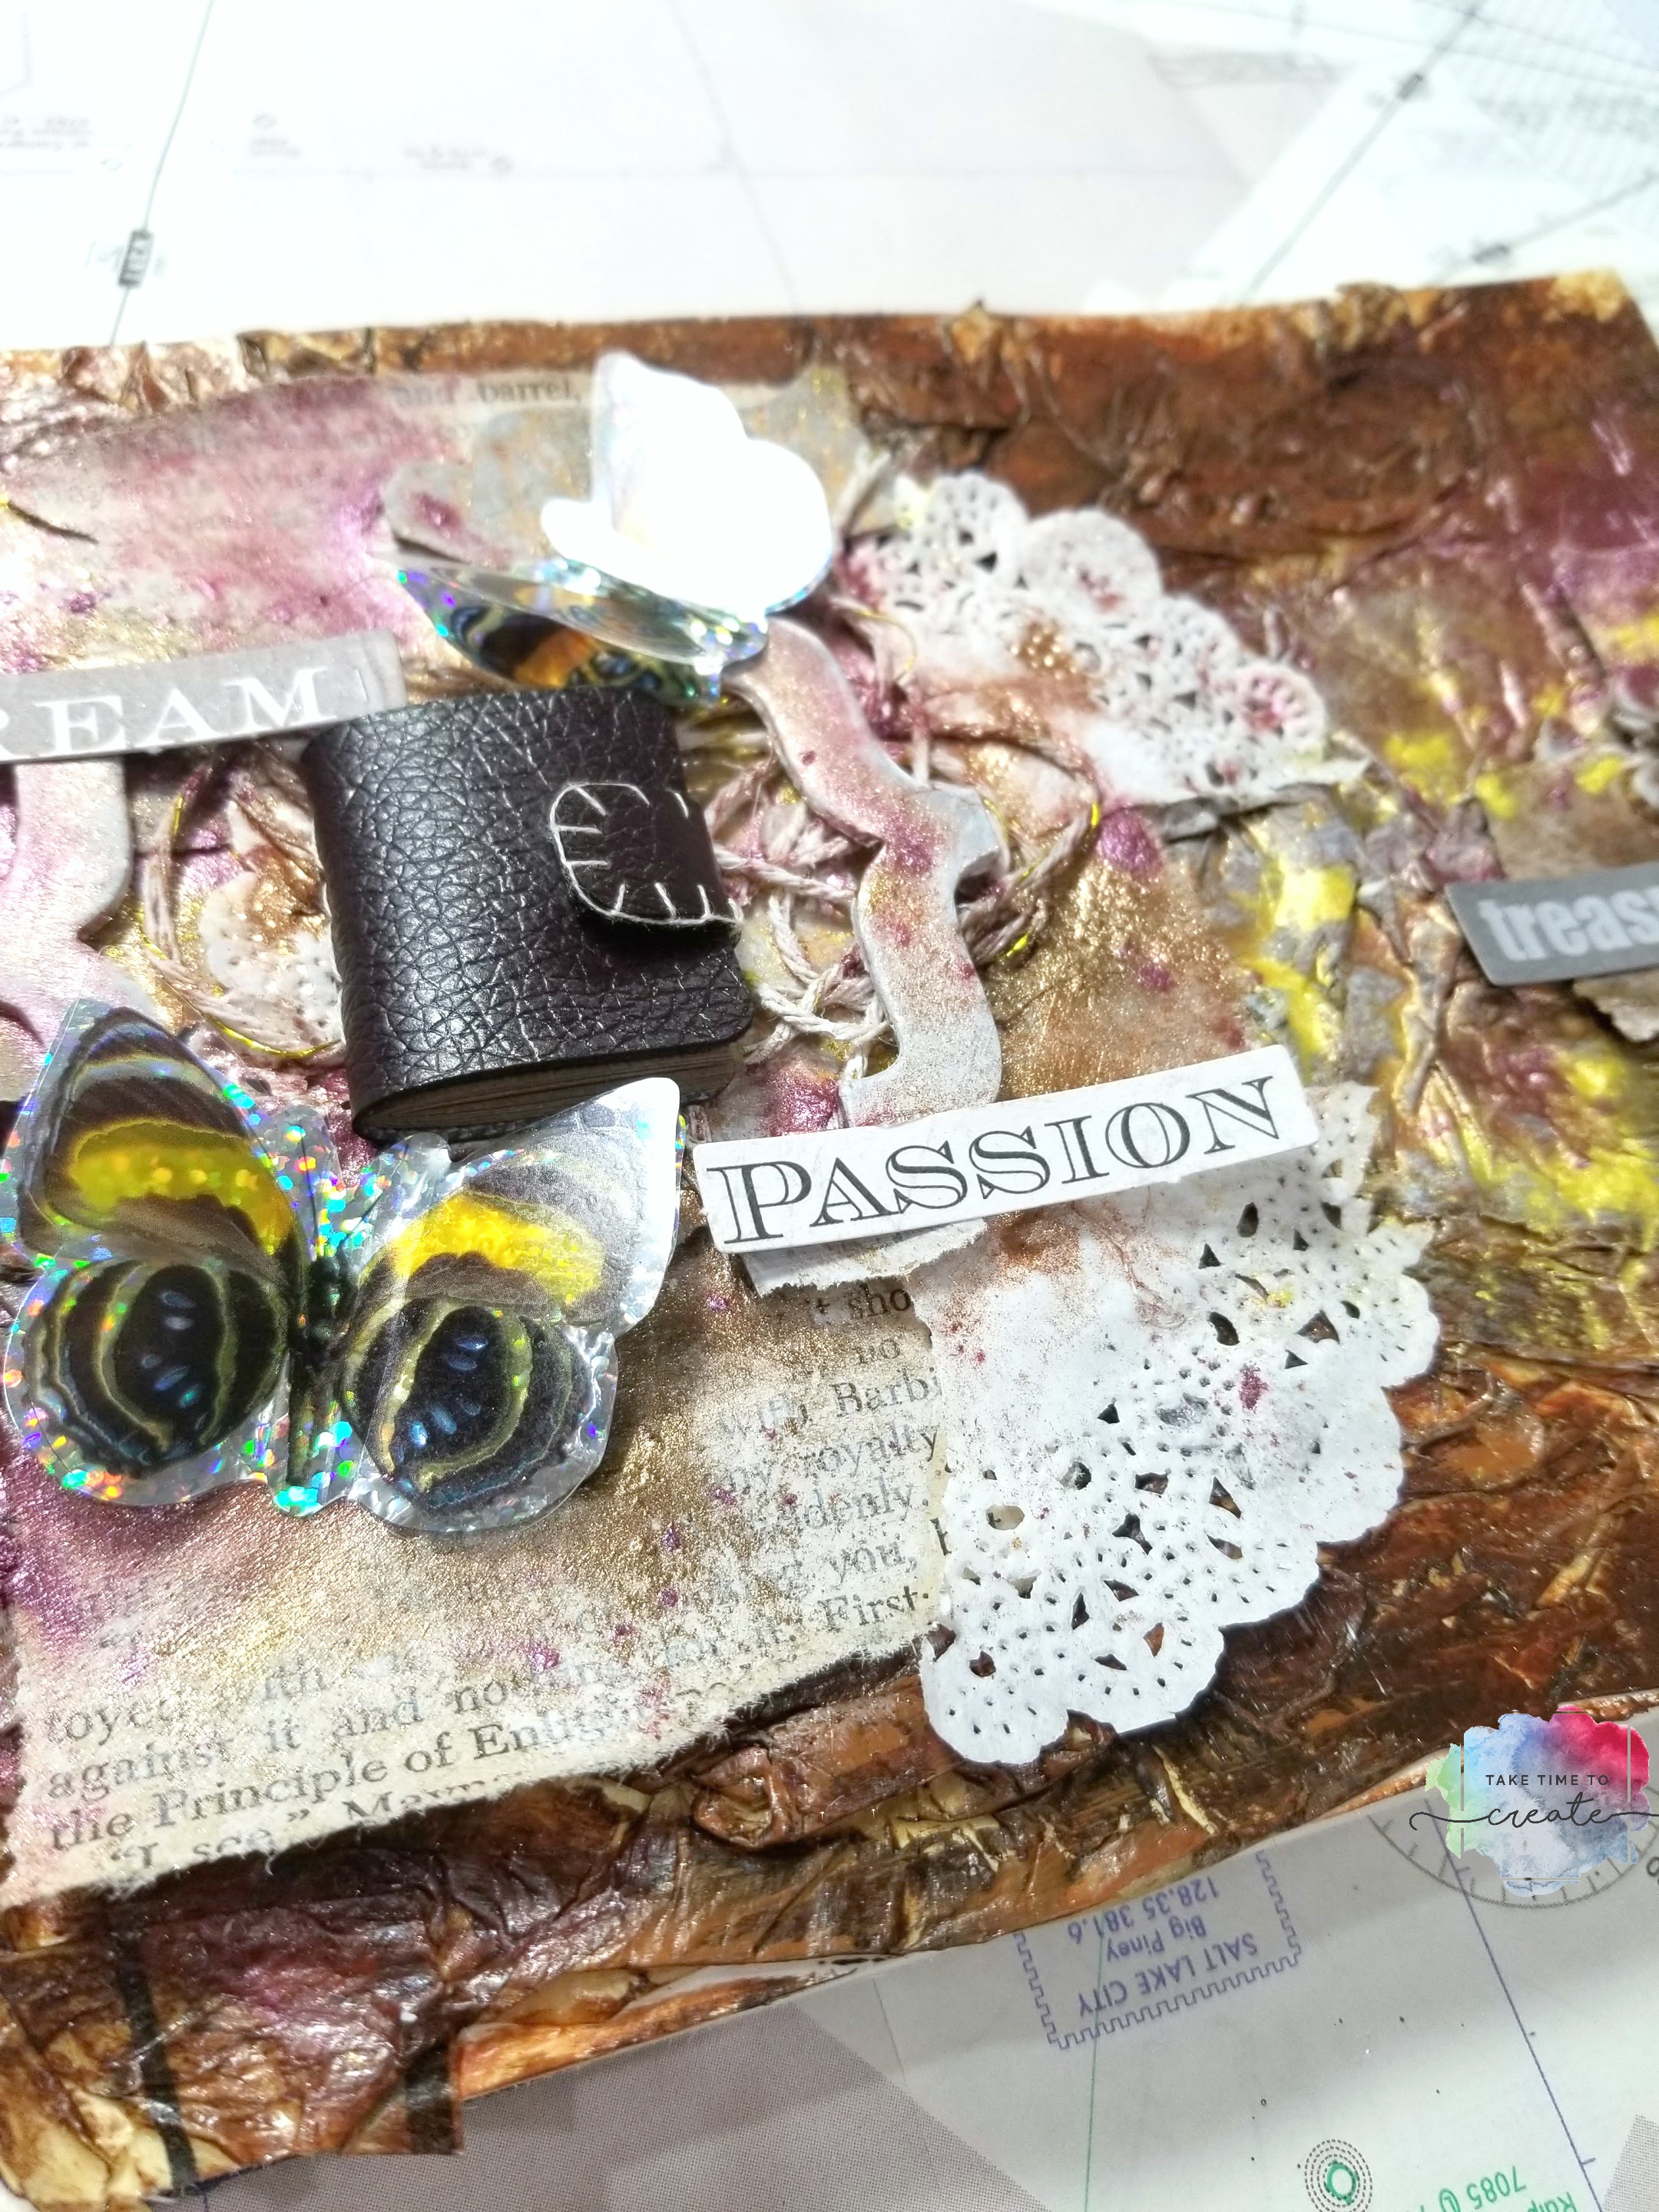
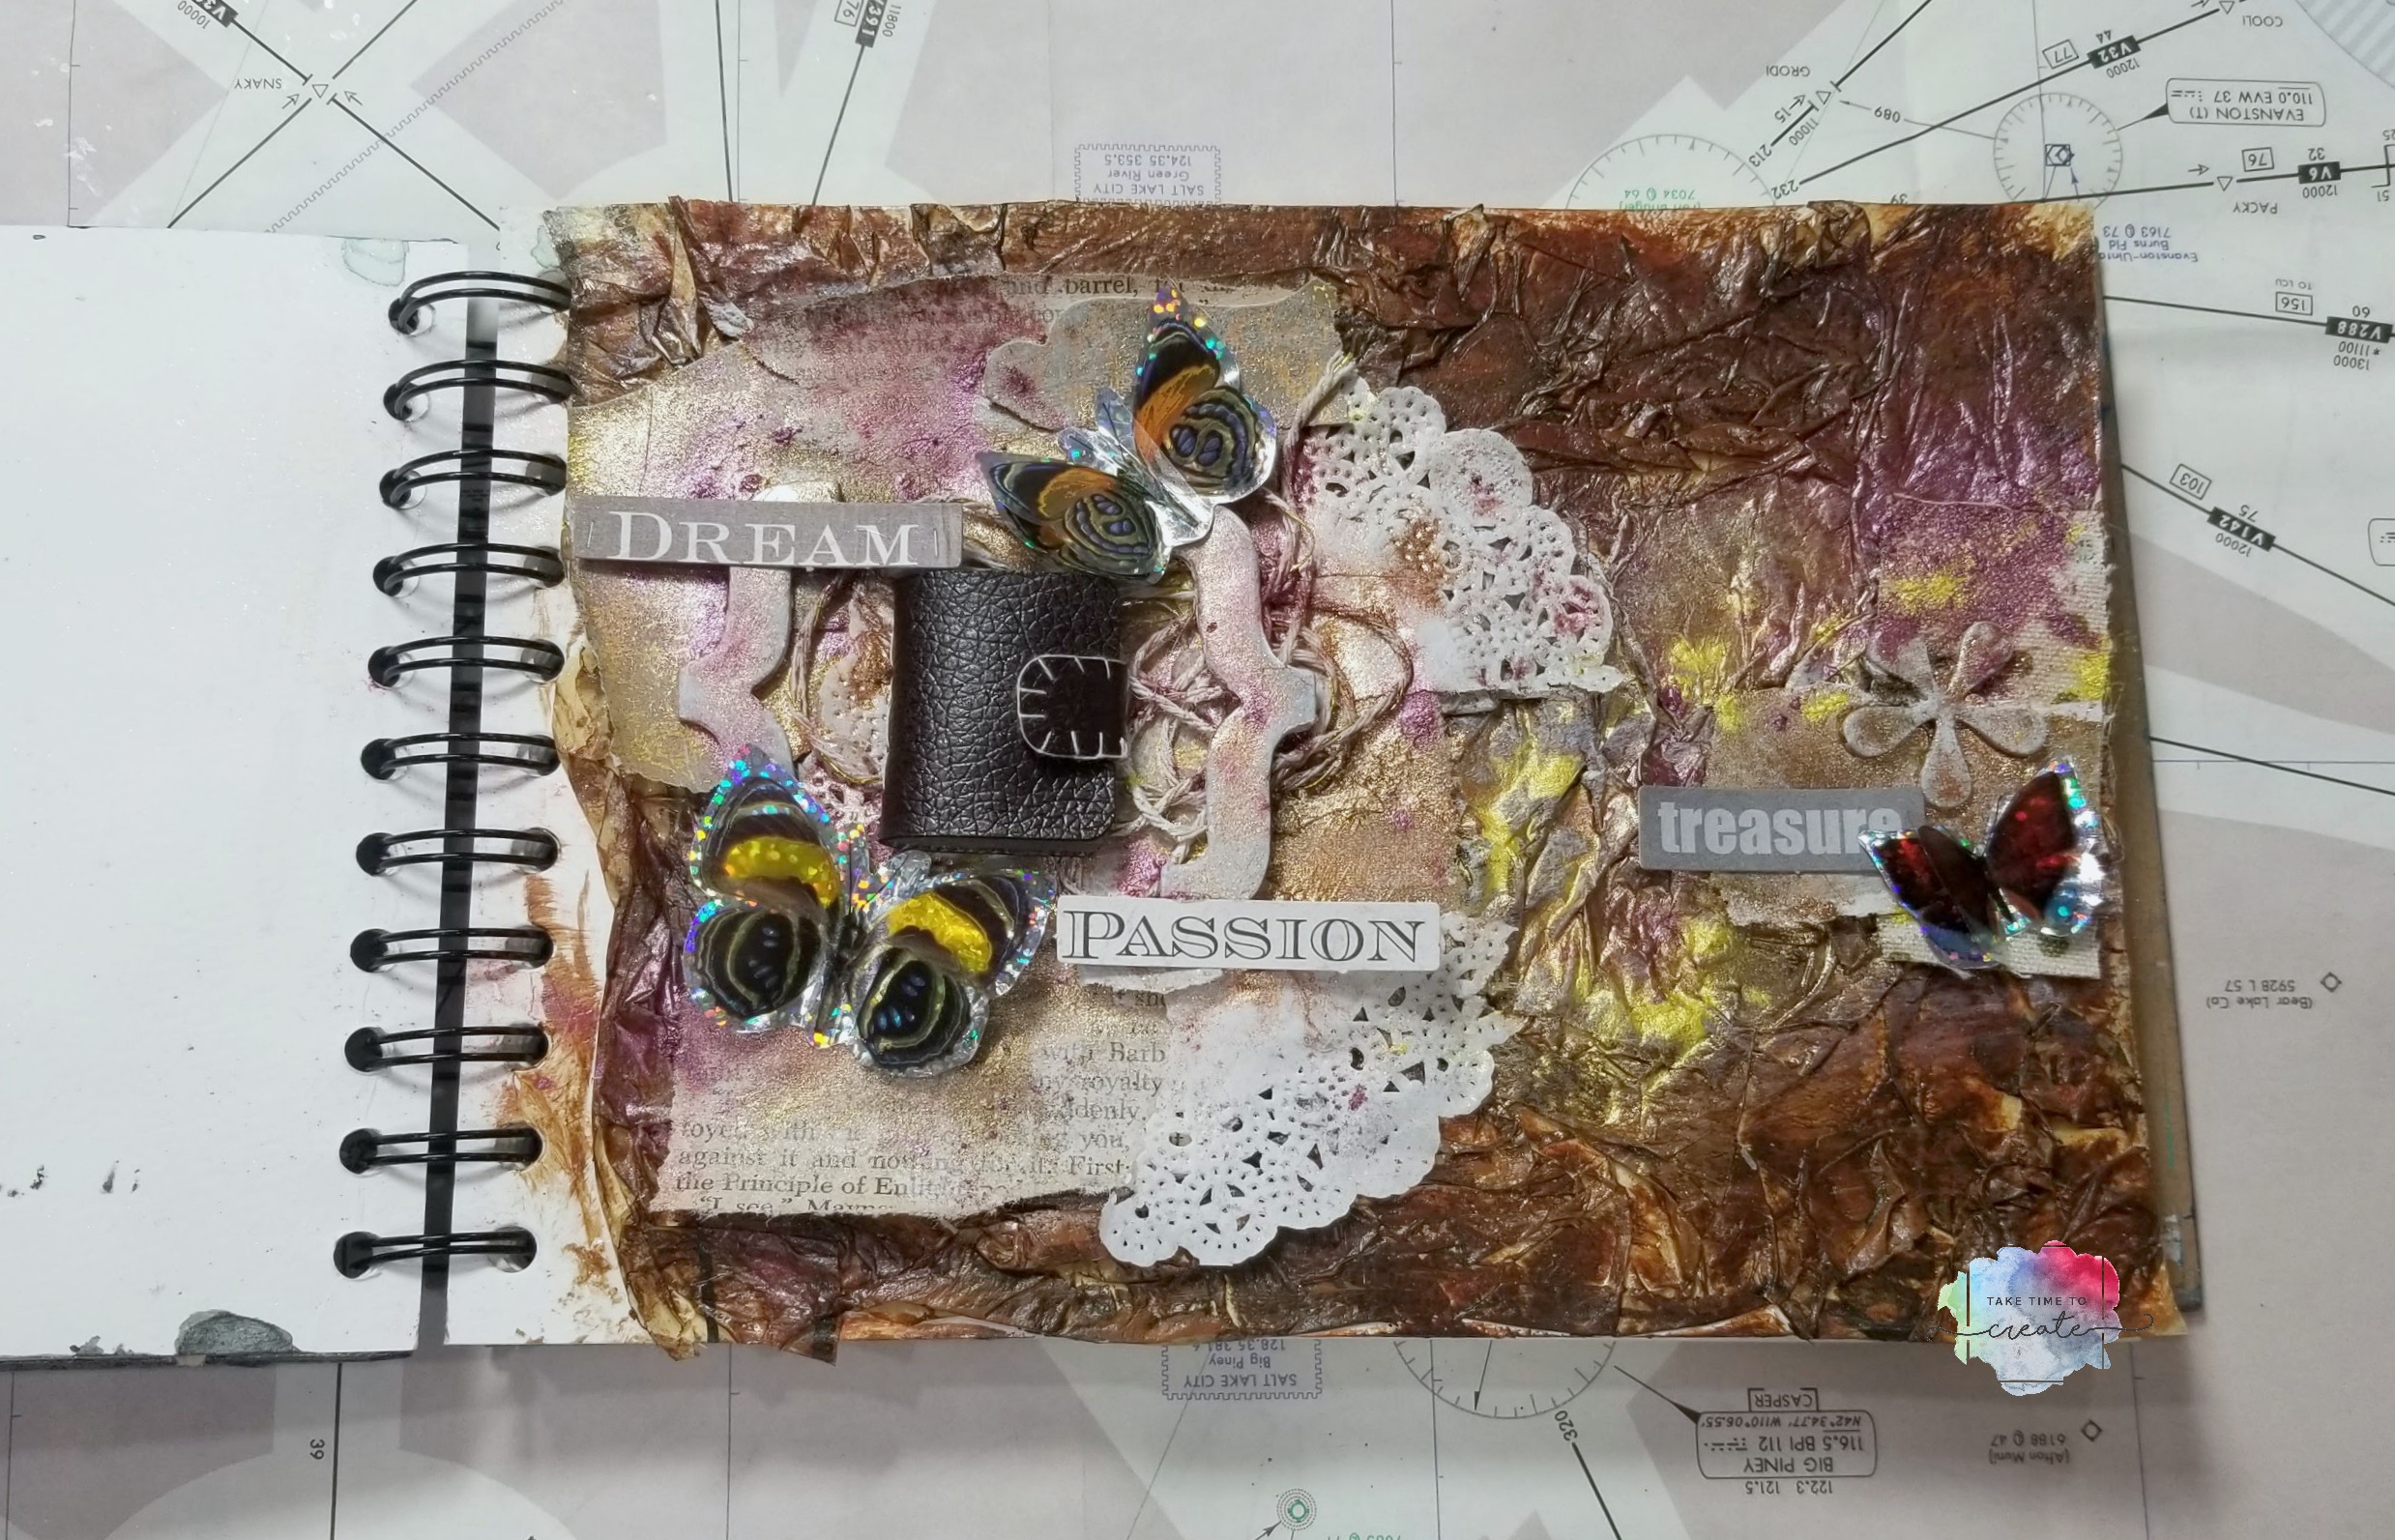
Art journaling is quickly becoming one of my favorite activities! I love creating quick little projects that help me grow and expand my abilities. I have this faux leather art journal page that I wanted to share with you.
I really wanted to start with a faux leather look for the background. So I took the tissue paper inserts from old patterns and Mod Podged that onto the page. Once it was dry I painted it all in browns and yellows to make it look like leather.
You can use different colors to create different looks, and you very the “wrinkly-ness” of the tissue paper to create different looks as well.
Once everything was dry I started to add all the details. I wanted the tiny book to be the focal point. You can see the video tutorial for the book here: Tiny Book
That tiny book was so much fun to make, and the perfect addition to my page.
I added string, torn up old book pages, doilies, chip boards, words, and butterflies. I added color with Finnabair’s mica flakes and a little water, that was really fun because it brought out the texture of the tissue paper and brought the page to life. Once everything was dry I light sprayed everything with some cheap hairspray to help seal the mica powders (otherwise it could all be brushed off)
There you go, a very easy faux leather journal page. I am thinking about doing this same technique on an old trunk. What else can I faux leather?
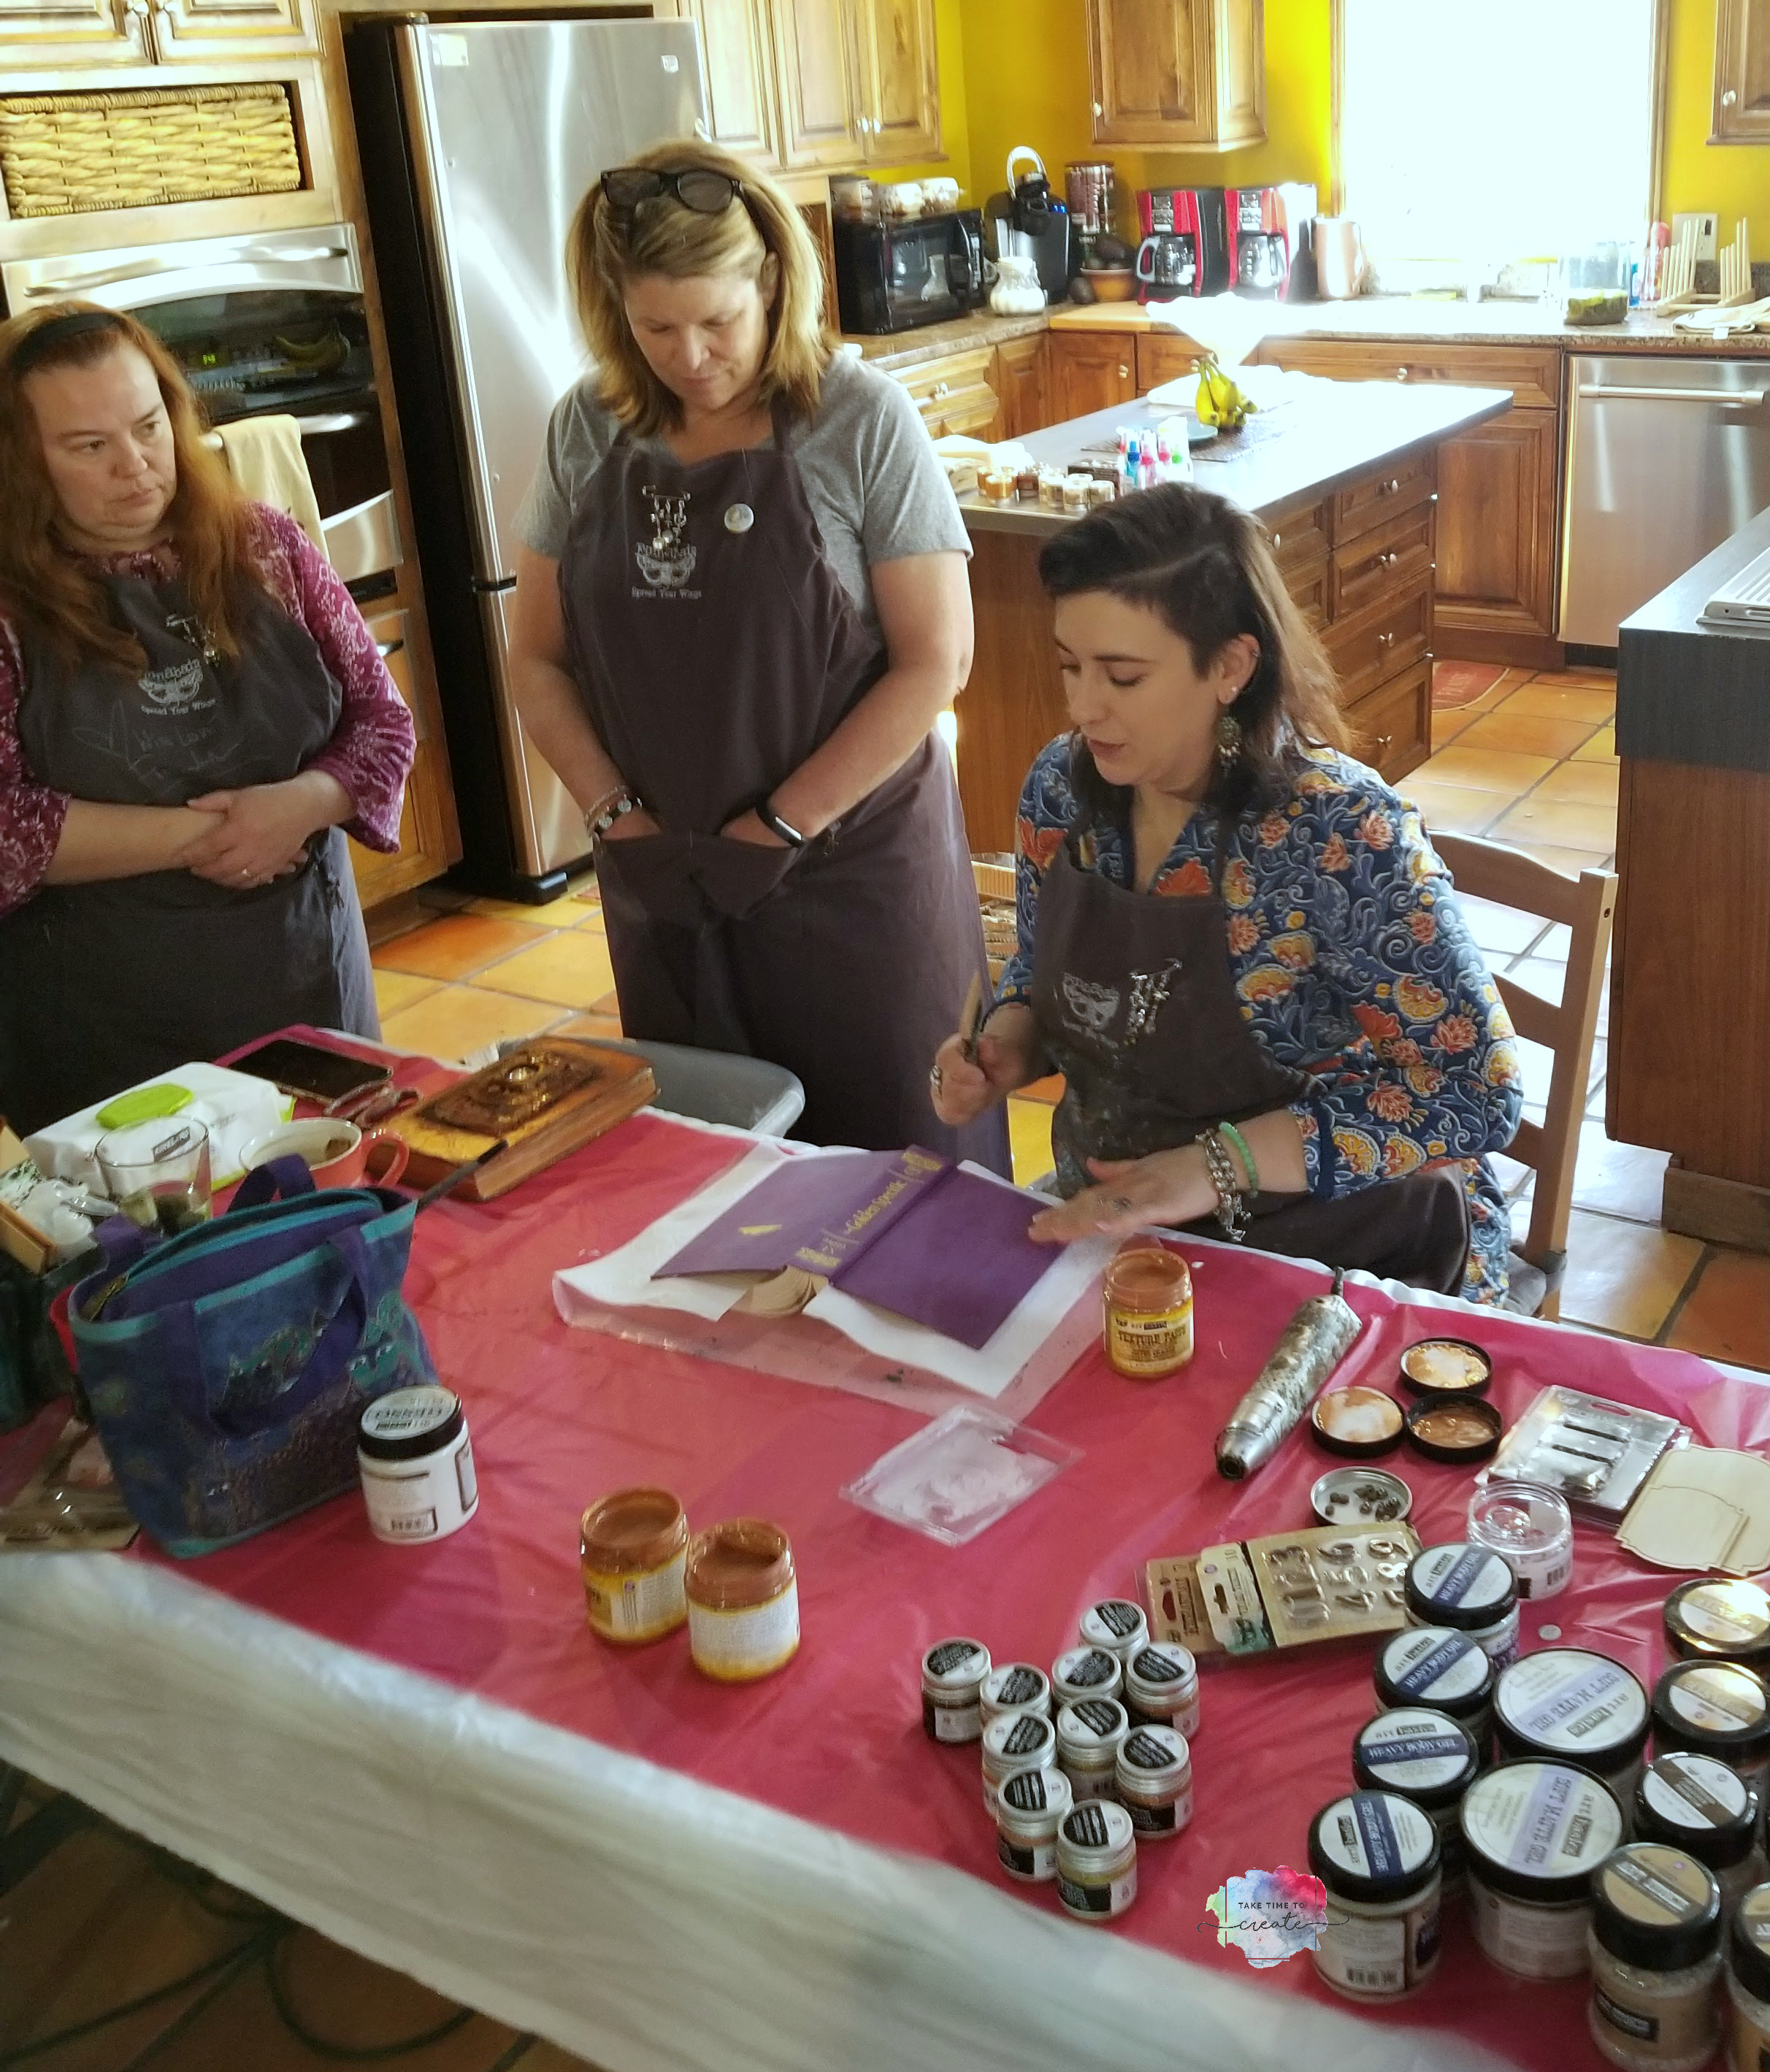
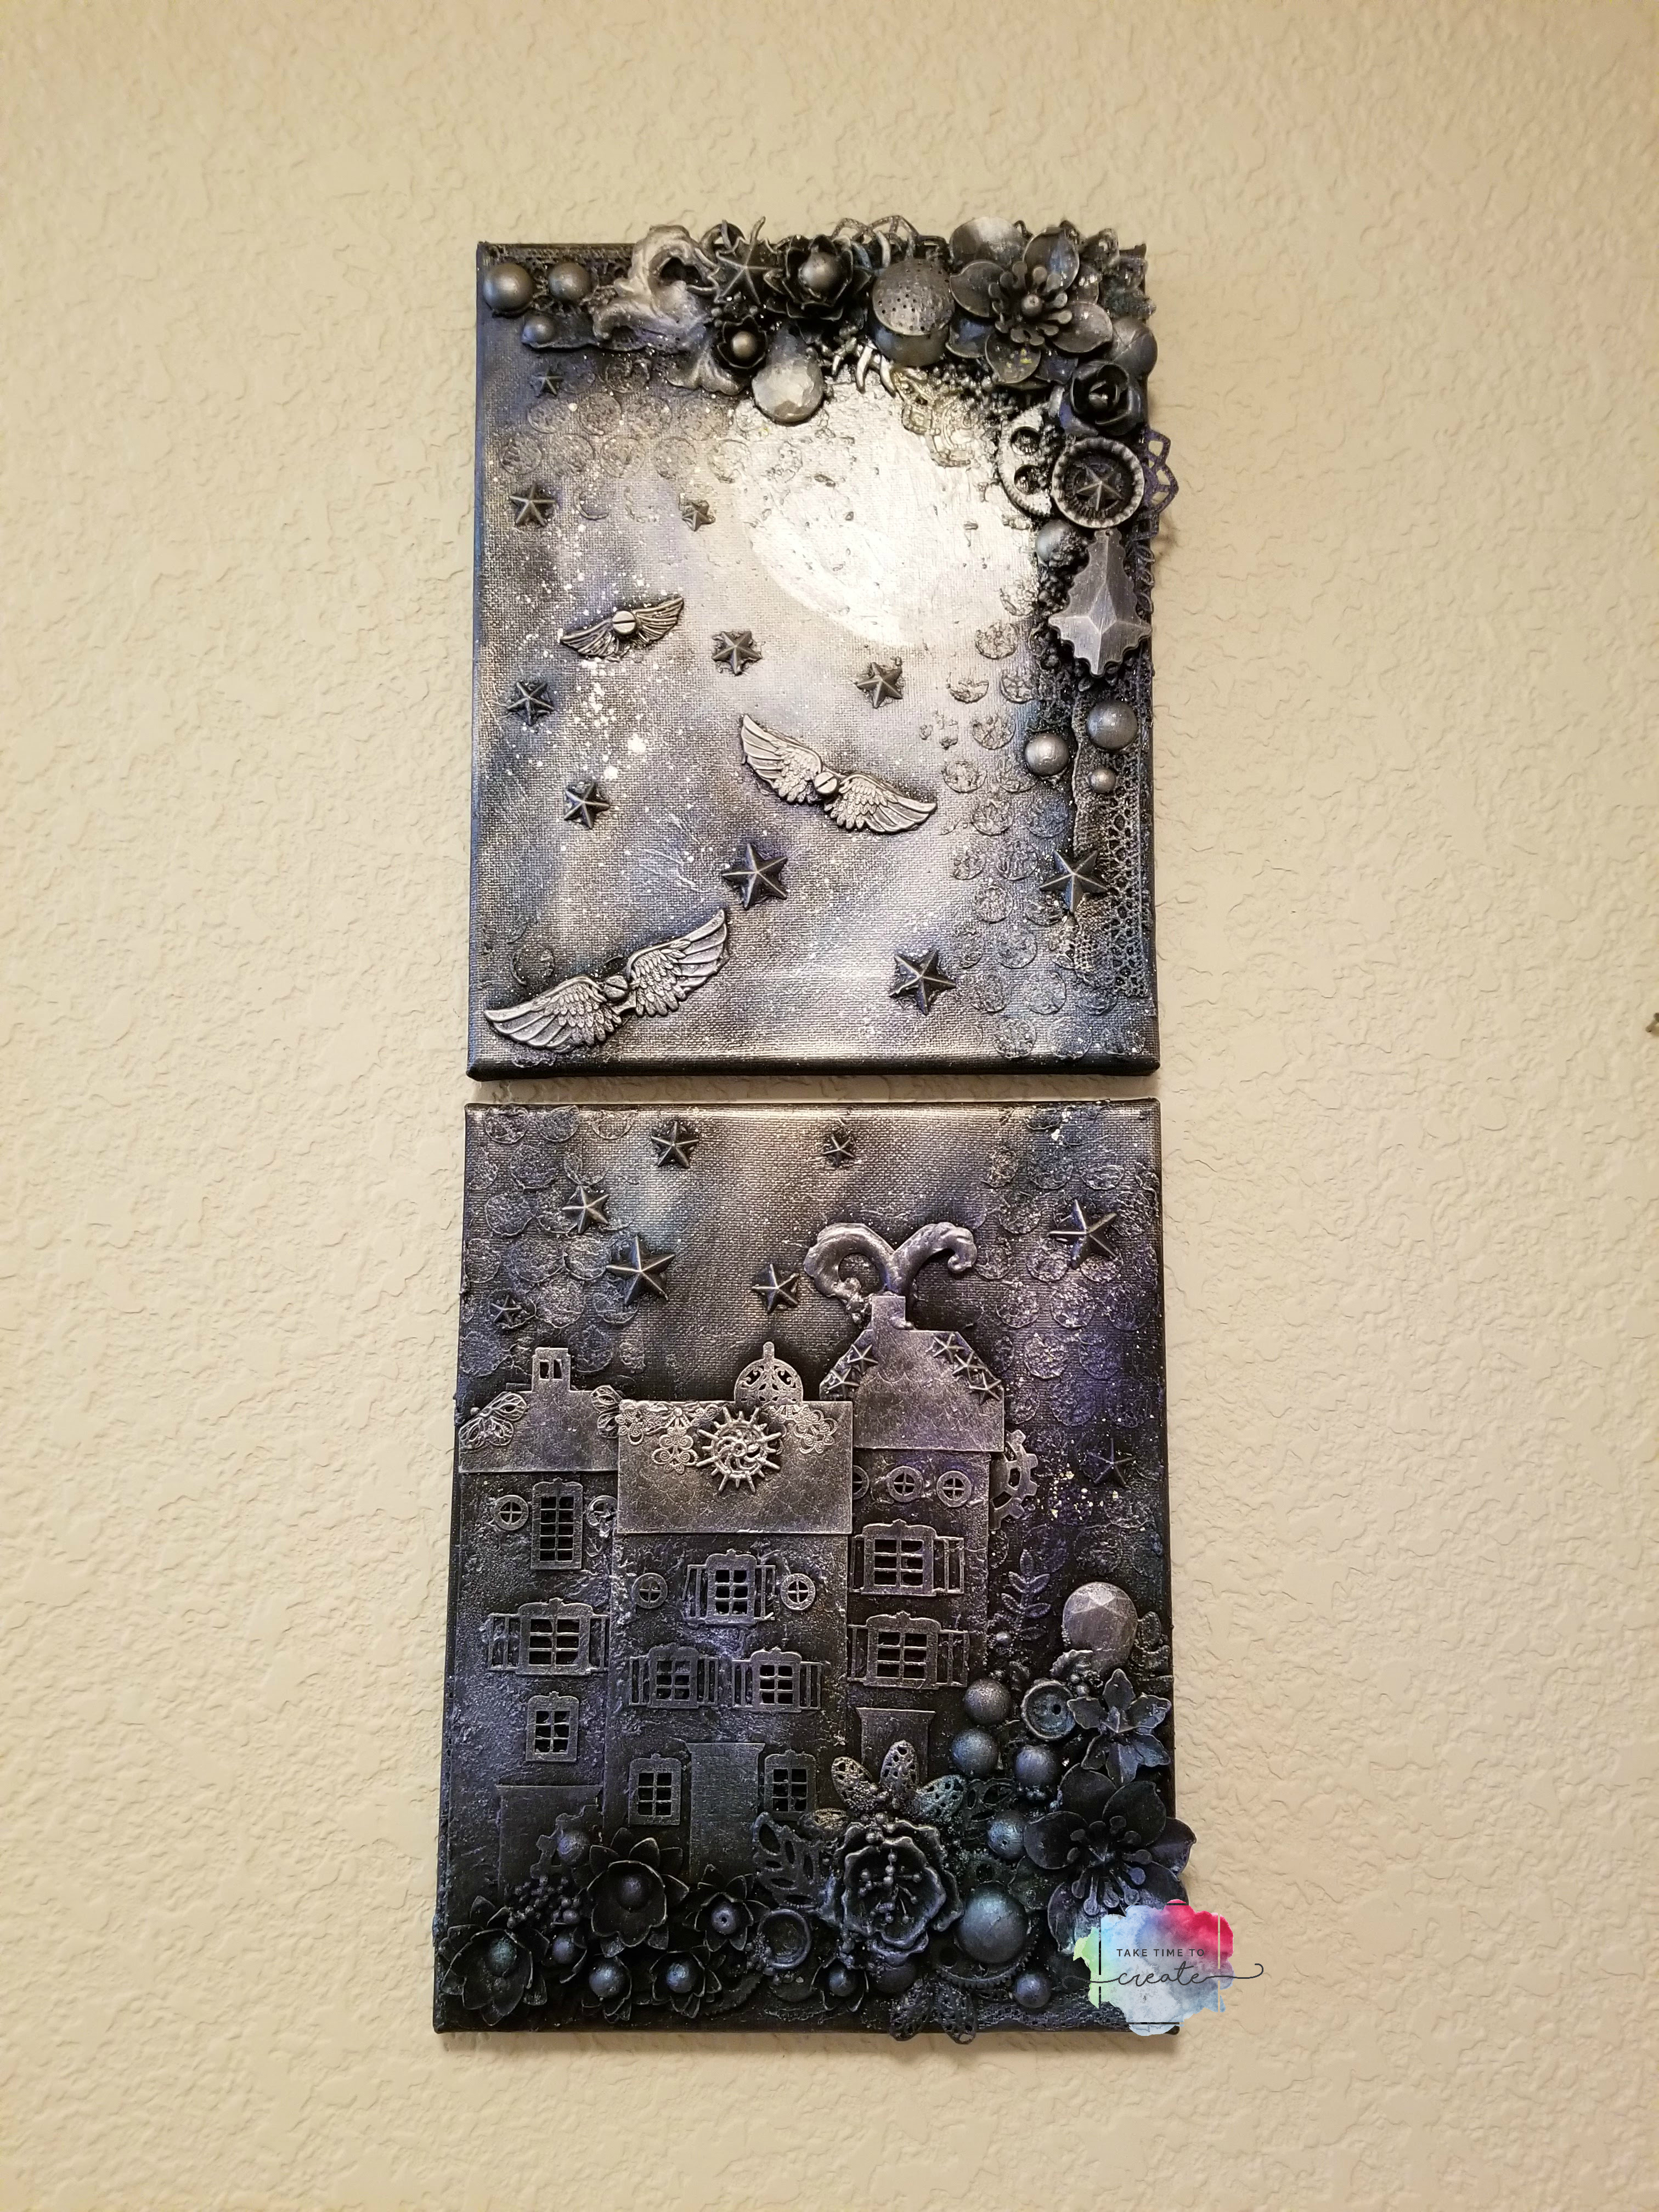
A couple of weekends ago I had the most magical, special weekend! I was able to take 4 mixed media classes from the amazing Finnabair! She is so wonderful and sweet and patient, and I learned a ton from her!
I did a try to keep my squeals and fan girling to a minimum, but I am not sure I succeeded, lol. It was just so awesome!
See here we are, bffs now, lol.
I am only kidding, but just a little bit. It was so nice to spend the time with her at Mojito Creek, a retreat in Colorado. I have been there before, and I love it there! You can read my review on the retreat here: Mojito Creek Review Link
I did a video of the projects we completed and you can see that here:
At the end of this post I will add affiliate links to some of the supplies we used, but there was just too many to list all of them.
The first project we did is the Book of Rust. I loved learning more about the rust paste and how to use it and just to get better with it. I am going to incorporate more rust into my projects because I love the look of rusty old things.
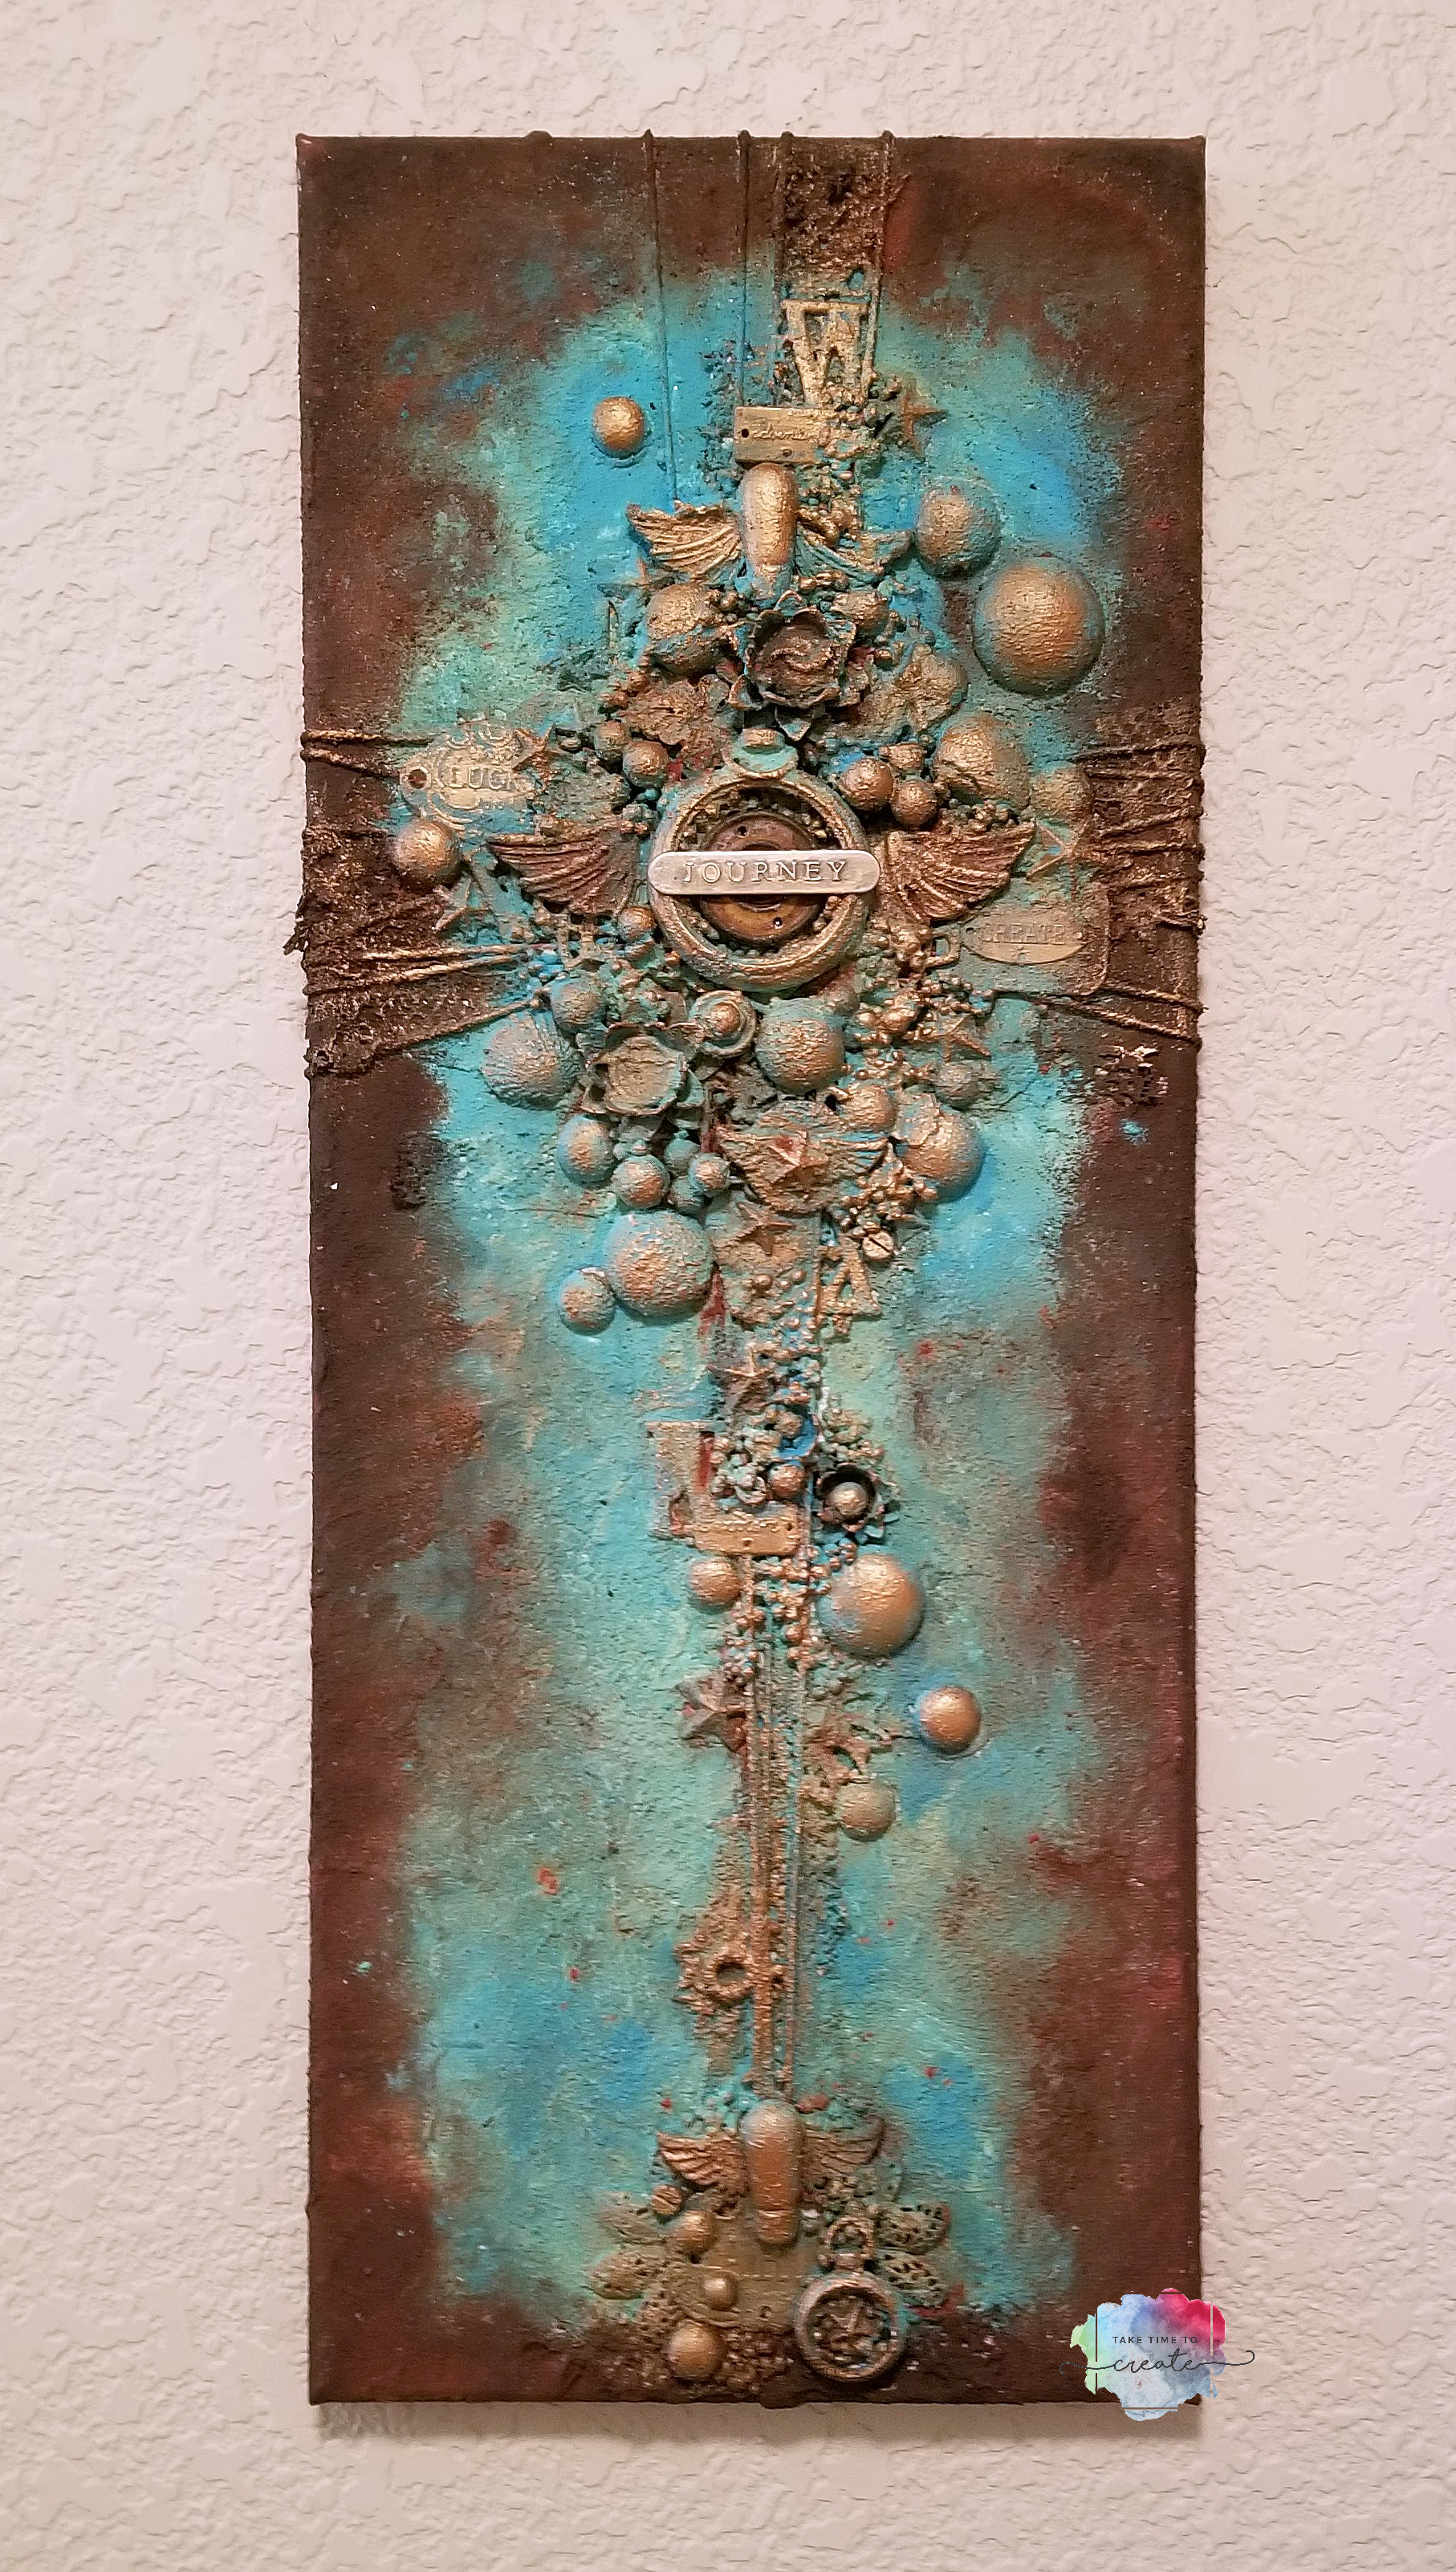
The next project is the long skinny canvas with rust paste and patina. I loved learning about how to use the patina, I have the paint at home but I never use it. Now I know what it can do and I am excited to add this medium to my projects!
That wrapped up the classes for Friday. It was a long day full of learning and exploring and I was ready for bed that night! The next day we got up not too early and started our day learning how to do 2 more projects.
The first one was the journal. This picture is the cover we made, I don’t have a pic of it reassembled. But it did go back together nicely, lol. I love this journal and I have been using it to make art journal pages, which is so nice because I have missed making art journal pages.
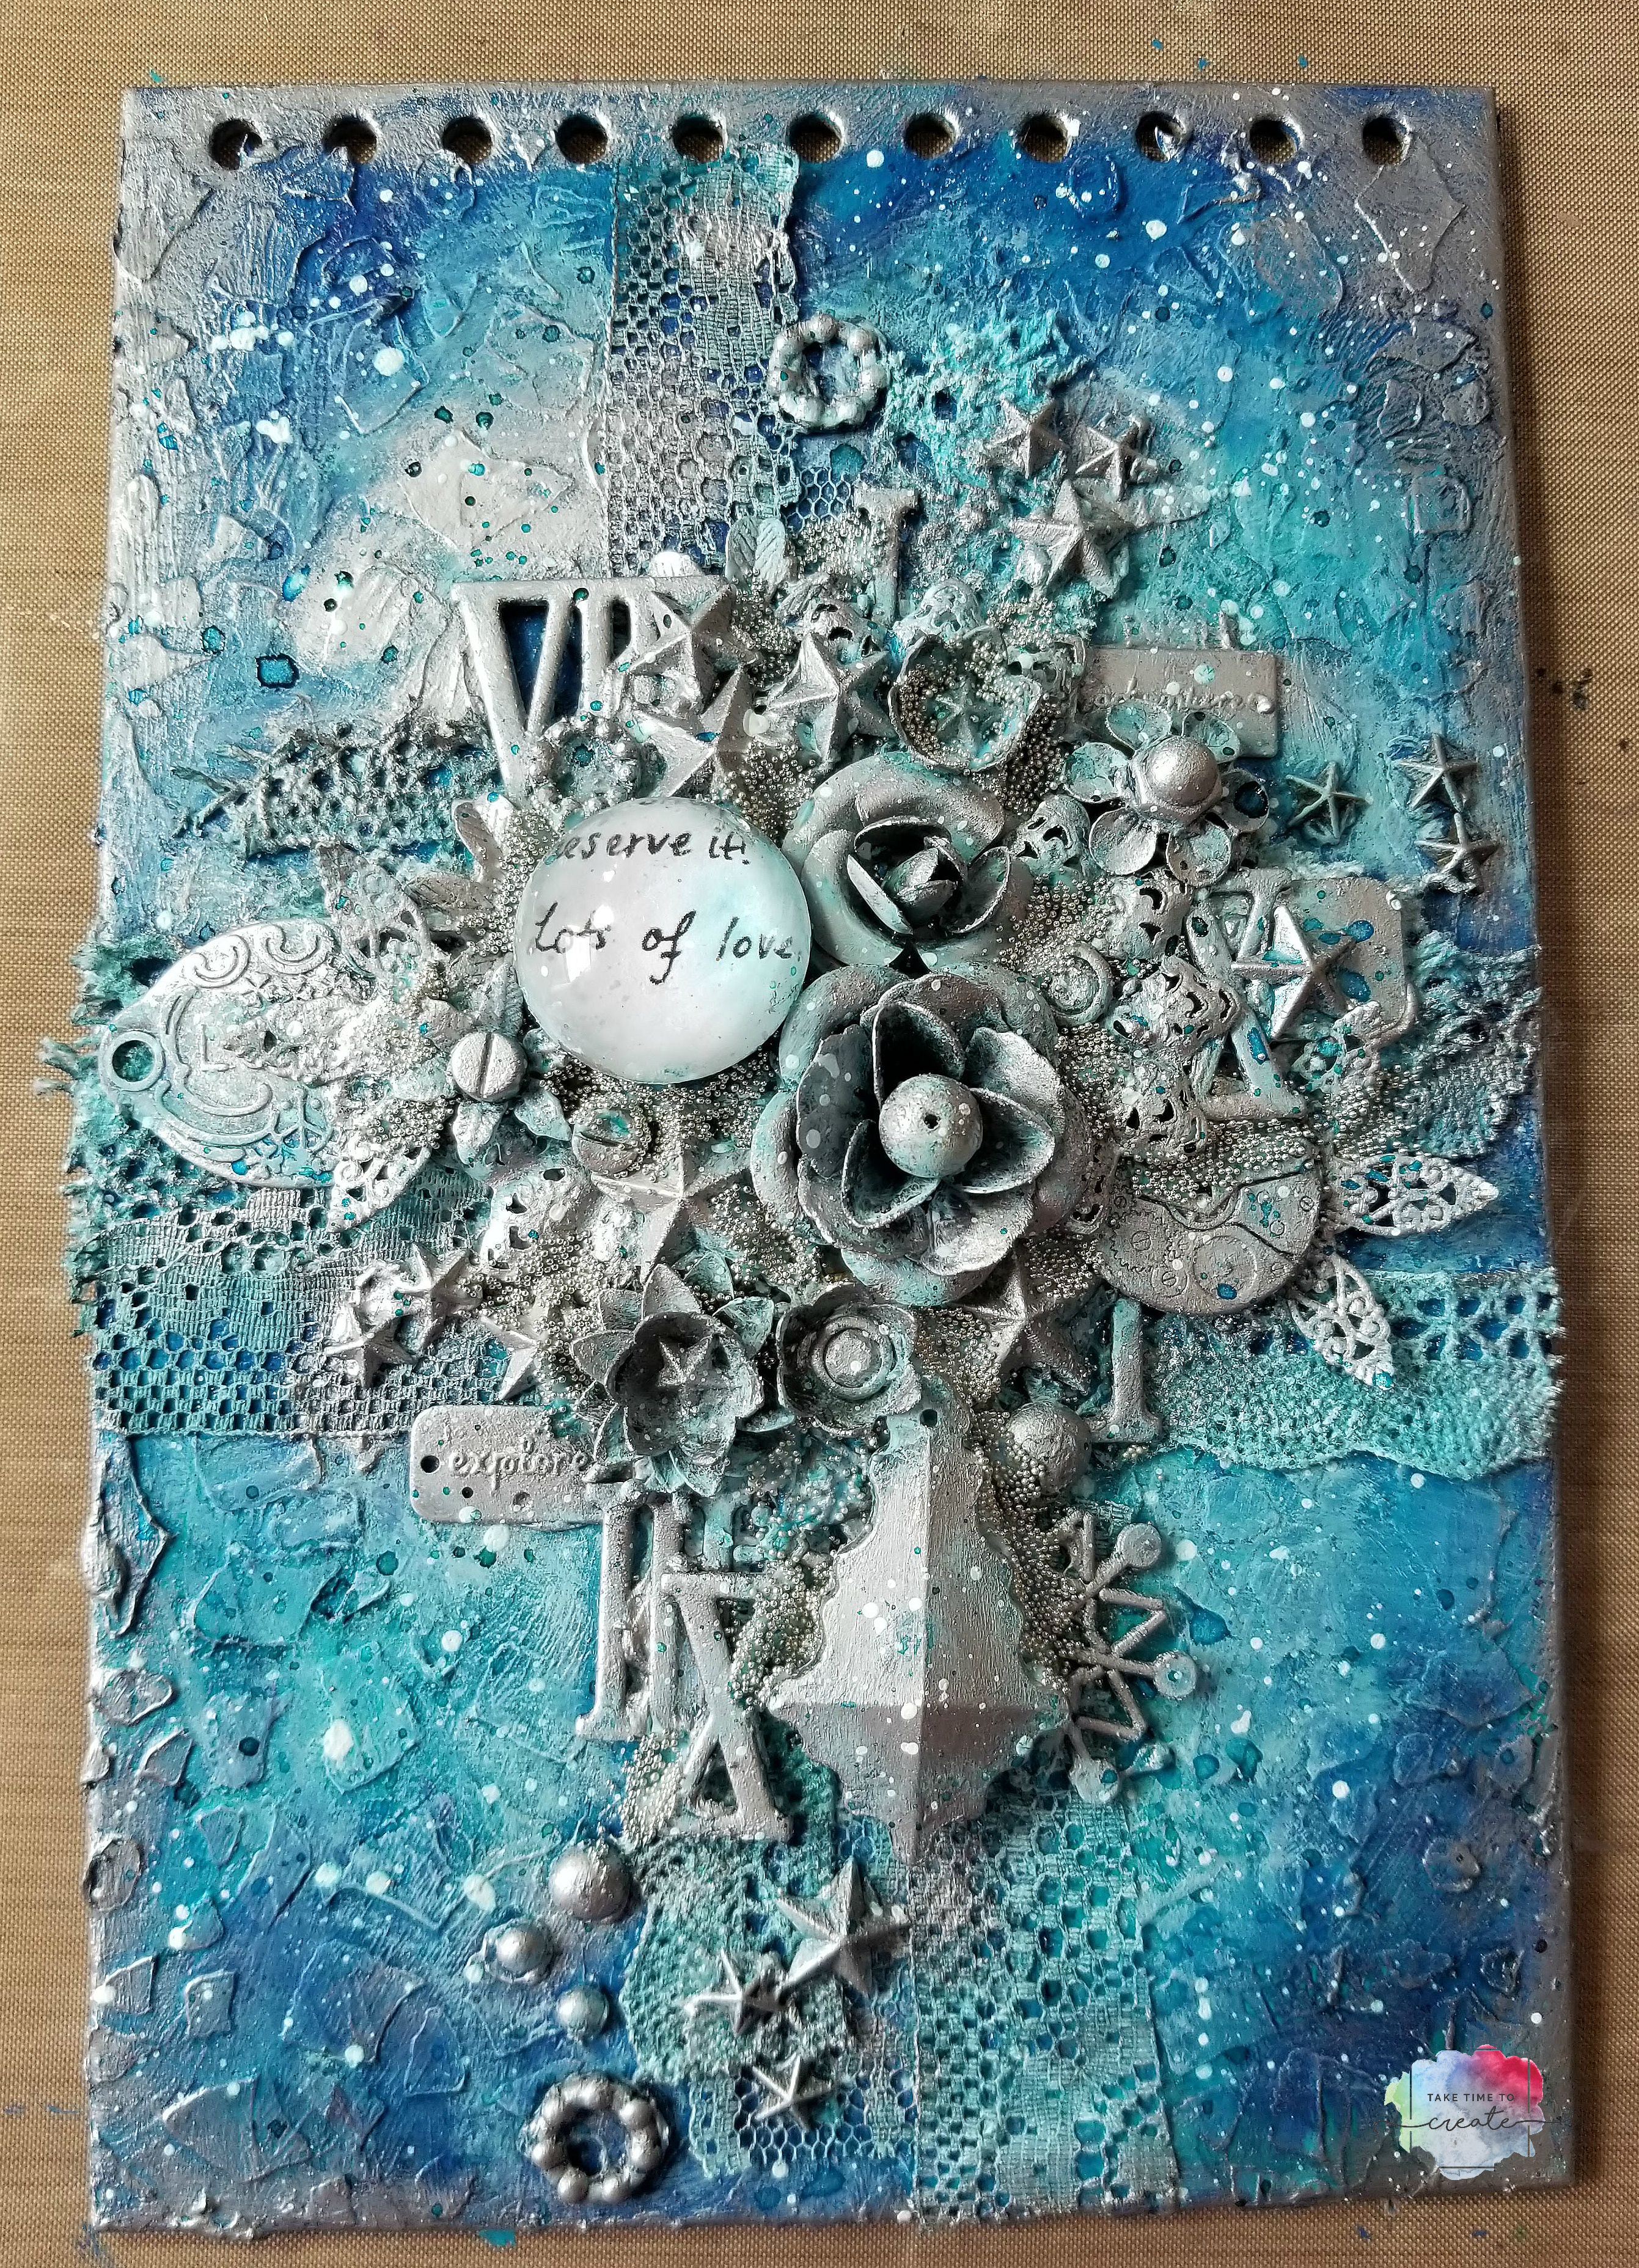
The last project is the moonlight one. I have to say this is the one I was most excited to learn! I love the technique and the final canvas is just so pretty.
All of these projects were so much fun to make! And I actually finished all the projects while I was at Mojito Creek, so that was nice to actually come home with finished projects! If she comes to Colorado again I will be sure to sign up for her classes! This a dream come true and I can wait to incorporate what I learned into my projects!
Here is the list of some of the products I used (they are all affiliate links)
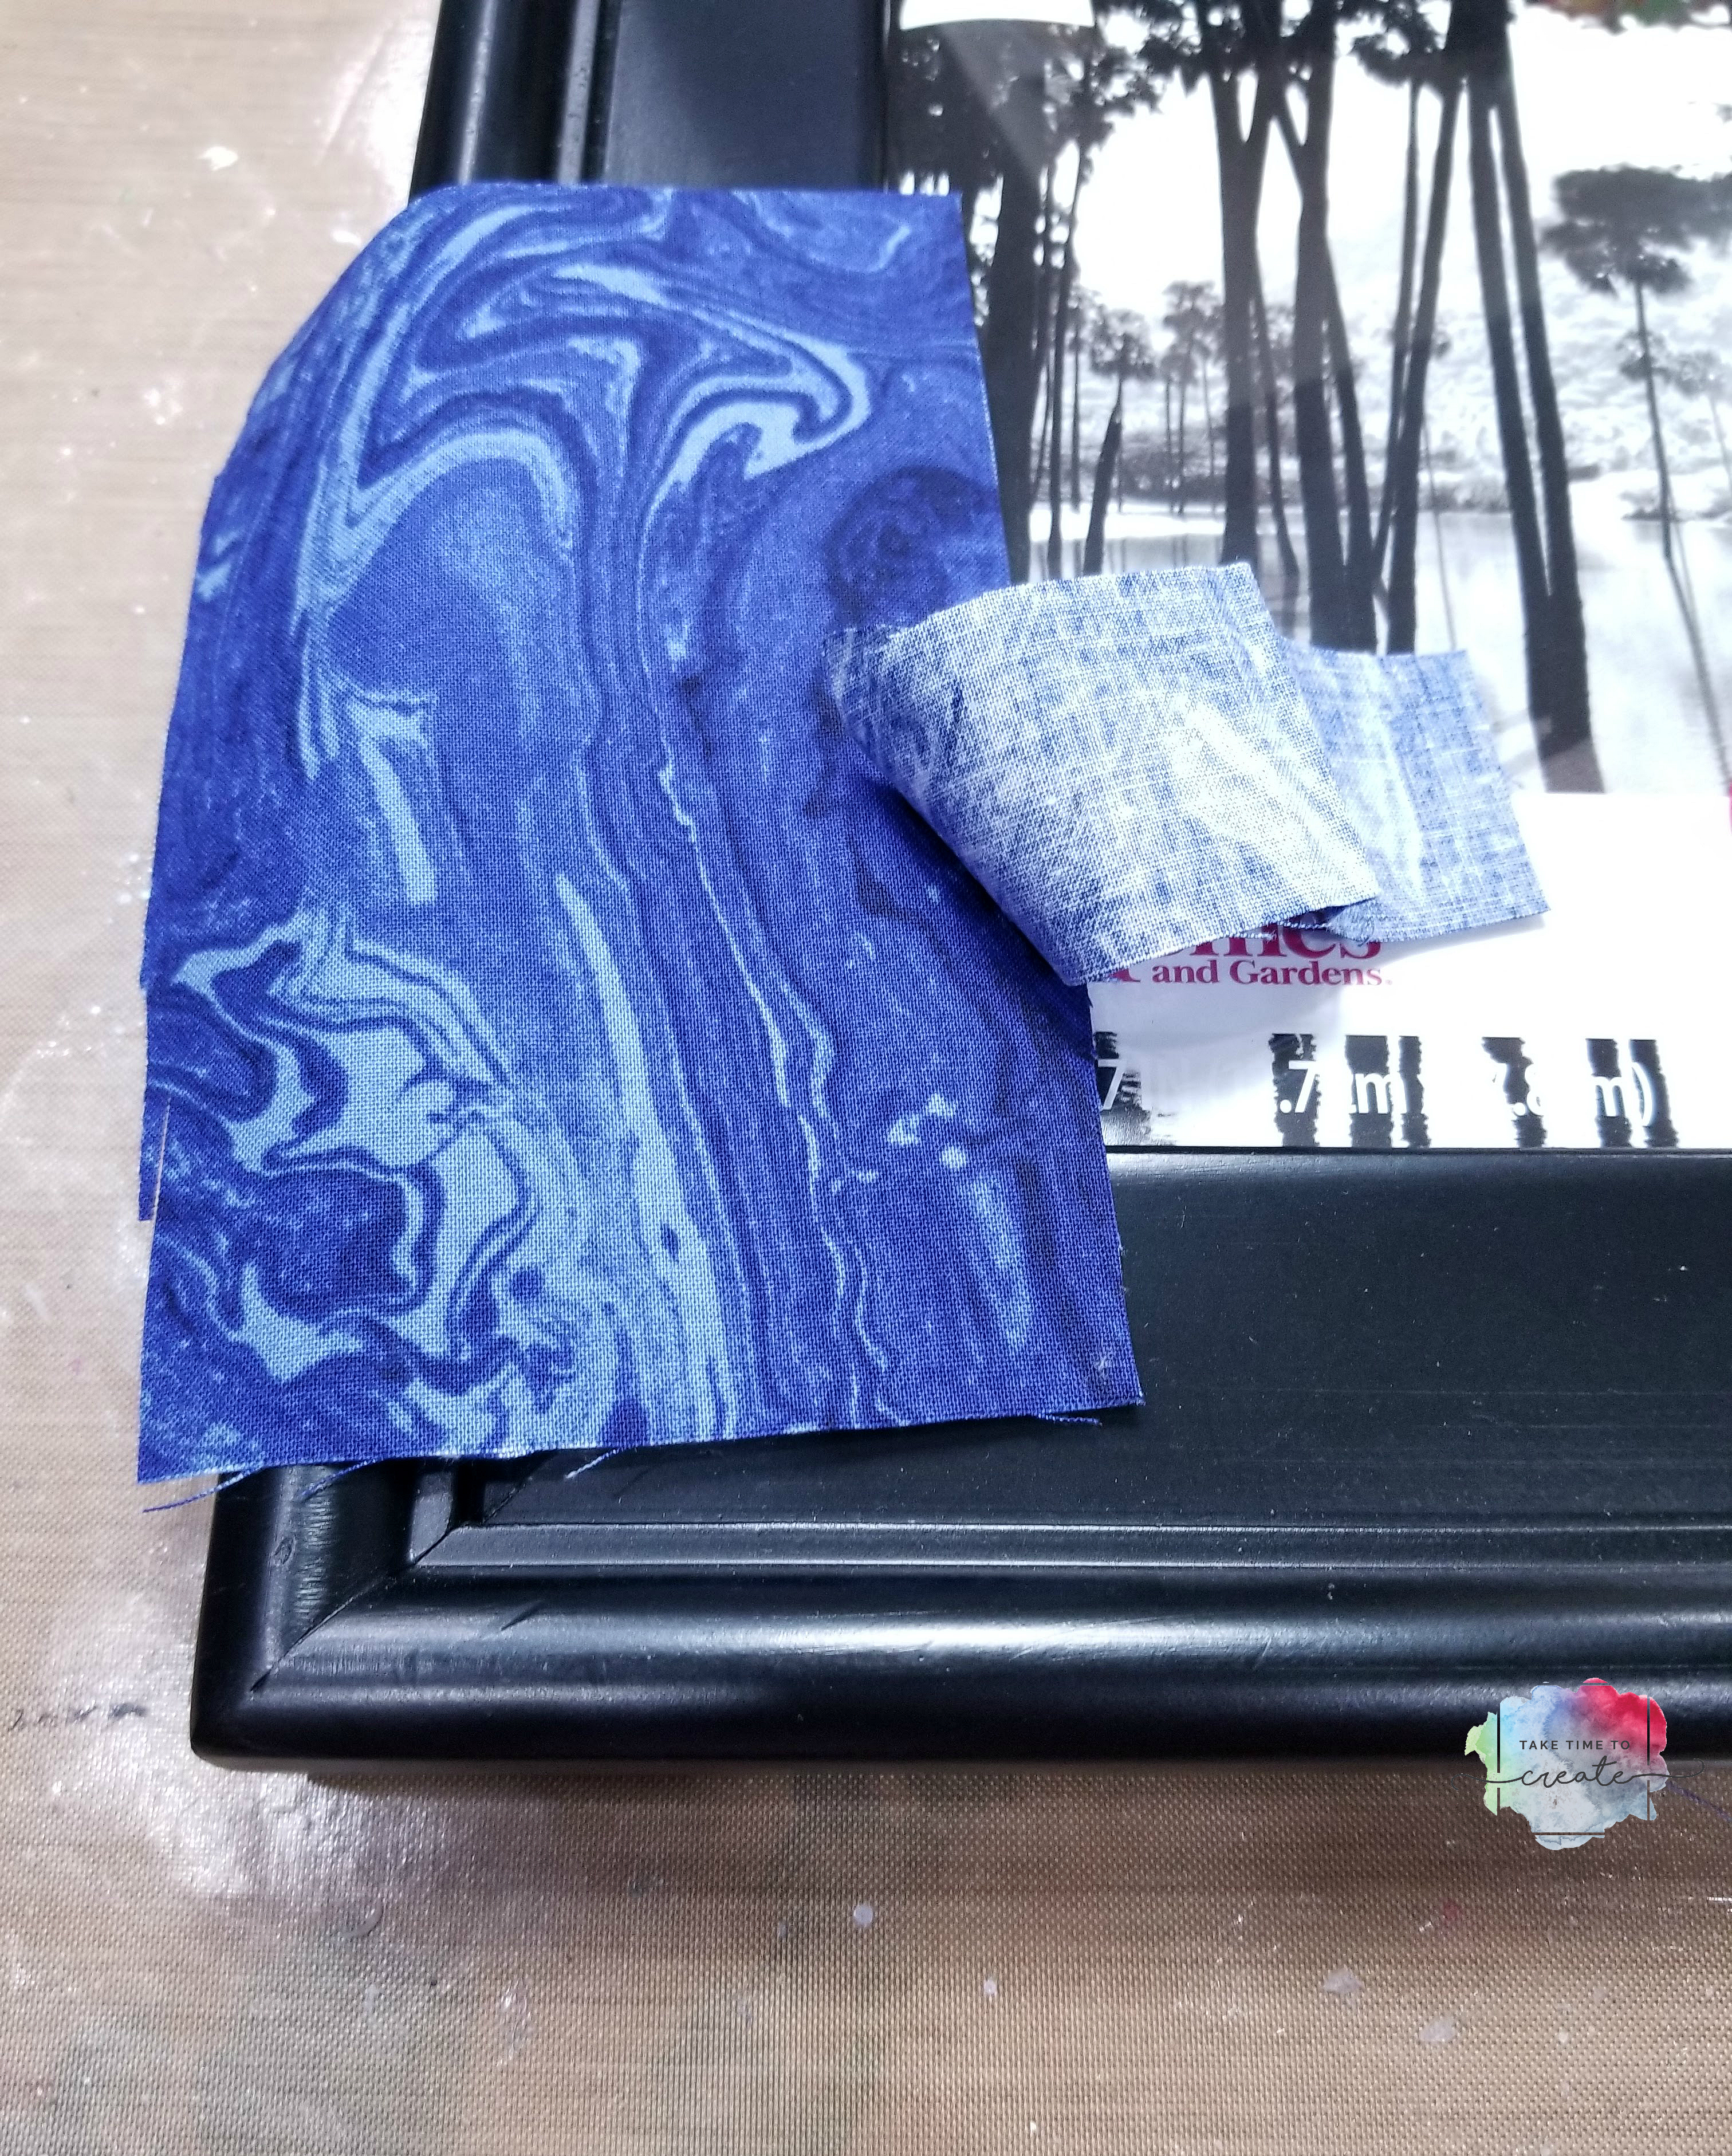
Today I have a fun, easy fabric frame project for you. I am still on a fabric kick, I have so many ideas using fabric and I can’t wait to share them with you.
For this project I used fabric I got from Annie’s Fabric Club. This is not sponsored, but I really like the fabric I got, and I am looking forward to next month’s fabric. Here is the link to the club if you are interested in joining: https://www.creativequiltersfabricclub.com/
This is such a fun, easy project that only takes a few materials
Gather all your material including the fabric and your frame. The frame should have a wide enough border that gives you plenty of room to add fabric. The color of the frame doesn’t matter a lot because you will be covering it in fabric.
To get started cut your fabric in strips that are a little wider than your frame. Spread heavy gloss gel on the frame. Coat your fabric strip in Gloss gel and add to frame, crinkling it up as you go. While everything is wet take the time to get all the wrinkles and texture you are wanting.
Take your time and make sure it looks like what you are going for. Before you let your frame dry clean up the edges and back with a baby wipe. Let the frame dry. Once dry you can leave it at this step if you want, or you can go on to the next step which is adding paint.
After the fabric dried (leaving it over night is best) I dry brushed on a Finnabair Metallique and a Finnabair Sparks paint to add some detail and sparkle. I really love her paints and they add that bit of interest that I am looking for. .
And that is it, the frame is done! These are so much fun and easy to make, I think I will be making a lot more as gifts this year.
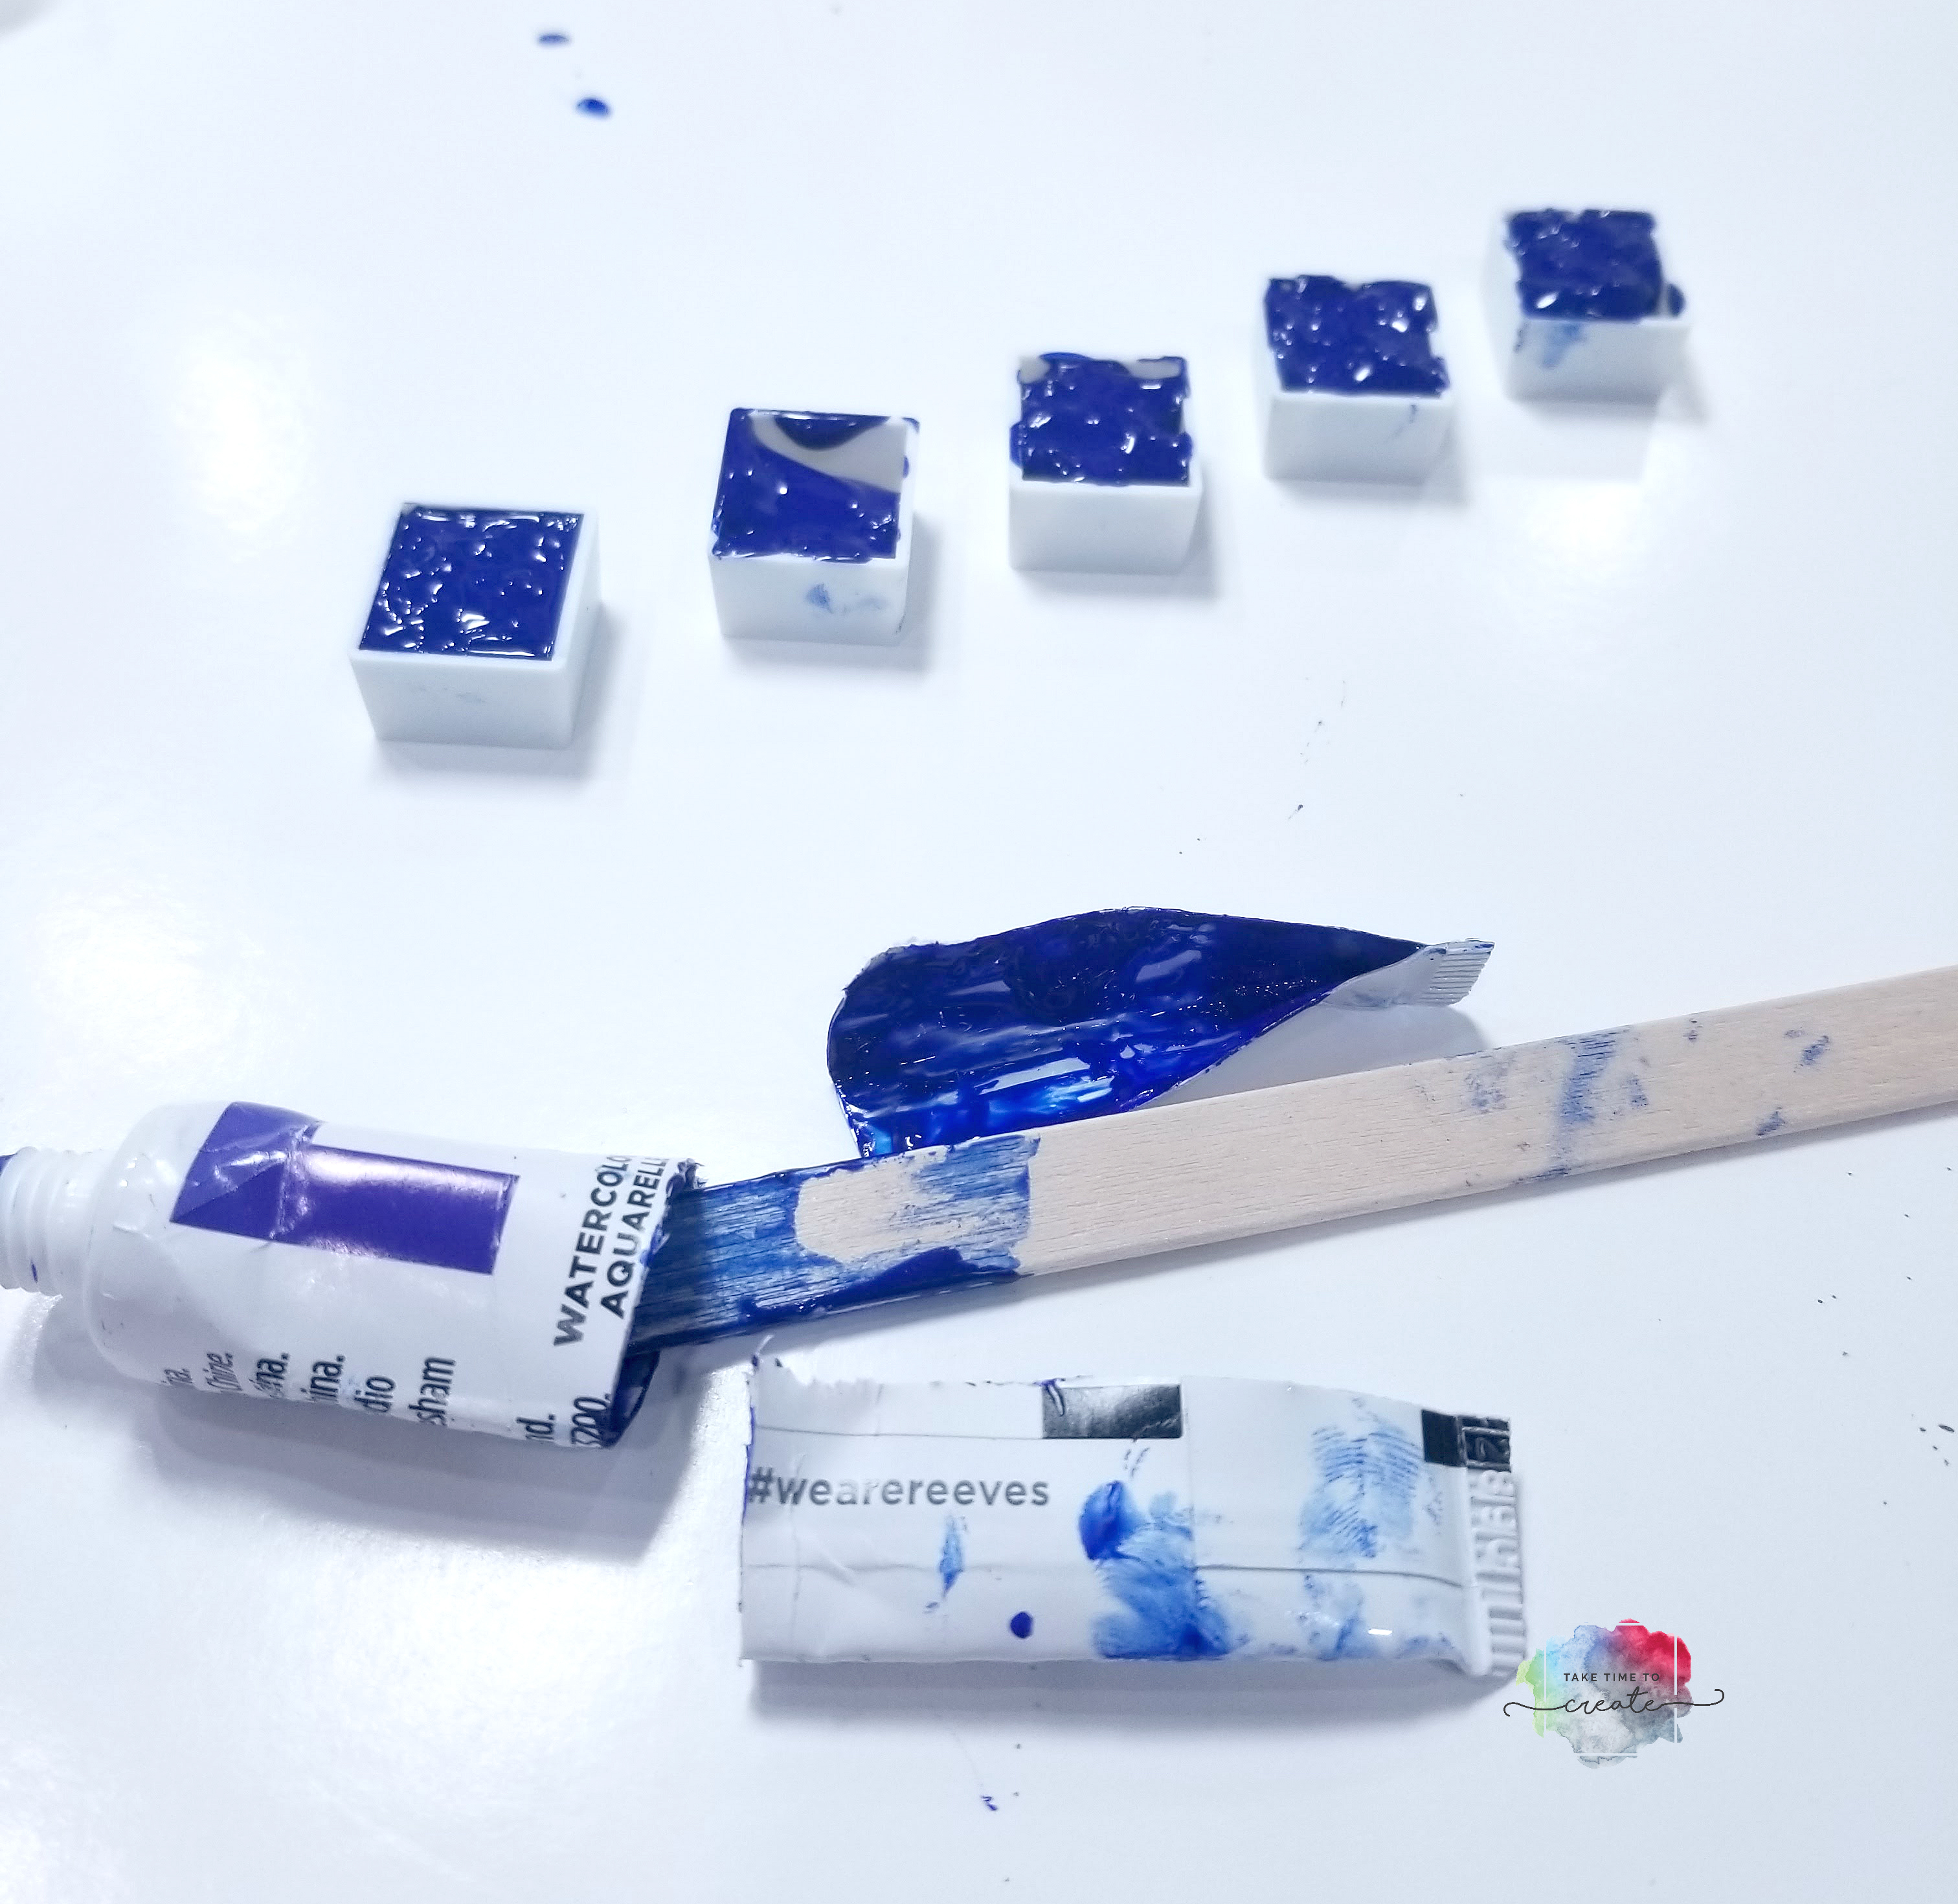
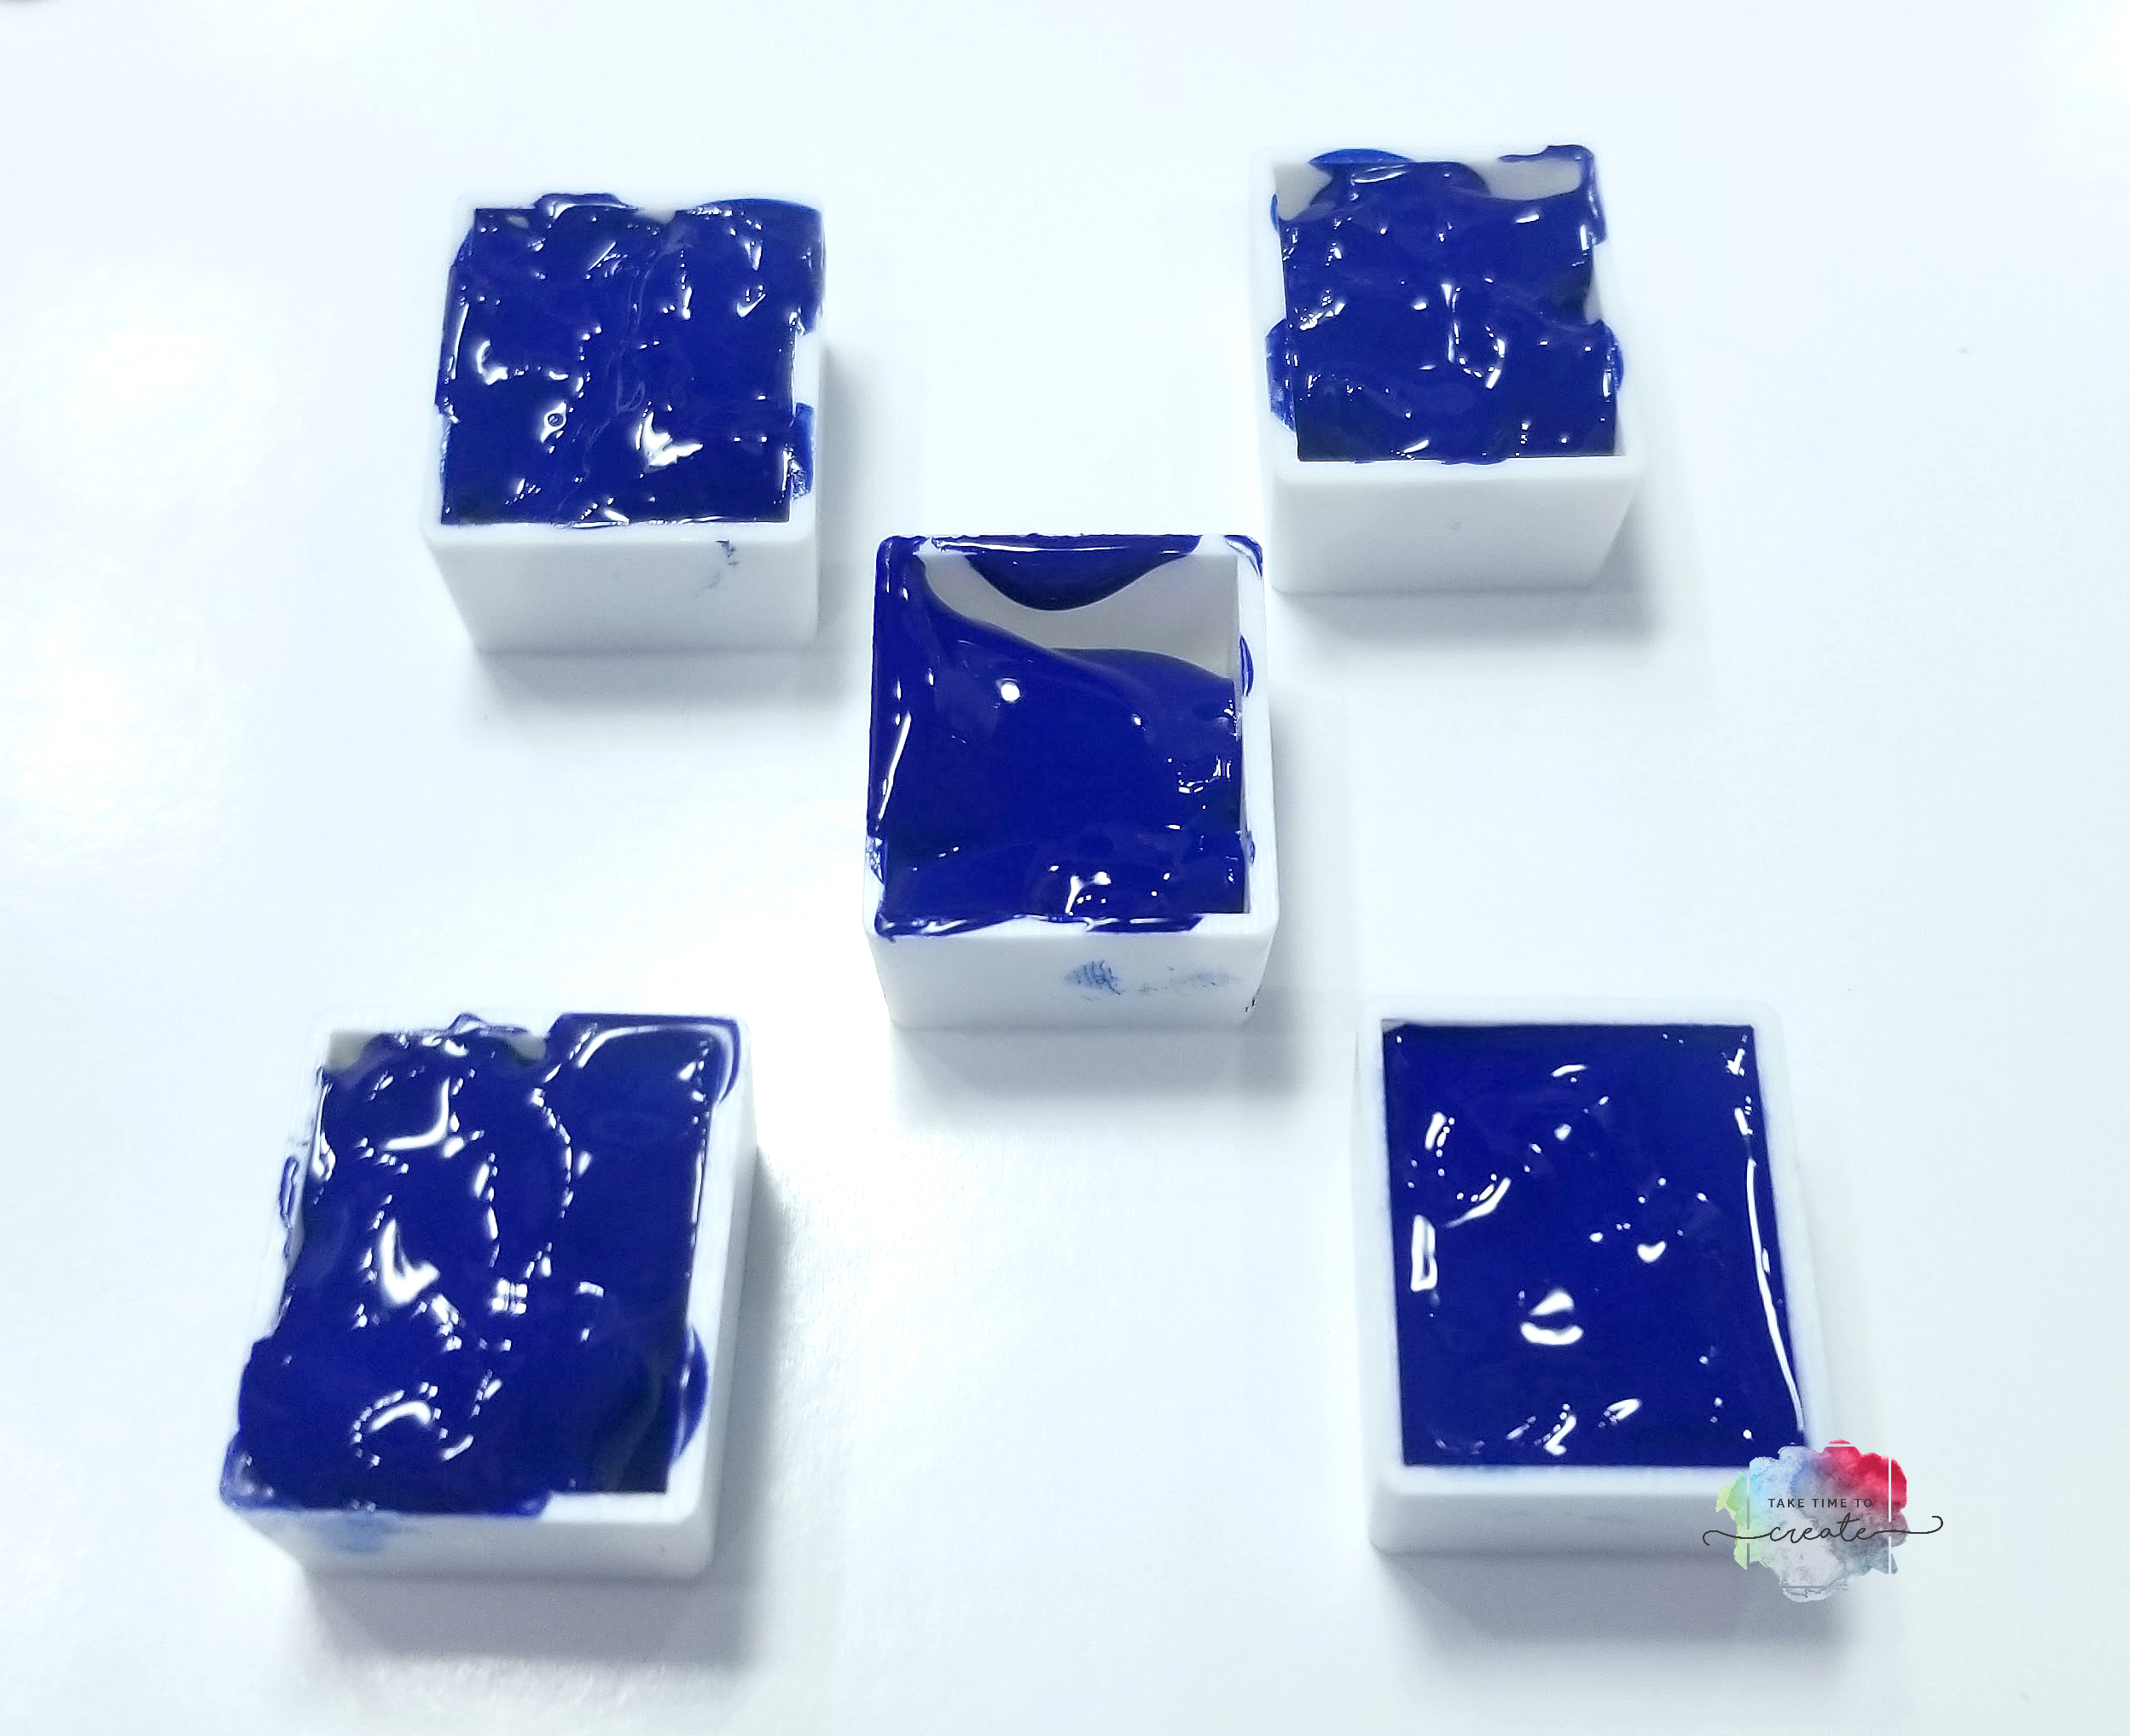
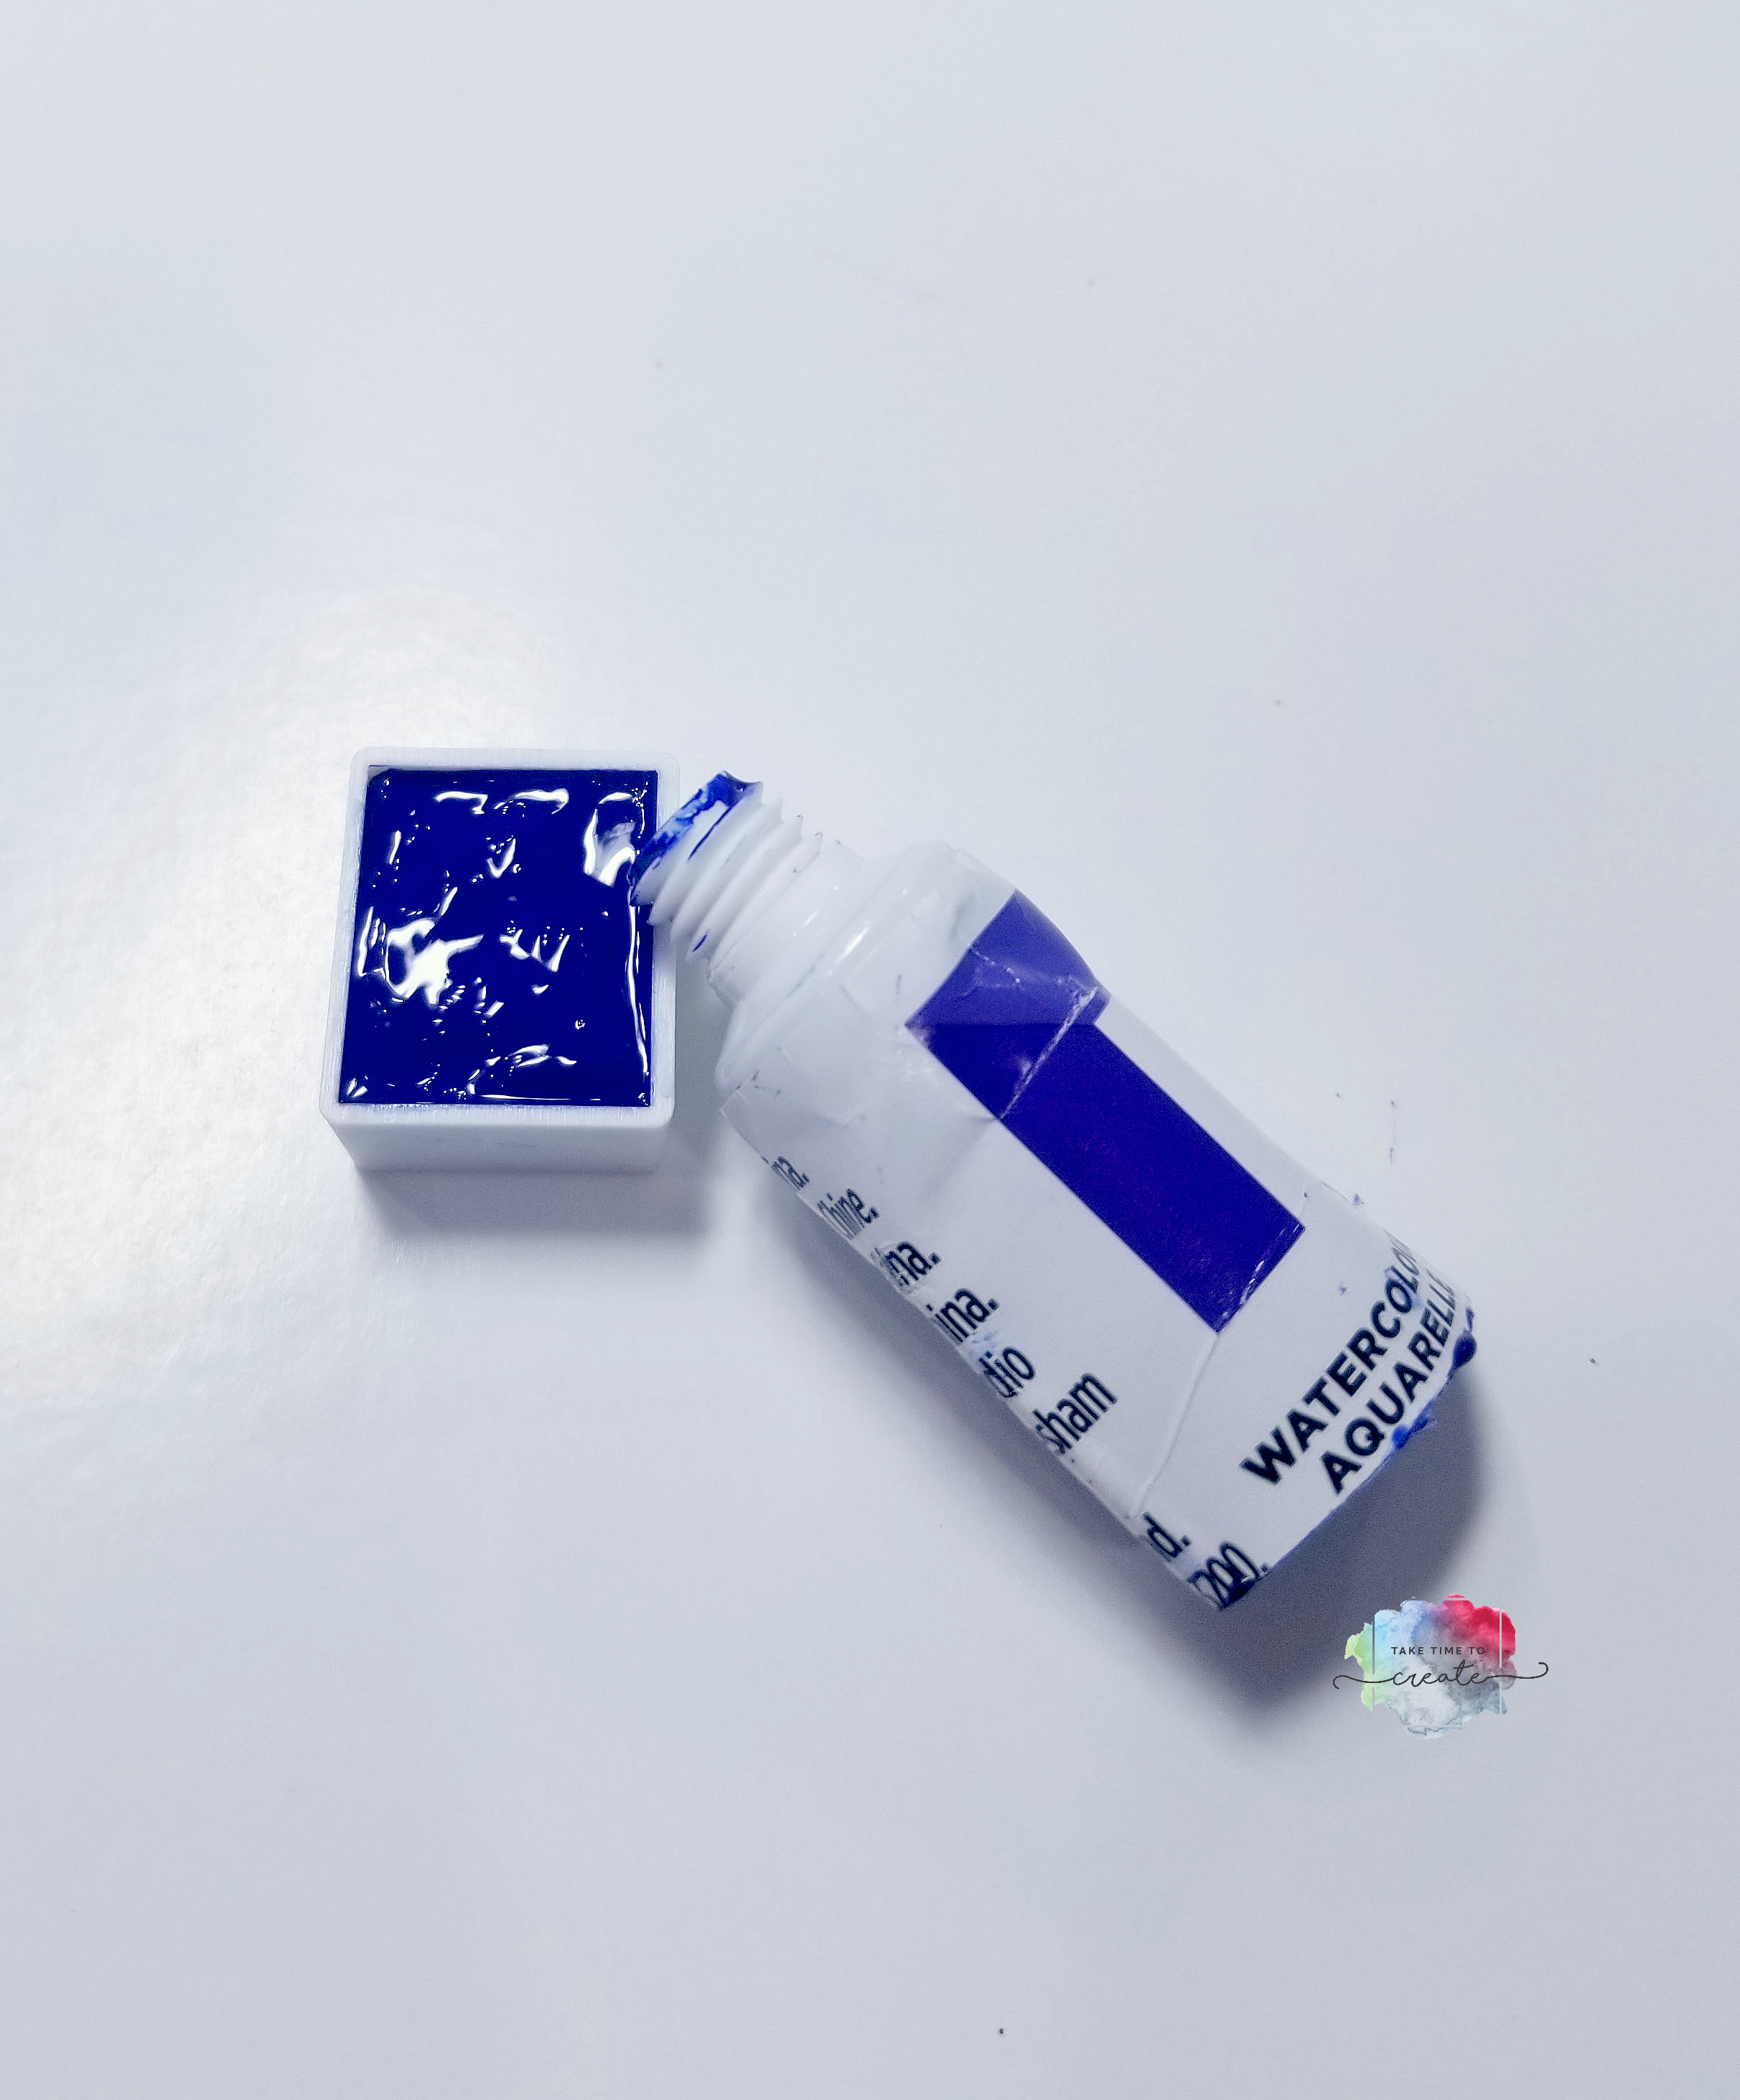
It has been a while since I posted. I have an Investigative Art Journal for you today. Today we are seeing how many half pans can you get from one tube of watercolors.
For this experiment I used Reeves Watercolors that I picked up at Michael’s. The affiliate link is listed here:
I found this a very interesting experiment, how much is actually in a watercolor tube? I was pleasantly surprised.
There are four and half, half pans in a tube!
This is a great if you want to invest in higher quality watercolors, but you don’t think you can go through that many pans, so sharing with a friend or 2 is now a viable option.
There is plenty of product to go around to everyone!
Check out the video to see more on the experiment and there are links to my other Investigative Art Journals.
What other experiments do you want me to do with watercolors?
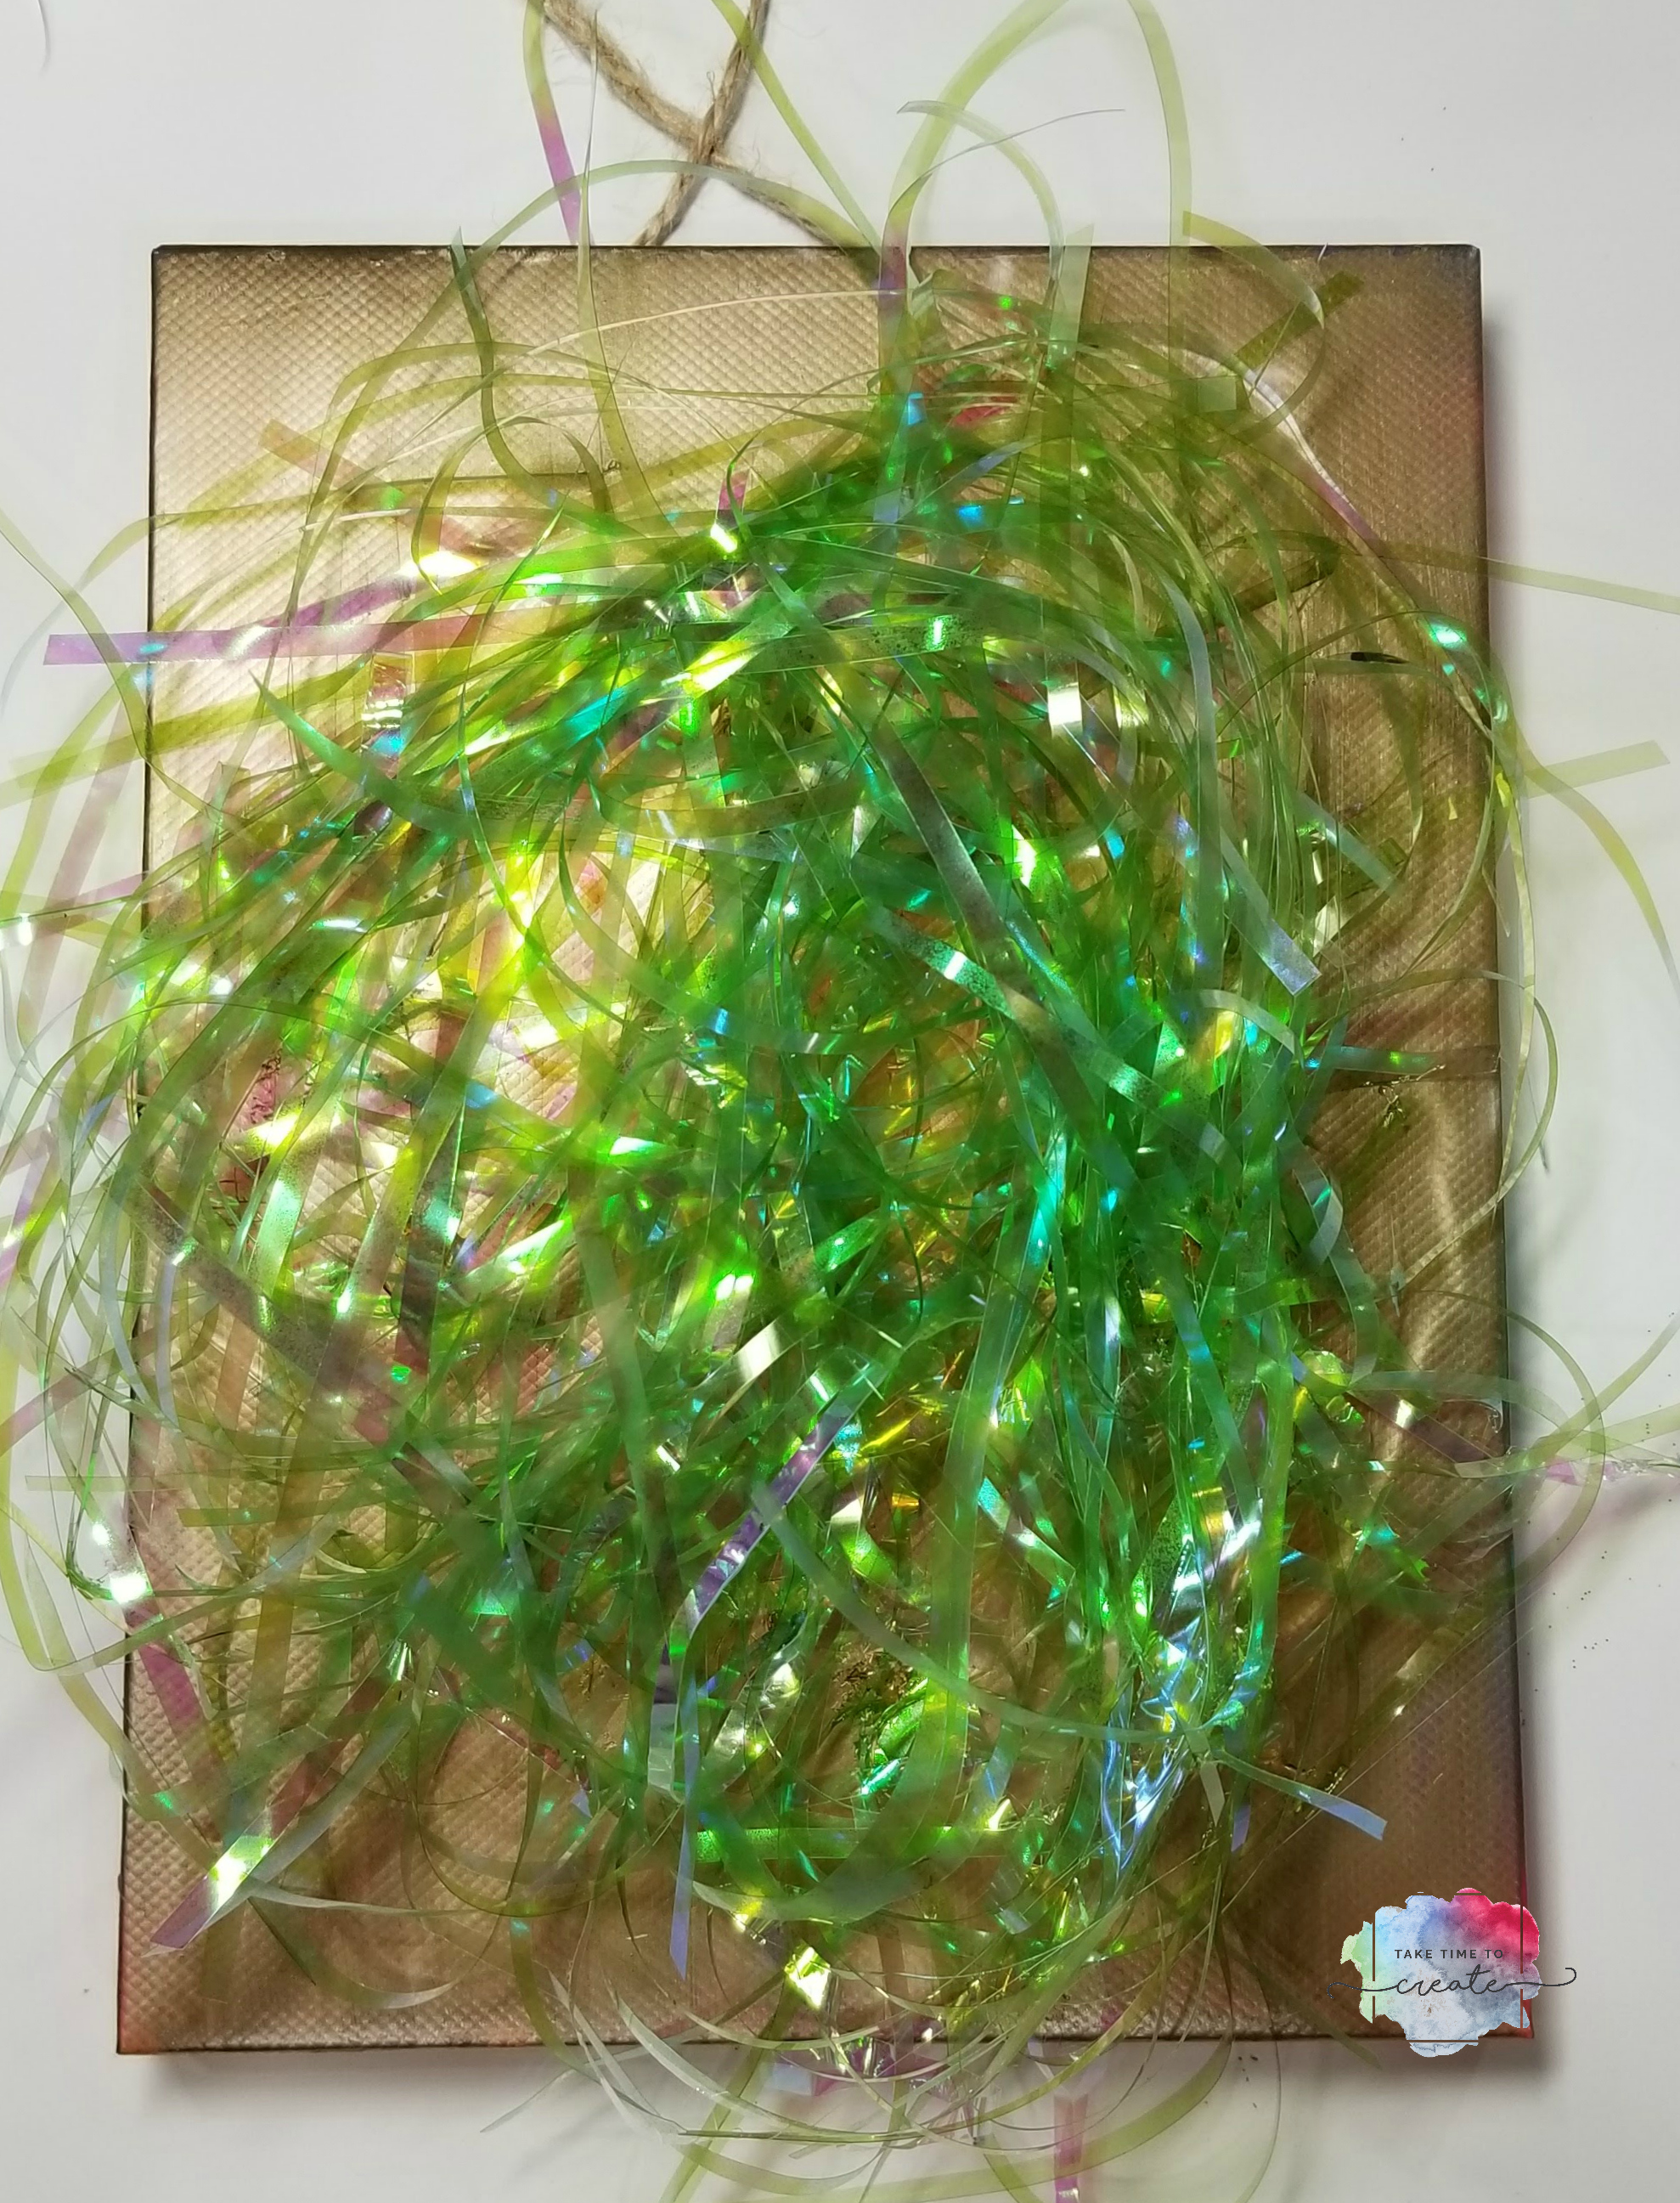
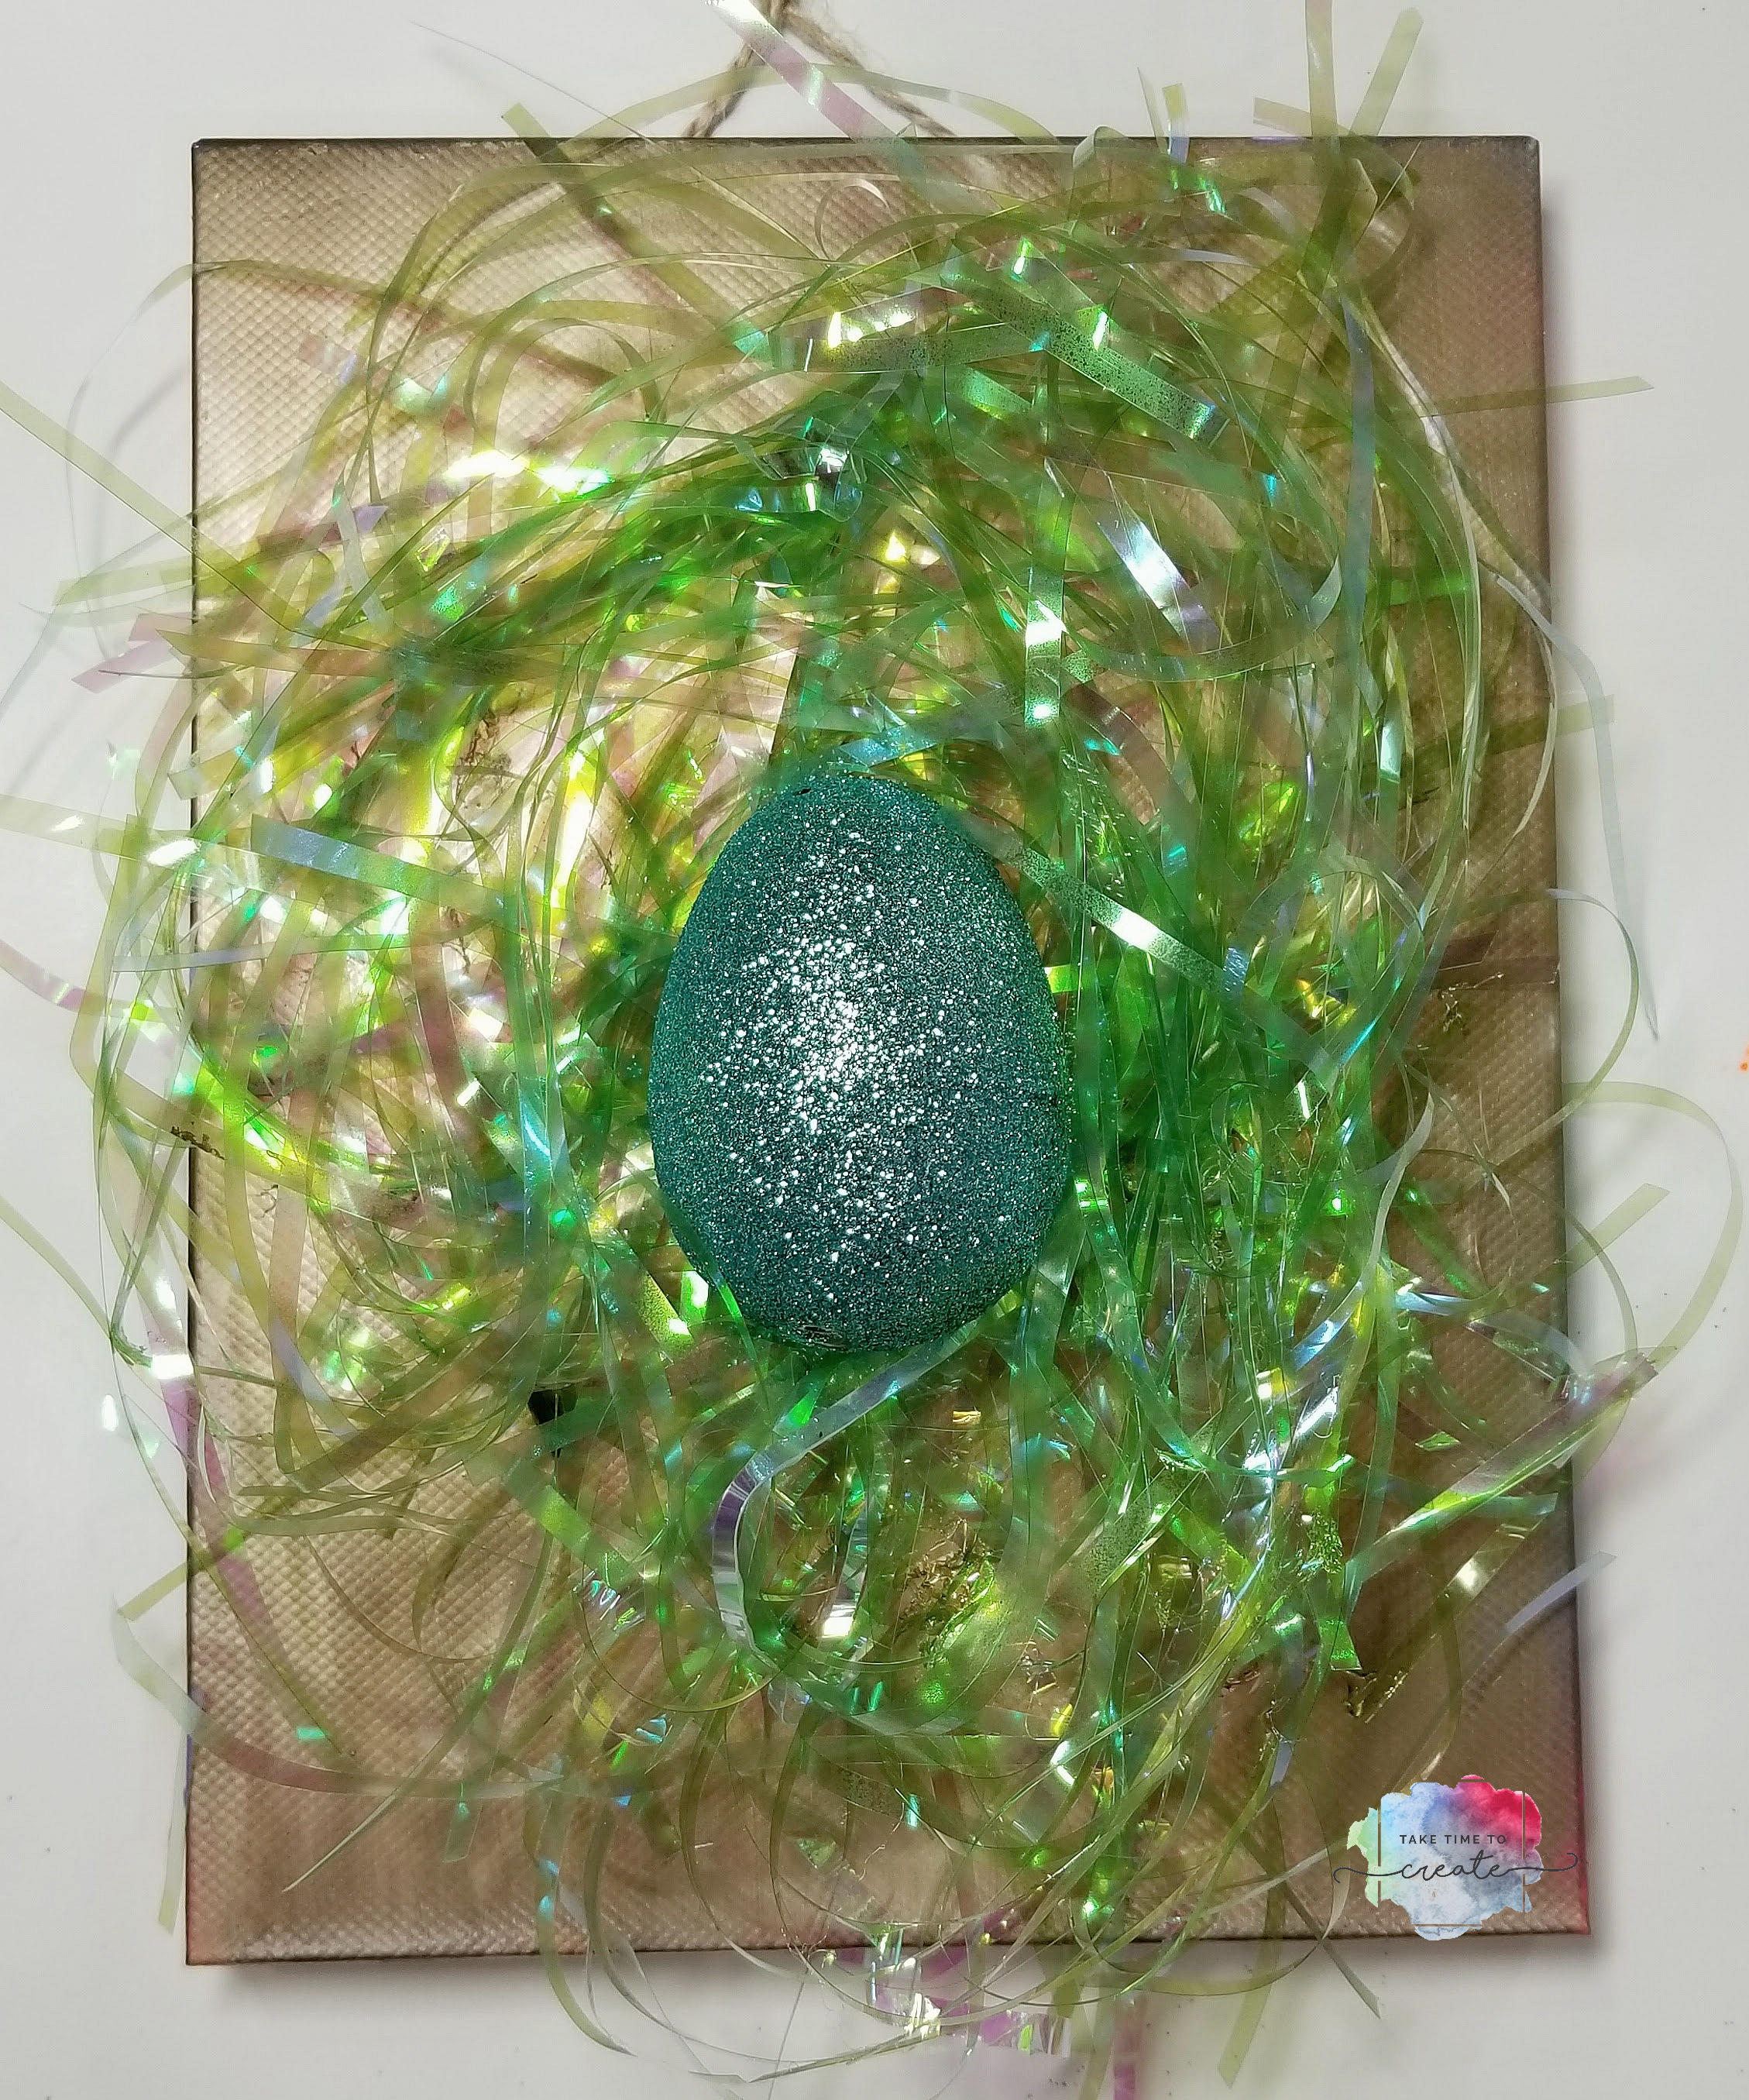
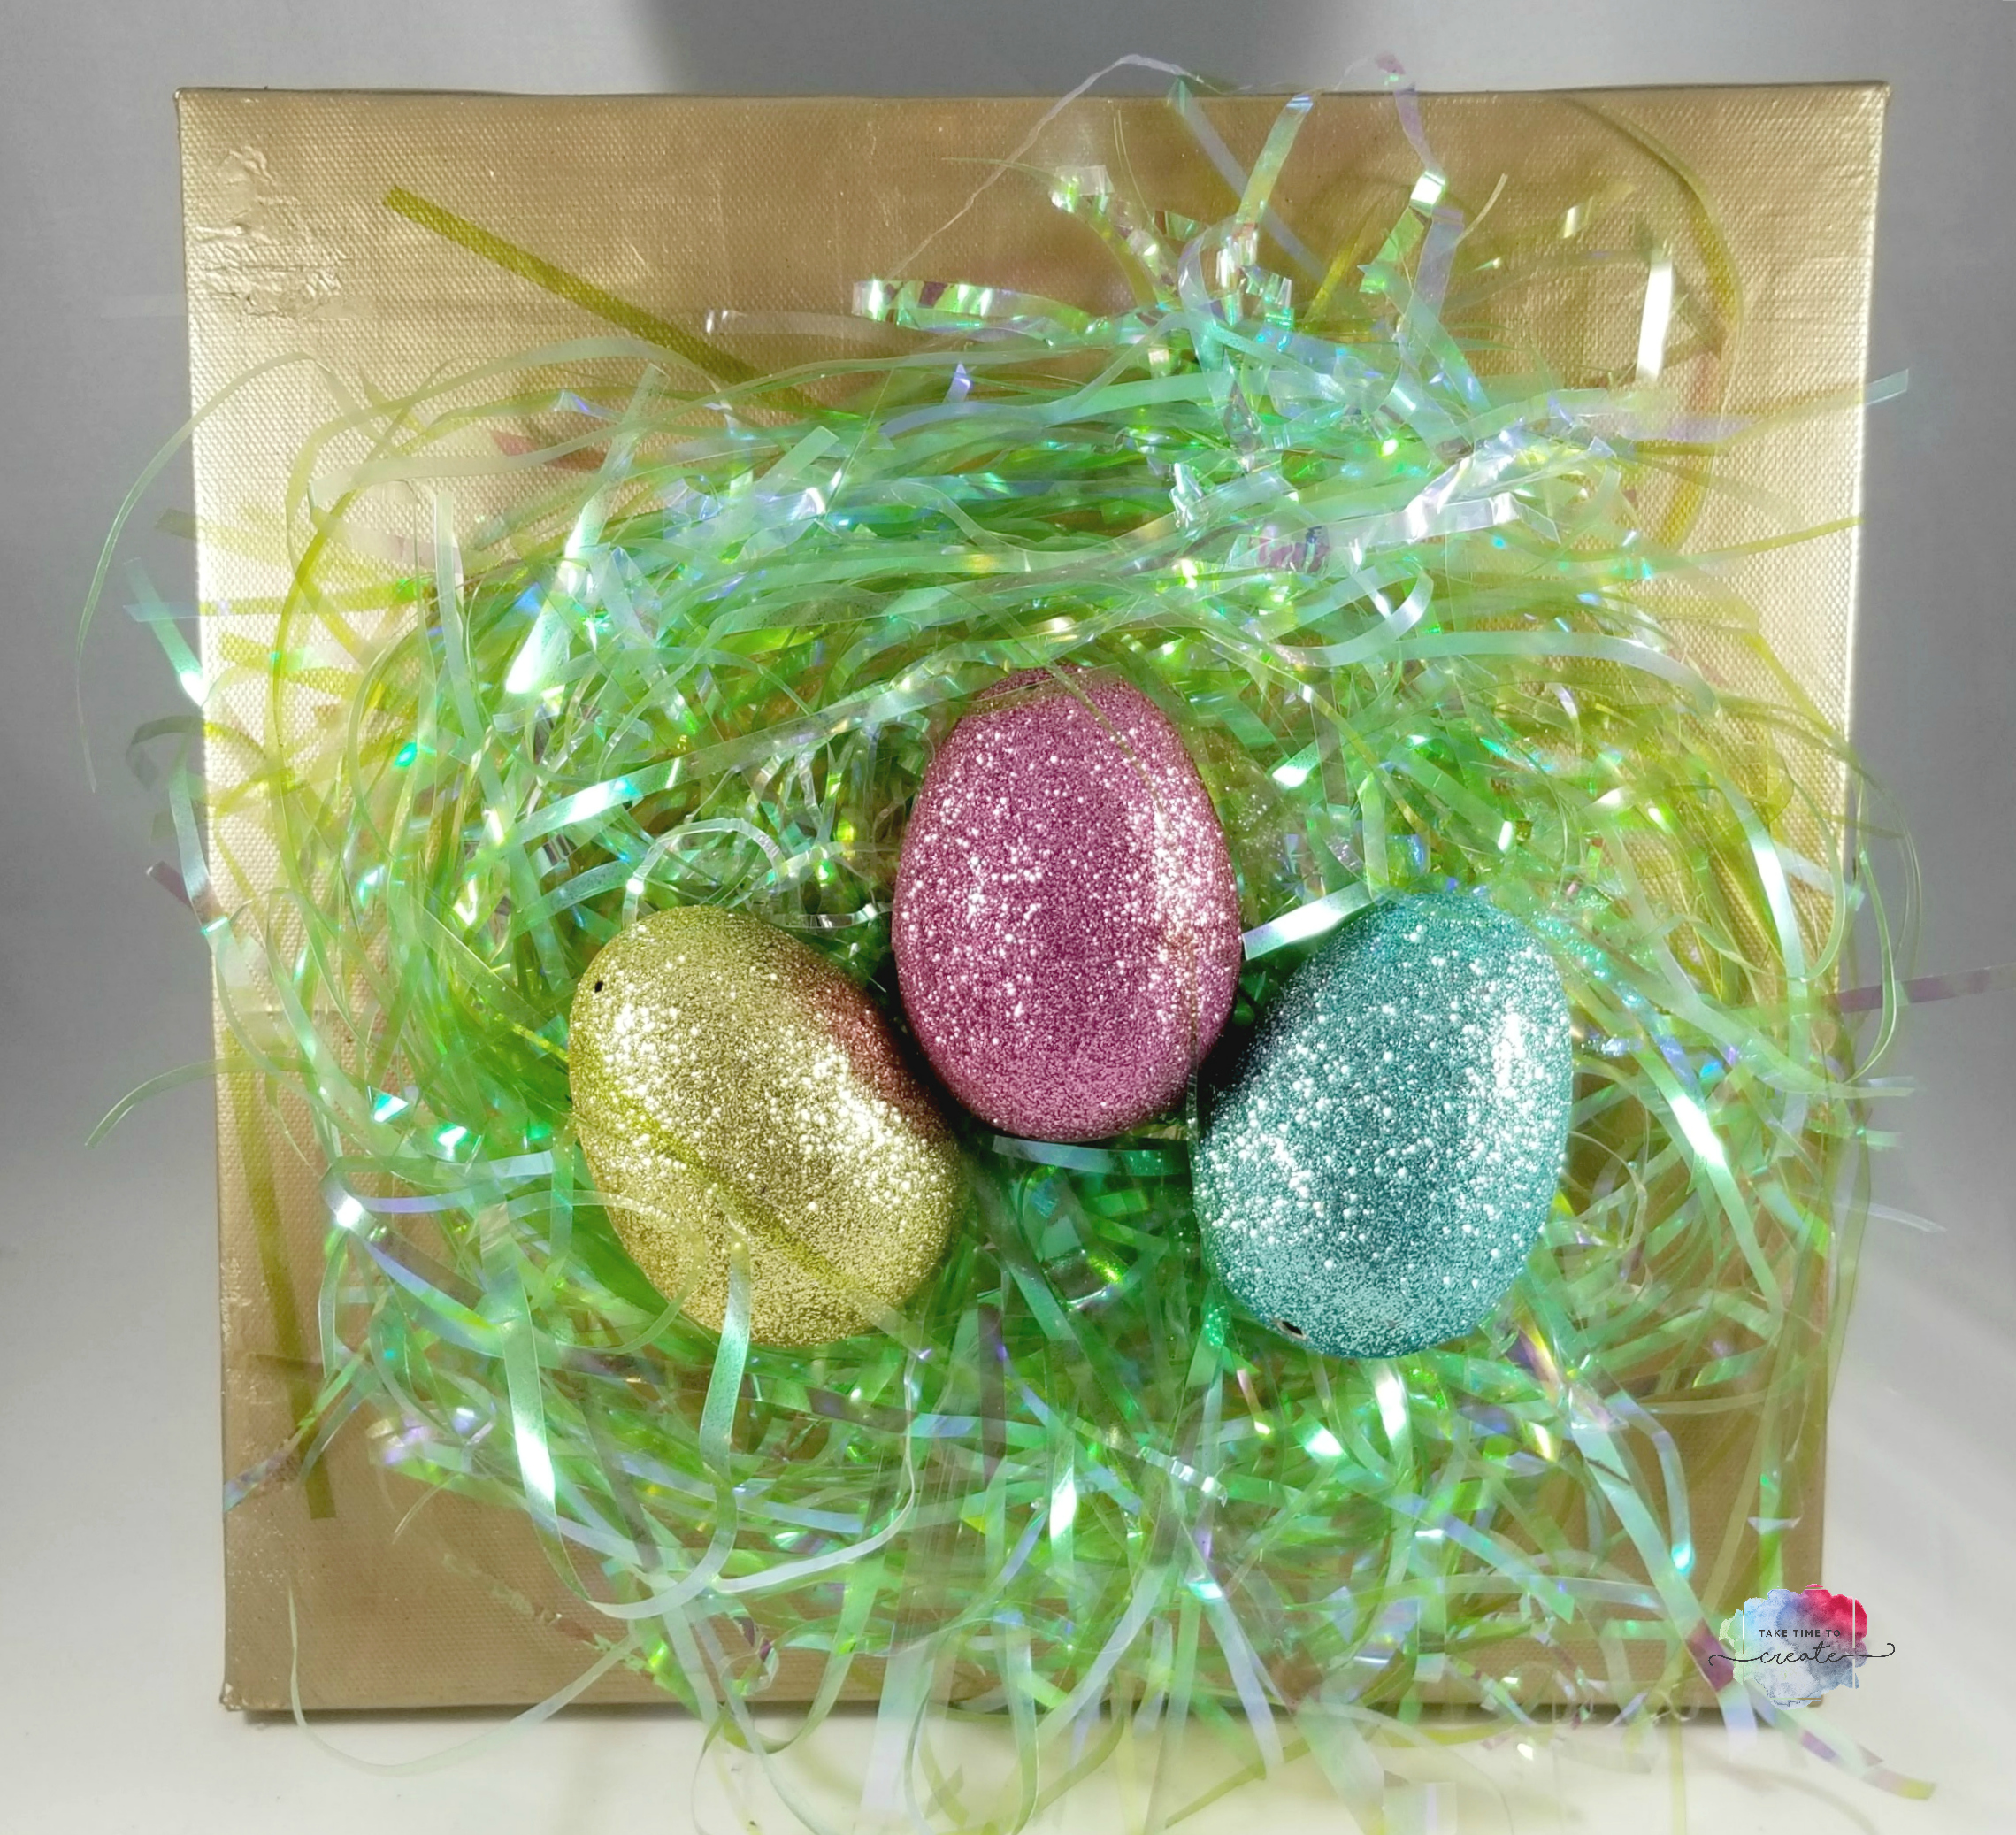
Can you believe that Easter is just right around the corner? Where is this year going? Anyway, I have a fun and easy Dollar Tree DIY Easter Decor project for you.
FTC Disclaimer:
I was compensated for this post. This post also contains affiliate links and I will be compensated if you make a purchase after clicking on my links.
So, to do this project you will need a few supplies, most of them can be picked up at the Dollar Tree.
First you will want to paint your canvas. I used a gold Folk Art paint. You can use any color you want, but it will take a few coats to cover up the canvas. You might not be able to find the exact canvas I am using, but look around they seem to always have some great choices for canvases, and you might want to experiment with different sizes.
Once your paint is dry you can add the grass. Take as much as you want and shape it into a nest shape and hot glue it to the canvas.
Then you add your eggs, add a single one in the middle, or a grouping of 3. If you can’t find any eggs look around for another spring related item that would fit on your canvas. Be creative and experiment with your center piece.
These are just so cute when they are all finished. These would look great in a grouping of 3. Also, this would be a fun project for kids or a church group. There are so many great options for these canvases.