Tag: art (page 3 of 6)

Zipper and Buttons Art Journal Page

Hello Everyone!

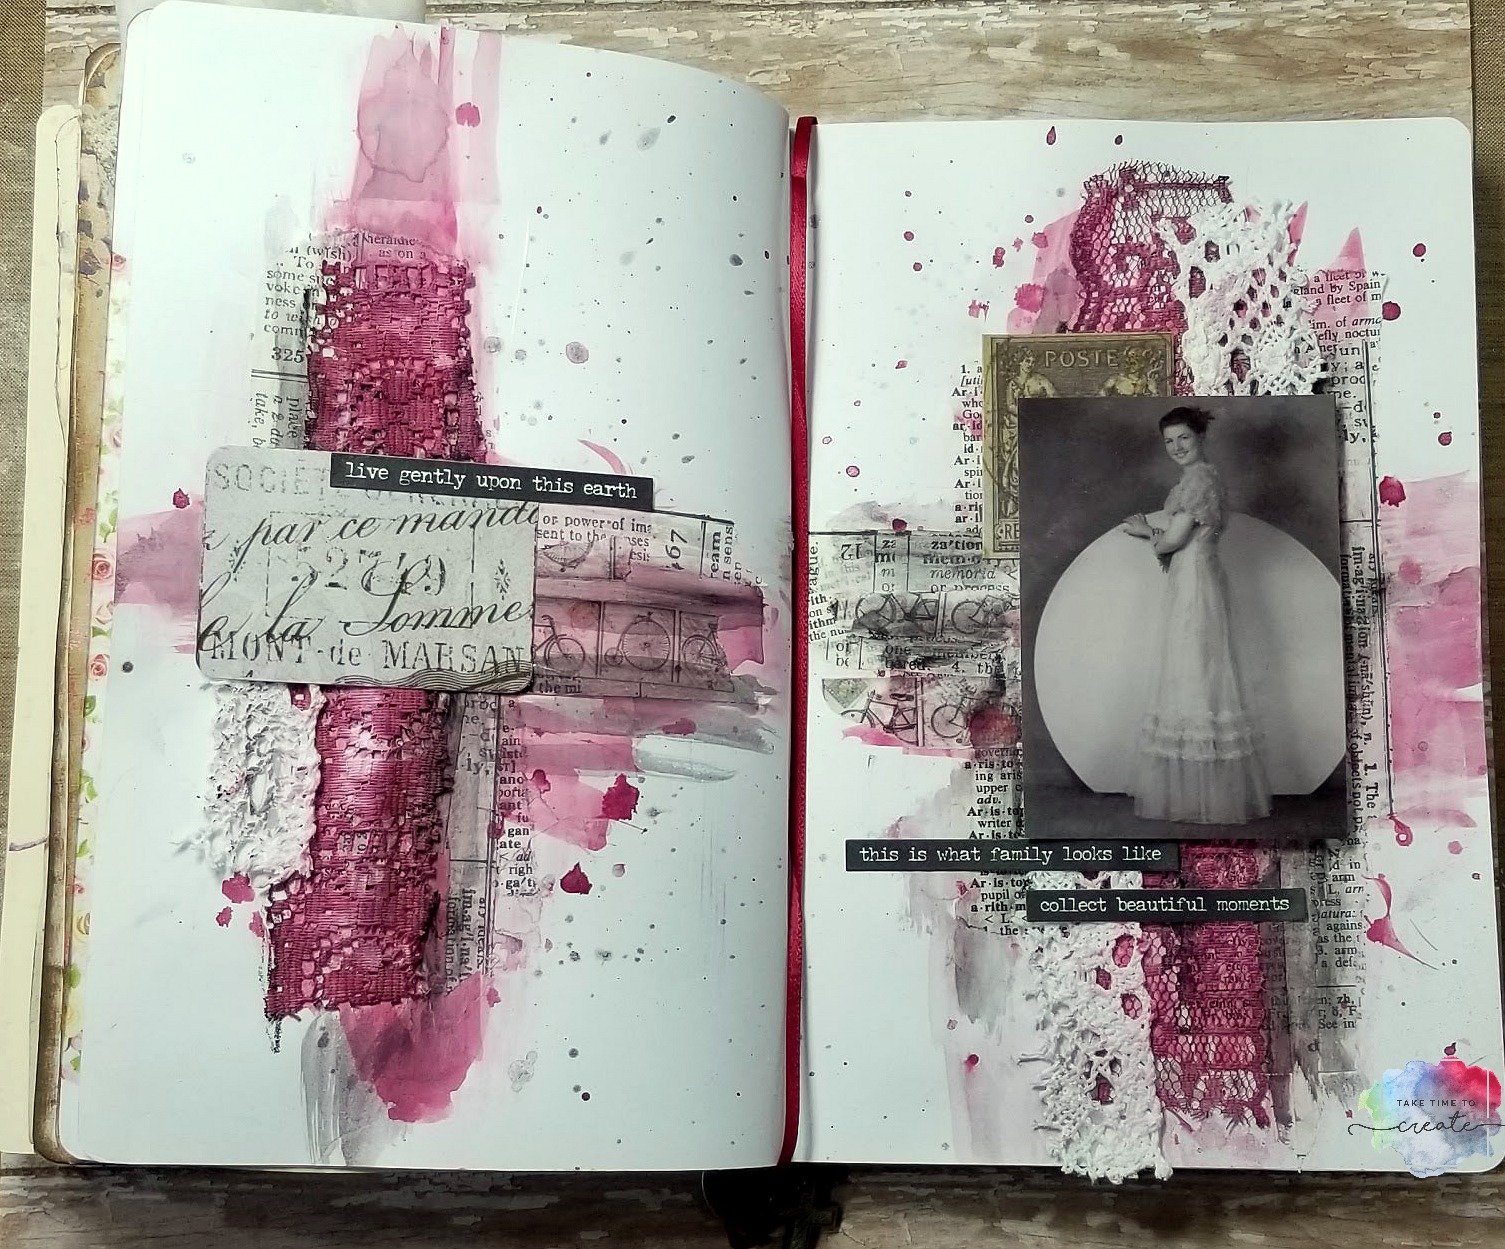
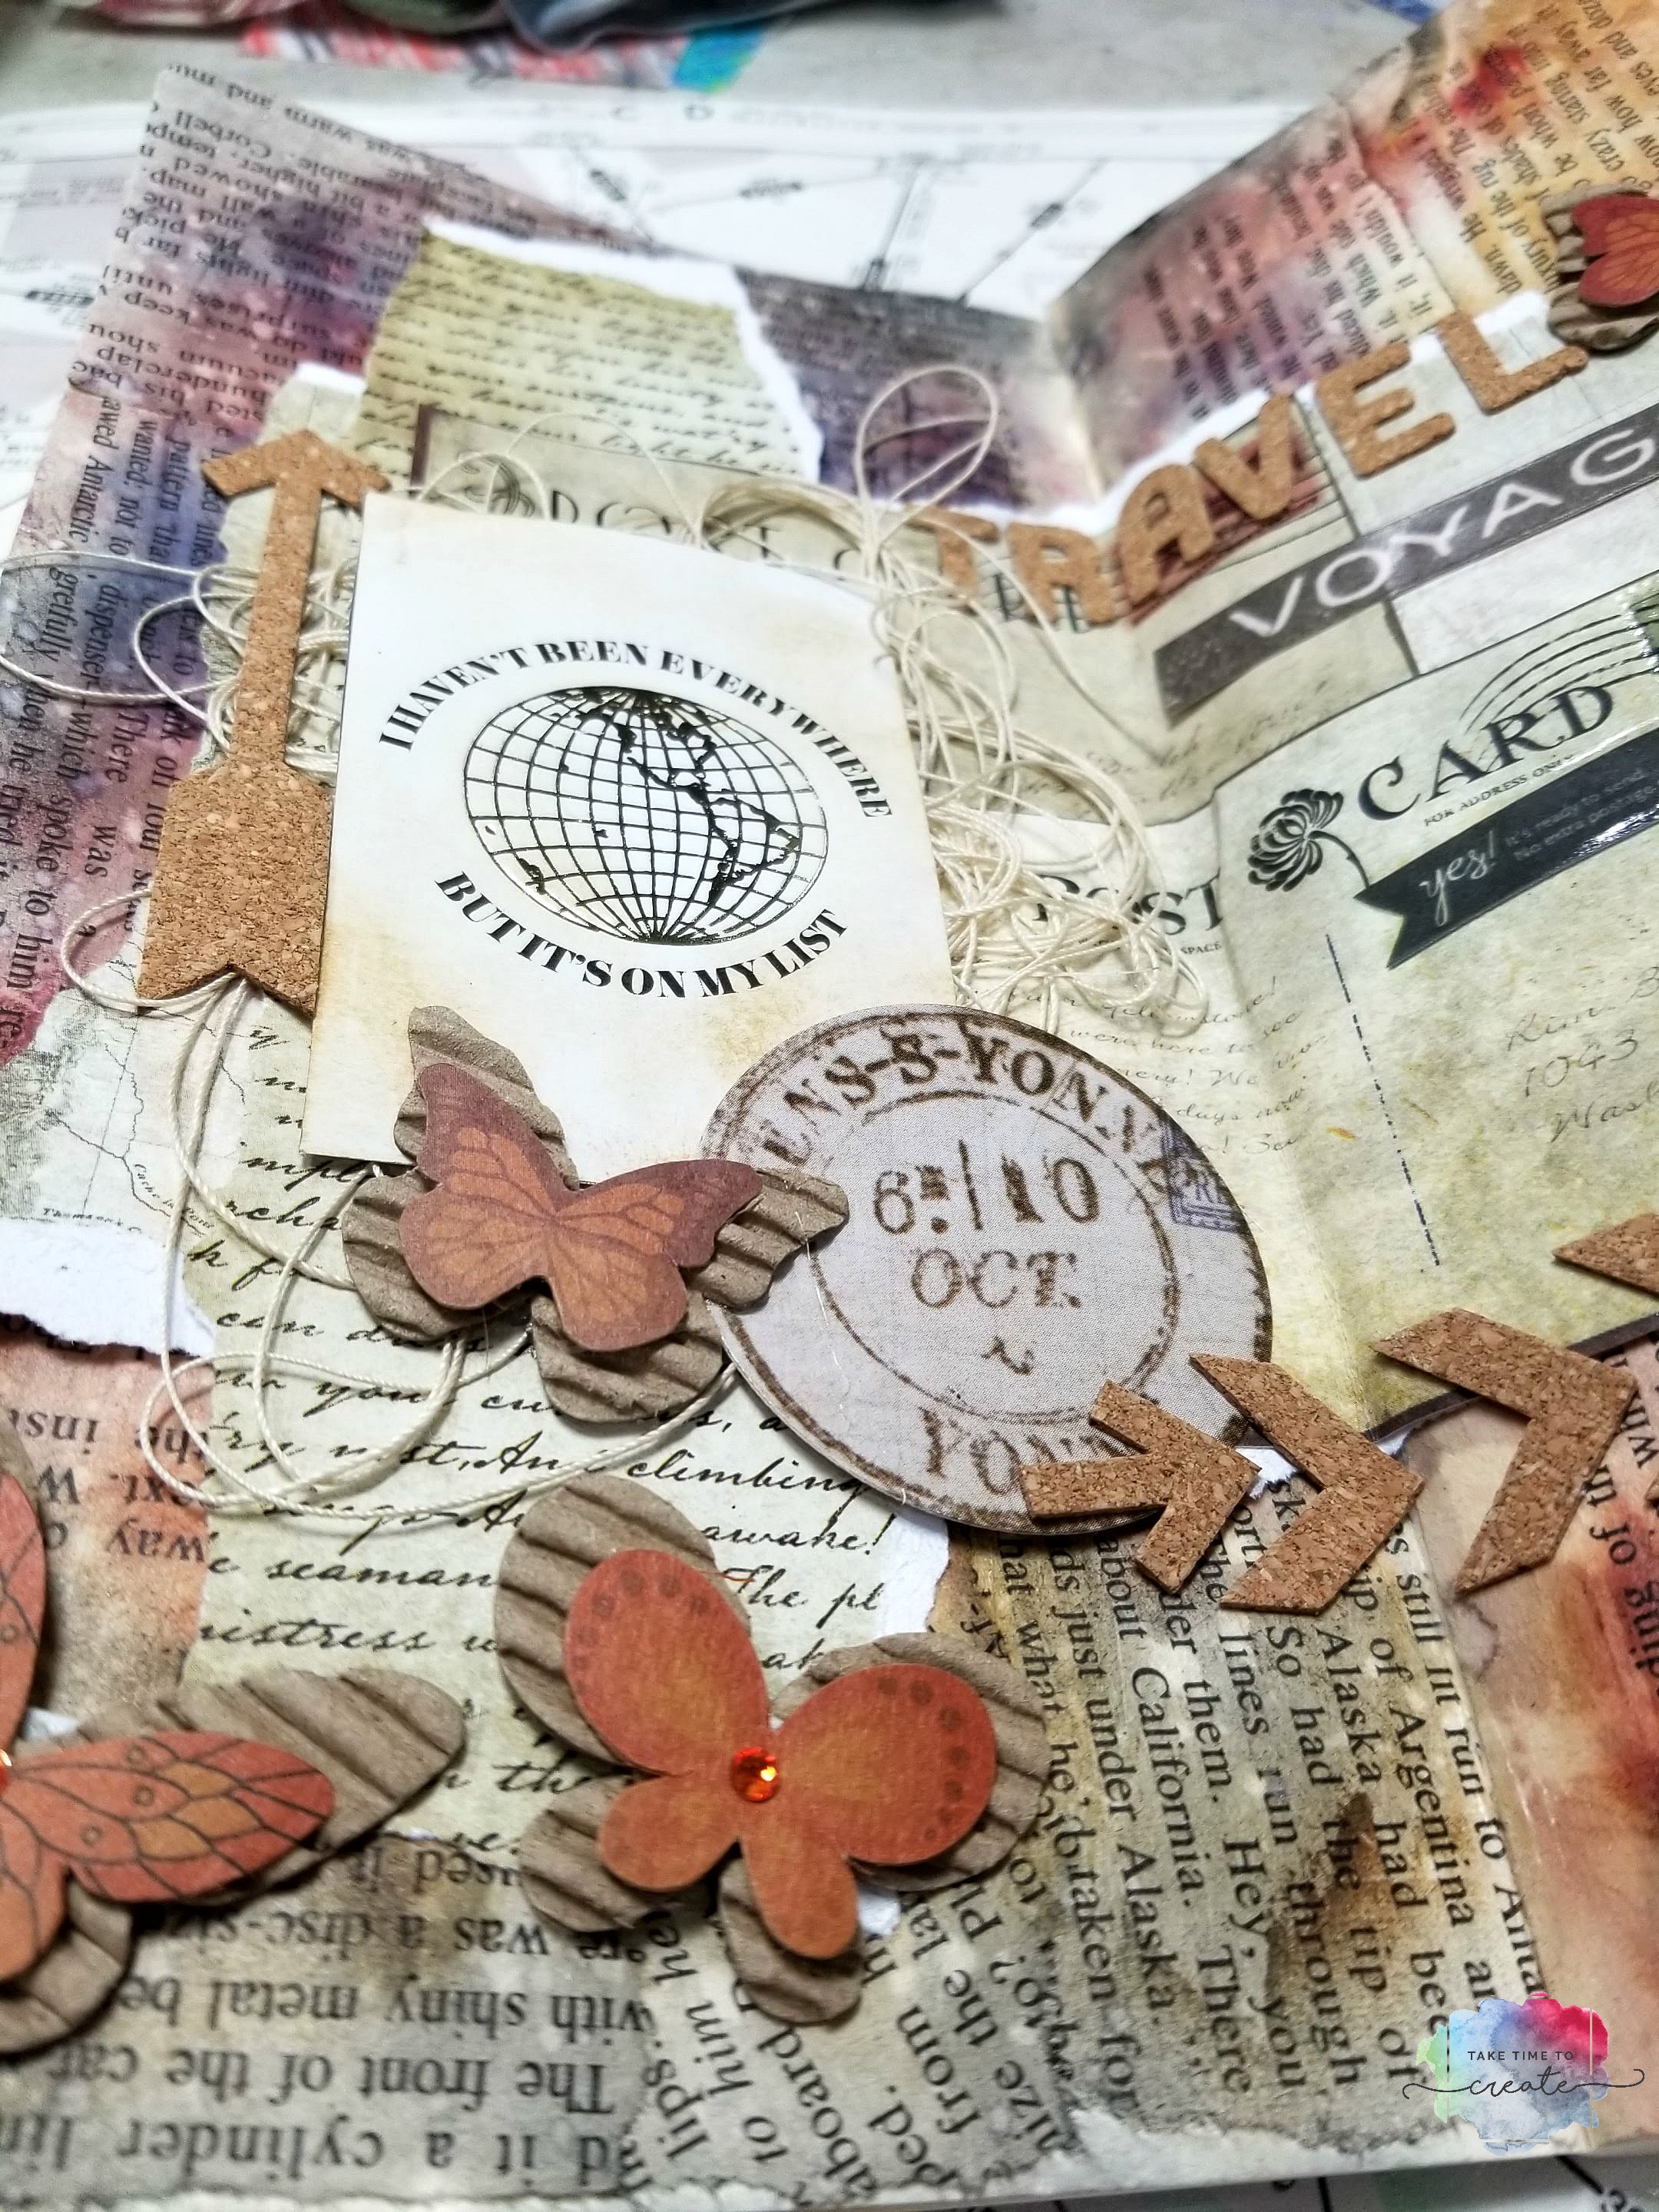
The Sisterhood of the Traveling Art Journal strikes again, lol. New month, new theme! This month’s journal’s theme is sewing and I love it. There is a wonderful quote at the beginning of the books that states “My soul is fed by needle and thread.” and I just love that quote. The previous pages are wonderful and a huge inspiration for me.

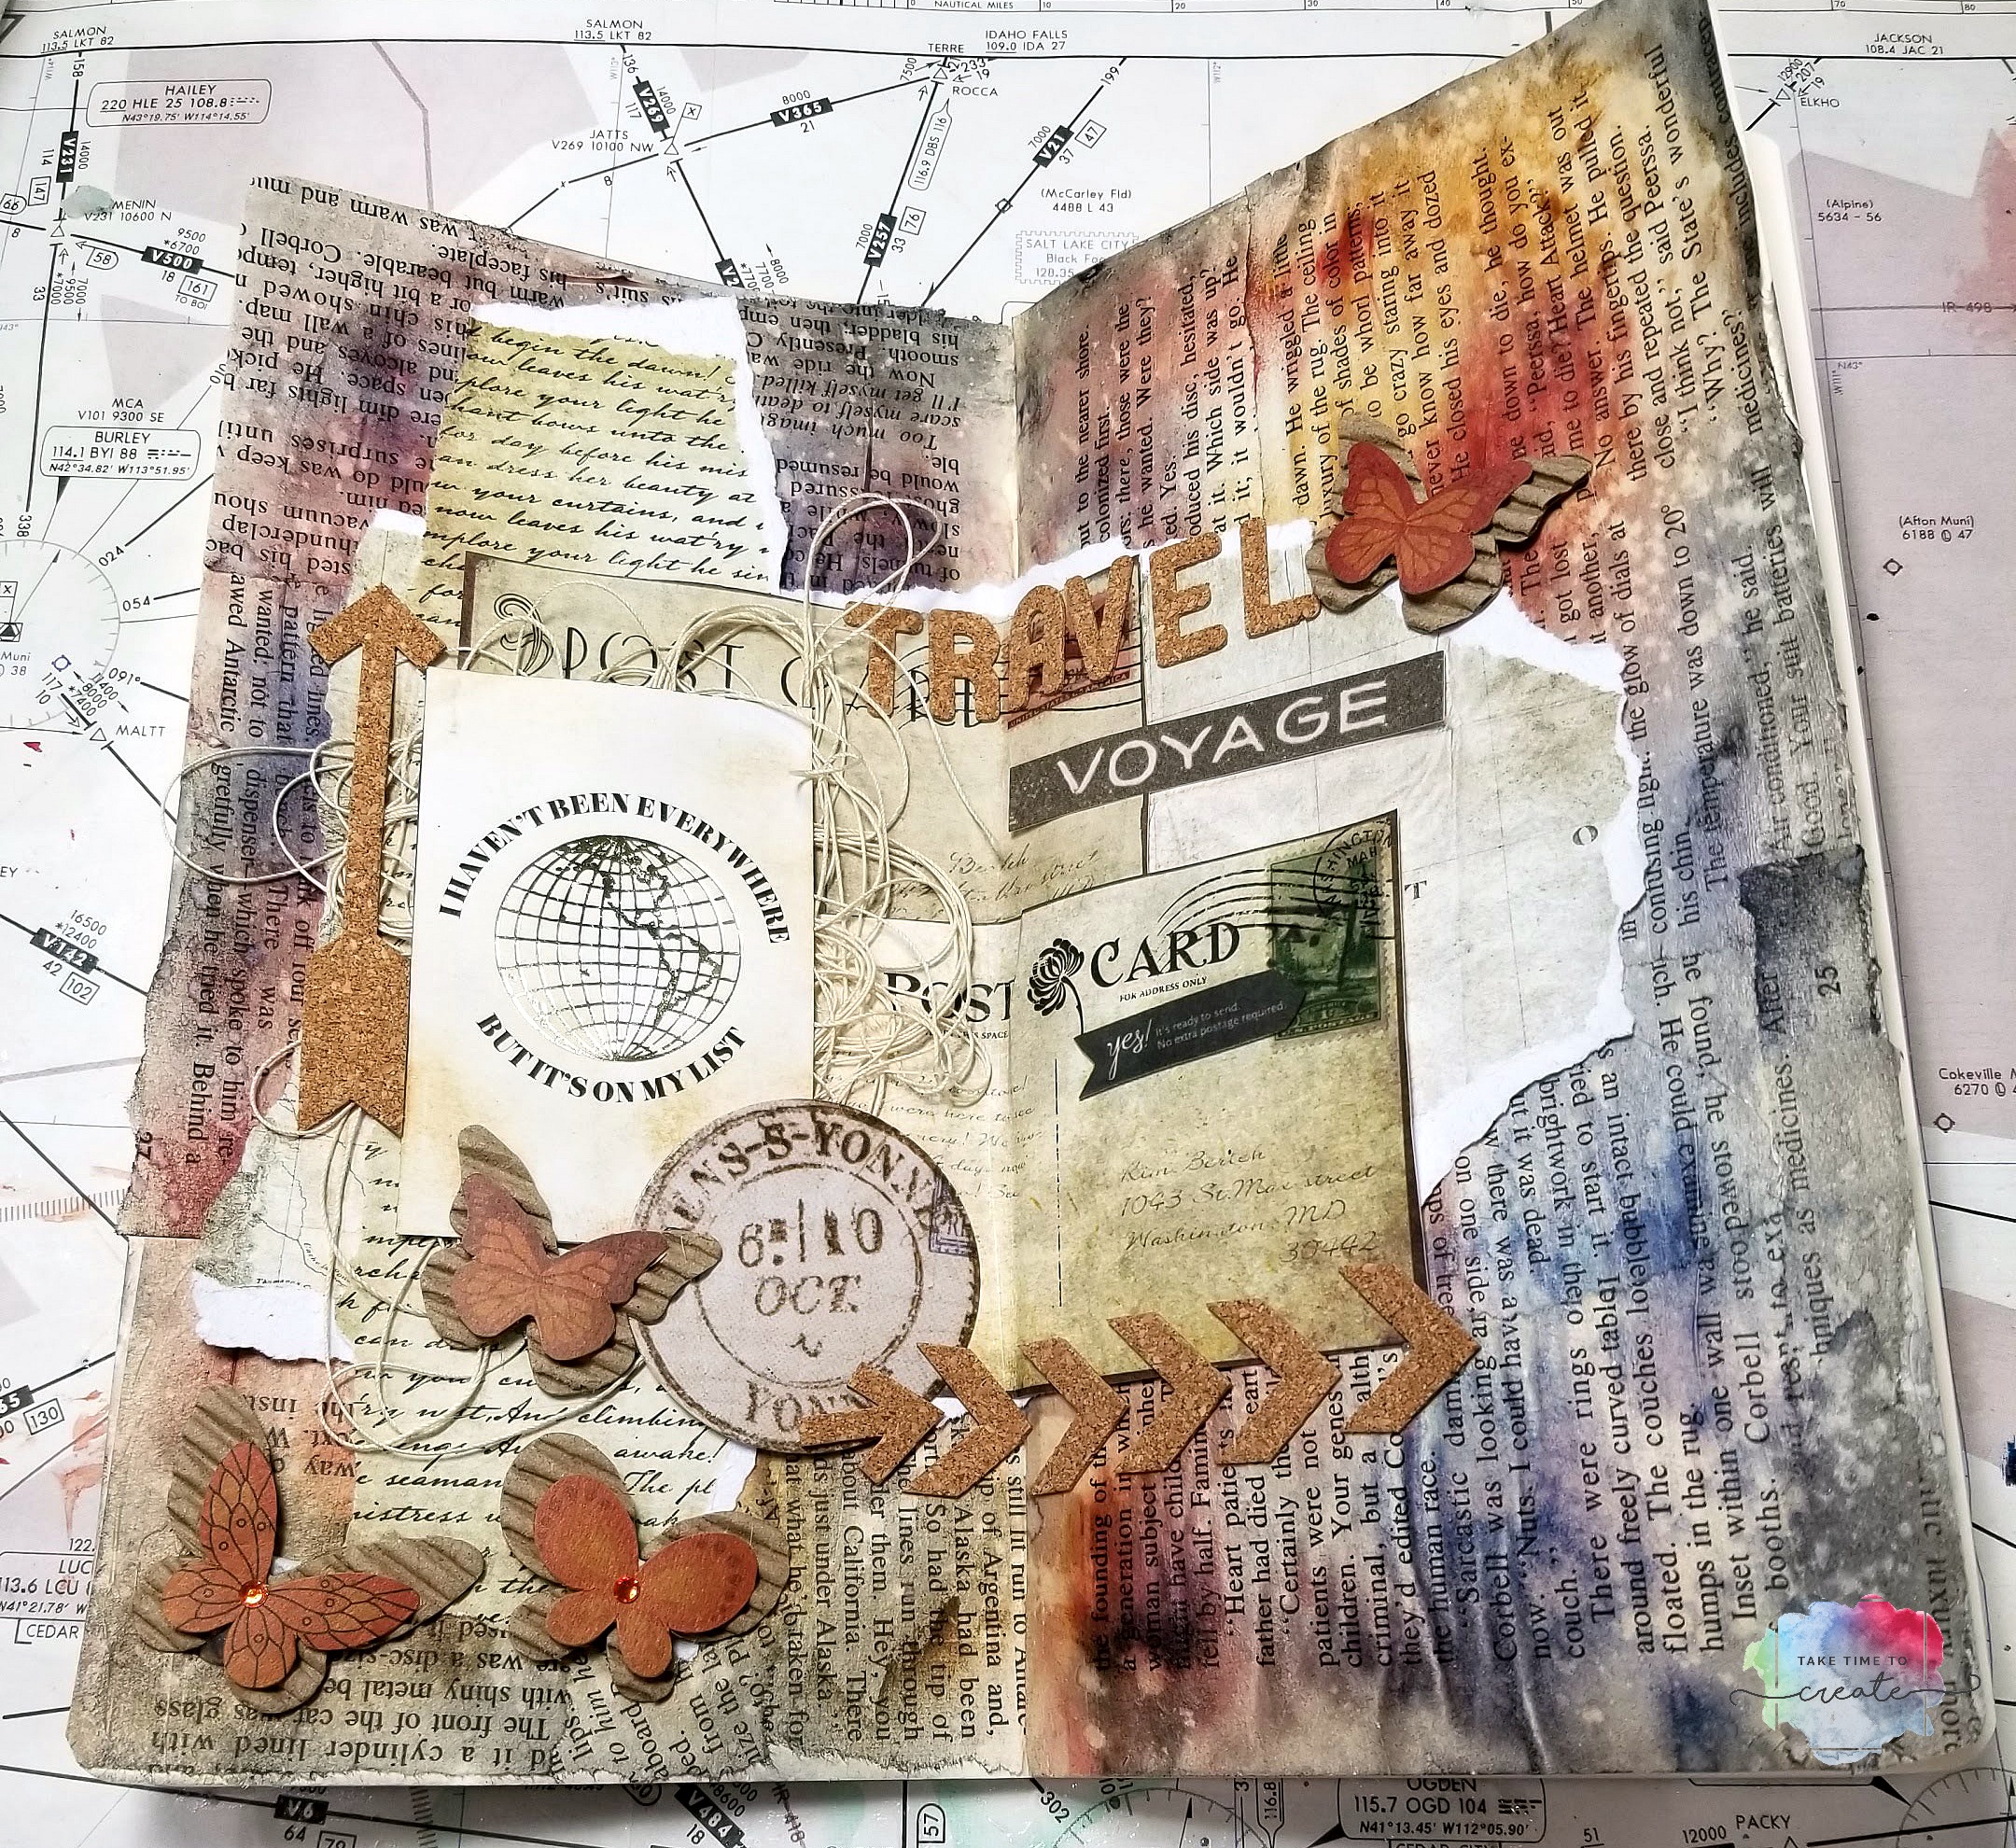
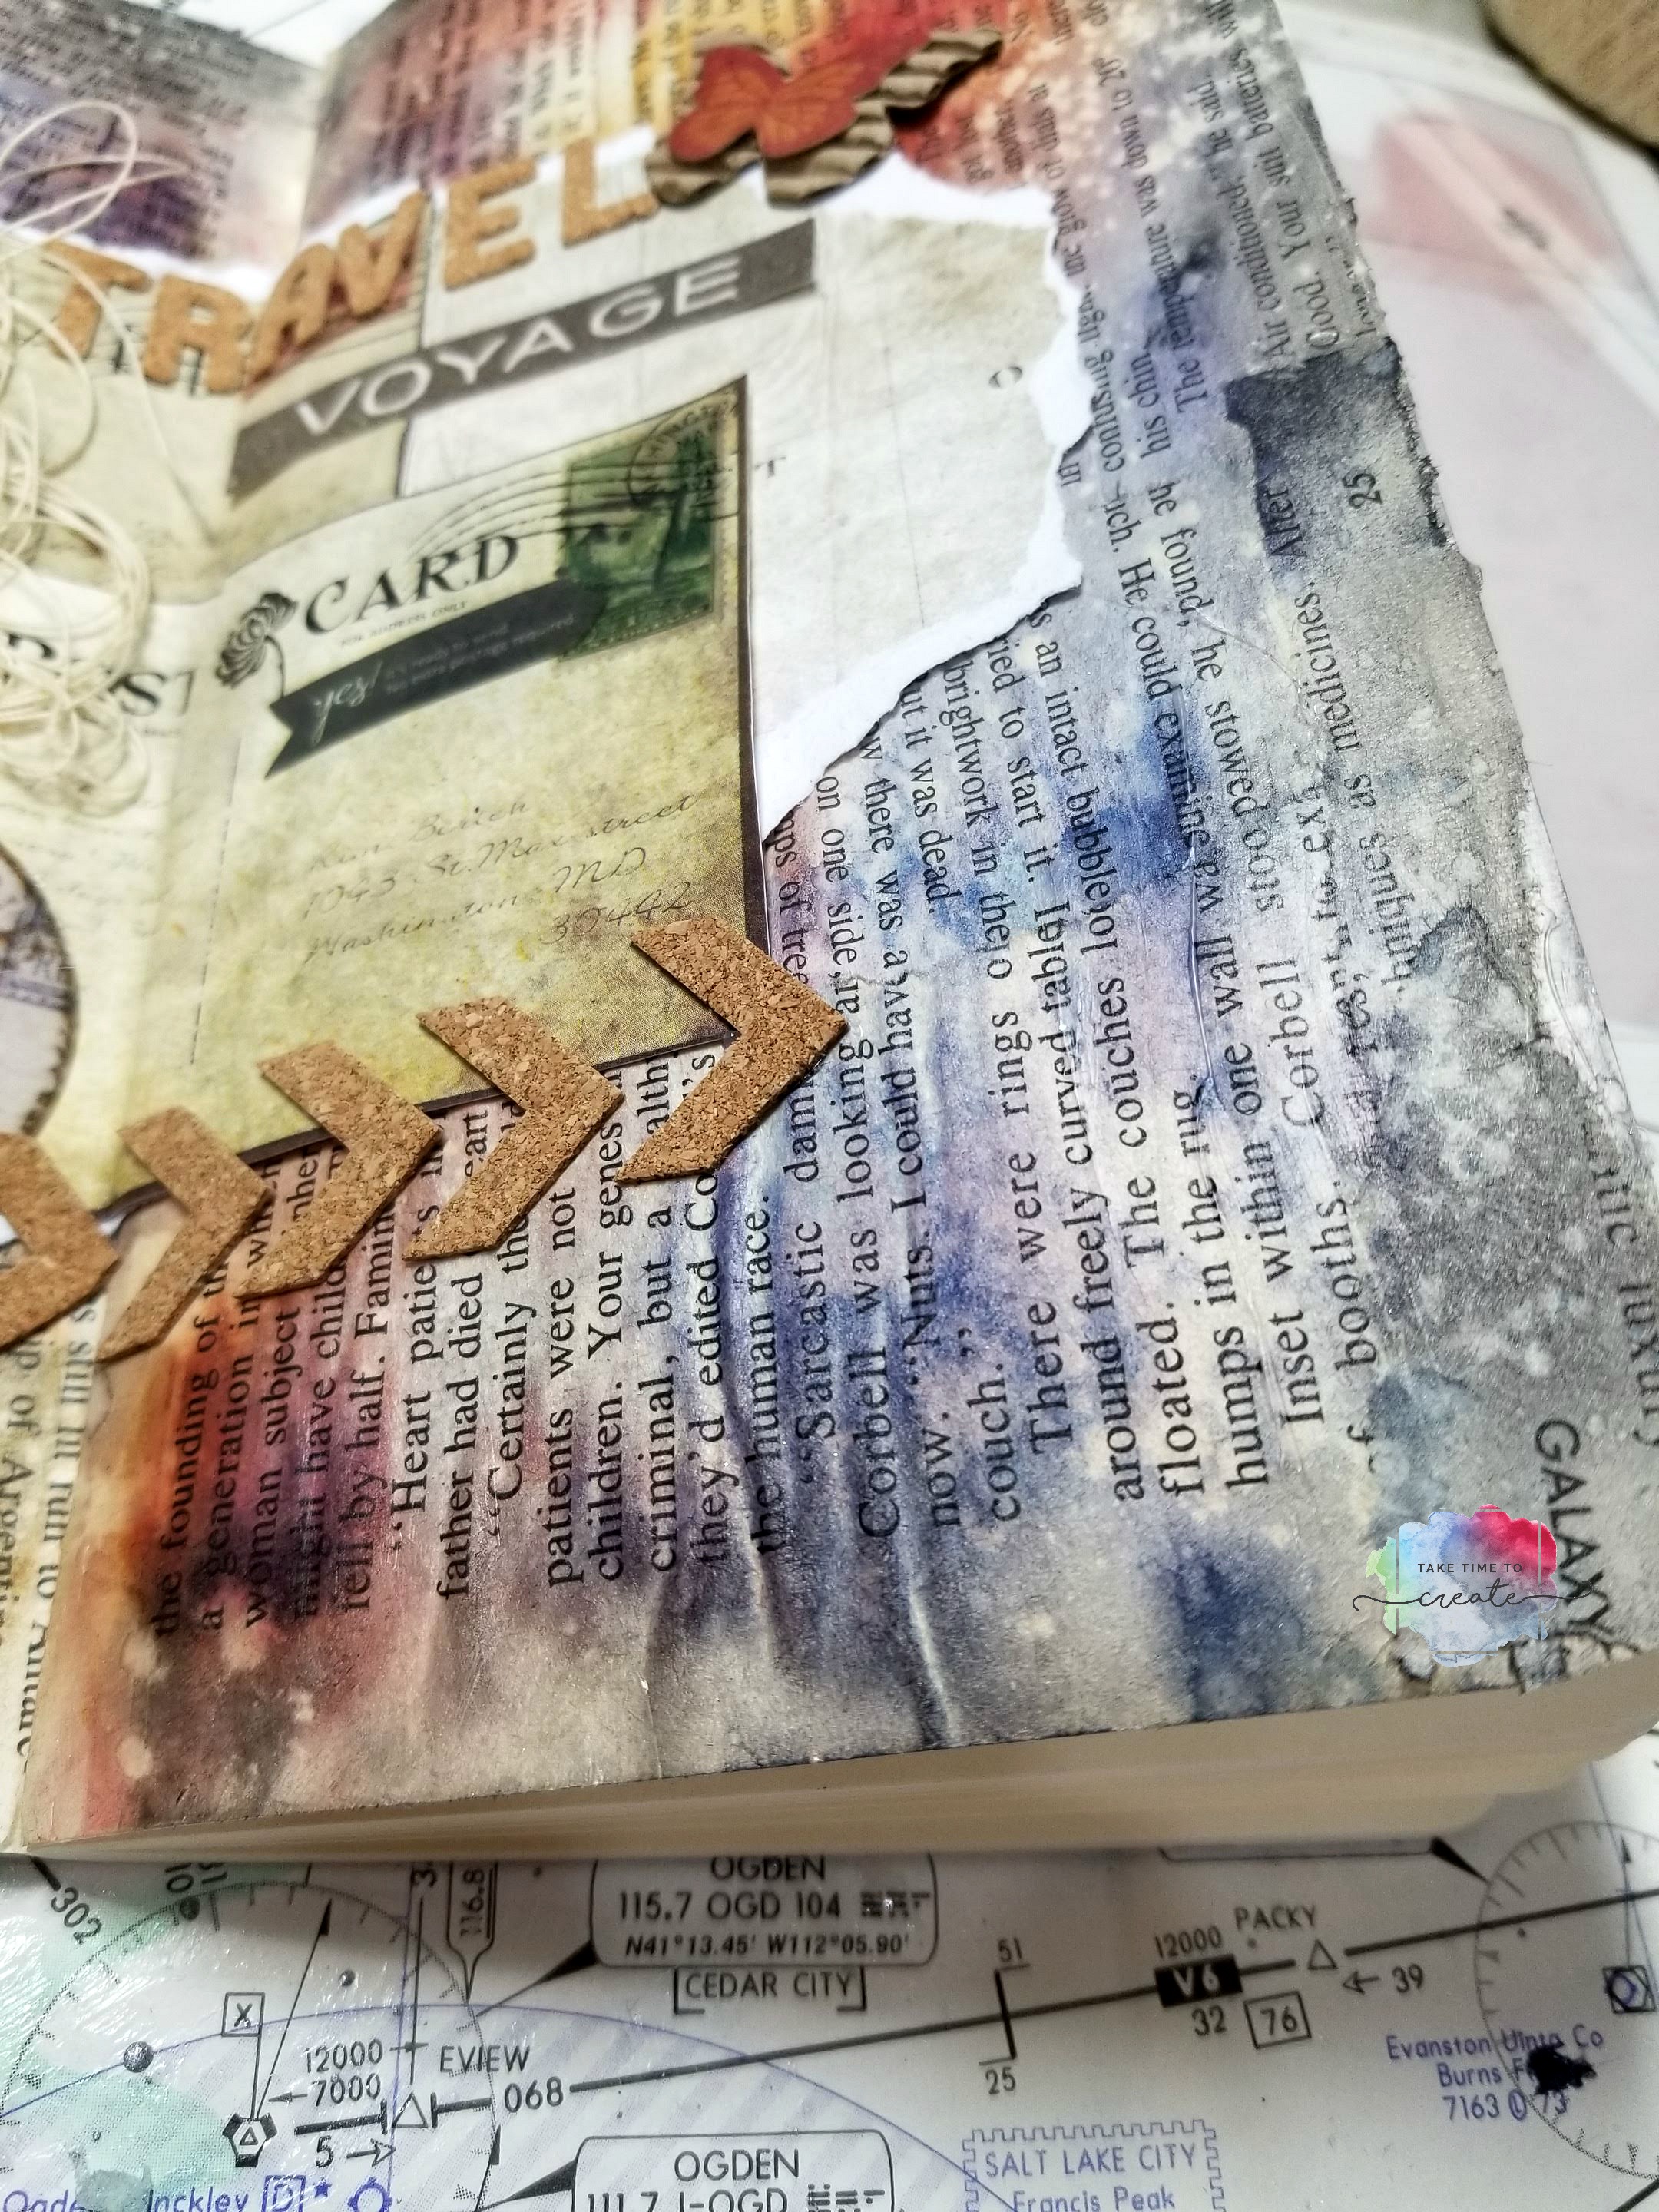
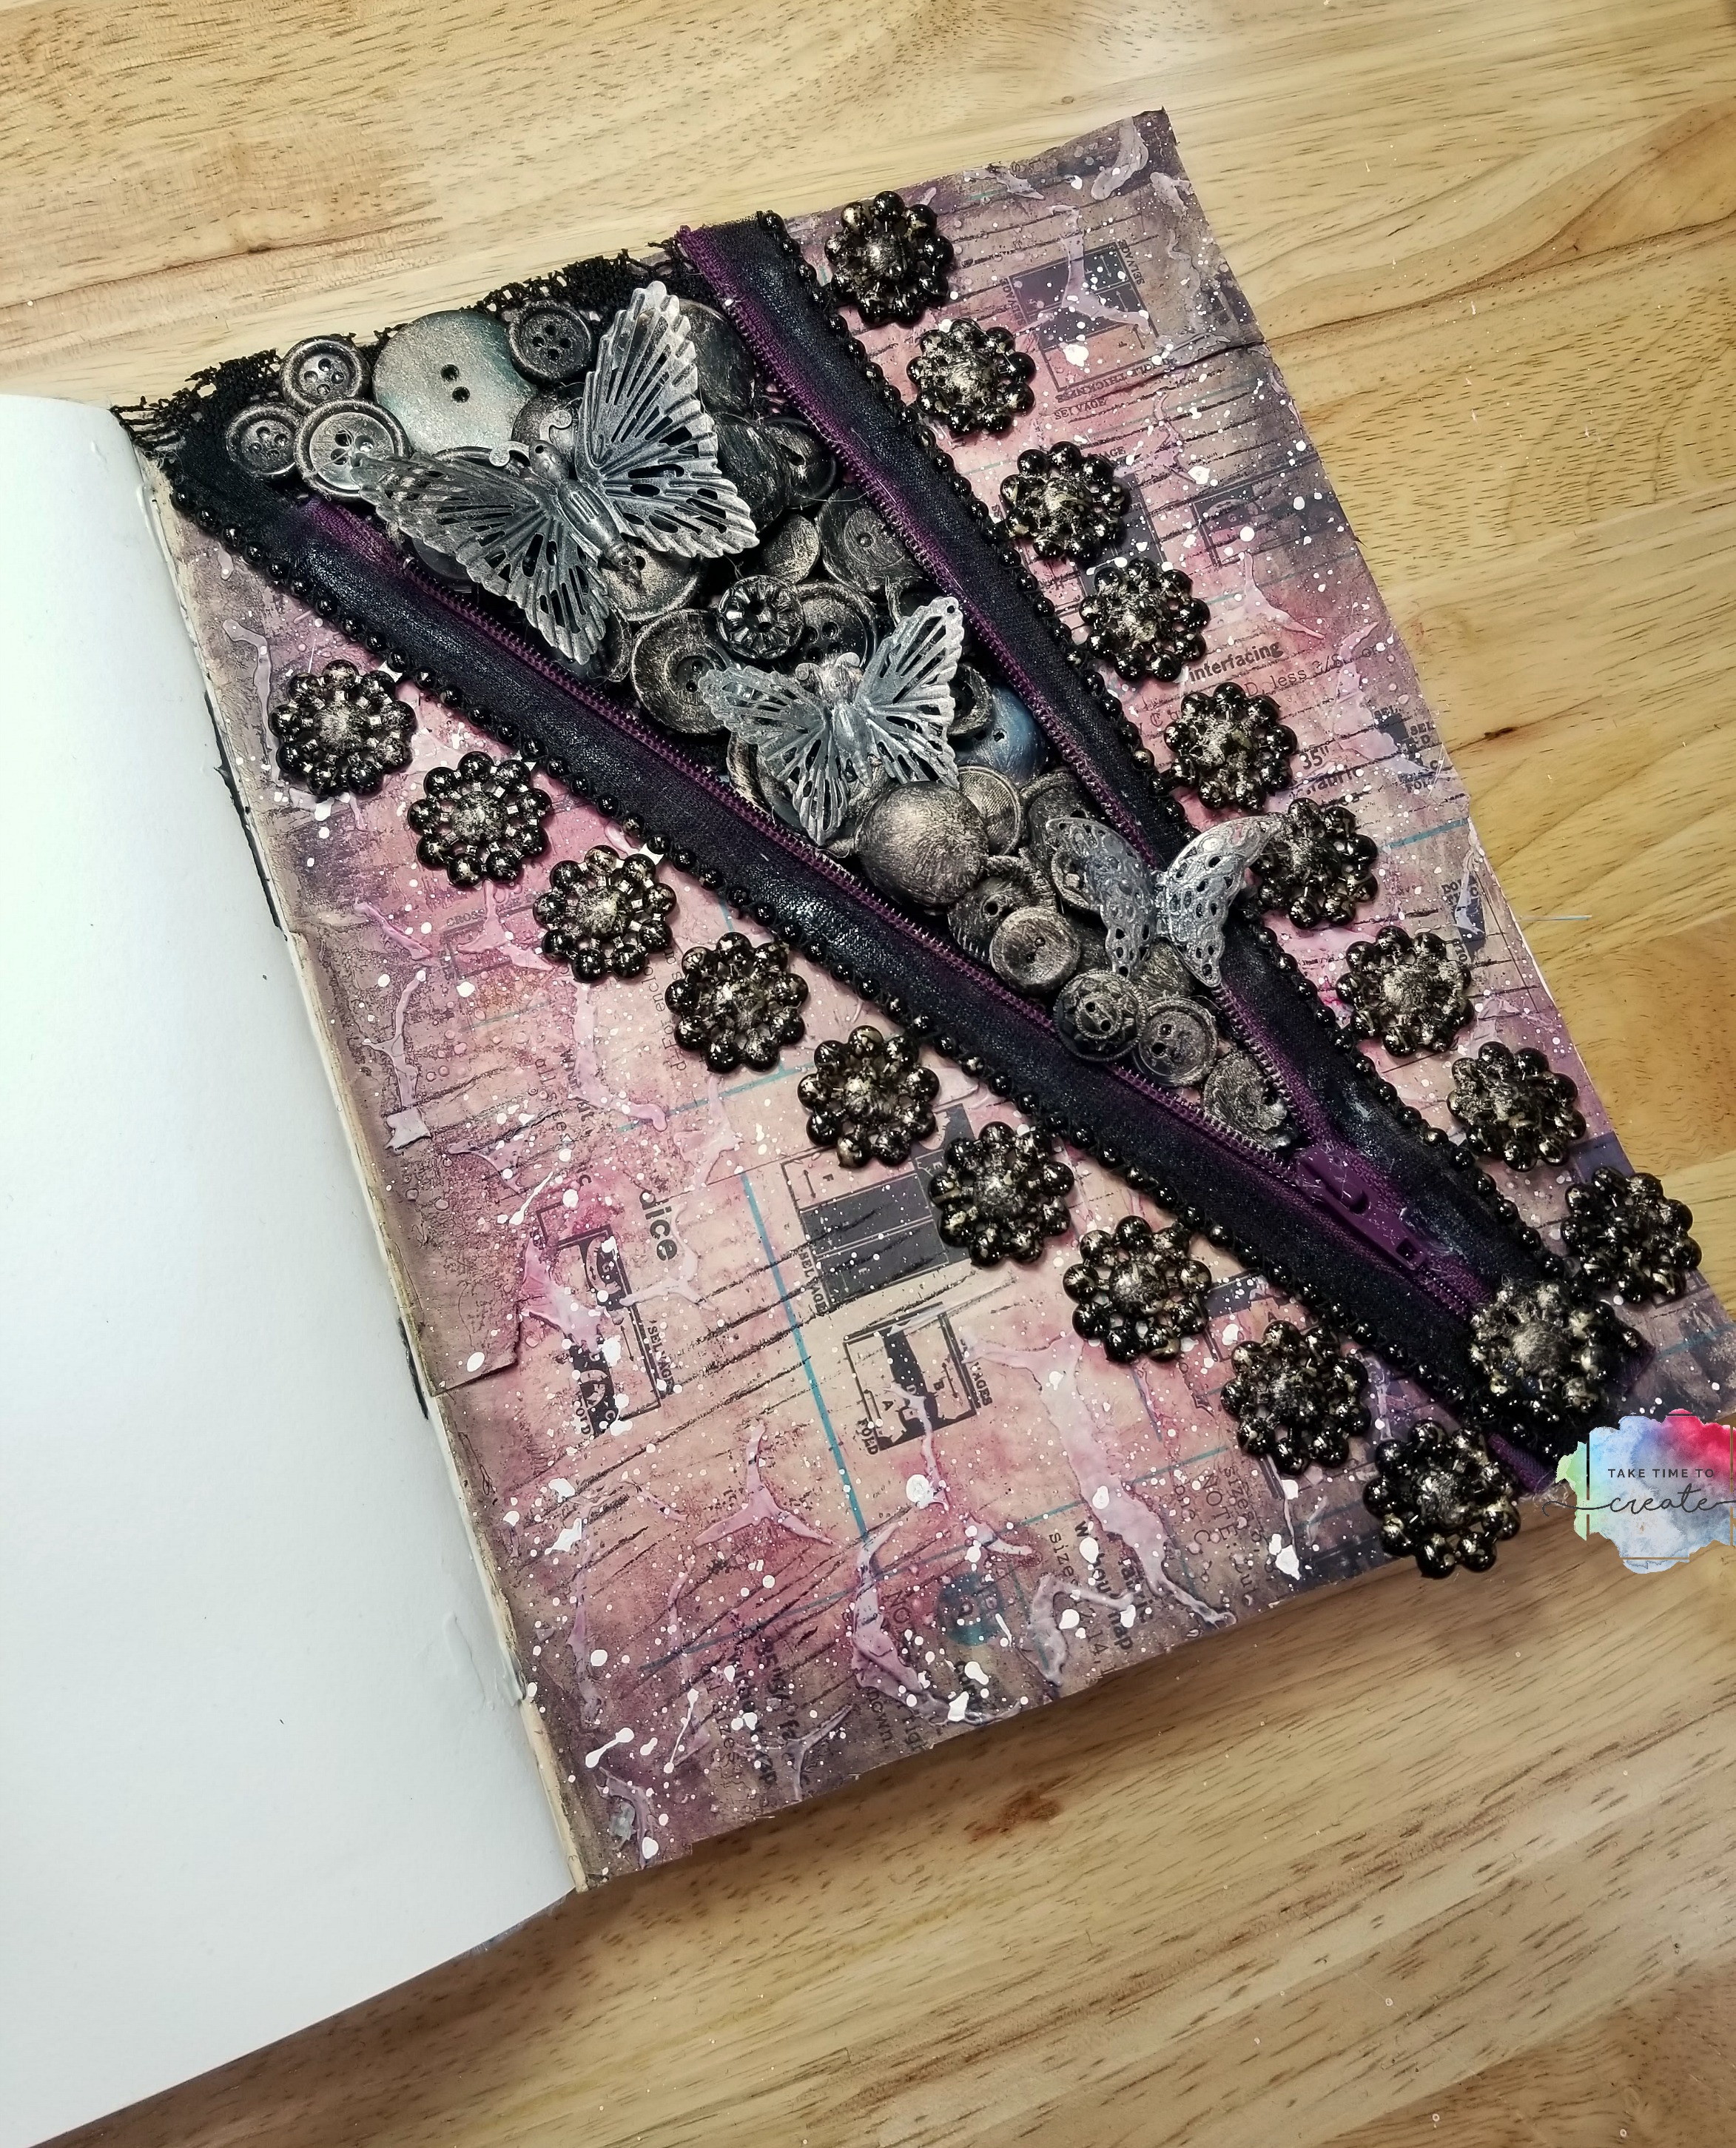
I decided to take my page in a little different direction and create a page around buttons bursting out of a zipper.

I have done this technique in the past on a bottle, but not a journal page.  I did a blog post using a Mason Jar and sea shells, I think it turned out really cute, lol. You can see that post  by clicking here — Sea Shell Mason Jar. 


Zipper Art Journal Page

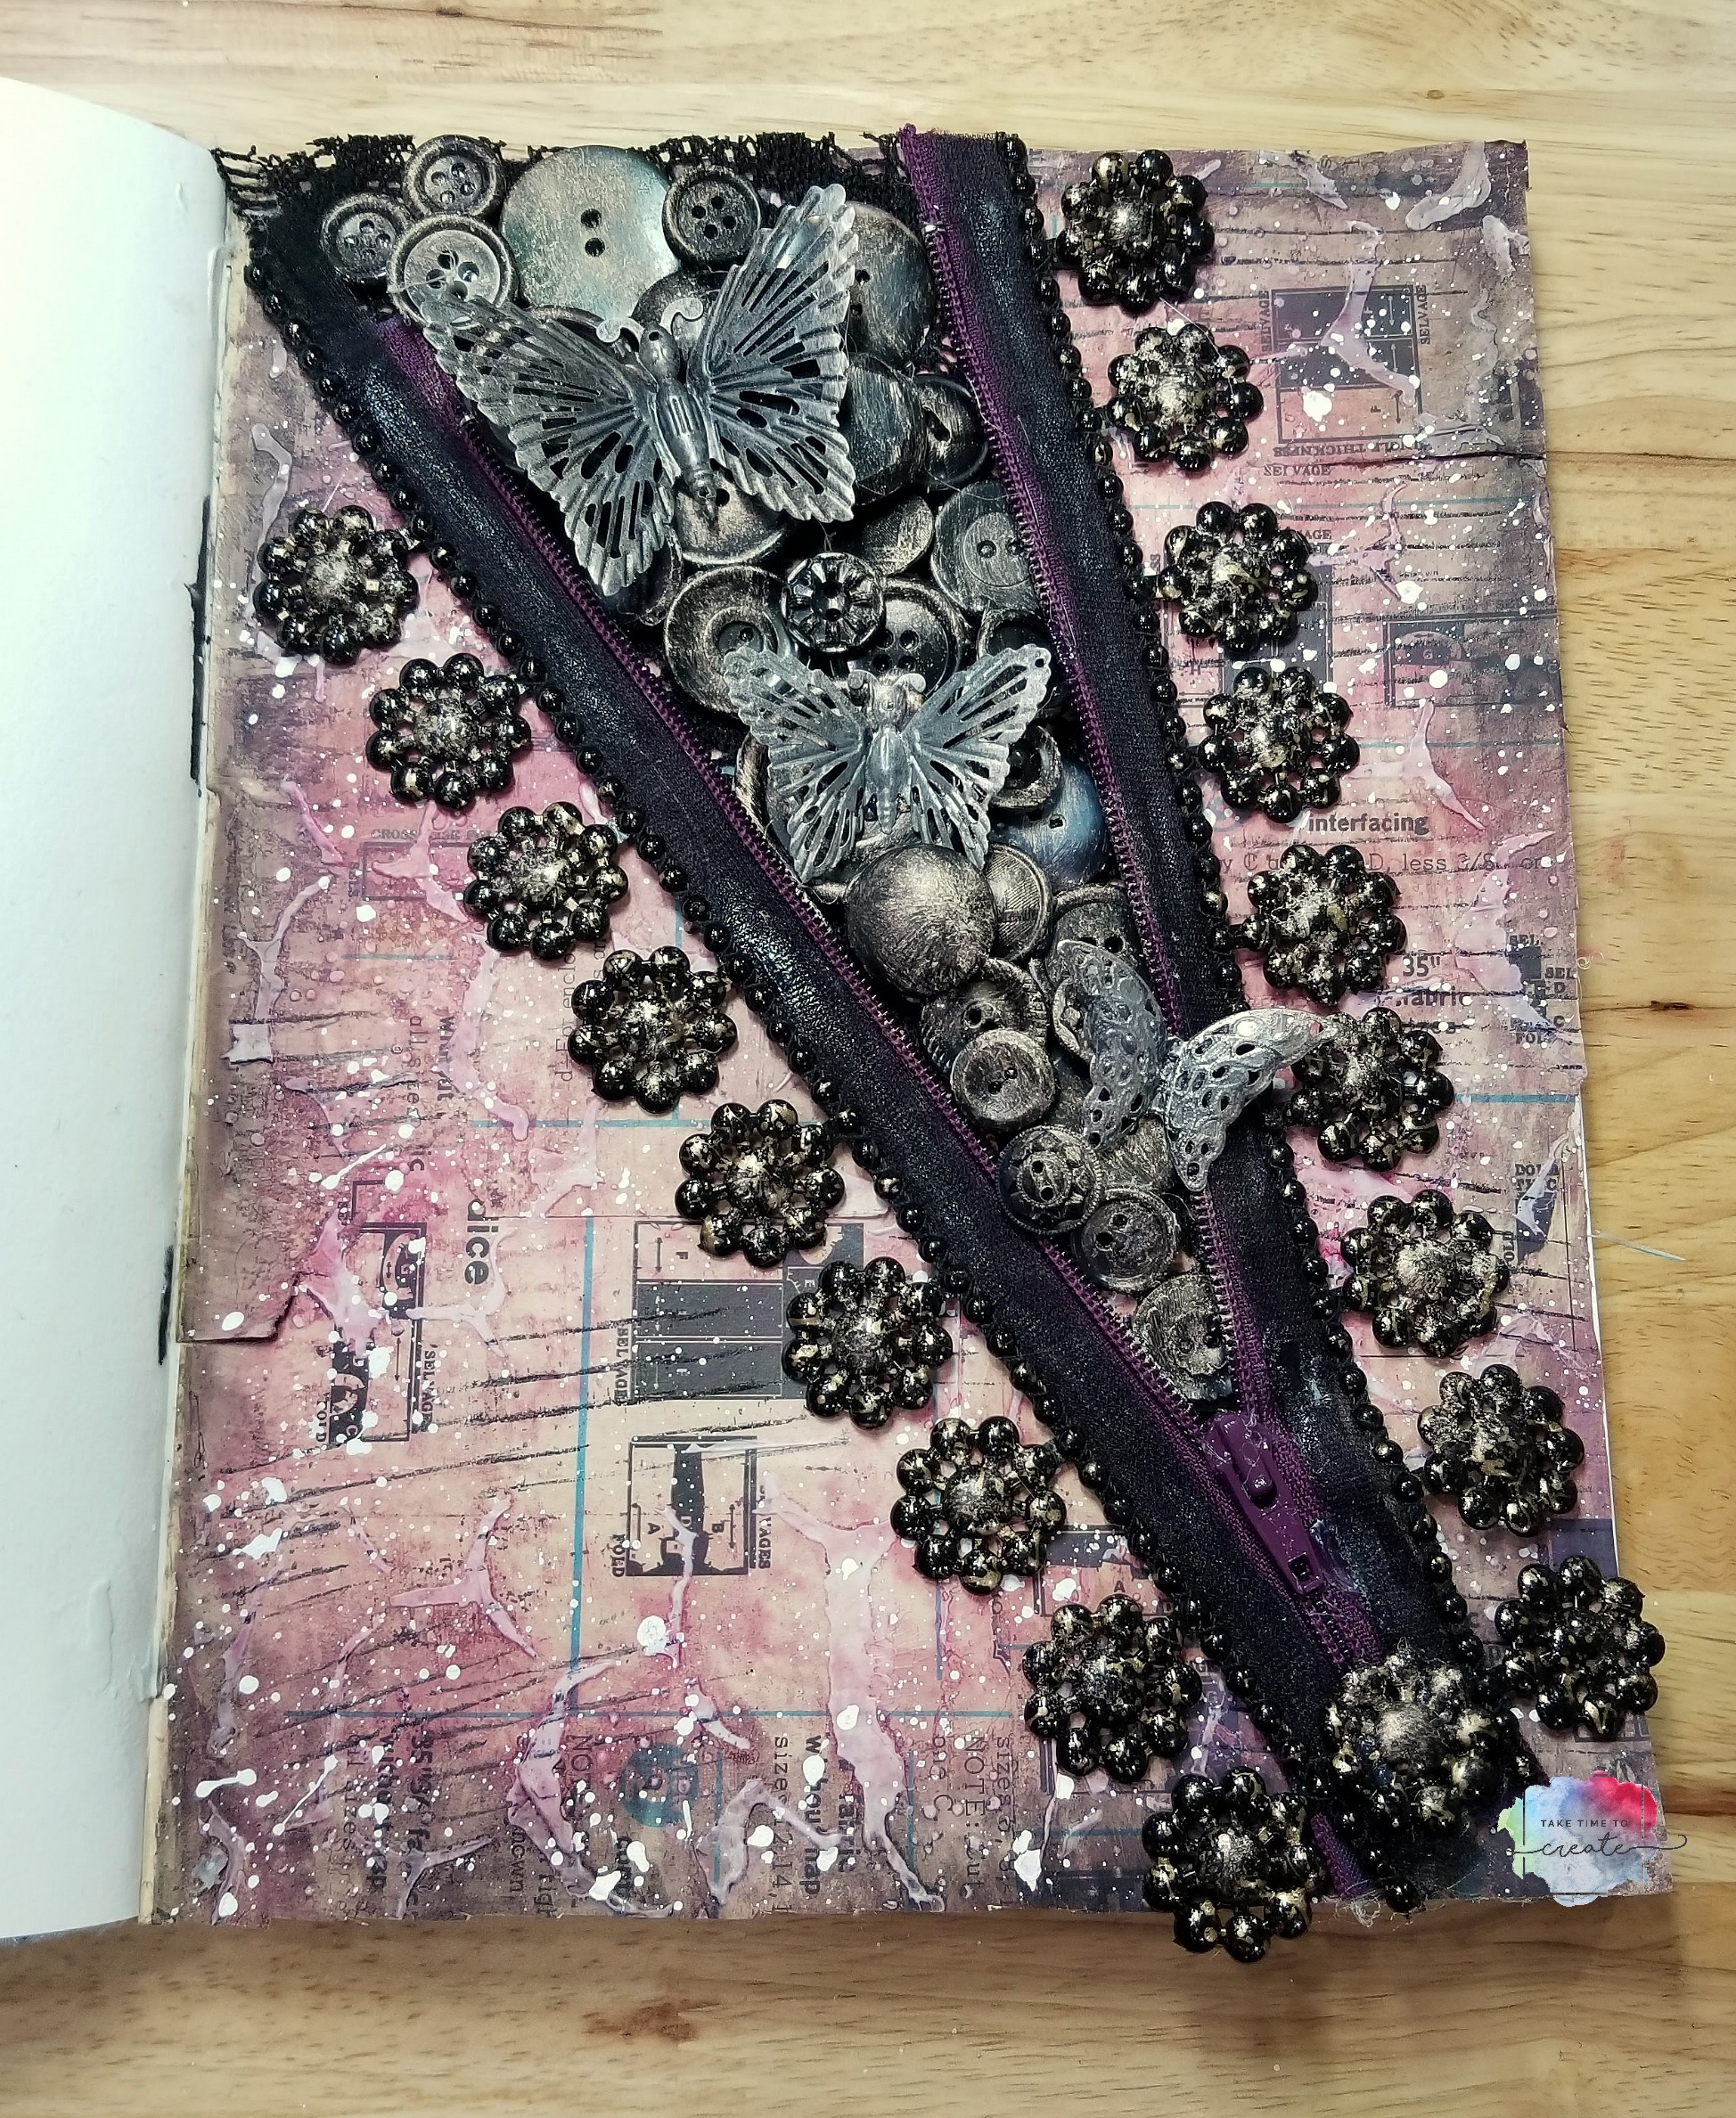
This was such a fun page to create! I added texture, paint, stamps, and other interest to the background. I played with my Dylustions paint for the background, I just love the way that paint applies.

Then I added the zipper, buttons, and butterflies to the page.  Then I painted everything with Finnabair waxes to create the aged look I was going for.

Zipper Art Journal Page

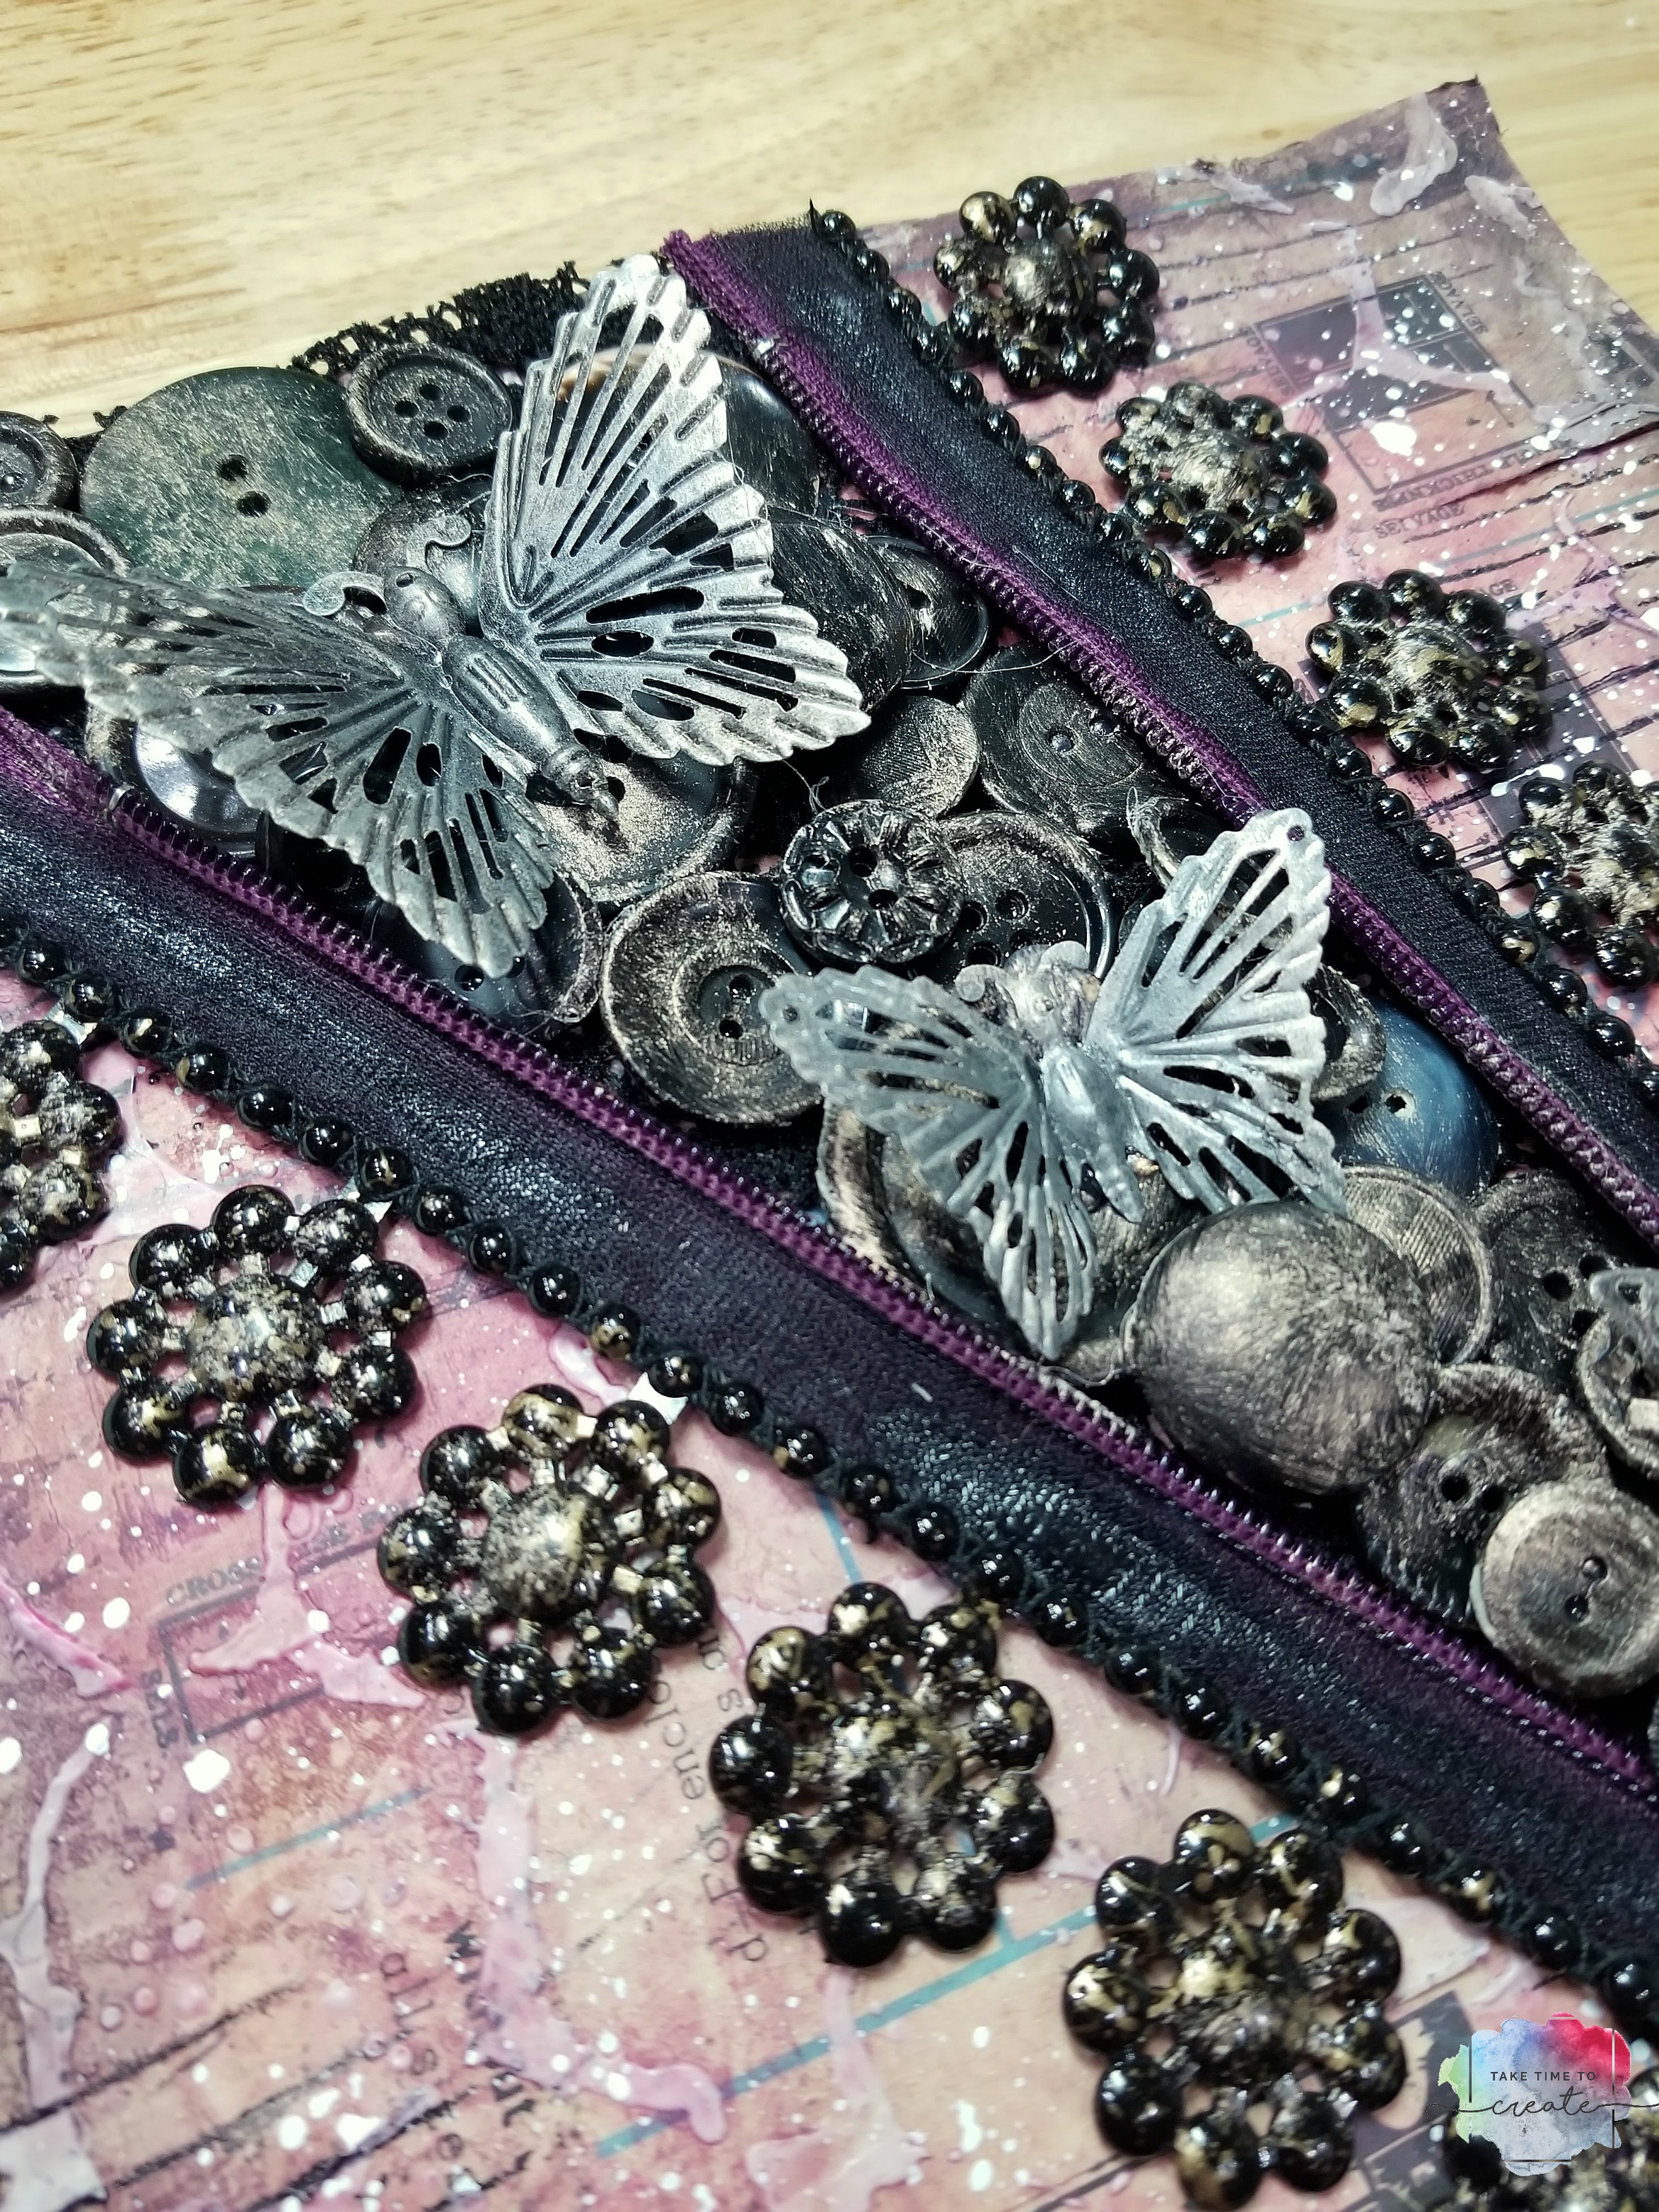
The only problem is that techniques like this can make your journal really bulky, lol. But I love when that happens because it just means that I am using my journal even more and doing even more creating! The bigger the better, lol.

Zipper Art Journal Page

I have to say I am still really loving my art journal group! I love working on different pages and trying new things. I can’t wait to see what next month will bring!

Also, don’t forget to check my events page to see when and where I am teaching, I would love to have you join me in my class!

Affiliate Links to products I used (or similar ones)

Ranger Journal: https://amzn.to/2A0ZjQ6
Dylusions Paint https://amzn.to/2IMwQR1
Zipper https://amzn.to/2E9miwt
Finnabair Mechanicals Butterflies https://amzn.to/2Eafuim
Finnabair Stencil https://amzn.to/2C3ZoUS
Finnabair stamp and stencil set https://amzn.to/2QEgvR3
Ranger Archival Ink https://amzn.to/2yaQv93
Finnabair modeling paste https://amzn.to/2ypTpGw
Finnabair Wax https://amzn.to/2C48jWi
pack of black buttons https://amzn.to/2y9MCBt

The post Zipper and Buttons Art Journal Page appeared first on Take Time To Create.


Fun Art Journal Page with an Ostrich in a Suit!

Hello Everyone!

I am still on an art journal kick, lol. I love that I can finish a page relativity quickly and I can practice new techniques and try out new mediums.  This page was especially fun! I found this old pic of a woman and an ostrich in a suit. I laughed when I saw it. I am not exactly sure what is going on but I knew I had to make a page around this pic.

I got this picture in a pack of papers and random items from Who Gives a Scrap. There was a ton of really cool items in the pack, including this picture. The woman does not look too happy, but the ostrich looks happy enough. I just love it, lol. I figured it might be in Paris, so that is why I added some French elements.


ostrich art journal page

I wanted to keep the journal a bit more neutral than I usually do, lol. So I kept with brown and teal and some neutrals. I also like to play with different textures, so I added paper, washi tape, metal, some cork, and a lacy stencil. All the various textures go together to make a fun, interesting page.

ostrich art journal page

And on this page I used Lindy’s Sprays. This is a relatively new product to me, and I am in love. The sprays are perfect for adding the right amount to color and there are a ton of ways to add the color. I love exploring new mediums and adding new elements to my art.

ostrich art journal page

Now I am excited to rummage through the rest of the papers and elements i picked up to see what other goodies are there!

The Post Fun Art Journal Page with an Ostrich in a Suit! appeared first in Take Time to Create.

Affiliate links:
Lindys Sprays https://amzn.to/2xSIGUq
Tim Holtz Scissors https://amzn.to/2DsNLcs
Finnabair stencil https://amzn.to/2QY2LSe
Finnabair Modeling paste https://amzn.to/2OeDYL5
Cork Shapes https://amzn.to/2N2daJh


Affiliate link disclaimer:
“We are a participant in the Amazon Services LLC Associates Program, an affiliate advertising program designed to provide a means for us to earn fees by linking to Amazon.com and affiliated sites.”

Ancestor Tribute Art Journal Page

Hello Everyone!

Recently I created another art journal page for the Sisterhood of the Traveling Art Journal! (This is the traveling art journal that I am a part of) If you have missed the explanation of the art journal  series you can see that post here- Sisterhood of the Traveling Art Journal.

The theme of this journal is cemeteries. This is a new theme for me, and I love expanding my creativity and seeing what I can do with a new theme. Rather than do a cemetery as a place I decided to a ancestor tribute art journal page to my Great Aunt Naomi who passed away in March. This seemed like the most appropriate way for me to express a cemetery.


For this journal page I wanted to be a little more subtle that I usually am. I know, big shock right, lol. I usually put everything including the kitchen sink on my journal pages, but this time I wanted to do a less is more theme.

ancestor art journal

I used her high school graduation picture and used that as my focal point (don’t use originals, this is just a print from Wal Mart). Once I knew my focal point the rest was easy to build upon.

I used lace, washi tape, Tim Holtz stickers and quotes, ripped book pages, Prima Marketing oil pastels, and Lindy’s Sprays.

ancestor art journal

I loved challenging myself by creating a simpler page. I love how it turned out and I think this is a perfect tribute to one of my favorite people on the planet.

ancestor art journal

This page has inspired me to create some additional pages that are in the simpler side, pages that showcase a photo and use a small amount of products rather than create a page that uses everything in my stash, lol. I am looking forward to the next page I create.

What do you do to get out of your comfort zone when creating?

Affiliate links:

The page Ancestor Tribute Art Journal Page appeared first on Take Time To Create.

Upcycled Mixed Media Tag Using Dollar Tree Cards

Hello Everyone!

I am excited to tell you that as of today the Dollar Tree will be selling Expression from Hallmark cards! Now, I usually like to make my greeting cards, but sometimes I am in a pinch and so I need a good place to purchase them, and the Dollar Tree really came through with these cards!

There are over 6,500 Dollar Tree stores nationwide and on August 30th every store will carry Expressions from Hallmark, $1 each and Heartline a Hallmark company, 2 for $1. With hundreds of new greeting cards to choose from, you can celebrate every moment with your friends and family without breaking the bank!

I received a pack of cards from the Dollar Tree and I have to say, they are wonderful. Great colors and designs and some glitter (of course I am a fan of glitter, lol) and they are printed on nice heavy card stock.

upcycled tag

They a few different varieties, like the Joyfully Yours line (that is the teal one on the right in the above photo)  Joyfully Yours lets family and friends express their faith in just the right way during holidays, special occasions, and moments big and small.

upcycled tag

I was please with the selection and I am excited to use the cards. You all know I am a big fan of upcycling and repurposing items in my art. Since the cards are on nice paper it is easy to reuse them and make cards and tags from old greeting cards.

upcycled tag

In the video at the beginning of the post I show you how to take the baby card and make this cute mixed media tag. I used some ink, stencils, scrabble tiles, bakers twine, and other elements.

upcycled tag

Such a cute little tag and easy to make and have on hand. You can do this technique for any occasion!

I was compensated for this post. This post also contains affiliate links and I will be compensated if you make a purchase after clicking on my links.

Dollar Tree Affiliate Links:
Expressions from Hallmark- https://tinyurl.com/ya8agy7n
Hot Glue- https://tinyurl.com/y8nw388p
Lace-https://tinyurl.com/yahjgdt3.

Amazon Affiliate links:
Versa Magic- https://amzn.to/2PnyvyB
Tag die cut- https://amzn.to/2NafZMN
Finnabair stencil set- https://amzn.to/2PR27p6
Finnabair Modeling paste- https://amzn.to/2wu09D7
Finnabair silicone brush- https://amzn.to/2PlieKn
Bakers twine- https://amzn.to/2N4kwjz
Mini clothes pins- https://amzn.to/2MZ8197
Scrabble Tiles- https://amzn.to/2MCRAzZ

The Post Upcycled Mixed Media Tag Using Dollar Tree Cards appeared first on Take Time To Create.


Watercolor Green Galaxy Art Journal Page

Hello Everyone!

I have really been enjoying watercolors! This art journal was an experiment with a green galaxy rather than a pink or blue one. I really like the way it turned out!


Watercoloring is so freeing and expressive! I love that you can do so much with a watercolor and you can create some really cool textures and images with watercolors.

For this galaxy I wanted to use some yellows and greens and dark grays to create this galaxy. That bright yellow in the center is so fun and exactly what I was going for

watercolor galaxy art journal

I don’t have the skills to paint a whale, lol so I used this really cute whale I had in my stash, just the perfect touch for the journal page. I used a stencil from the Dollar Tree to create a mandala effect and i think it ties it all together

The last piece to the journal page was for me to add a quote. My handwriting is not the best, lol, but I really thought this quote was perfect for the page.

watercolor galaxy art journal


I really love how this all came together! Art journaling is becoming one of my favorite activities, I love that is is the perfect place to play and experiment with new techniques and ideas!

Affiliate Links

The post Watercolor Green Galaxy Art Journal Page appeared first on Take Time To Create.

Art Journal Page- Travel Theme

Hello Everyone!

It is time for another art journal page! I am part of a group of artists, we call ourselves the Sisterhood of the Traveling Art Journal, lol. And what we do is everyone creates a page and then mails it to the next person on the list. Then when I get the next journal in the mail I add to it, using the theme they decided on. My journal is a travel theme, I love to travel so I figured this would be the best theme for my journal.

I am excited to see what people come up with and what their themes will be. I think this will take over a year to complete, so it is a long term project. I will share the pages when I get the next journal in and I will do tutorials on the pages I create.

I attached the video where I explain how I created my first page.

I did a generic travel page rather than an individual place or country. I thought this would really show my love of travel, no matter where I go, or who it is with.

art journal travel page

I used a ton of products to create a layered look, all surrounding the focal point.  I really enjoyed going through my stash and finding vintage looking papers, stickers, and embellishments.


art journal travel page

The journal I picked is the Dylusions art journal. It is the perfect size and easy to transport. I added a cover to protect it and a pocket in case someone wants to add goodies to send to the next person.


art journal travel page

Affiliate Links:


The post Art Journal Page- Travel Theme appeared first on Take Time to Create.

Faux Leather Art Journal Page

Hello Everyone!

Art journaling is quickly becoming one of my favorite activities! I love creating quick little projects that help me grow and expand my abilities. I have this faux leather art journal page that I wanted to share with you.

I really wanted to start with a faux leather look for the background. So I took the tissue paper inserts from old patterns and Mod Podged that onto the page. Once it was dry I painted it all in browns and yellows to make it look like leather.

You can use different colors to create different looks, and you very the “wrinkly-ness” of the tissue paper to create different looks as well.

Faux leather art journal

Once everything was dry I started to add all the details. I wanted the tiny book to be the focal point. You can see the video tutorial for the book here: Tiny Book

That tiny book was so much fun to make, and the perfect addition to my page.


Faux leather art journal

I added string, torn up old book pages, doilies, chip boards, words, and butterflies. I added color with Finnabair’s mica flakes and a little water, that was really fun because it brought out the texture of the tissue paper and brought the page to life.  Once everything was dry I light sprayed everything with some cheap hairspray to help seal the mica powders (otherwise it could all be brushed off)

Faux leather art journal

There you go, a very easy faux leather journal page. I am thinking about doing this same technique on an old trunk. What else can I faux leather?

Affiliate links:

This post also contains affiliate links and I will be compensated if you make a purchase after clicking on my links.
Finnabair Black Cherry Mica powder-https://amzn.to/2JZoHfV
Finnabair copper Mica powder-https://amzn.to/2K8qH1e
Finnabair Yellow Mica Powder-https://amzn.to/2K7WlvV
Heavy White Gesso-https://amzn.to/2McF05B
Butterfly Stickers-https://tinyurl.com/y79av9qn


The post Faux Leather Art Journal Page appeared first on Take Time To Create.

Easy Fabric Frame DIY

Hello Everyone!

Today I have a fun, easy fabric frame project for you. I am still on a fabric kick, I have so many ideas using fabric and I can’t wait to share them with you.


For this project I used fabric I got from Annie’s Fabric Club. This is not sponsored, but I really like the fabric I got, and I am looking forward to next month’s fabric.  Here is the link to the club if you are interested in joining: https://www.creativequiltersfabricclub.com/

This is such a fun, easy project that only takes a few materials

Materials (with affiliate links):


Instructions:

Gather all your material including the fabric and your frame. The frame should have a wide enough border that gives you plenty of room to add fabric. The color of the frame doesn’t matter a lot because you will be covering it in fabric.

To get started cut your fabric in strips that are a little wider than your frame. Spread heavy gloss gel on the frame. Coat your fabric strip in Gloss gel and add to frame, crinkling it up as you go. While everything is wet take the time to get all the wrinkles and texture you are wanting.

Fabric Frame

Take your time and make sure it looks like what you are going for. Before you let your frame dry clean up the edges and back with a baby wipe. Let the frame dry. Once dry you can leave it at this step if you want, or you can go on to the next step which is adding paint.

Fabric Frame

After the fabric dried (leaving it over night is best) I dry brushed on a Finnabair Metallique and a Finnabair Sparks paint to add some detail and sparkle. I really love her paints and they add that bit of interest that I am looking for. .

And that is it, the frame is done! These are so much fun and easy to make, I think I will be making a lot more as gifts this year.


The post Easy Fabric Frame DIY appeared first on Take Time To Create.


Dollar Tree DIY Easter Decor

Hello Everyone!

Can you believe that Easter is just right around the corner? Where is this year going? Anyway, I have a fun and easy Dollar Tree DIY Easter Decor project for you.

FTC Disclaimer:

I was compensated for this post. This post also contains affiliate links and I will be compensated if you make a purchase after clicking on my links.

So, to do this project you will need a few supplies, most of them can be picked up at the Dollar Tree.

Materials (affiliate links)

Bulk Special Moments Frameless Canvas Art, 8.5 in. atcom

from: DollarTree

Bulk Iridescent Easter Grass, 1.75-oz. Bags atcom

from: DollarTree

Bulk Colorful Fillable Metallic Plastic Easter Eggs, 6-ct. Packs atcom

from: DollarTree

Instructions:

First you will want to paint your canvas. I used a gold Folk Art paint. You can use any color you want, but it will take a few coats to cover up the canvas.  You might not be able to find the exact canvas I am using, but look around they seem to always have some great choices for canvases, and you might want to experiment with different sizes.


Dollar Tree Easter DIY

Once your paint is dry you can add the grass. Take as much as you want and shape it into a nest shape and hot glue it to the canvas.

Dollar Tree Easter DIY

Then you add your eggs, add a single one in the middle, or a grouping of 3. If you can’t find any eggs look around for another spring related item that would fit on your canvas. Be creative and experiment with your center piece.


Dollar Tree Easter DIY

These are just so cute when they are all finished. These would look great in a grouping of 3. Also, this would be a fun project for kids or a church group. There are so many great options for these canvases.

Dollar Tree Easter DIY


What Easter project are you working on?

The post Dollar Tree DIY Easter Decor appeared first on Take Time To Create.


Easy DIY Thank You Cards

Hello Everyone!

Thank you cards are something we all need to have and these easy DIY cards are perfect for almost any occasion. And since I am obsessed with watercolors, these are right up my alley 🙂

These would be great gifts for new homeowners, newly weds, or graduates.


Materials (Affiliate Links):

  • Water Color Postcards: http://amzn.to/2EmGb2S
  • Van Gogh Water Colors: http://amzn.to/2GaSfRs
  • Dylusions Ink: http://amzn.to/2suEniH
  • Washi Tape
  • Thank you stamp

Instructions:

This first card is super easy and looks really cute. All you do is spritz the watercolor card with water and then lightly spray 2 different Dylusions ink sprays.  Move the card to blend the colors in the middle, then add some washi tape at the bottom and stamp Thank You in the middle and you are done! Quick and easy and they look great!

Watercolor thank you cards

This next card is also super fun and easy to make. Which is great because you can make a lot of them ahead of time and have them ready! For this one take a wet paint brush and paint with water in a blob type shape. Then add some watercolors into the blob, you can mix the 2 in the middle and blend them together. Add splashes and a stamped Thank You to the middle and some washi tape on the bottom. Now you have another Thank you card for your stash.

Watercolor thank you cards

This last card takes a little longer, but it is worth it. All you do is watercolor the sky, starting with the lightest color and work your way darker.  Blend carefully, you don’t want to create mud.  Once the sky is dry it is time to paint the mountains. I just used black acrylic paint to make the mountains and then I lightly drew in the trees with the same paint. Now you have a cute sunset card that is perfect for all occasions.

Watercolor thank you cards


Watercolor thank you cards

There you have it, 3 easy watercolor Thank You cards.

The post Easy DIY Thank You Cards appeared first on Take Time To Create.

« Older posts Newer posts »

© 2024 Take Time To Create

Theme by Anders NorenUp ↑

Follow

Get the latest posts delivered to your mailbox:

%d bloggers like this: