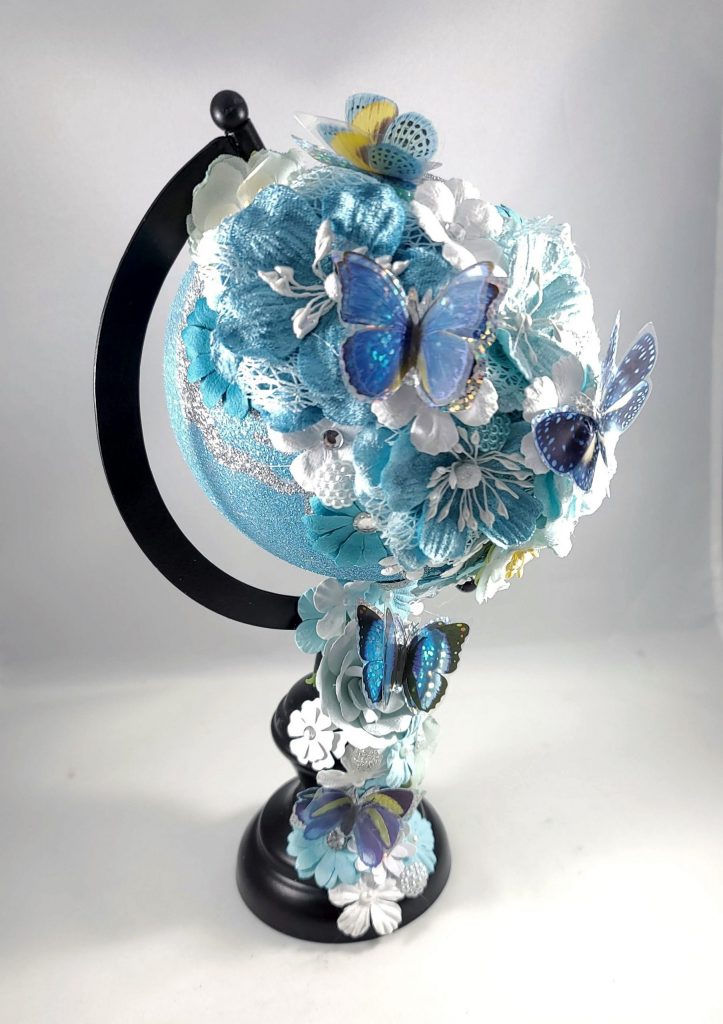
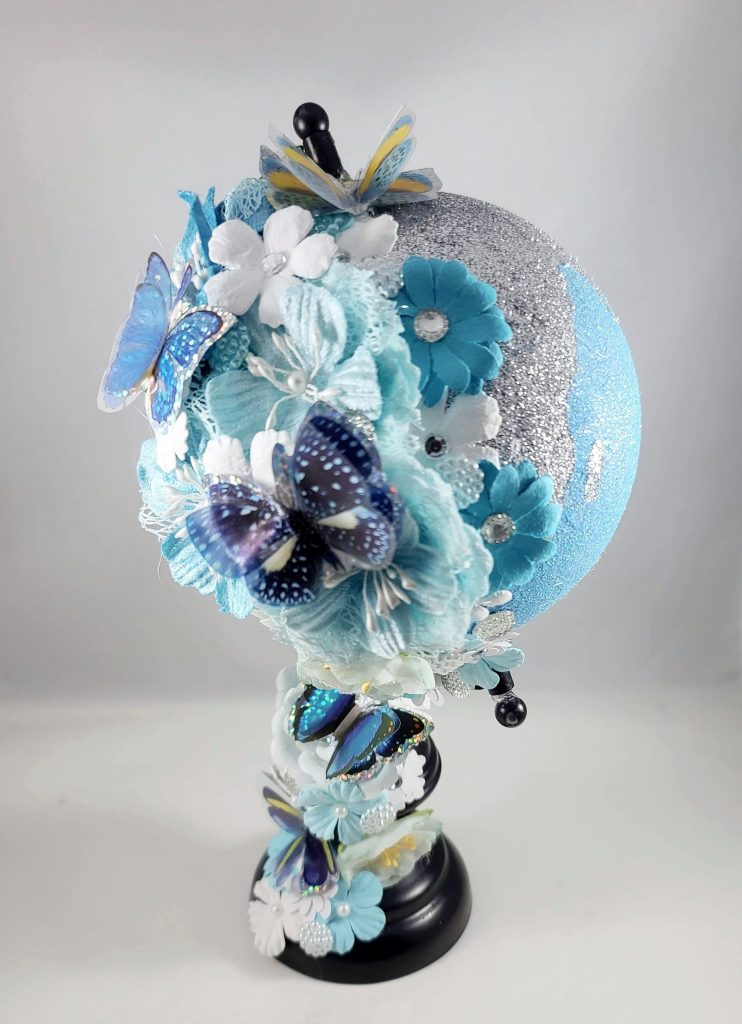
Have you ever had a project that just didn’t turn out exactly how you thought it would? That is what happened to me with this globe. I really didn’t like how the text looked (there was a quote on the globe that said “Follow that dream”) so I decided to add flowers and mixed media elements.
Being adaptable while creating is imperative. Things don’t always turn out how we envision them, but if you are adaptable then you can create something even better.
I have to say, I am even more pleased with the flowers and butterflies that I added. I am glad that I could change my direction and try something different. The result is even better than my original vision.
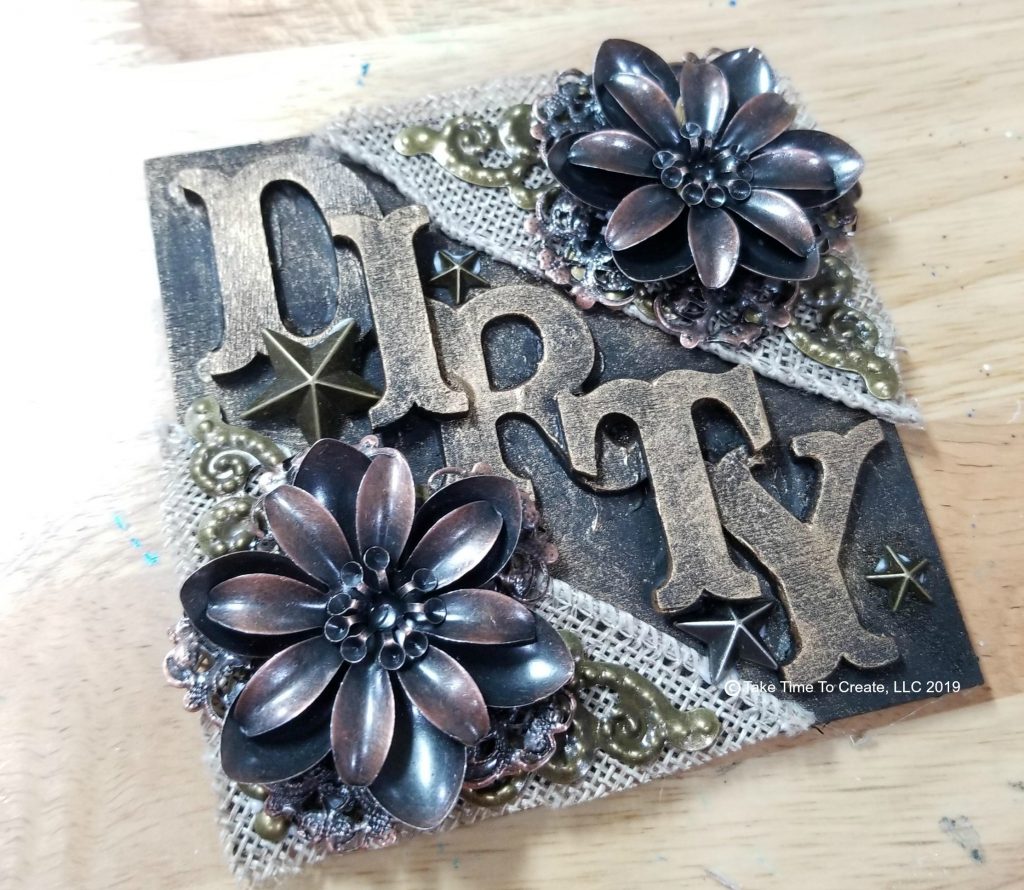
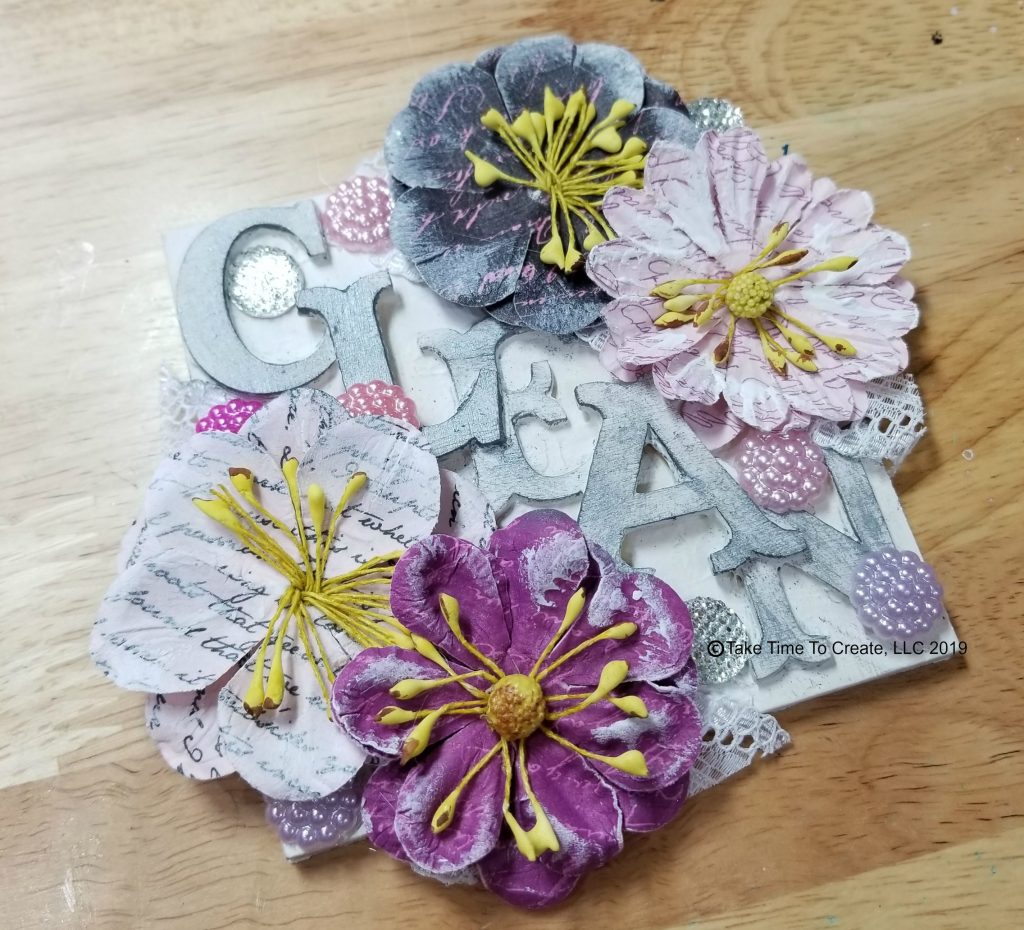
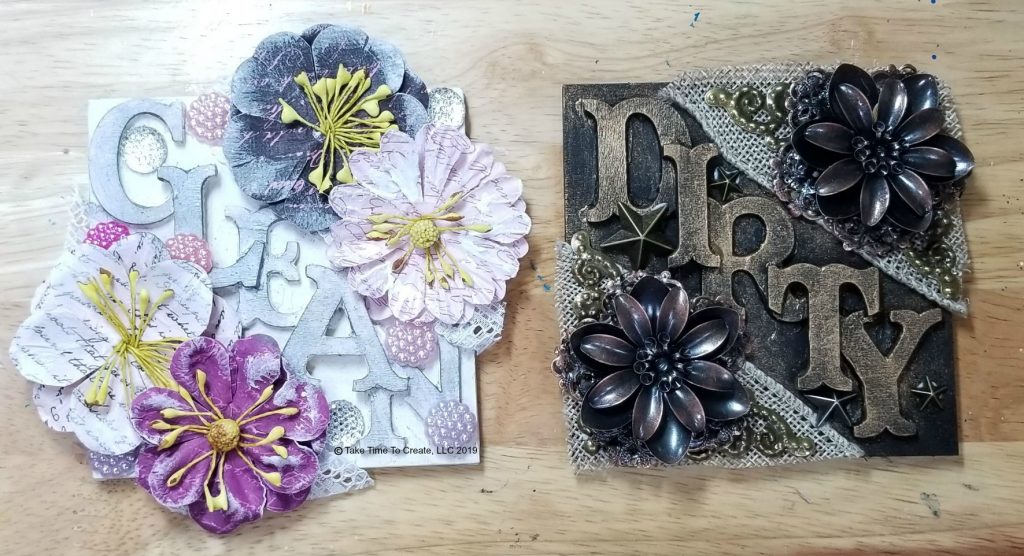
What do you do when your clean/dirty dishwasher signs are destroyed by your cat? Well you make a new one, of course, lol. This time, instead of a simple paper sign, I decided to make a mixed media sign.
These were super fun to make and they look great in the kitchen.
Dirty Dishwasher Sign
The dirty side was fun, I painted with black gesso and added metal flowers and elements along with some Finnabair waxes. I like how it looks a little dingy and grungy. Perfect for the dirty side.
Clean Dishwasher Sign
I wanted the clean side to look bright and clean looking. So I used white gesso and pretty Prima Marketing flowers to create a bright sign.
Clean and Dirty Dishwasher Signs
I adhered them together with a ribbon in the middle and hung it on my kitchen all above the dishwasher. I think this was the perfect solution to let everyone in the house know what is going on with the dishwasher.
I love how this turned out! I think I will make a few more signs for around the house.
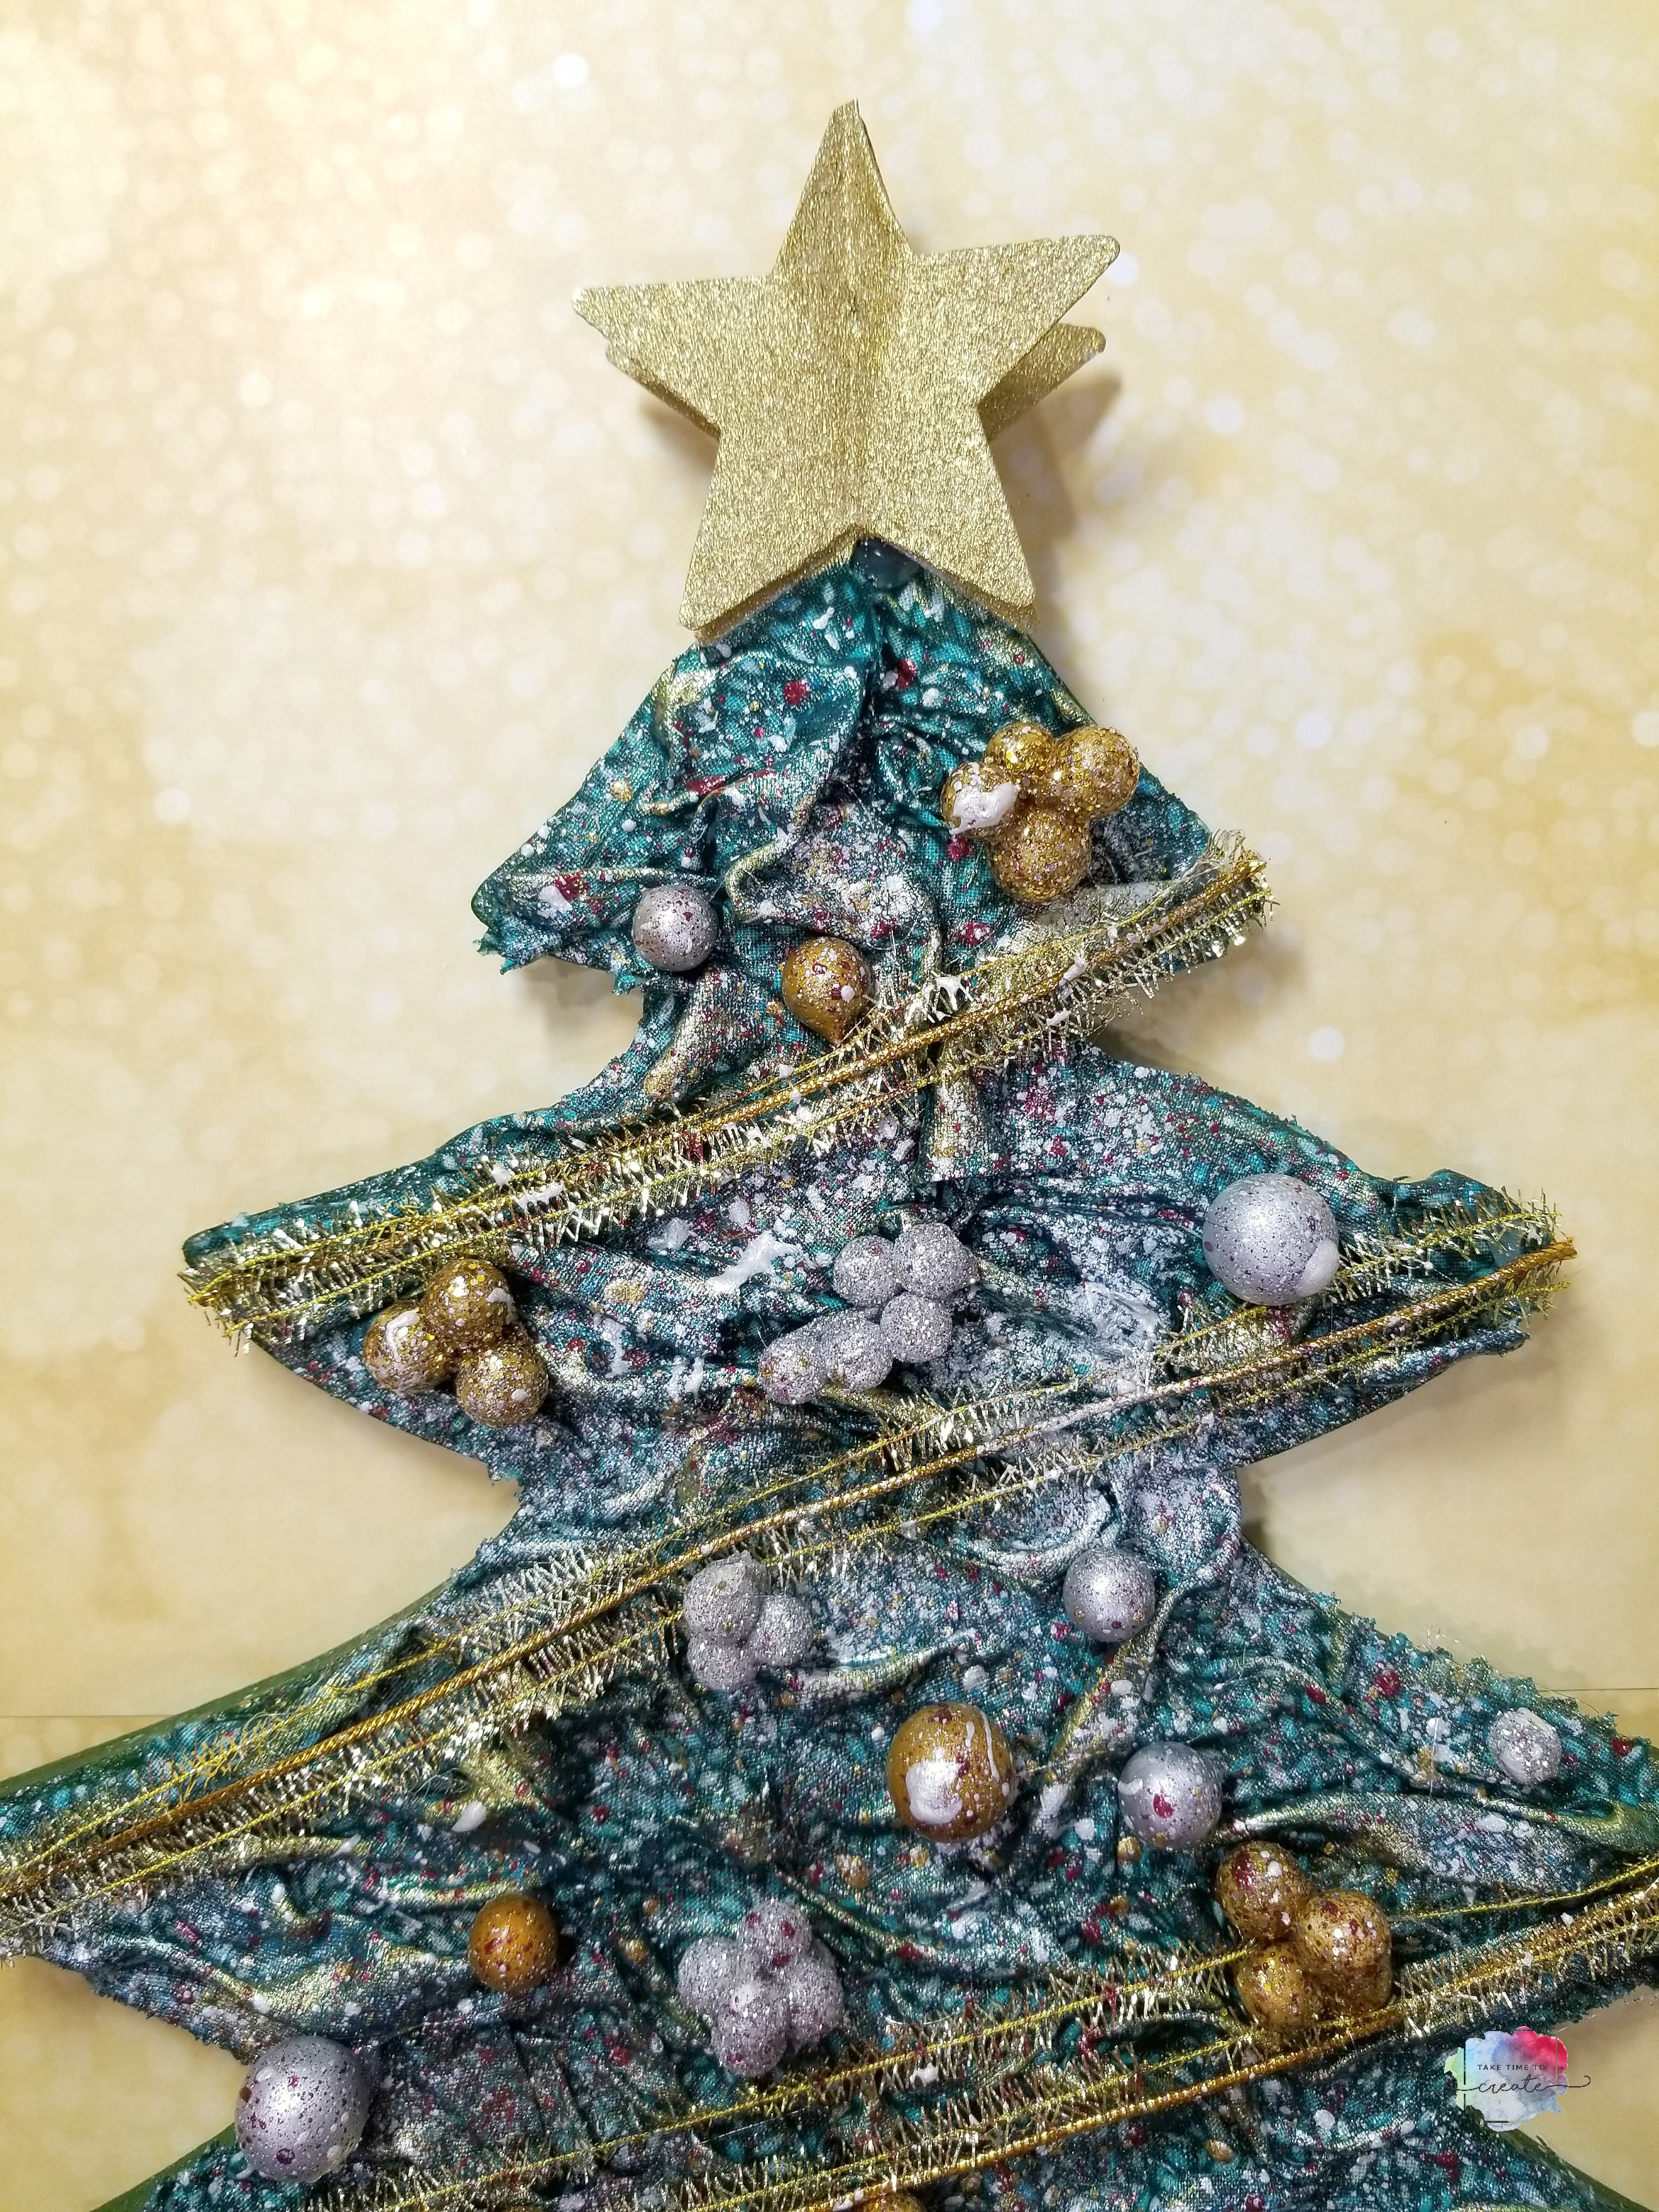
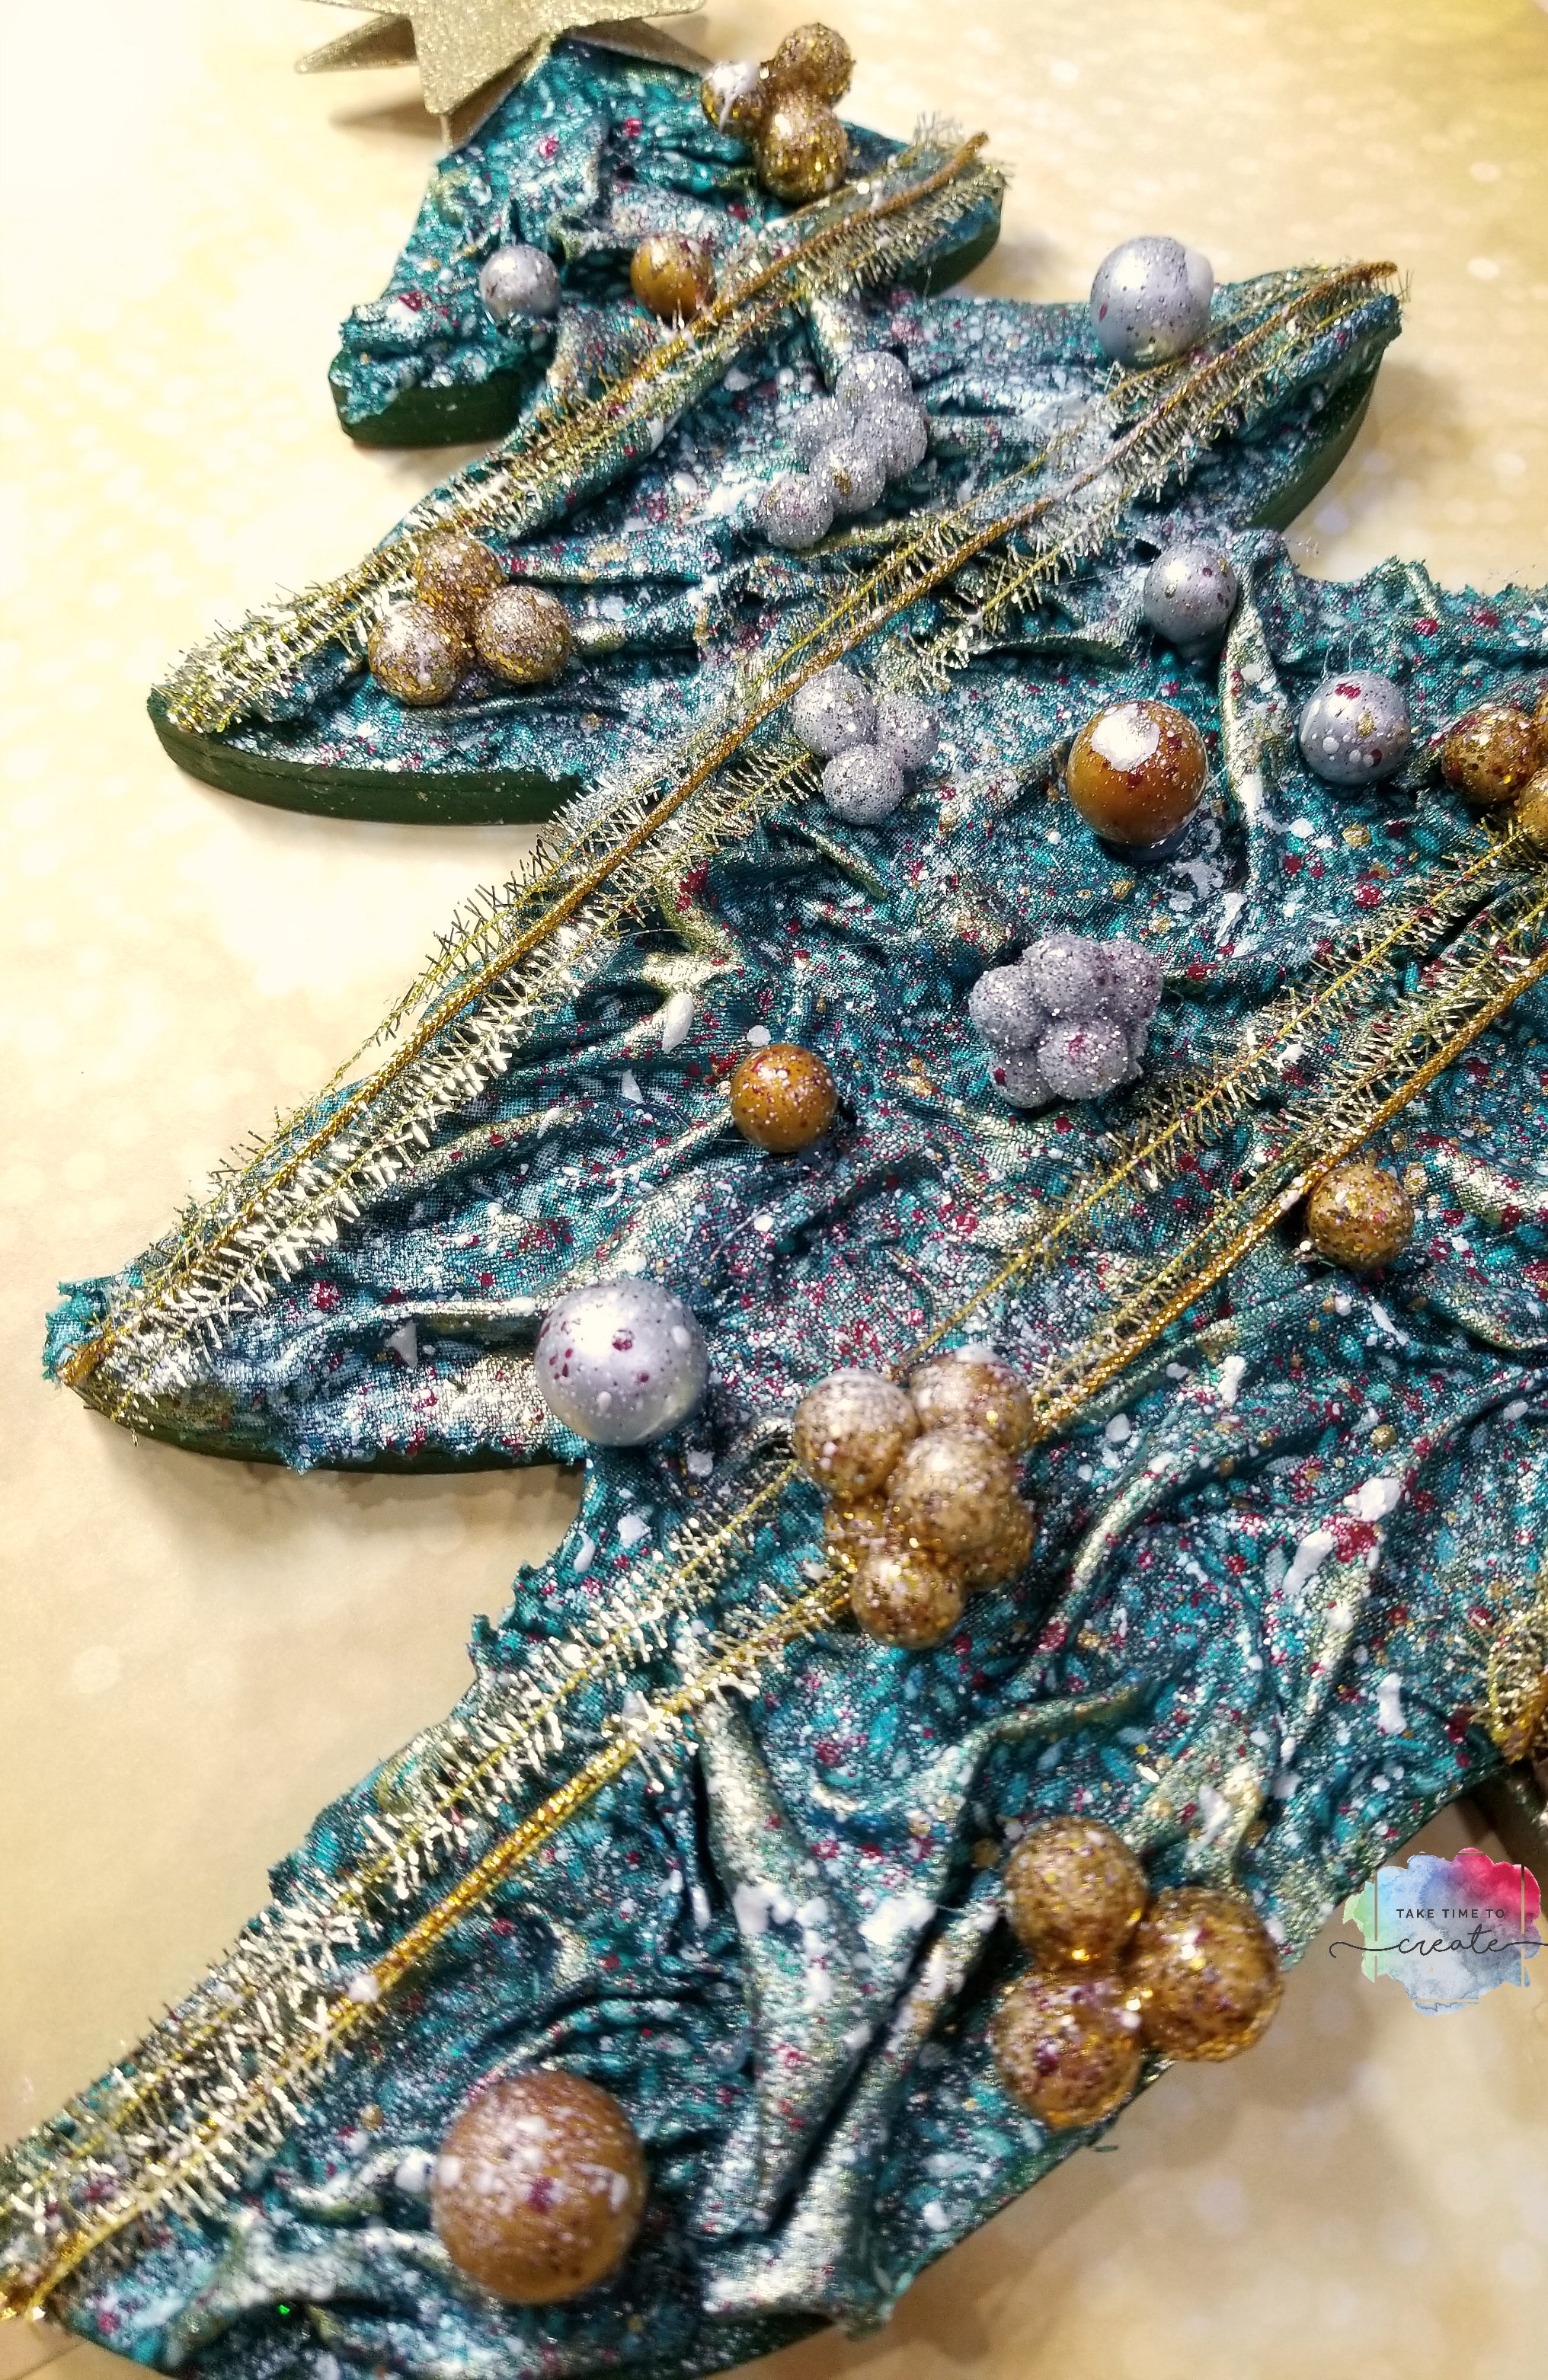
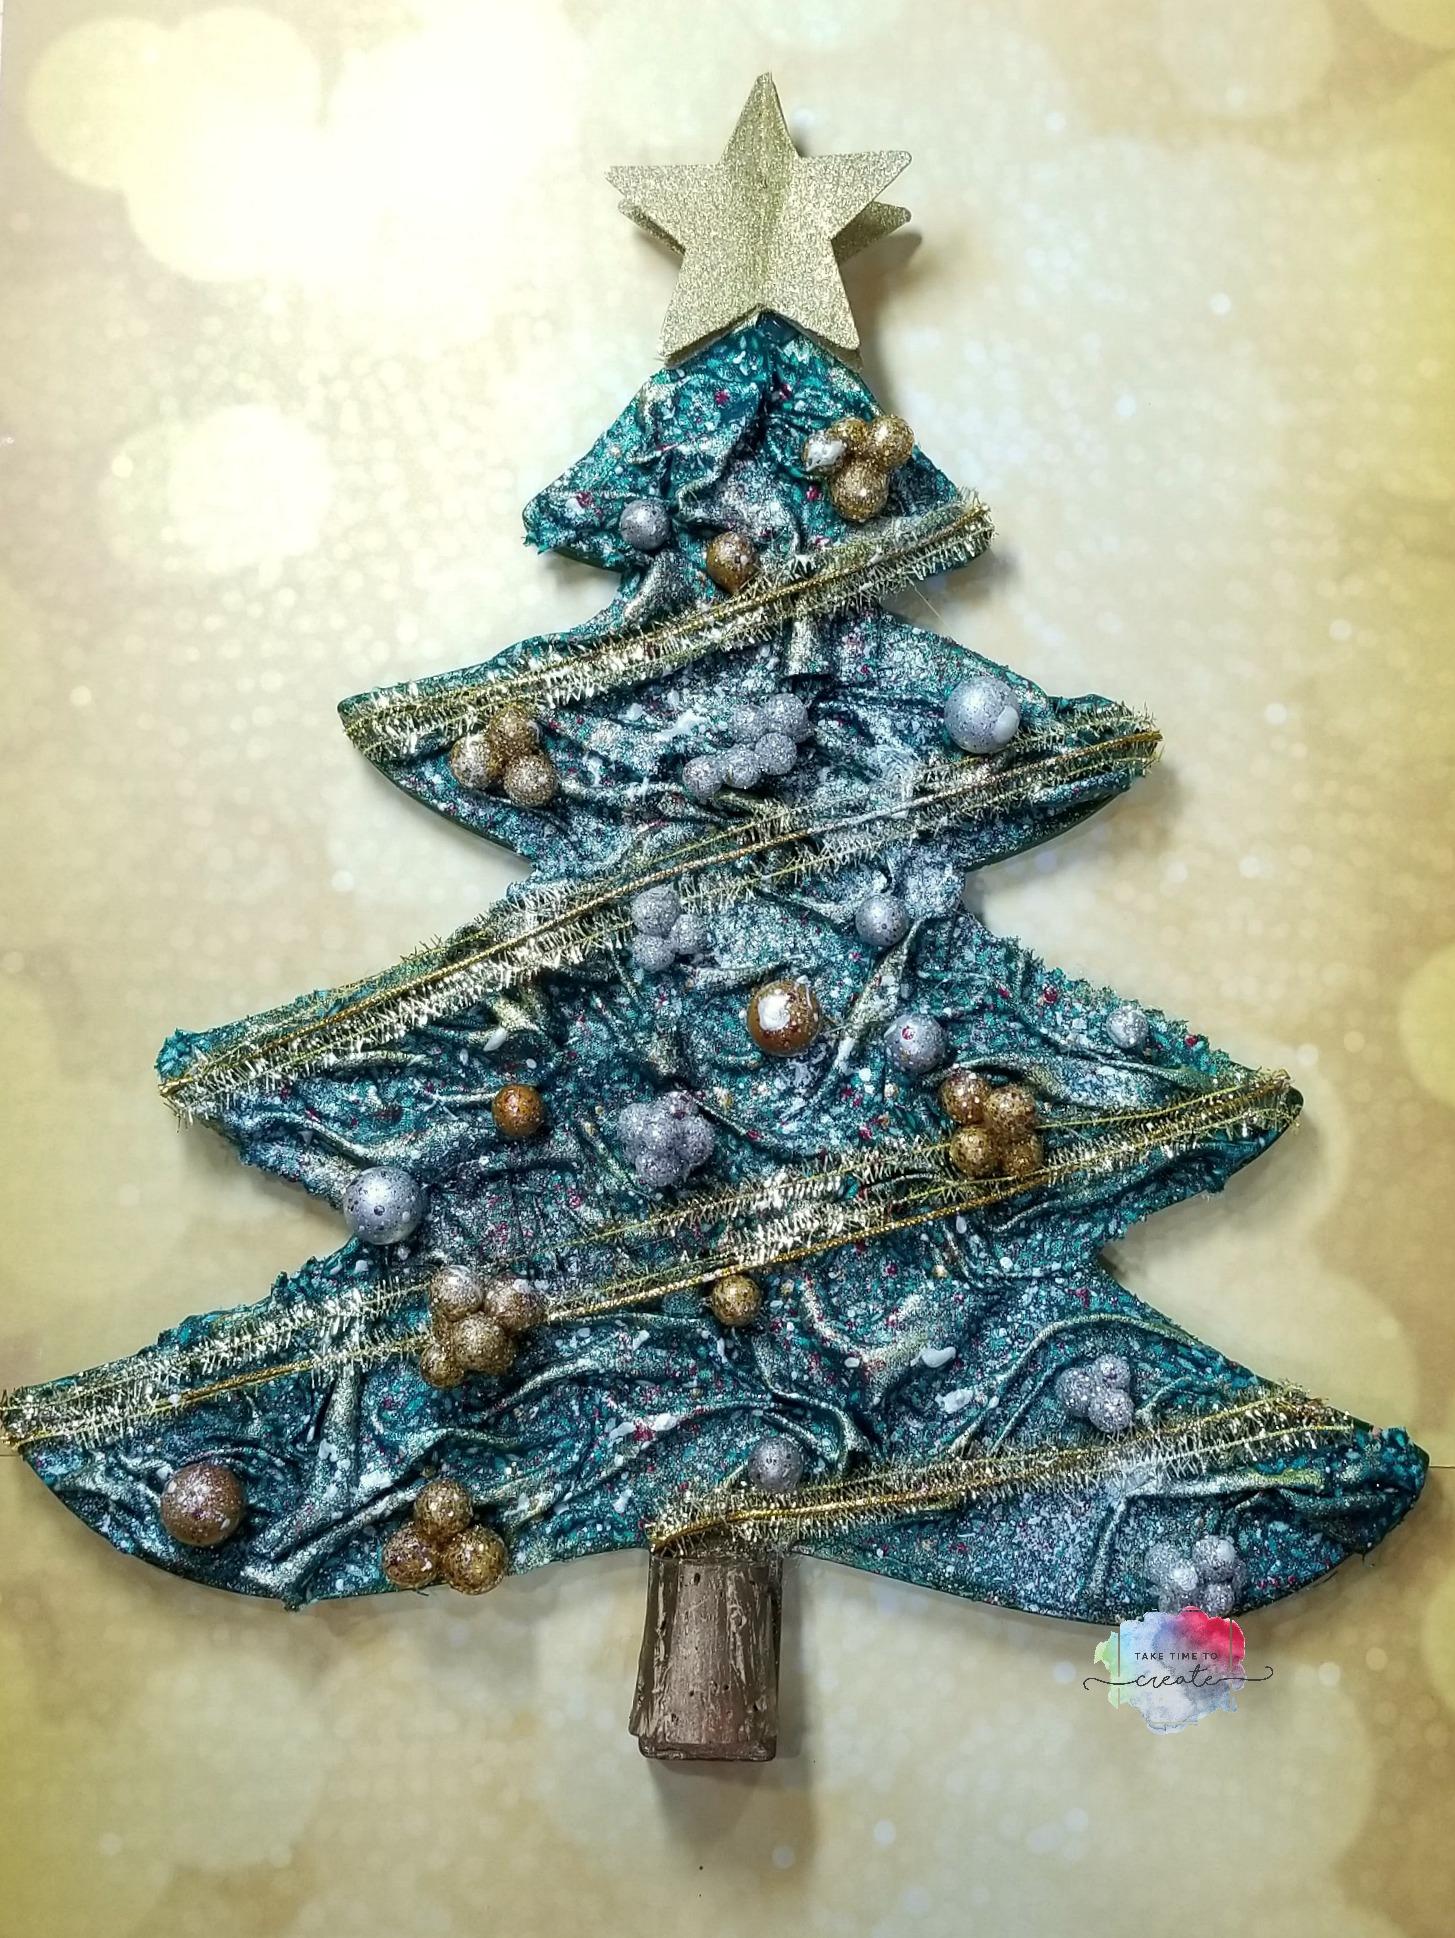
Christmas is fast approaching and now is the perfect time to make some new Christmas decor!
I found this chipboard tree at my local creative reuse center and I knew it would be perfect for a fabric mixed media project. It is a Paper Studio brand, I think you can find similar items at your local craft stores.
The first layer is paint. I wanted to make sure the tree was green just in case the fabric didn’t cover it all. Then I added the fabric layer. This added a lot of texture and interest.
Once the fabric was dry it was time to start painting. I have found that these fabric mixed media projects work best if you let the fabric dry overnight rather than using a heat tool.
Once the fabric is dry it is time to add paint. I dry brushed on a few of the Finnabair Metallique and Sparks paint. Then I added the decorations. I used items I found at the Dollar Store and adhered them with hot glue.
Once that was all dry I flicked paint on with a toothbrush. I love how it turned out! This was a lot of fun to create and it will look great in my home. What decor projects are you working on?
Affiliate links:
Liquitex super heavy gel- https://amzn.to/2Px3flj
Liquitex Heavy Gel-https://amzn.to/2RXTQ2O
Gloss Mod Modge-https://amzn.to/2PZxr7R
Corks-https://amzn.to/2zfepkg
Finnabair sparks-https://amzn.to/2DHSq9F
Finnabair Metallique-https://amzn.to/2DHqjXX
Finnabair Paint brushes-https://amzn.to/2TjbgrZ
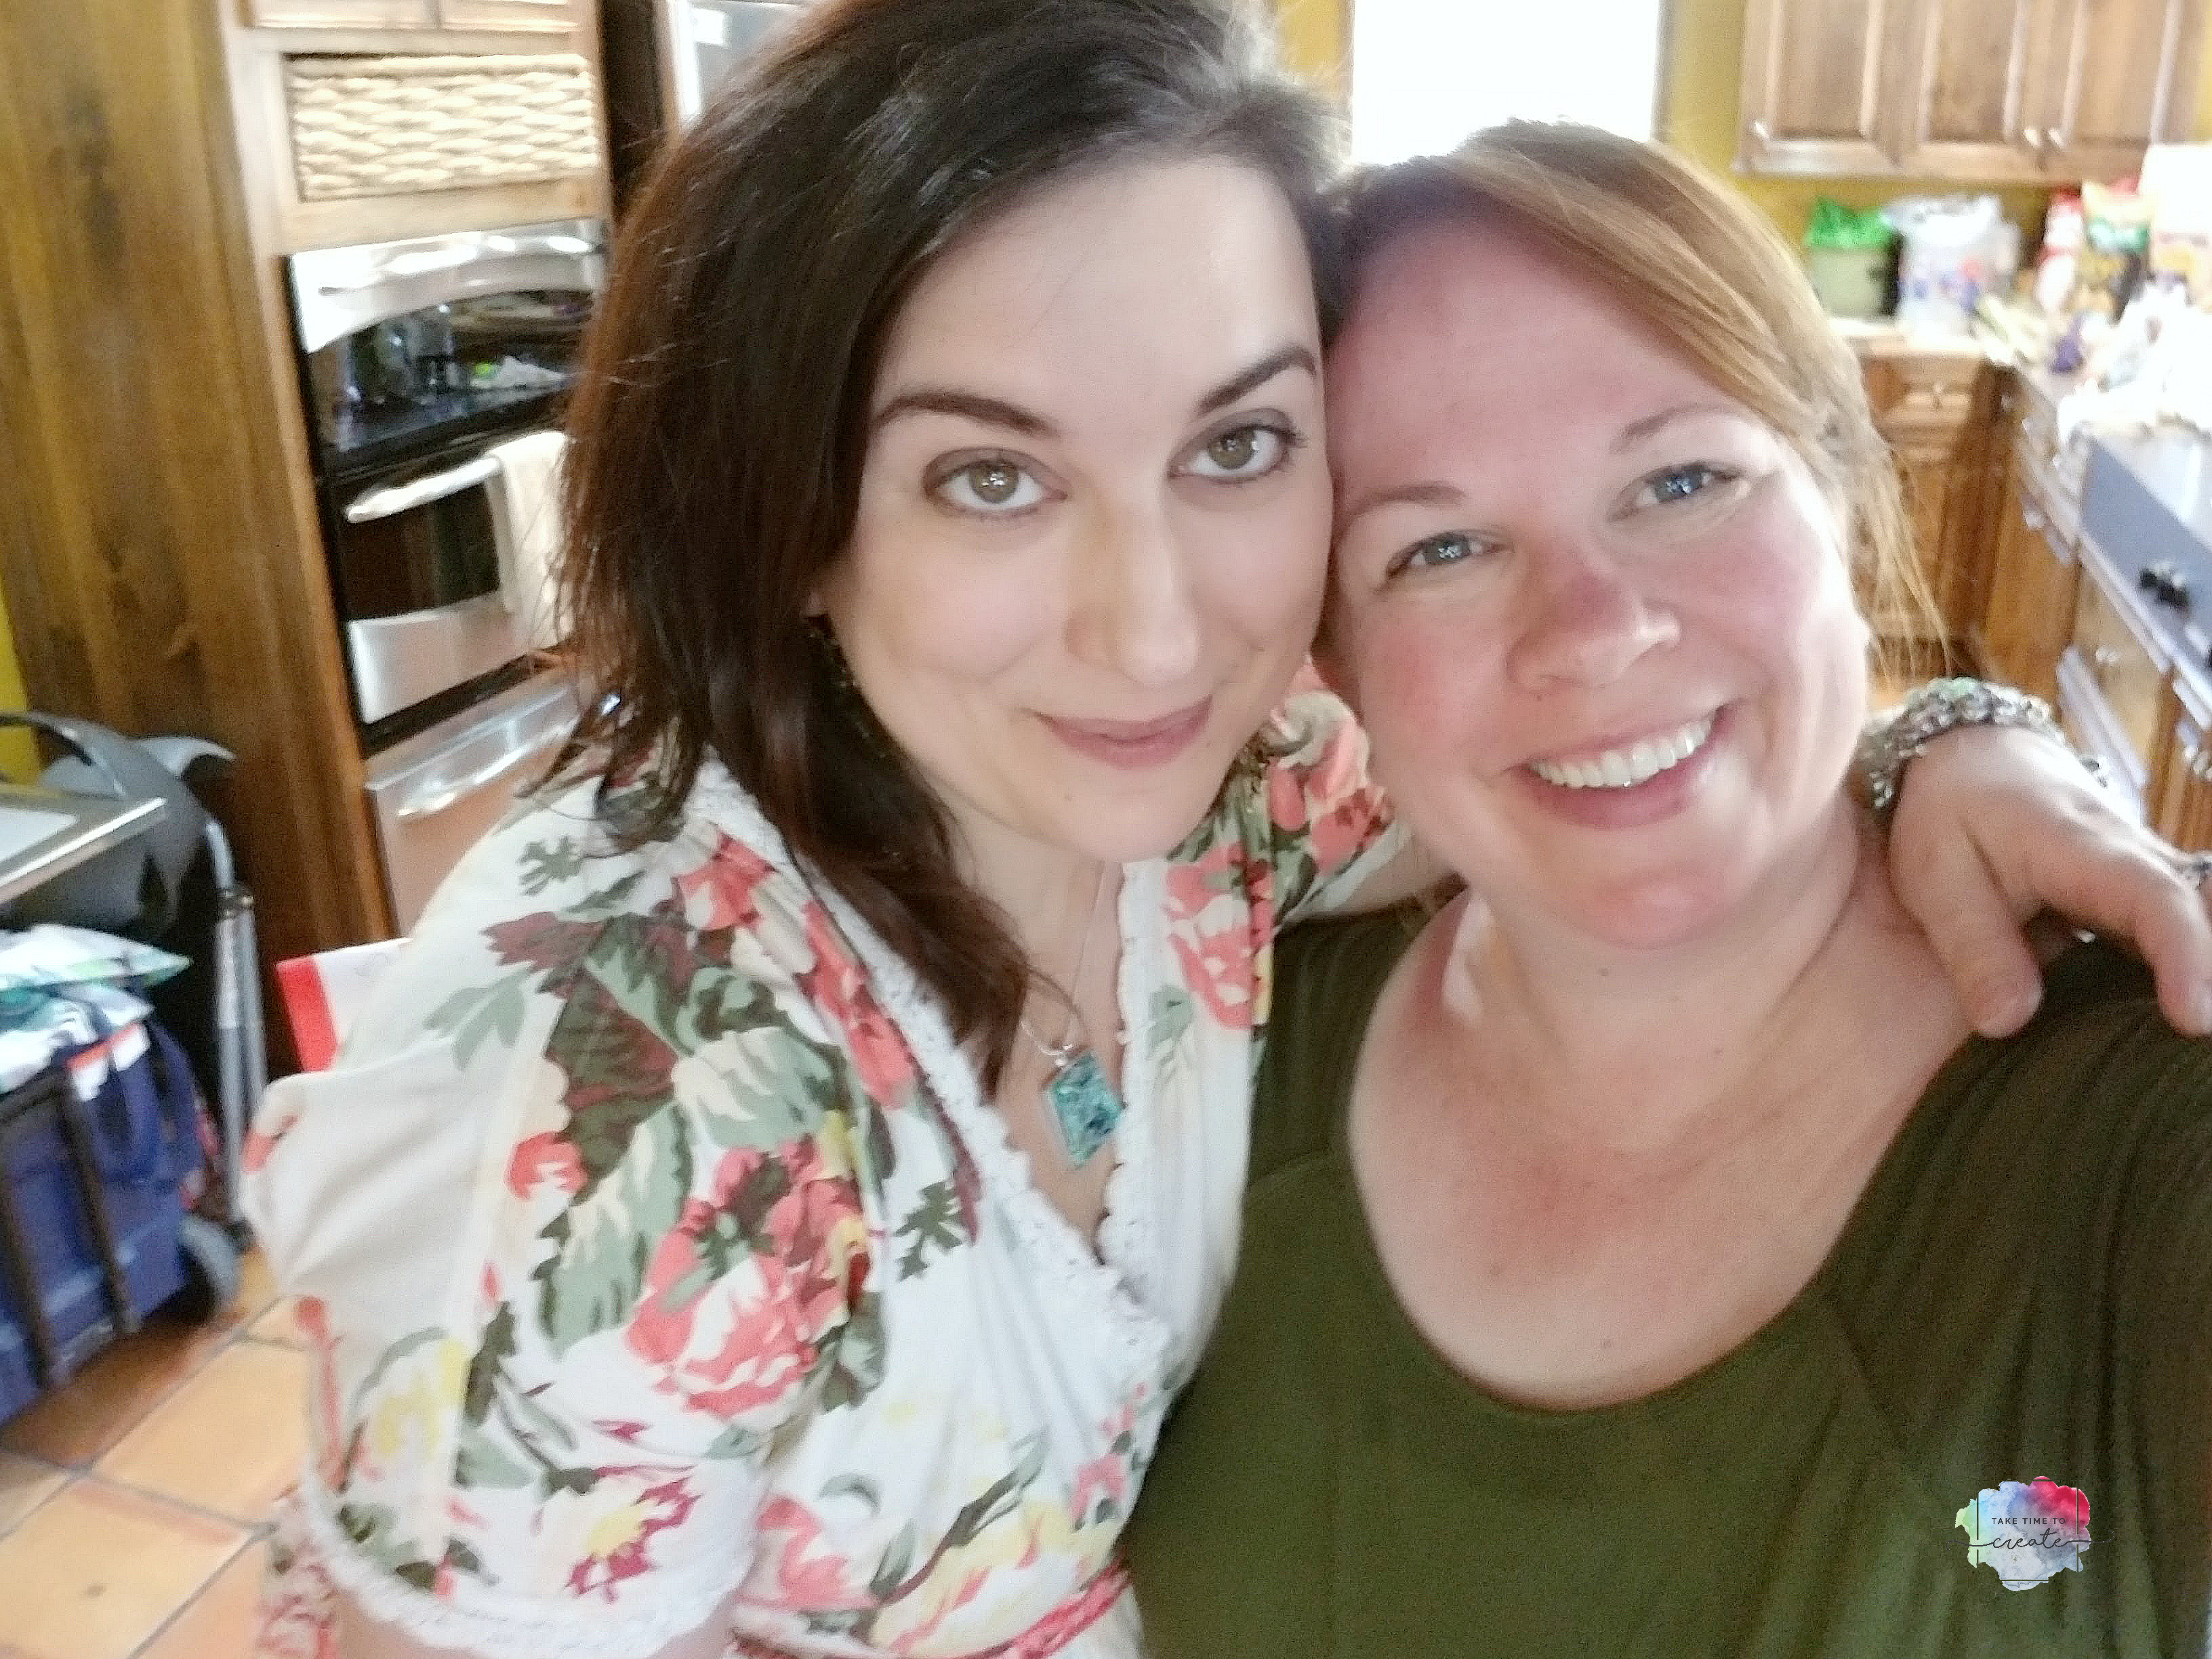
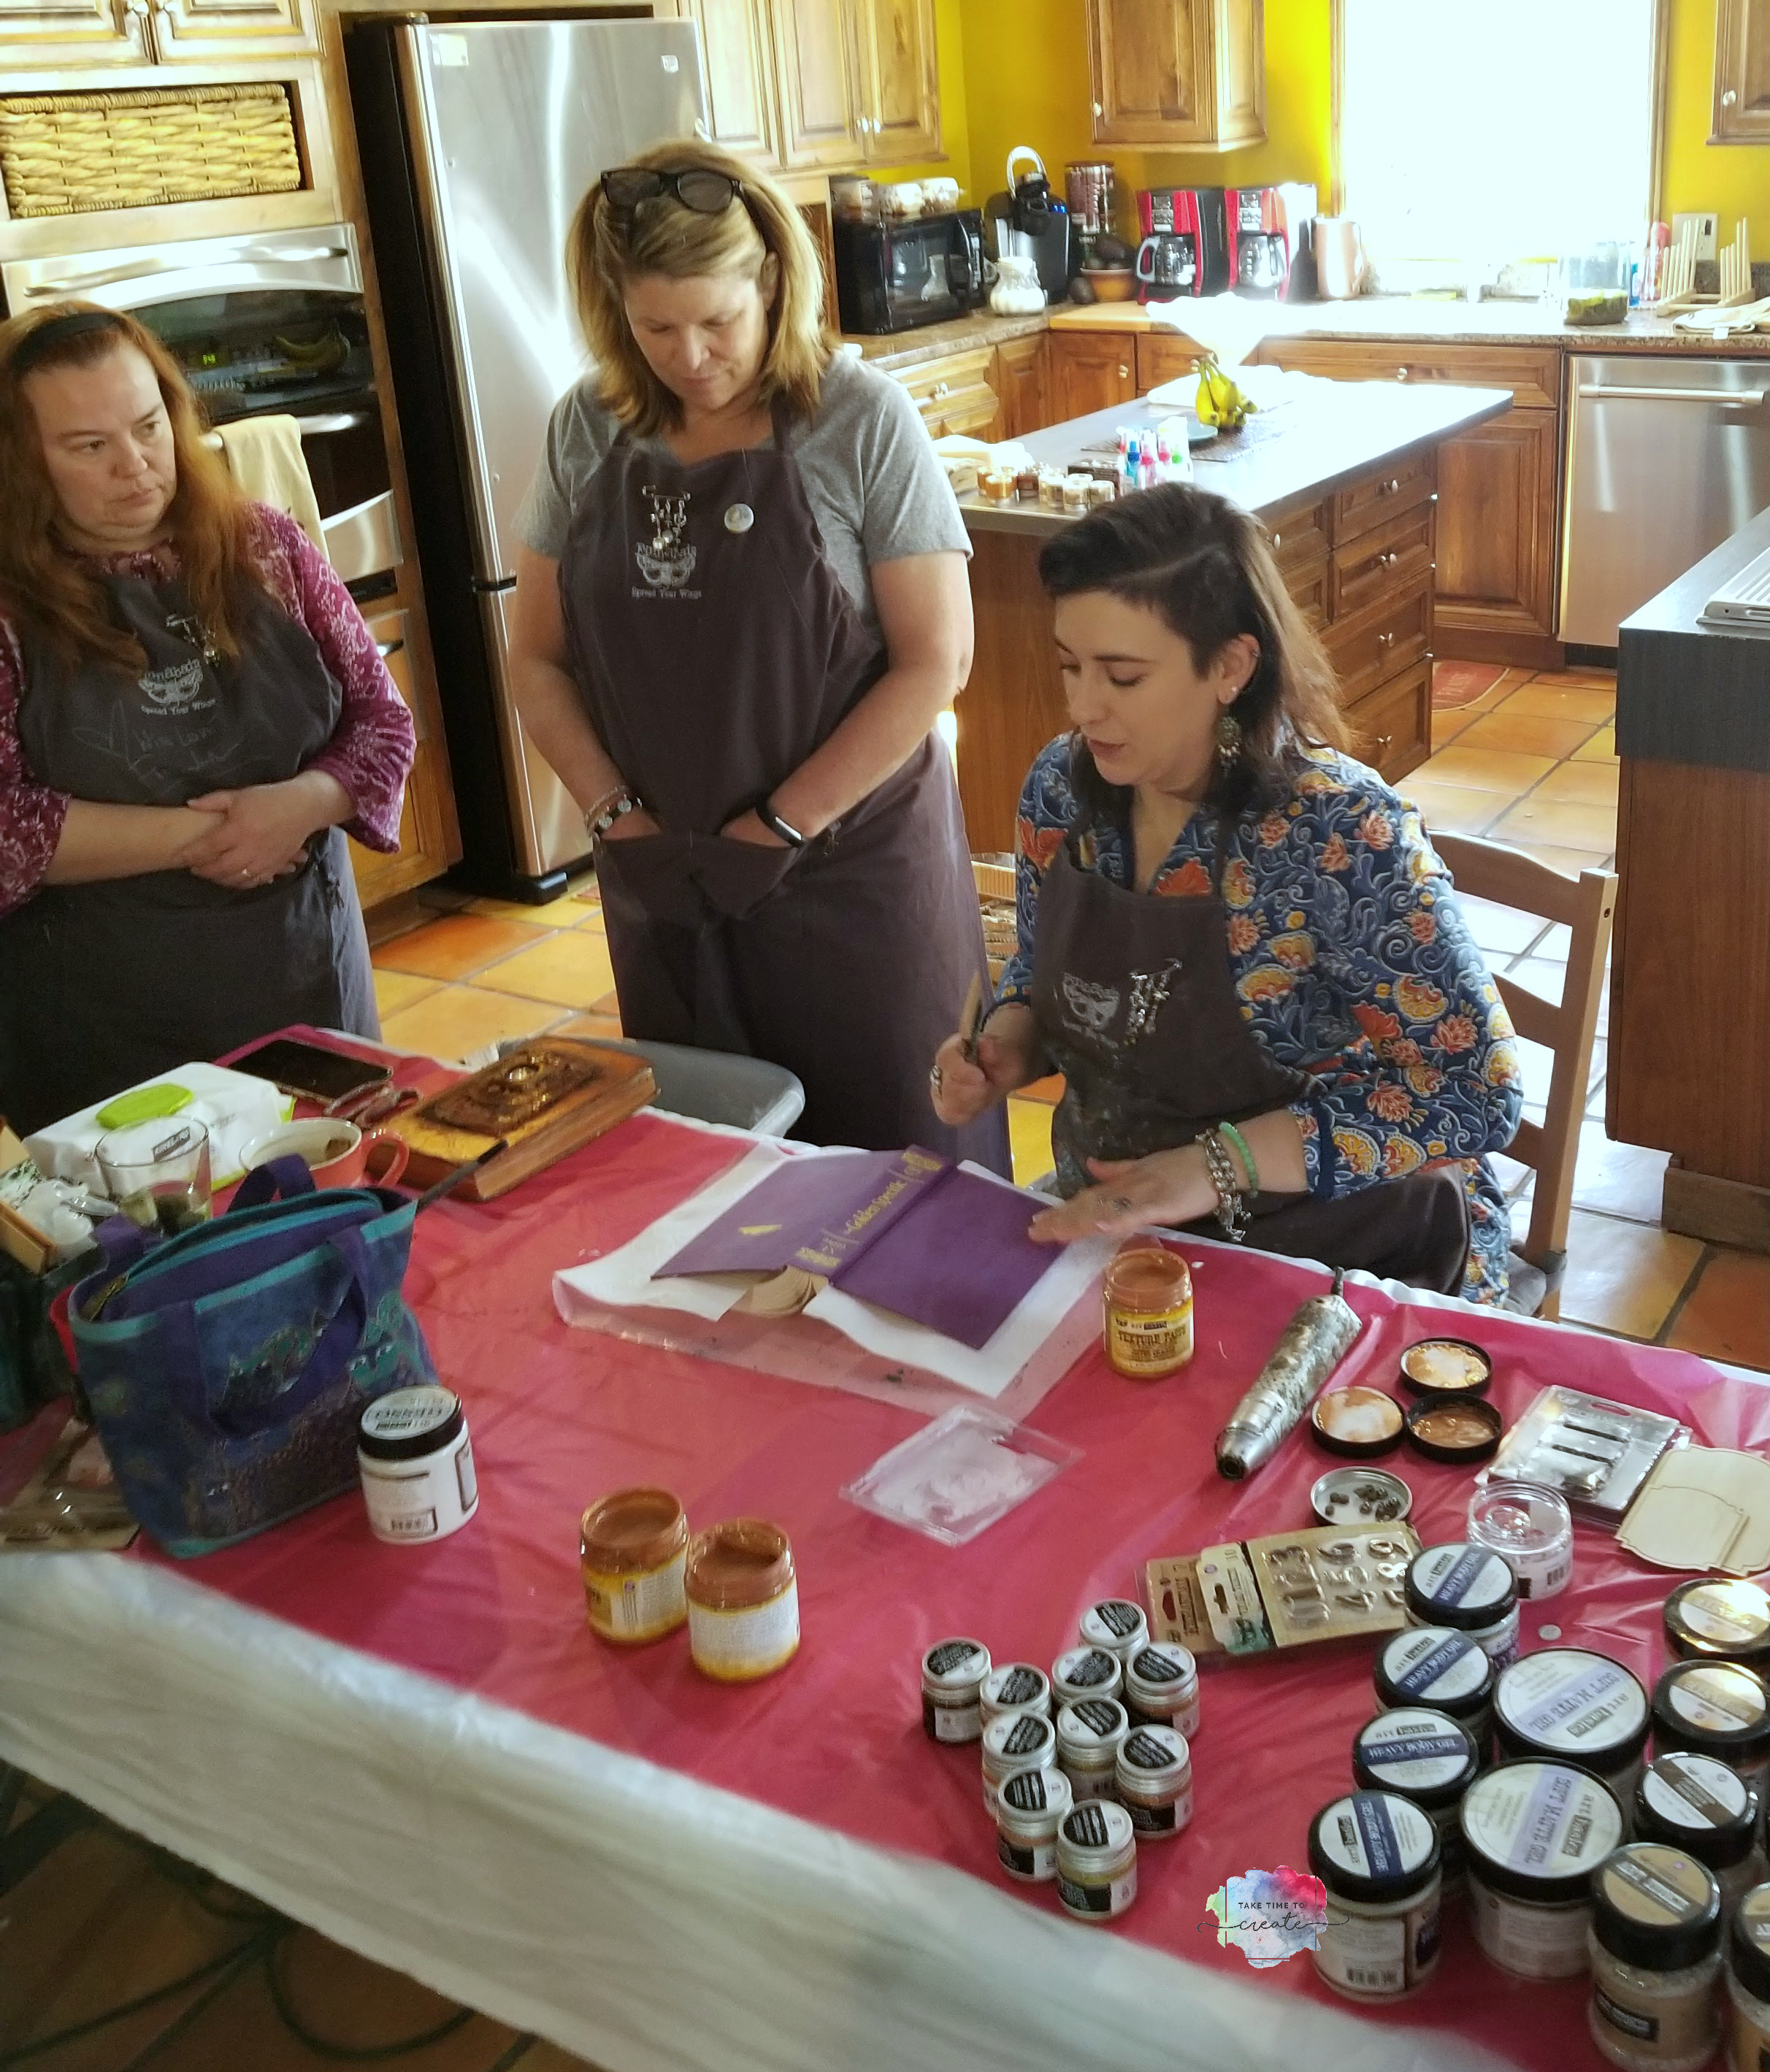
A couple of weekends ago I had the most magical, special weekend! I was able to take 4 mixed media classes from the amazing Finnabair! She is so wonderful and sweet and patient, and I learned a ton from her!
I did a try to keep my squeals and fan girling to a minimum, but I am not sure I succeeded, lol. It was just so awesome!
See here we are, bffs now, lol.
I am only kidding, but just a little bit. It was so nice to spend the time with her at Mojito Creek, a retreat in Colorado. I have been there before, and I love it there! You can read my review on the retreat here: Mojito Creek Review Link
I did a video of the projects we completed and you can see that here:
At the end of this post I will add affiliate links to some of the supplies we used, but there was just too many to list all of them.
The first project we did is the Book of Rust. I loved learning more about the rust paste and how to use it and just to get better with it. I am going to incorporate more rust into my projects because I love the look of rusty old things.
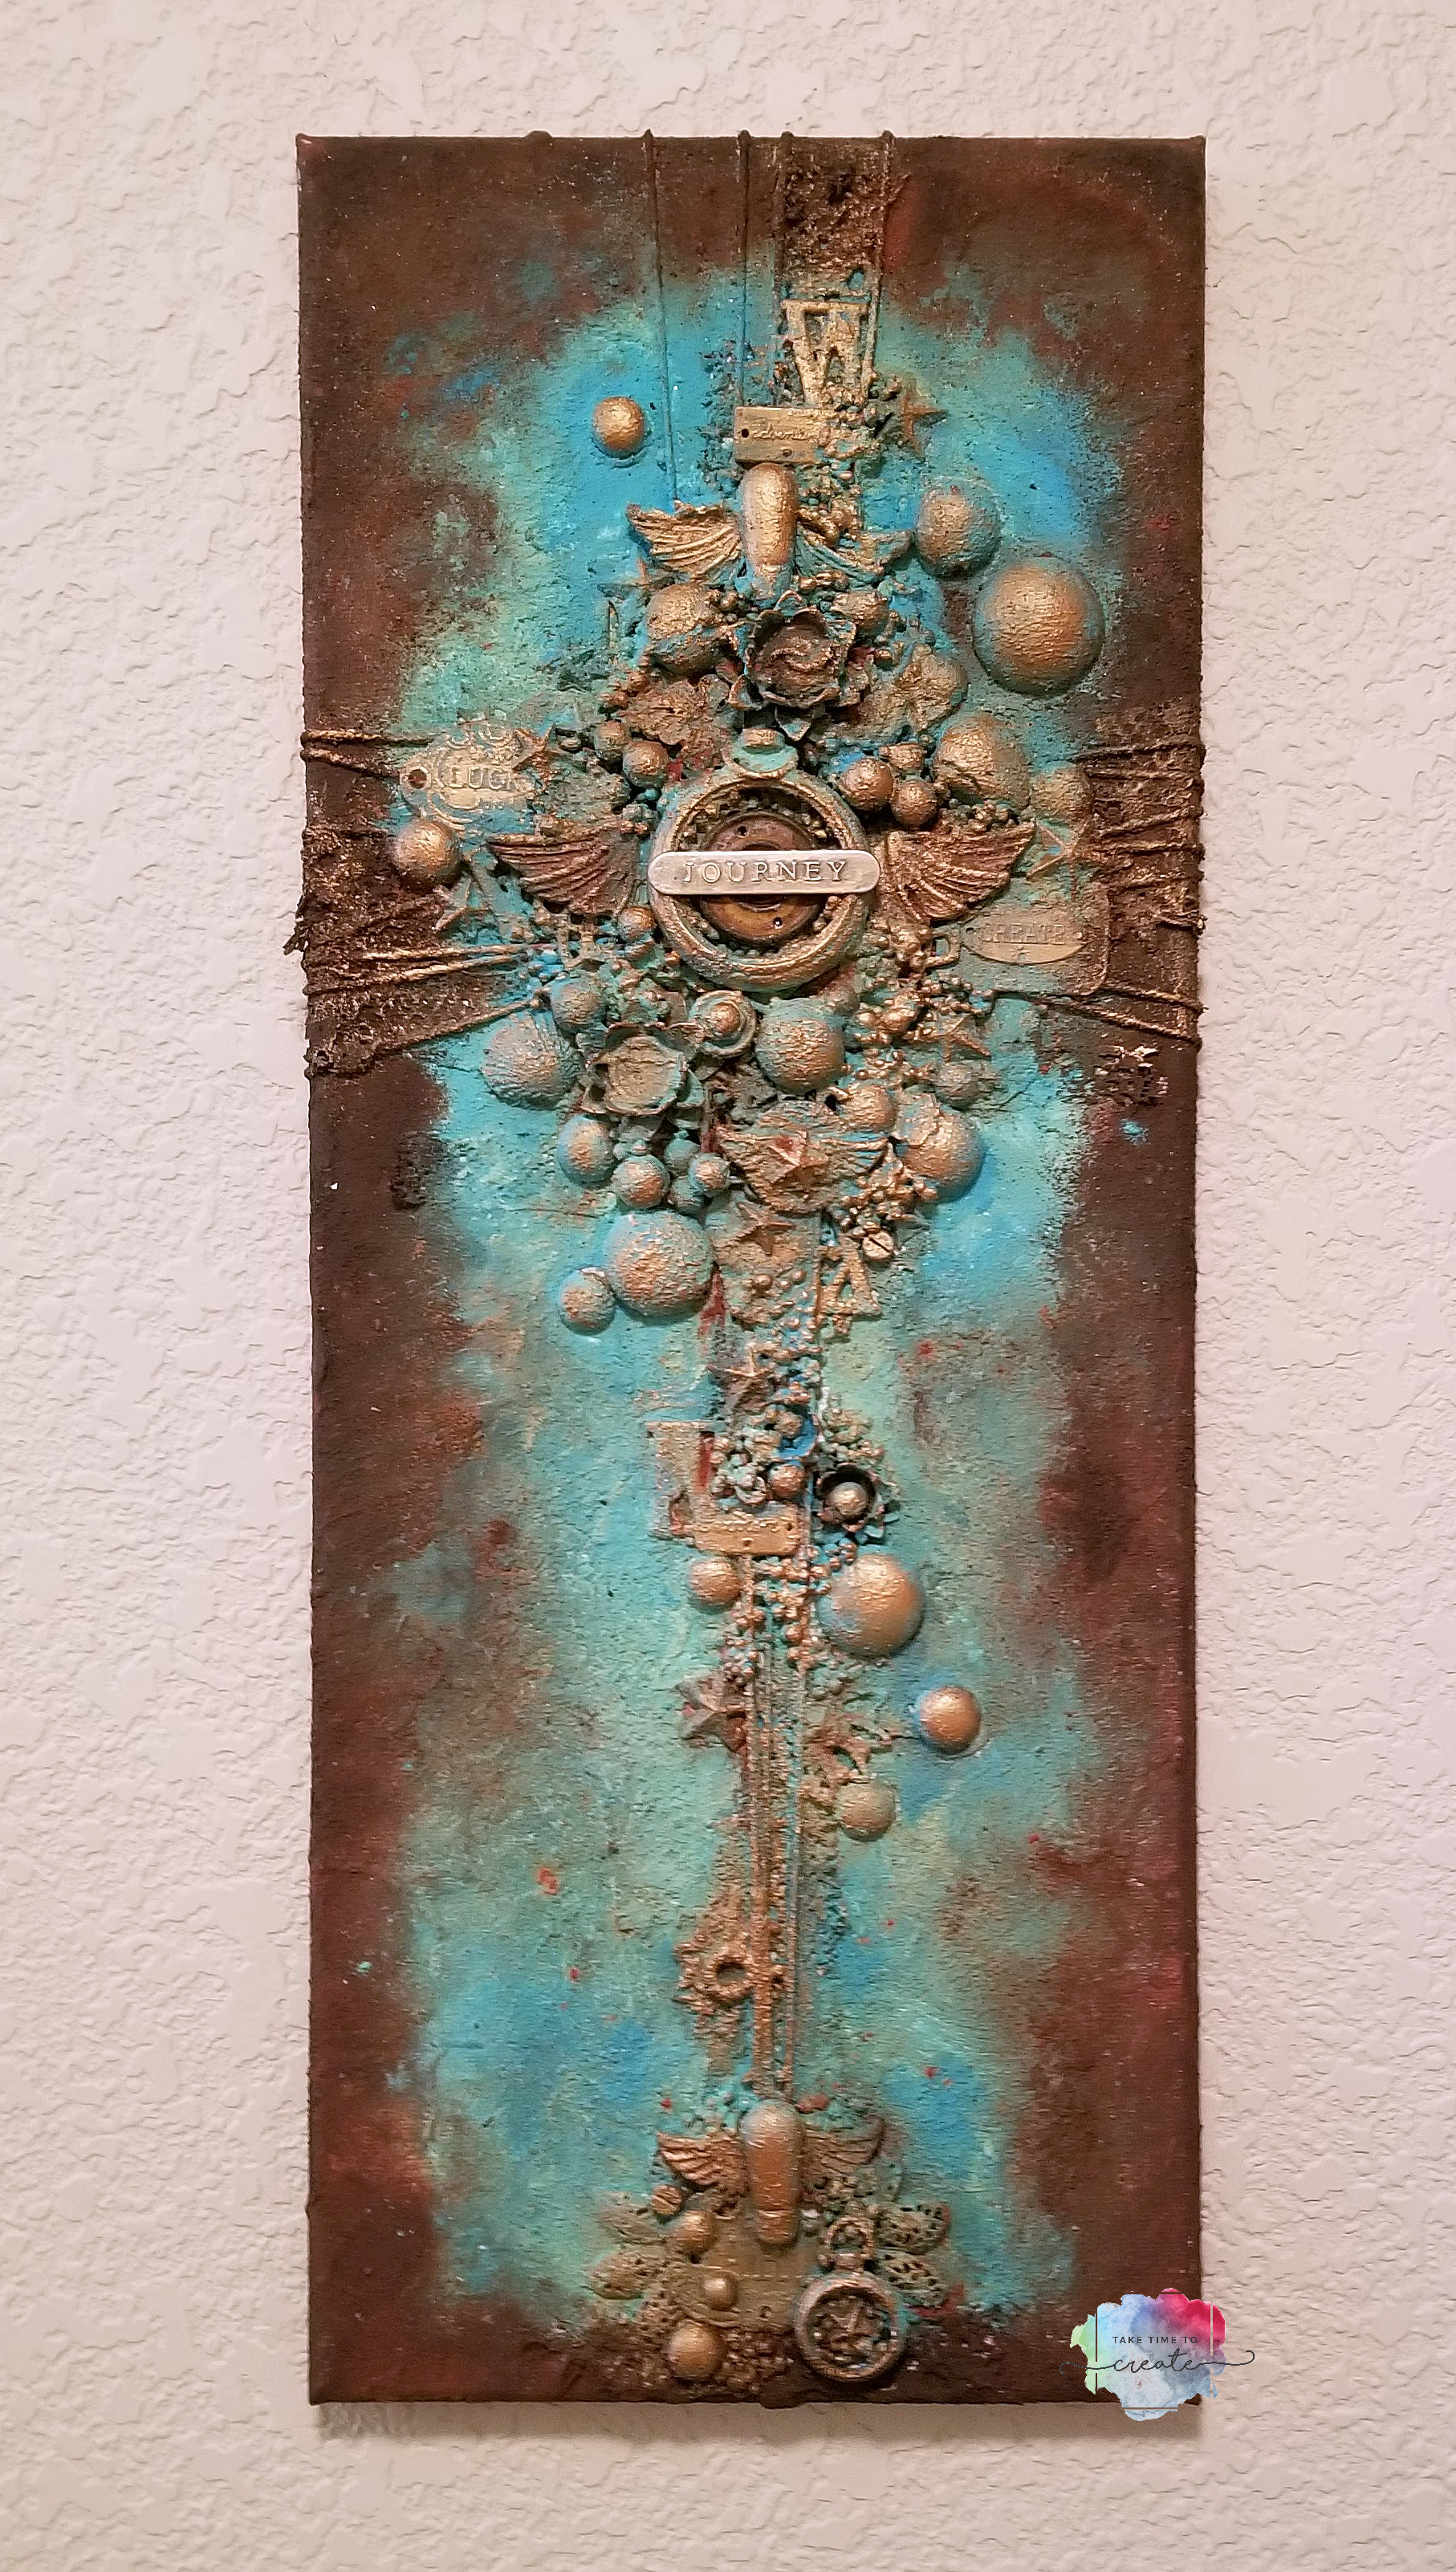
The next project is the long skinny canvas with rust paste and patina. I loved learning about how to use the patina, I have the paint at home but I never use it. Now I know what it can do and I am excited to add this medium to my projects!
That wrapped up the classes for Friday. It was a long day full of learning and exploring and I was ready for bed that night! The next day we got up not too early and started our day learning how to do 2 more projects.
The first one was the journal. This picture is the cover we made, I don’t have a pic of it reassembled. But it did go back together nicely, lol. I love this journal and I have been using it to make art journal pages, which is so nice because I have missed making art journal pages.
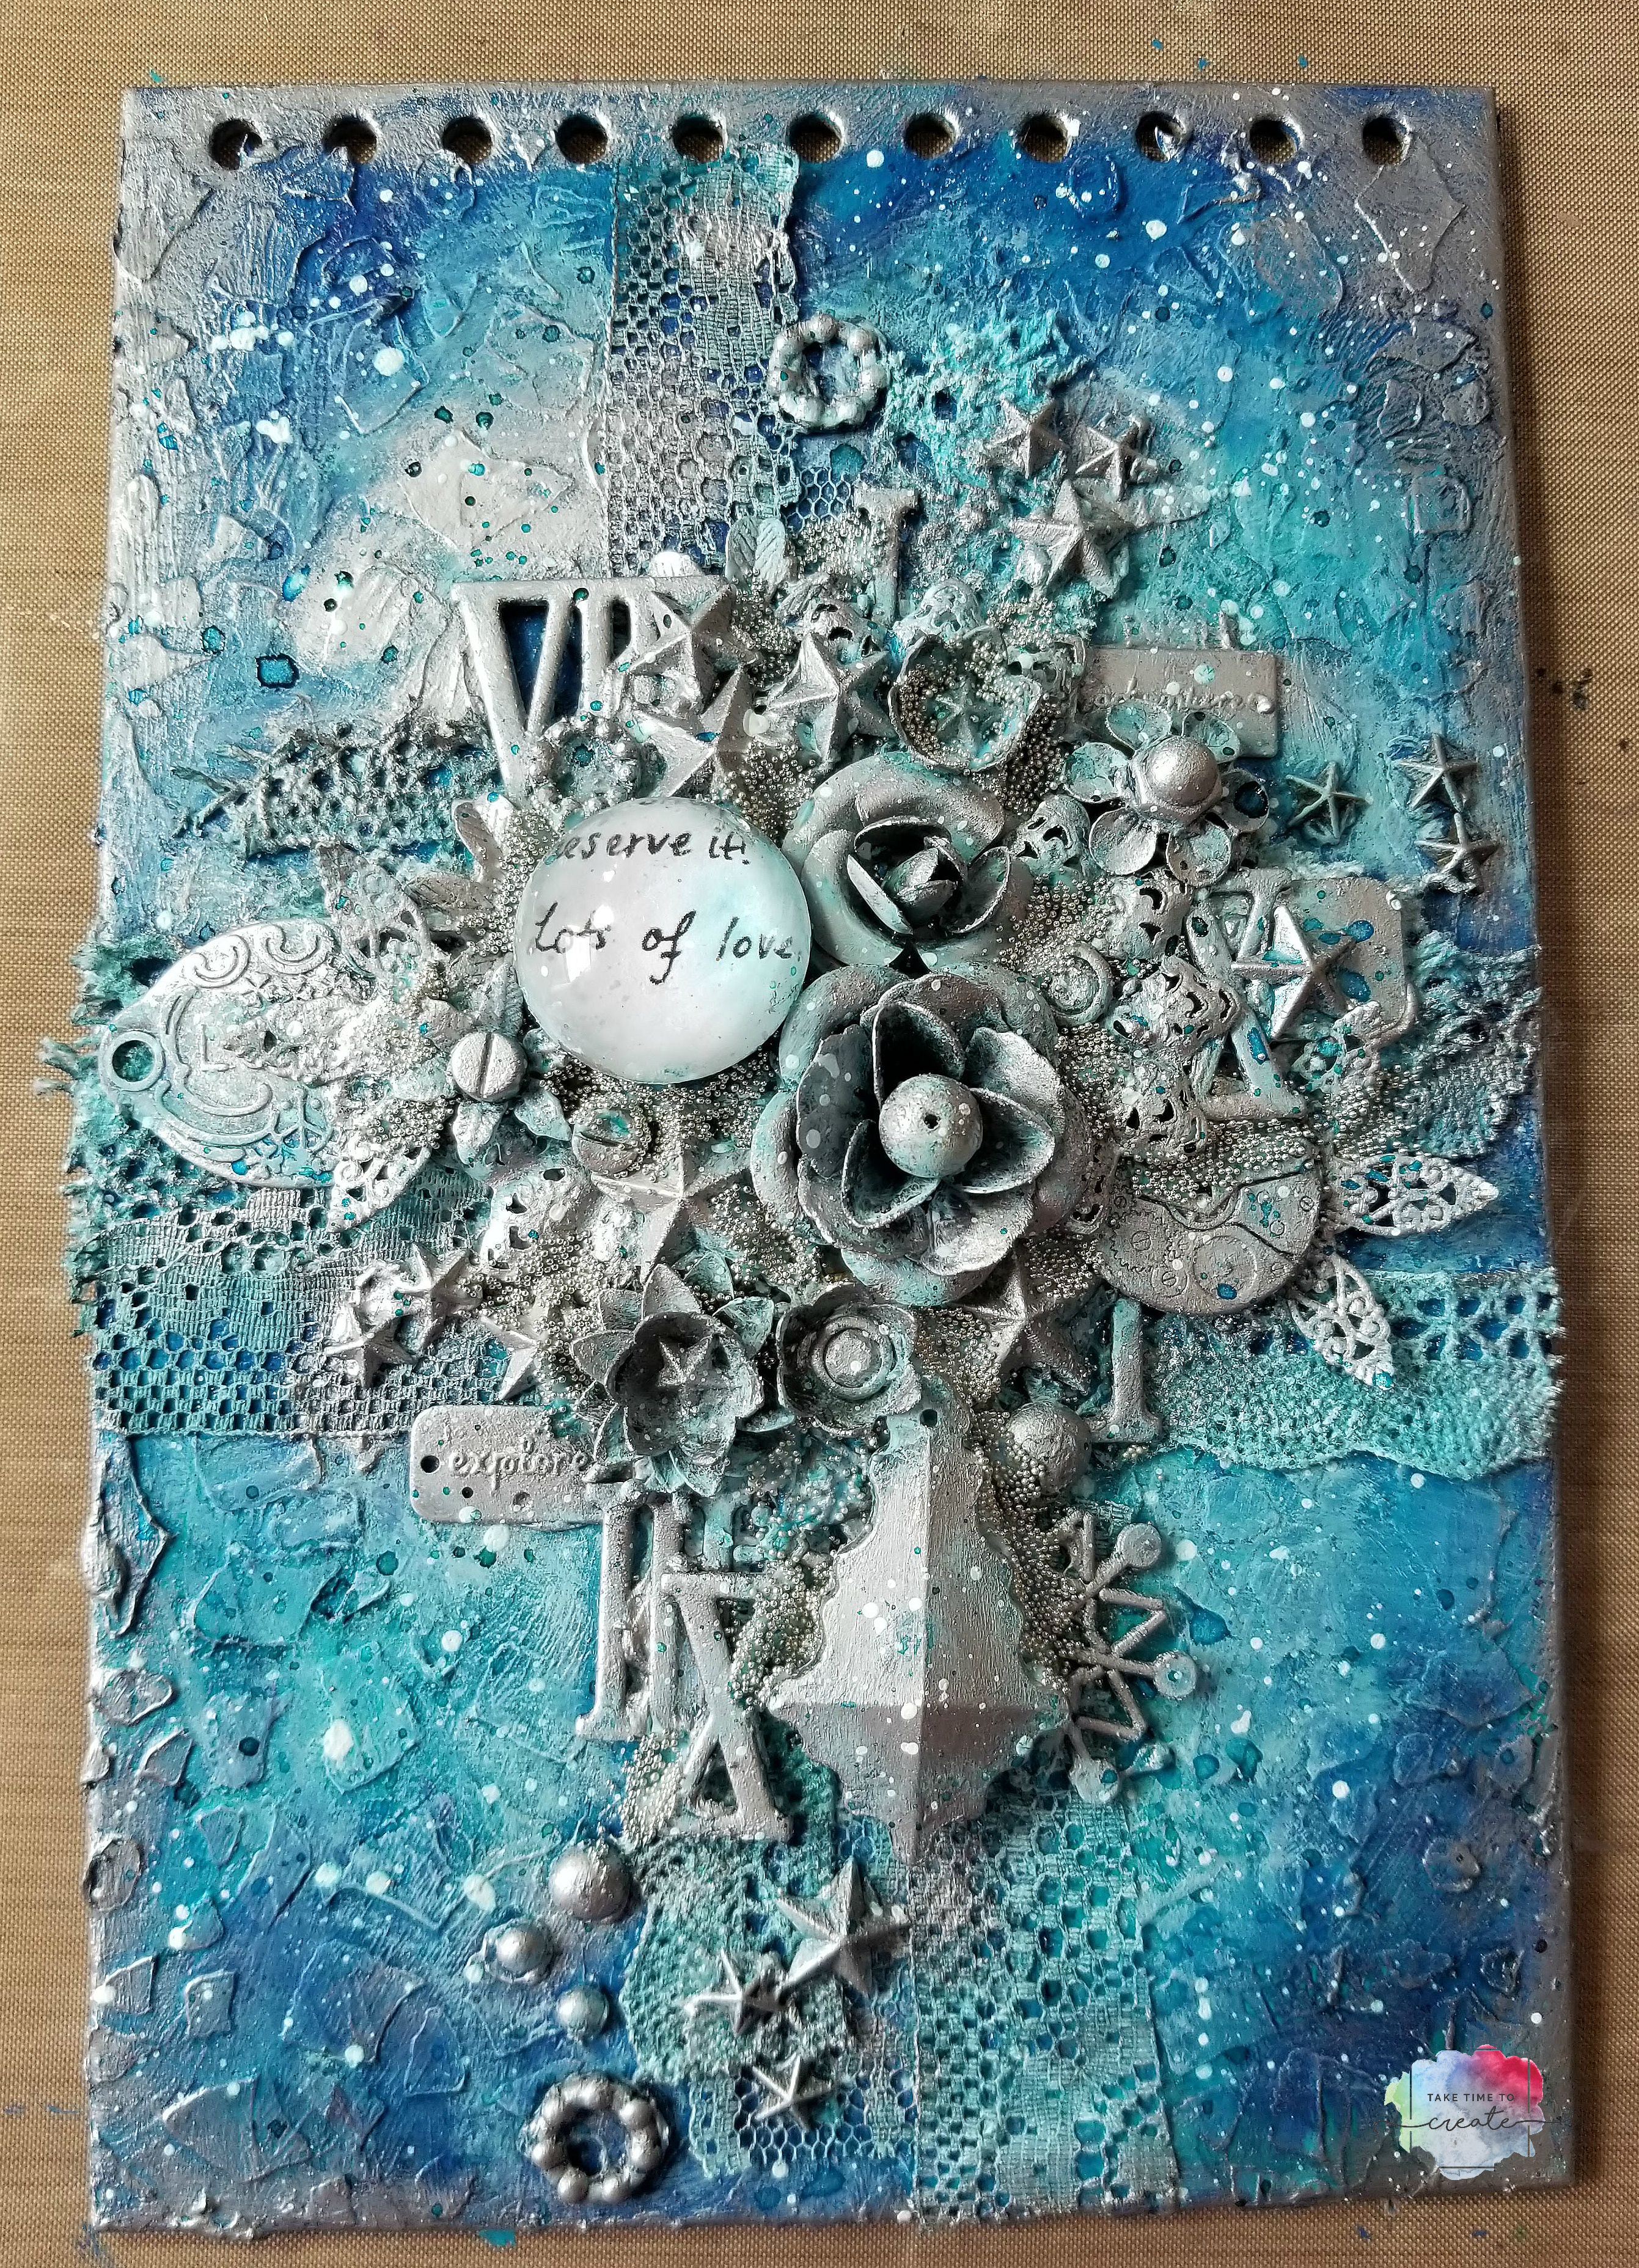
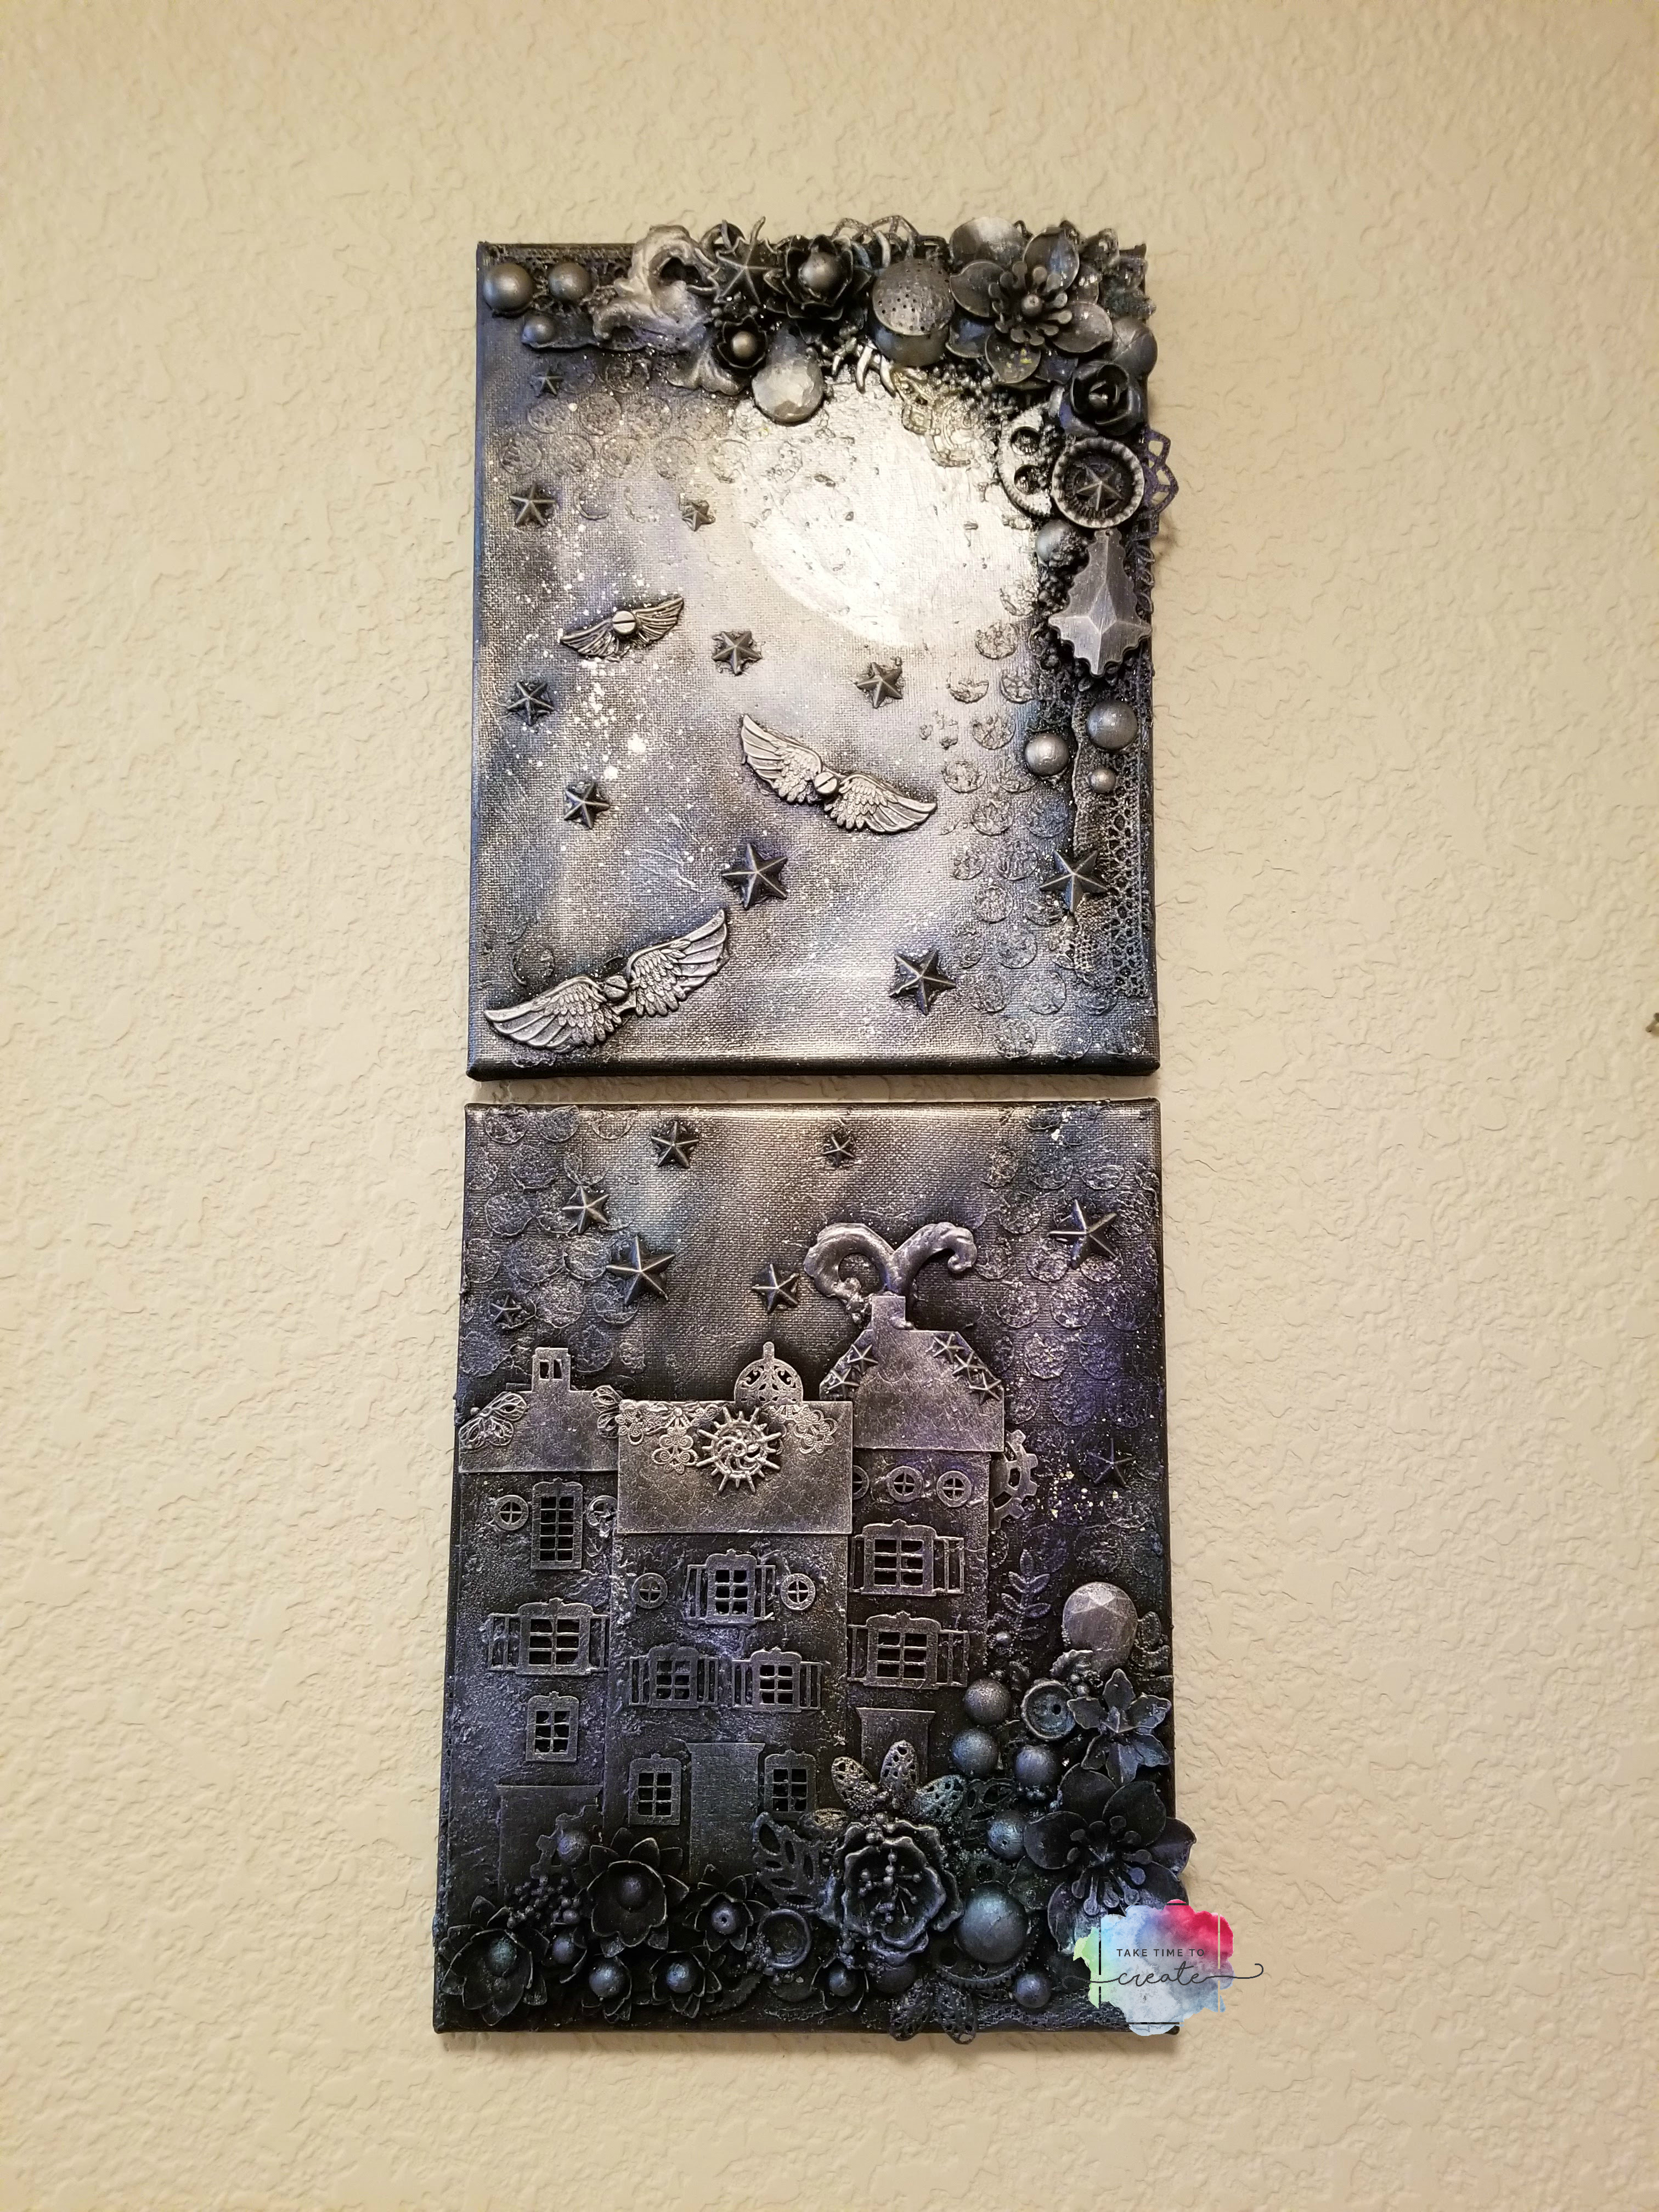
The last project is the moonlight one. I have to say this is the one I was most excited to learn! I love the technique and the final canvas is just so pretty.
All of these projects were so much fun to make! And I actually finished all the projects while I was at Mojito Creek, so that was nice to actually come home with finished projects! If she comes to Colorado again I will be sure to sign up for her classes! This a dream come true and I can wait to incorporate what I learned into my projects!
Here is the list of some of the products I used (they are all affiliate links)
Today I have a fun, easy fabric frame project for you. I am still on a fabric kick, I have so many ideas using fabric and I can’t wait to share them with you.
For this project I used fabric I got from Annie’s Fabric Club. This is not sponsored, but I really like the fabric I got, and I am looking forward to next month’s fabric. Here is the link to the club if you are interested in joining: https://www.creativequiltersfabricclub.com/
This is such a fun, easy project that only takes a few materials
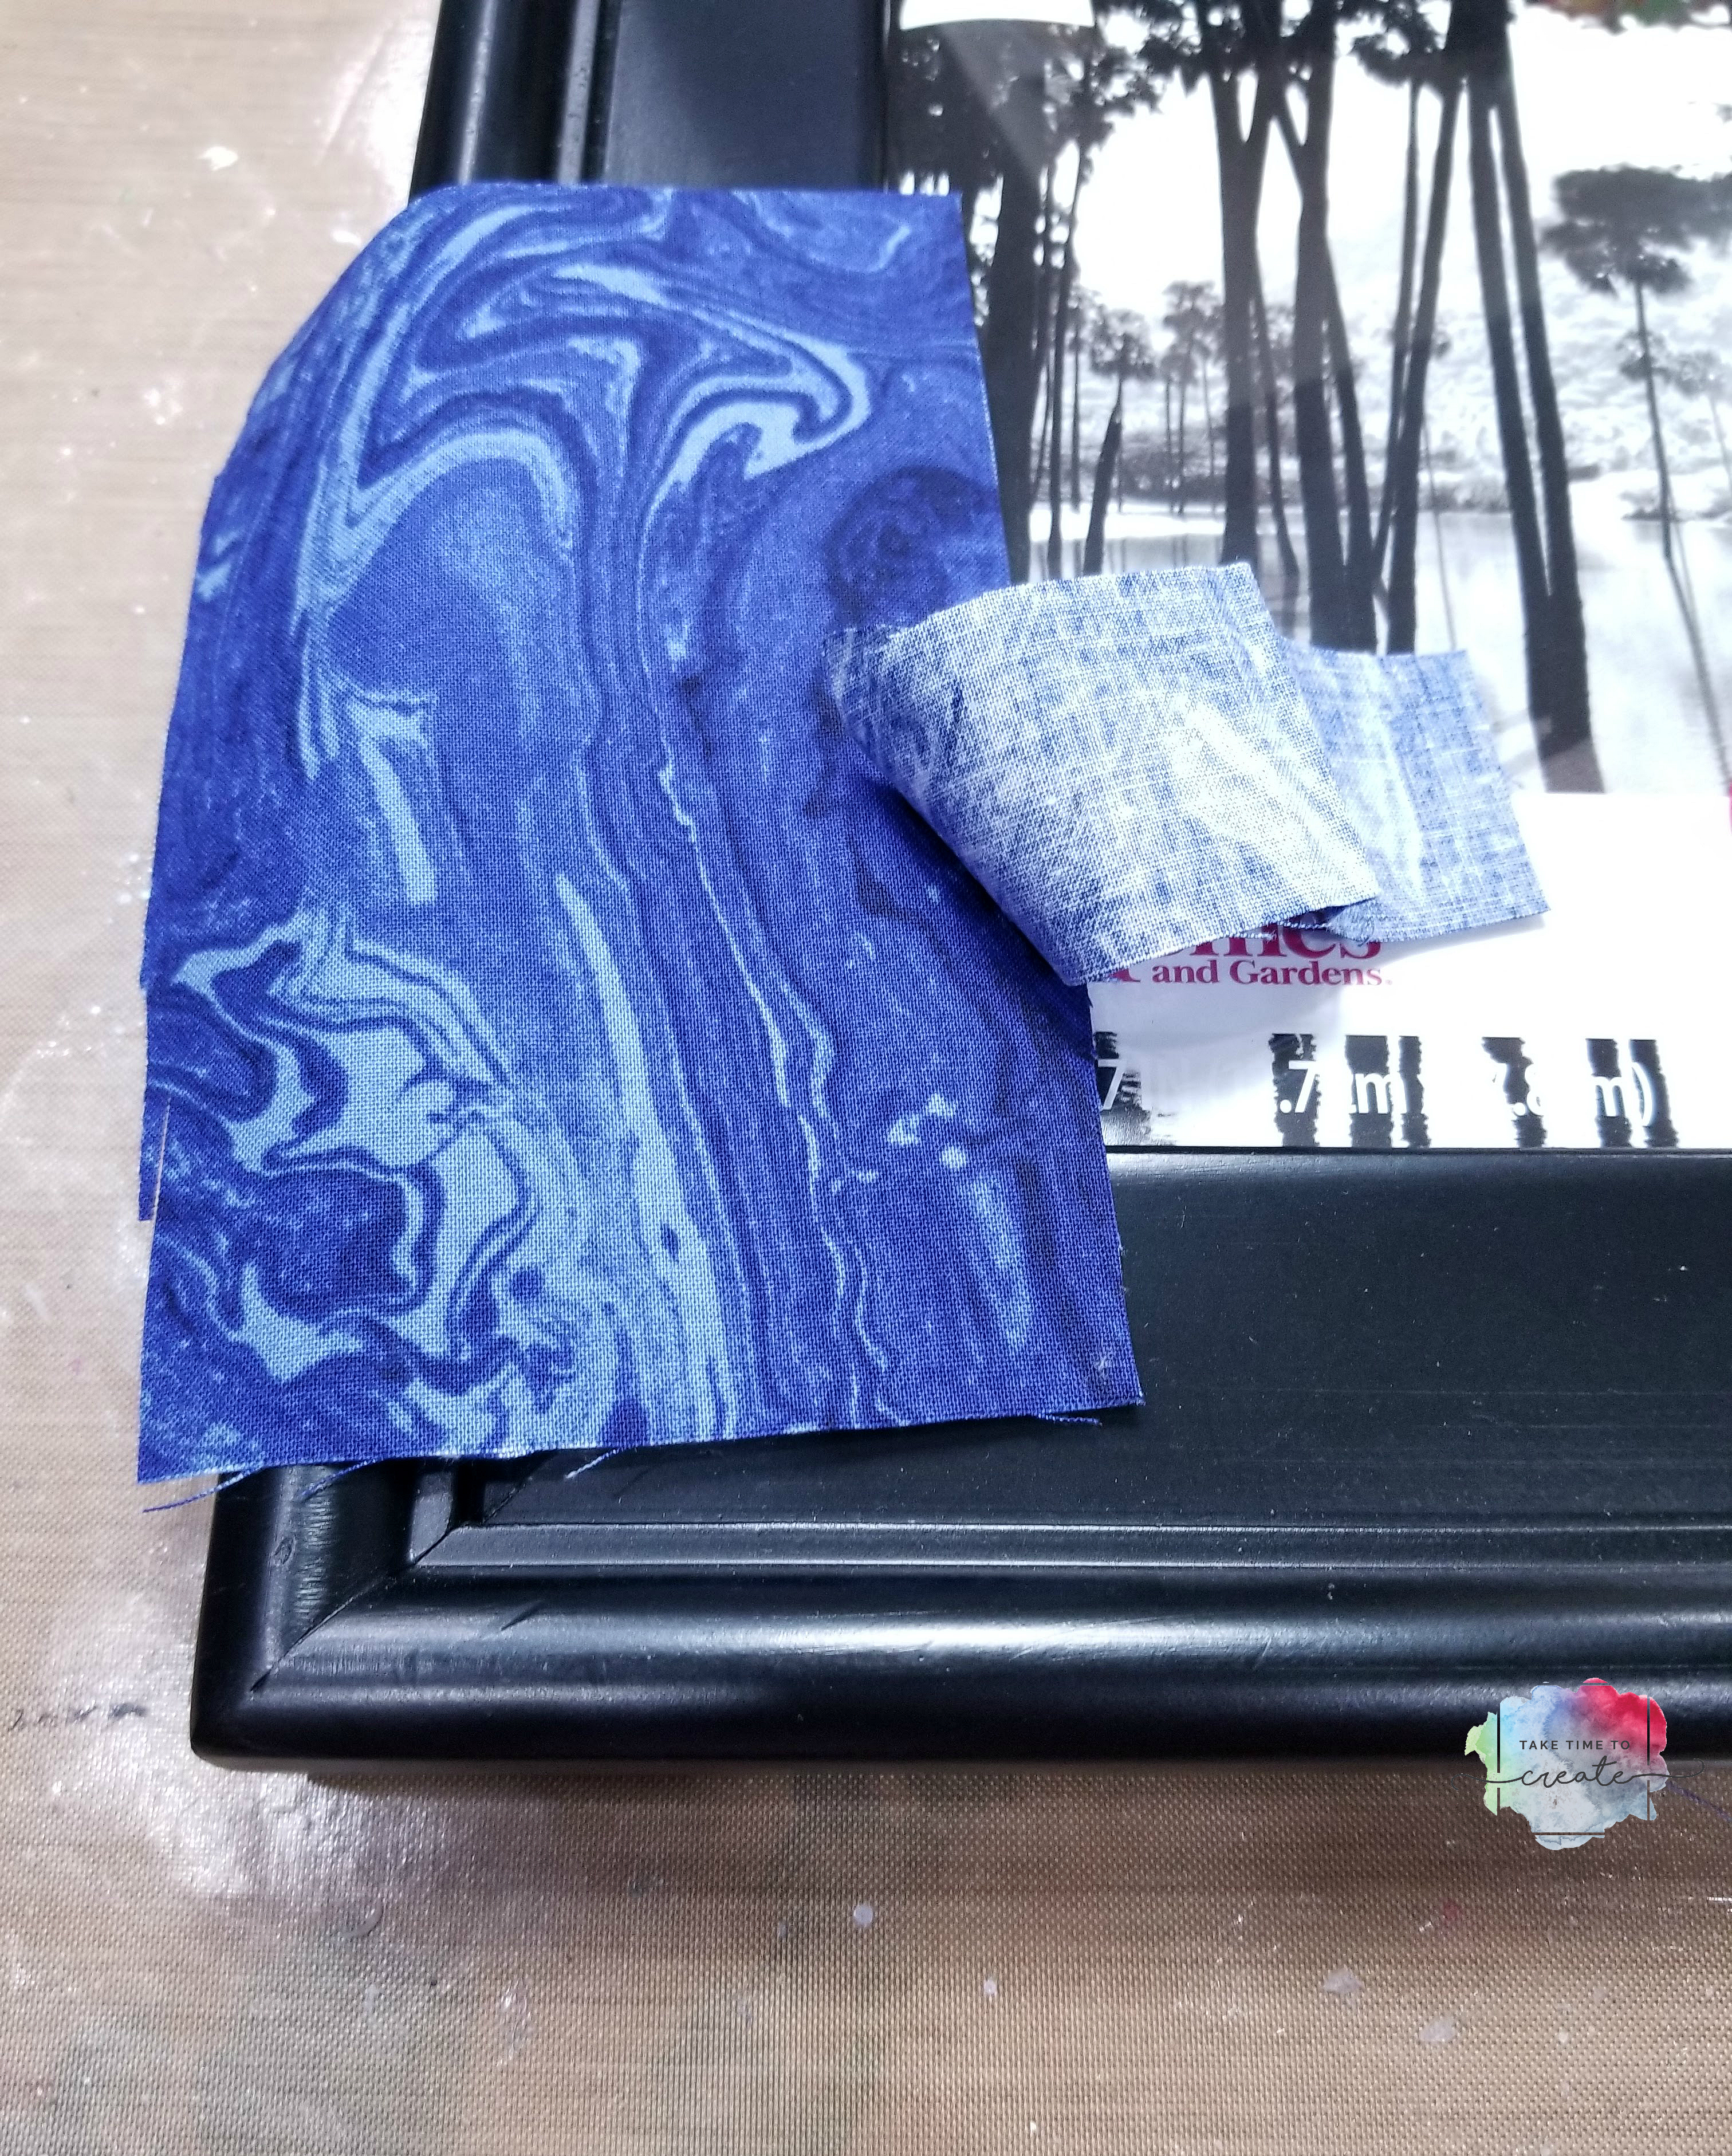
Gather all your material including the fabric and your frame. The frame should have a wide enough border that gives you plenty of room to add fabric. The color of the frame doesn’t matter a lot because you will be covering it in fabric.
To get started cut your fabric in strips that are a little wider than your frame. Spread heavy gloss gel on the frame. Coat your fabric strip in Gloss gel and add to frame, crinkling it up as you go. While everything is wet take the time to get all the wrinkles and texture you are wanting.
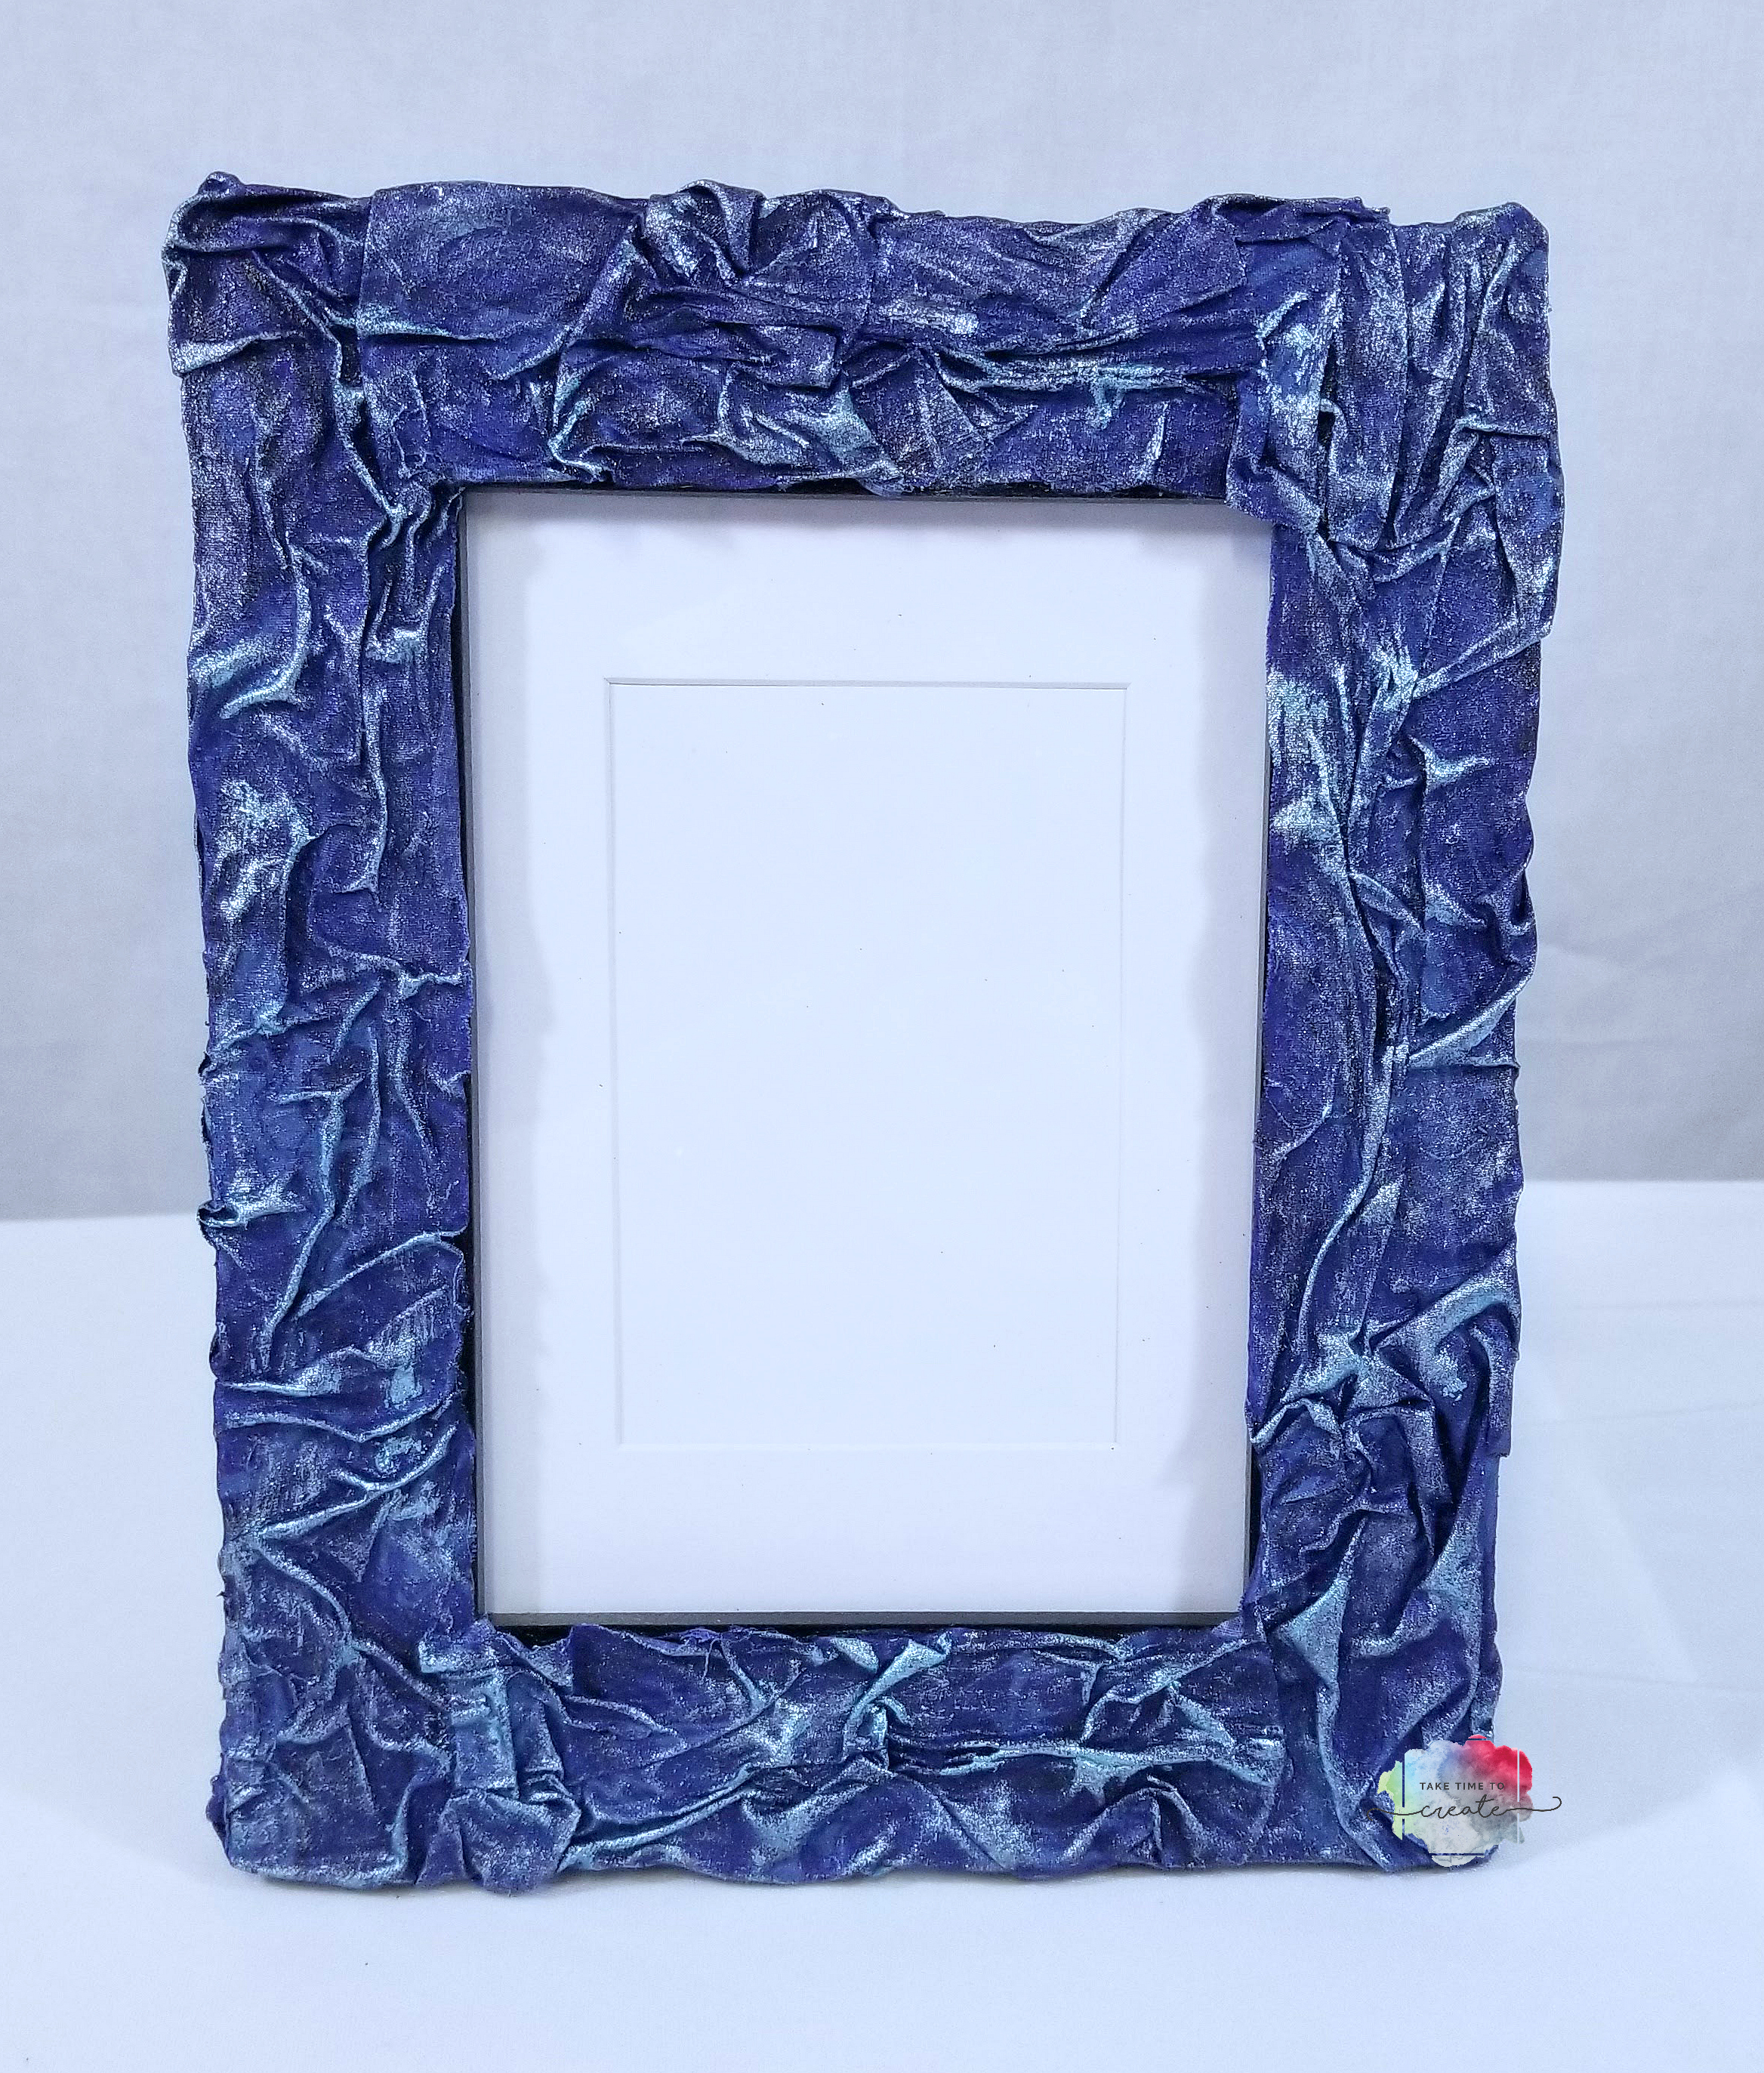
Take your time and make sure it looks like what you are going for. Before you let your frame dry clean up the edges and back with a baby wipe. Let the frame dry. Once dry you can leave it at this step if you want, or you can go on to the next step which is adding paint.
After the fabric dried (leaving it over night is best) I dry brushed on a Finnabair Metallique and a Finnabair Sparks paint to add some detail and sparkle. I really love her paints and they add that bit of interest that I am looking for. .
And that is it, the frame is done! These are so much fun and easy to make, I think I will be making a lot more as gifts this year.
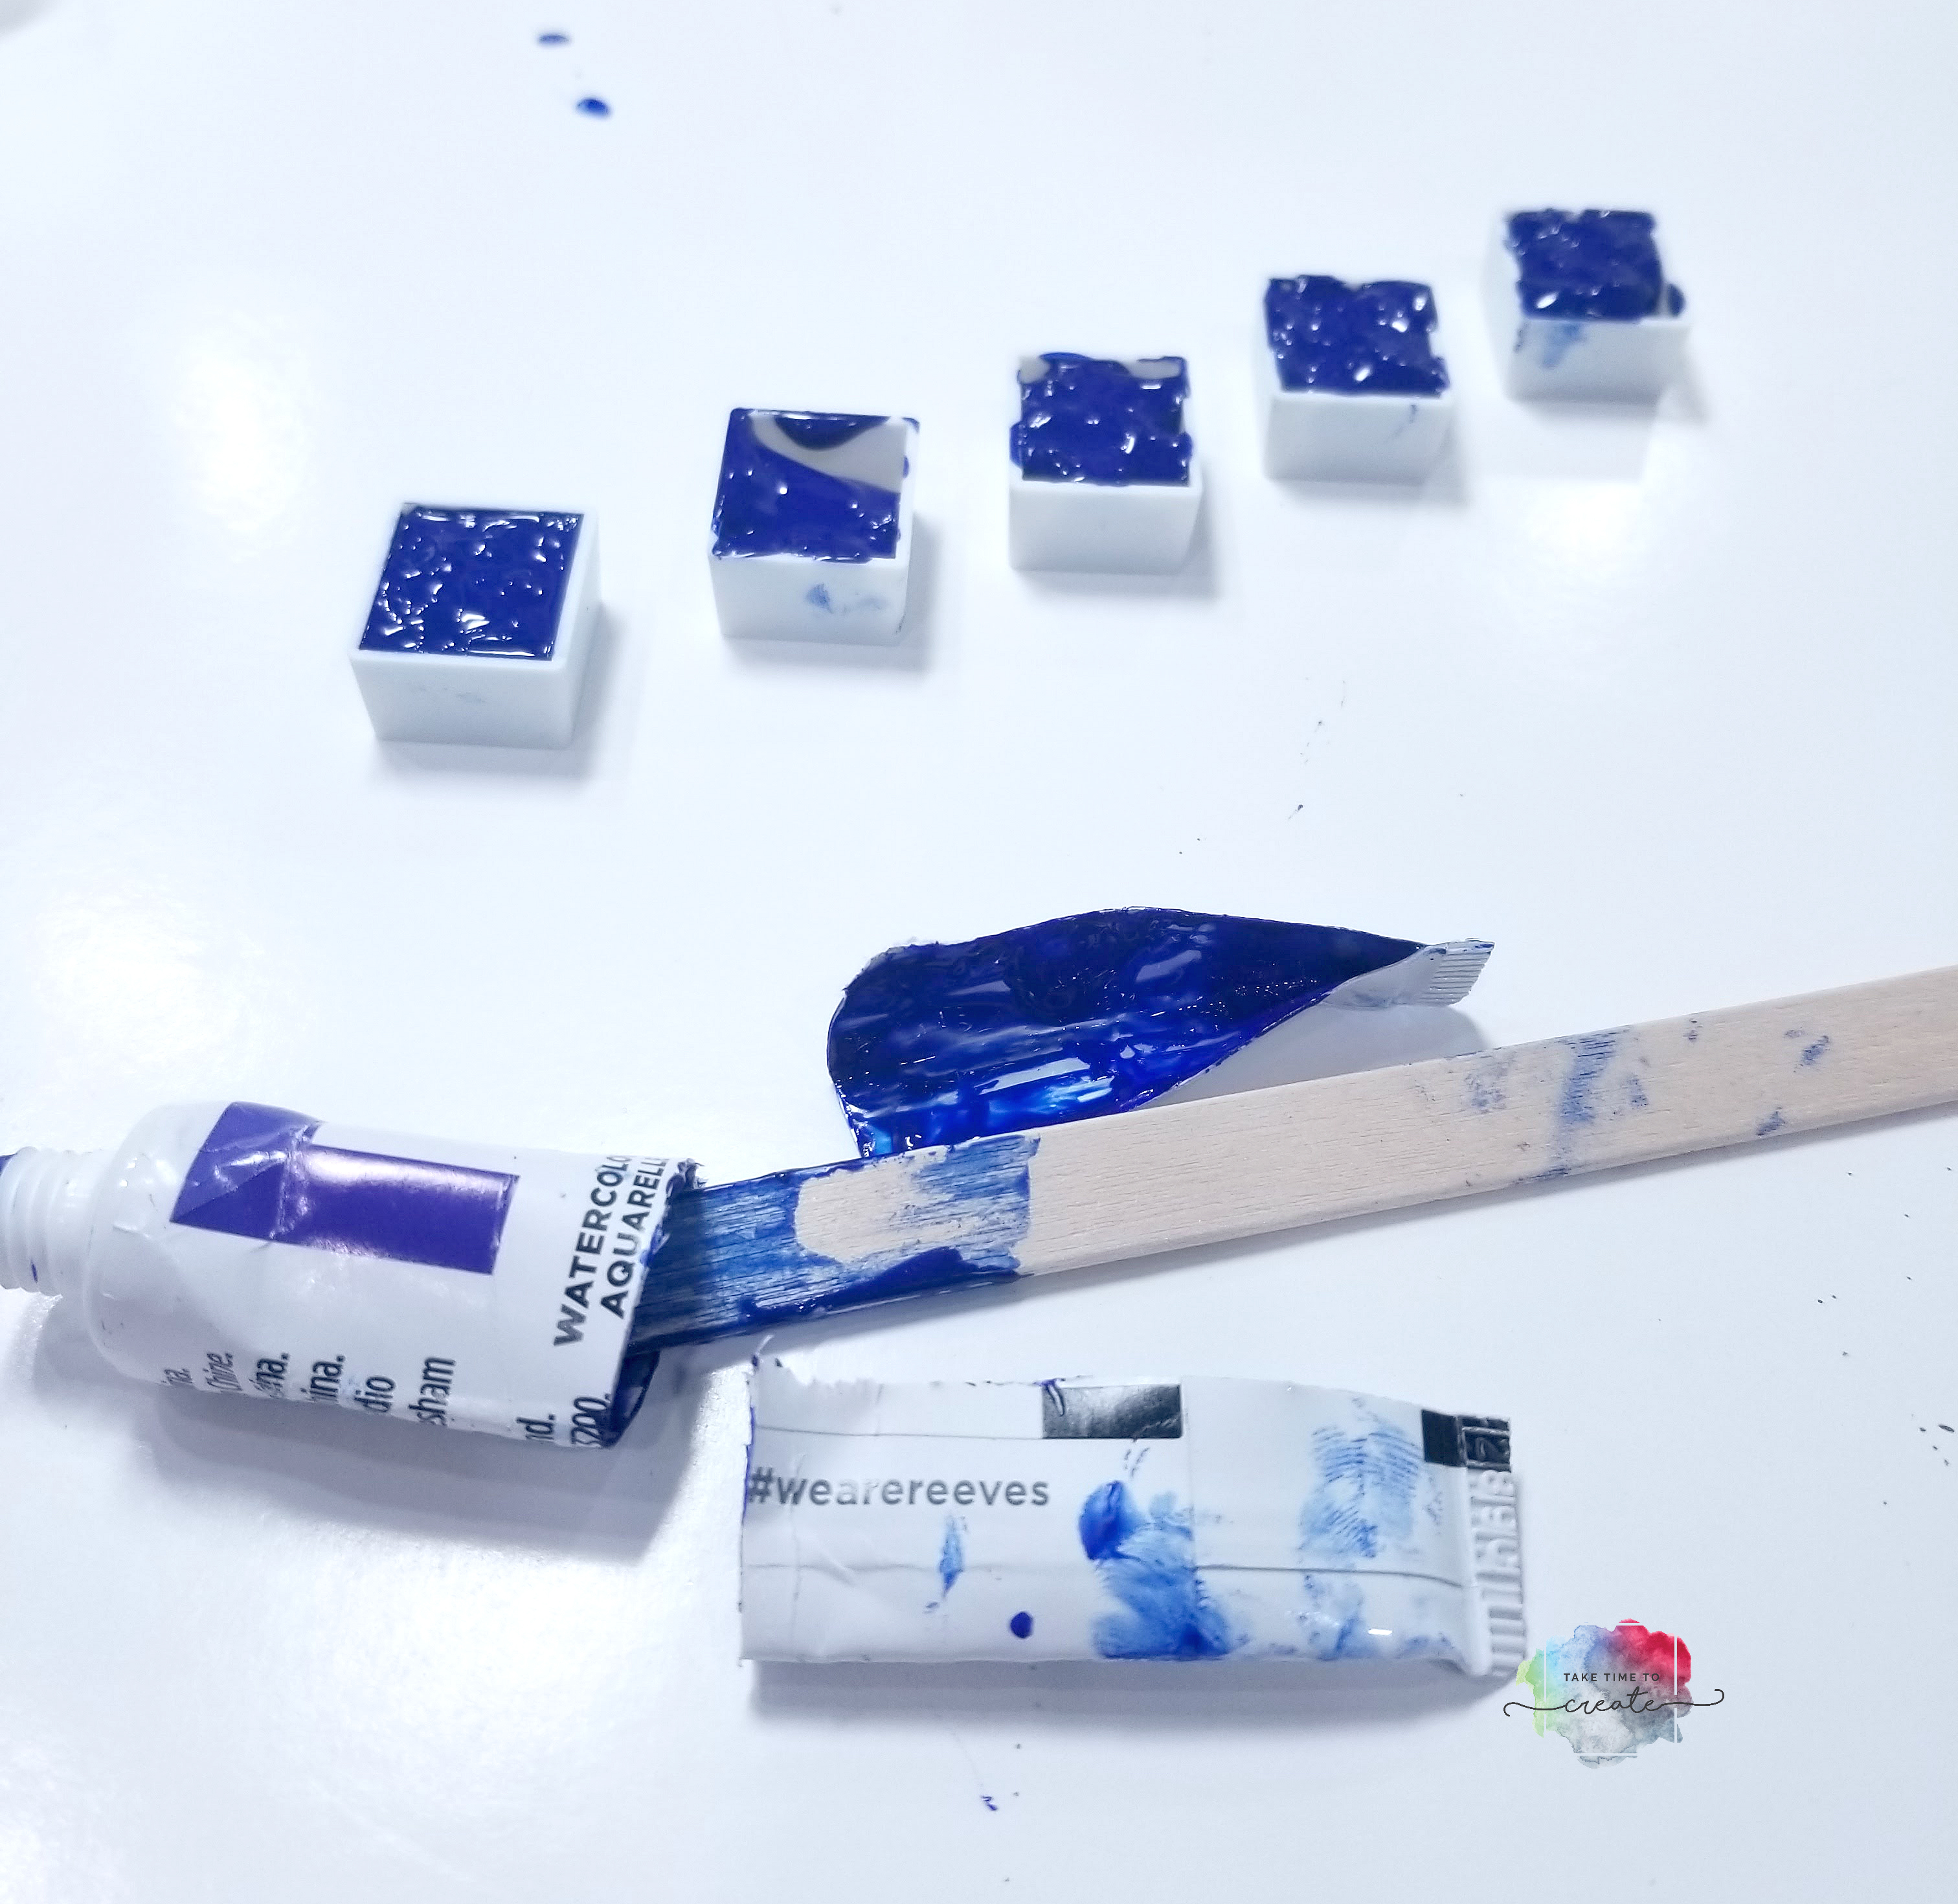
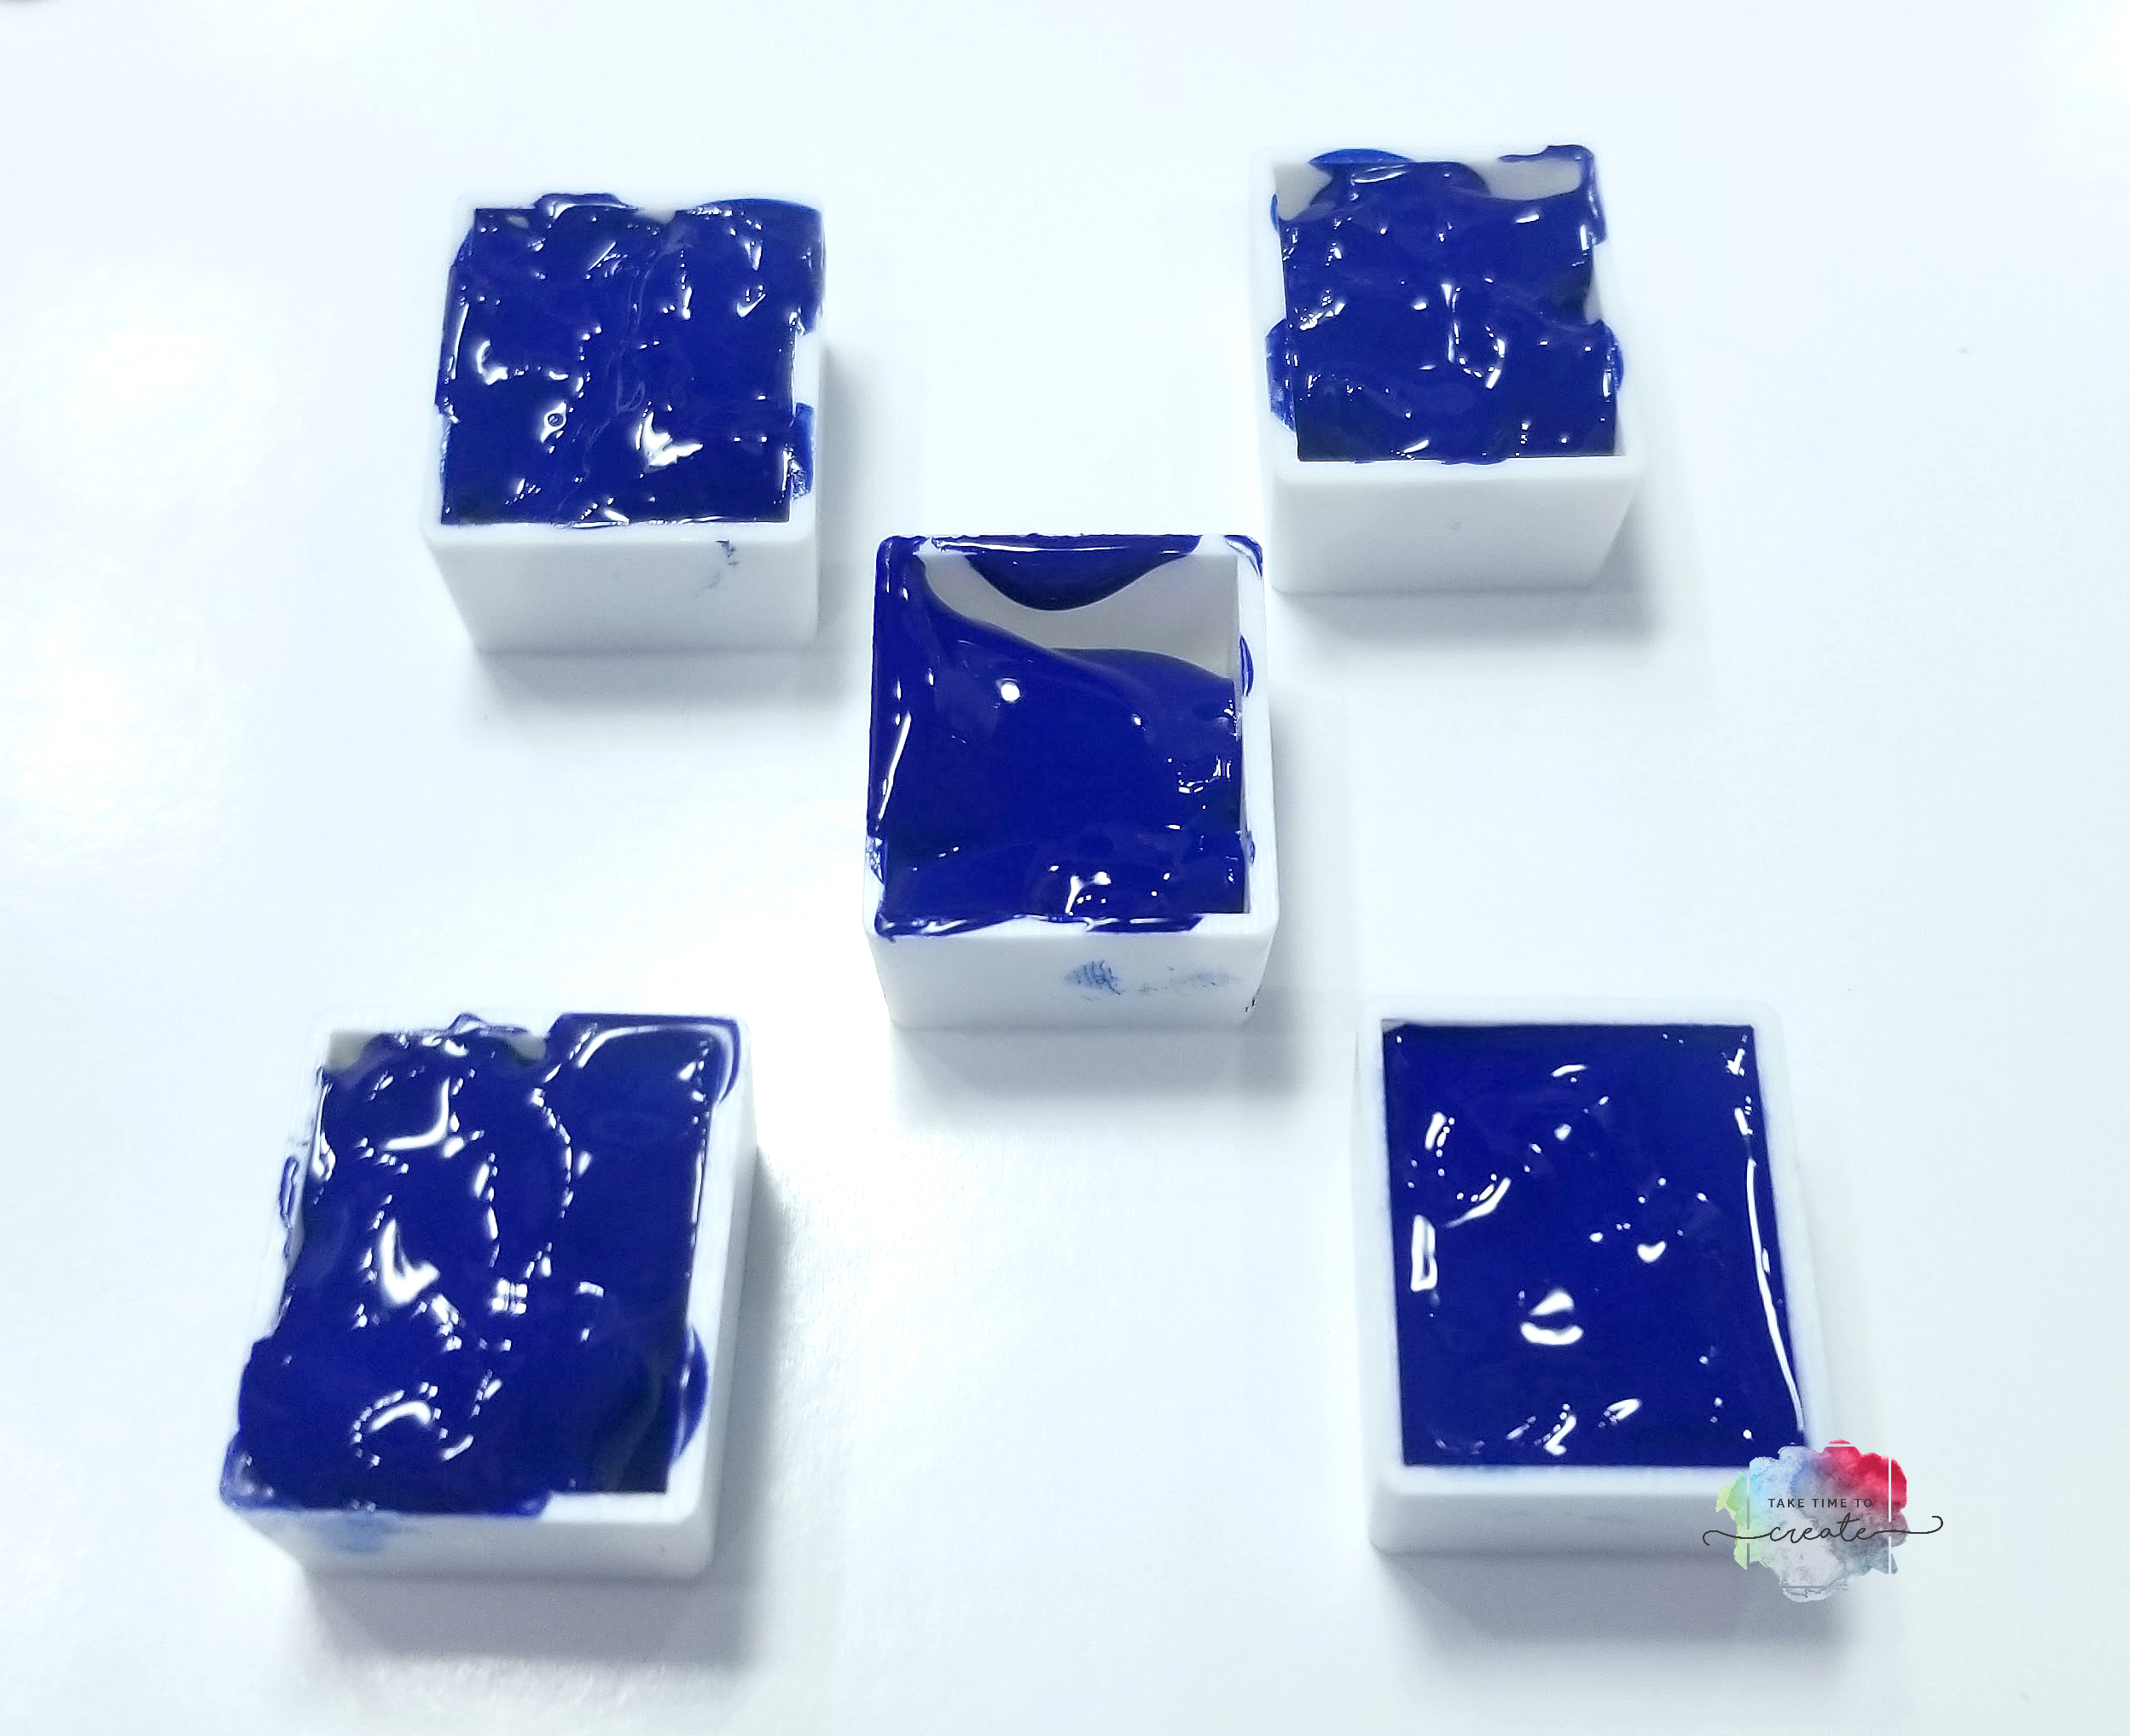
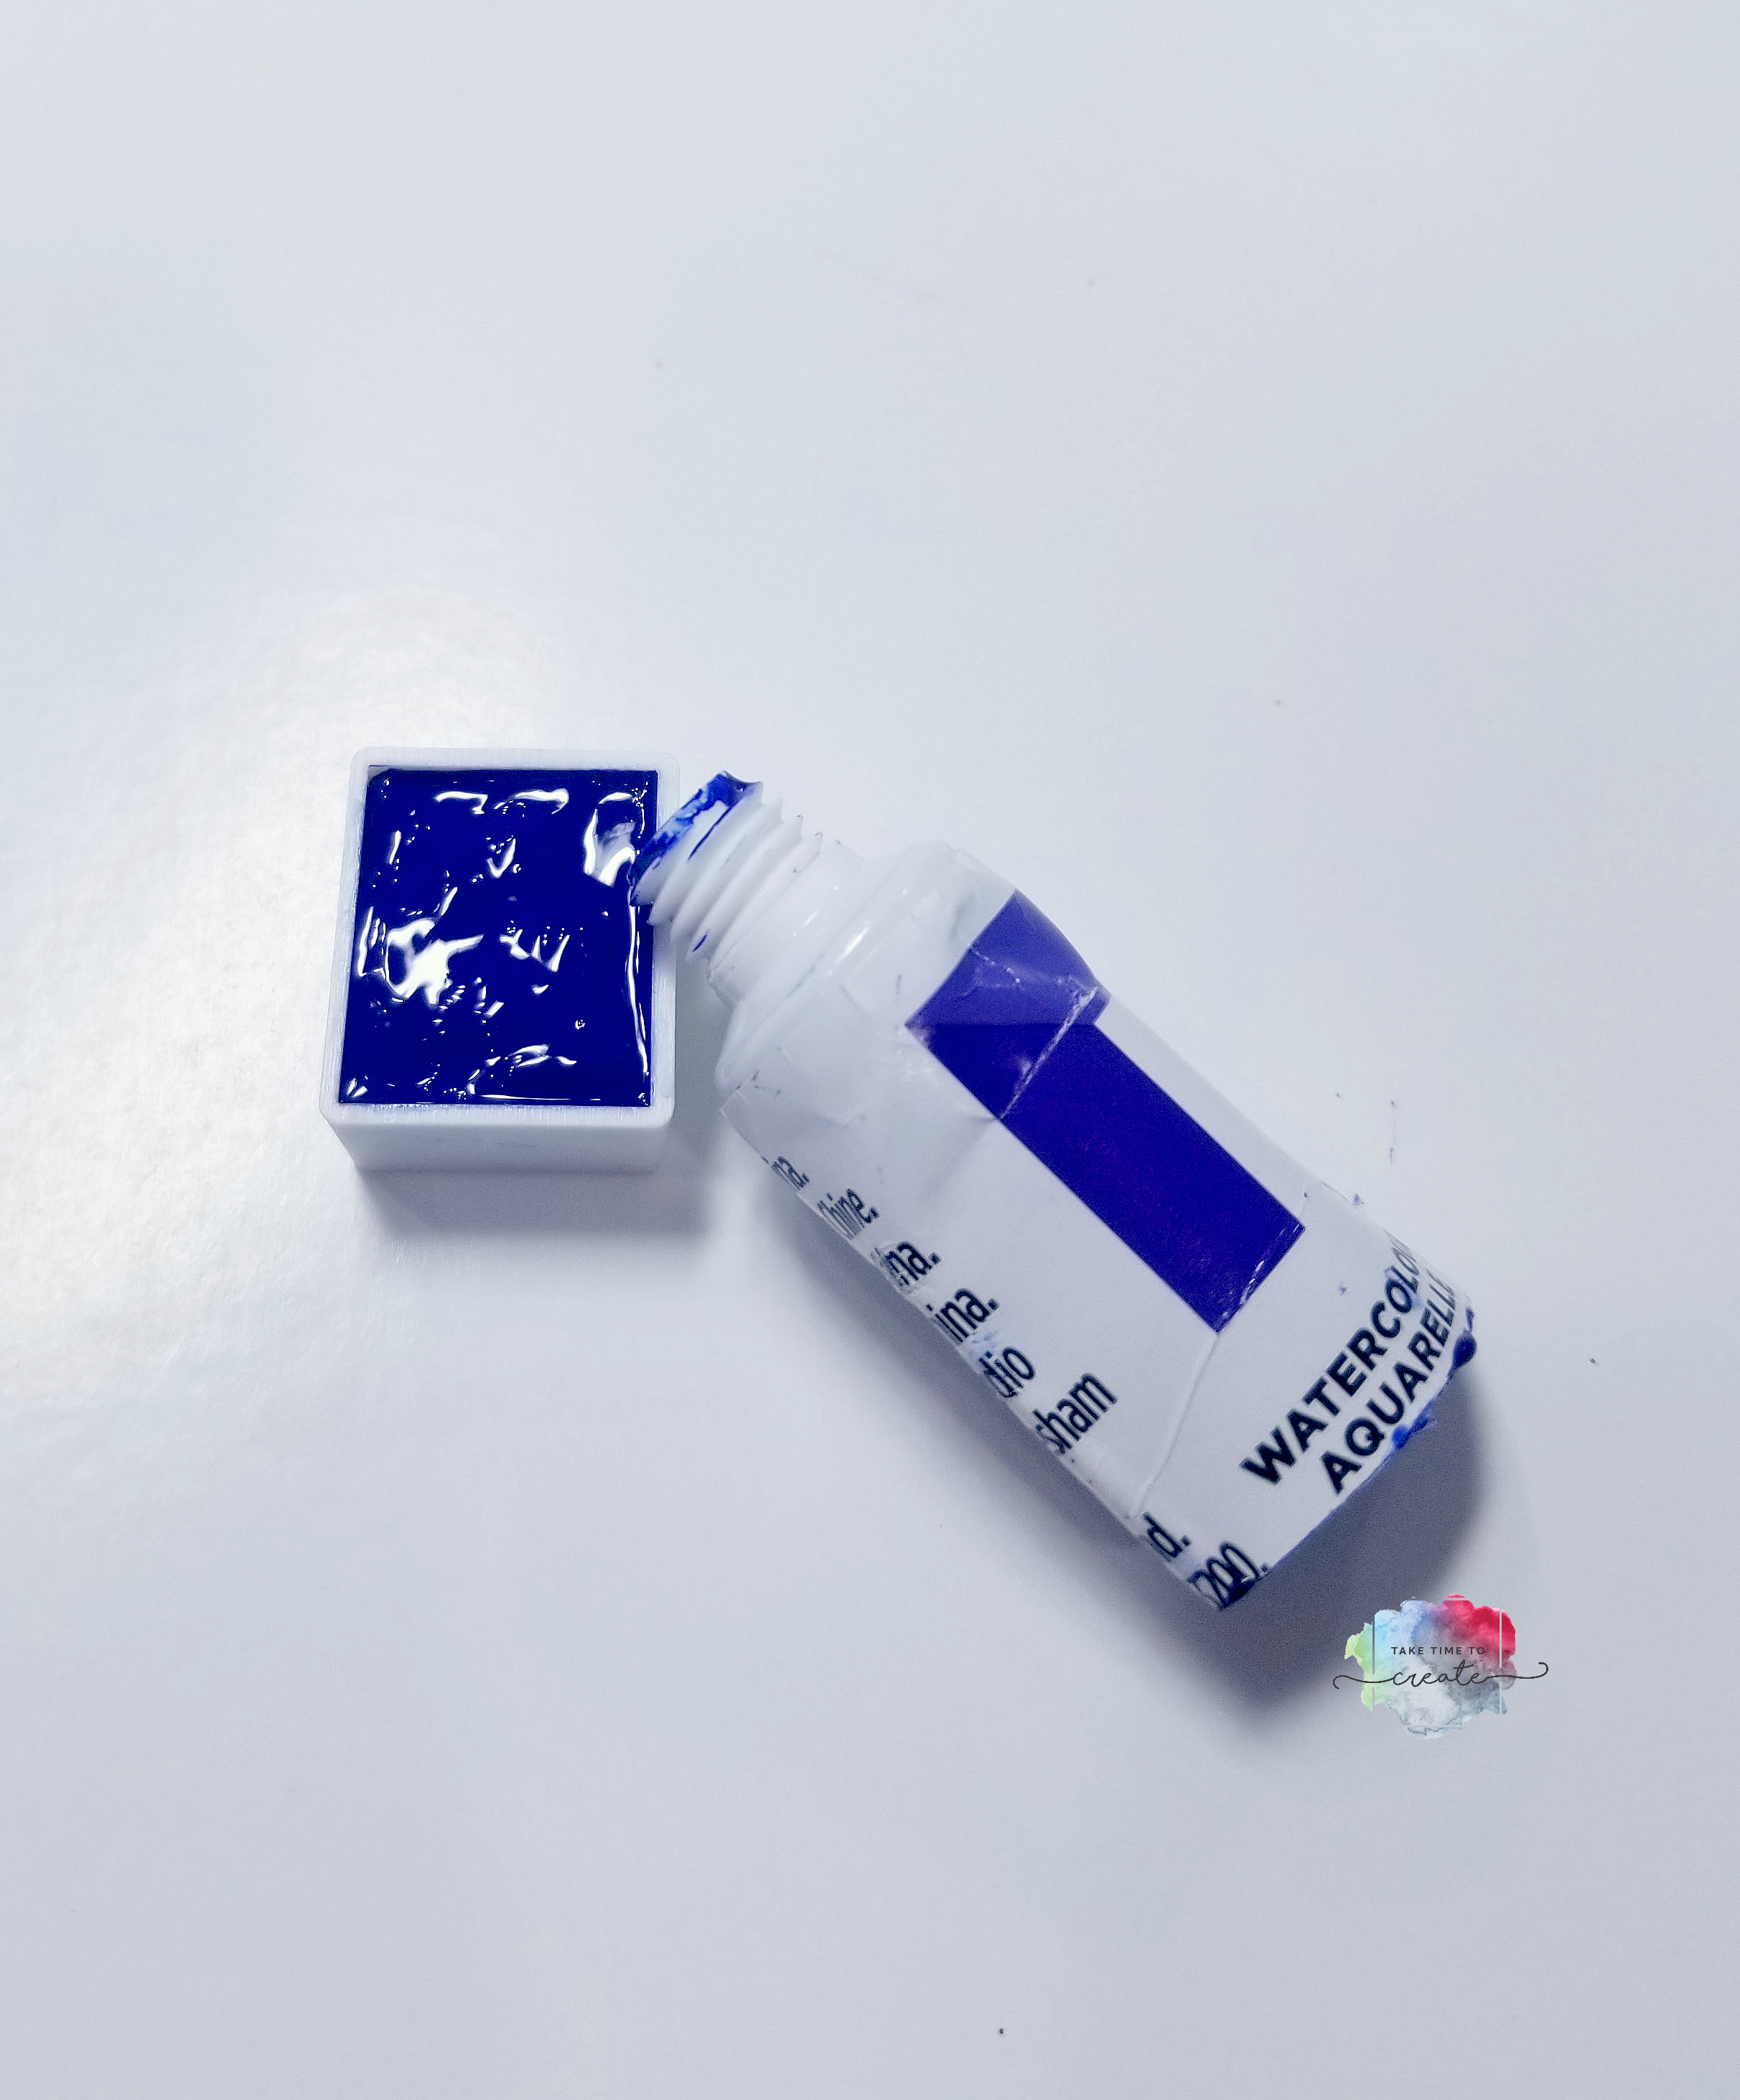
It has been a while since I posted. I have an Investigative Art Journal for you today. Today we are seeing how many half pans can you get from one tube of watercolors.
For this experiment I used Reeves Watercolors that I picked up at Michael’s. The affiliate link is listed here:
I found this a very interesting experiment, how much is actually in a watercolor tube? I was pleasantly surprised.
There are four and half, half pans in a tube!
This is a great if you want to invest in higher quality watercolors, but you don’t think you can go through that many pans, so sharing with a friend or 2 is now a viable option.
There is plenty of product to go around to everyone!
Check out the video to see more on the experiment and there are links to my other Investigative Art Journals.
What other experiments do you want me to do with watercolors?
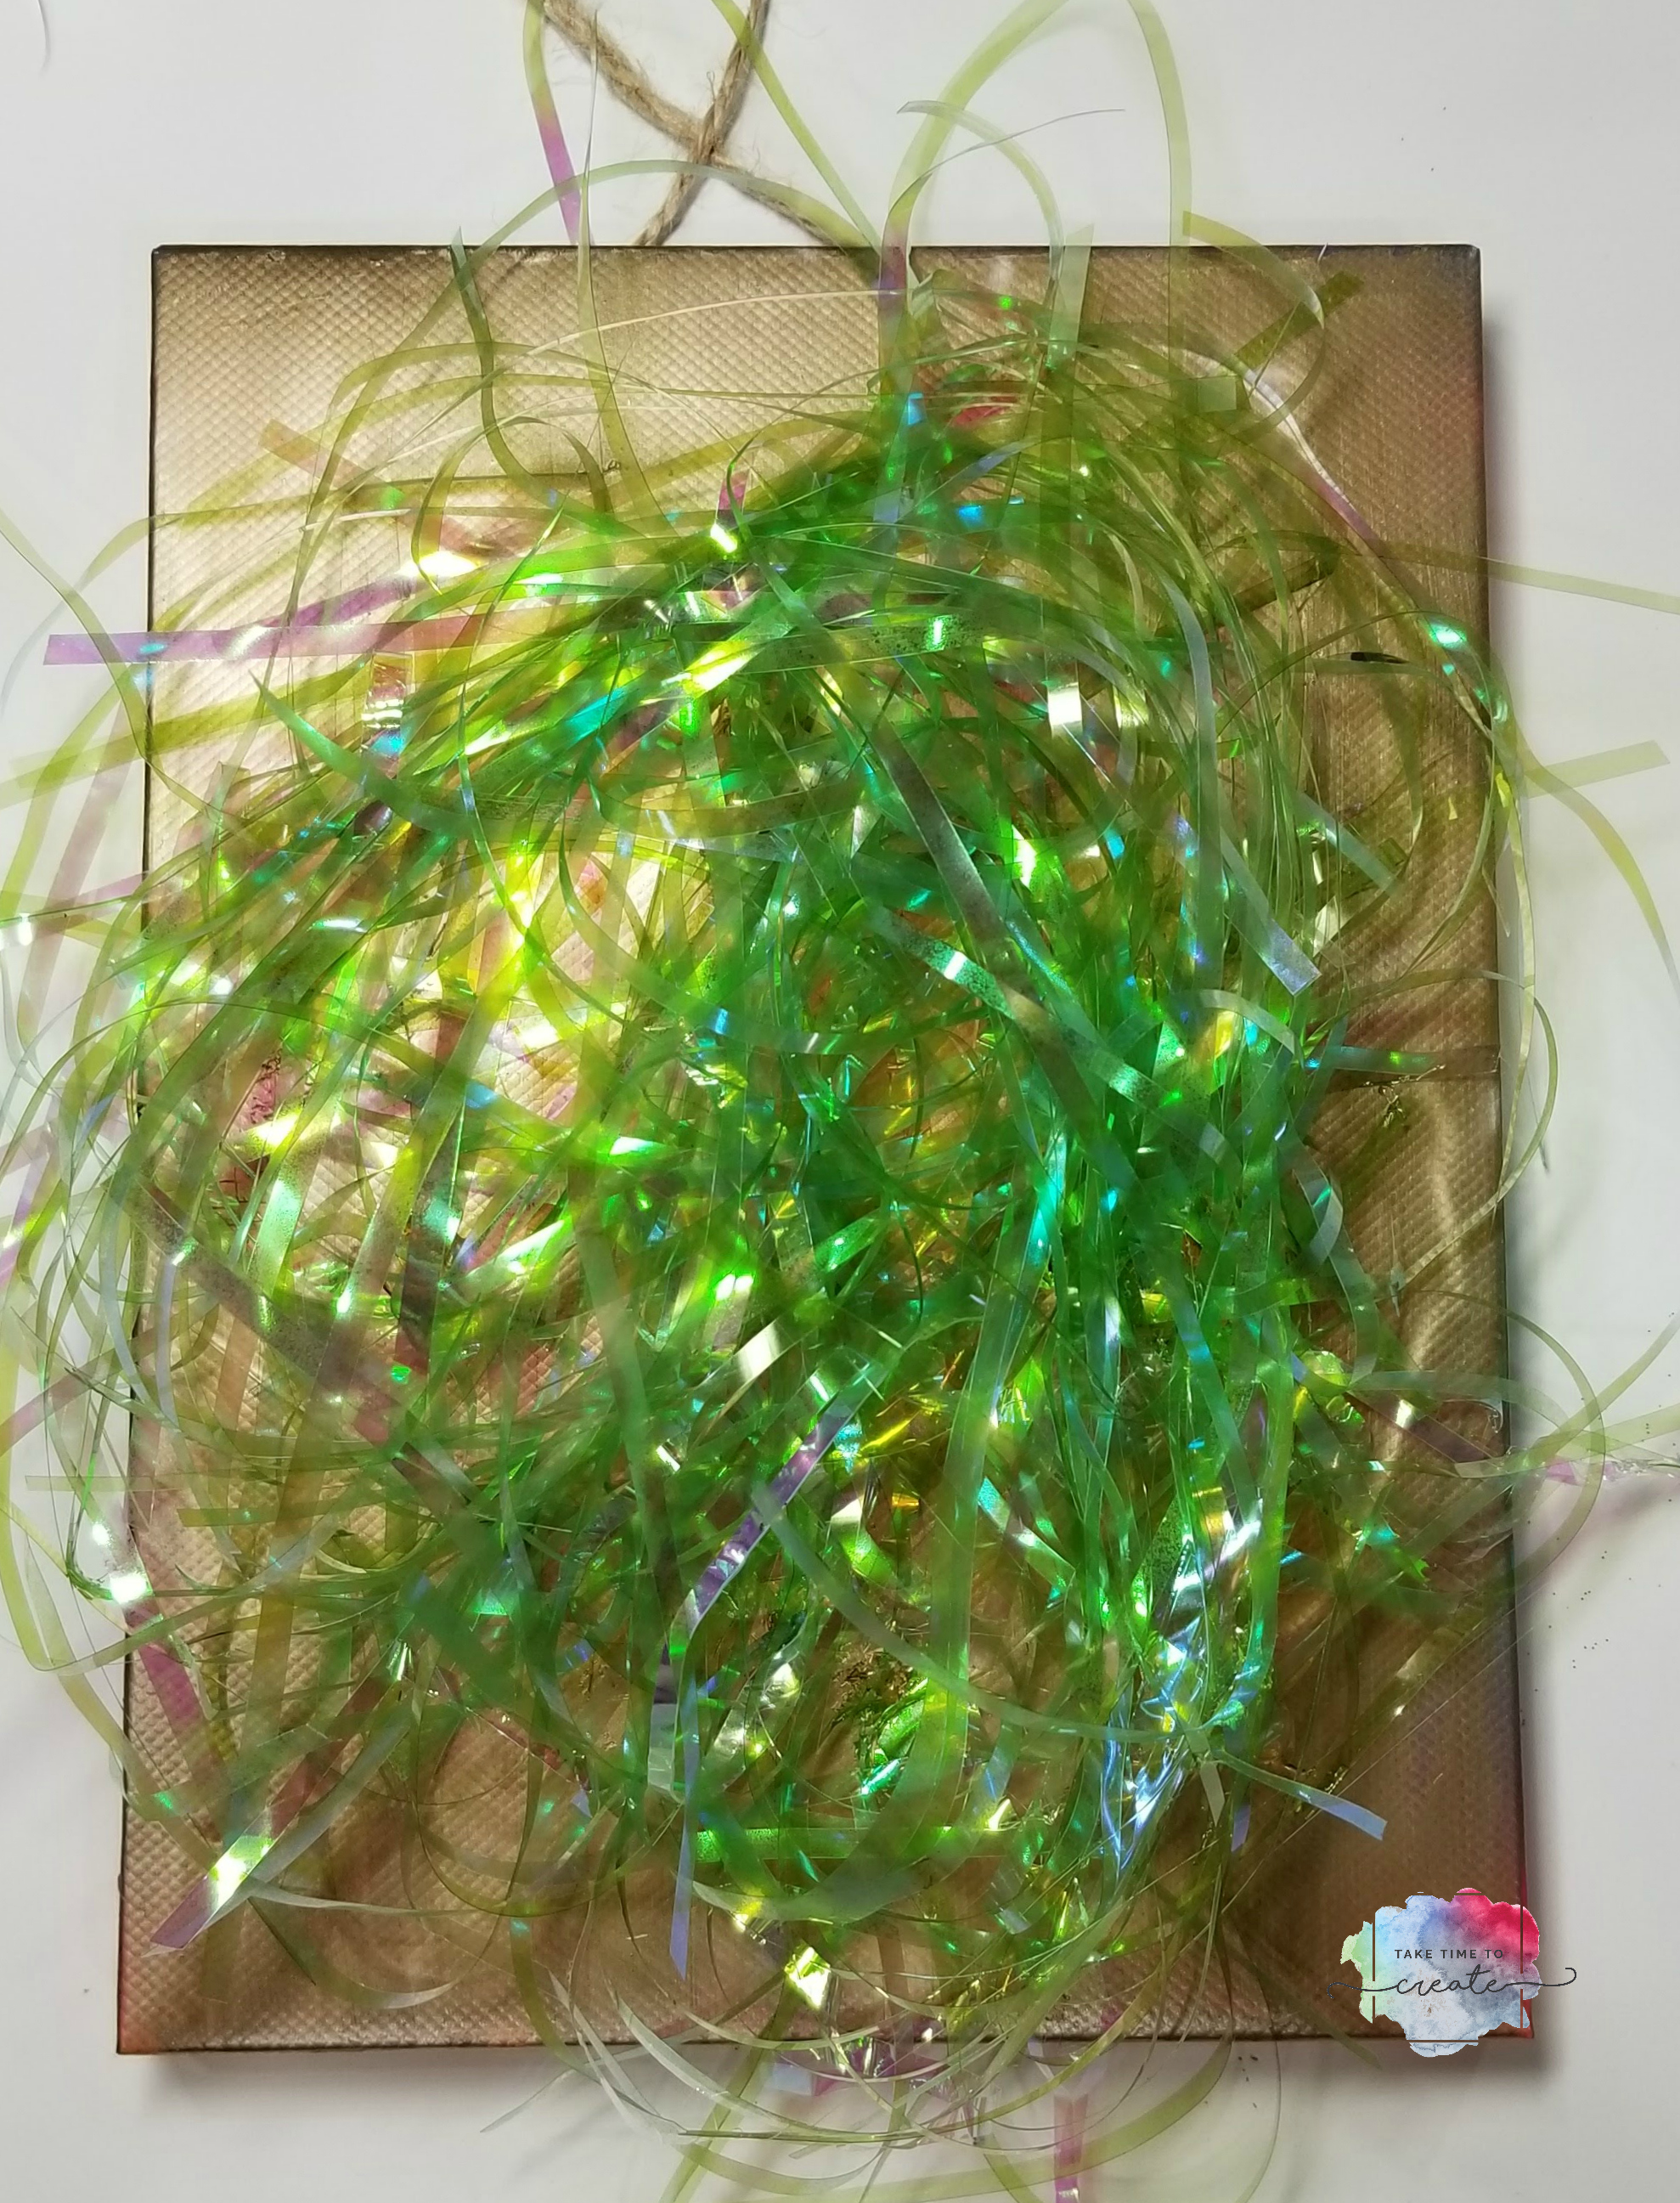
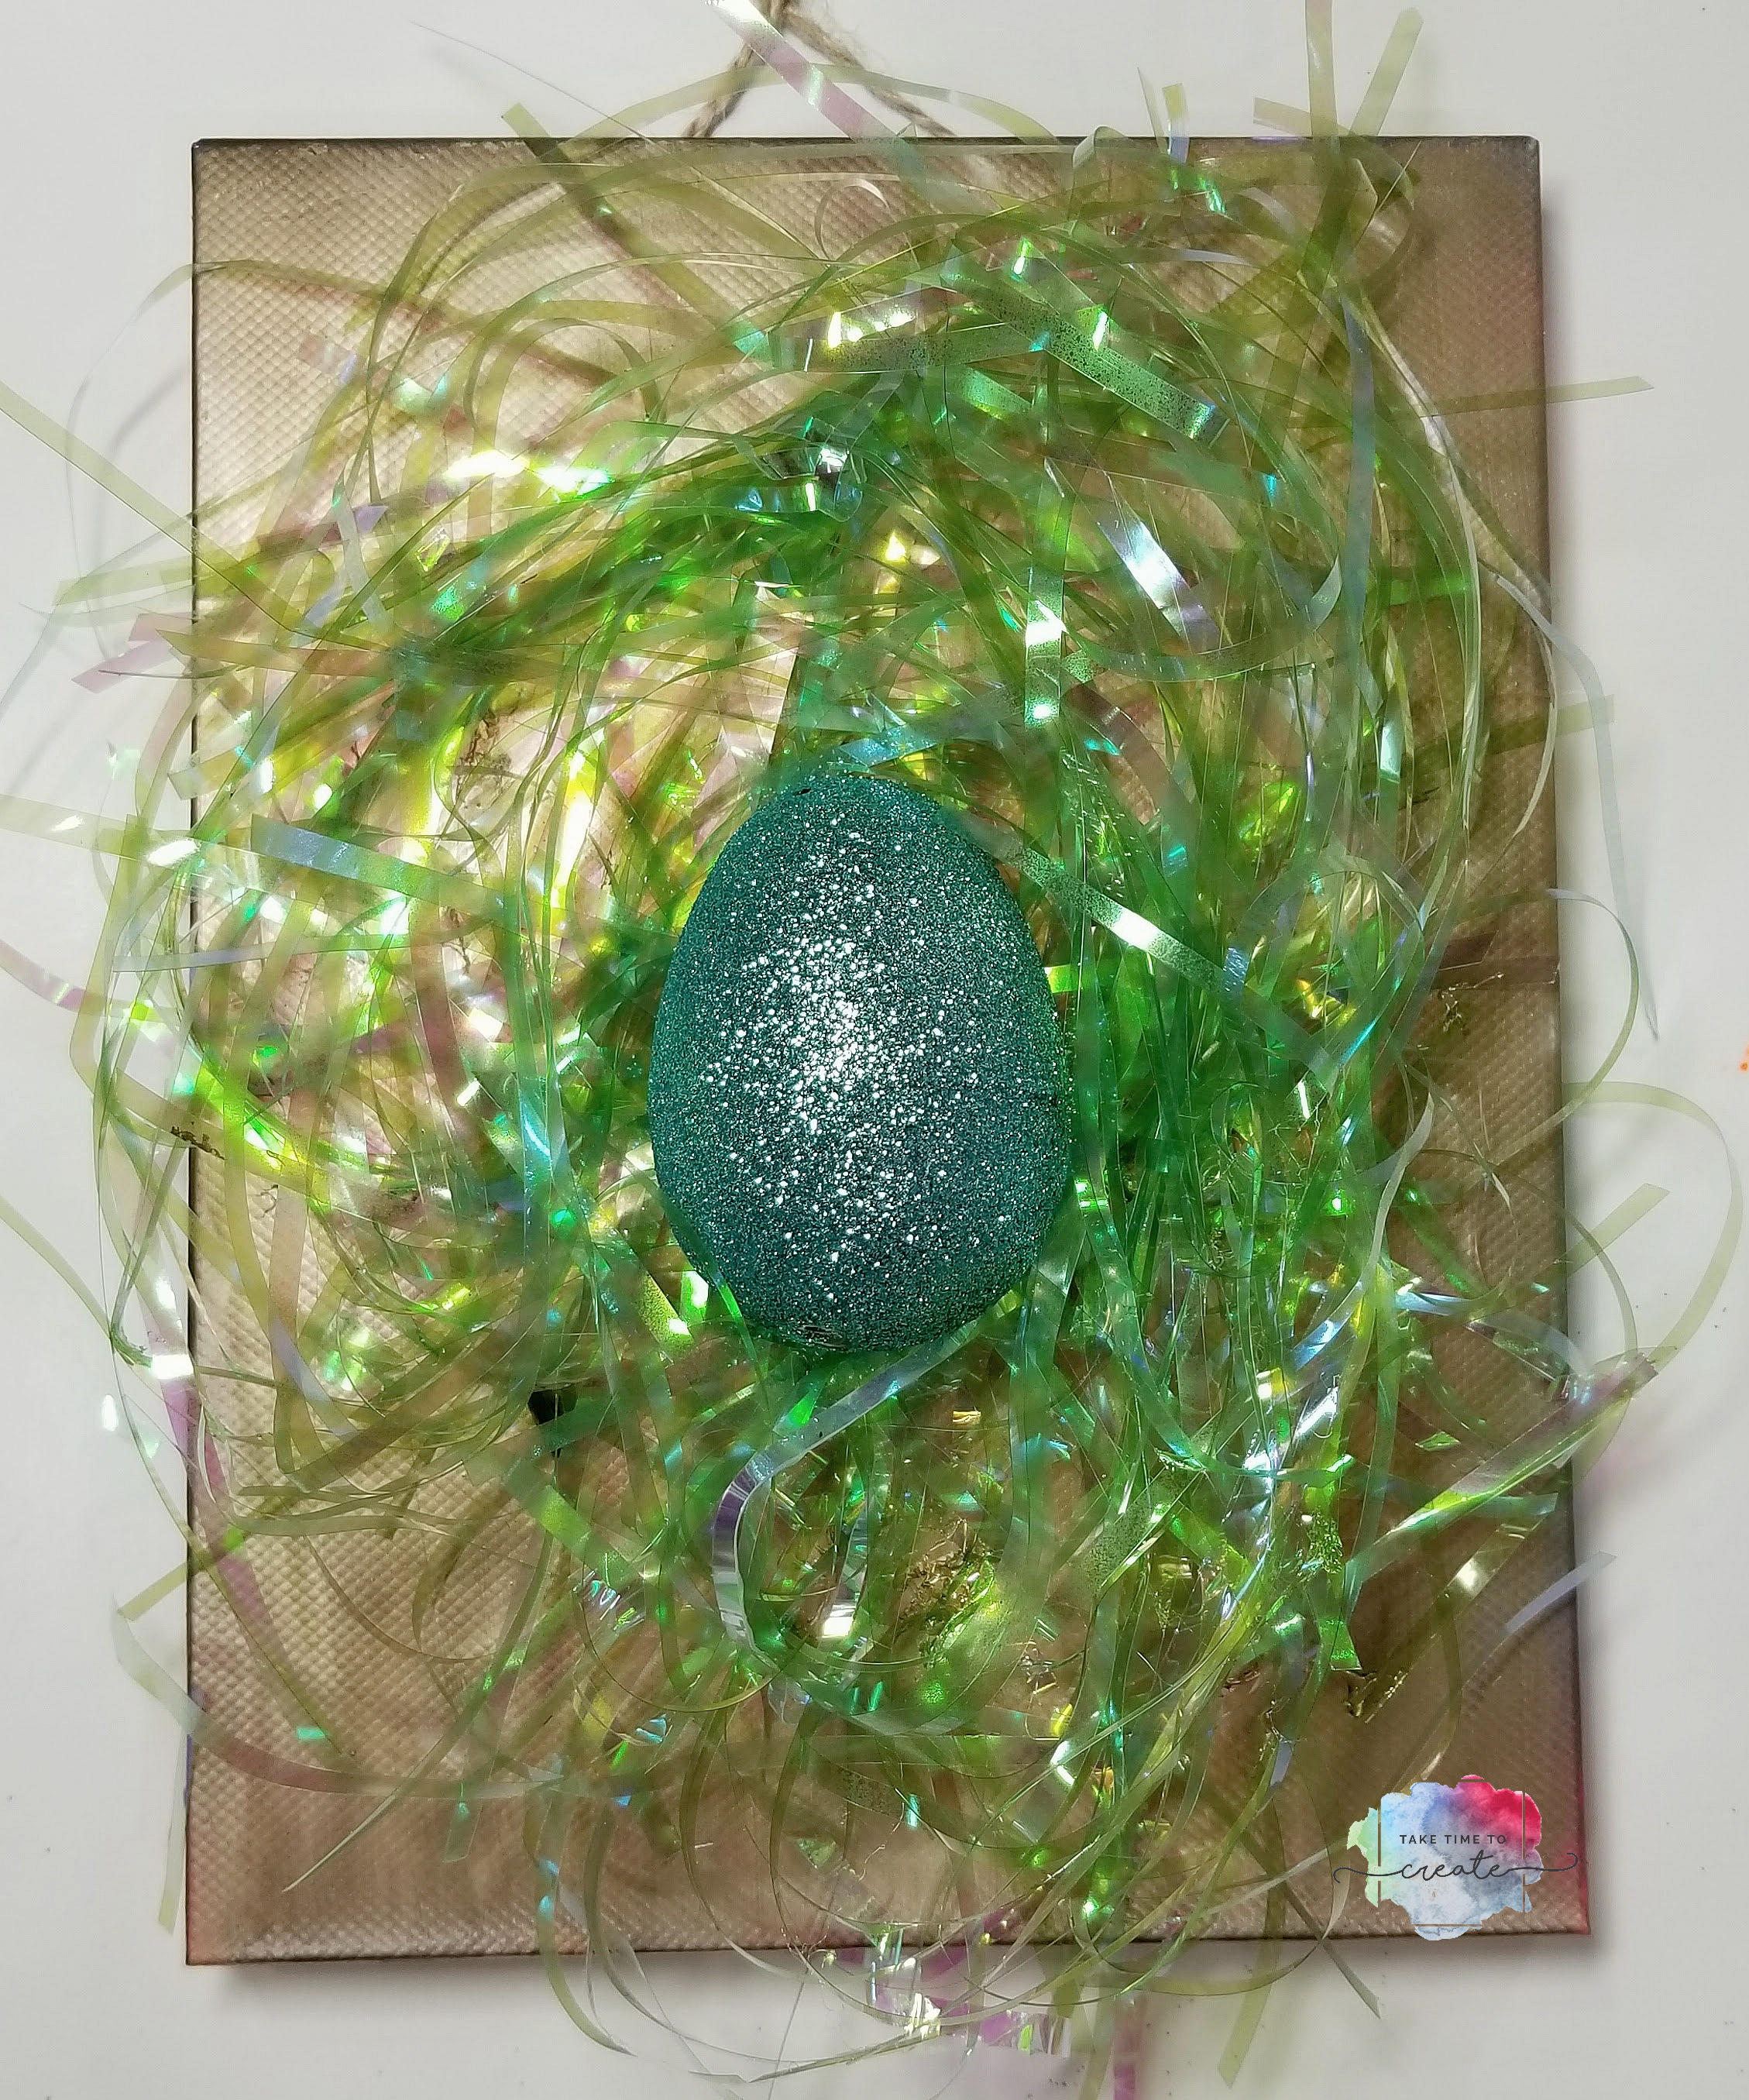
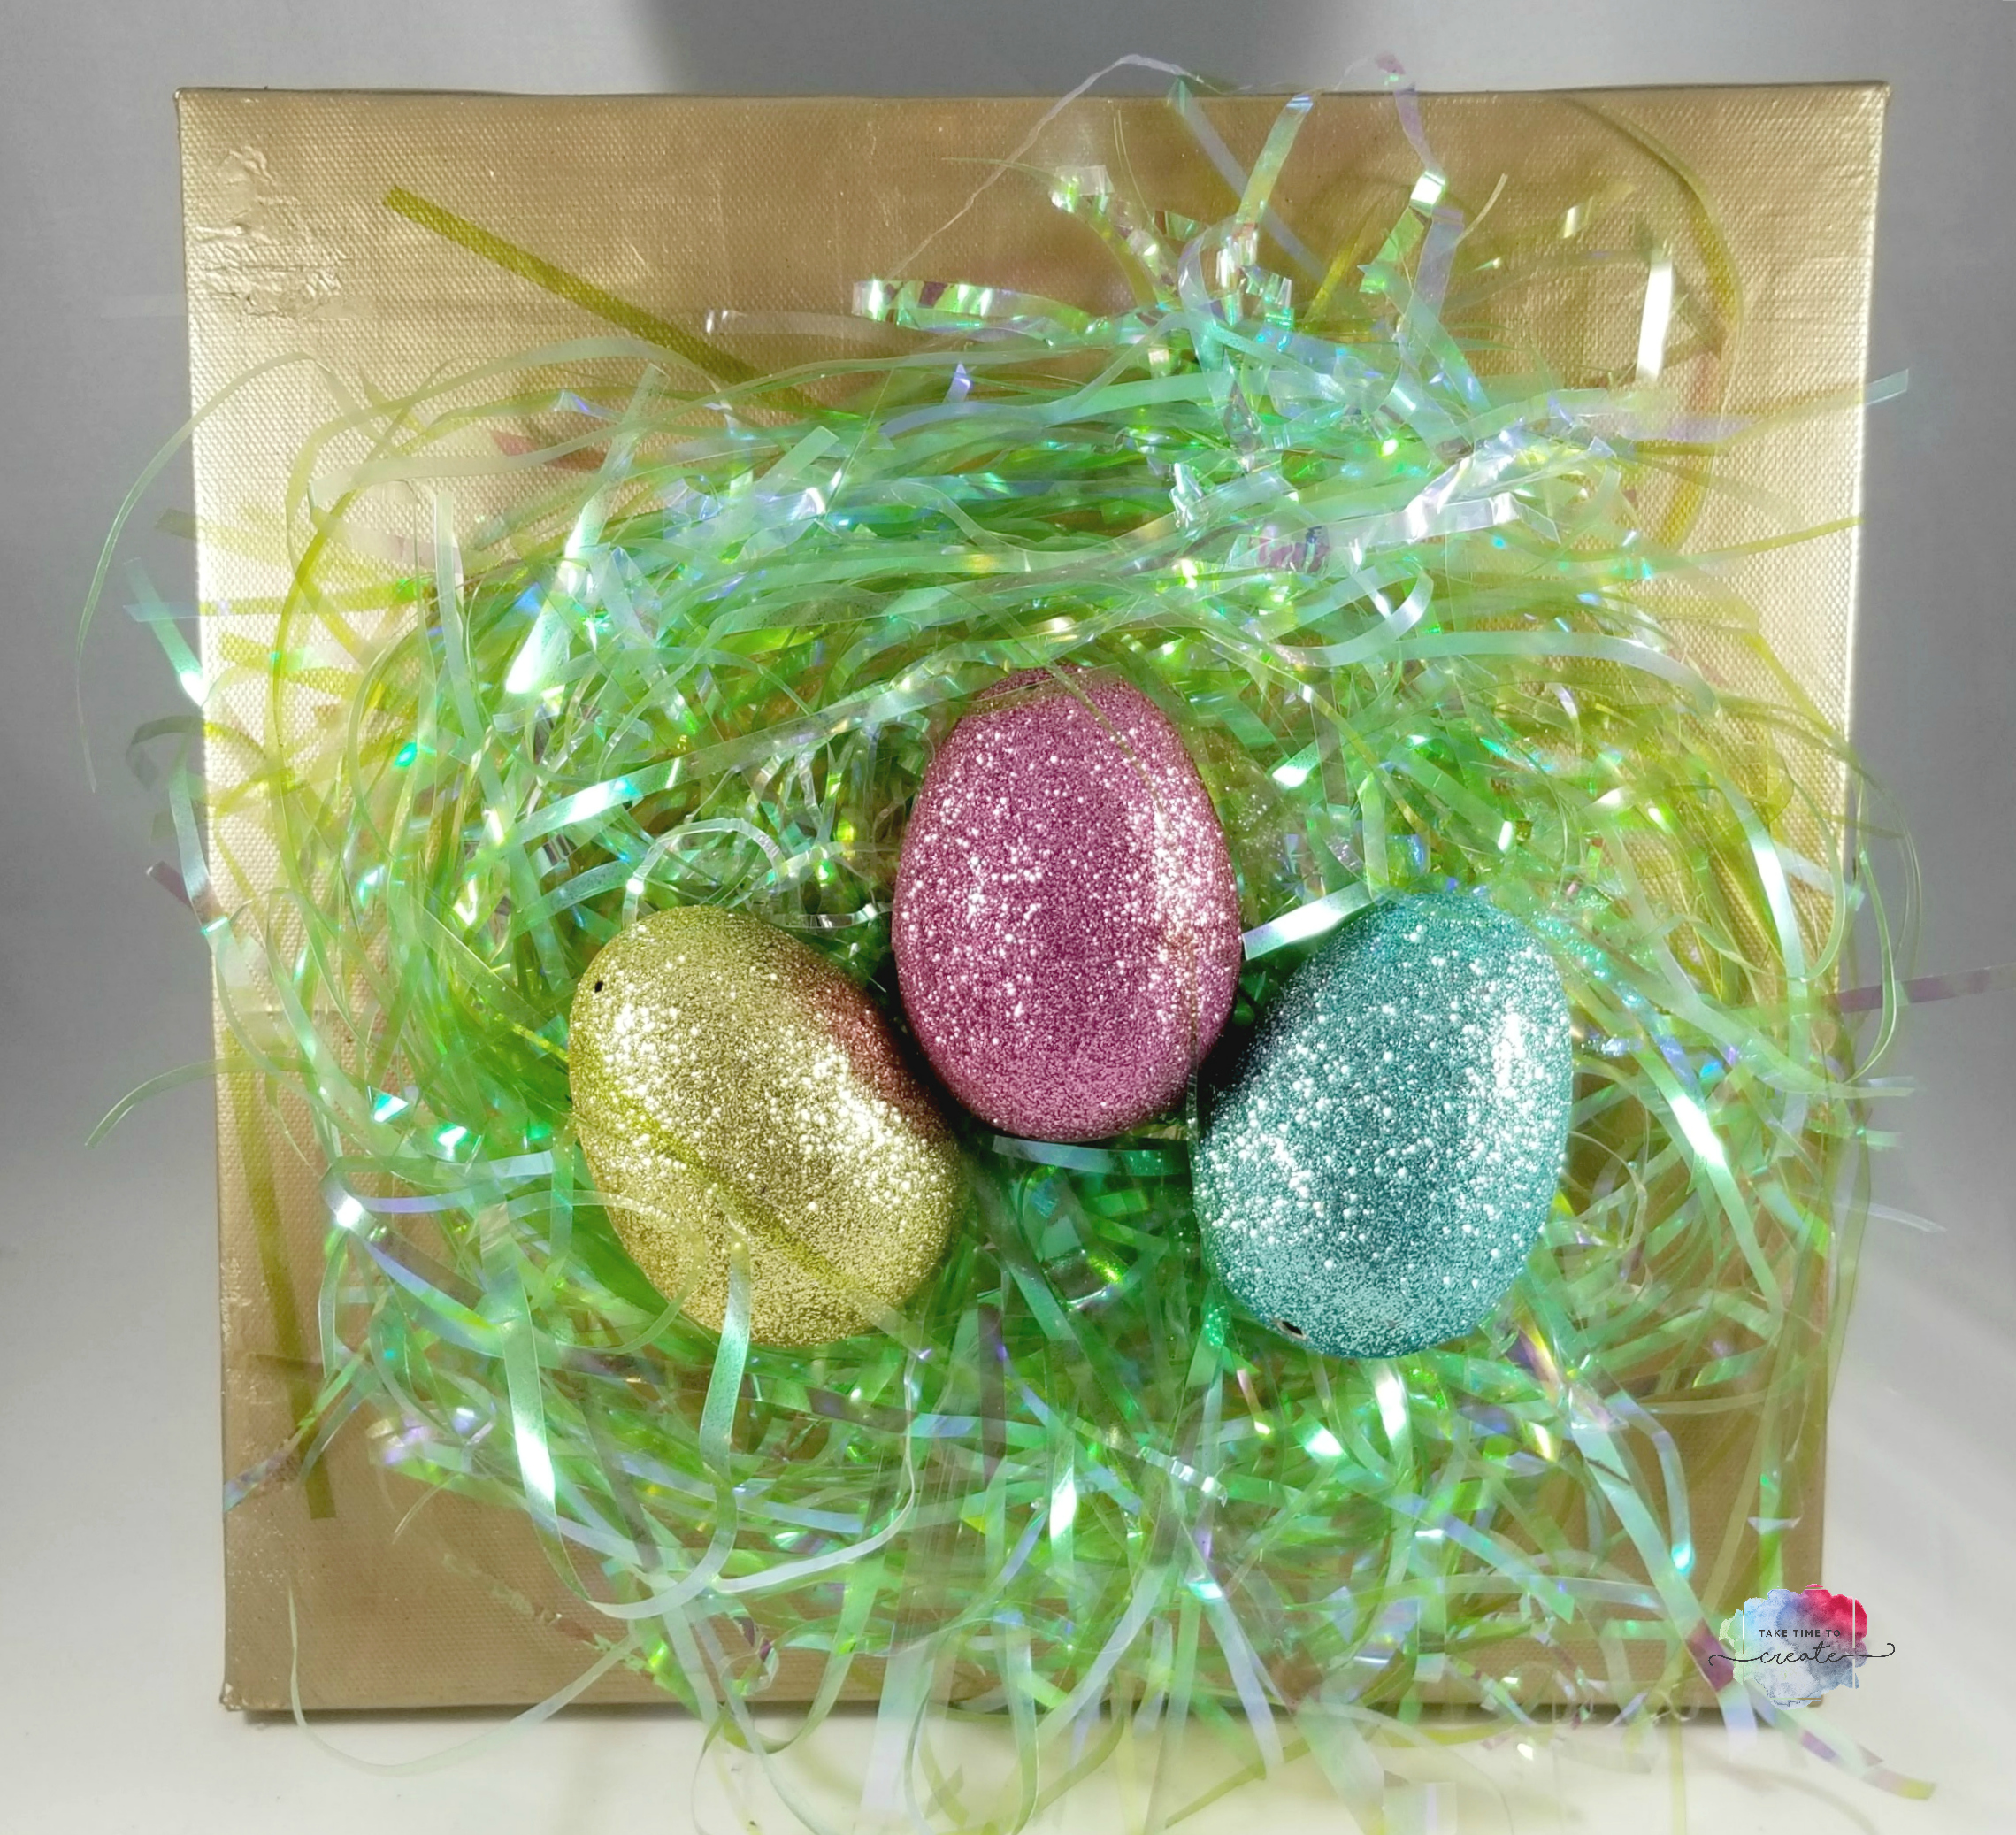
Can you believe that Easter is just right around the corner? Where is this year going? Anyway, I have a fun and easy Dollar Tree DIY Easter Decor project for you.
FTC Disclaimer:
I was compensated for this post. This post also contains affiliate links and I will be compensated if you make a purchase after clicking on my links.
So, to do this project you will need a few supplies, most of them can be picked up at the Dollar Tree.
First you will want to paint your canvas. I used a gold Folk Art paint. You can use any color you want, but it will take a few coats to cover up the canvas. You might not be able to find the exact canvas I am using, but look around they seem to always have some great choices for canvases, and you might want to experiment with different sizes.
Once your paint is dry you can add the grass. Take as much as you want and shape it into a nest shape and hot glue it to the canvas.
Then you add your eggs, add a single one in the middle, or a grouping of 3. If you can’t find any eggs look around for another spring related item that would fit on your canvas. Be creative and experiment with your center piece.
These are just so cute when they are all finished. These would look great in a grouping of 3. Also, this would be a fun project for kids or a church group. There are so many great options for these canvases.
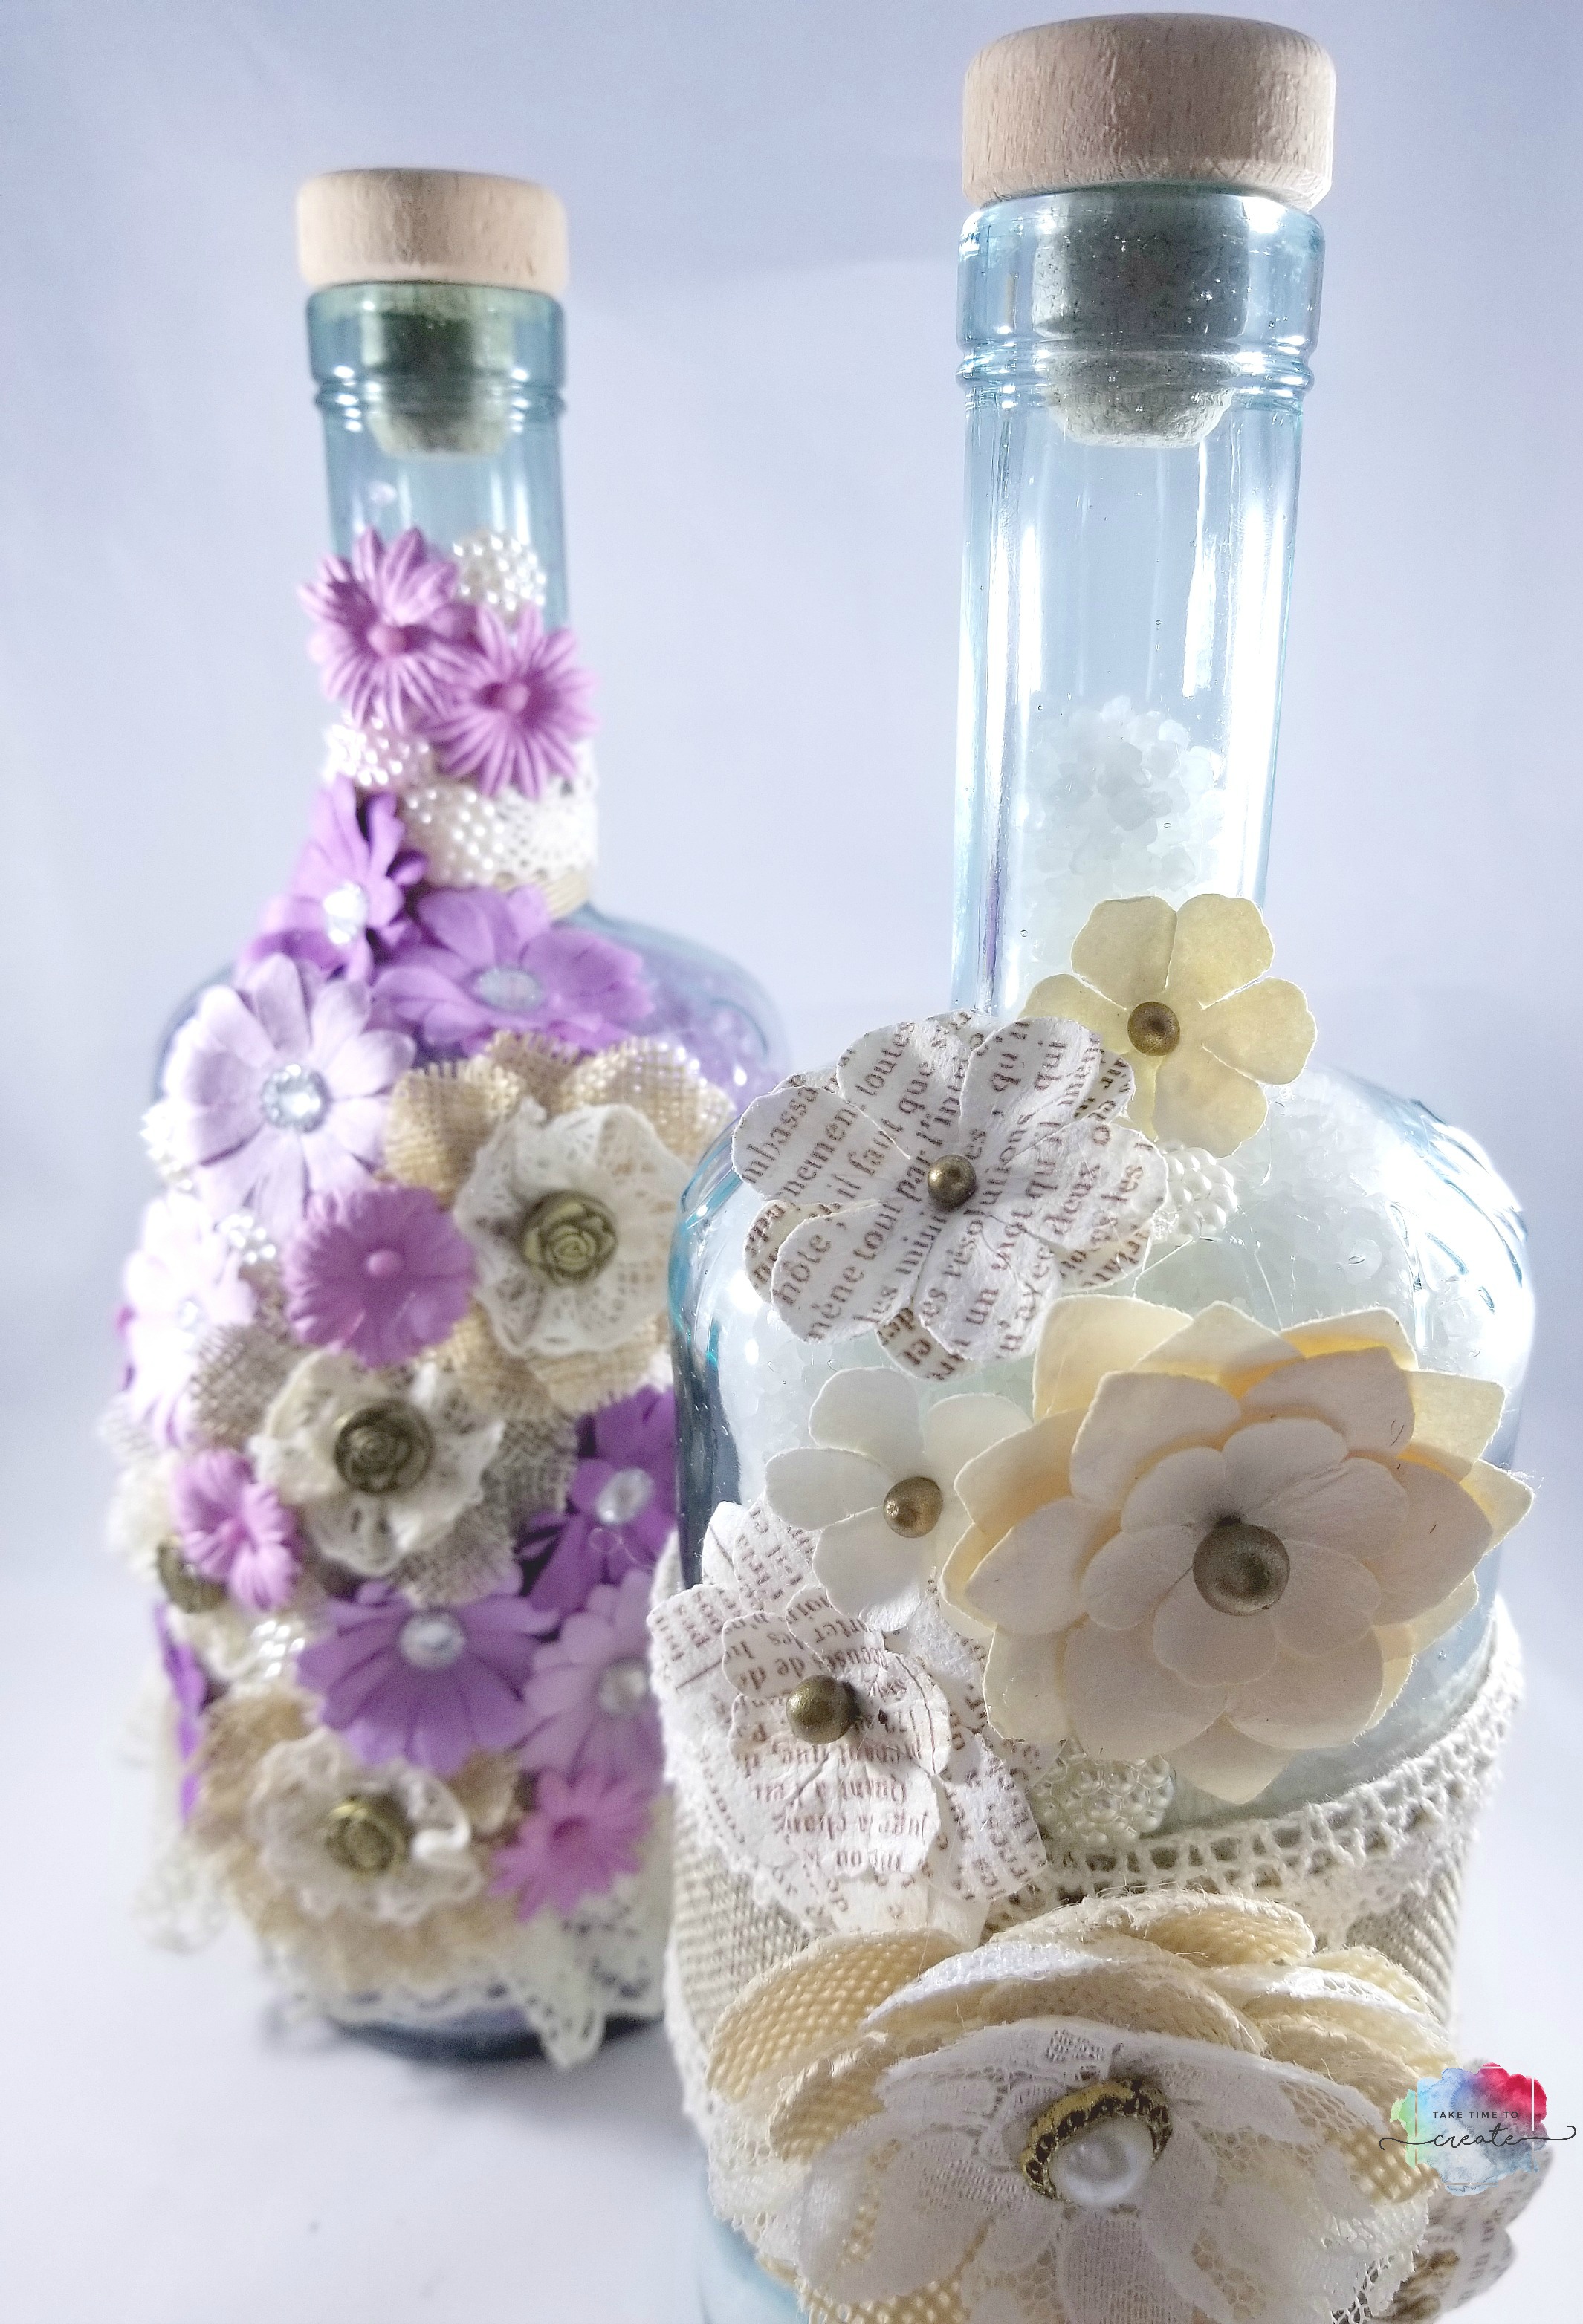
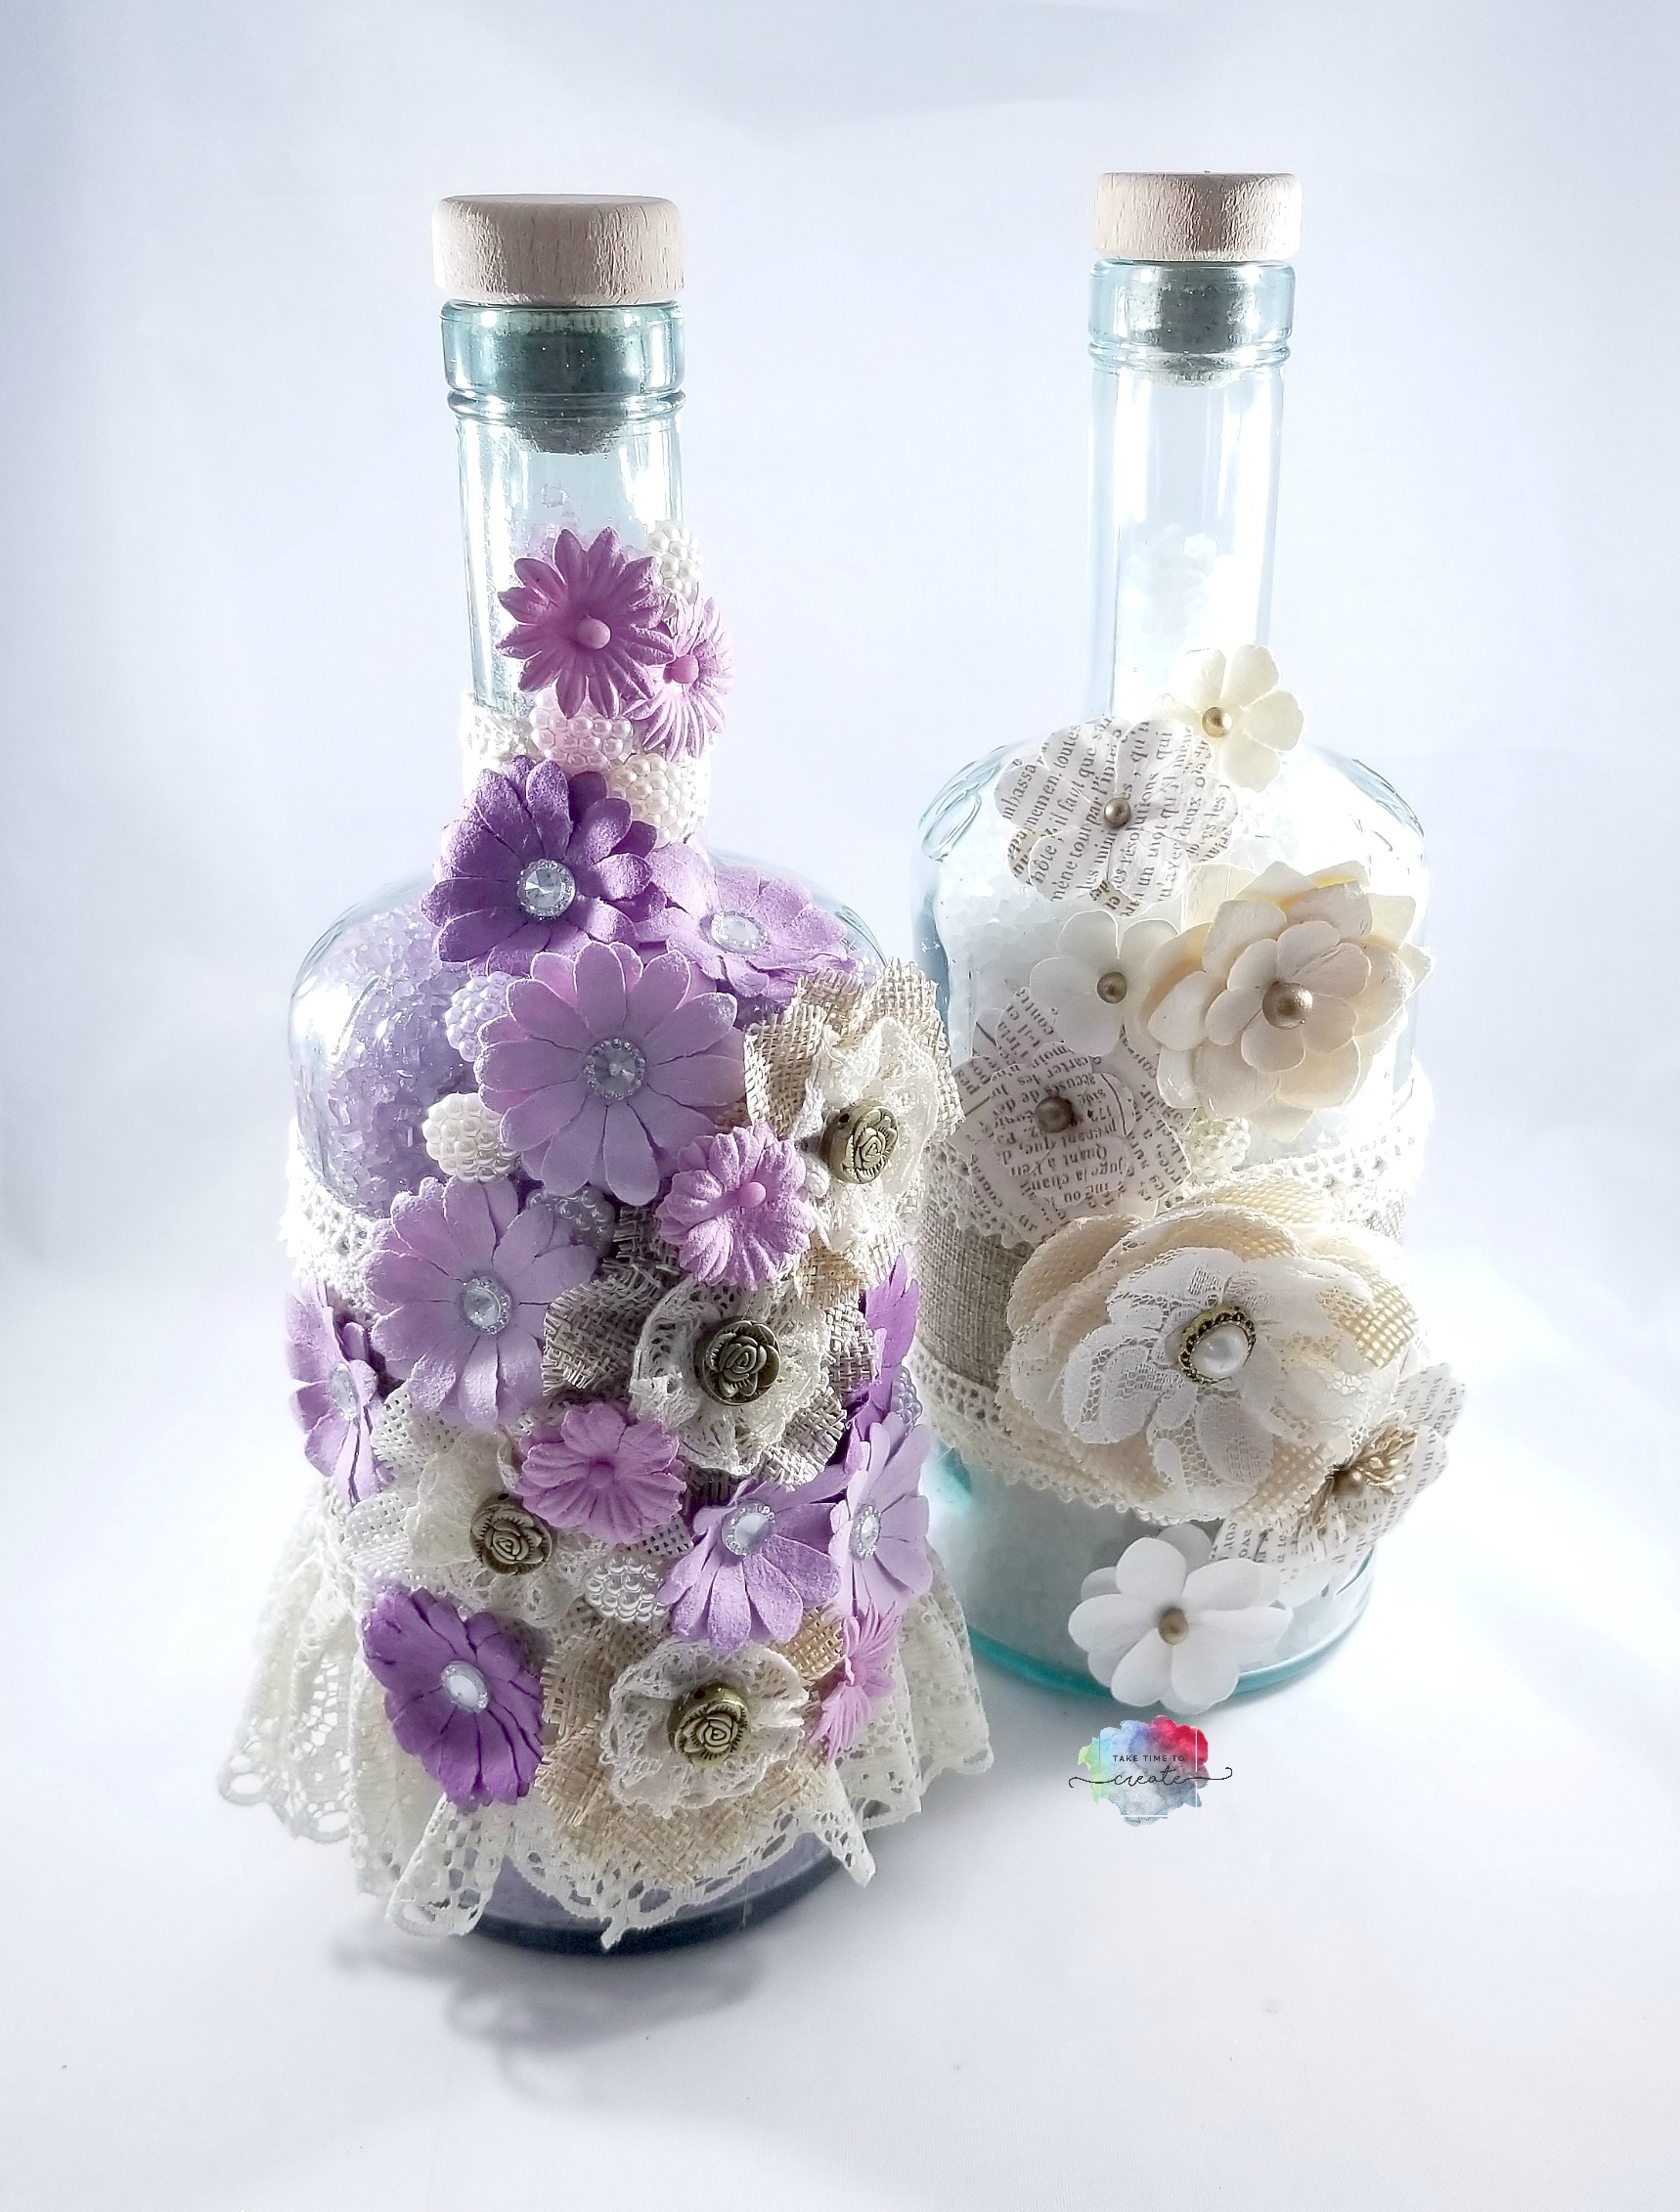
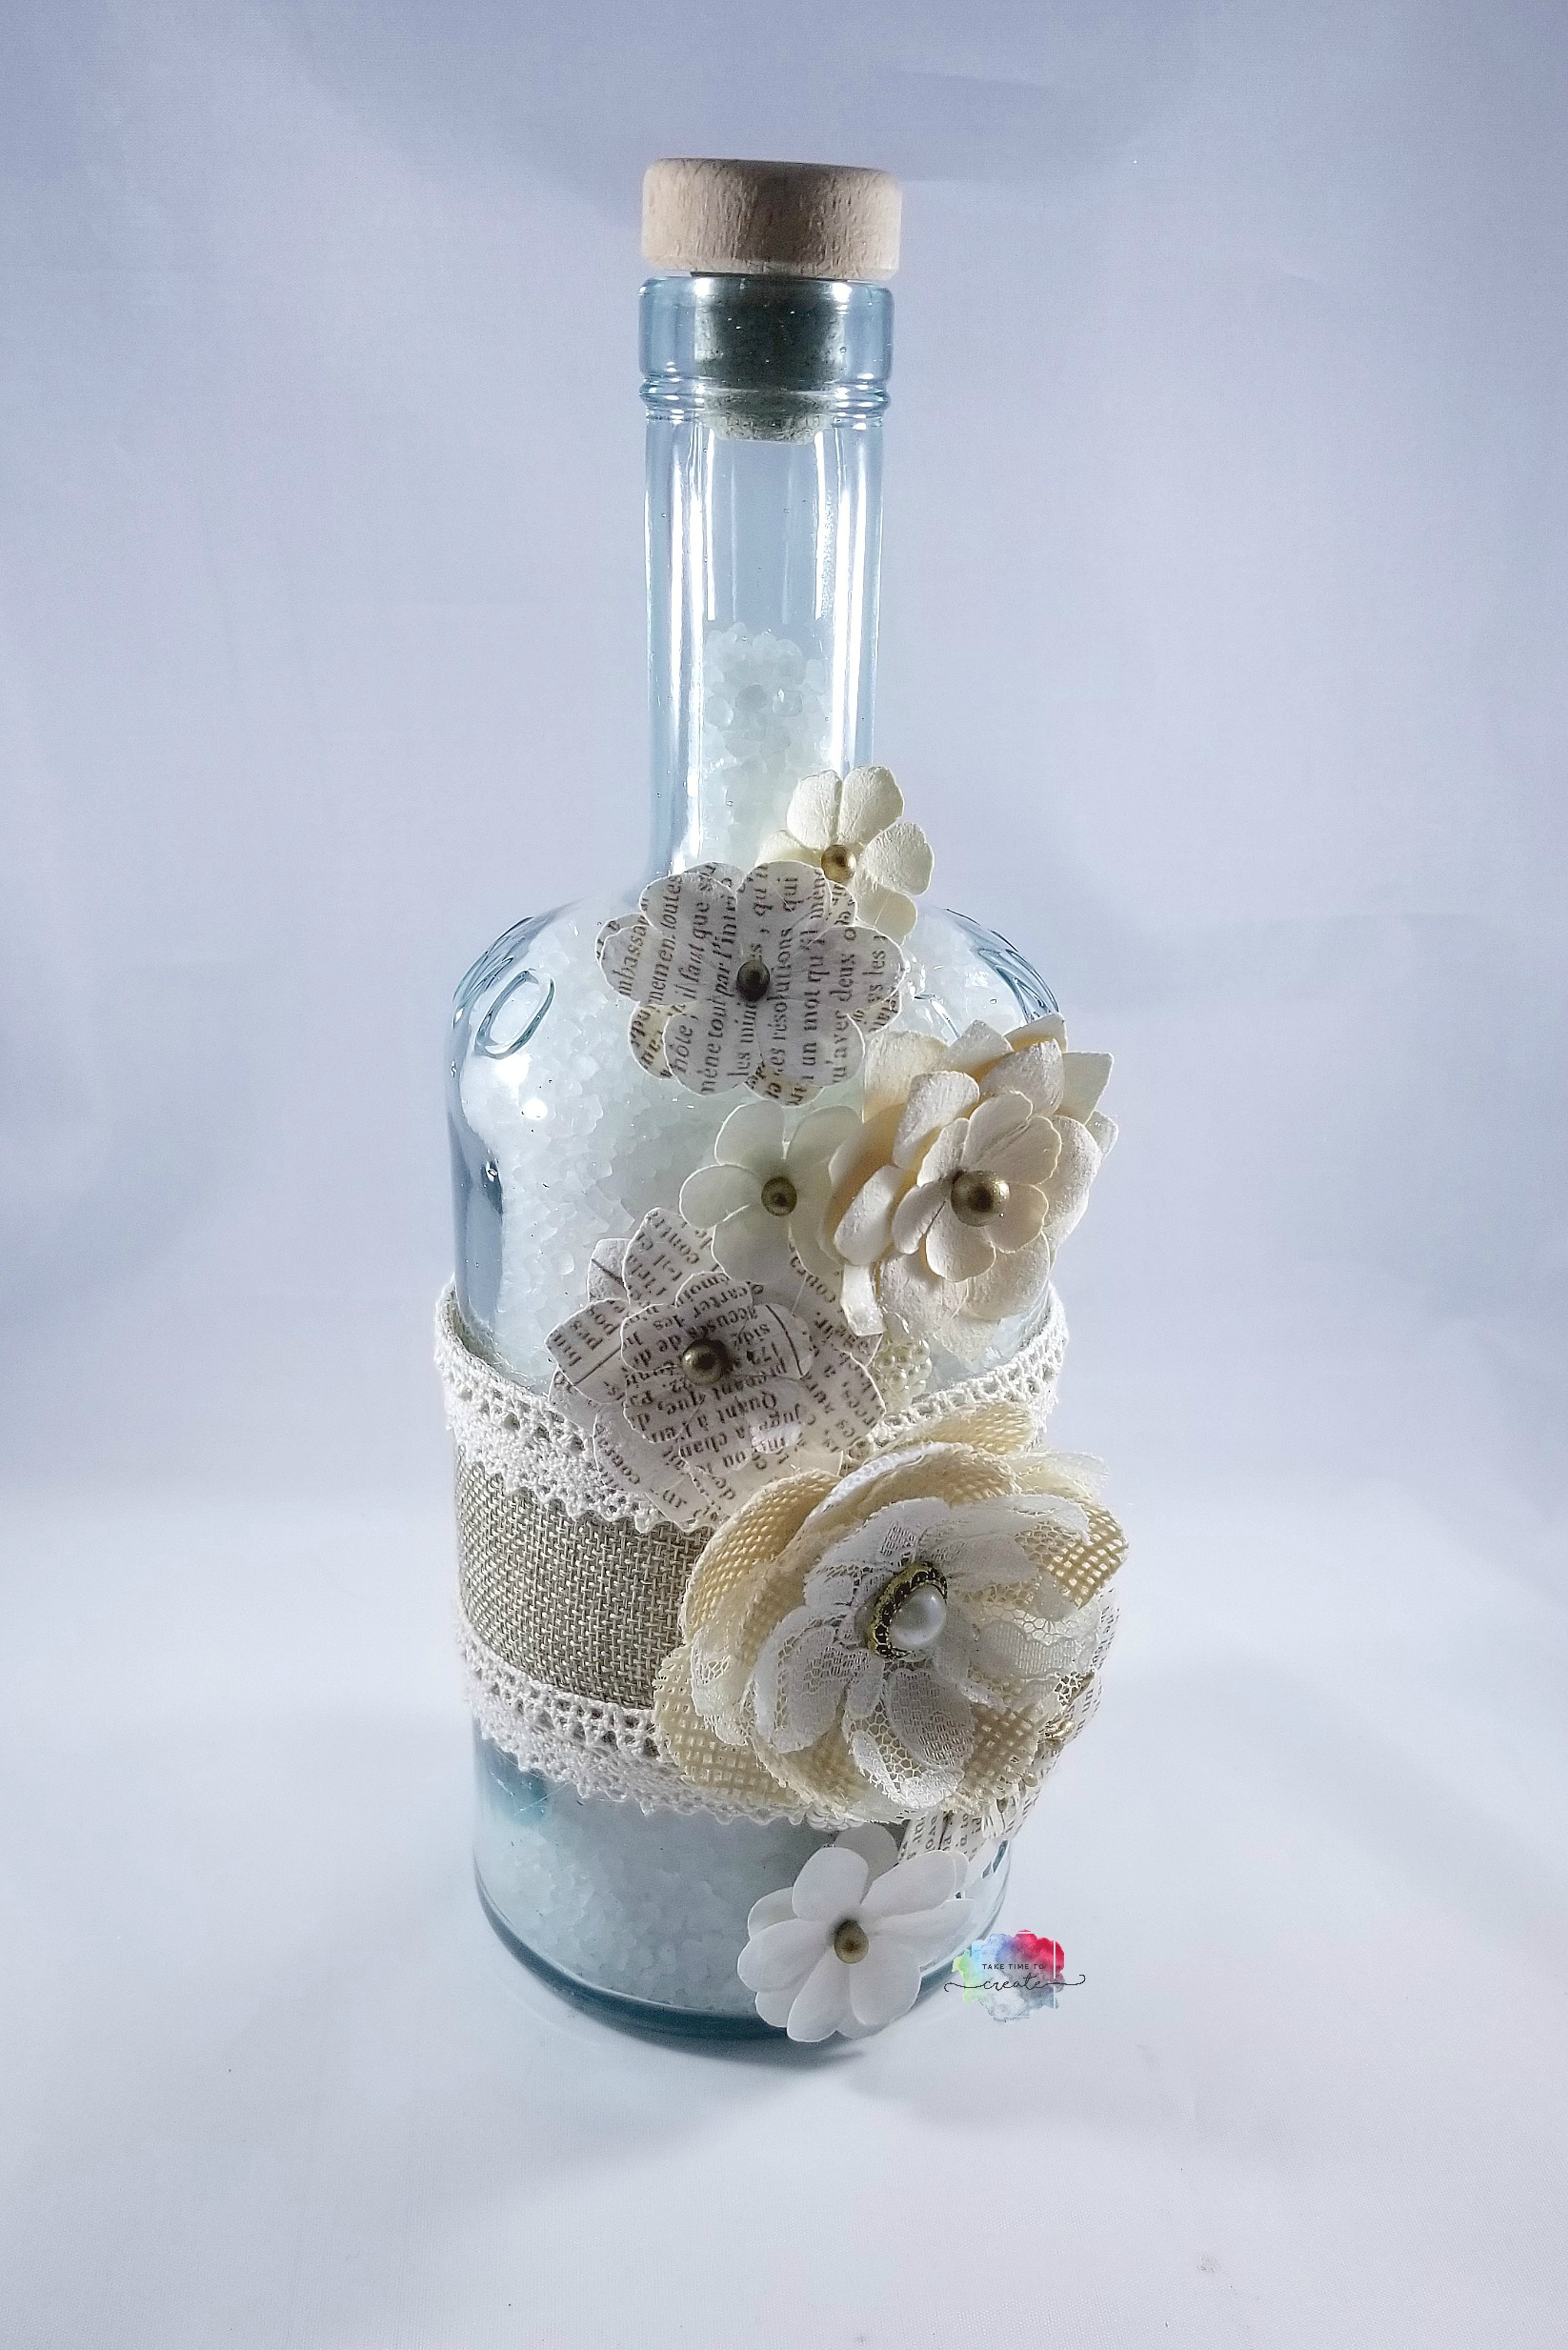
With the holidays approaching it is important to take time to relax and a bath is perfect for relaxing! I made these altered bottles for bath soaks which look great in your bathroom!
They are easy to make and they can also make a perfect handmade gift, or you can sell them at a craft fair.
For this project find a really great bottle. I found mine at Who Give a Scrap. It is on on the larger size, that worked perfectly for me. Make sure it has a lid and that you clean it thoroughly.
Once the bottle is clean and dry add your embellishments. I added burlap and lace around the bottle to start.
Then I added a lot of flowers and beads to create the look I was going for. You can add flowers, buttons, keys, and found objects. Anything would look great on the bottle.
Once it was all decorated I added the bath salts and the cork. Now I have a great gift, or even something for me.
Christmas craft fair season is upon us! Yikes, I am not ready! Anyone else doing craft fairs and are you ready?
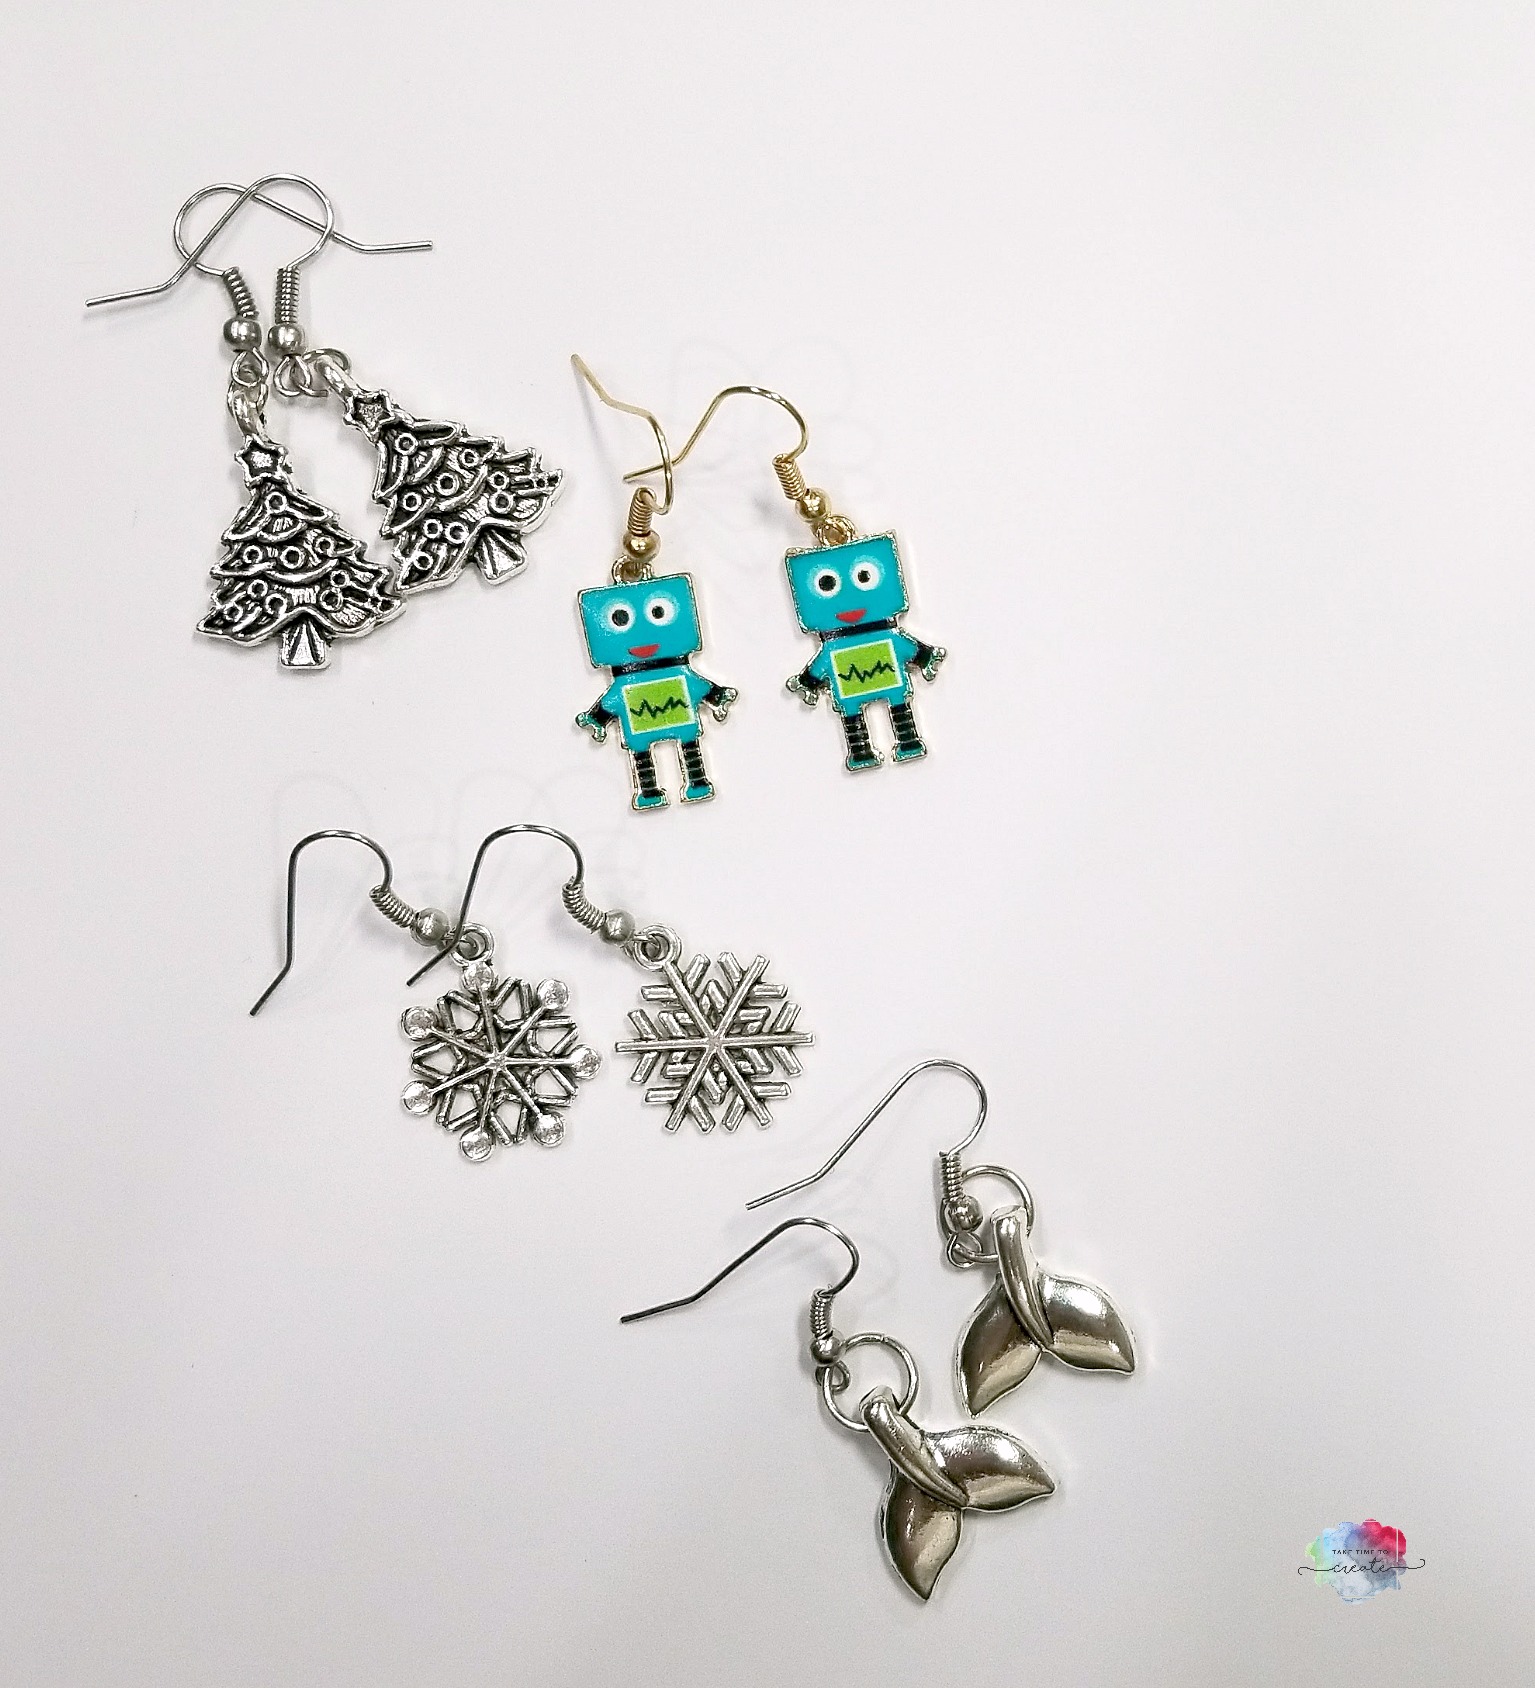
One item I like to see are earrings. On a side note I only make and sell things I will use/wear/display in my home. Too often people try to make only what they think will sell and not what they actually like or that they would wear or use. This is my opinion, and I sure it is different from other opinions. Now I want to sell it all, but I know some things won’t sell and that is ok. And since I like it I will be more likely to use in my daily life.
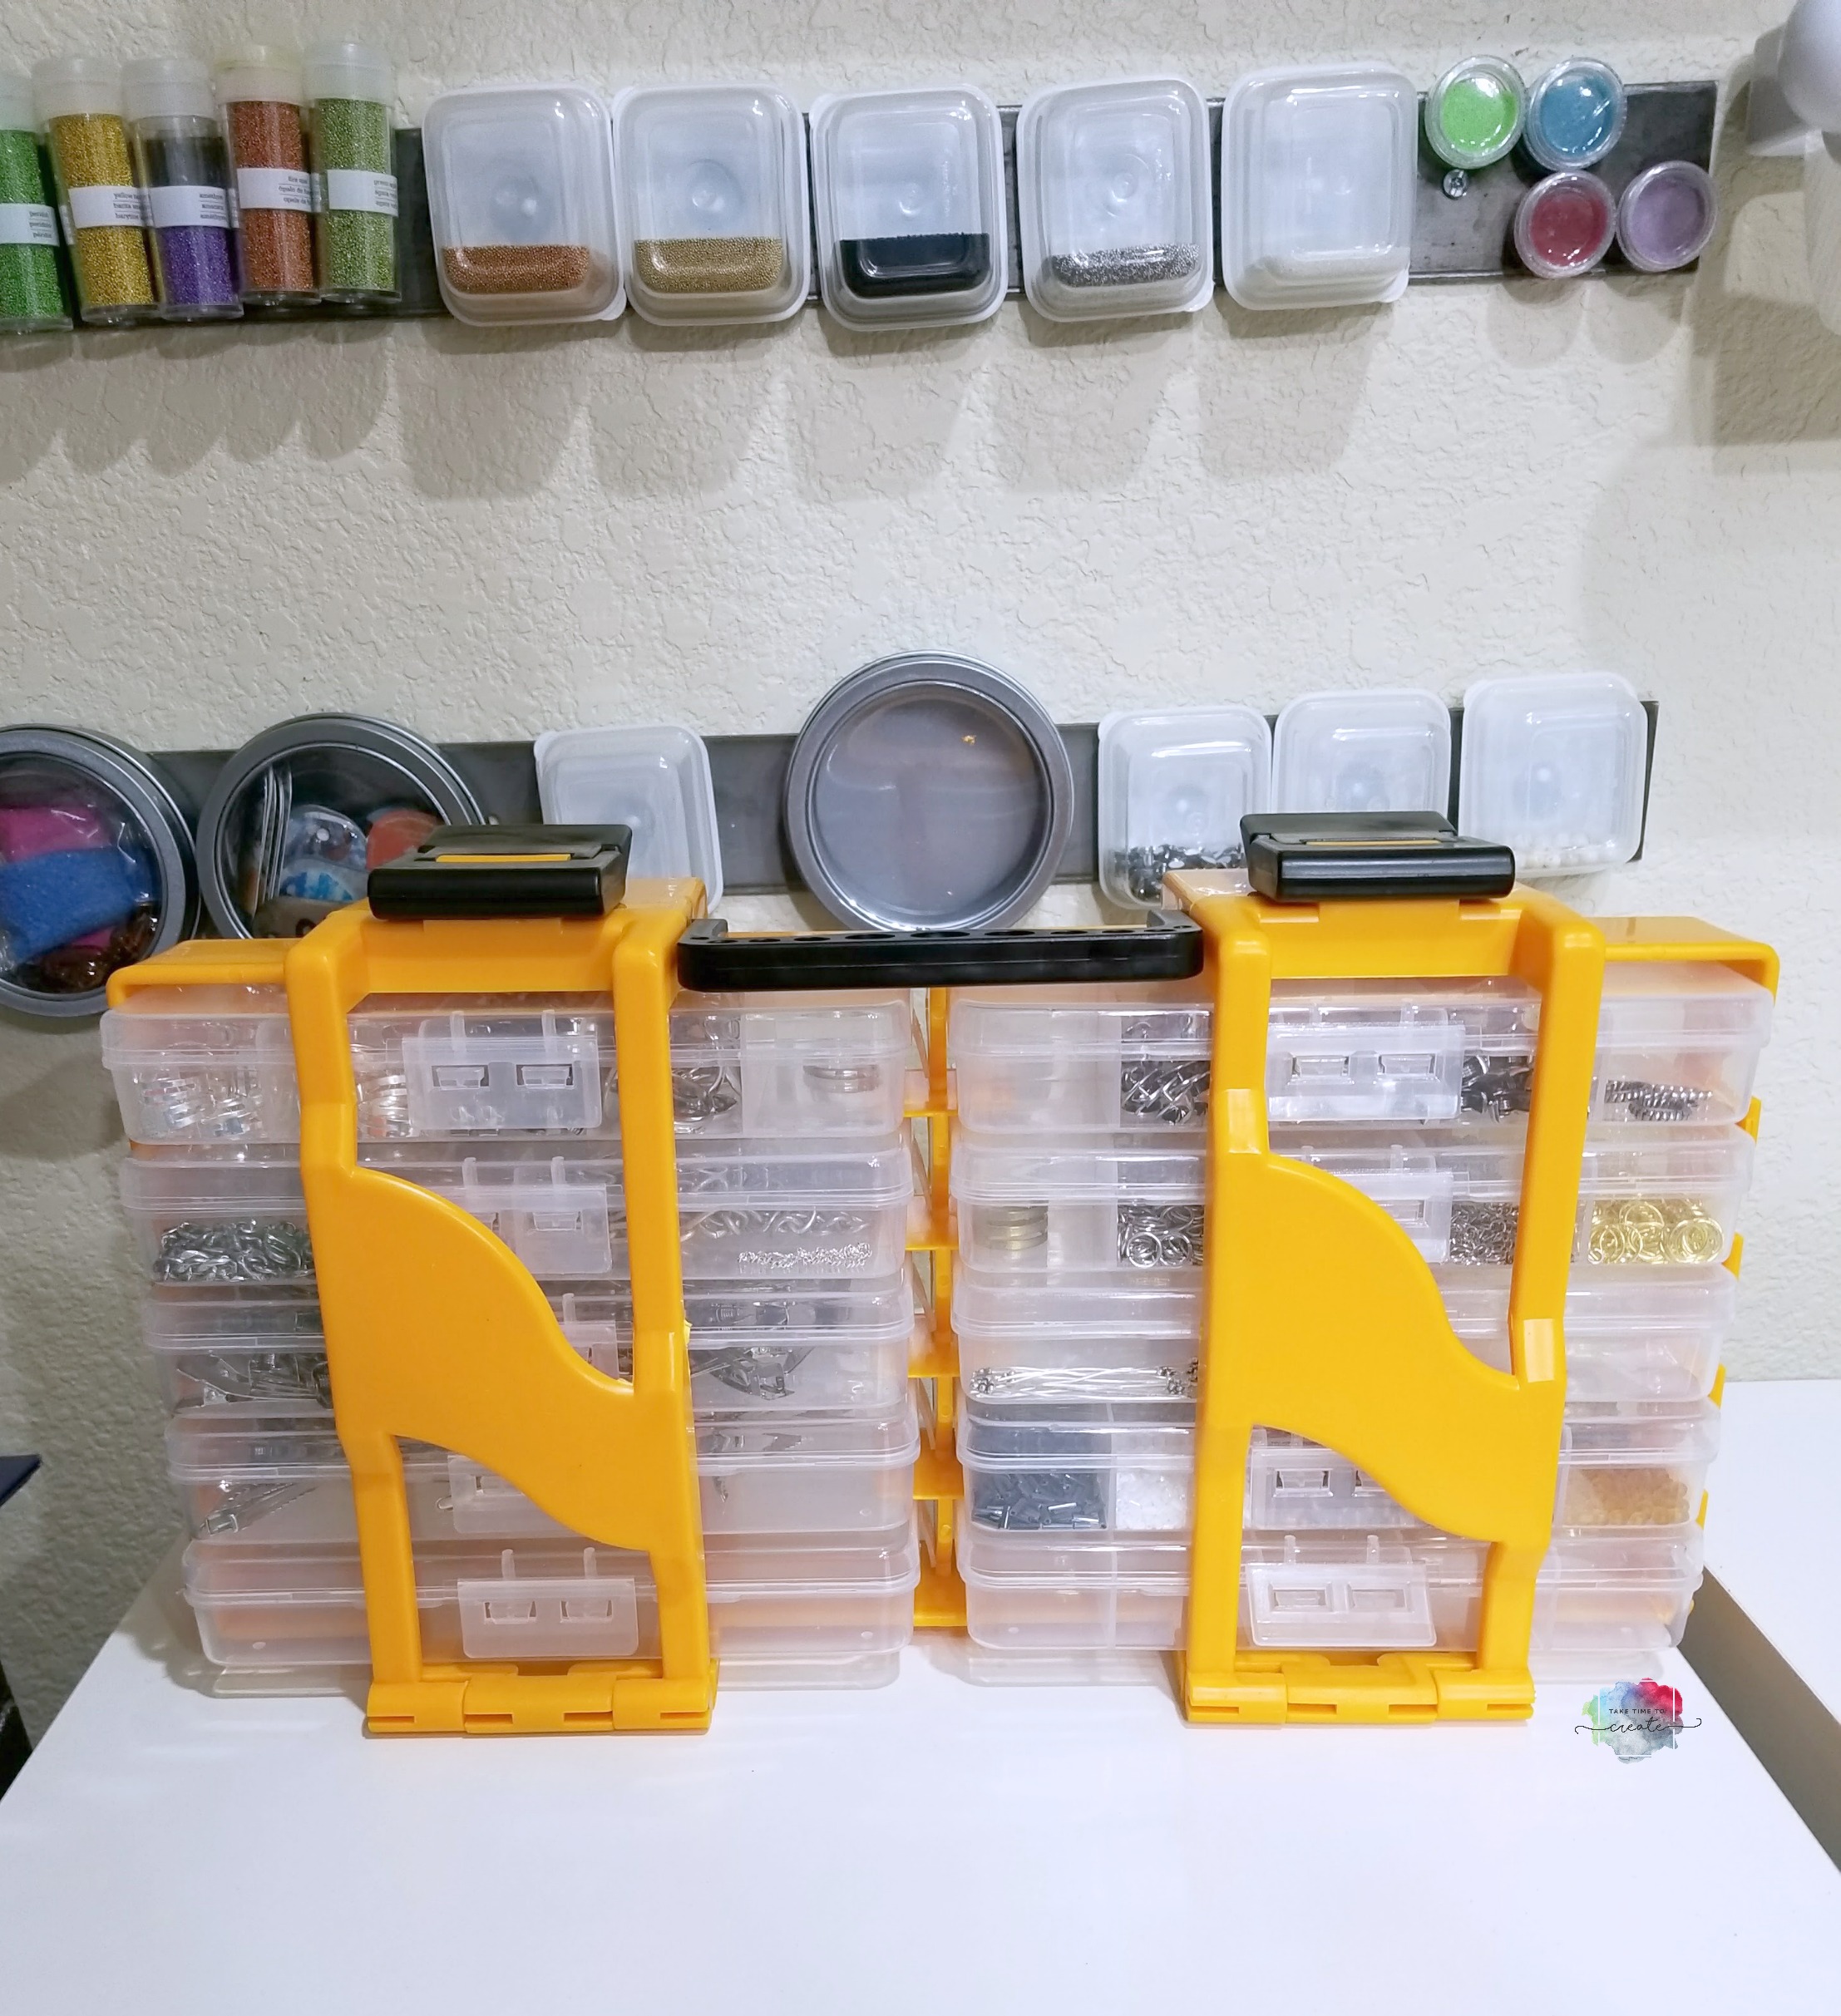
They are fantastic, I love how portable they are with the handle and each bin comes out so I take out what I need. There is a lot of room and they fit my needs perfectly.
The organizational bins behind the plastic storage is the metal strip my husband hung along with the magnetic containers from the dollar store. You can read the blog post here: Organizers
The earrings are really cute and fairly simple to make. All you do is add a French hook to a cute charm. I used a zipper pull and some other charms I had in my stash.
I like to use a variety of charms, not just Christmas ones. You never know what people will need or want.
Once I have a pile made I will package them and get them ready for the craft fair. If you are interested in seeing how I make my packaging and how I display my earrings let me know and I will write a post about it.
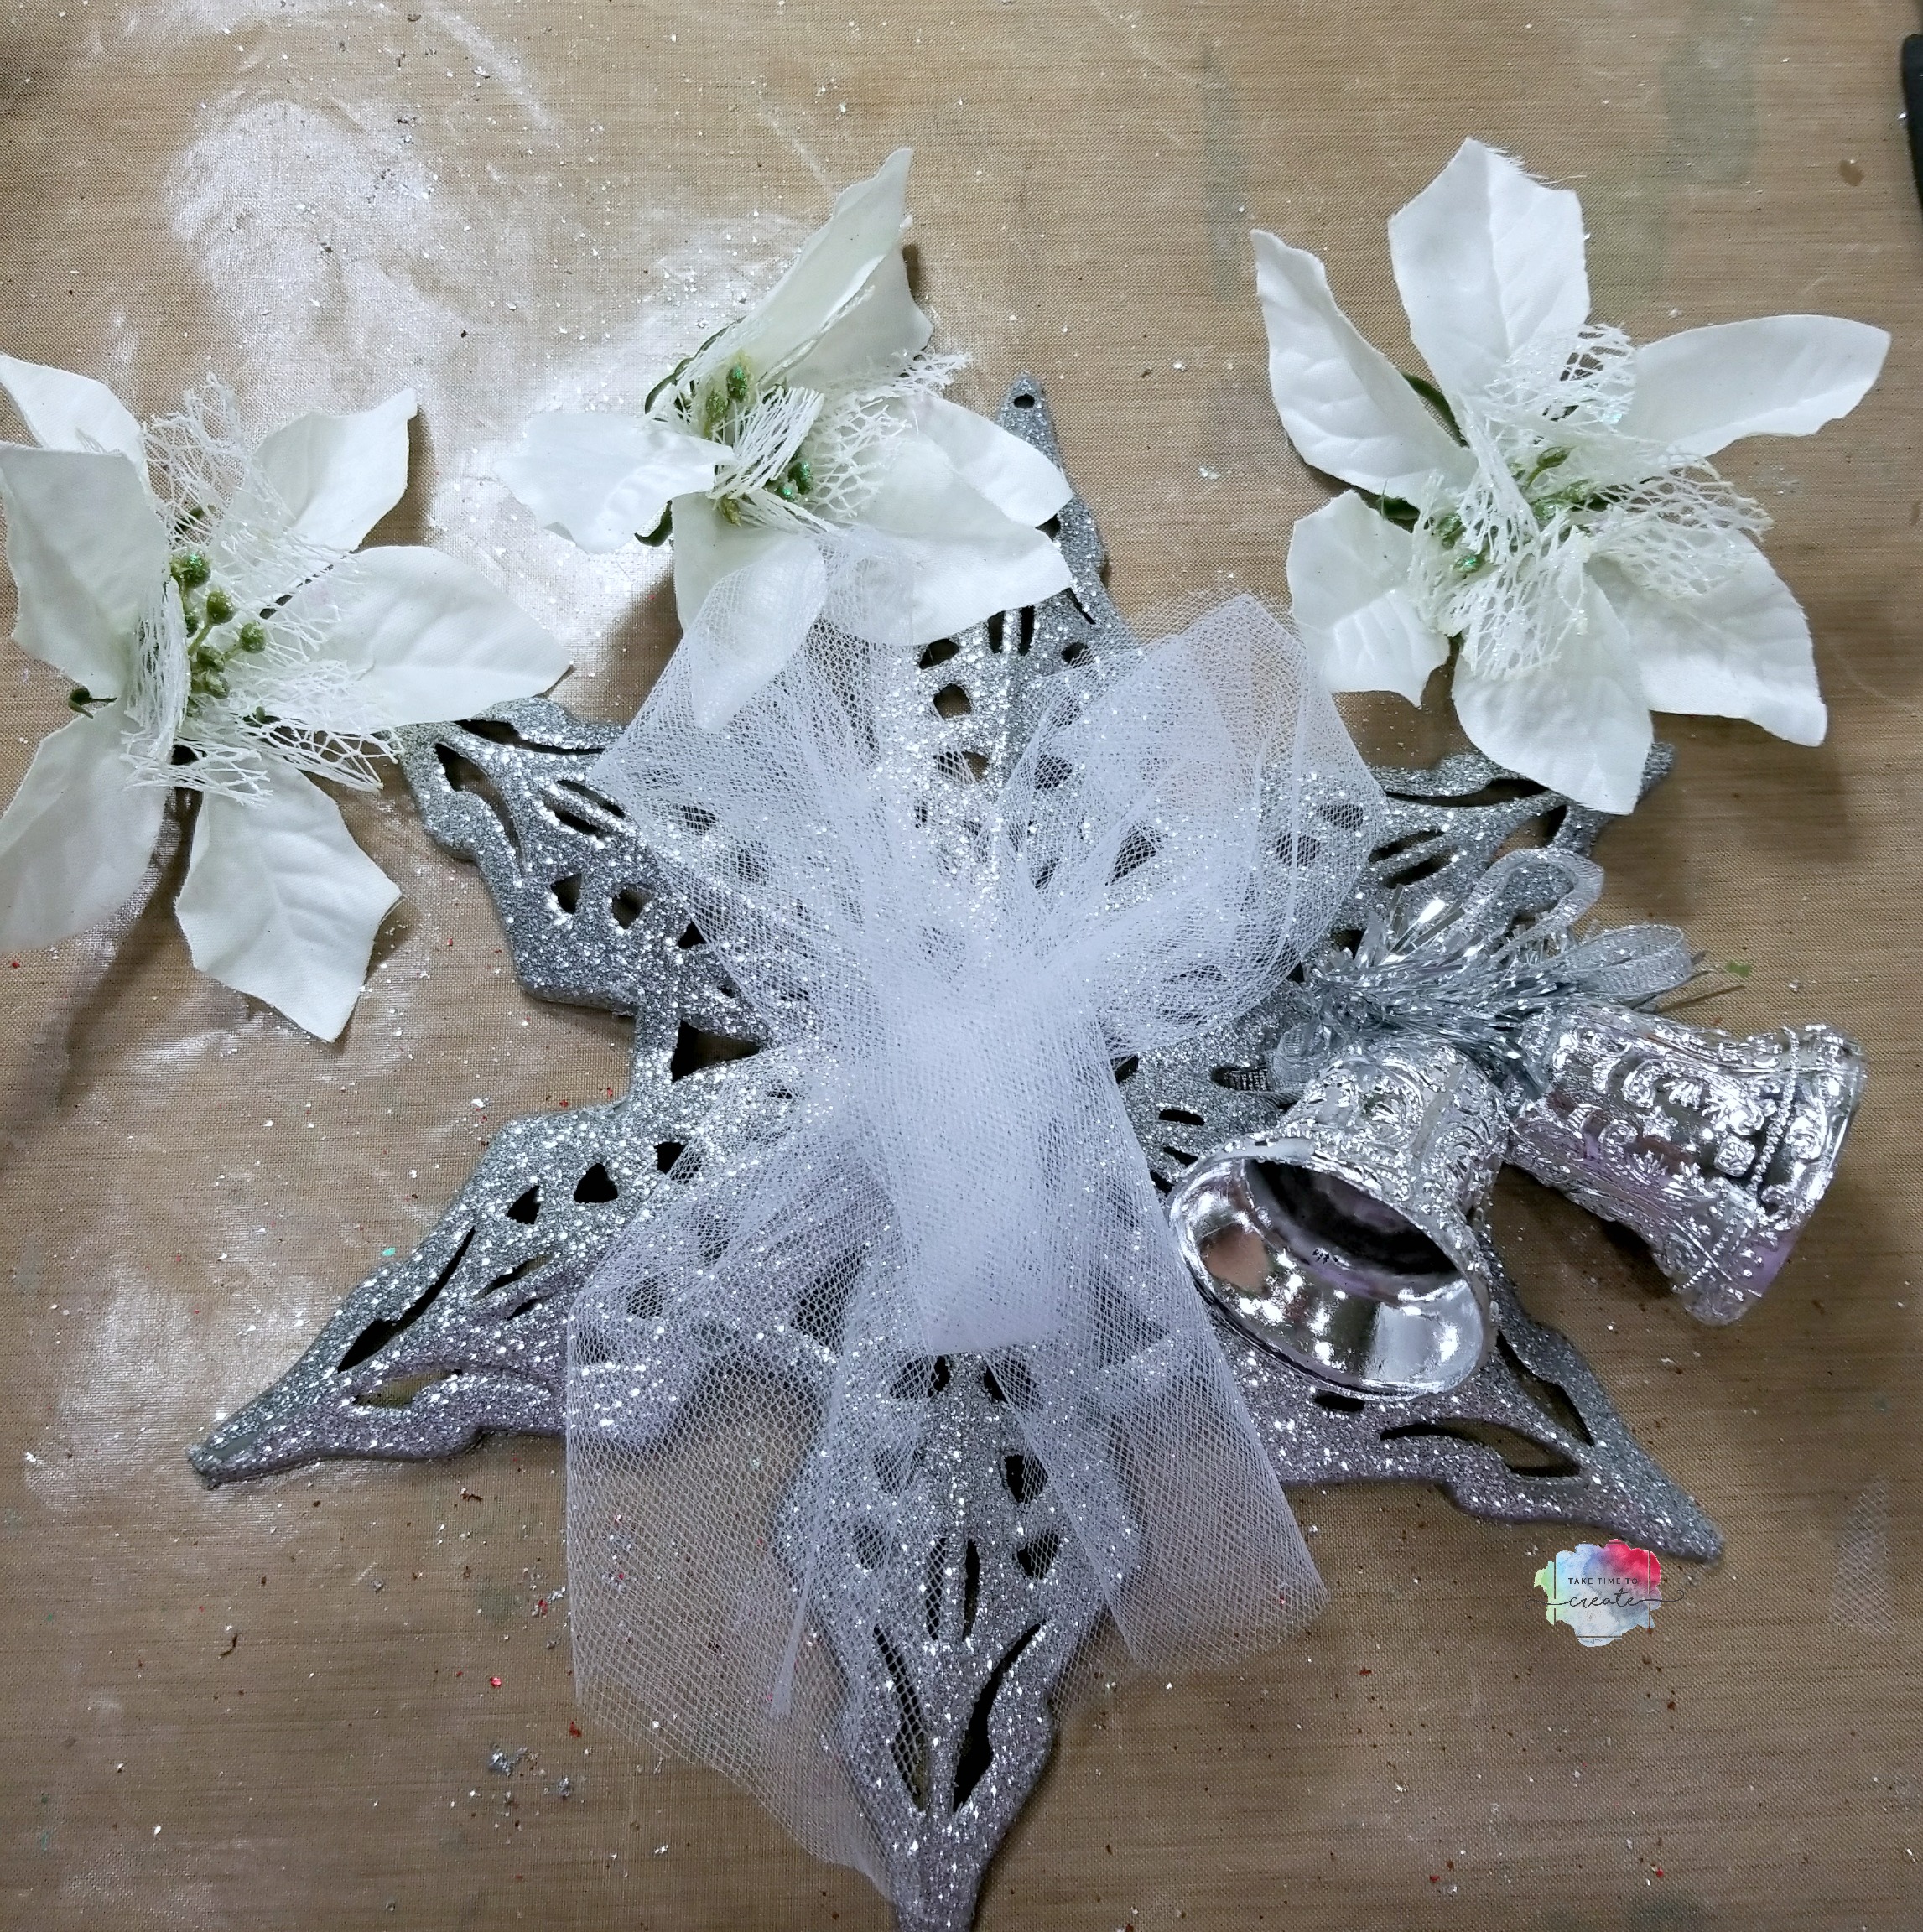
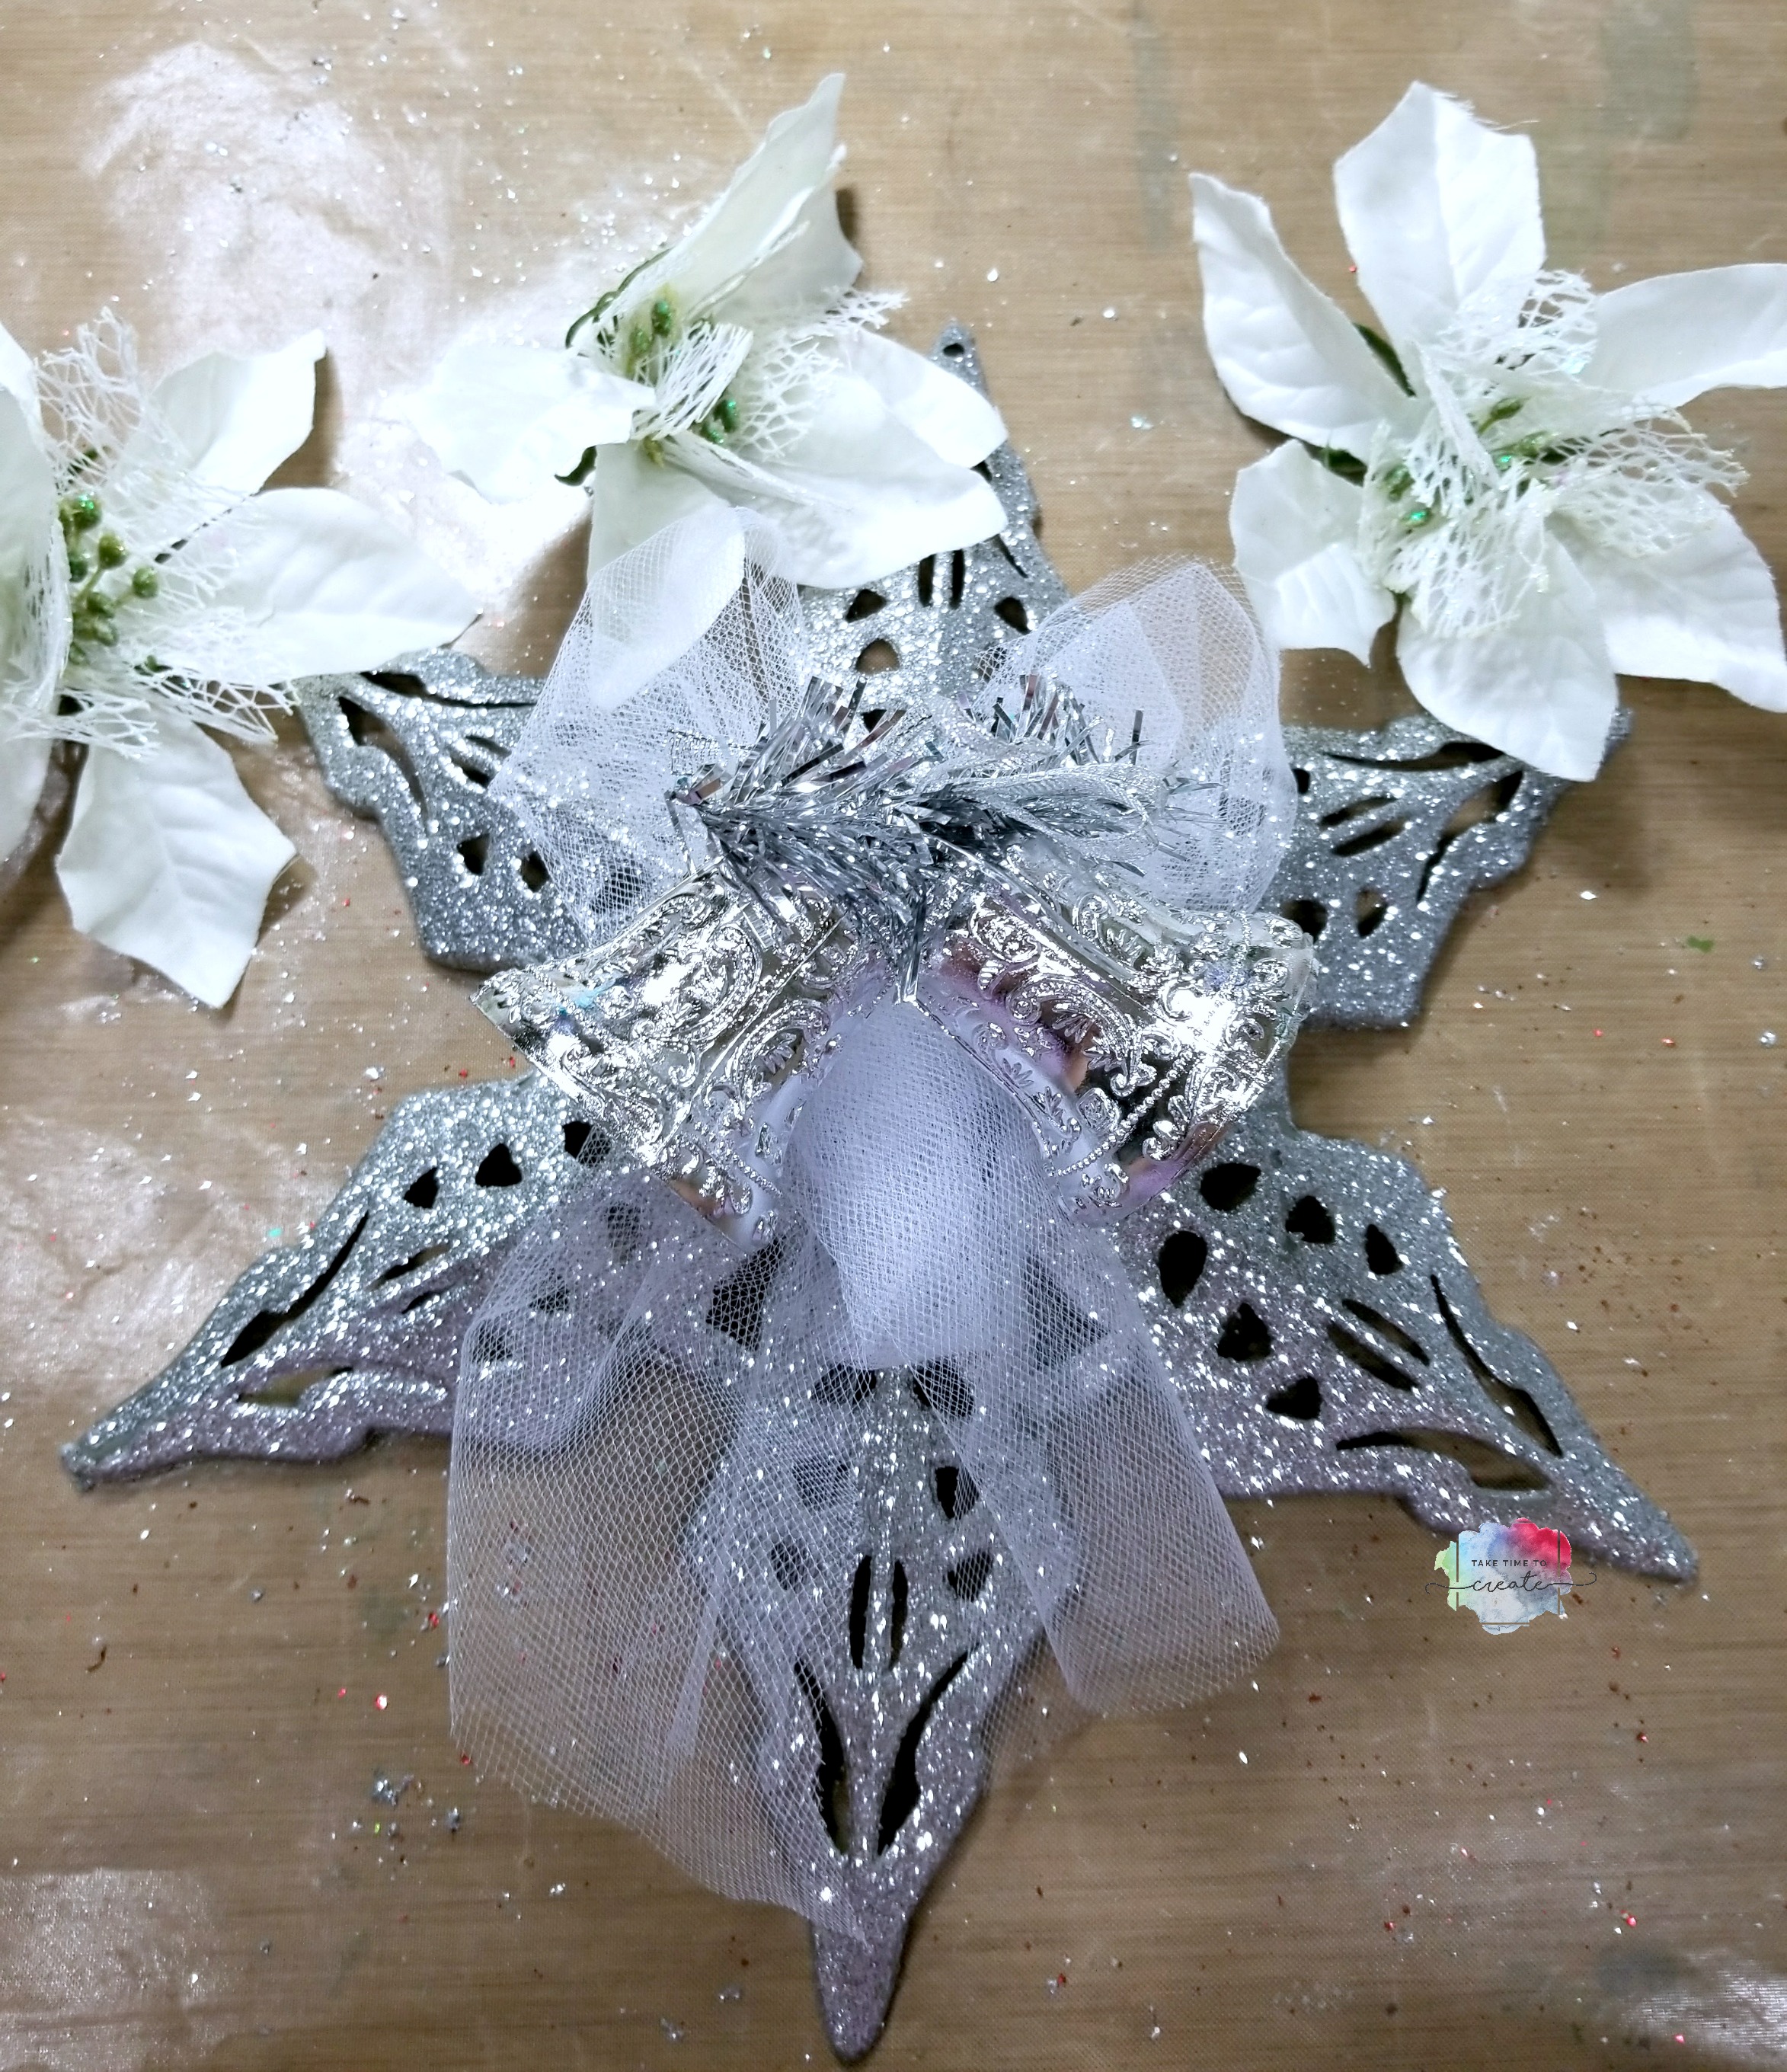
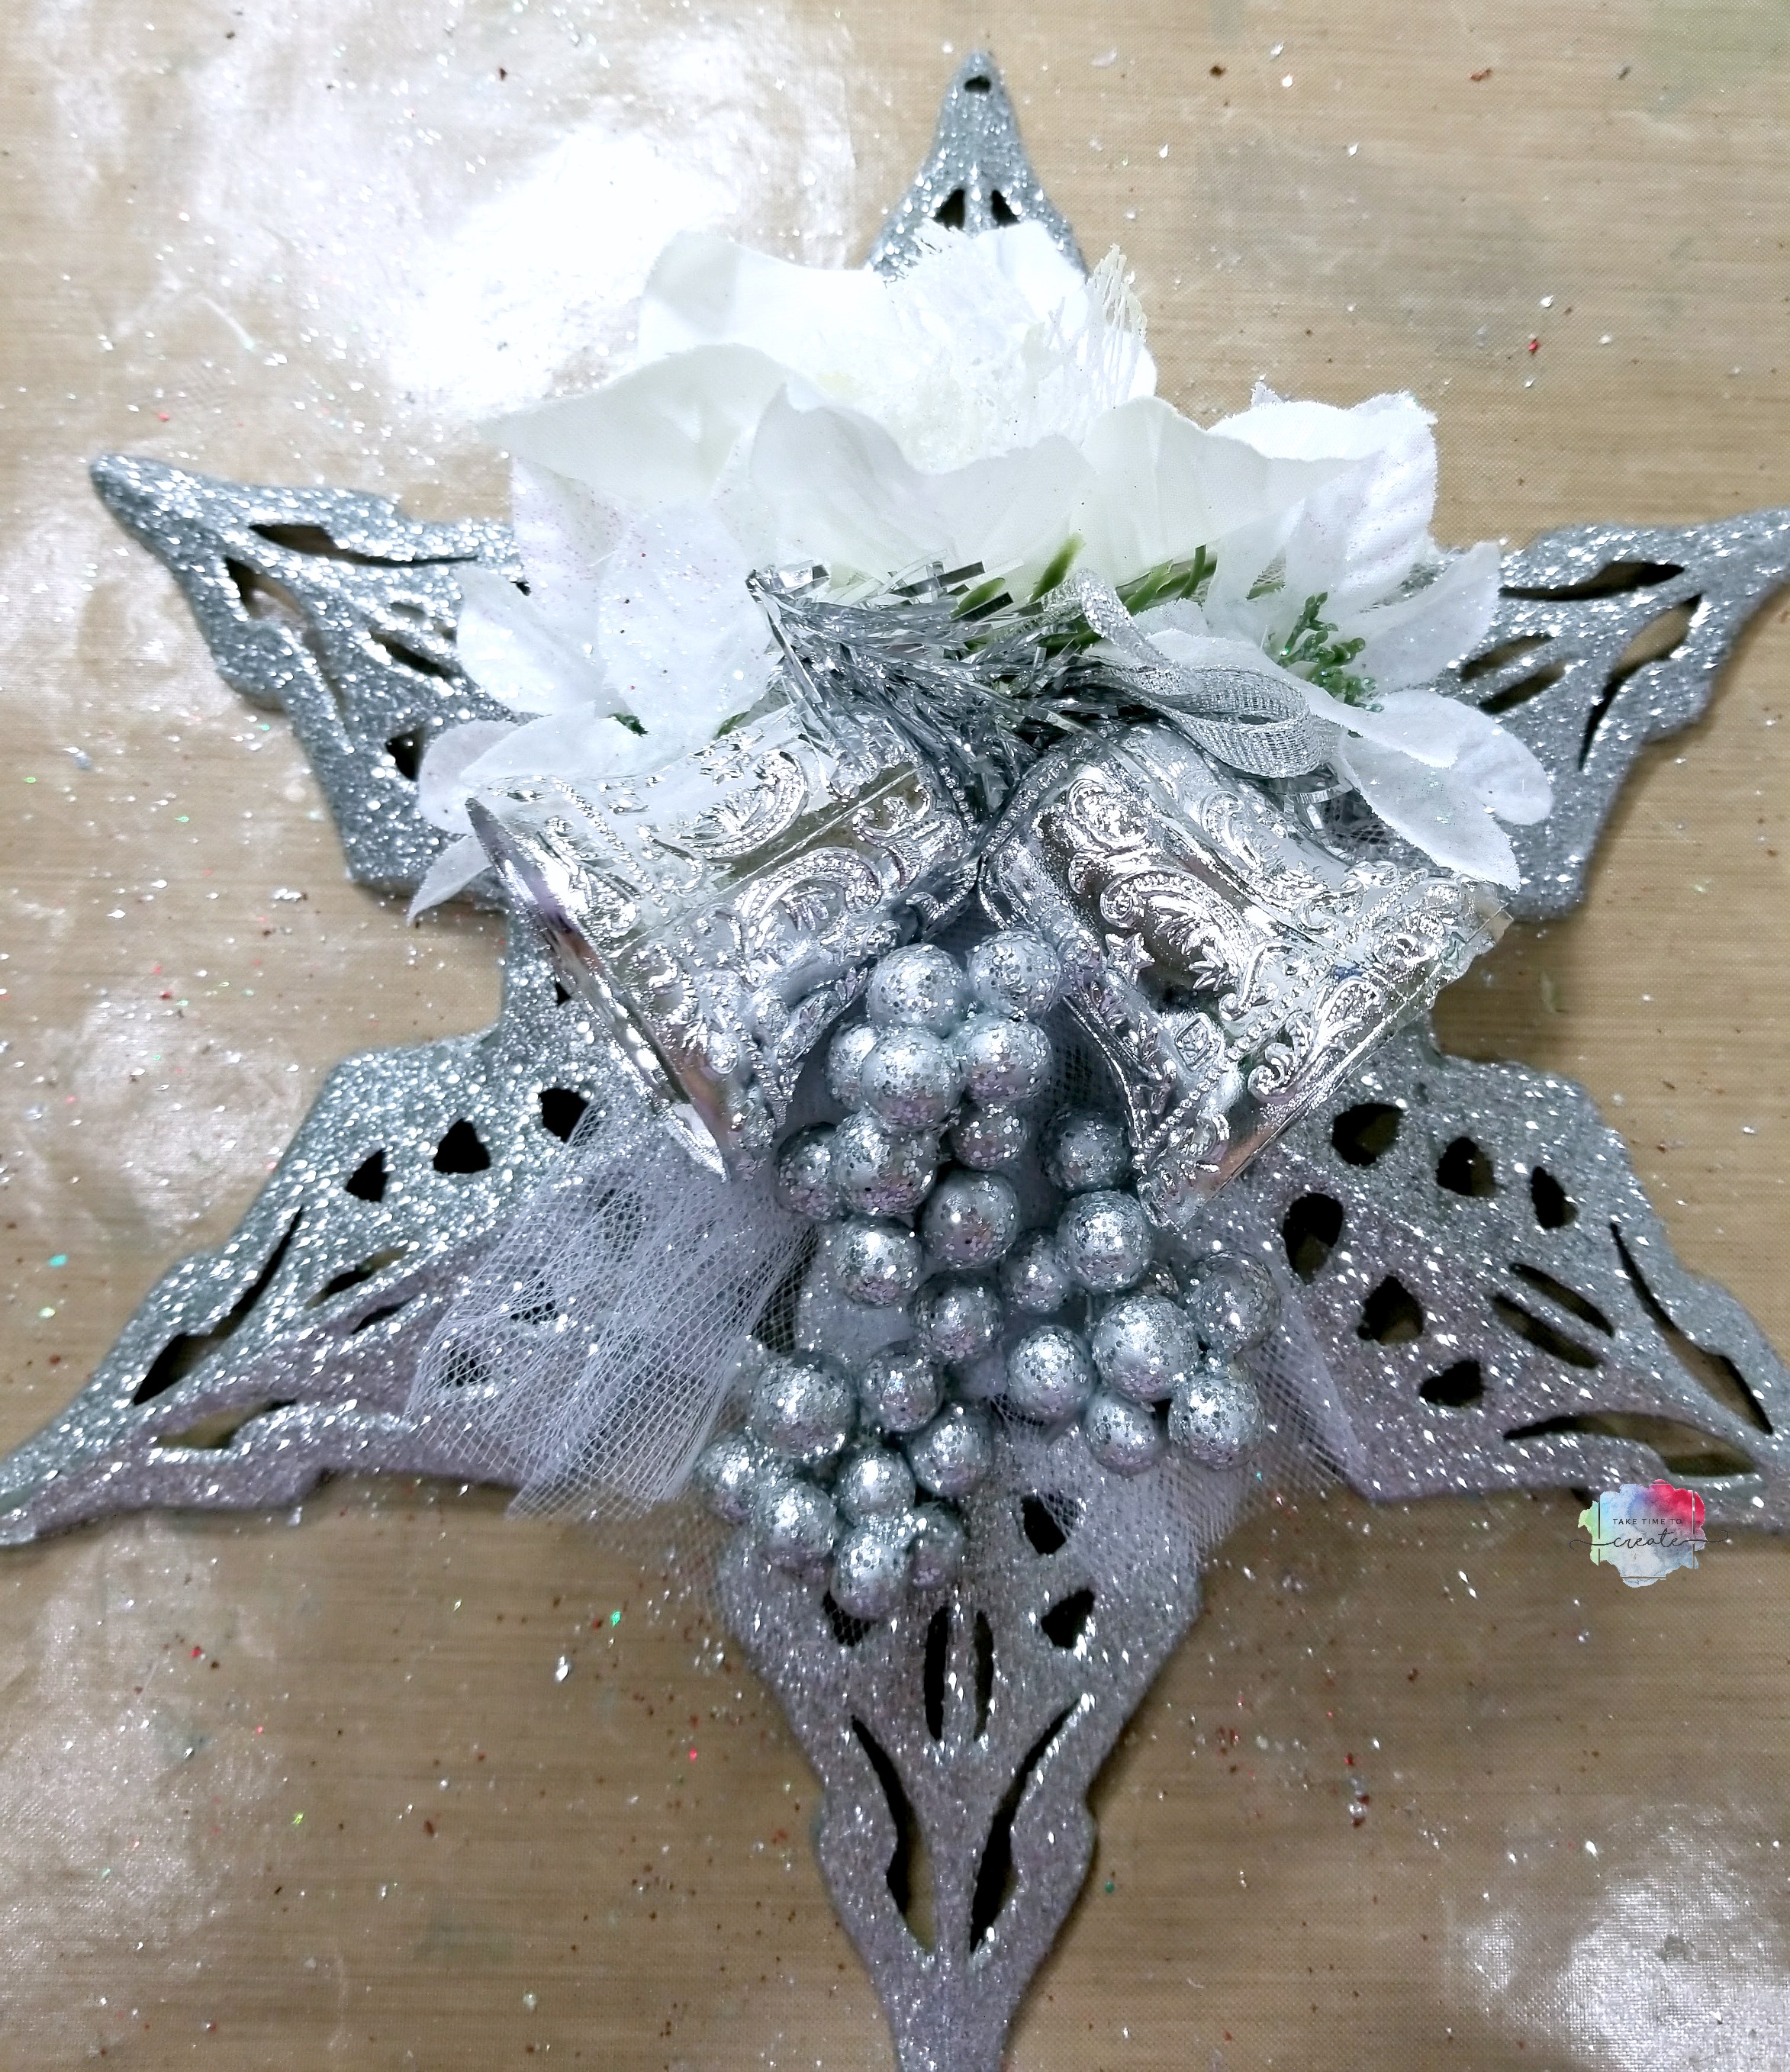
Start with your glittery snowflake and add some tulle as a base layer. Or you can add glitter mesh, or ribbon, or lace, anything really. You just want to make sure you have an anchor for your focal point. Glue the tulle on with hot glue.
Then you want to glue on your focal point to the center of the snowflake
Then you glue on accents and decoration all around your focal point. Poinsettias, floral picks, beads, jingle bells, and small ornaments work great for this step. Anything will work, you just want to fill up the empty spaces and make it full and festive.
There you go, nice and easy and they looks so festive and glittery. A grouping of the snowflakes would look really great on a wall, or it could be the perfect gift!
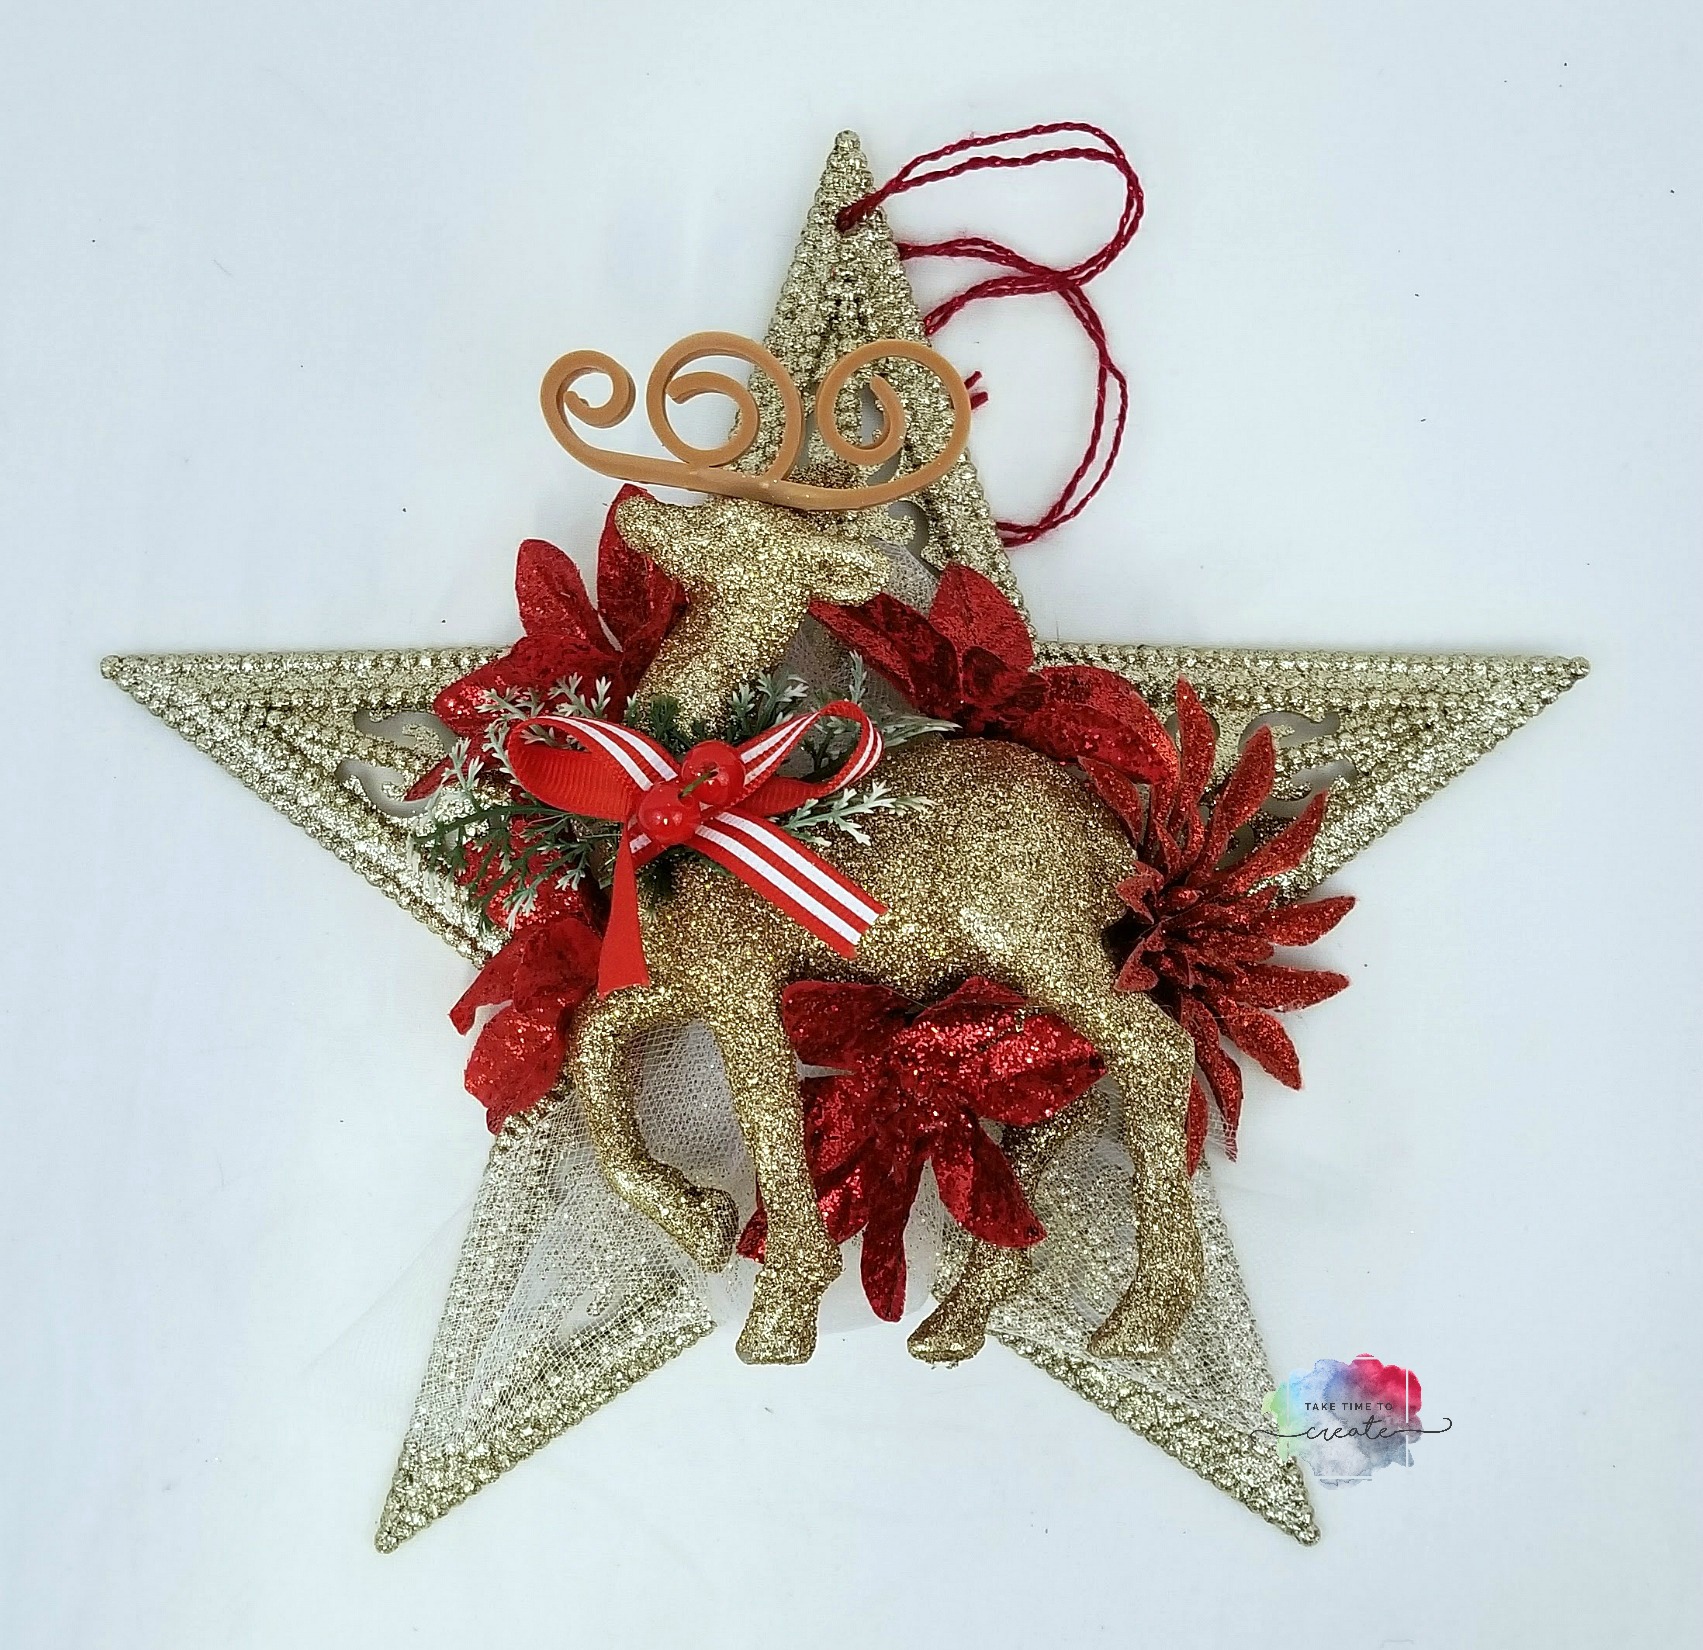
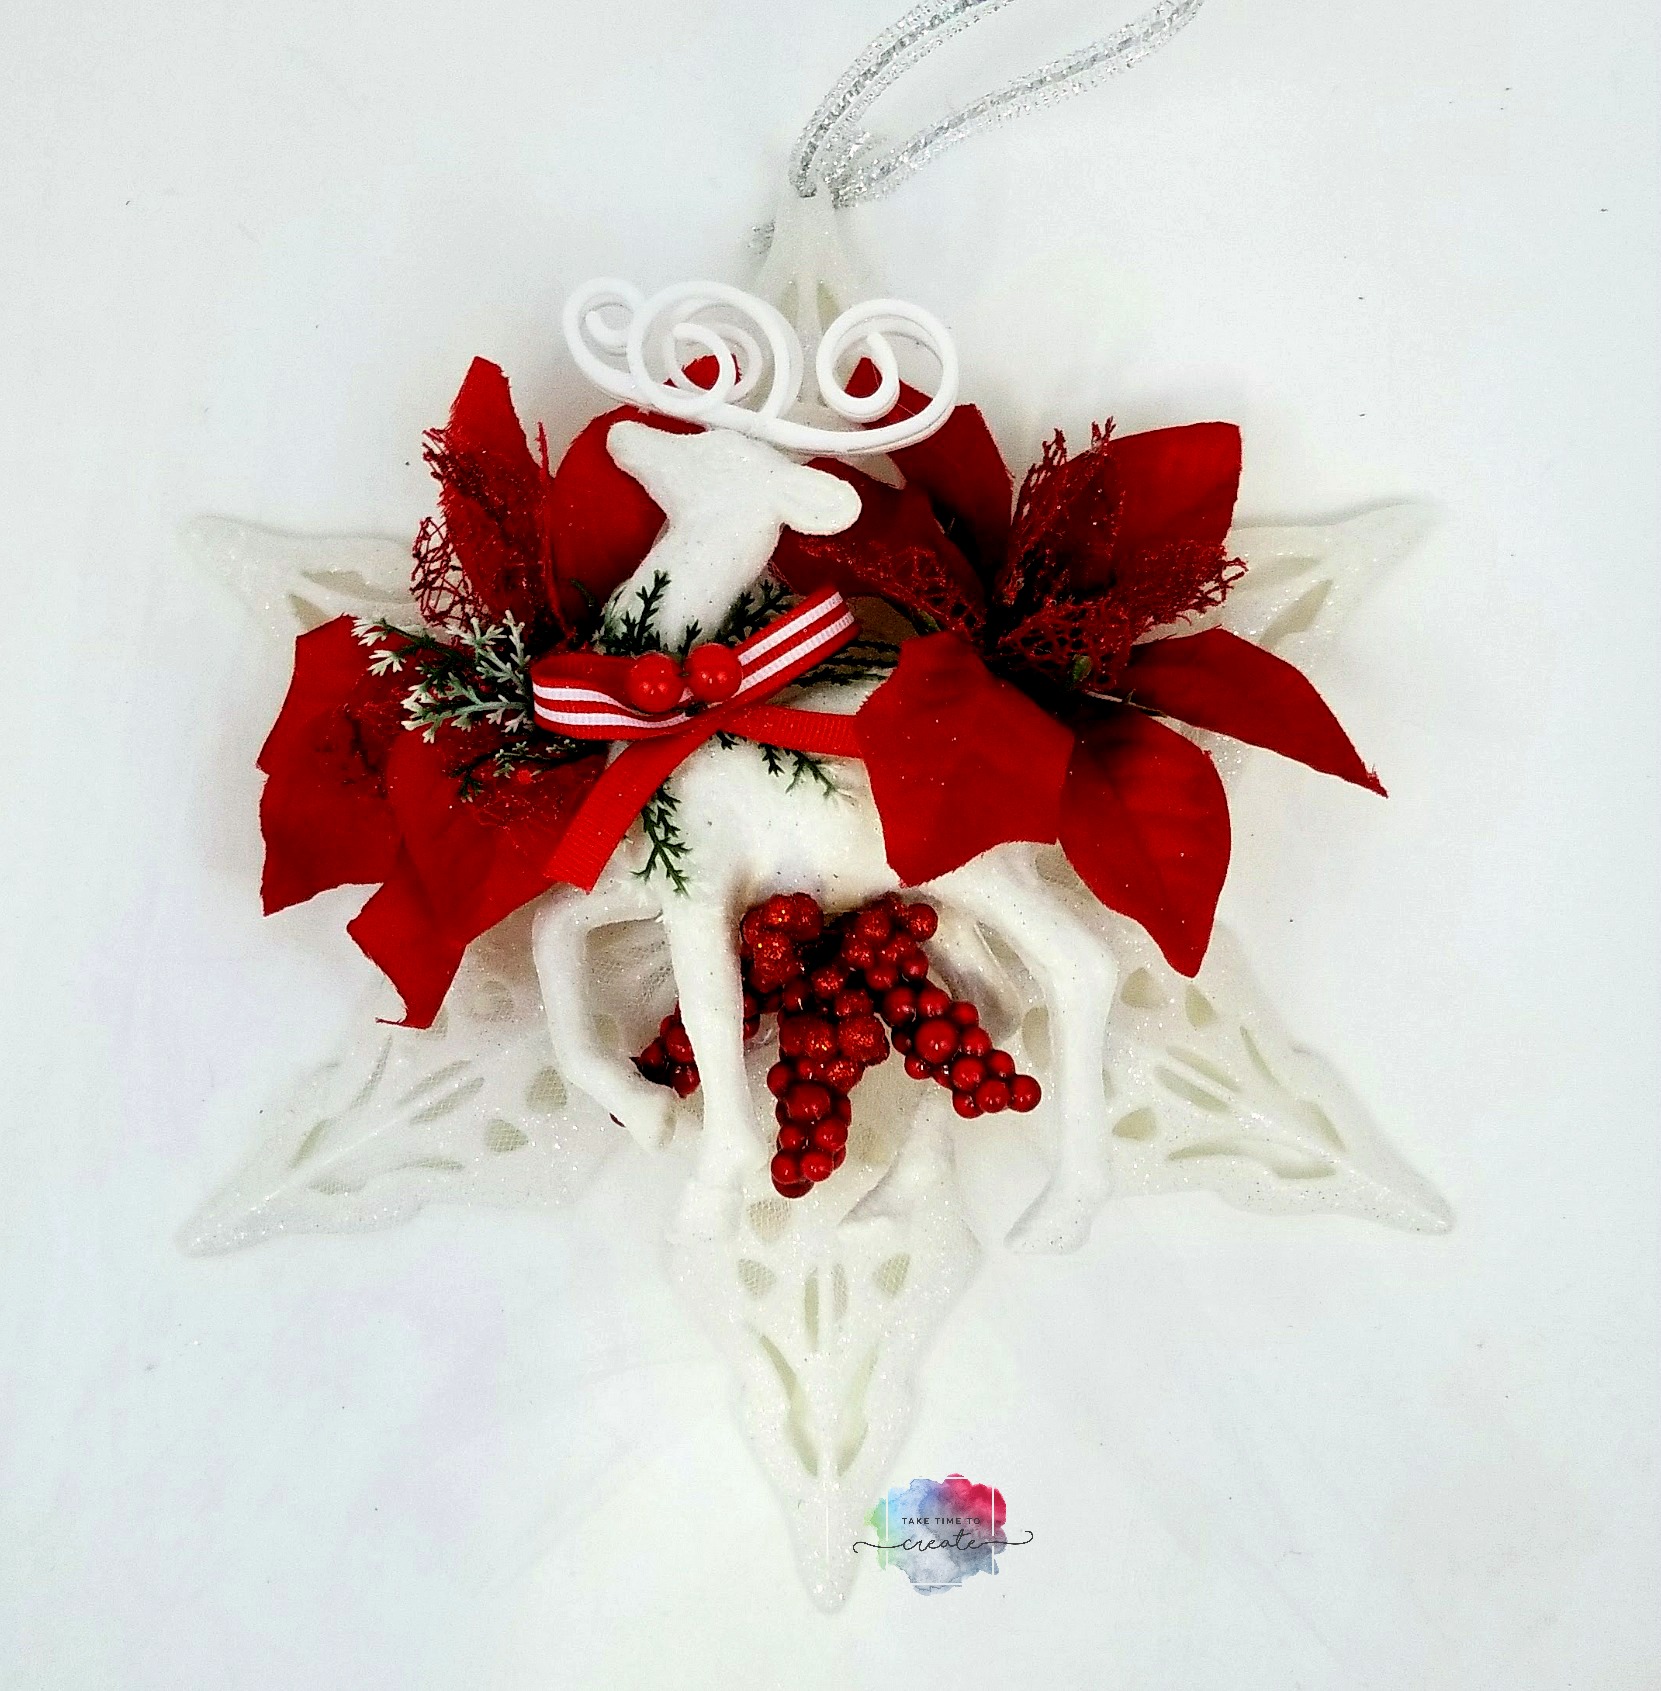
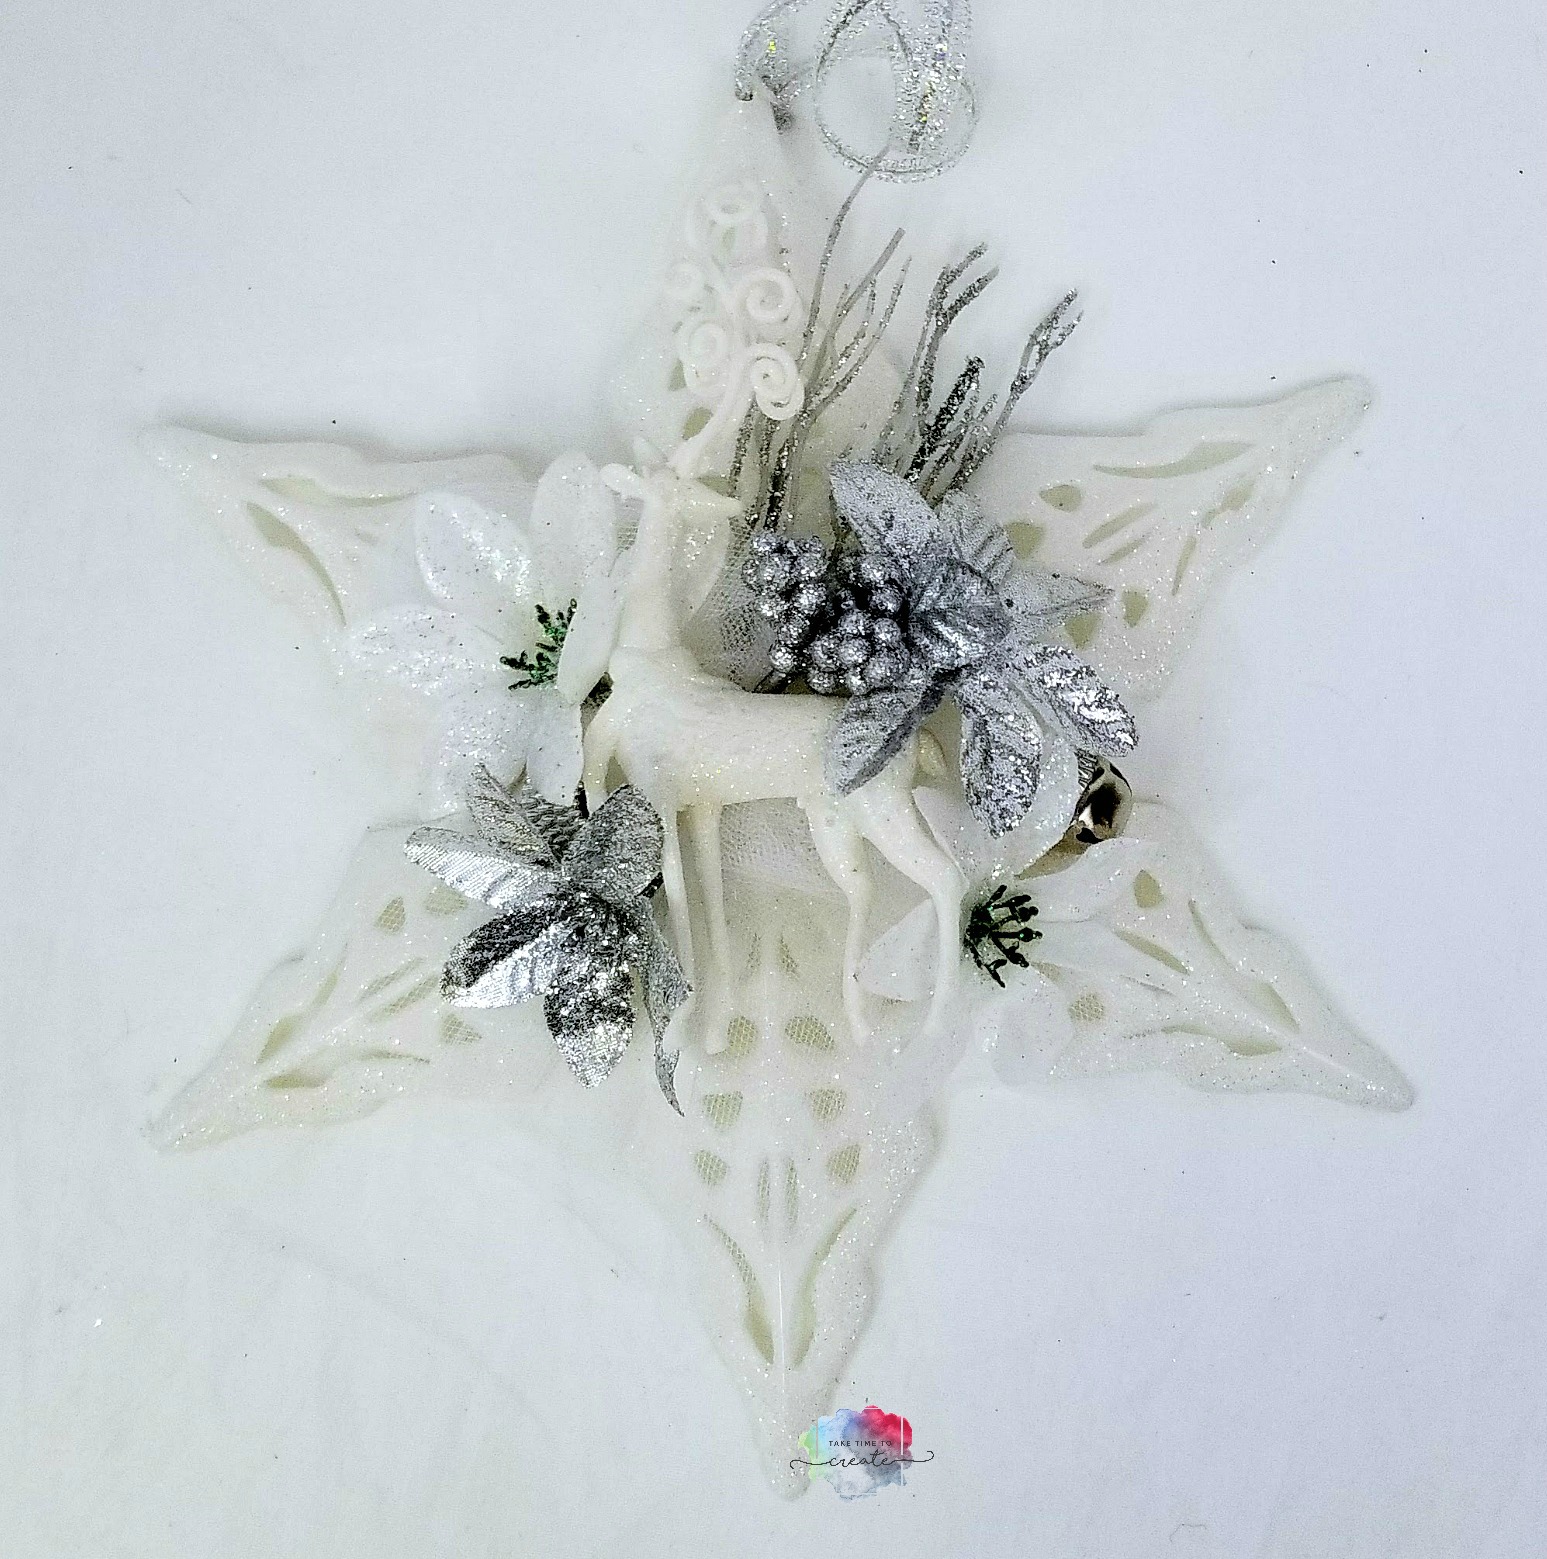
I thought it would be fun to show you some other variations I created. I just love making these, I can’t seem to stop, lol