Tag: fabric (page 1 of 2)

Mixed Media Fabric Pendants

Hello Everyone!

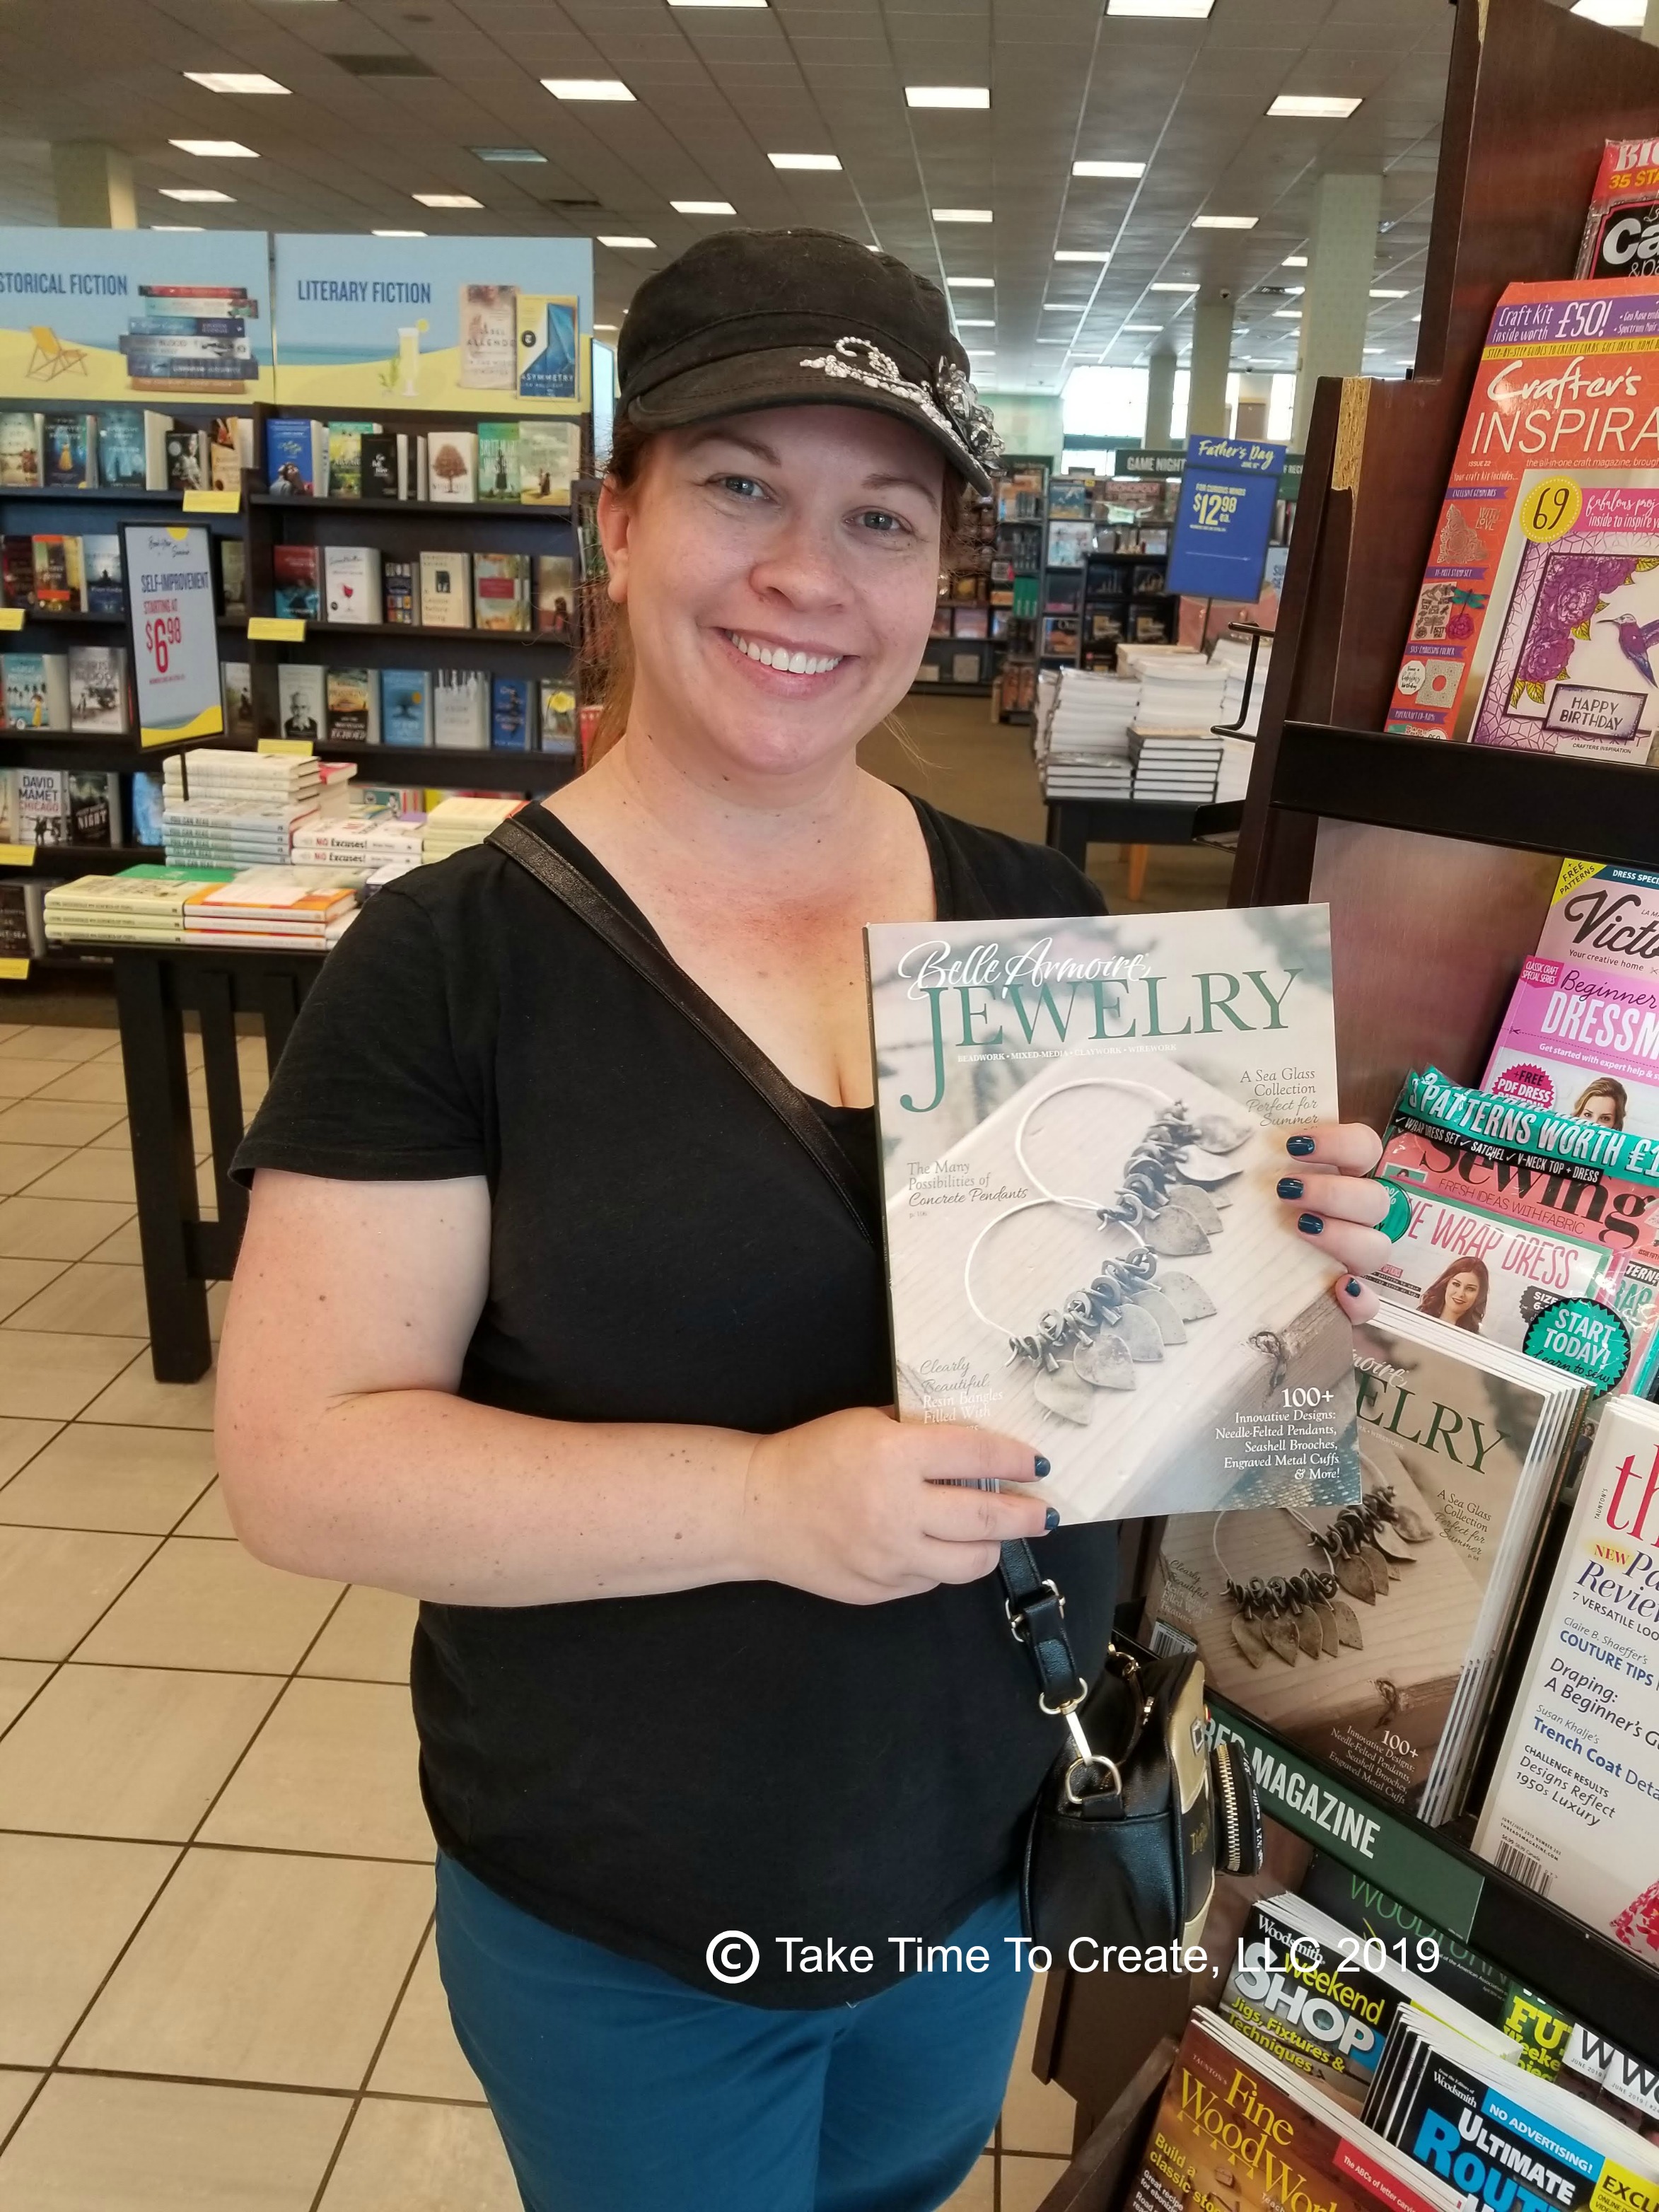
Exciting news! I got published! I am so excited, I sent my pendants to Belle Armoire Jewelry Magazine and got in the June issue!

I love this magazine and it was a huge honor to be included with all the other wonderful artists. I was thrilled to see the magazine at Barnes and Noble!

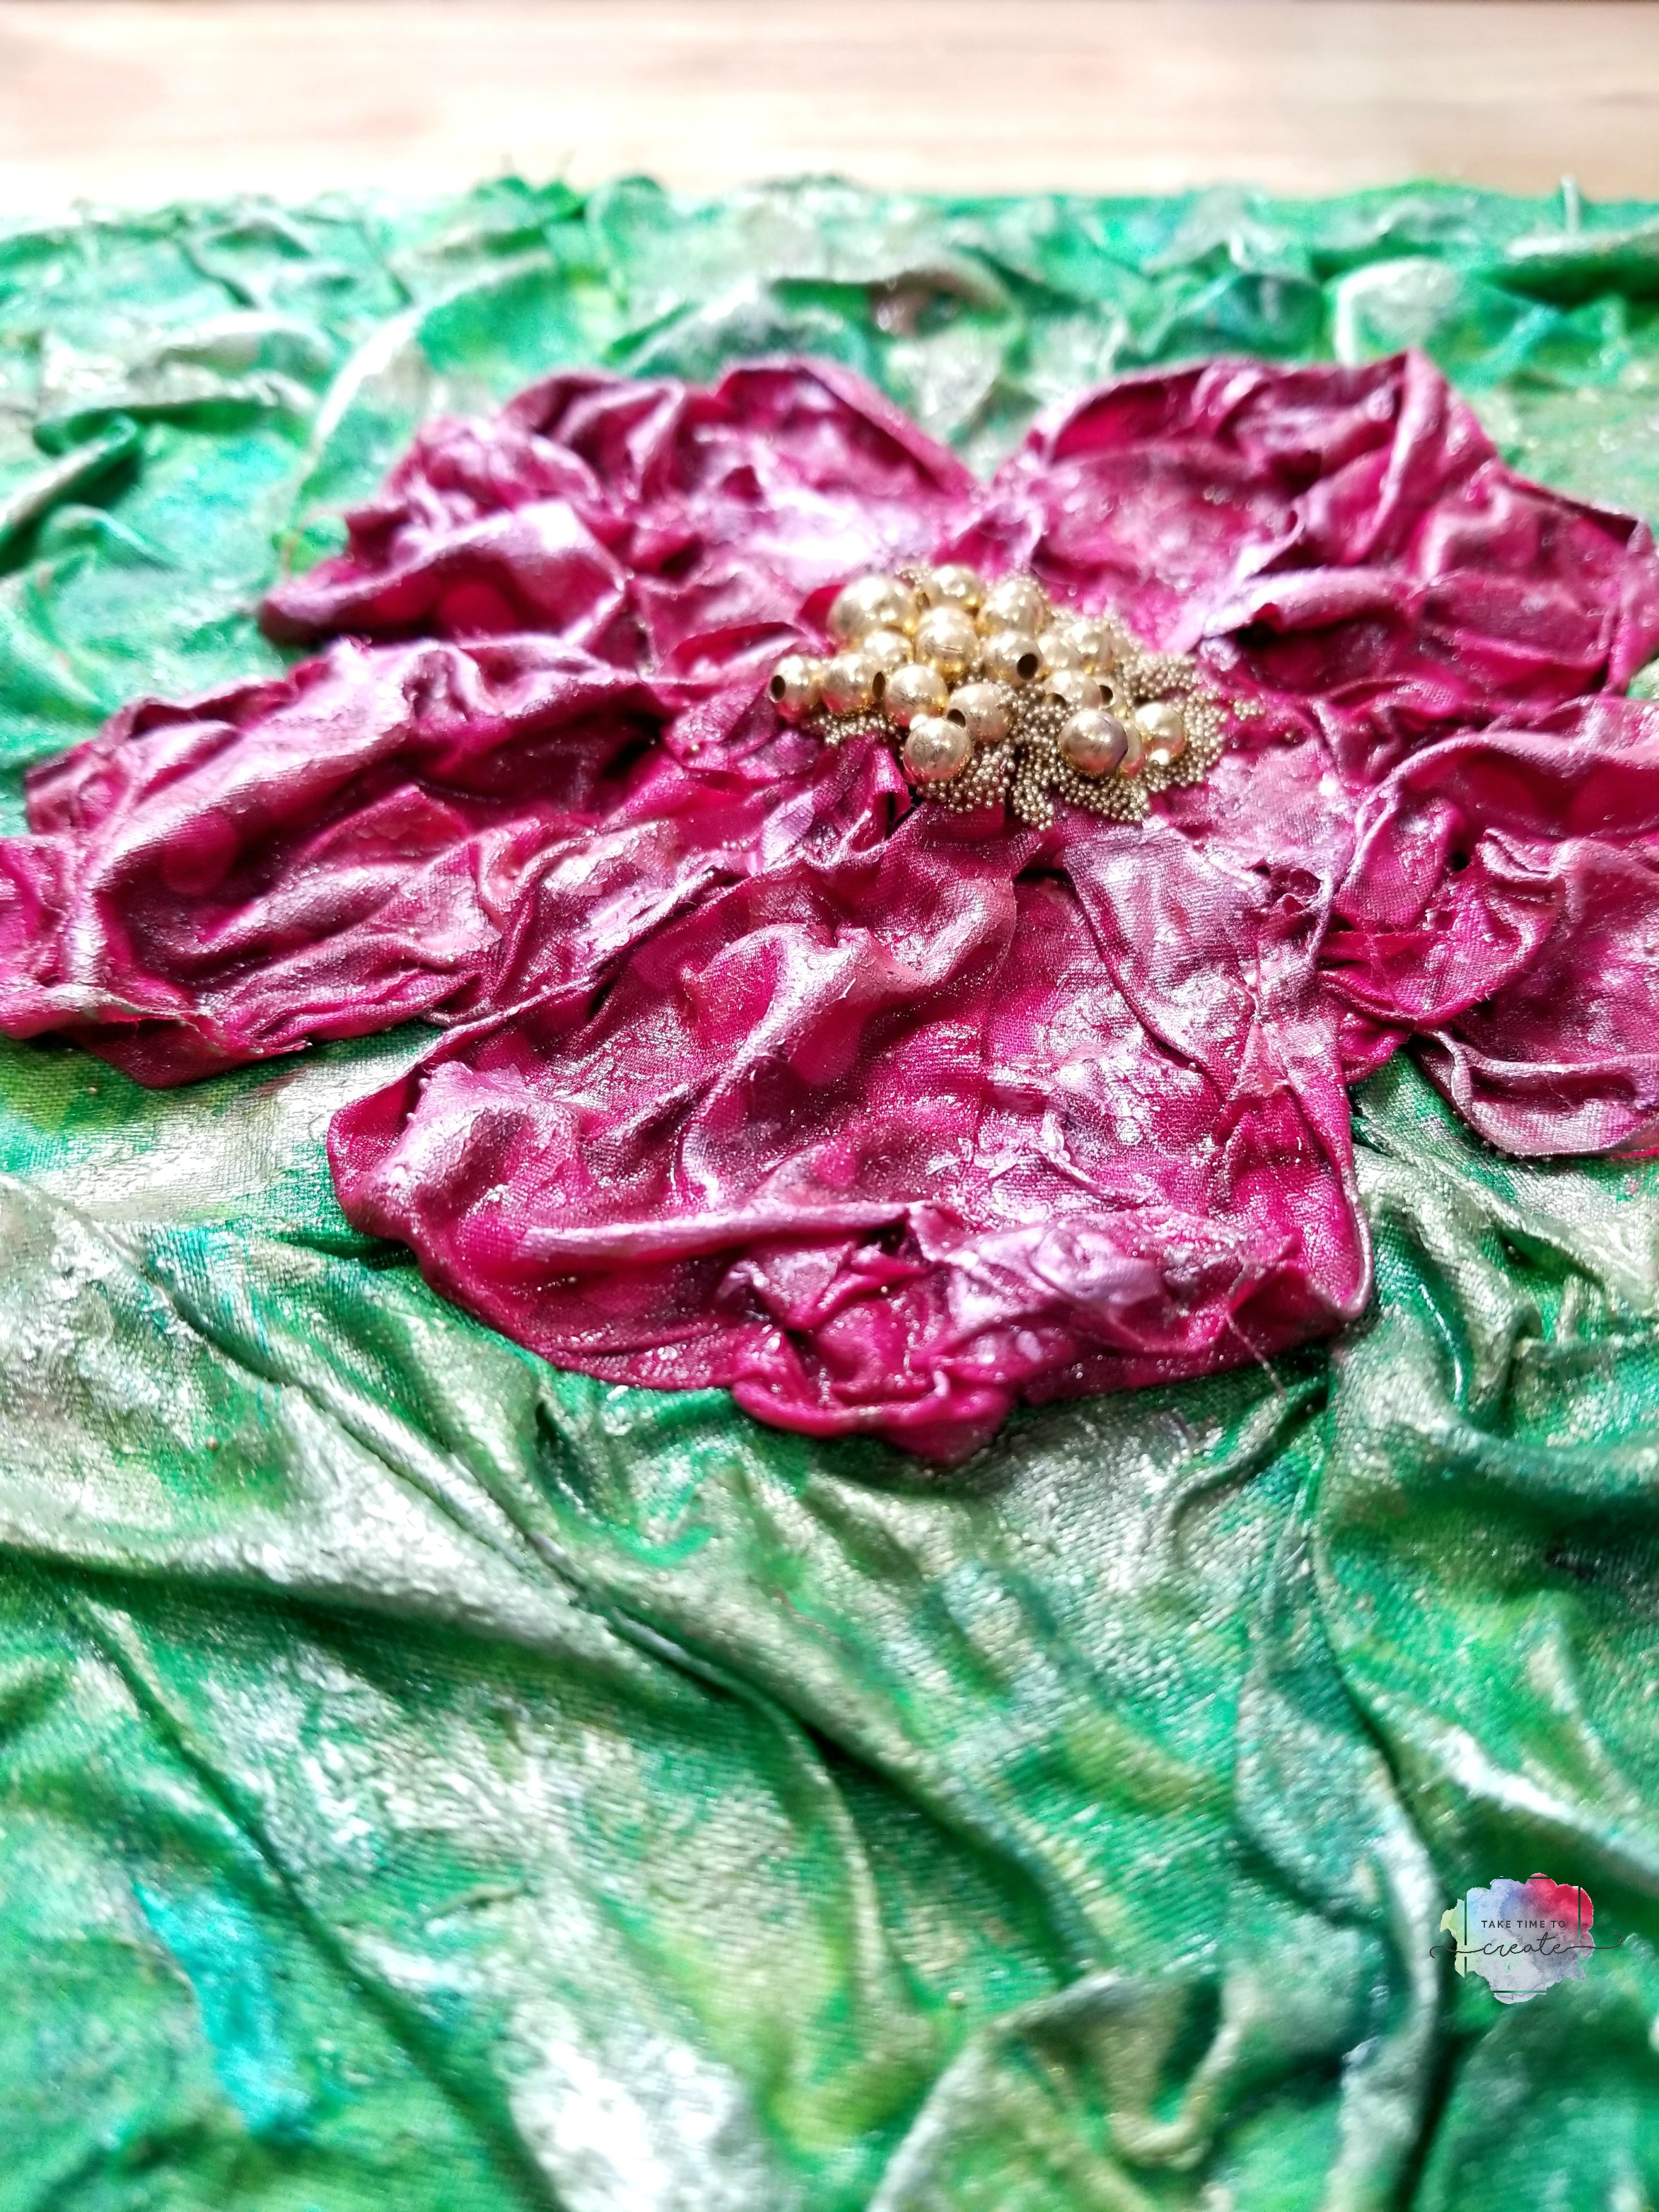
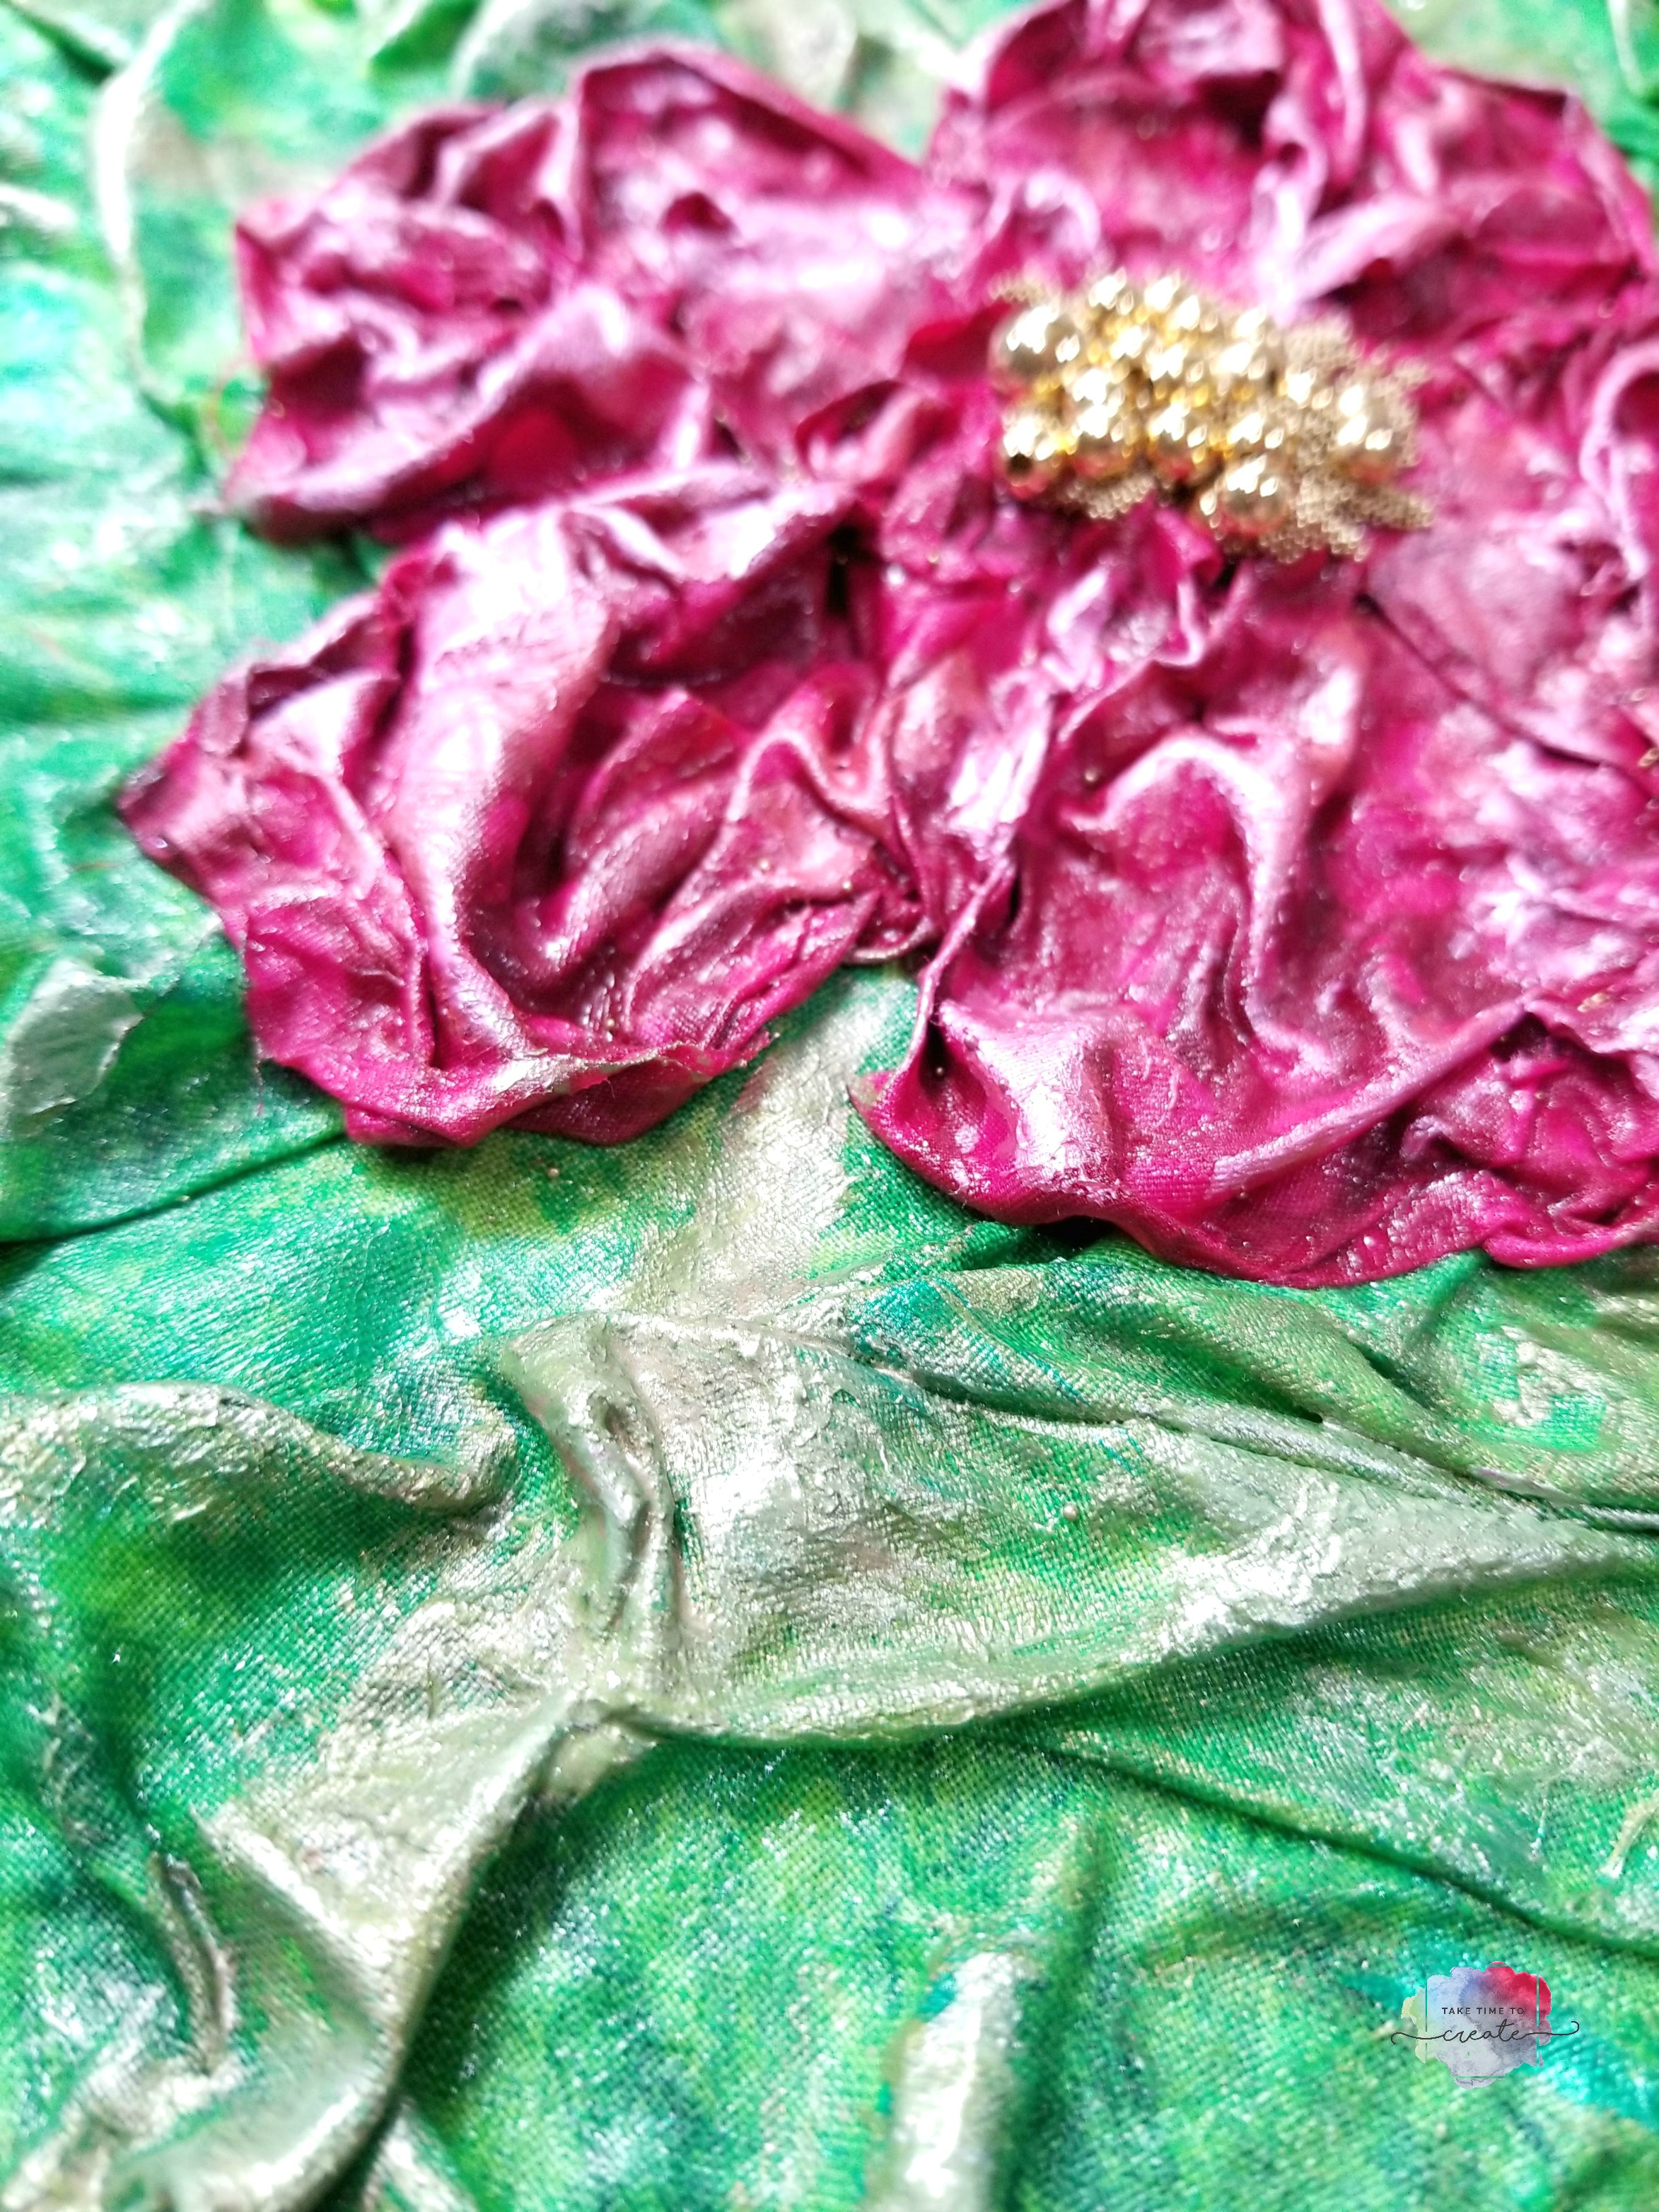
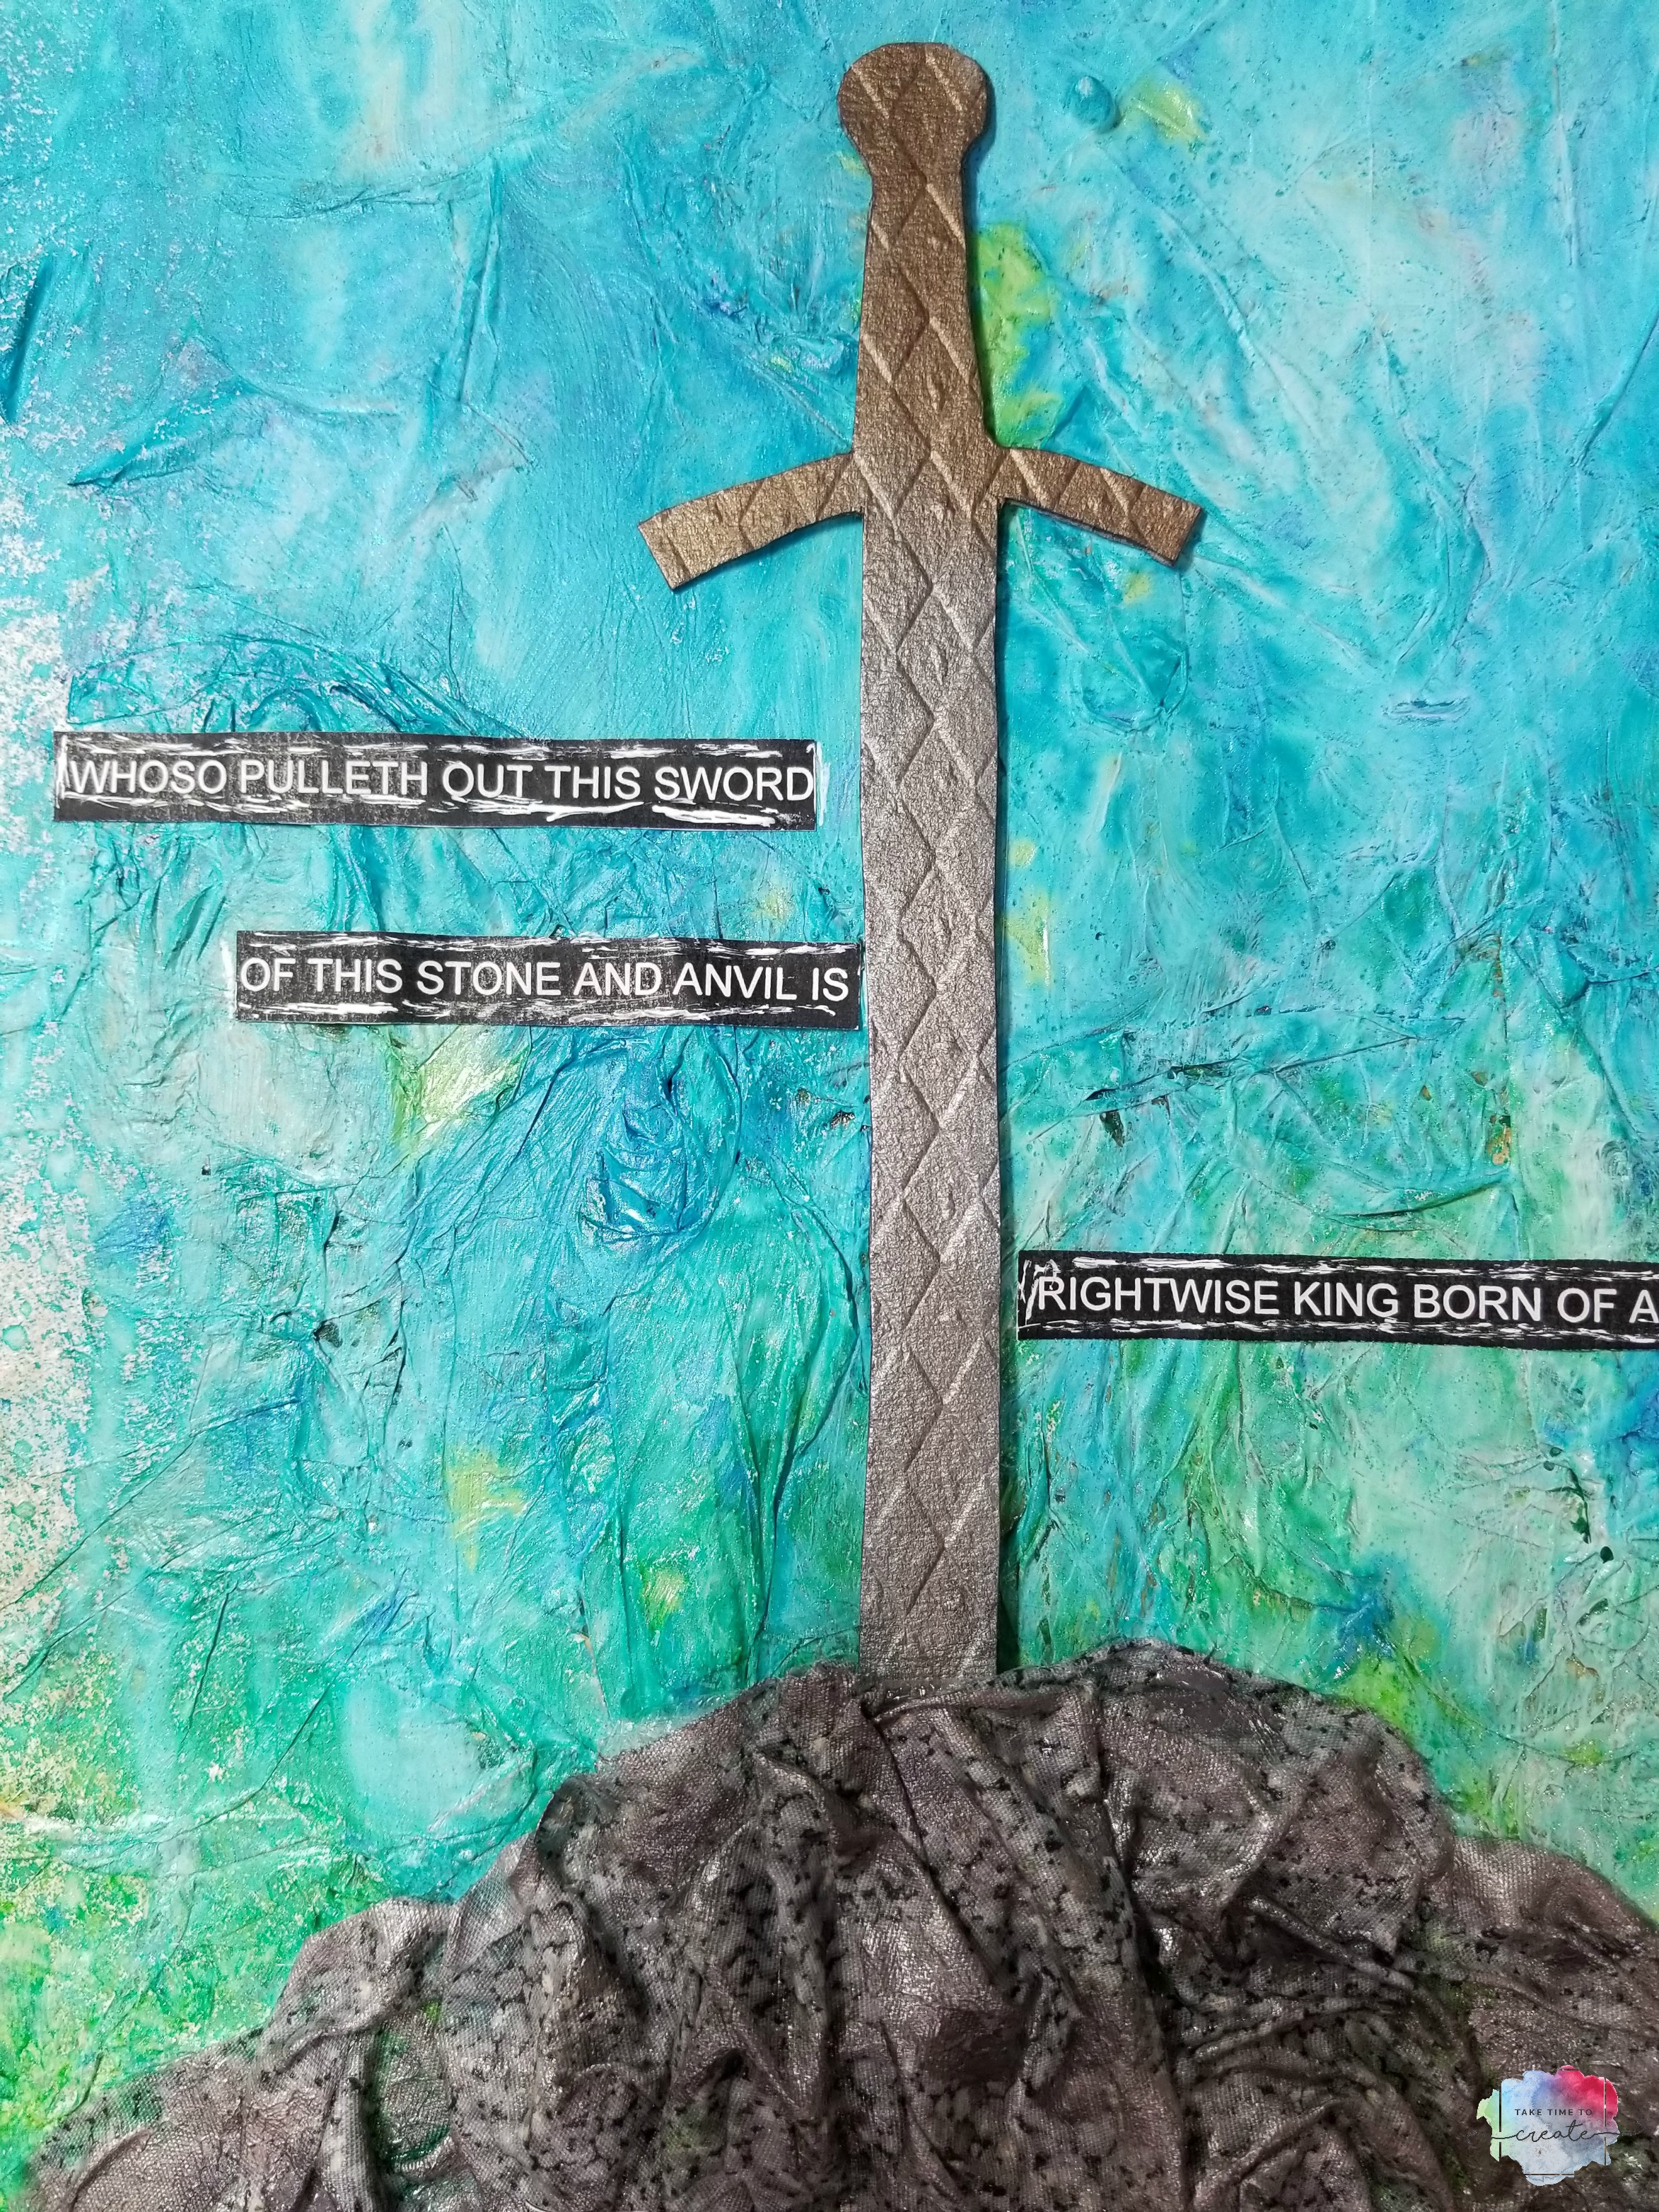
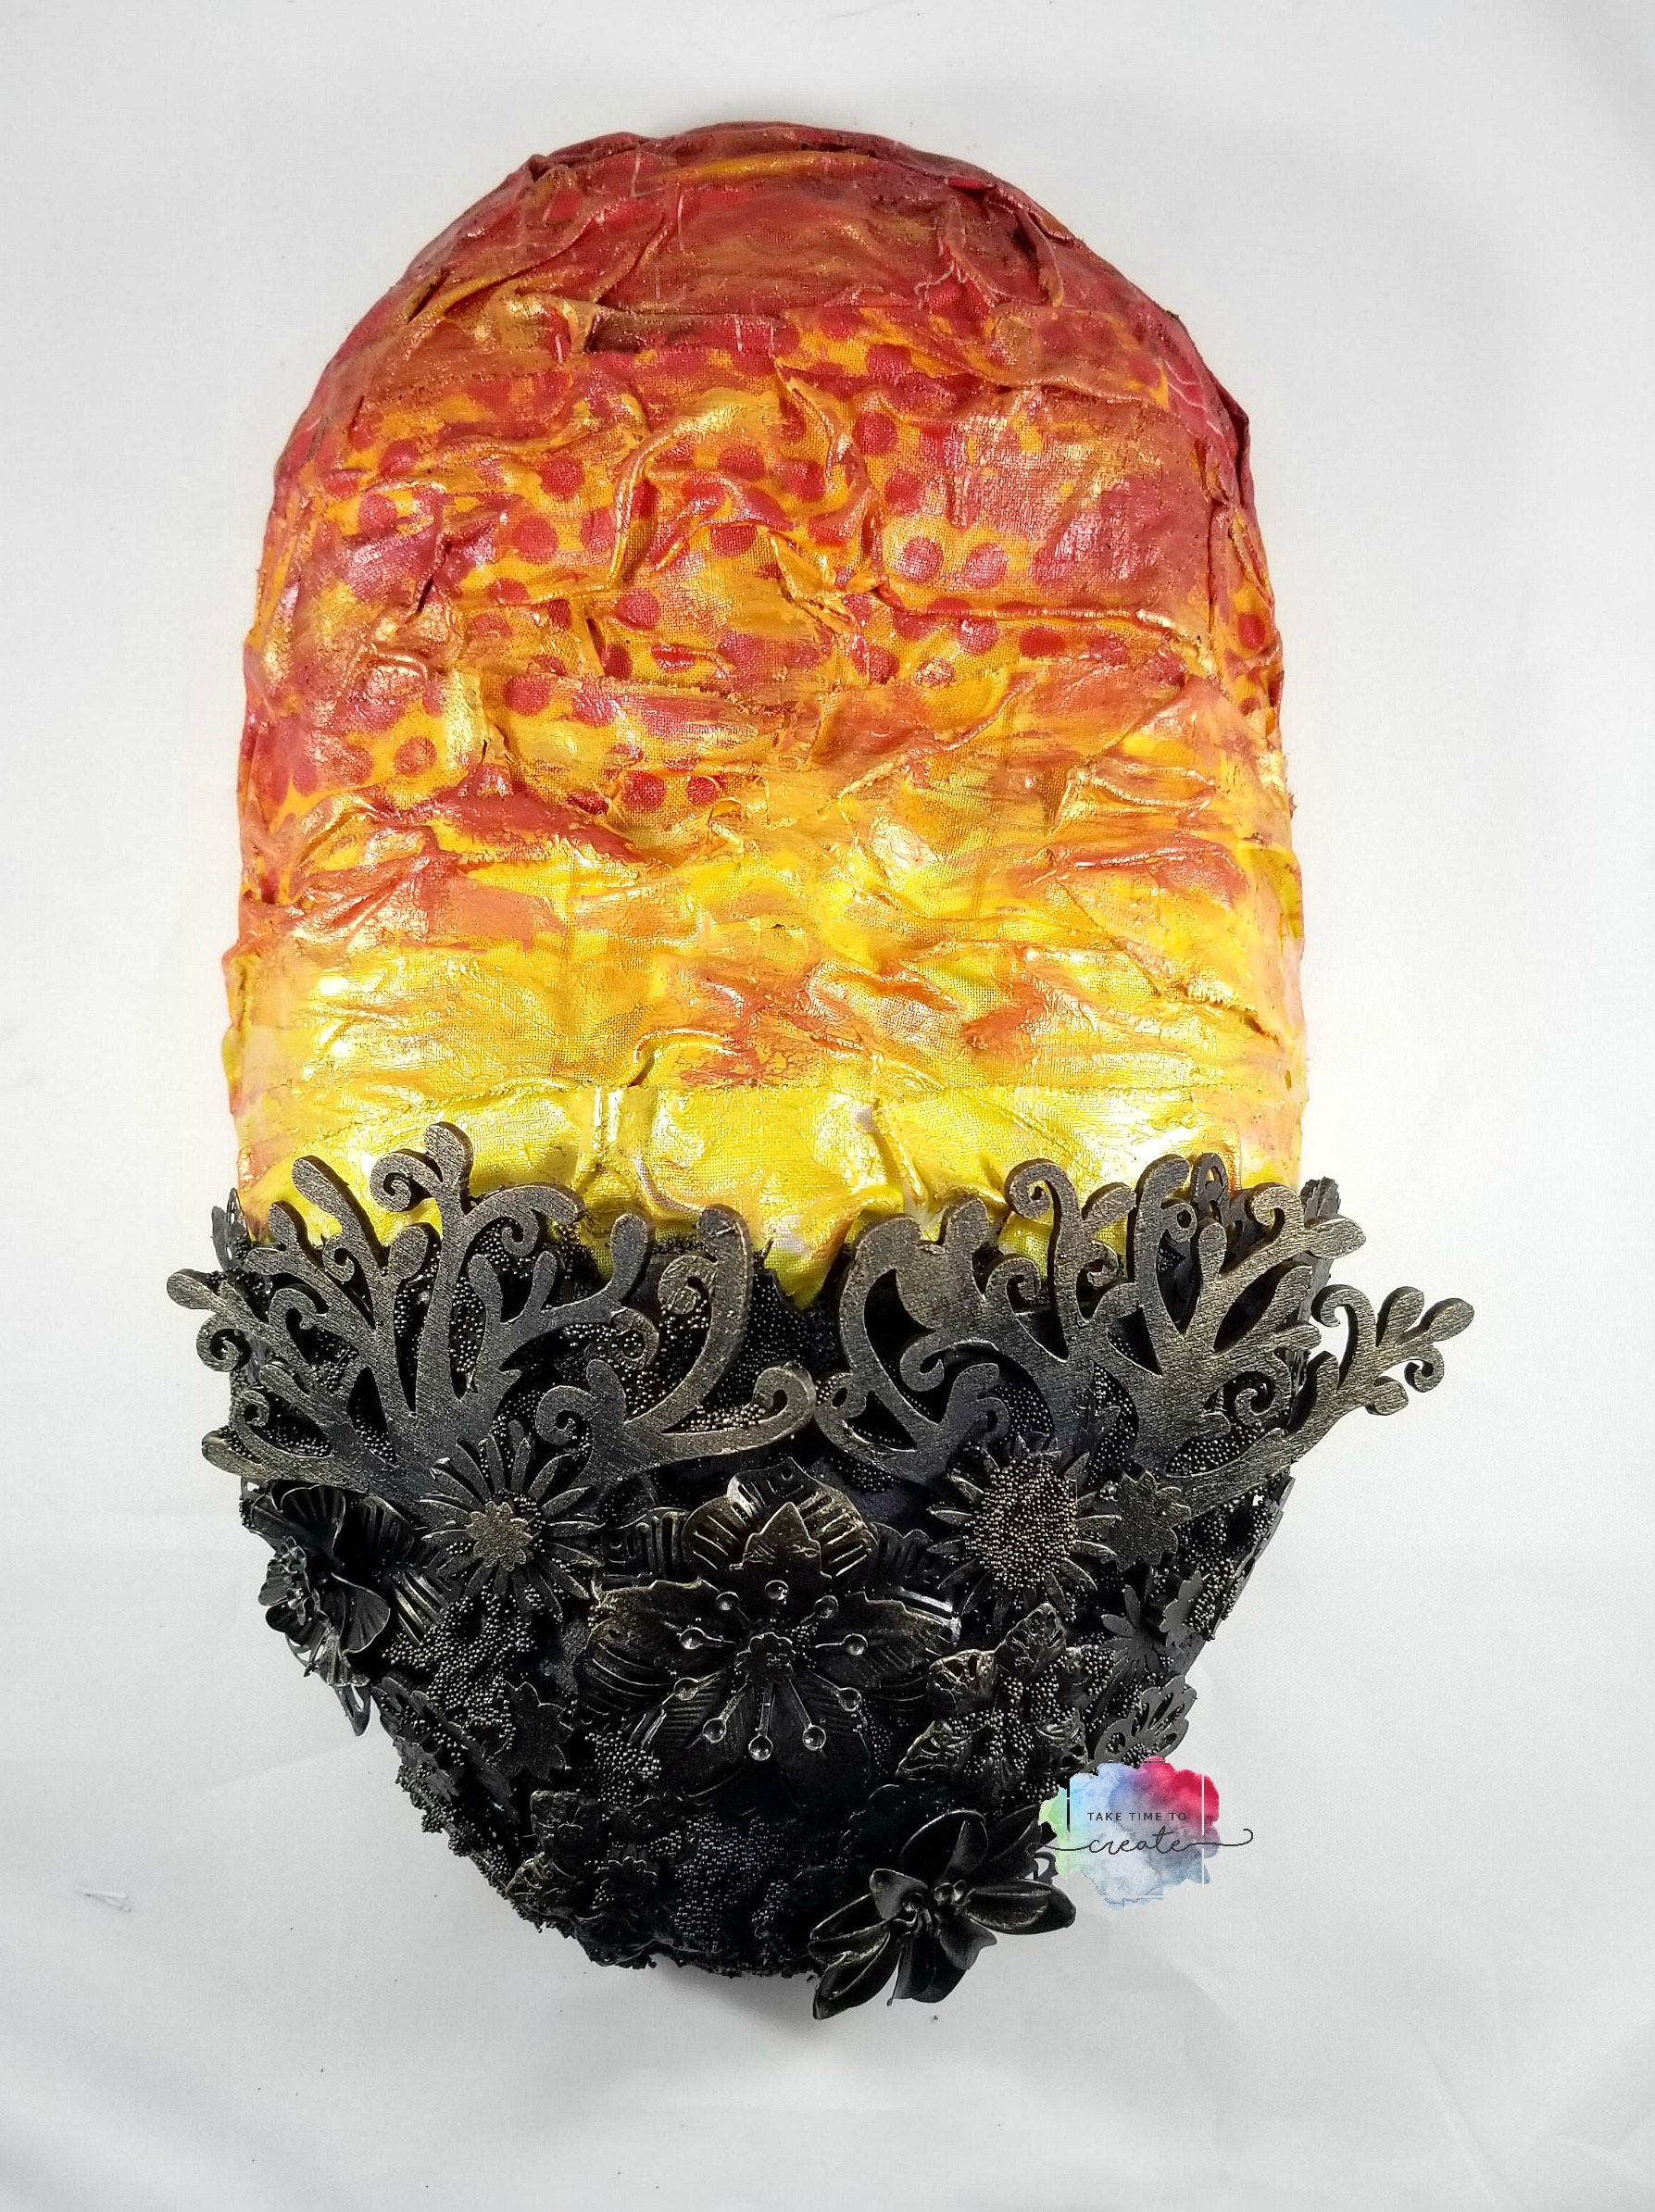
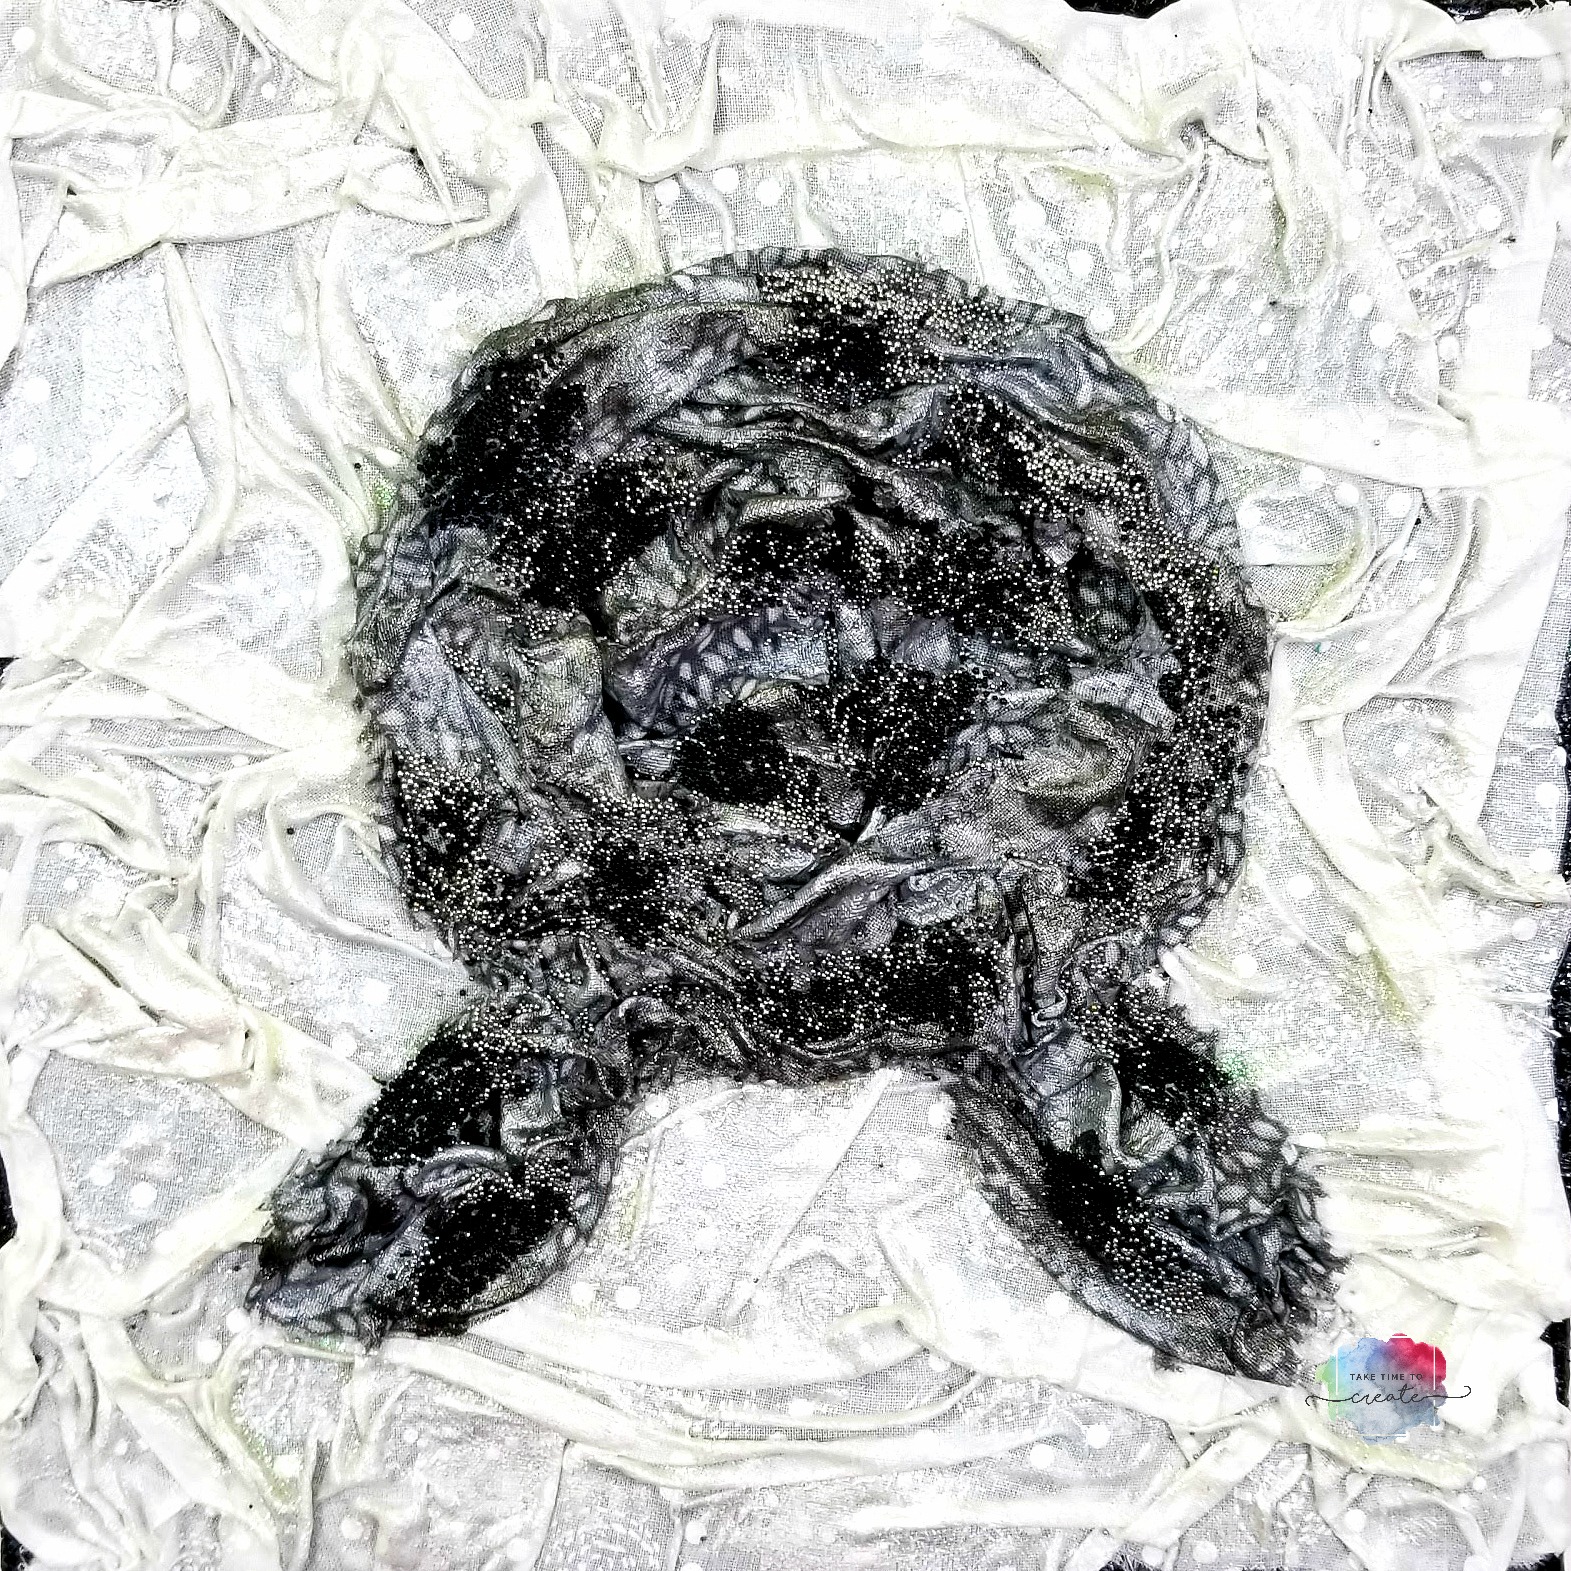
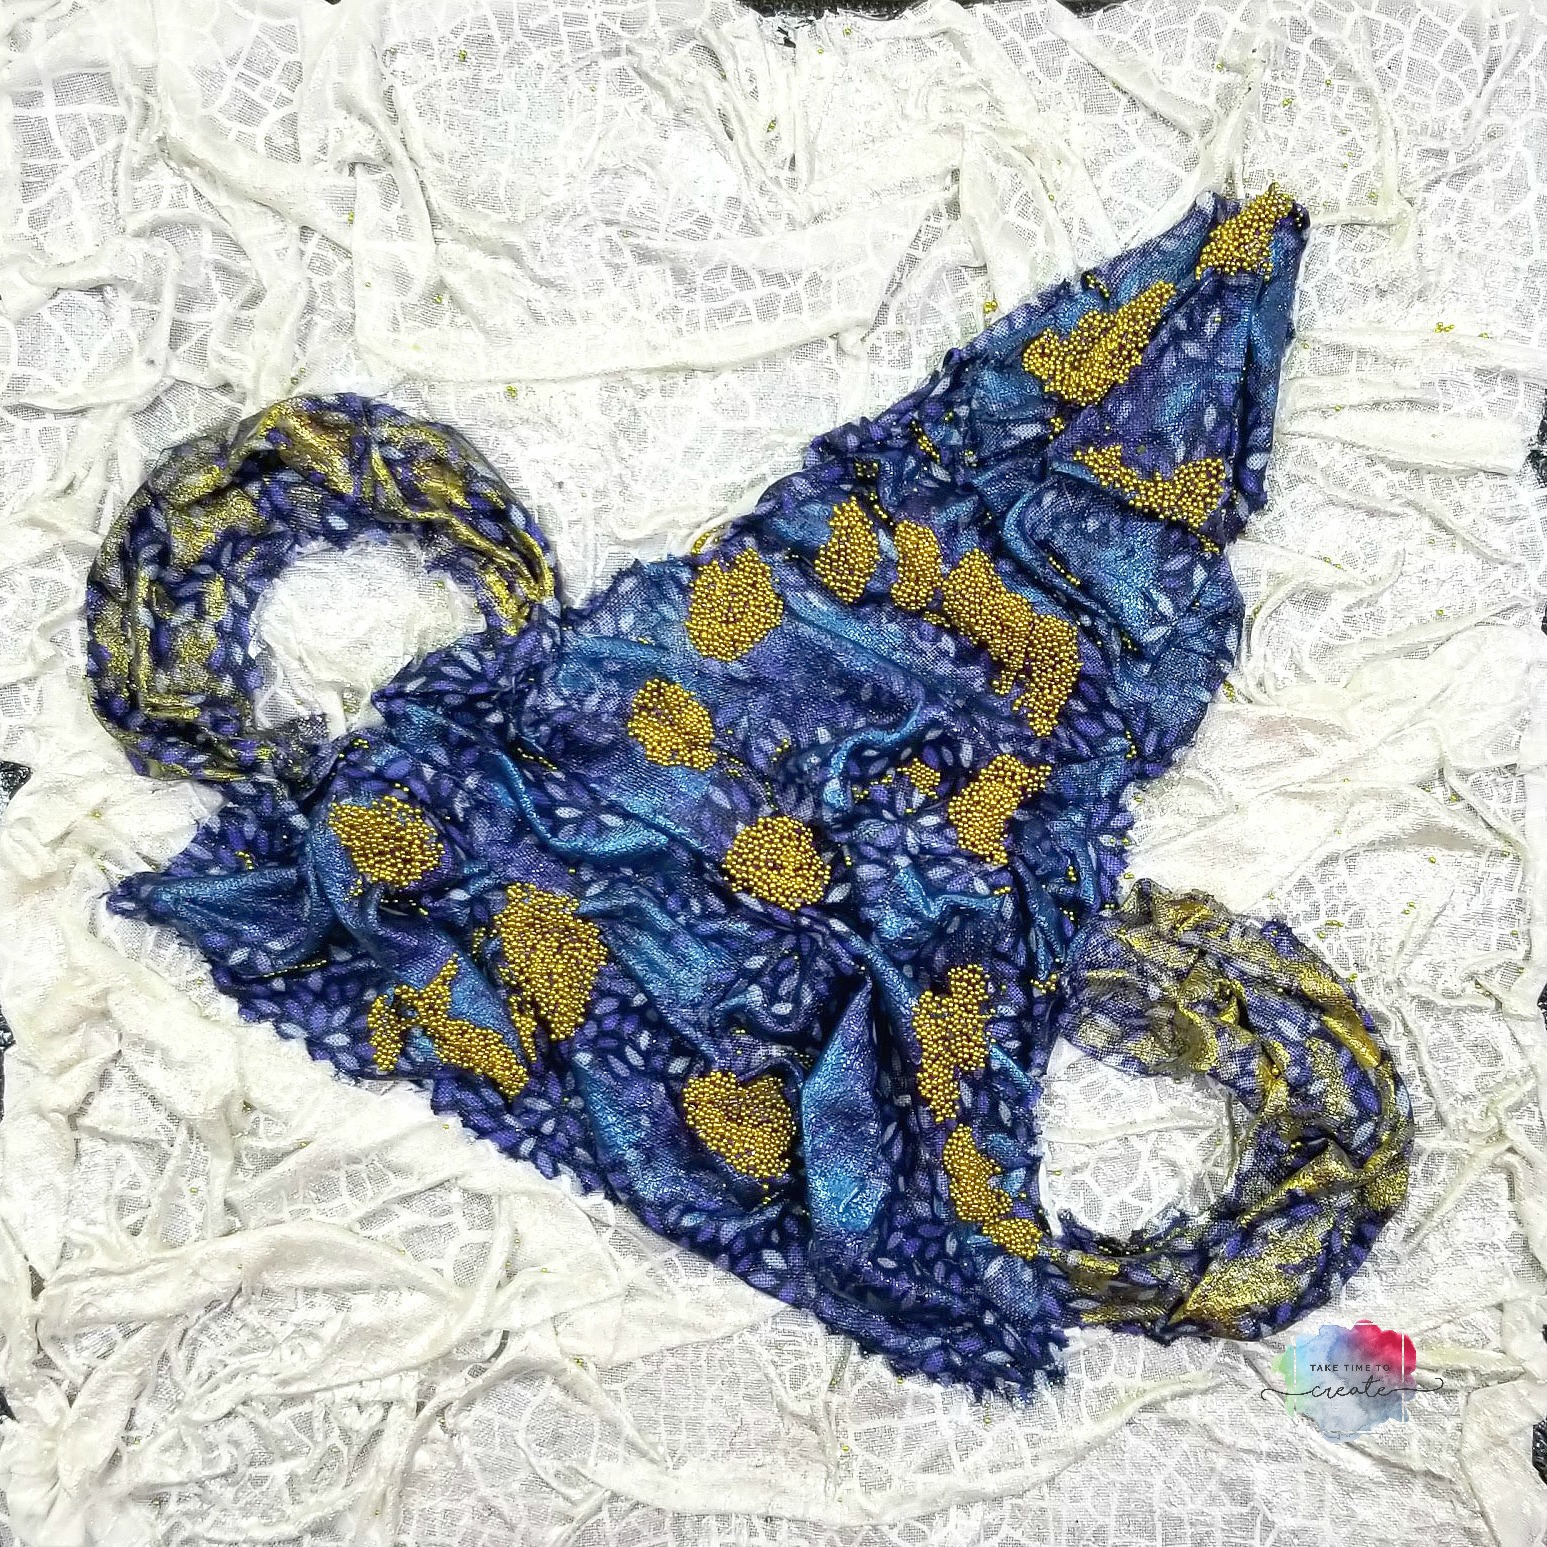
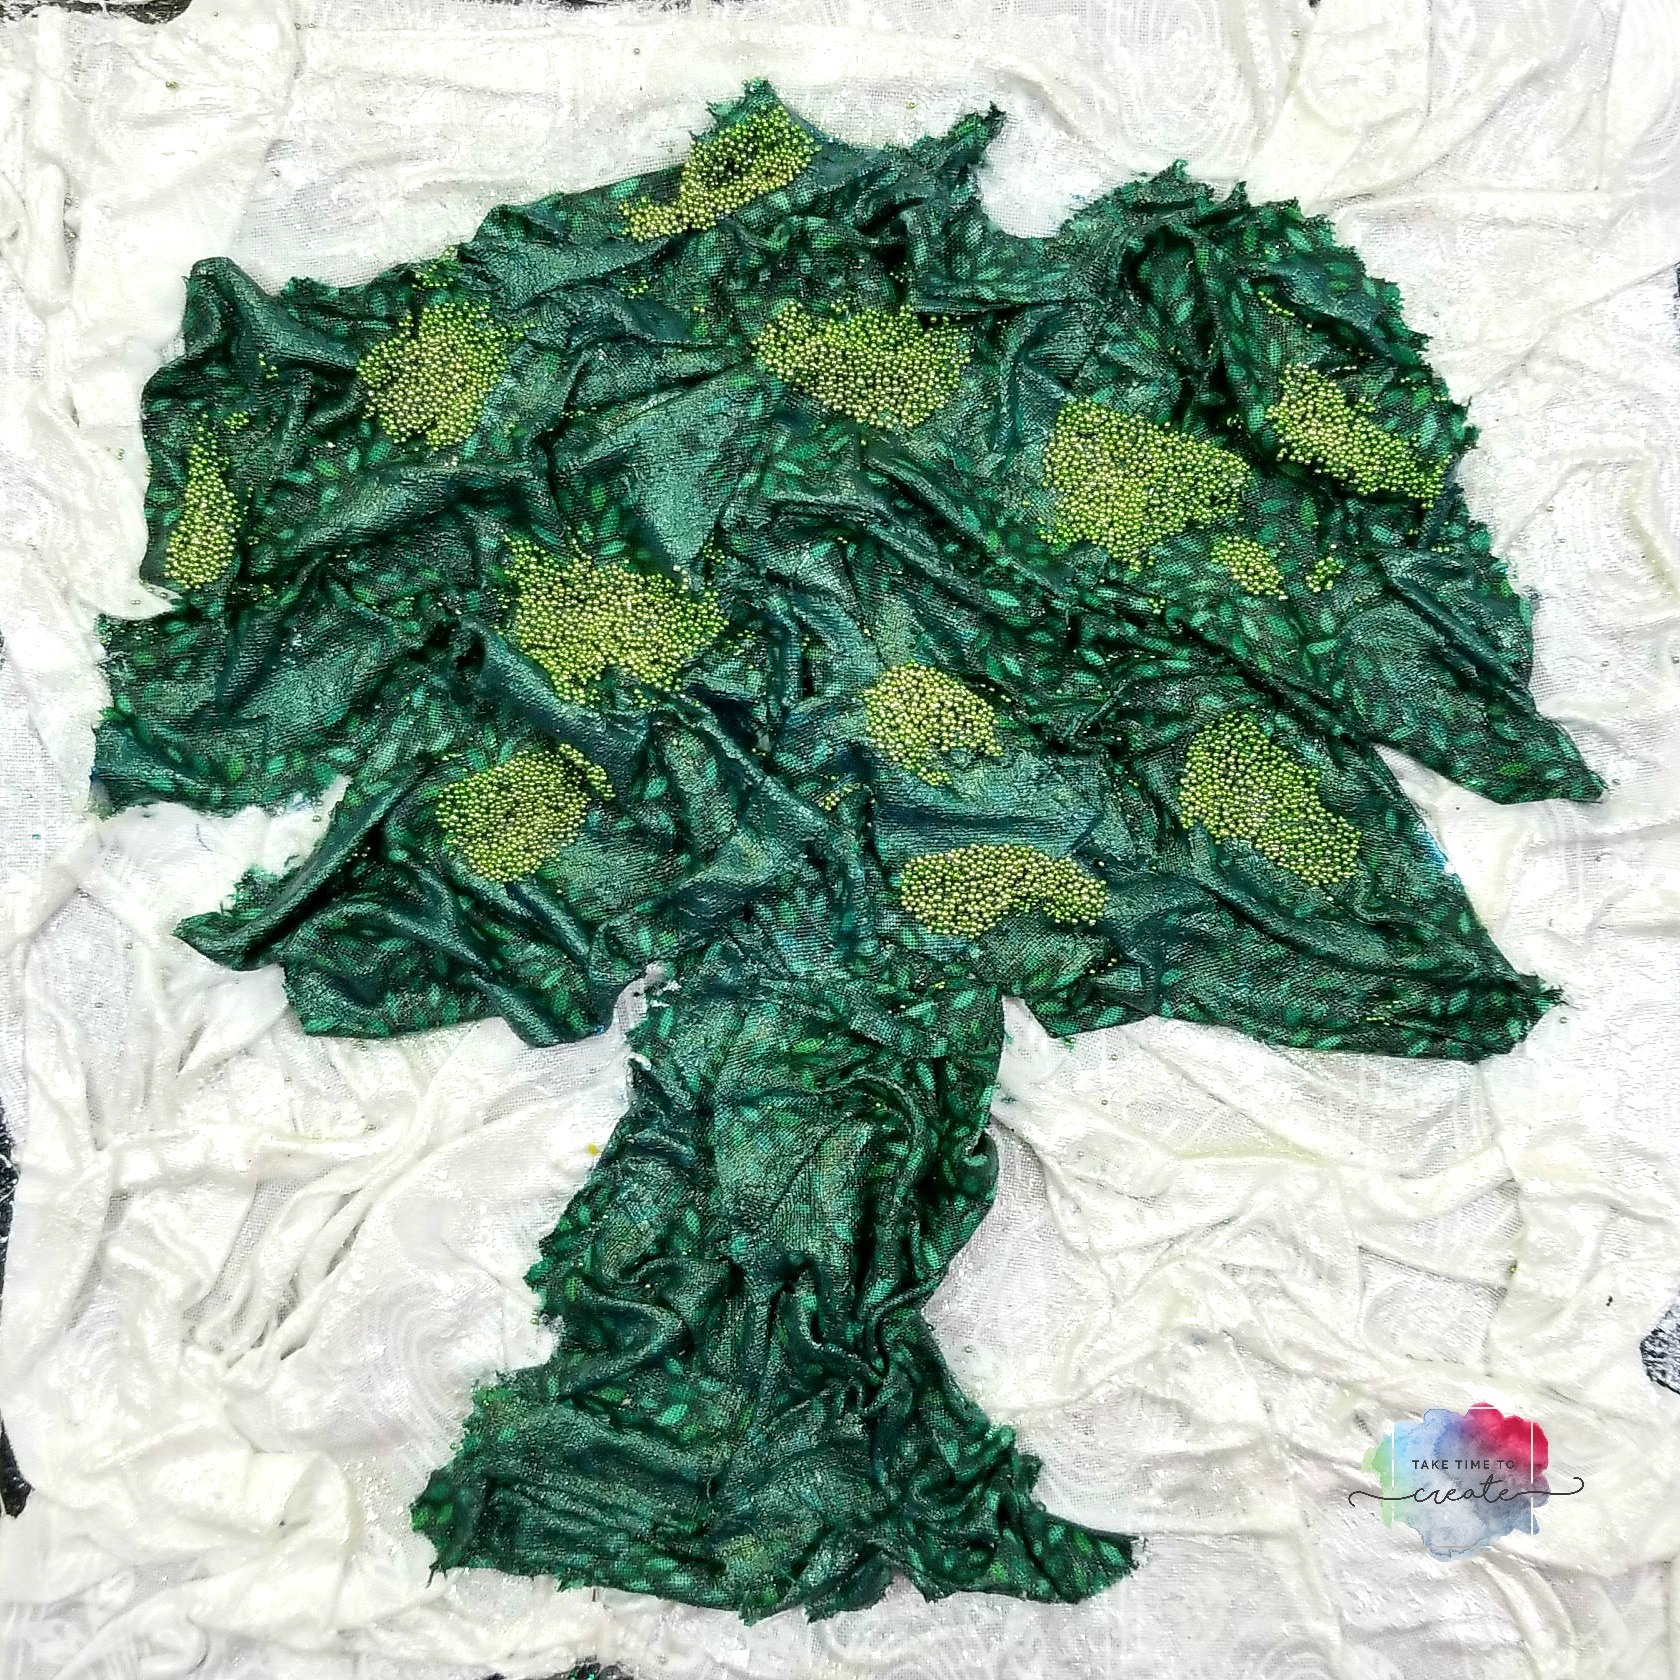
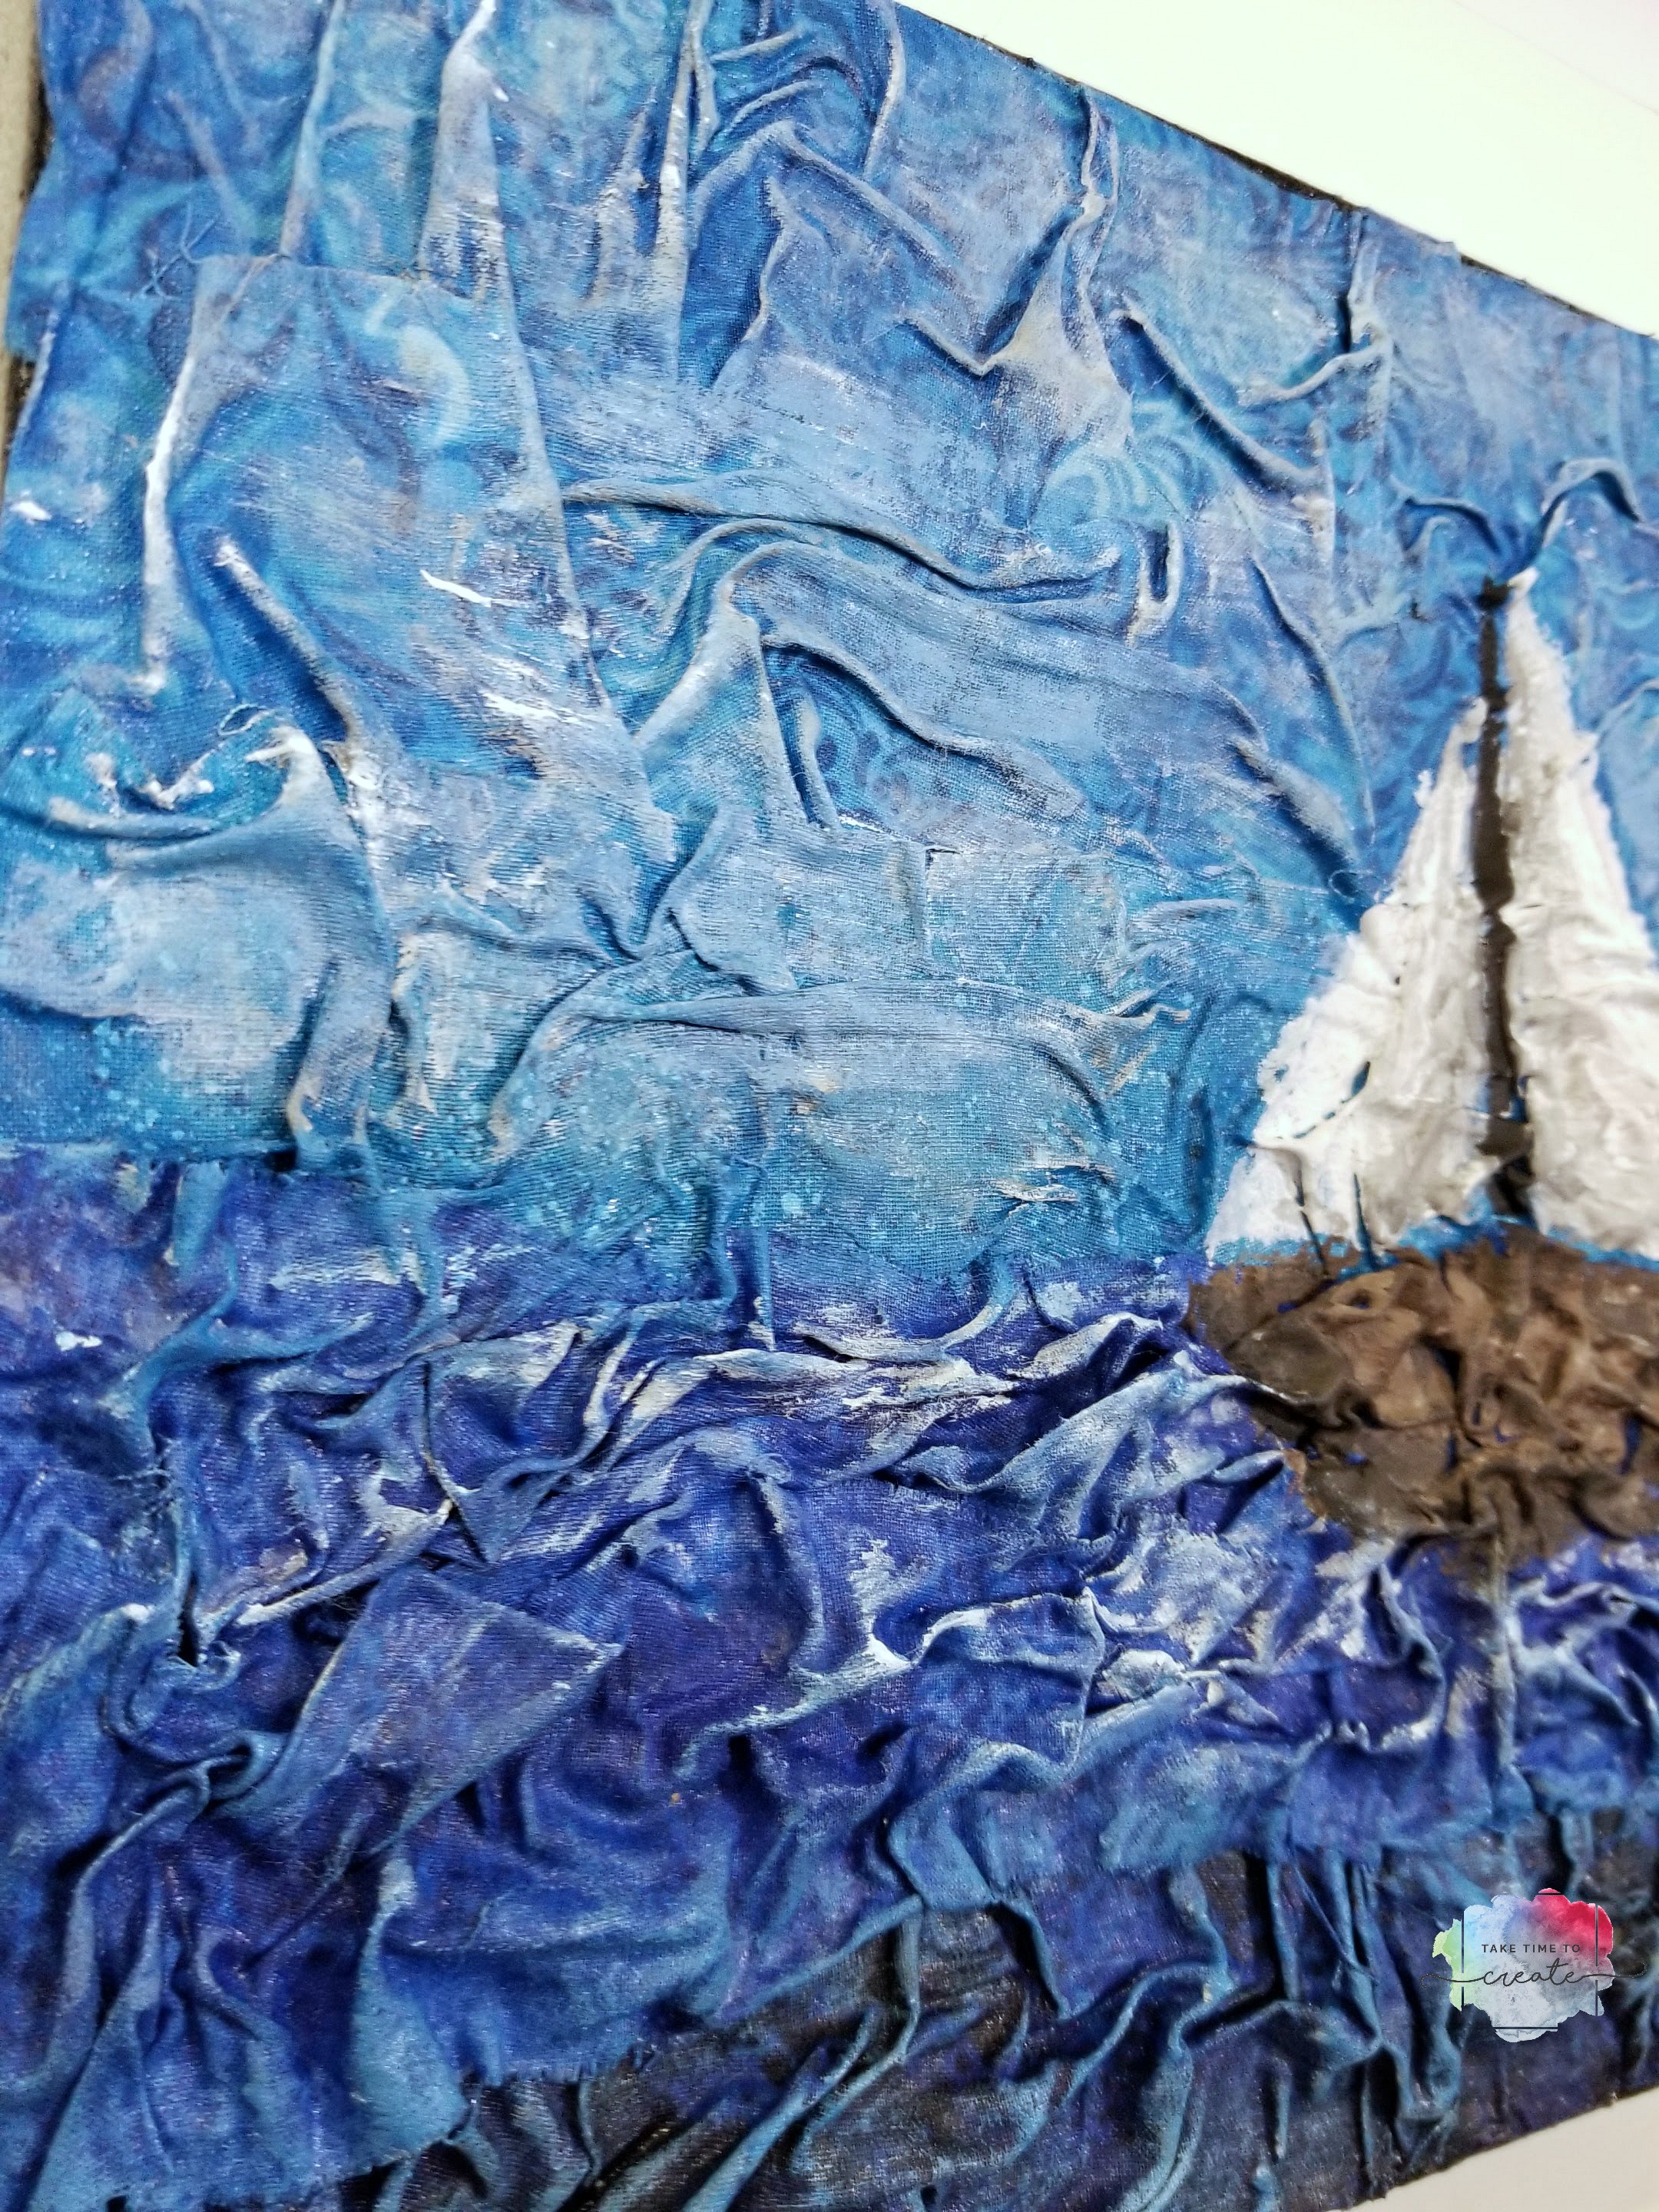
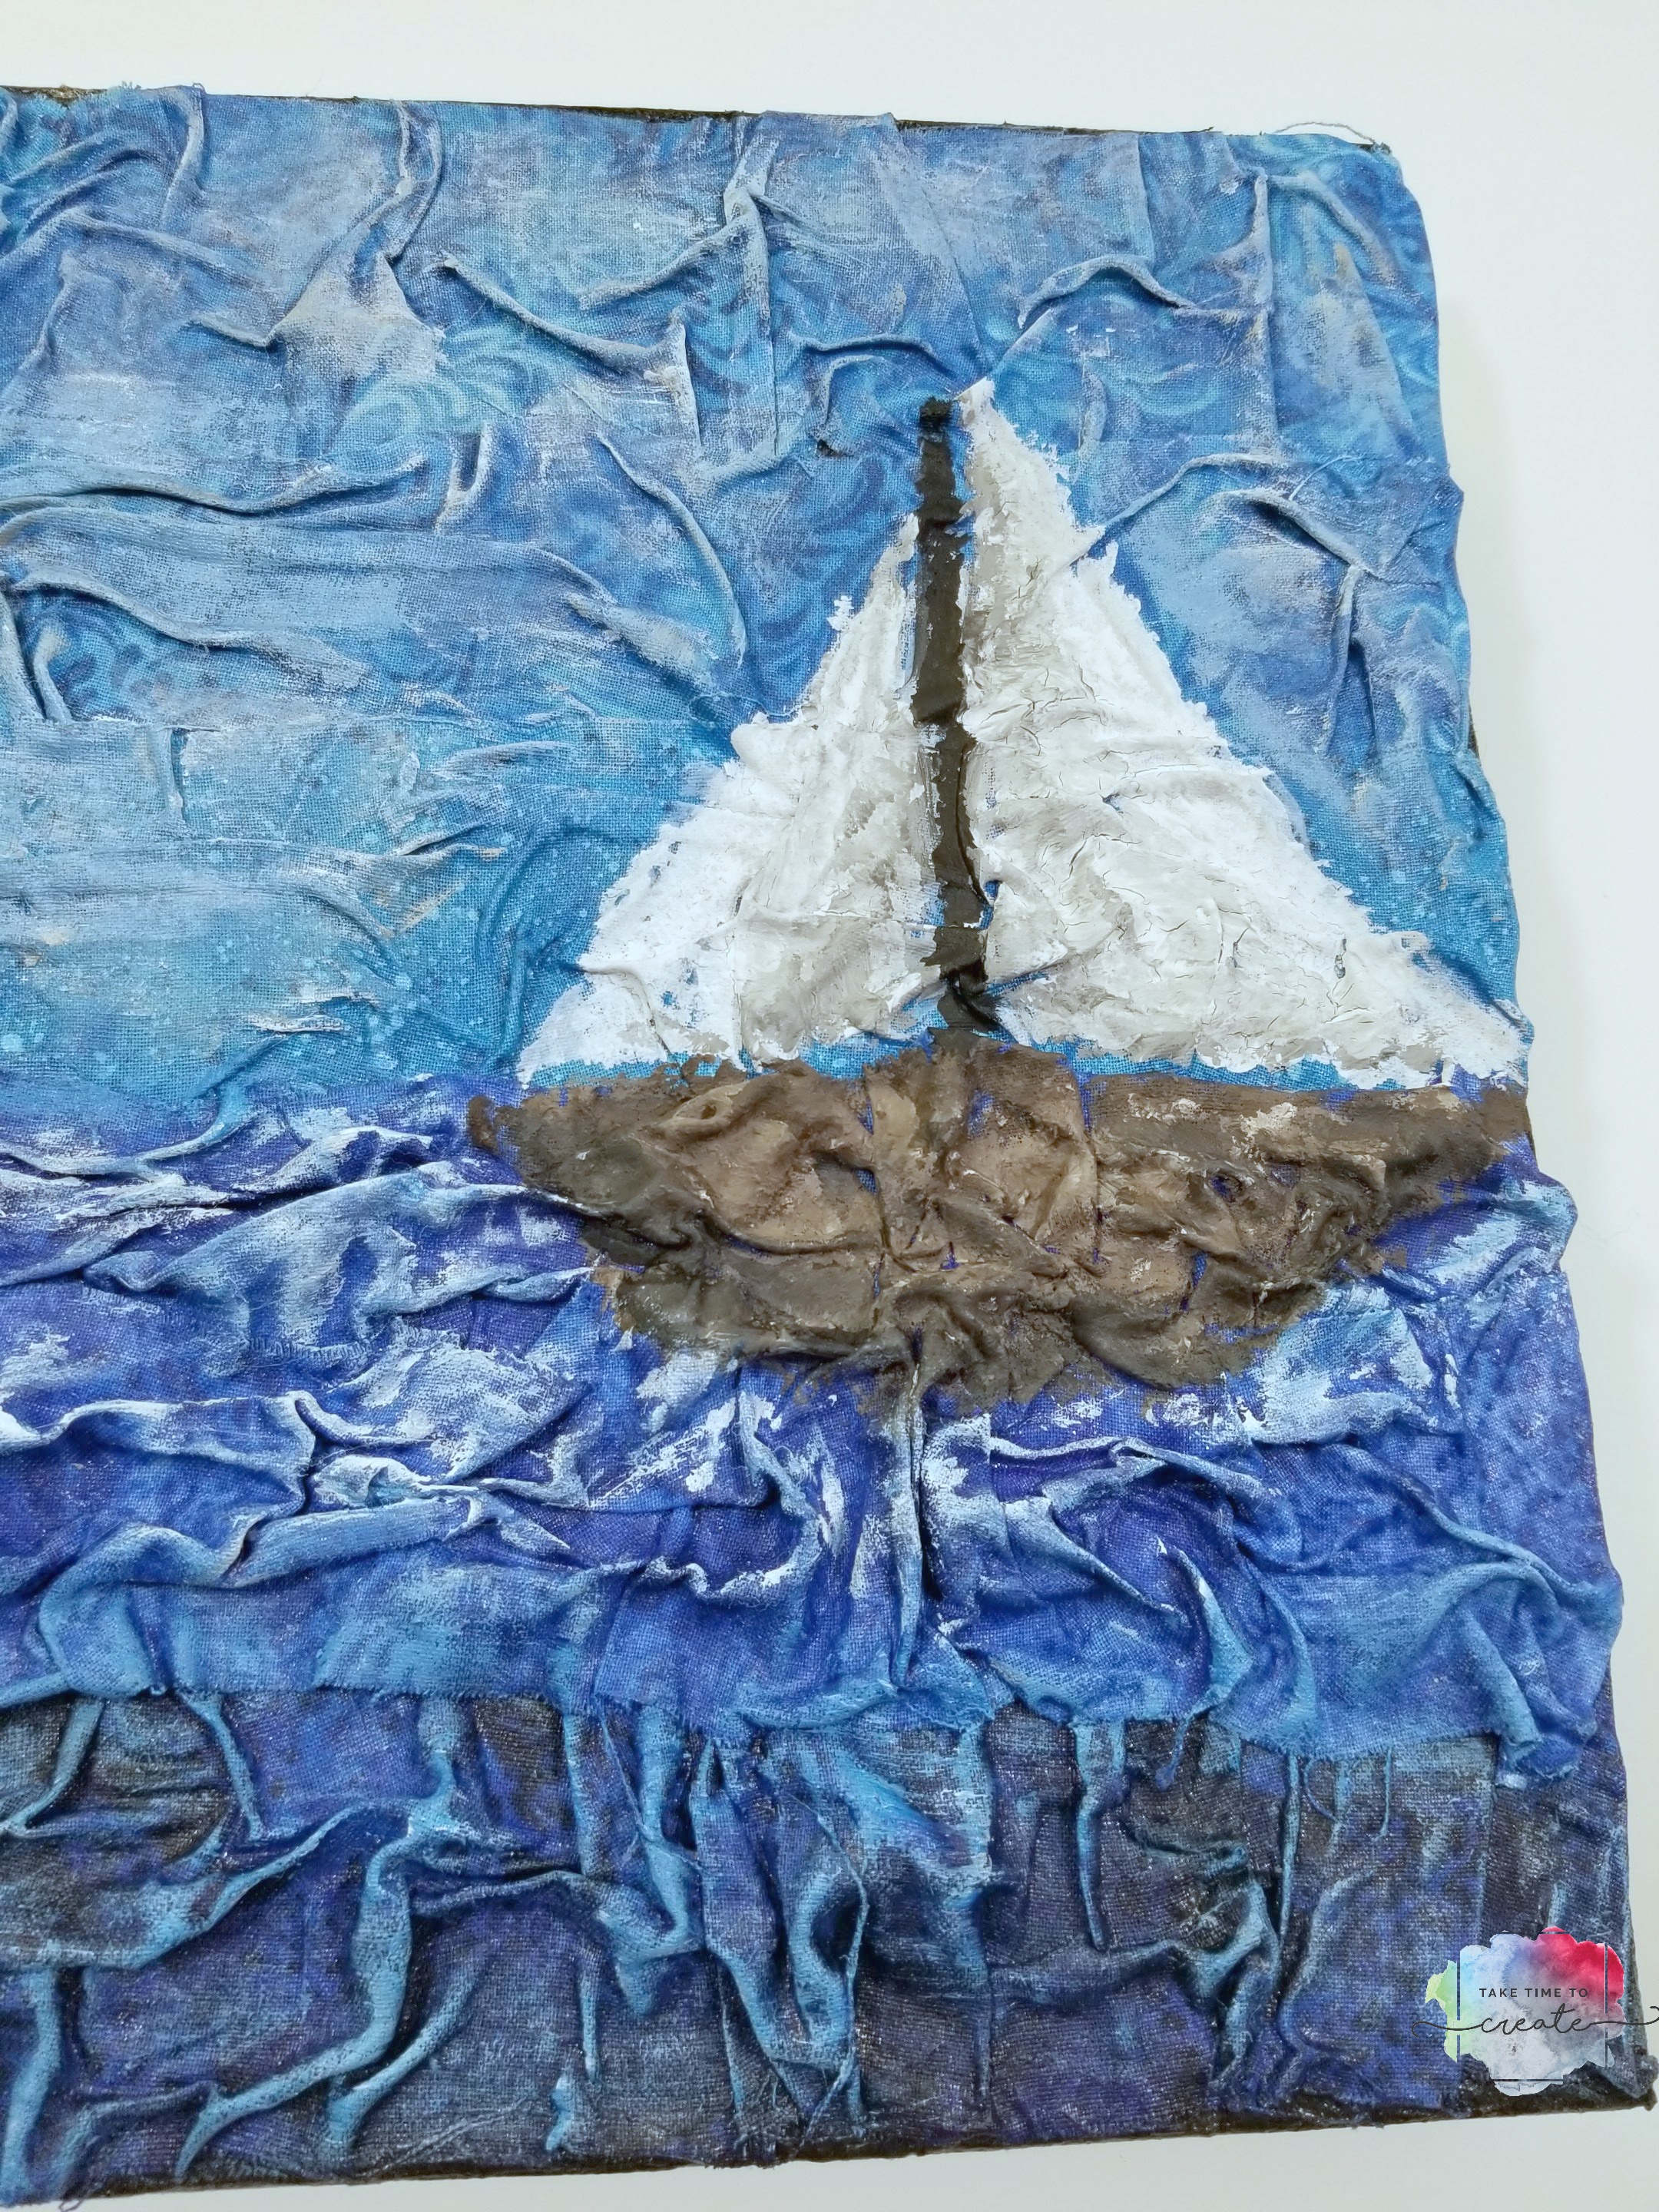
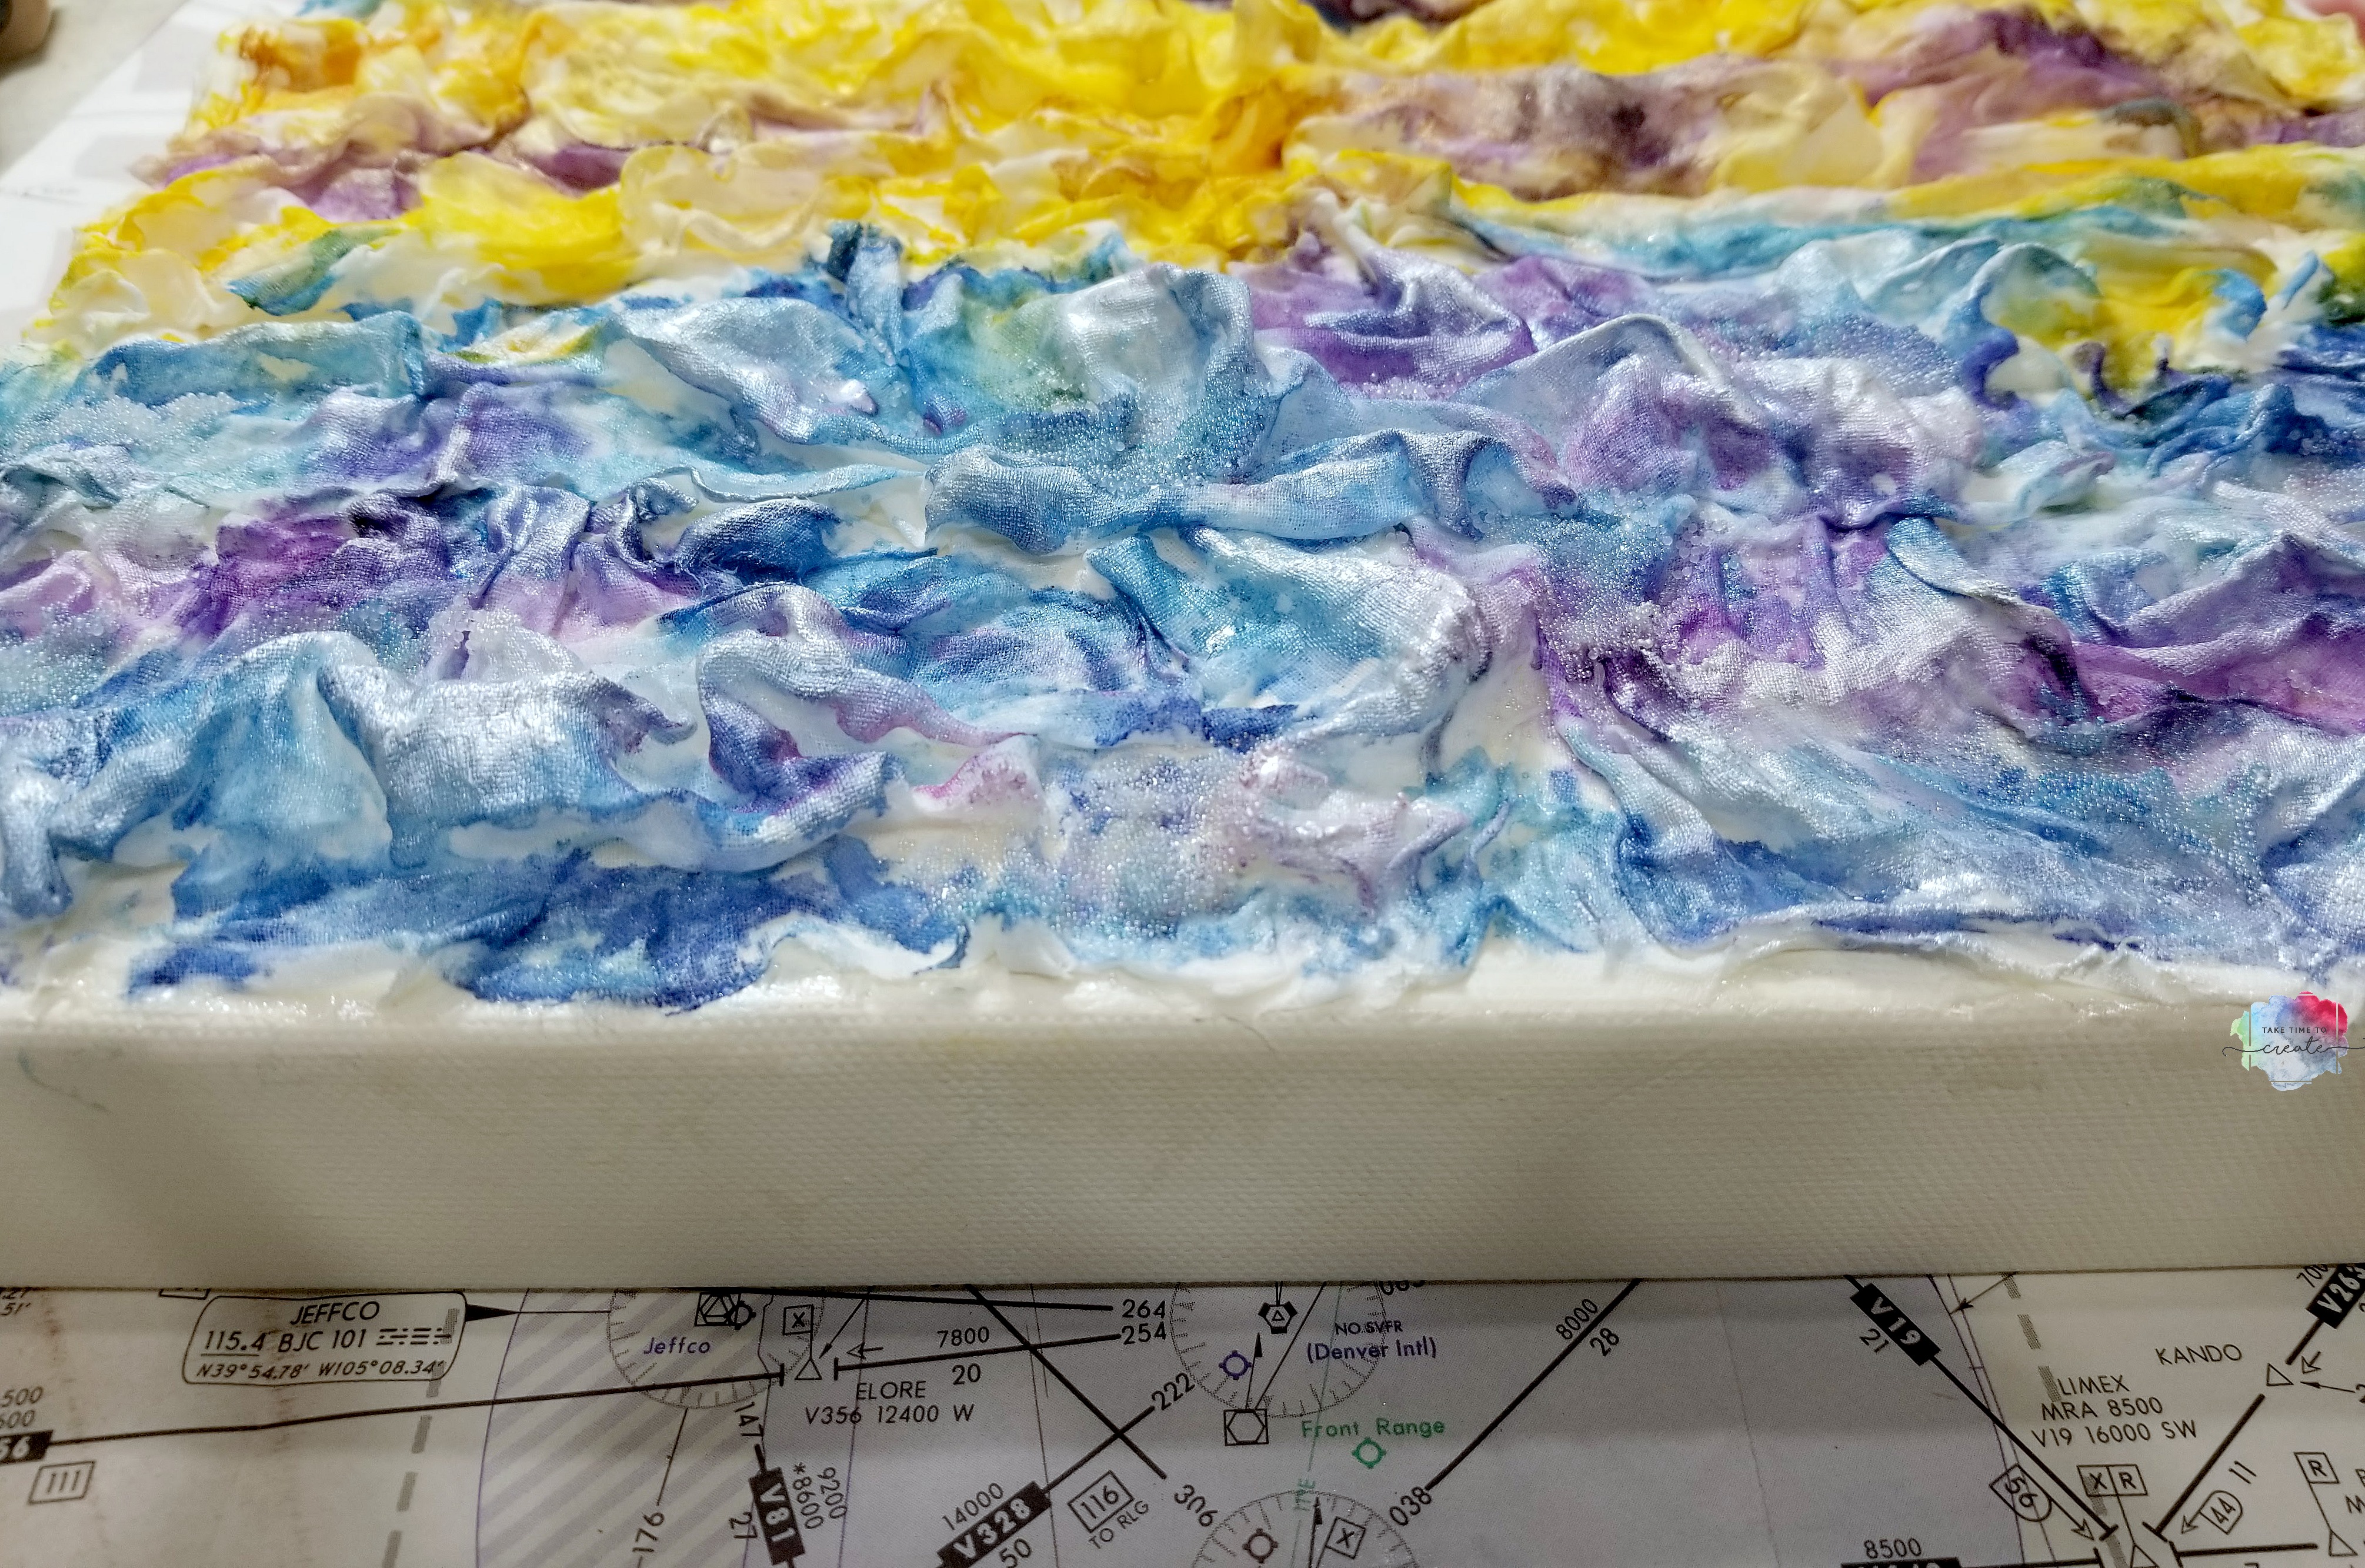
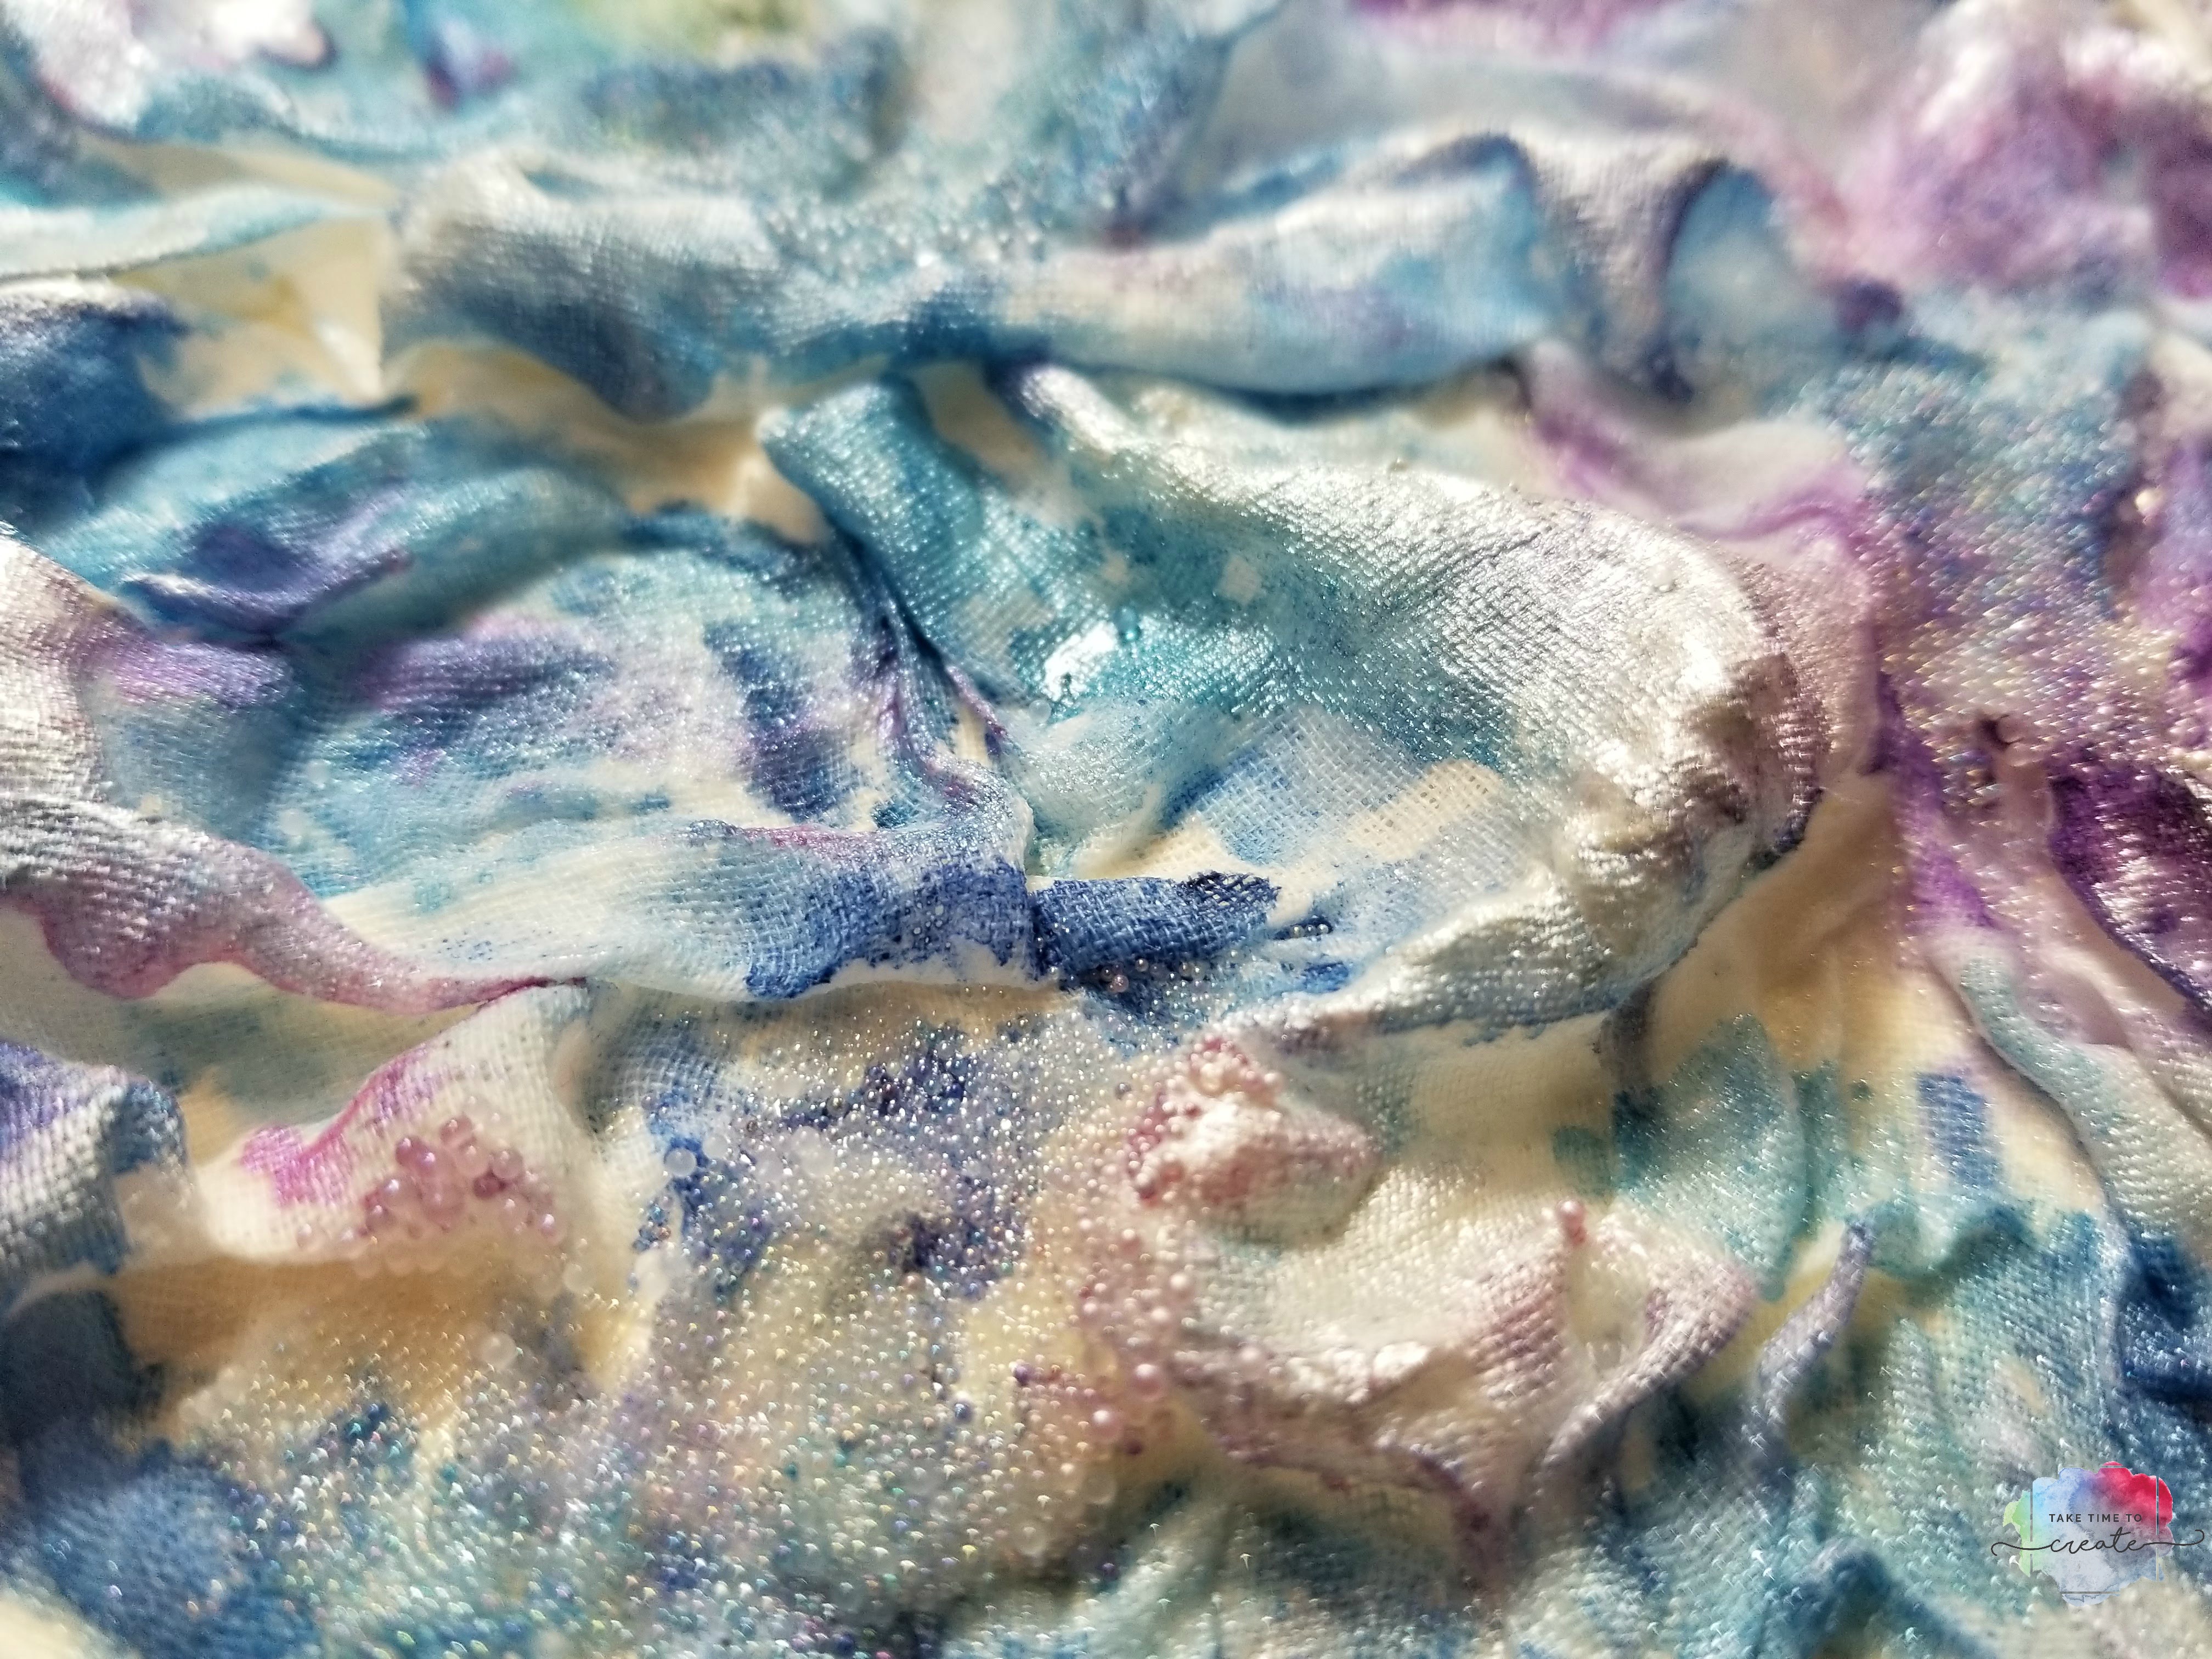
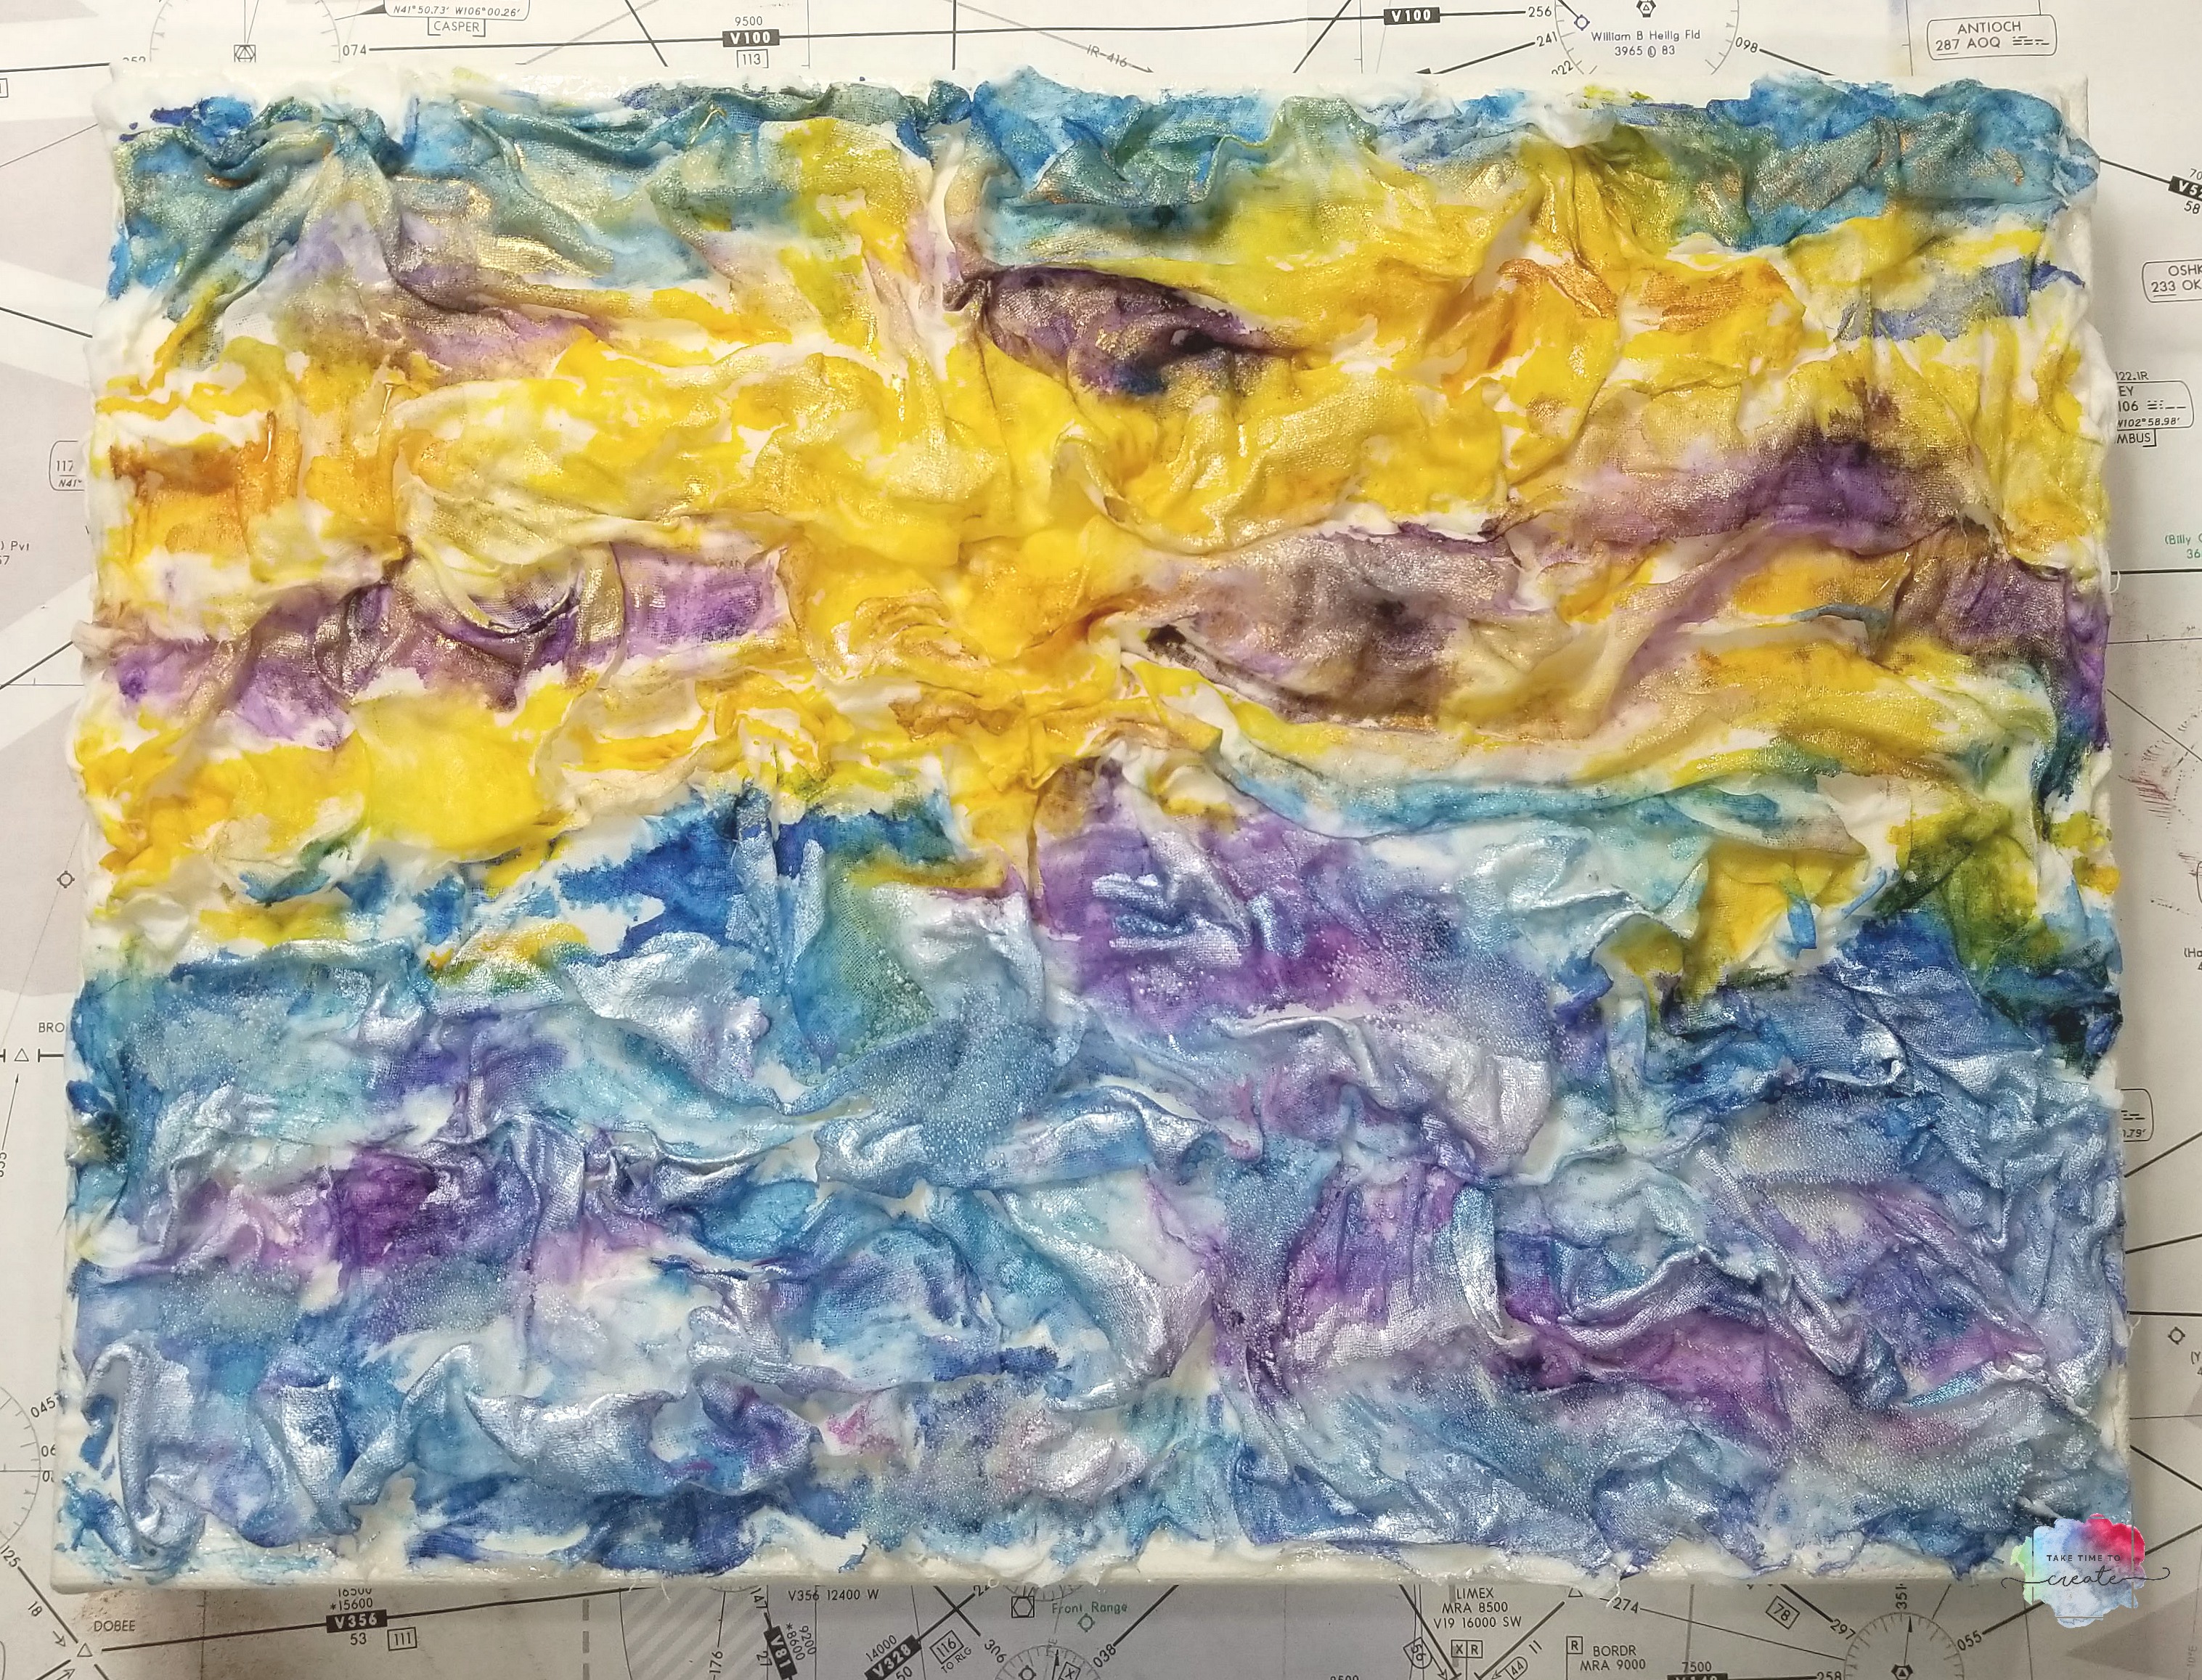
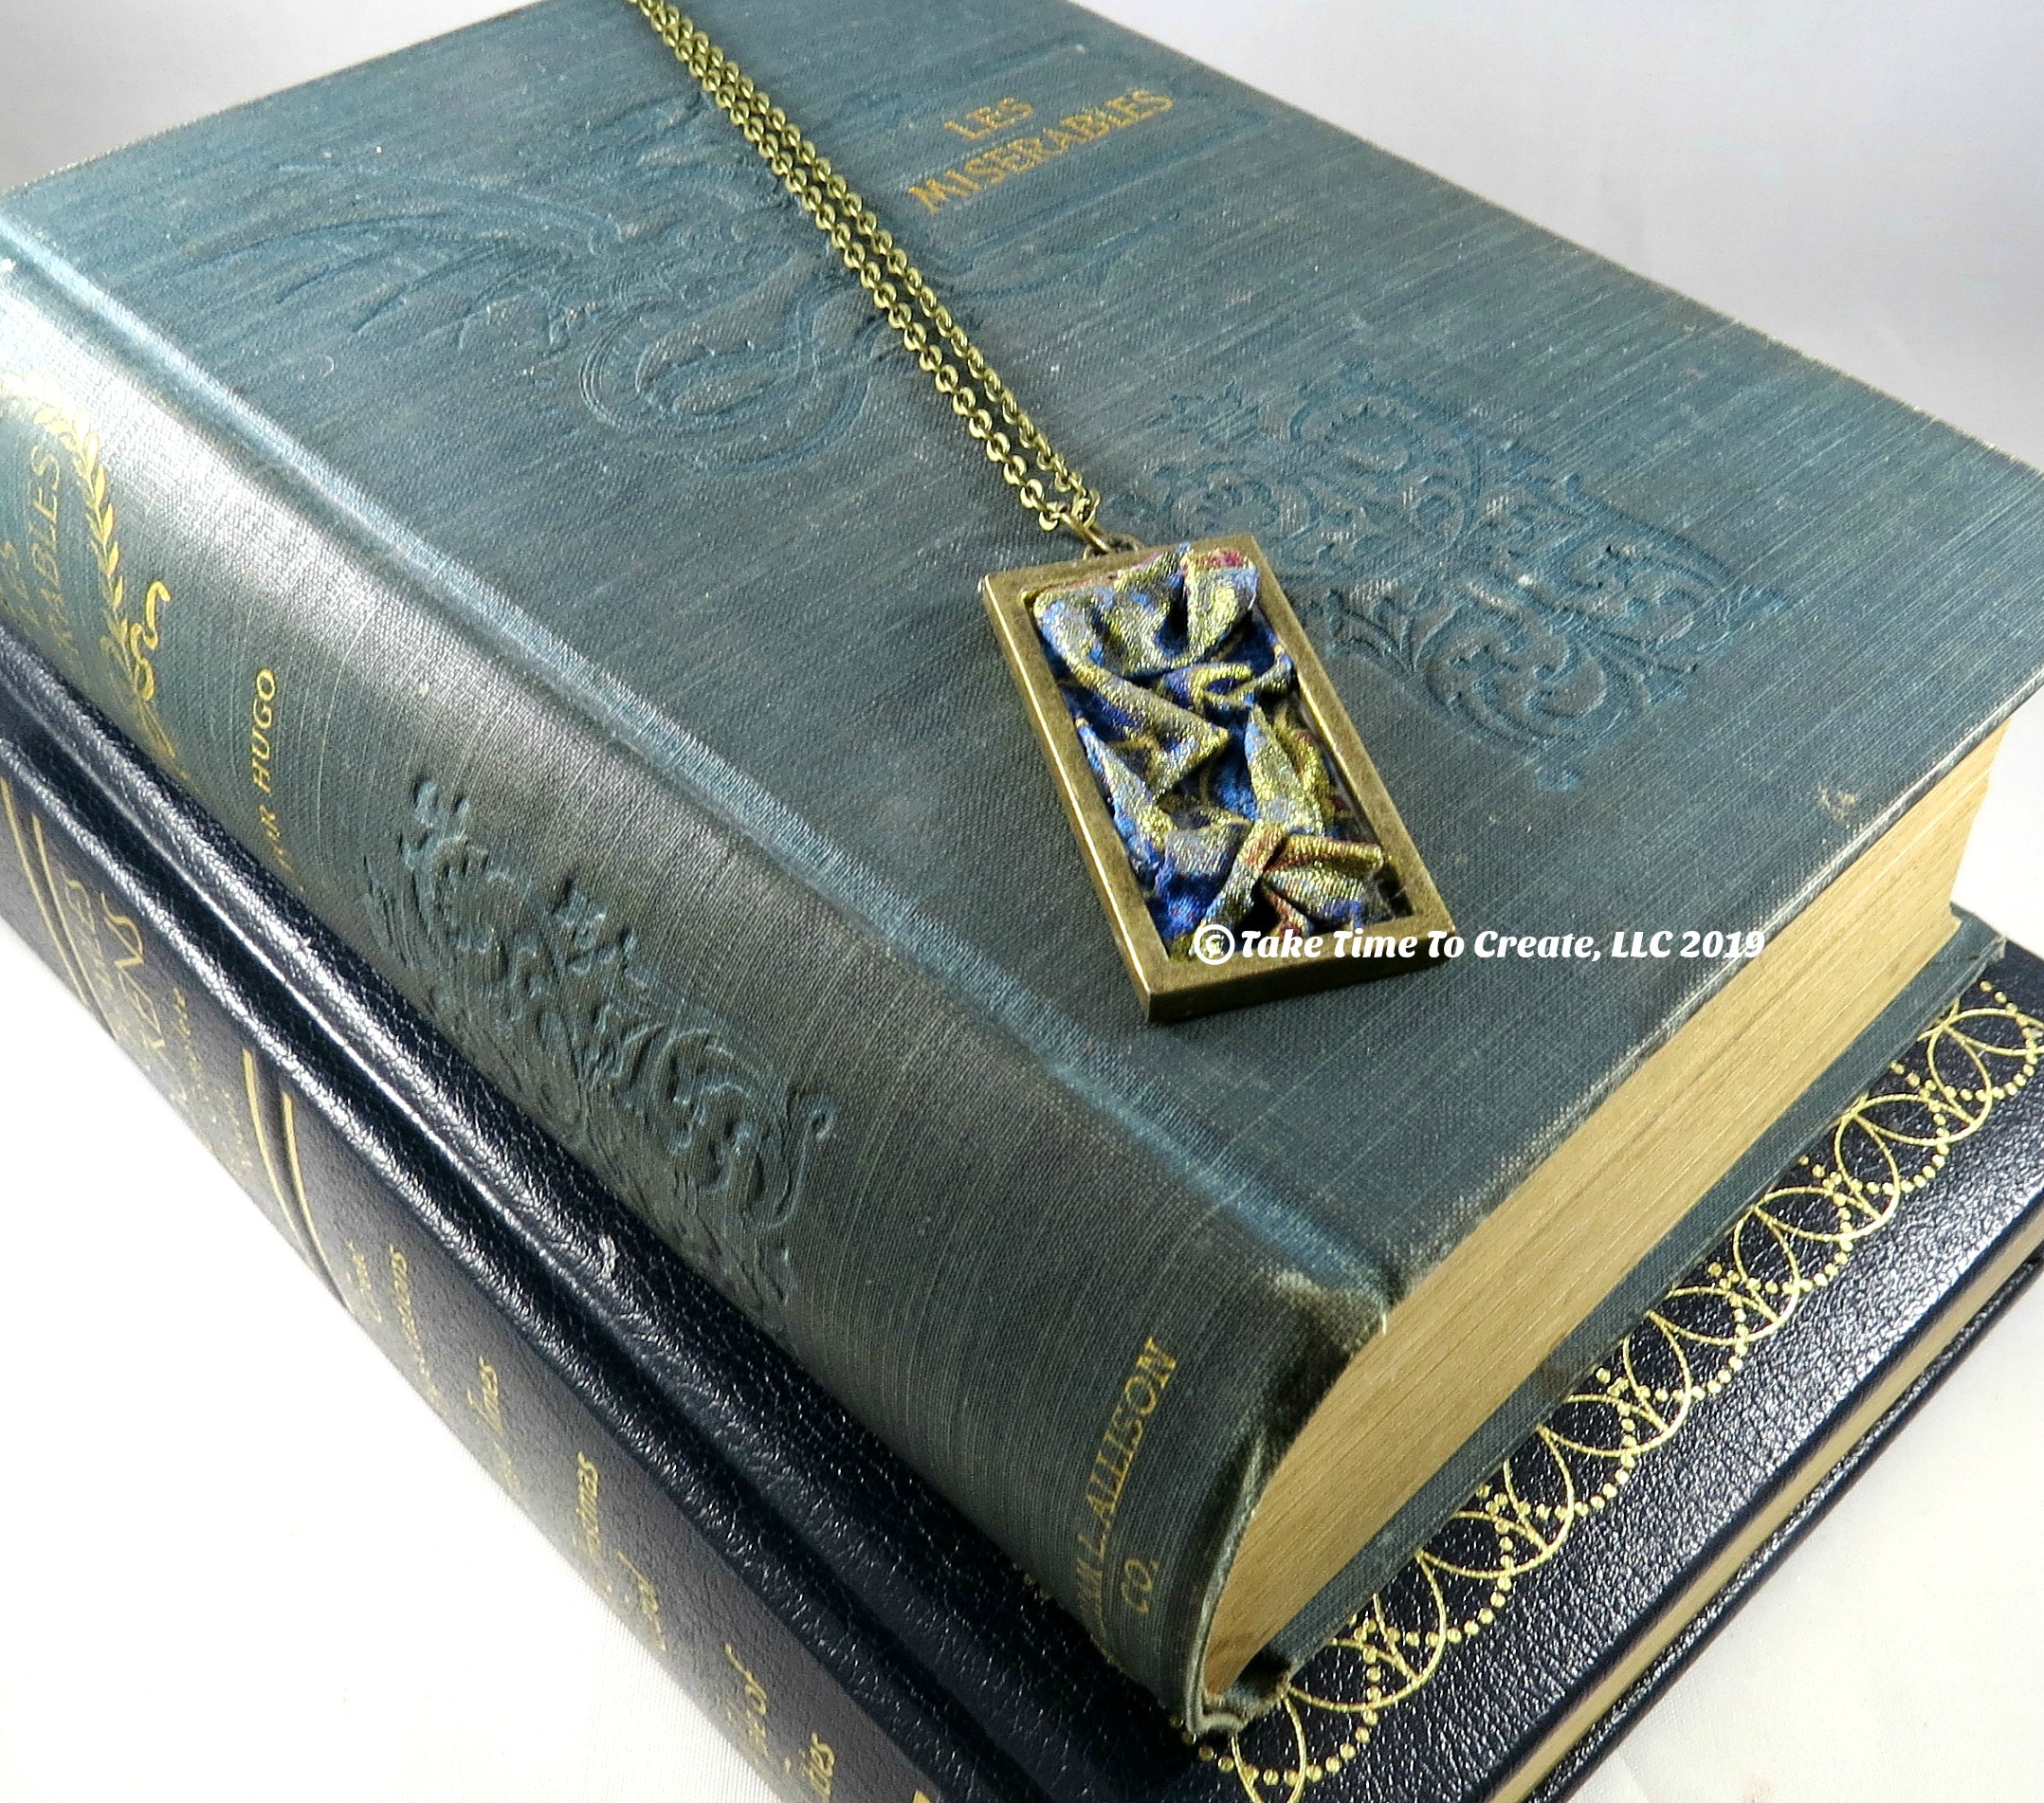
In the magazine I showed off the fabric pendants that I love to create. So, in the video I showed you how to create these pendants. You can also find them in my Etsy shop.

Picking up the magazine at Barnes and Noble

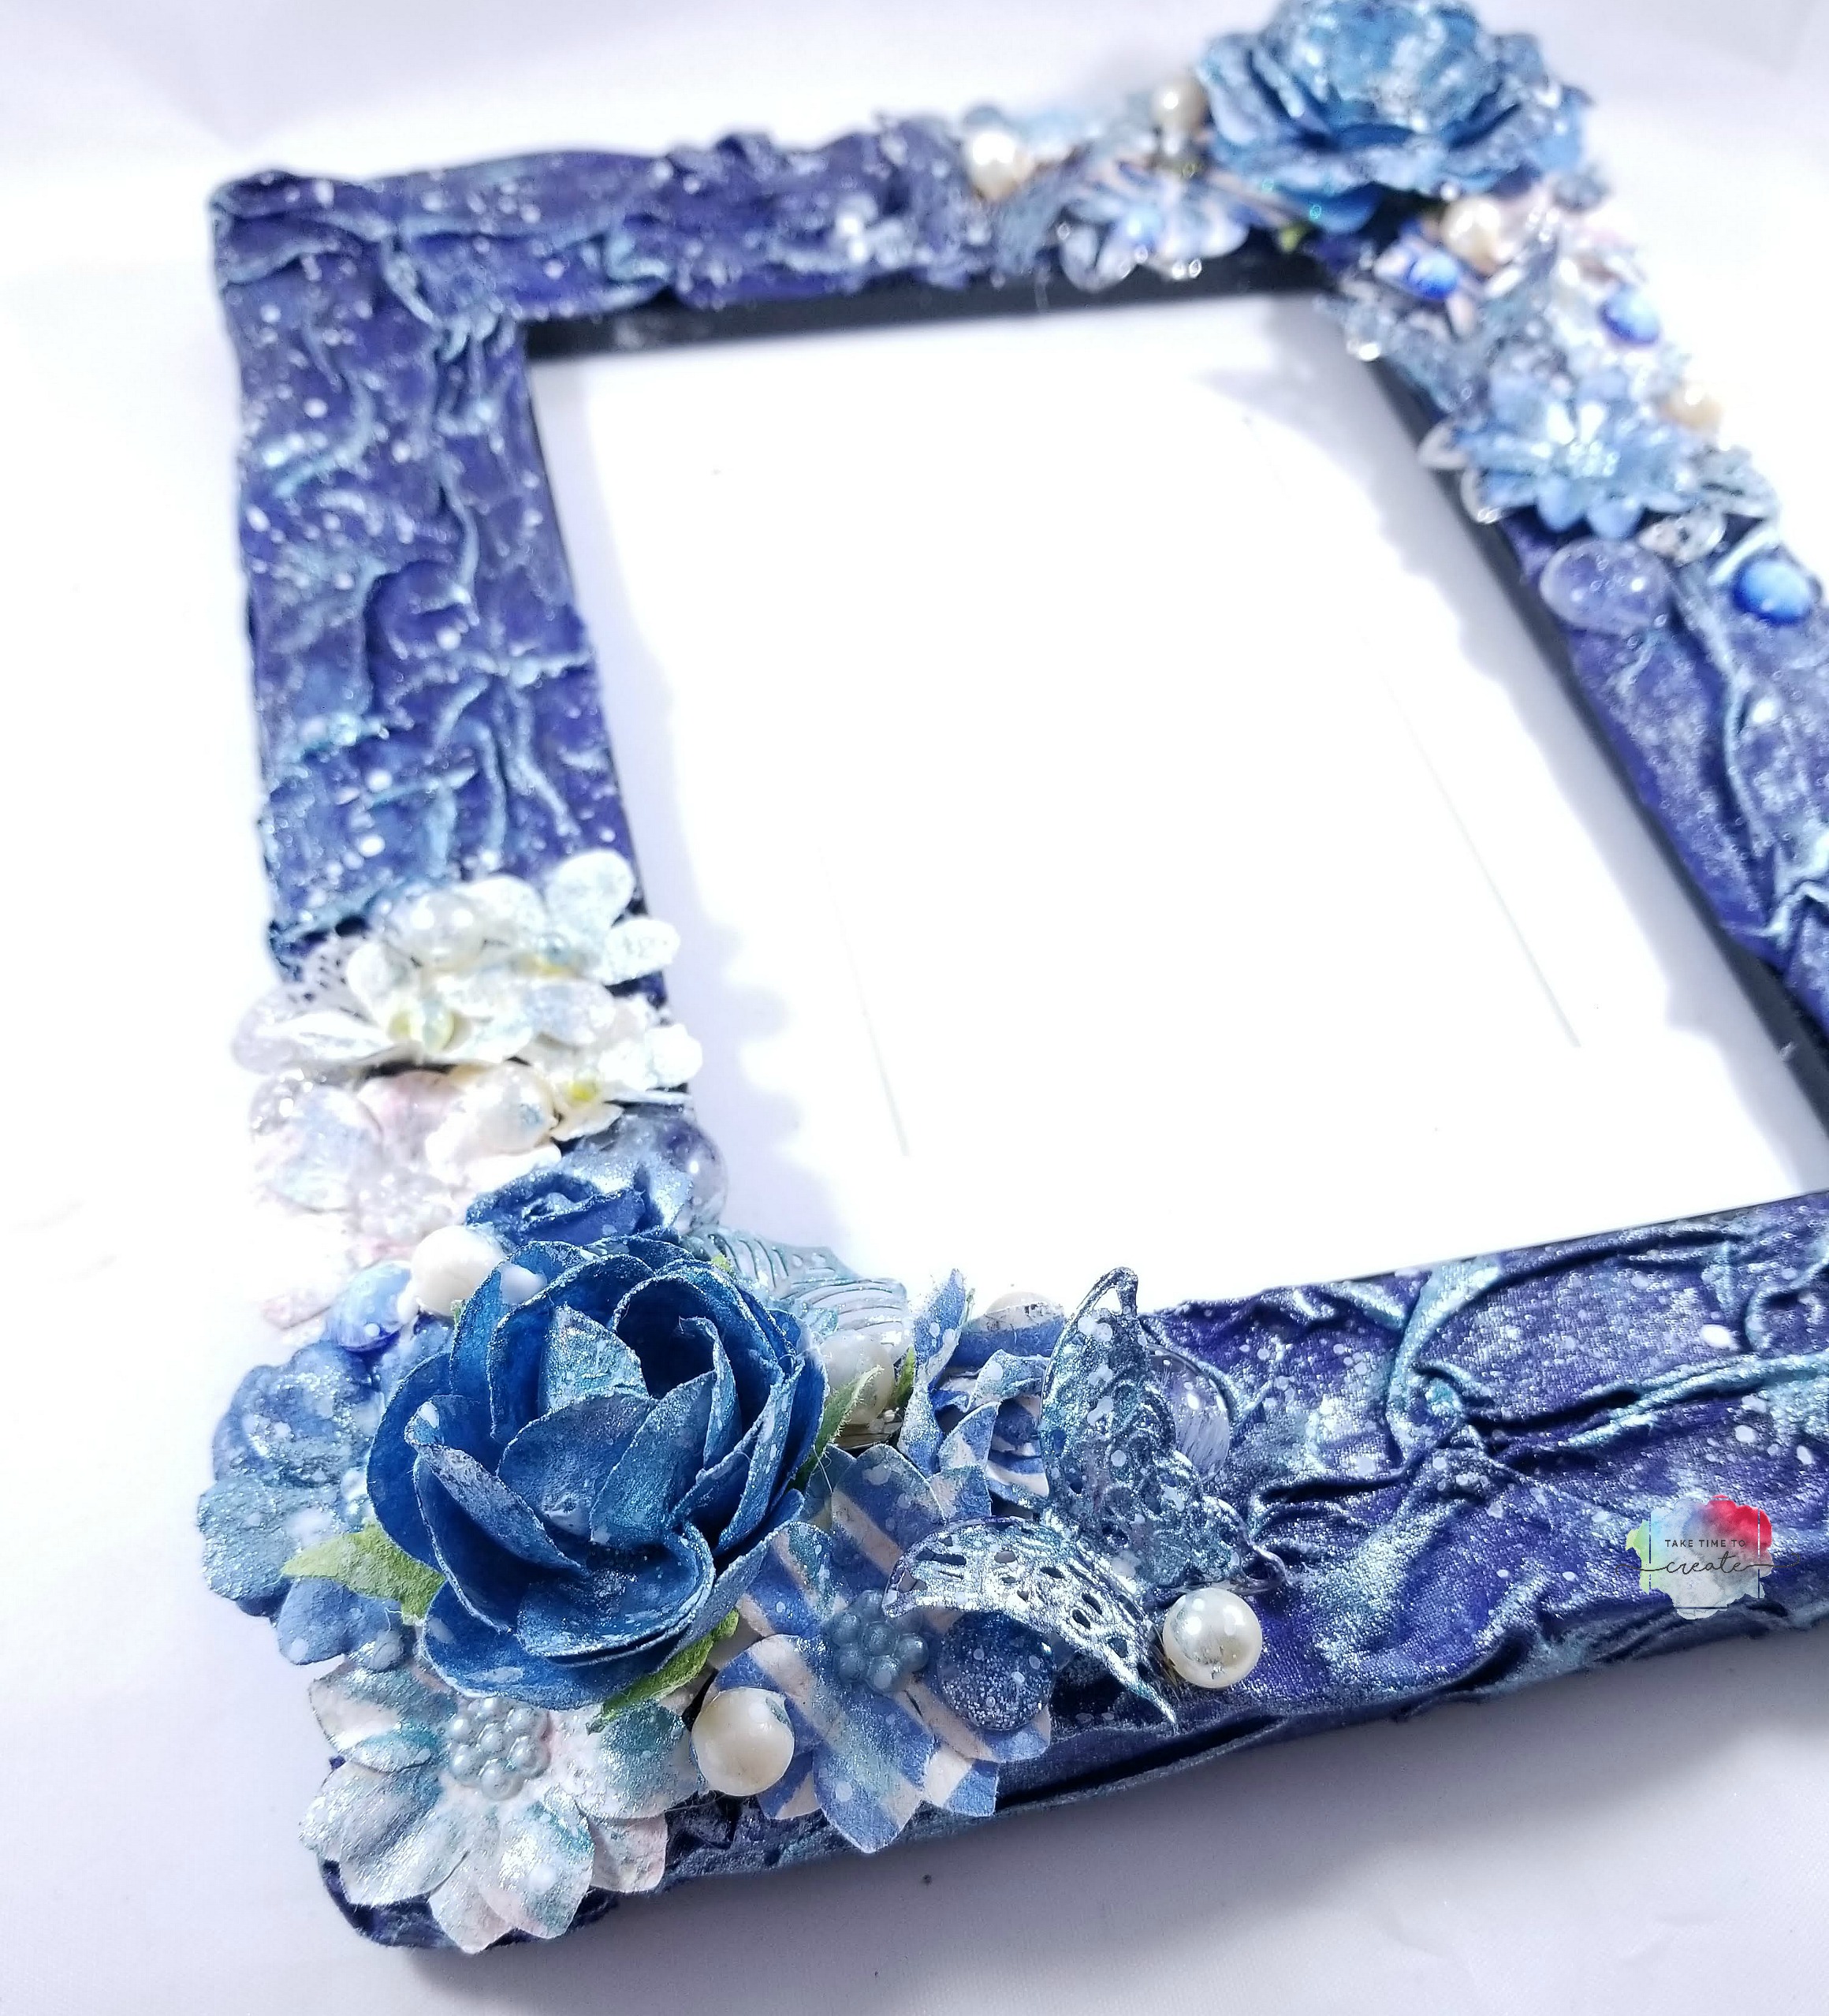
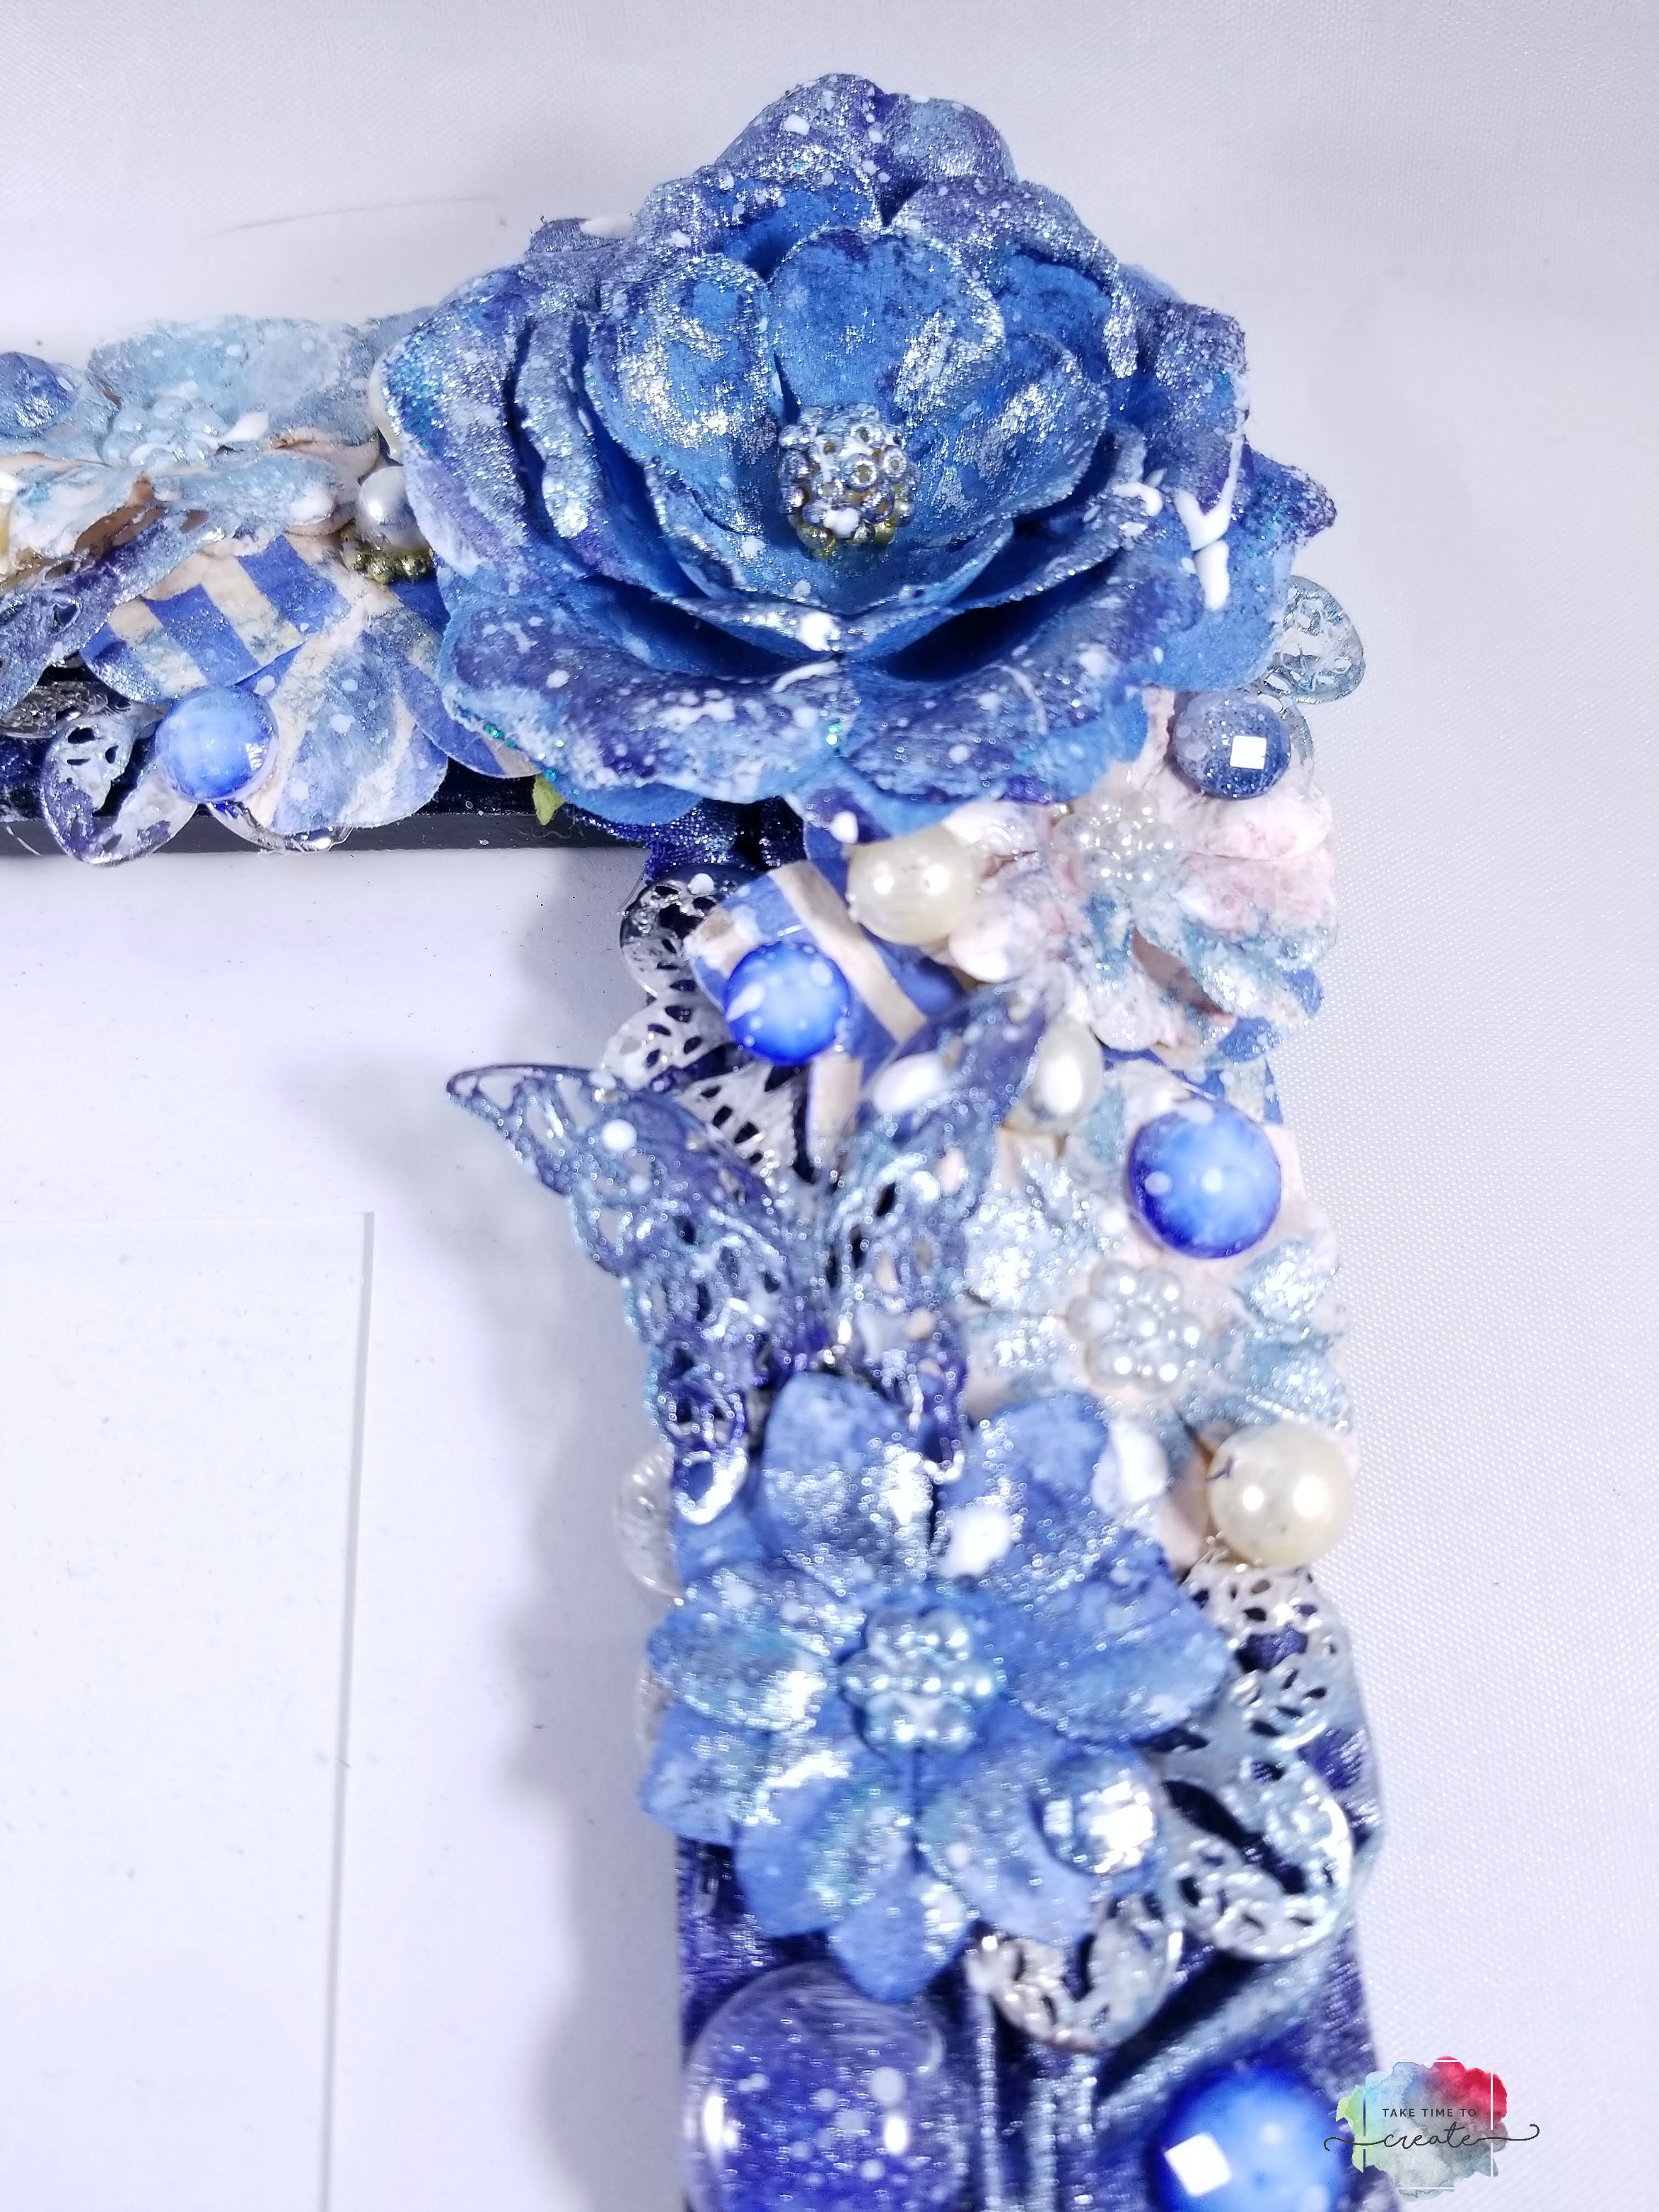
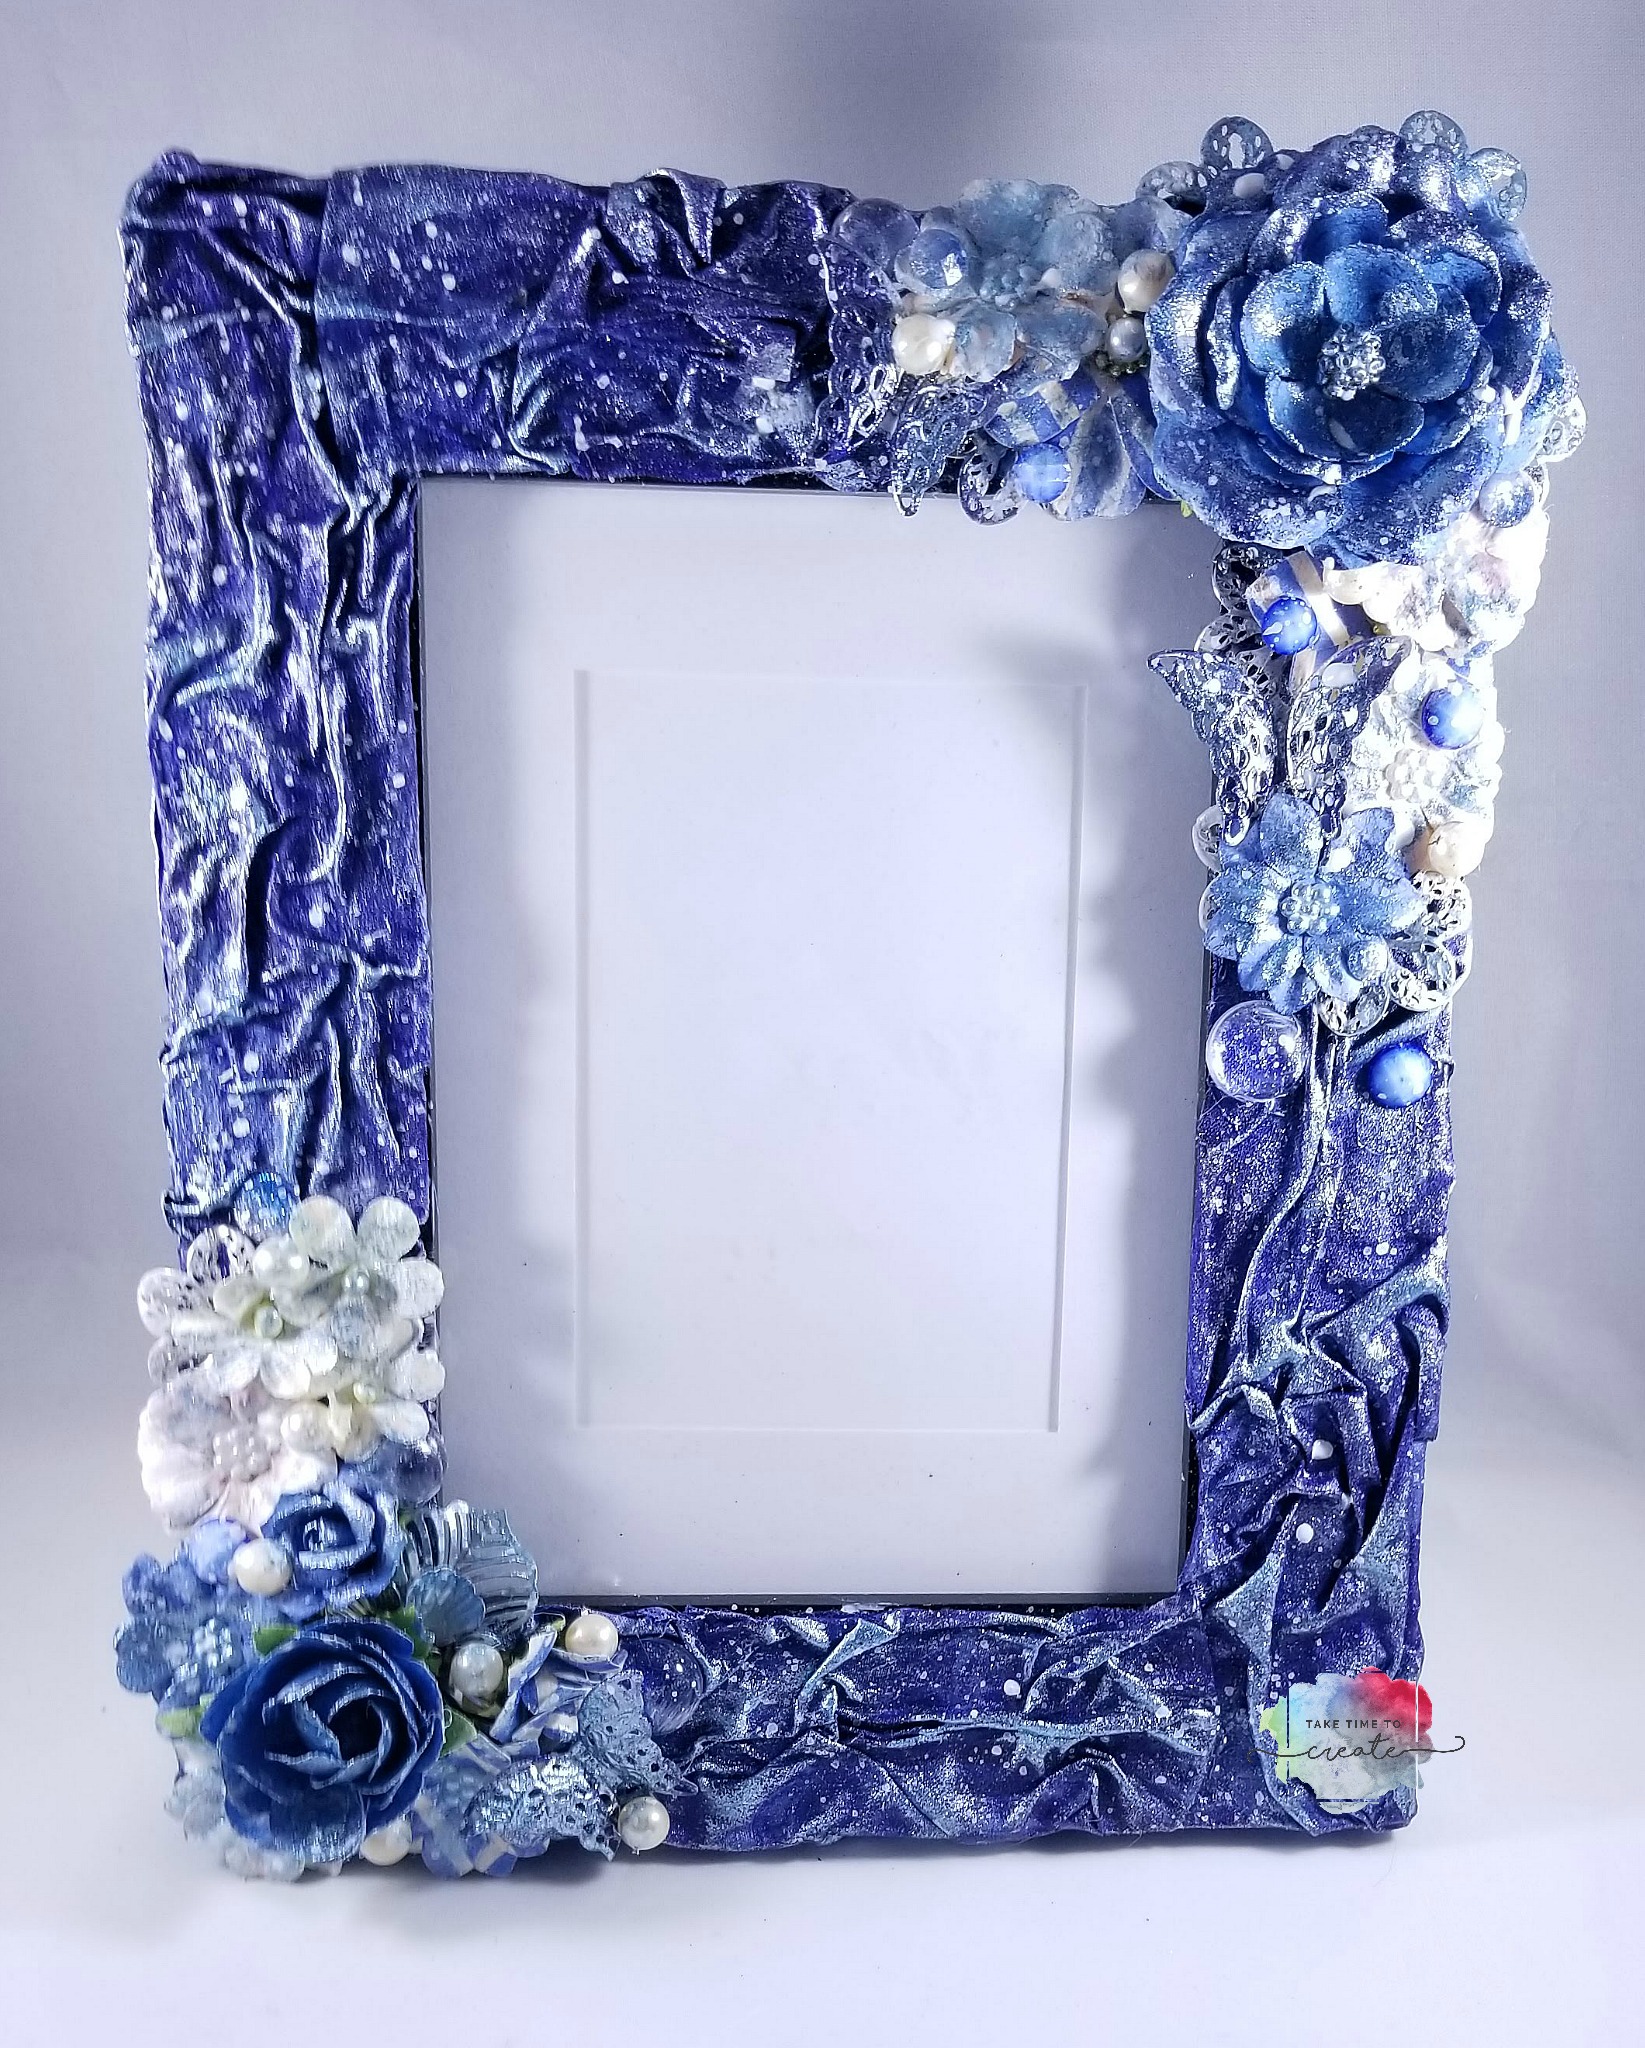
These pendants are great to feature fabric that important you, or just really pretty. They are not too complicated, and are unique when done. No two pendants look the same.

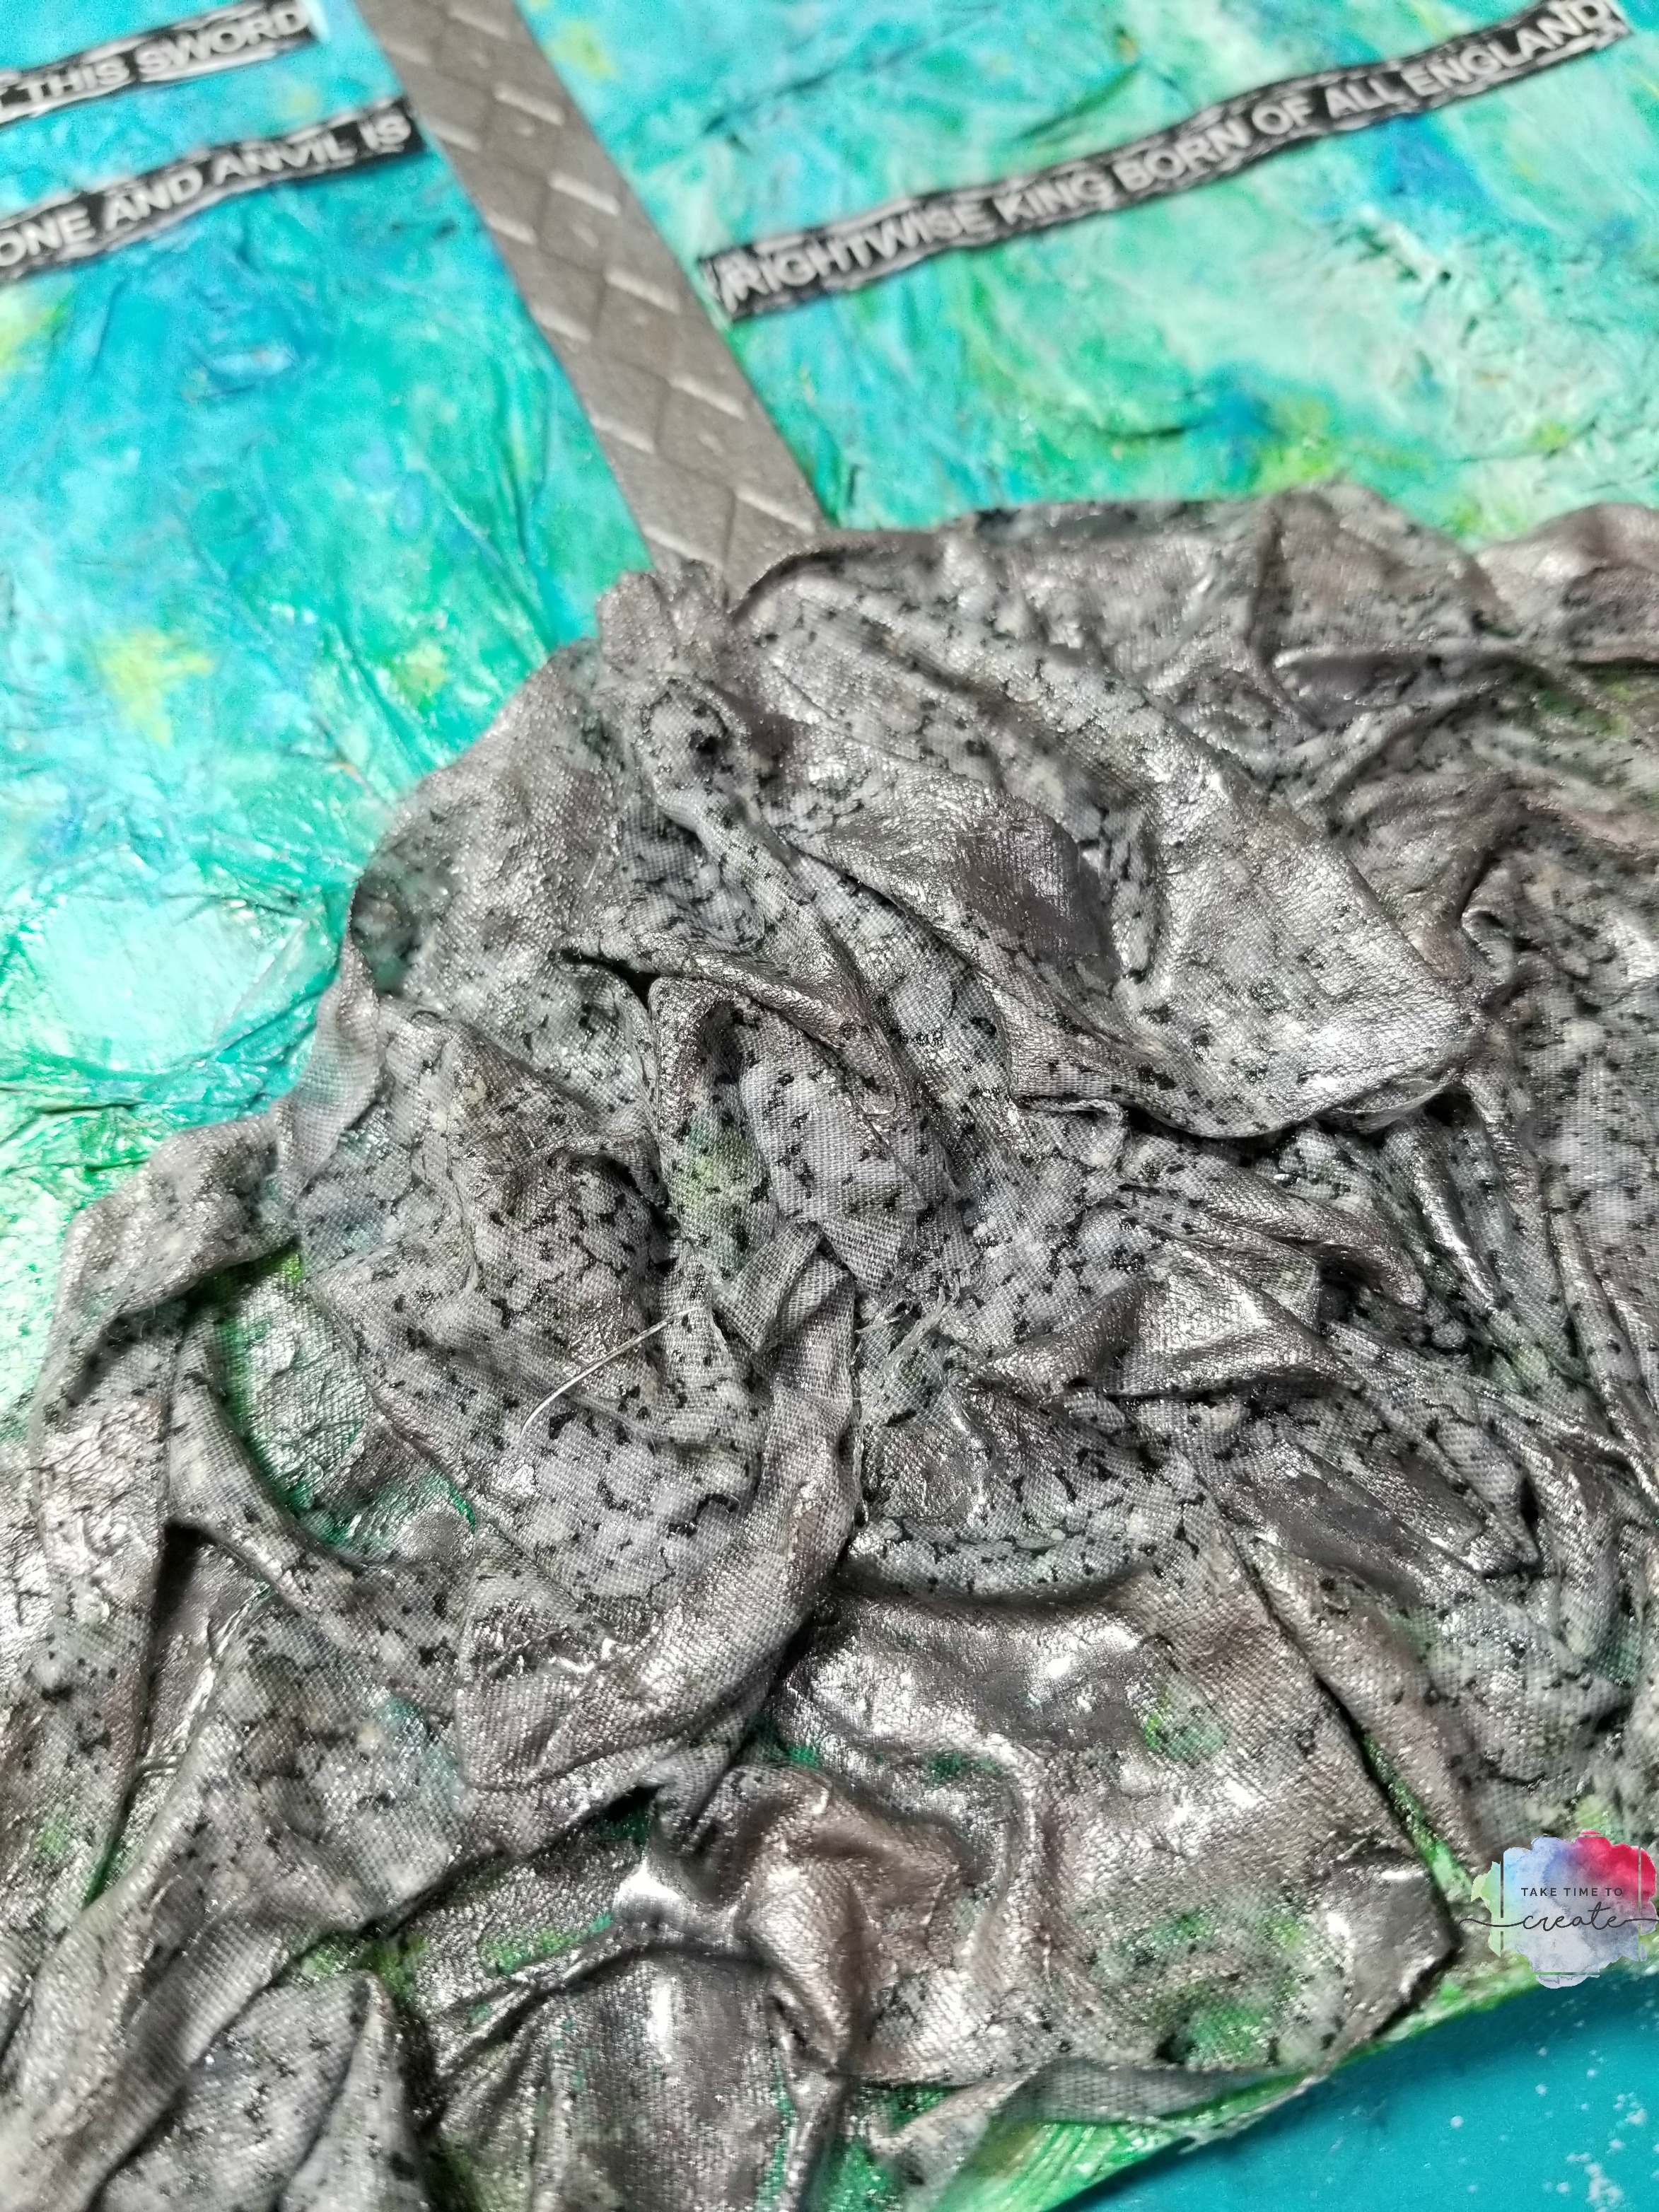
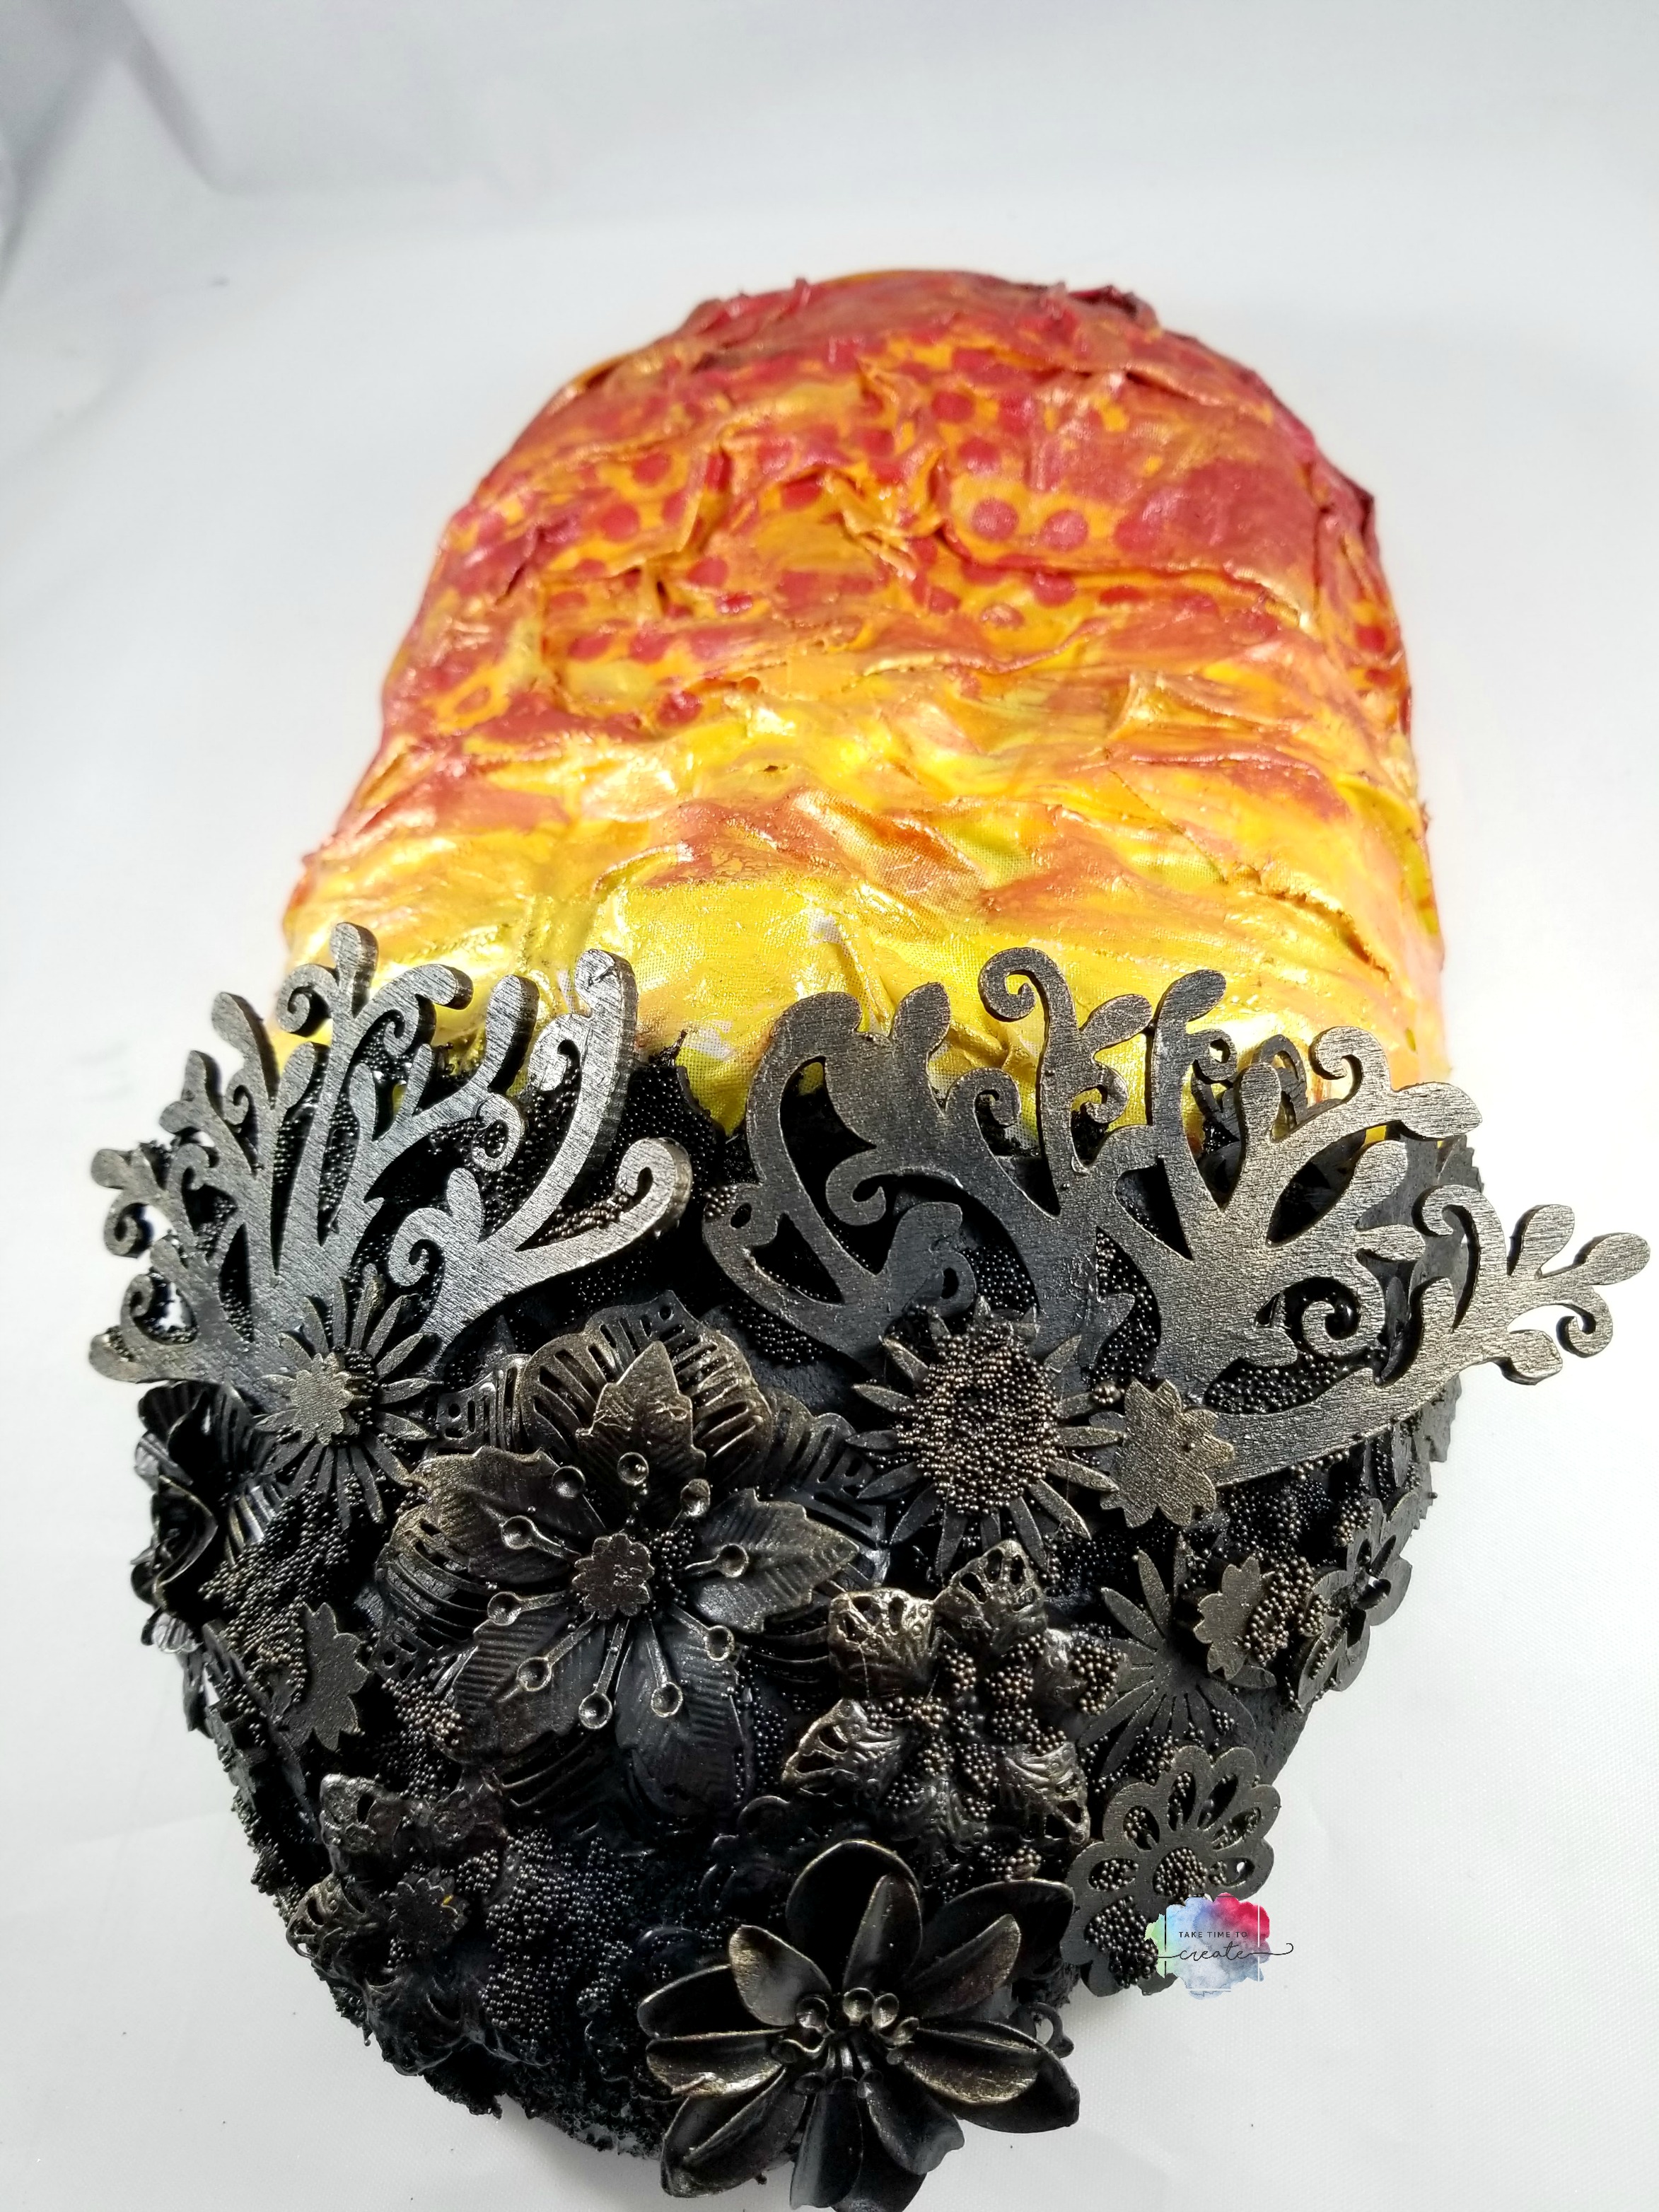
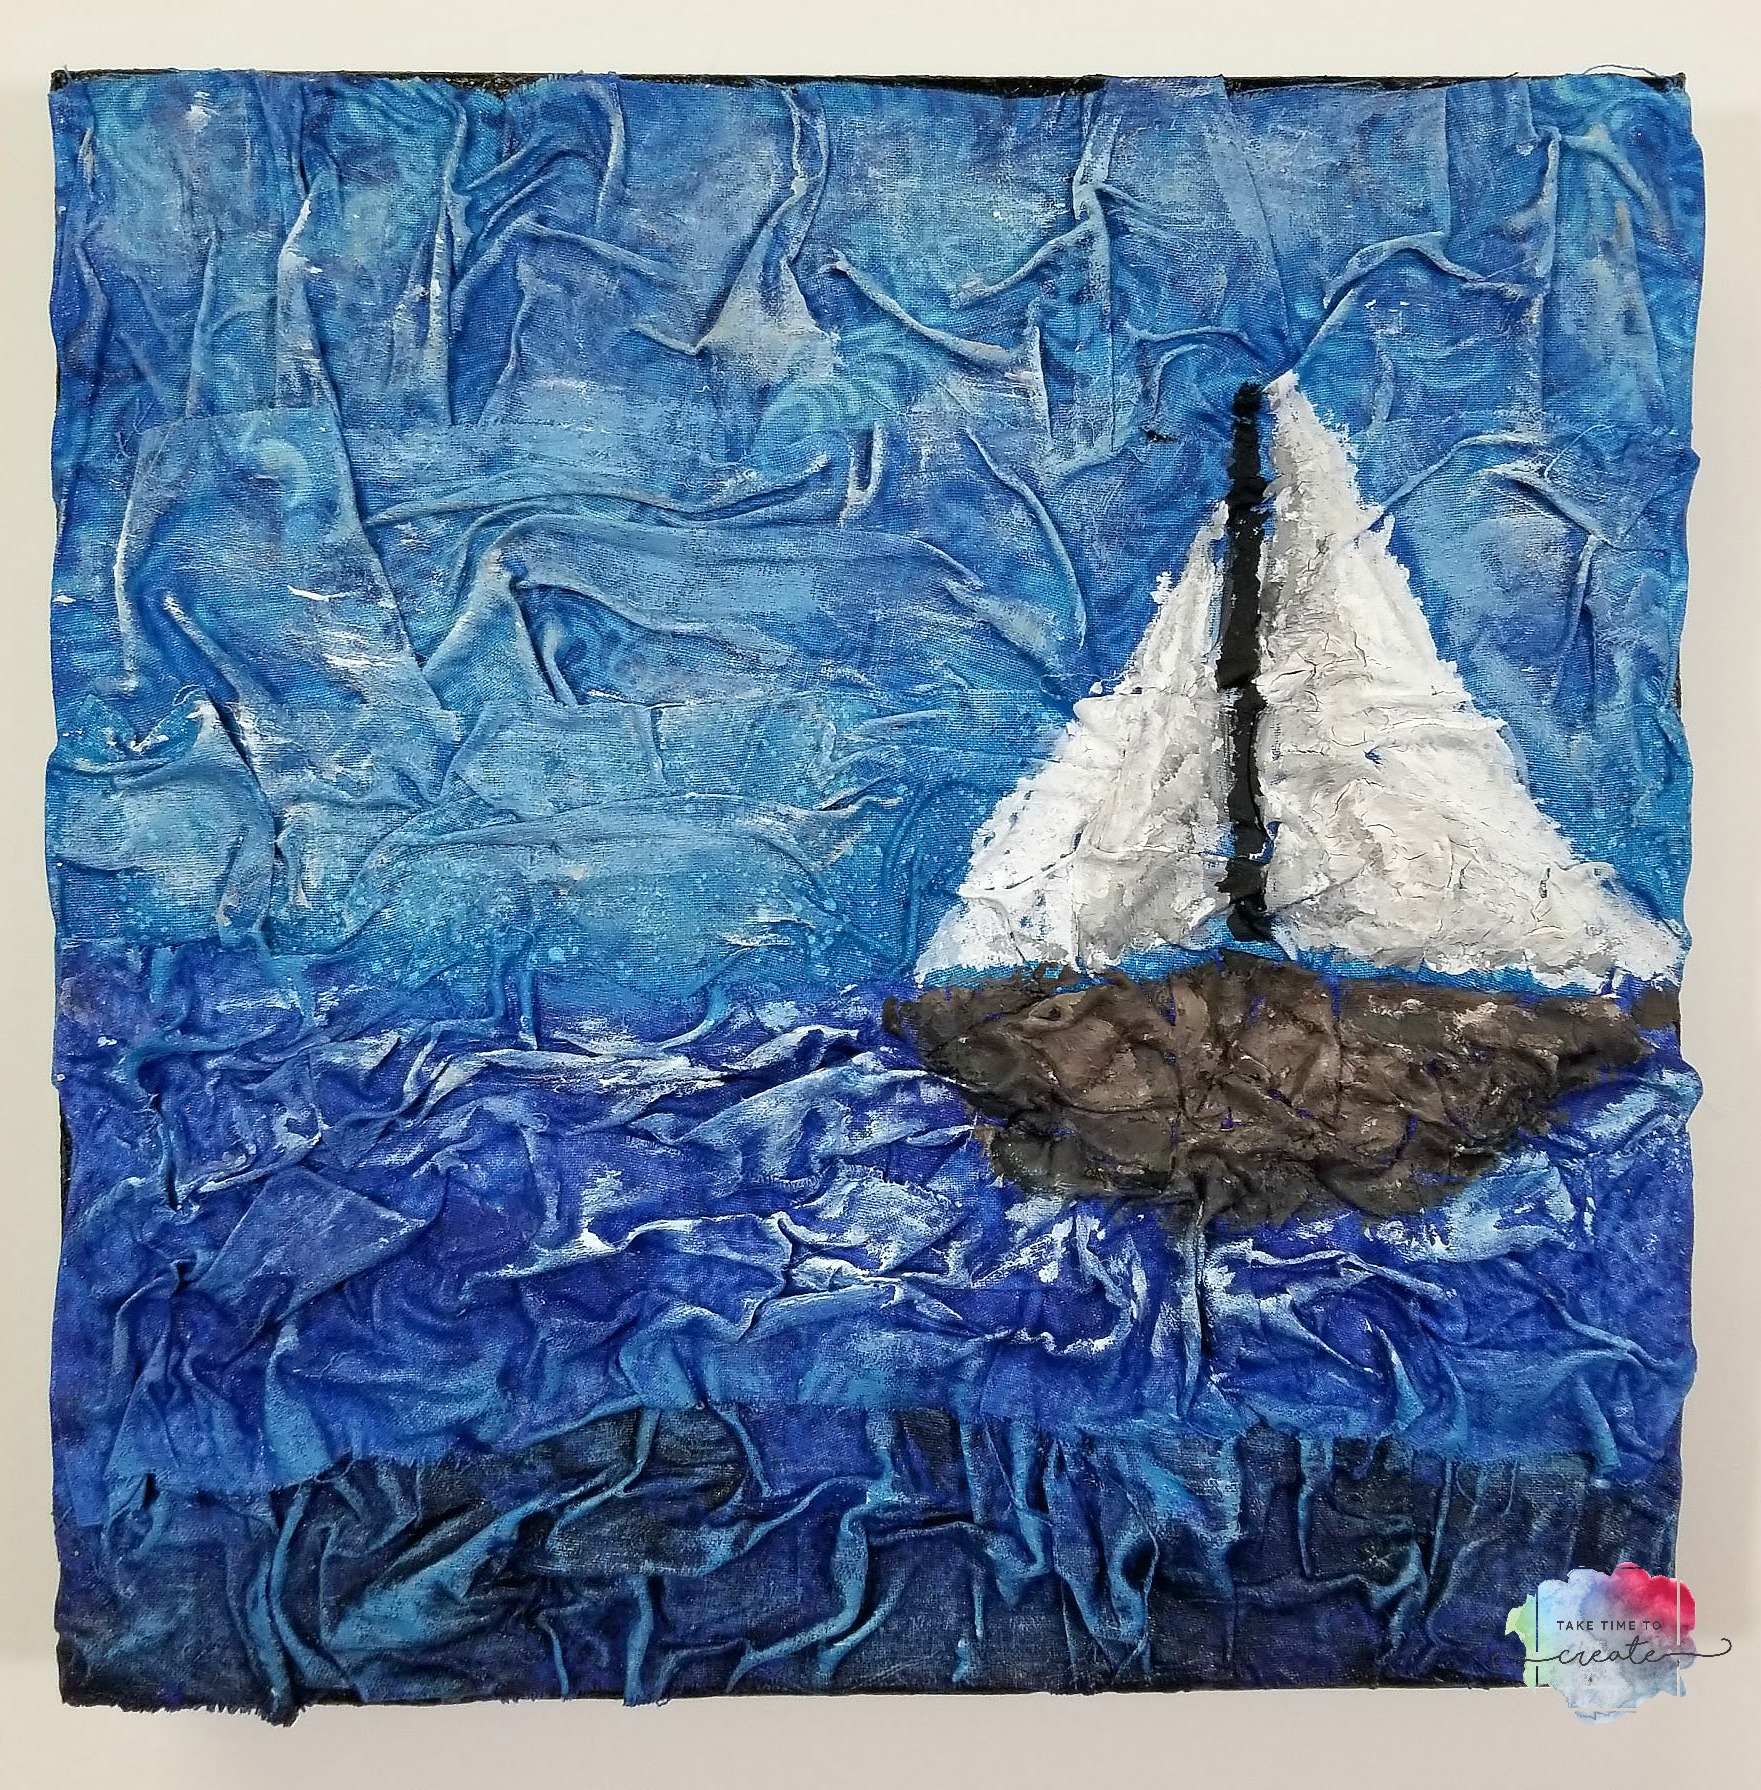
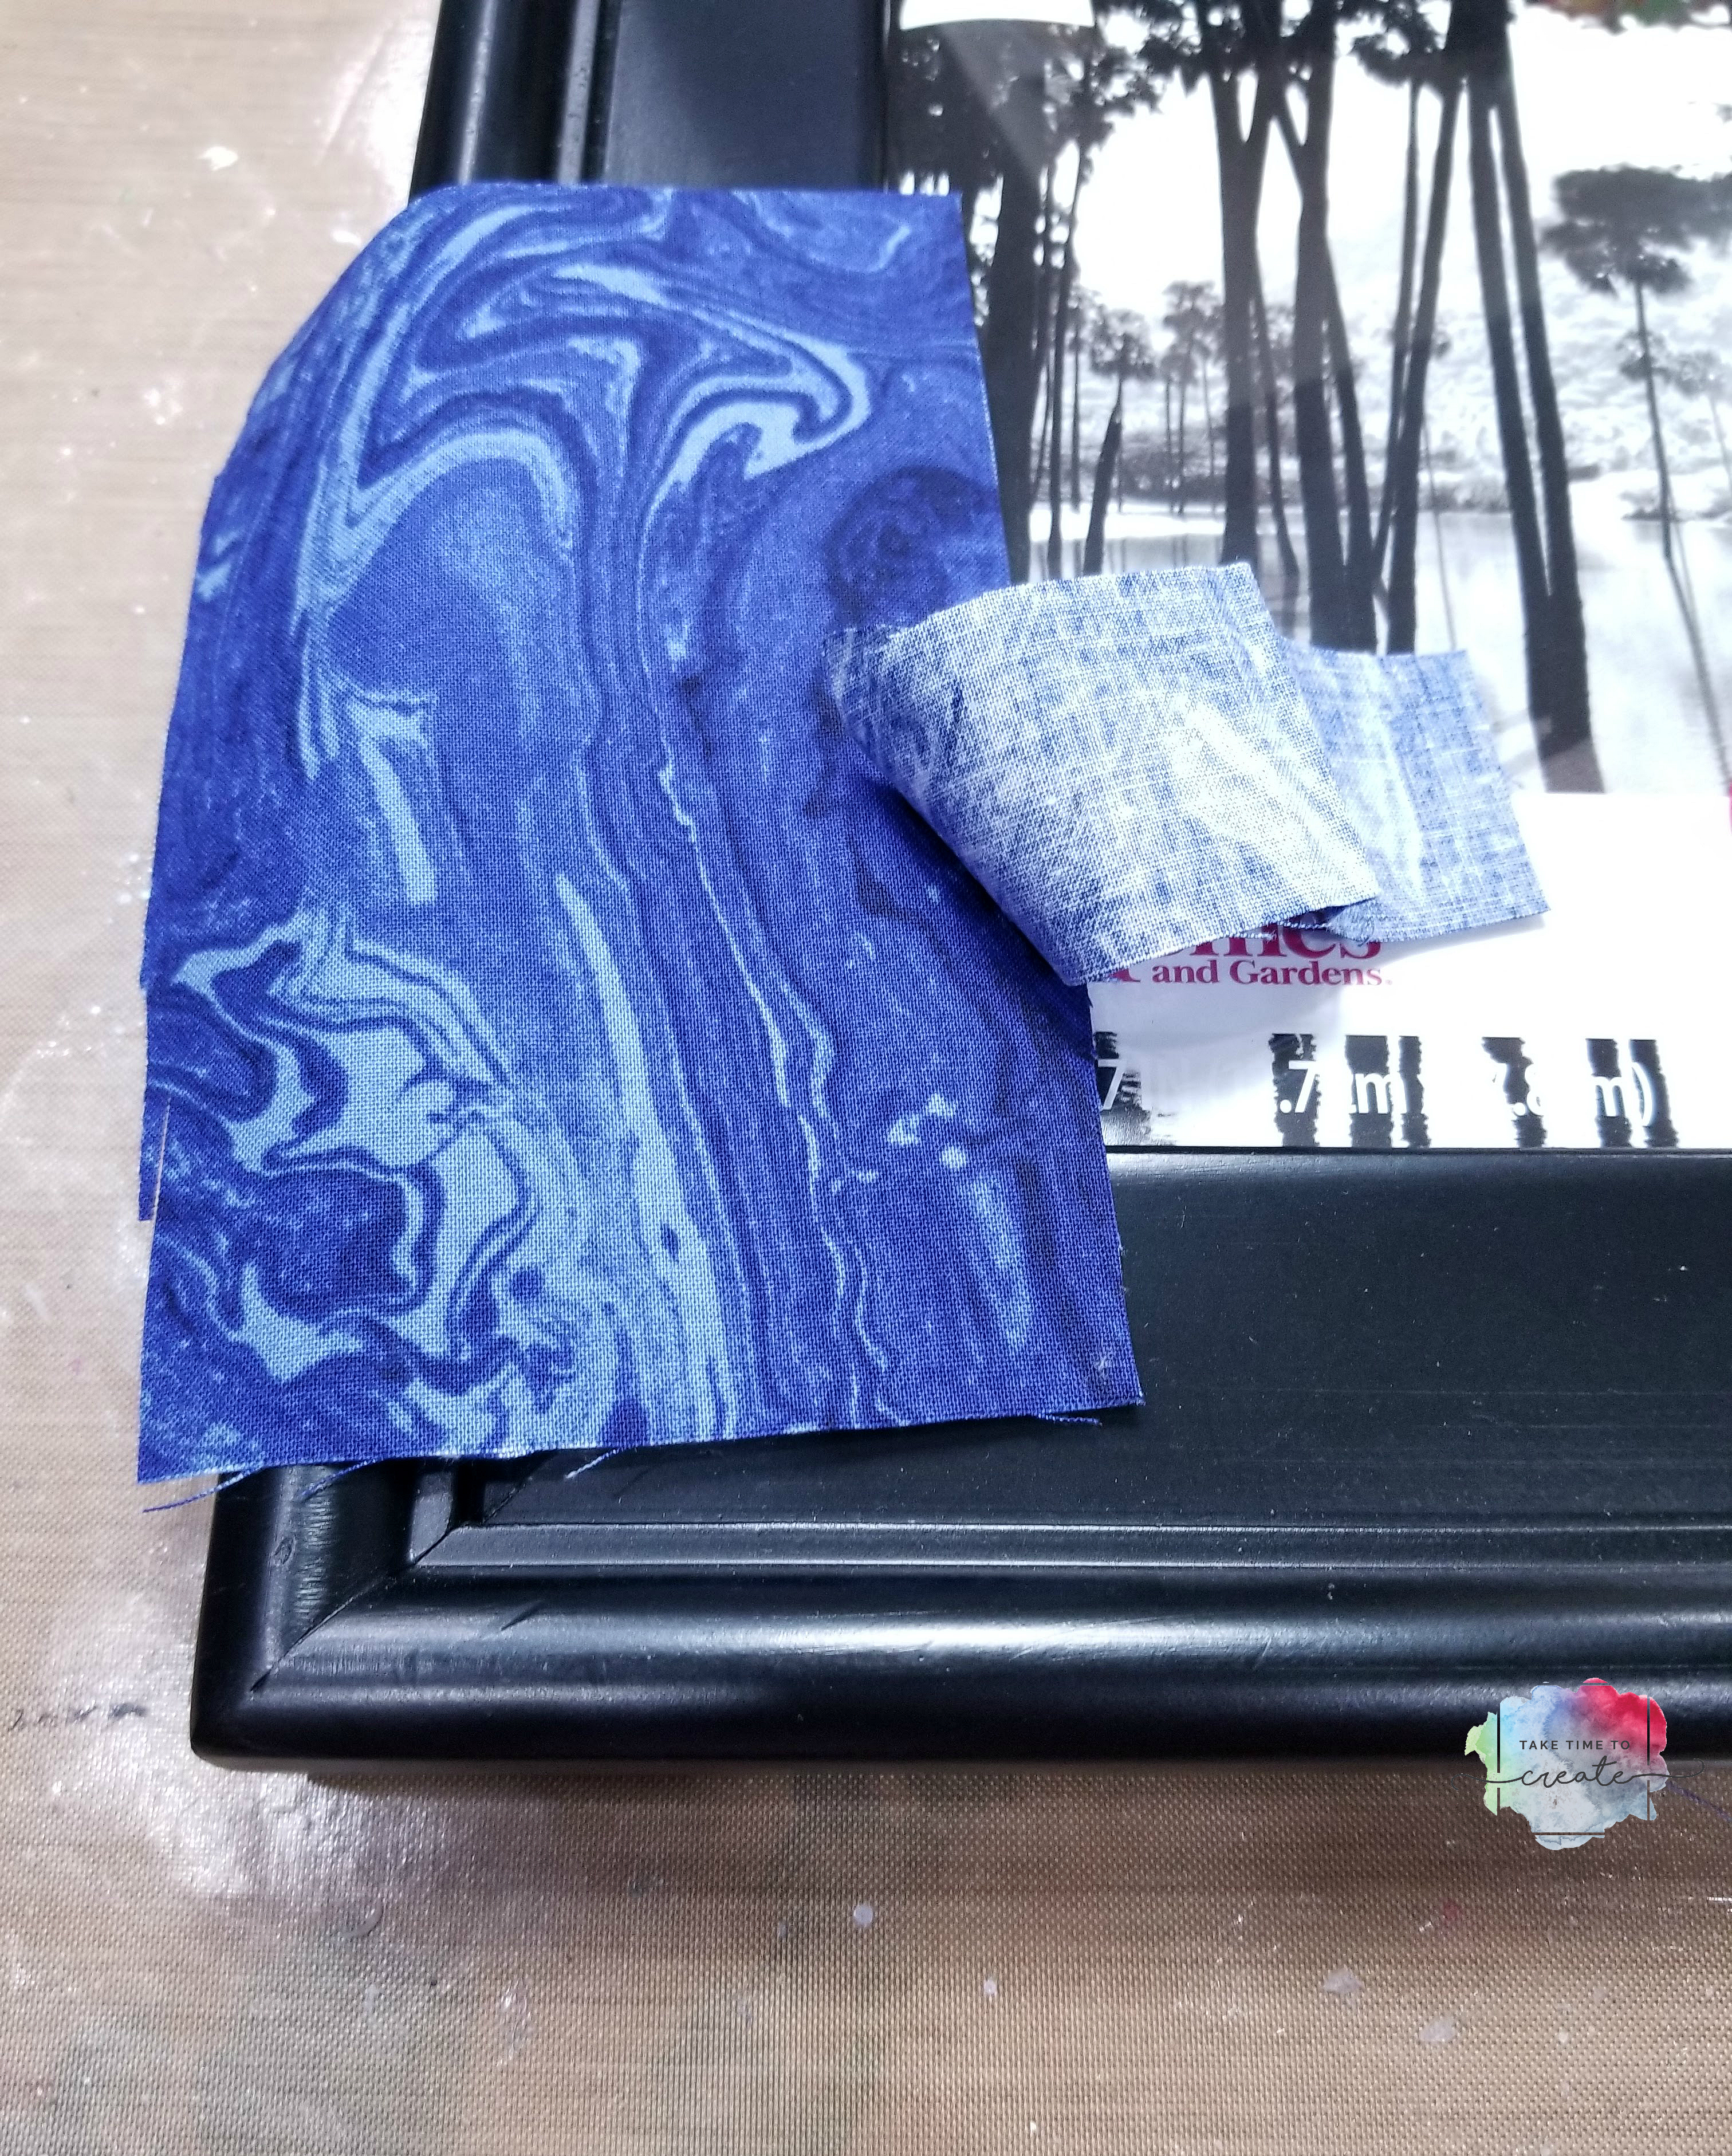
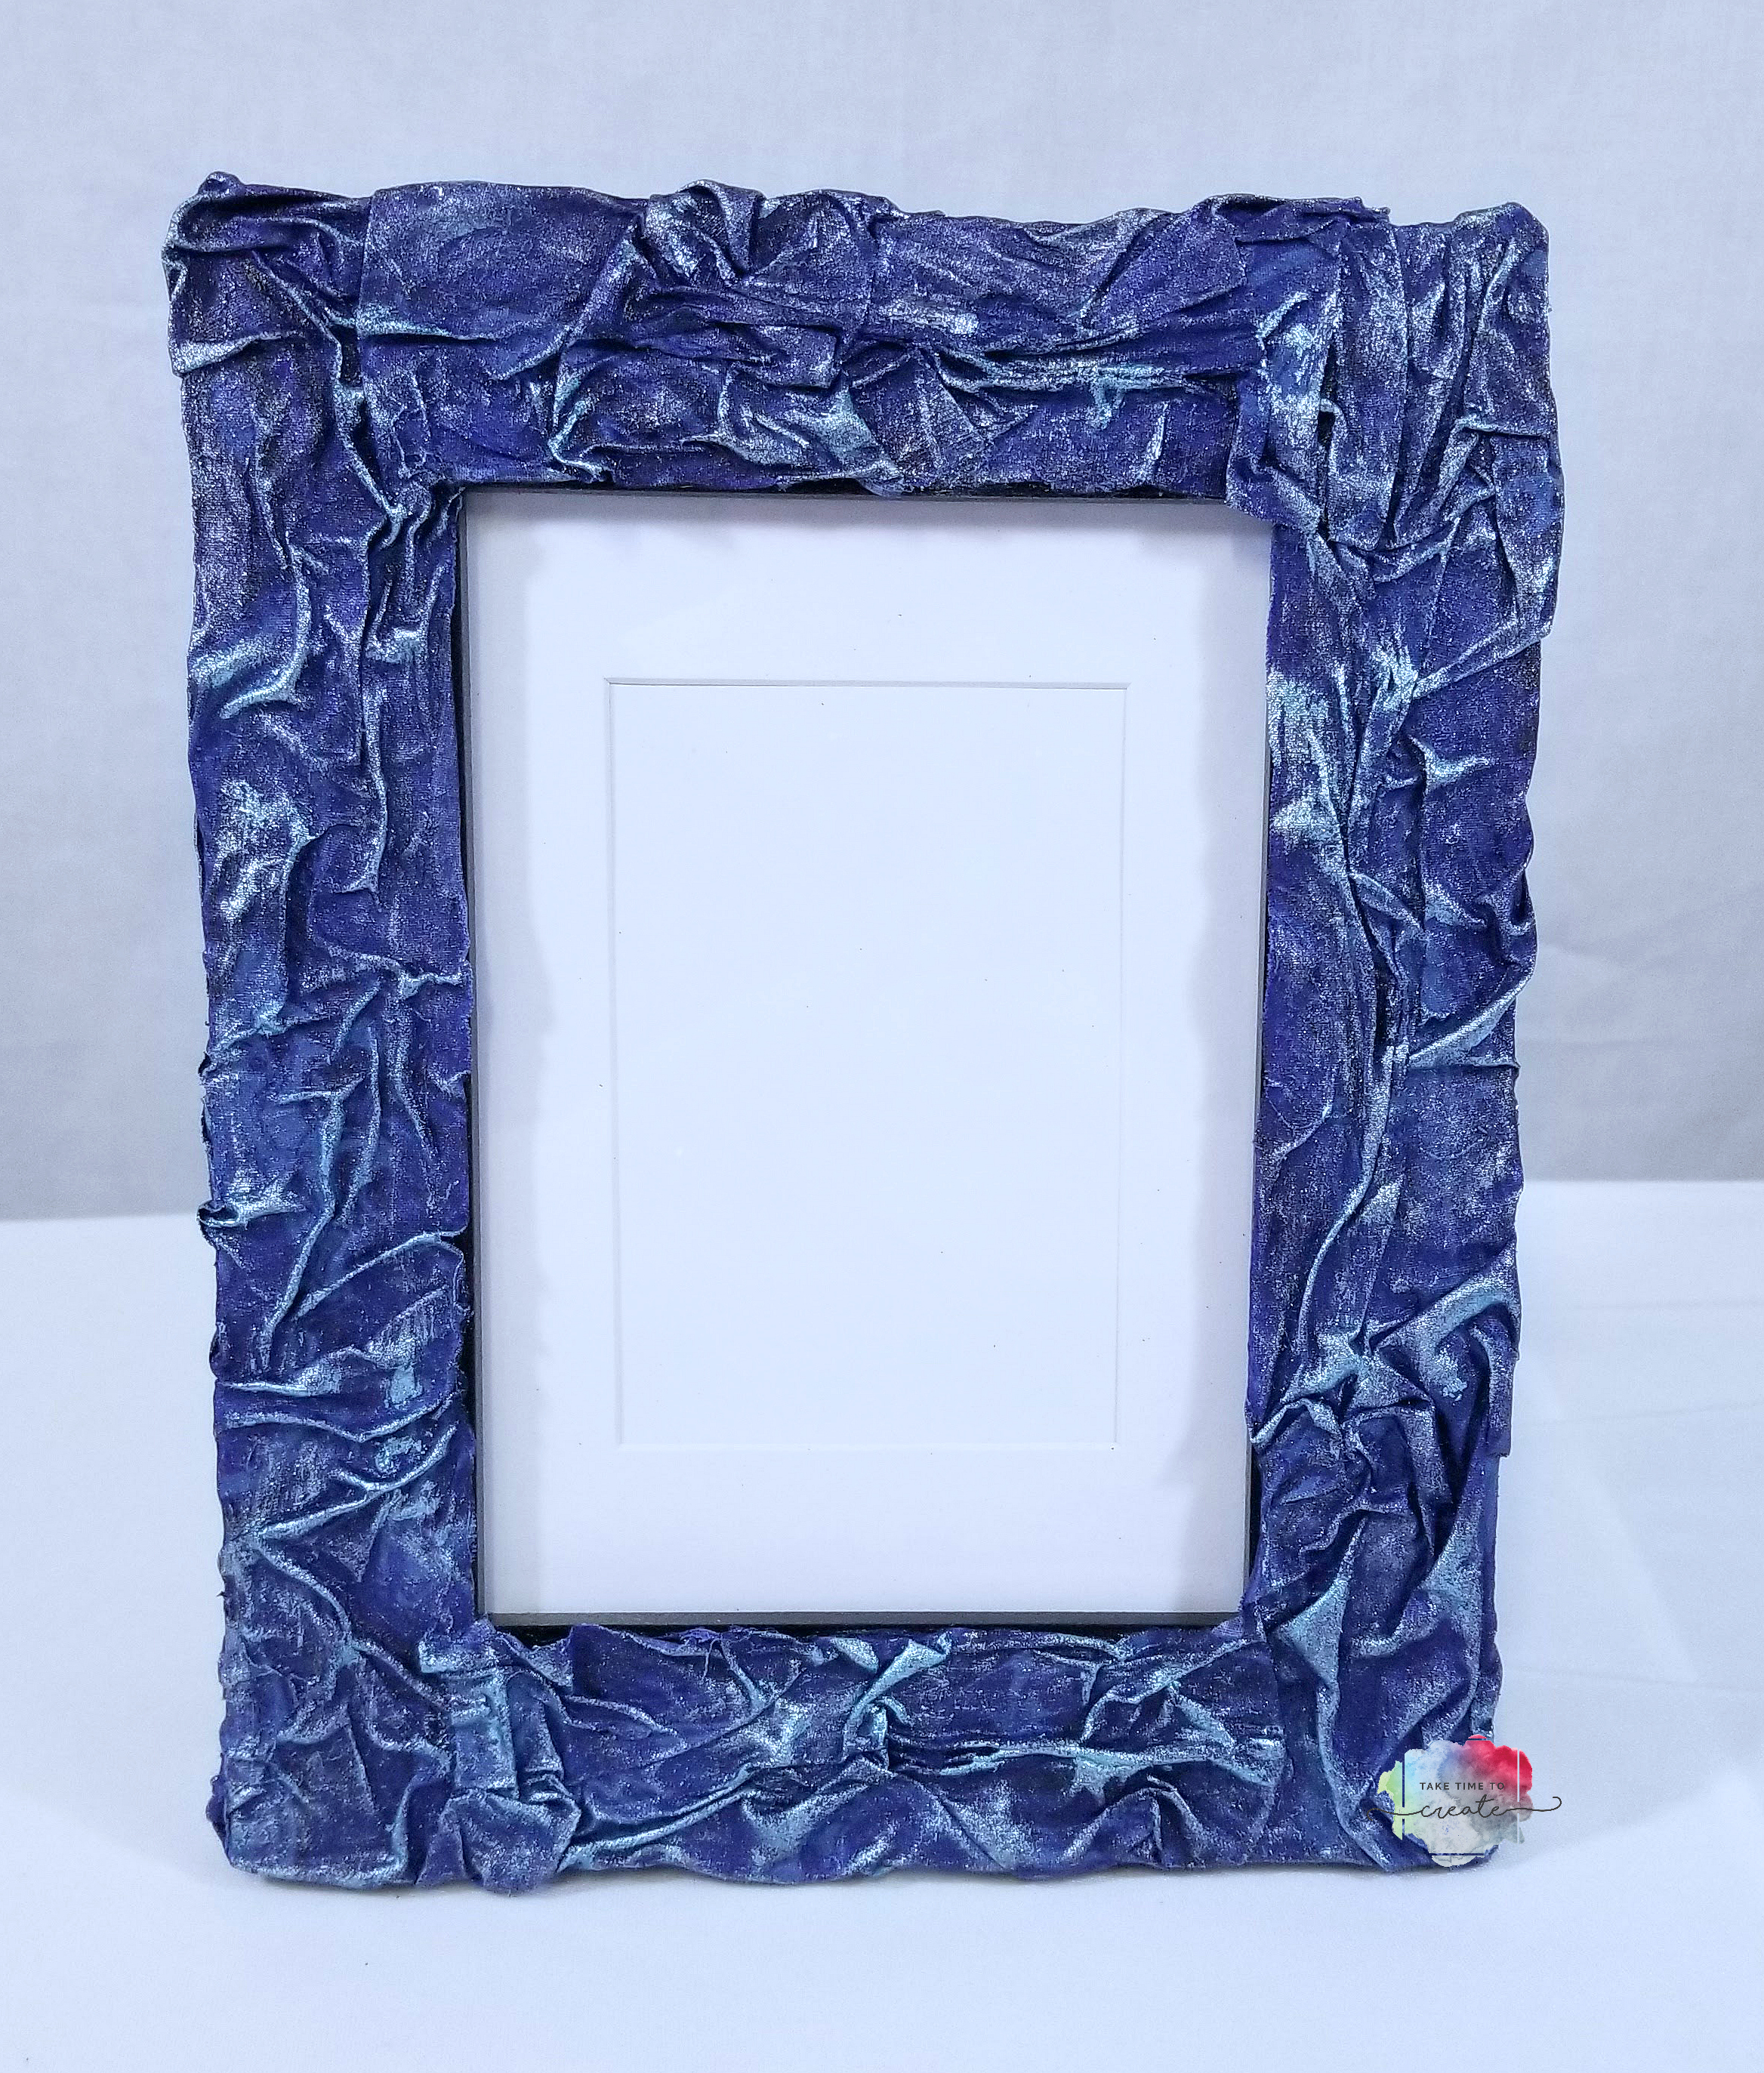
To create the pendant just cut some fabric a little larger than the pendant. Add E6000 to the pendant then soak the fabric in Gloss Gel. Once the fabric is coated wrinkle it up and squish it into the pendant.

Fabric pendant
Fabric pendant

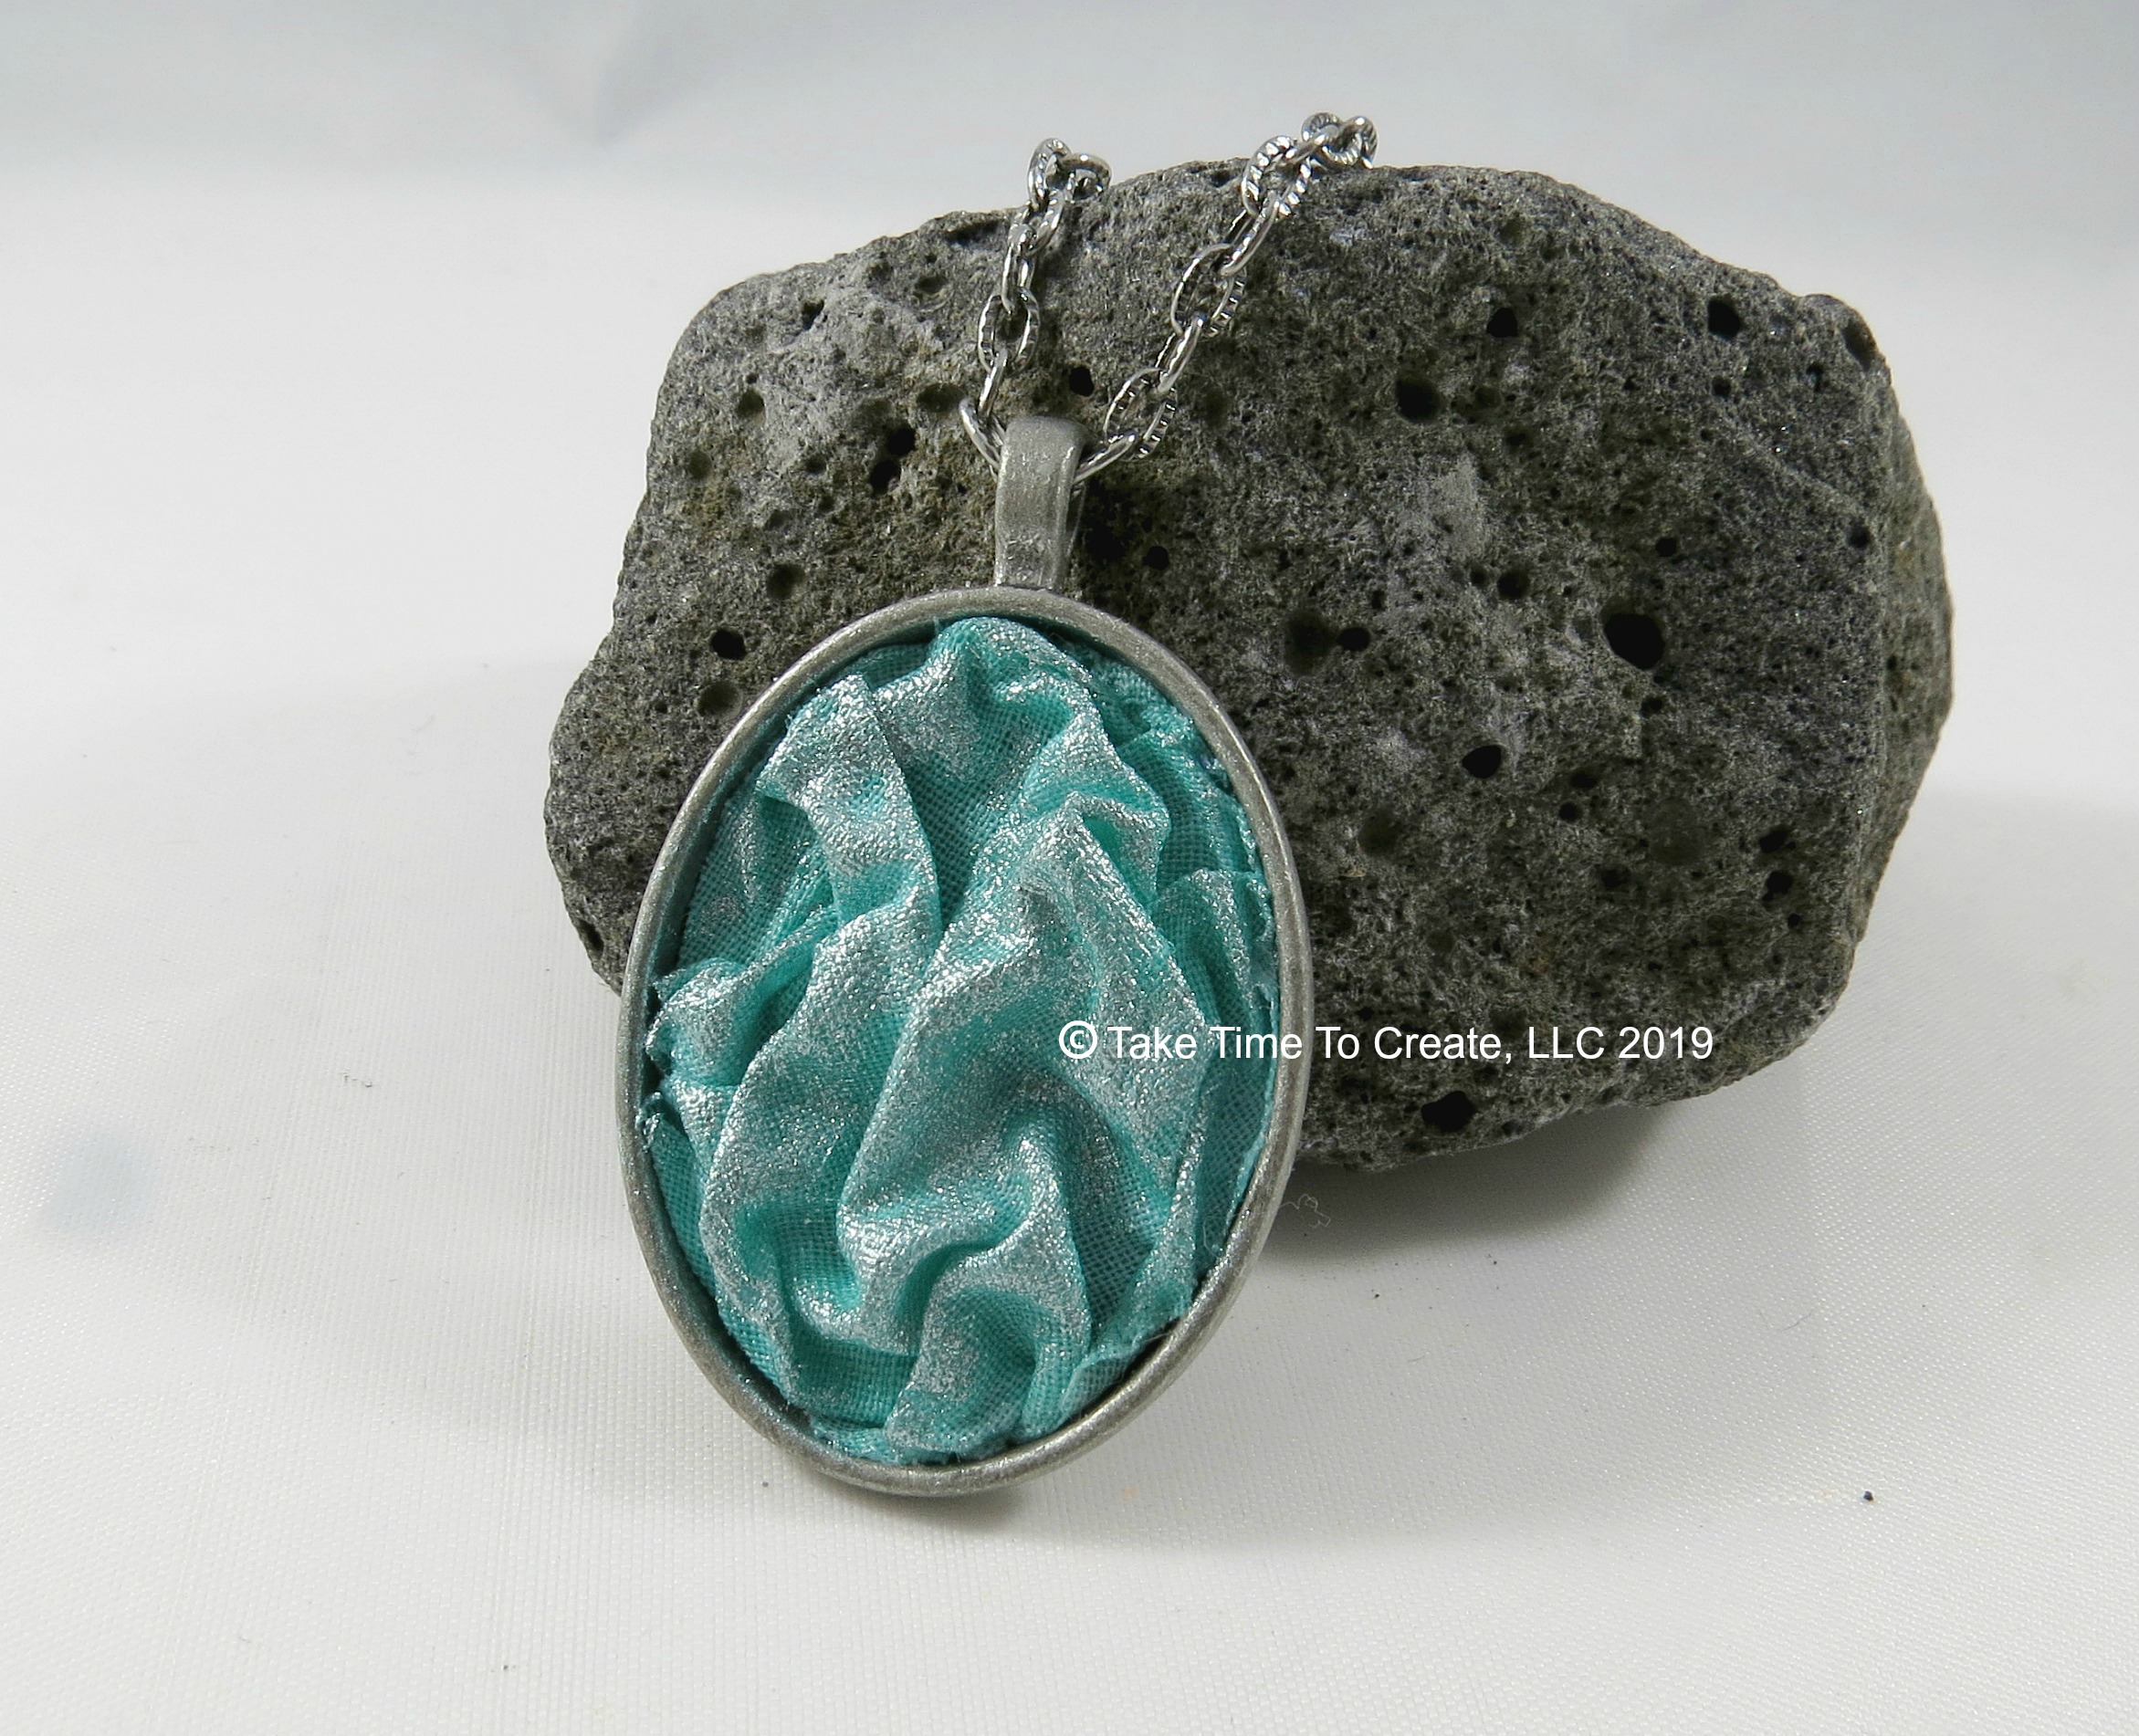
For the finishing touch I add some acrylic paint on the top after they are dry and that adds just the right amount of sparkle and interest.

Once the acrylic is dry it is ready to be worn. The gloss gel really helps the fabric hold its shape. These are so much fun to make, what fabric would you use to create one of these?

Fabric Pendant
Fabric Pendant

You can find the magazine at Barnes and Noble and online here: https://stampington.com/belle-armoire-jewelry

You can find me on Etsy at my shop: Take Time To Create

Affiliate Links:
Gloss gel (similar) https://amzn.to/2IwgoEX
Bezel Pendants https://amzn.to/2Ioqvvs
E6000 https://amzn.to/2XqjvEp
Finnabair Sparks https://amzn.to/2MrsdBn

The post Mixed Media Fabric Pendants appeared first on Take Time To Create.

Hibiscus Flower Fabric Mixed Media

Hello Everyone!

I have another fabric mixed media for you today. I am feeling like I need some spring, so I created this hibiscus flower fabric mixed media canvas. 

It was so good to get back into my fabric mixed medias and this one turned out great. 

I just used pink and green fabric as my base, this canvas didn’t need a lot of fabric colors to make it work. 

Hibiscus Flower Fabric Mixed Media

The bold flower in the center works great with the green background. And the gold beads in the center off set the flower perfectly.


Hibiscus Flower Fabric Mixed Media

I love all the texture and interest you get when using fabric. It makes the flower come alive.

Hibiscus Flower Fabric Mixed Media

If you want to recreate this canvas here is the photo I used as my reference, you are able to use it as a reference photo only. 

Hibiscus reference photo copy write Take Time To Create, LLC
Hibiscus reference photo copy write Take Time To Create, LLC.
Subject to terms and conditions of reference photos.

This has gotten me inspired to create new canvases, I can’t wait to show you what I decide to do next!

Affiliate links:

Liquitex black paint- https://amzn.to/2IpHGiz
Liquitex gloss gel https://amzn.to/2Z84W9M
Liquitex heavy gloss gel https://amzn.to/2ID2ti2
10 x 10 canvas- https://amzn.to/2GfGISq
palette knife https://amzn.to/2V2QVed
Folk Art Metallic https://amzn.to/2V7Cq8Y
Finnabair brushes https://amzn.to/2IzGFUo

The post Hibiscus Flower Fabric Mixed Media appeared first on Take Time To Create.

Sword in the Stone Art Journal Page

Hello Everyone!

I have another page for the Sisterhood of the Traveling Art Journal. This theme was a little harder for me, and really challenged me creatively, but in the end I think I found a creative way to approach this theme. 


So the theme of this journal is medieval gypsy. I am not sure exactly what that means so I just went with the medieval part, specifically the legend of the Sword in the Stone. 

Sword in the Stone
Sword in the Stone

I love this story, and this page reflect this. I created a rock out of fabric, and the background is textured with tissue paper and colored with dylusions sprays. 

Sword in the Stone
Sword in the Stone

The best part of this page is that the sword actually goes up and down! So much fun! 

Sword in the Stone
Sword in the Stone

I am really loving how this Sisterhood program that I am in really helps me expand my boundaries and stretch my creativity. I can’t wait to see what next month will bring!

Affiliate Links

Dylusions sprays https://amzn.to/2V1O7KI
Ranger journal https://amzn.to/2XlctRU
White gesso https://amzn.to/2NdBUju
gloss gel https://amzn.to/2GRAlXi
Tim holtz grunge board https://amzn.to/2Xcb1B5
Finnabair wax https://amzn.to/2GXo4Rt
Distress ink https://amzn.to/2T3jaZf
Folk art paint https://amzn.to/2TXCpAS

The post Sword in the Stone Art Journal page appeared first on Take Time To Create. 

No Sew Cat Bed

Hello Everyone!

I have a cat that thinks she is a princess, and since she is a princess she needed a pink velour bed with gold trim. And since I don’t sew, I had to create a no sew version.

Our cat rules the house, lol. And since she does this pretty pink pillow is perfect for her. 

Starlight
Starlight

This pillow is easy to create. Take 2 pieces of fabric and glue them together with fabric glue. If you want trim add it now. Make sure you leave a hole so you can stuff the pillow with ploy fill. 

Stuff your pillow and then glue the hole shut. That is it. Such a fun, easy way to create a new space for your pet.

No sew cat bed

I placed the bed on the trunk that Starlight sleeps on. The trunk is super hard and I thought she would appreciate the soft pillow. In true cat form she refused to pose for a picture, lol

But at least she has a new bed when she is ready to sleep on it. What other no sew projects do you work on?

Affiliate links:
Fabric Fusion https://amzn.to/2tvf0eF
Poly Fill https://amzn.to/2TJUNgt
Pink Velour (I found mine at a creative reuse center, but this is similar) https://amzn.to/2N6CFe5
Gold Cord trim (I found mine at a creative reuse center, but this is similar) https://amzn.to/2TPcdbE

The post No Sew Cat Bed appeared first on Take Time To Create.


Sunrise Fabric Mixed Media Mask

Hello Everyone!

My local art museum has an annual charity auction and this year I got to participate! The auction is actually in April, but I had to turn my mask in earlier than that, lol.

I really love the challenge of working on a mask, rather than a flat canvas. It was fun to see if my technique for creating landscapes could be translated to a mask, and I think it was a success!

sunrise mask

I used a photo that I took of a sunrise over my local city as a reference photo. Here the photo I took, it is a few years old but I really love it and I thought it would be perfect for this project

Linda Sampson Sunrise photo

The colors really spoke to me and I want to recreate it.

sunrise mask

I found that the biggest challenge was to make sure everything stayed adhered to the mask while it dried. Since it is not a flat surface things had a tendency to slide, lol. But I was patient and everything worked out in the end.


sunrise mask

This project has encouraged me to look at other object to apply fabric to. Nothing is safe from my fabric, lol


Affiliate Links

  • Finnabair Red paint- https://amzn.to/2Po7omm
  • Finnabair Brushes- https://amzn.to/2UlwBlj
  • Finnabair Dabbing Brushes- https://amzn.to/2SuWWLS
  • Finnabair Wax-https://amzn.to/2SzgiQ9
  • Fabric Jelly Roll (similar)- https://amzn.to/2KZTG8W
  • Liquietex Gloss gel- https://amzn.to/2Efu9rR
  • Liquitex Heavy gel- https://amzn.to/2EkUTai
  • Liquitex Super Heavy gel- https://amzn.to/2SwHC1n
  • Black gesso- https://amzn.to/2SB1HDX
  • Wood trees- https://amzn.to/2PiL0el
  • Cork Shapes- https://amzn.to/2PnYqFY
  • metal flowers (similar)- https://amzn.to/2Upd3wa

The post Sunrise Fabric Mixed Media Mask appeared first on Take Time To Create.

WDW Park Icons Canvas- Mixed Media

Hello Everyone!

It is no secret how much I love Disney and visiting Disney World is one of my favorite things to do! When I began my journey into fabric mixed media I just knew that I would need to create some canvases that paid homage to Disney World.

So I created these 4 canvases celebrating each of the 4 parks at WDW.

The first is a pretty pink castle, this is for the Magic Kingdom. It is hard to tell in the photo but there is a lot of glitter and shine on the canvas, especially on the white background.

WDW Park Icons

Then there is EPCOT with an image of Spaceship Earth. This is one of my favorite rides, probably because it is slow and relaxing with lots of air conditioning, lol. Perfect break in the middle of a hot day in Florida, lol

WDW Park Icons

Then we have MGM, no I am sorry Hollywood Studios, lol. I think I will always call it MGM. And I loved the giant sorcerer’s hat that was in the middle of the park for the longest time. I know they removed the hat, but I loved it so much and that reminds me the most of the park, so I thought I would use the hat to depict MGM.


WDW Park Icons

Last but not least is the Animal Kingdom. I love going to this newer park and I have to say the new Avatar section is amazing!

WDW Park Icons


Overall these were so much fun to create and reminisce about going to Disney and I am eager to start my next canvas!


Affiliate Links
Liquitex heavy Gel- https://amzn.to/2DDcWbp
Liquitex gloss gel- https://amzn.to/2JZRSfq
Finnabair Sparks https://amzn.to/2DDkJG2
Finnabair Metallique https://amzn.to/2qJbRGn
Micro beads-https://amzn.to/2DD9opK and https://amzn.to/2B3KjSj
8×8 canvas https://amzn.to/2B3KmgX
Fabric roll (similar) https://amzn.to/2DCF1zF

The post WDW Park Icons Canvas- Mixed Media appeared first on Take Time To Create.

Blue Fabric Mixed Media Frame

Hello Everyone!

Have you ever finished a project and thought  you were done only to realize that you weren’t? Well that is exactly what happened to me with this Blue Mixed Media Fabric Frame.

A little while ago I created the fabric frame and I thought it was pretty cute as is. If you missed that blog post you can catch it here: Fabric Frame

And the original frame was really cute and I did love it, but as I thought about it I thought it needed more. And by more, I mean a lot, lol. So I embellished it, and painted it some more. I love how it turned out and it is a personal choice how much or how little you add to your frame.

Fabric Frame

As you can see the original just has fabric and paint, but the embellished one has flowers, pearls, metal elements, and more added to the frame.

Fabric Frame

I clustered 2 groupings on opposite corners of the frame. I added a variety of elements to create interest and texture to the frame. If you know what photo you will be putting in the frame you can tailor the elements to the photo, I think that would look amazing.


Fabric Frame

After the gesso was all dry I painted over everything with Finnabari Sparks and Metallique paints. They were the same colors as the original frame and I thought that would help make it all cohesive.


Fabric Frame

The last step was adding splashes all over to really blend the original and the new elements together. I wanted it to look like I planned it all at once, lol.

Fabric Frame

I really like how this all came together. I love adding new elements on top of project I thought I had finished.

What project did you think you finished but went back later to add embellishments to? Share in the comments.

Fabric Frame

Affiliate Links (similar product if actual one can’t be found)

  • Prima Marketing Flowers: https://amzn.to/2pPuO9W
  • Finnabair Sparks: https://amzn.to/2QNzIQb
  • Finnabair Metallique- https://amzn.to/2A7wYb1
  • White Gesso- https://amzn.to/2ITPExV
  • Prima Marketing Say it in Crystals- https://amzn.to/2IRaNbL
  • Finnabair Pebbles- https://amzn.to/2yik091


The post Blue Fabric Mixed Media Frame appeared first on Take Time To Create.

Sailboat- a Mixed Media Fabric Canvas

Hello Everyone!

Are you ready for another Fabric Canvas? I am still loving the fabric and the process of creating a canvas with fabric.

This scene was inspired by our recent vacation to Ft Lauderdale. We saw a lot of boats on the water and they looked so peaceful and wonderful that I knew I had to create one on a canvas with fabric.

I did use a smaller canvas than normal, but I really liked how it turned out.  And I used a variety of blues for the water and sky. I wanted to create depths and dimension with just one color. There are so many blues out there it was fun to pick and choose which one to use to get the look I was going for.

sailboat canvas

I used a heavy body paint from Finnabair to paint the boat, and that added additional texture and dimension to the boat. I really enjoyed that paint and I am looking forward to using it even more.

sailboat canvas

The last details were painted on to the sky and water with regular acrylic paint and that is what the painting needed.  I didn’t add any metalic paints or sparks or glitter to this canvas. I kept it all matte and I think that was the right choice for this piece of art.

sailboat canvas

This was such a fun piece to create and it was a great way to commemorate a wonderful vacation.


Affiliate Links:

The post Sailboat- a Mixed Media Fabric Canvas appeared first on Take Time To Create


Fabric Watercolor Landscape

Hello Everyone!

Sometimes an experiment turns out really cool, and this just so happens to be one of those times! I did a class at ArtVenture in January of this year that taught us how to watercolor on fabric. Not quite like this example, but it got my creative juices flowing! I really wanted to explore this method and develop my own technique, and this is what I came up with- A Fabric Watercolor Landscape (actually the ocean, and it is abstract…. lol)

As always the video goes over all the steps, and it is a good companion to the blog post.

To start prep your canvas by painting it a light color, I used a slightly off white and painted the top and sides.

you will need a light gauzy fabric for the base layer. I had some in my stash, so use what you have, as long as it is a very light fabric. Take a Heavy gel and spread that all over the canvas, then coat each strip of fabric with a gloss gel. (this is the same procedure that I use on all my canvases) Once the strip is coated adhere it to the canvas. Add as many wrinkles as you want and create the texture you are going for. (I have to say I really like this stage, in fact I almost stopped here because it is so pretty, an all white fabric canvas. I might have to make one and just leave it as is. Some thing to think about, lol)

watercolor fabric landscape

Once you are done with the fabric, let is step dry. I usually leave it over night just to make sure.

After it is dry it is time to start watercoloring! gently spray the canvas with water (this allows the watercolors to move freely on the canvas) and then start watercoloring! Slowly add colors and see where they go and blend to create new looks. You can dry in between layers if you want and just keep building until you get the look you are going for. I wanted to create a sunset on the water, it is a little abstract, but that is ok, I really like how it turned out.


watercolor fabric landscape

Once the watercolors are dry you can start adding in texture. I added some iridescent micro bead to add some more shimmer and shine to the water. Just apply some gloss gel and pour on some beads. Let it dry over night before removing the excess beads.

watercolor fabric landscape

Once the beads are dry you can add even more shimmer and shine by adding Metallic watercolors. I thought this would be the perfect way to add some more details. It is a little hard to see in the photos, but up close the metallic really added that perfect final touch.

Let everything dry completely and then spray it with a spray protector.


watercolor fabric landscape

I really like how this turned out and I can’t wait to try this technique on another canvas! What should I try to watercolor next? I love experiementing with my supplies and I would love suggestions on what to do next!

Affiliate links:

The post Fabric Watercolor Landscape appeared first on Take Time To Create.

Easy Fabric Frame DIY

Hello Everyone!

Today I have a fun, easy fabric frame project for you. I am still on a fabric kick, I have so many ideas using fabric and I can’t wait to share them with you.


For this project I used fabric I got from Annie’s Fabric Club. This is not sponsored, but I really like the fabric I got, and I am looking forward to next month’s fabric.  Here is the link to the club if you are interested in joining: https://www.creativequiltersfabricclub.com/

This is such a fun, easy project that only takes a few materials

Materials (with affiliate links):


Instructions:

Gather all your material including the fabric and your frame. The frame should have a wide enough border that gives you plenty of room to add fabric. The color of the frame doesn’t matter a lot because you will be covering it in fabric.

To get started cut your fabric in strips that are a little wider than your frame. Spread heavy gloss gel on the frame. Coat your fabric strip in Gloss gel and add to frame, crinkling it up as you go. While everything is wet take the time to get all the wrinkles and texture you are wanting.

Fabric Frame

Take your time and make sure it looks like what you are going for. Before you let your frame dry clean up the edges and back with a baby wipe. Let the frame dry. Once dry you can leave it at this step if you want, or you can go on to the next step which is adding paint.

Fabric Frame

After the fabric dried (leaving it over night is best) I dry brushed on a Finnabair Metallique and a Finnabair Sparks paint to add some detail and sparkle. I really love her paints and they add that bit of interest that I am looking for. .

And that is it, the frame is done! These are so much fun and easy to make, I think I will be making a lot more as gifts this year.


The post Easy Fabric Frame DIY appeared first on Take Time To Create.


« Older posts

© 2024 Take Time To Create

Theme by Anders NorenUp ↑

Follow

Get the latest posts delivered to your mailbox:

%d bloggers like this: