Tag: diy craft (page 5 of 6)

diy-pillows-burlap-coffee-sacks

Sewing Craft Project Burlap Pillows

Used burlap coffee sacks make for a great sewing craft project… they also make make great pillows. They are fun and unique and perfect for any decor.

Hello Everyone!

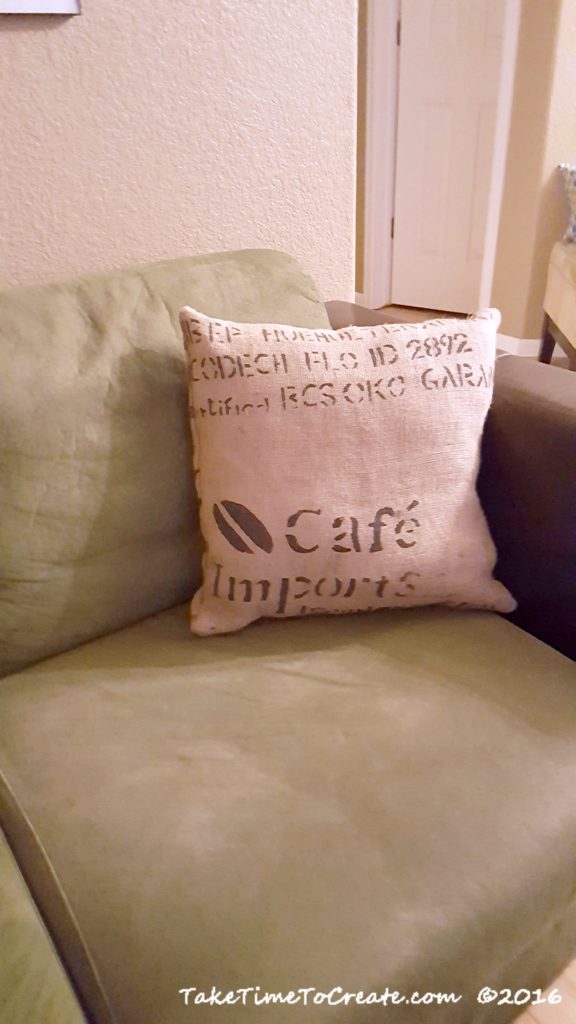
sewing craft project burlap pillow case

Finished burlap pillow case

Today is a cold, wintry day and I am inclined to stay inside all day (I do have to go to work, but when I get home I am going to snuggle down and say warm) anyway, as I think about staying home I am reminded of this sewing craft project I did where I made pillows from Burlap sacks. I did this a while ago, but I still love them so much. I think they are perfect for my decor. 

Materials:

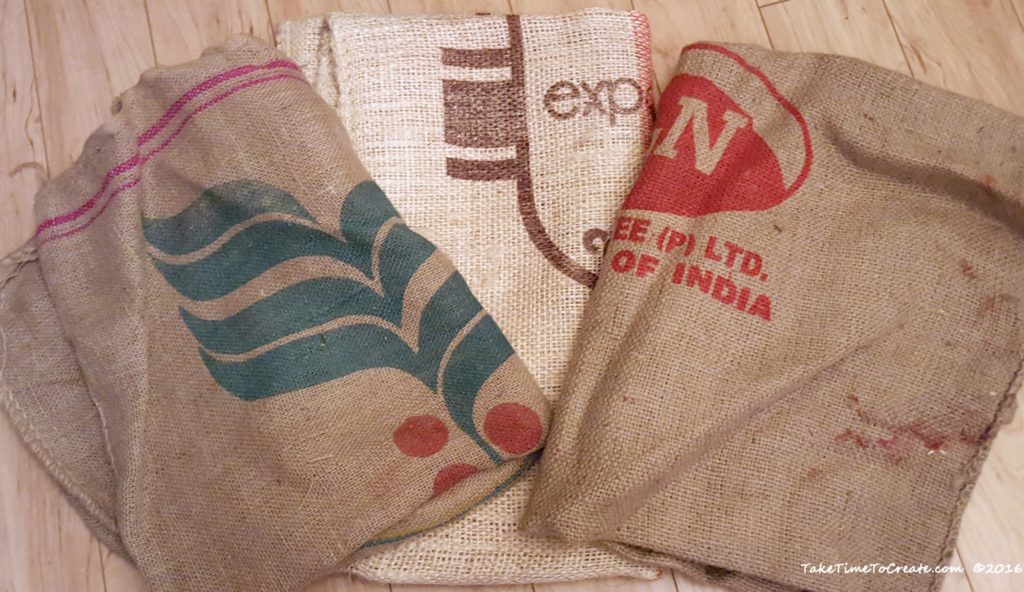
  • You will need the used burlap sacks that is used for coffee. I originally purchased mine on eBay, but I did find some on Amazon. You can use this link: Burlap Coffee Sacks.  There are a lot of vendors for these sacks so you have your pick! But they usually come with random patterns, I don’t think you are able to pick your pattern. So keep that in mind when purchasing. 
  • Pillow form. I found mine at Ikea, they have the best prices for pillow forms
  • Needle and thread, or sewing machine. 
burlap sacks

This sewing craft project starts with burlap bags

Instructions:

Cut your sack to the dimensions of your pillow form. If you want the pillow to look more full then cut the sack a bit smaller. (I have to be honest here, I didn’t actually sew these pillows. My fabulous mom sewed them for me. haha, I don’t know what I would do without her.)

Once it is cut, pin the right sides together and sew the right sides together. Leave a little hole so you have room to put your pillow form in. 

Stuff your pillow and stitch the hole. 

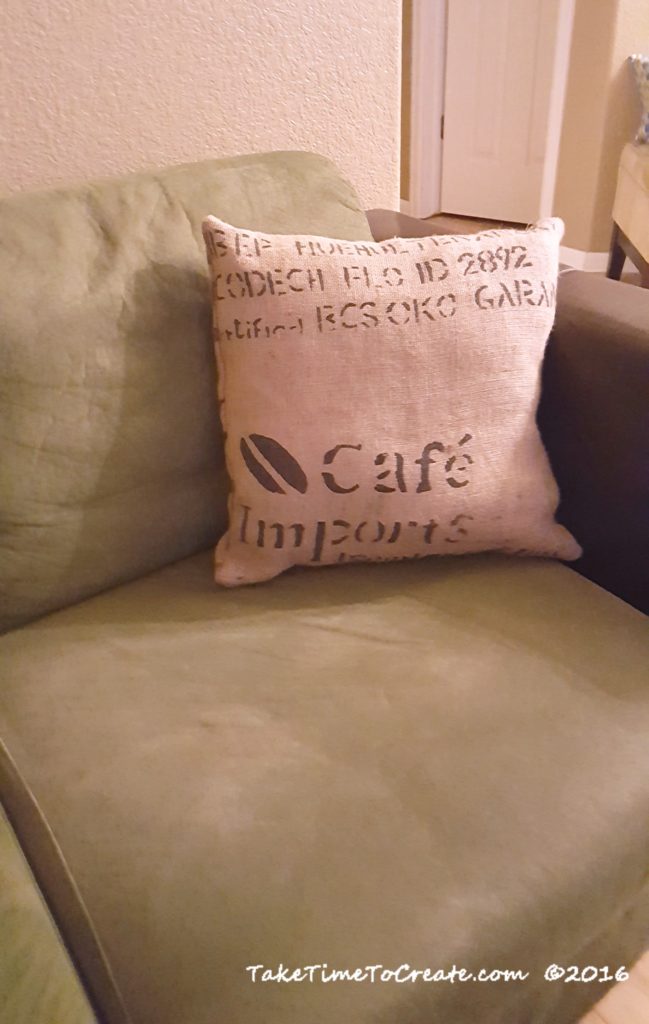
finished sewing craft project

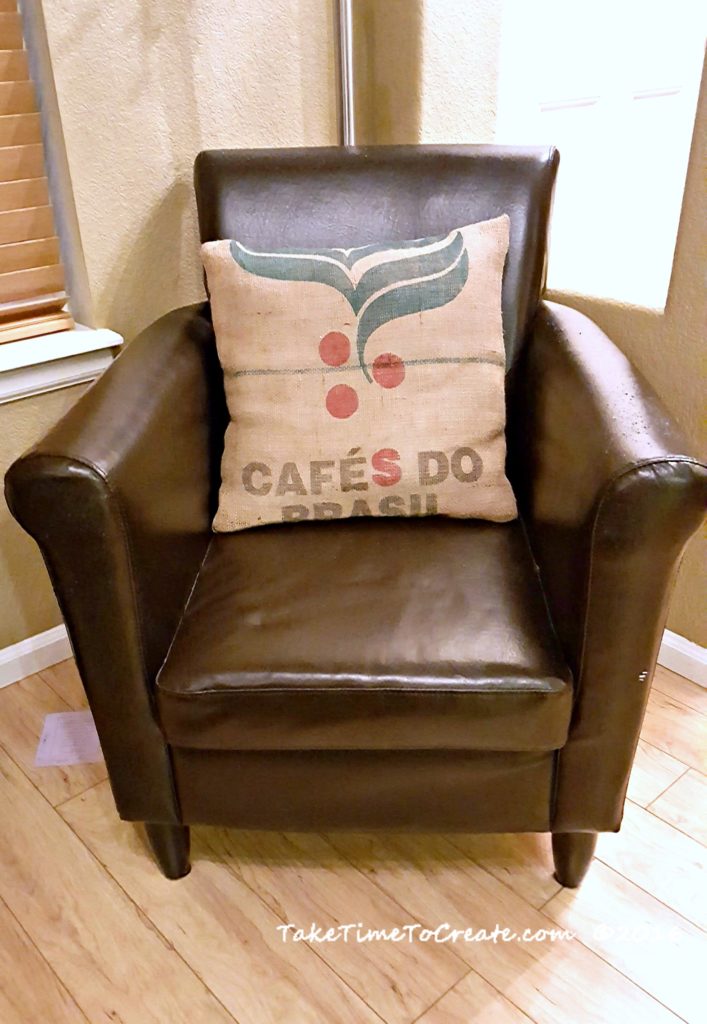
Here is another finished pillow

That is it, very easy to make a custom pillow for your home. You can use this technique for almost any fabric.  I love how easy it is to update your decor, and reusing items that might otherwise land in the landfill is a double awesome!

BTW if you are wondering how I painted my couch green you can check out this old post: Painted Couch

burlap-pillows-3

This post DIY Pillows from Burlap Coffee Sacks appeared first on Take Time To Create


If you enjoyed this post, make sure you Follow Take Time To Create so you don’t miss out on other great posts.

Follow Take Time To Create on WordPress.com


This post contains affiliate links.


Painted Christmas Houses

Painted Christmas Houses

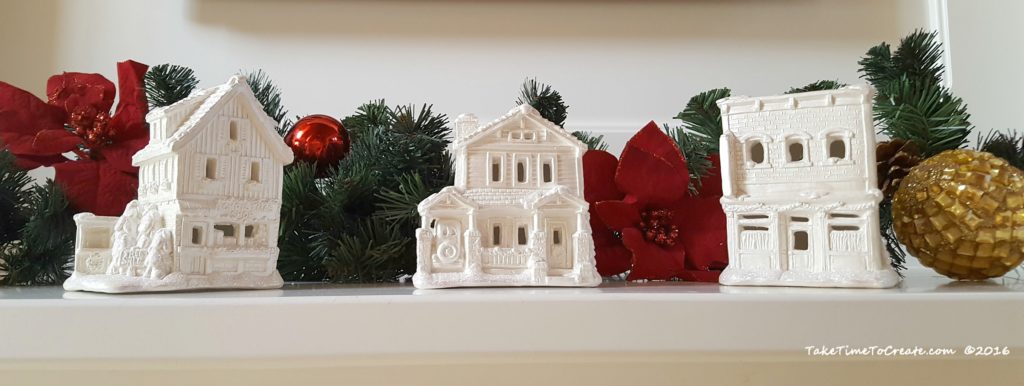
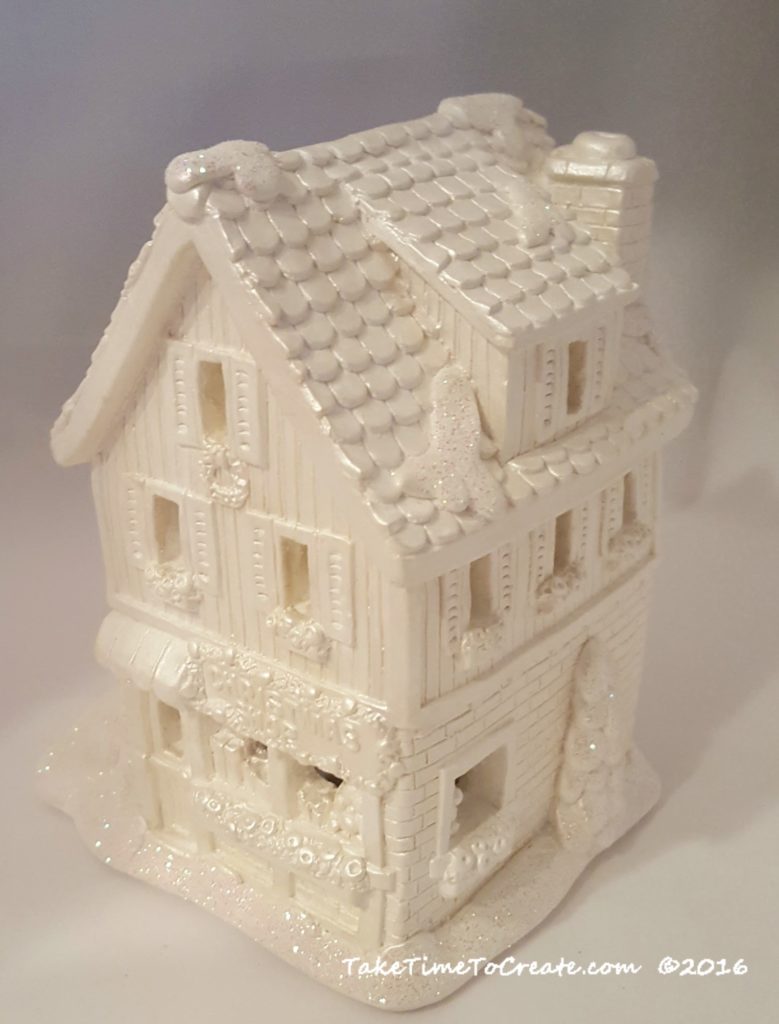
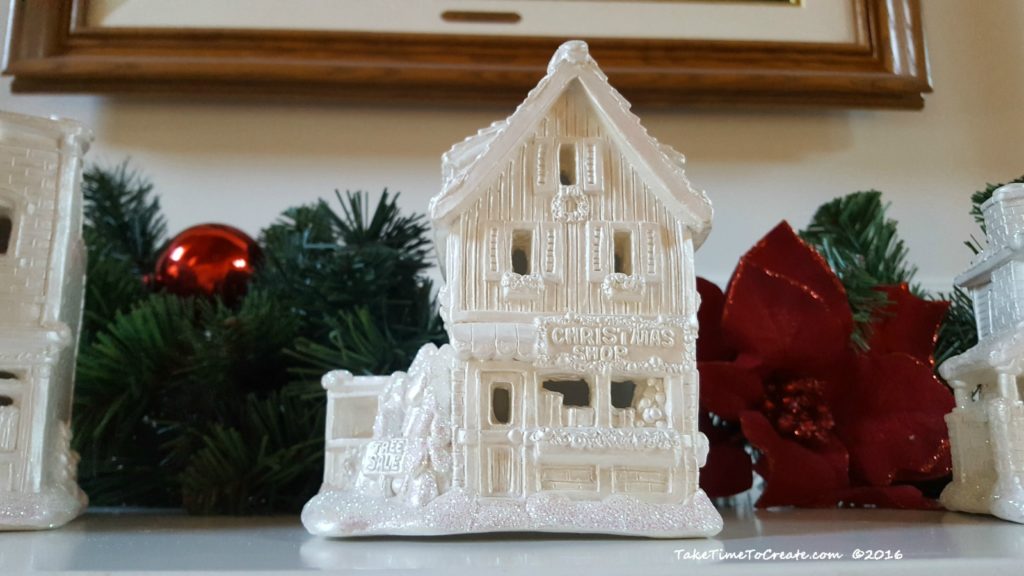
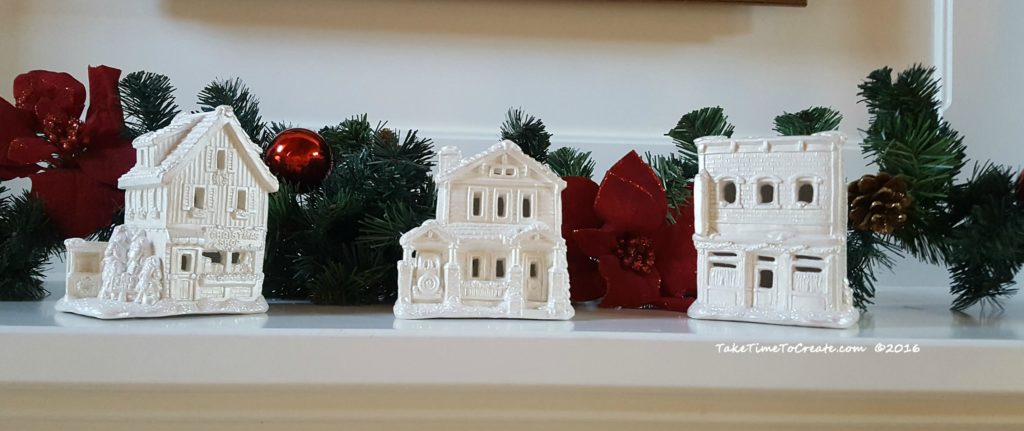
You can find these really cute ceramic houses just about anywhere, with just a little paint and glitter they are ready to be put on display. 

My finished Christmas houses on display

Hello Everyone!

December is rolling along and it is time for me to think about decorating. The tree is up, and if you follow me on Instagram you probably have seen our tree by now. (@taketimetocreate).

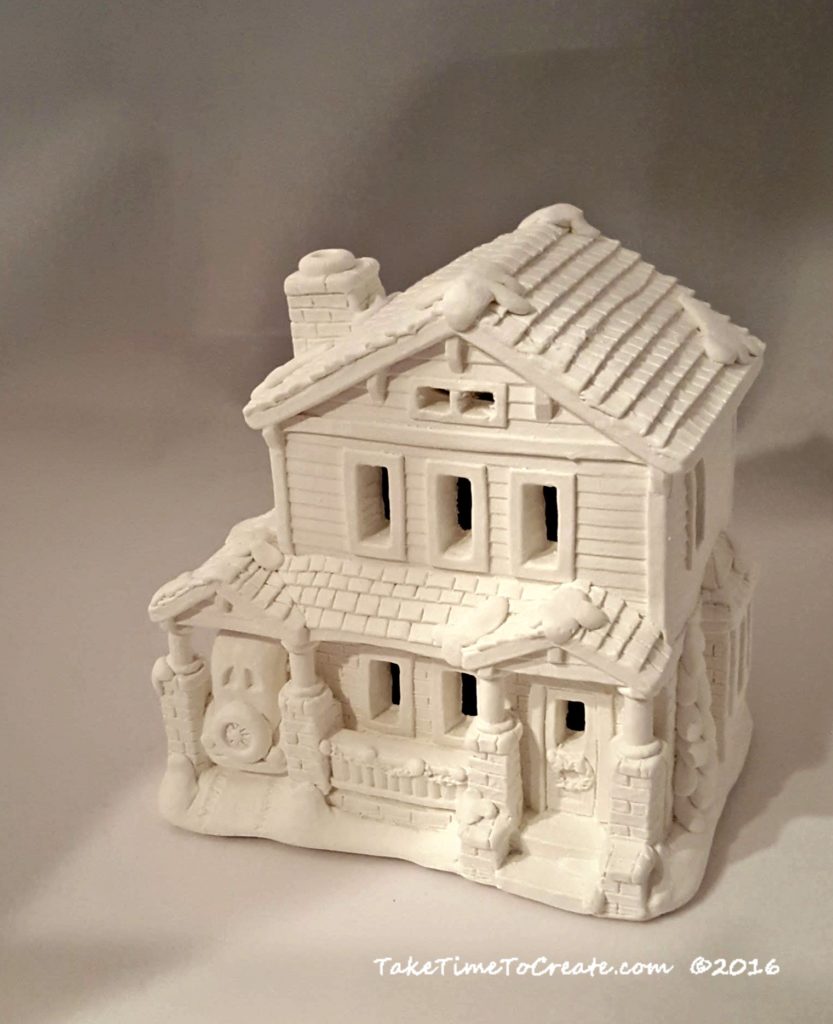
With any holiday I always feel the need to create some new items. This year I made some painted Christmas houses.  I found the unfinished ceramic houses at our creative reuse center Who Gives A Scrap (I love that place!) With a little paint and glitter they were ready to go.

Materials:

  • Ceramic House (You can get these at a creative reuse center, craft stores, and sometimes the thrift stores will have some unfortunutally painted ones that need an update)
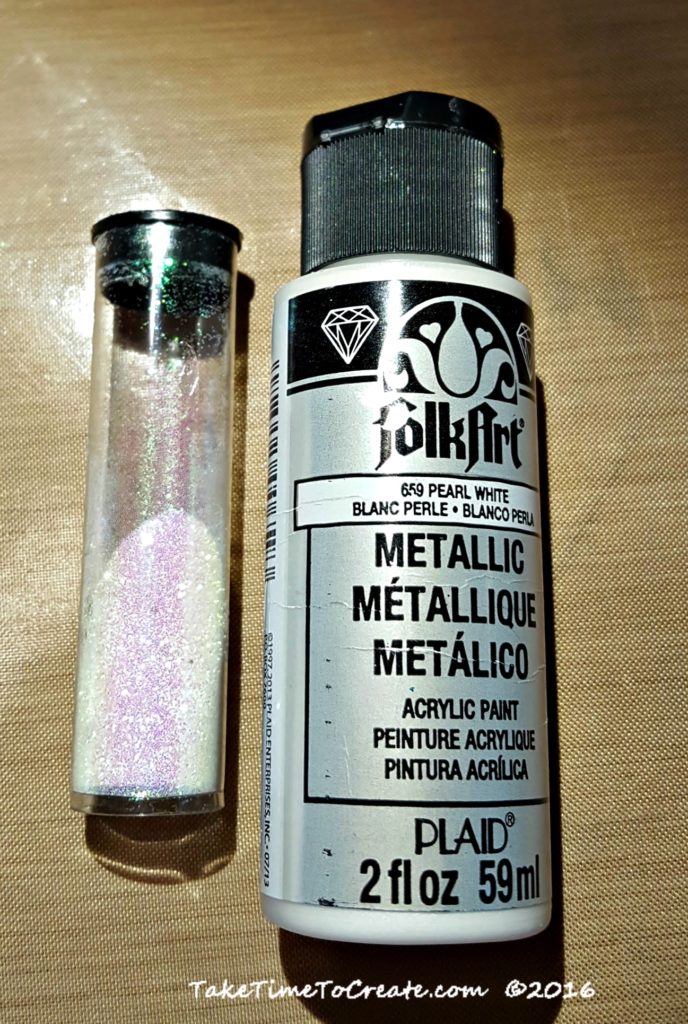
  • Paint and glitter found at the craft store. I really liked this paint, it was white with a little pearl look to it. Perfect for Christmas.

paint-and-glitter

Instructions:

Take your plain ceramic house and paint on a layer of white paint. You can always spray paint the houses, but I just decided to hand paint instead.  This is what it looks like before the paint.

(btw, The houses did come with detailed instructions to paint the house in all the colors, but I did not want to take the time to do any detailed painting. haha. So white paint here I come. )

Painted Christmas houses before glitter

My Painted Christmas houses before glitter

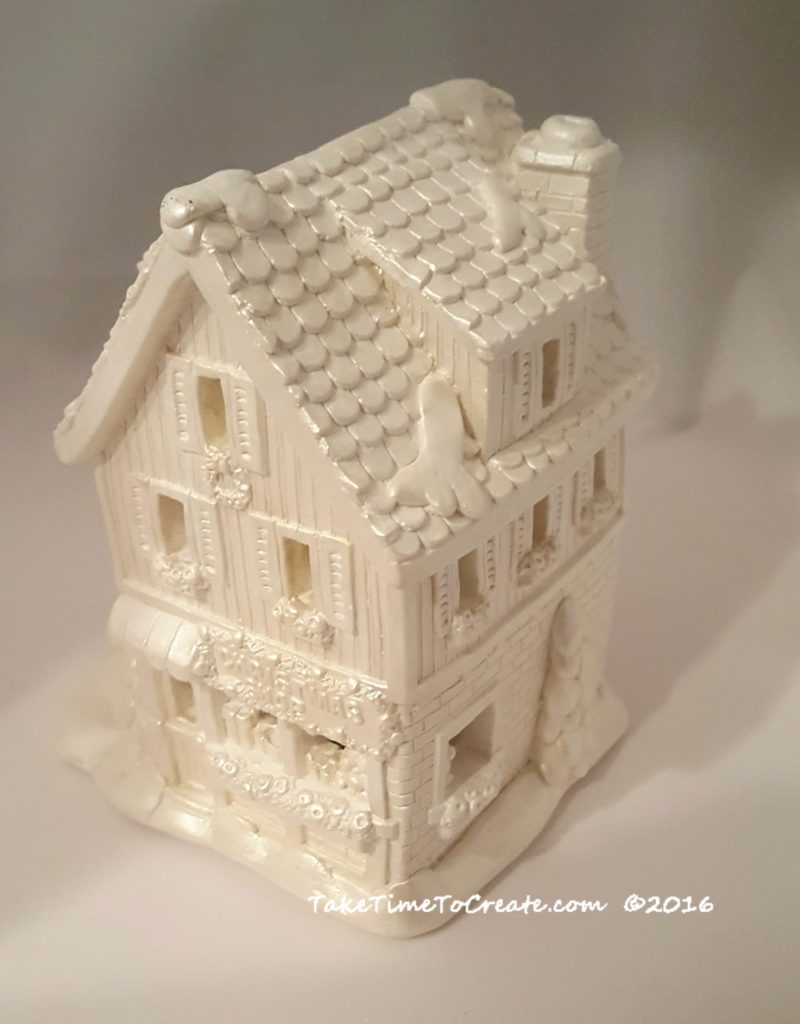
Add the paint. This is what it looks like with the paint. Go over everything, all the little details. Don’t forget the inside of the windows.  Touch up where ever you forgot.

Painted Christmas houses before glitter

My Painted Christmas houses before glitter

Then I decided to add some glitter detail to the snow and trees. Just pick a clear holographic glitter that goes with your paint. I put a layer of mod podge on then sprinkled it with glitter.

add glitter painted Christmas houses

Adding Glitter to the painted Christmas houses

Once they are dry they are ready to be put on display.

I think they turned out really cute. You can put lights in the bottom, but I didn’t have any. So this weekend I will pick up some and then they will look even better!

painted Christmas houses on the mantle

Close-up of the painted Christmas houses on the mantle

painted Christmas houses

Here are the finished painted Christmas houses


Subscribe via WordPress


The Take Time To Create Crafting Blog RSS Feed

Subscribe via Email

Enter your email address to subscribe to this blog and receive notifications of new posts by email.


Other Ways To Follow


The Take Time To Create Crafting Blog RSS Feed

Subscribe to my RSS feed

The Take Time to Create Crafting Blog Facebook Page

Follow me as Facebook

The Take Time to Create Crafting Blog Etsy Shop

Check out my my Etsy Shop

The Take Time To Create Crafting Blog Pinterest Board

Visit my Pinterest Board

Other Ways To Follow


The Take Time To Create Crafting Blog Instagram

Follow me on Instagram

The Take Time To Create Crafting Blog Twitter Feed

Follow me on Twitter

The Take Time To Create Crafting Blog Email

Send Me an Email


Mixed Media Canvas Celebrating Family

Mixed Media Canvas Celebrating Family

Hello Everyone!

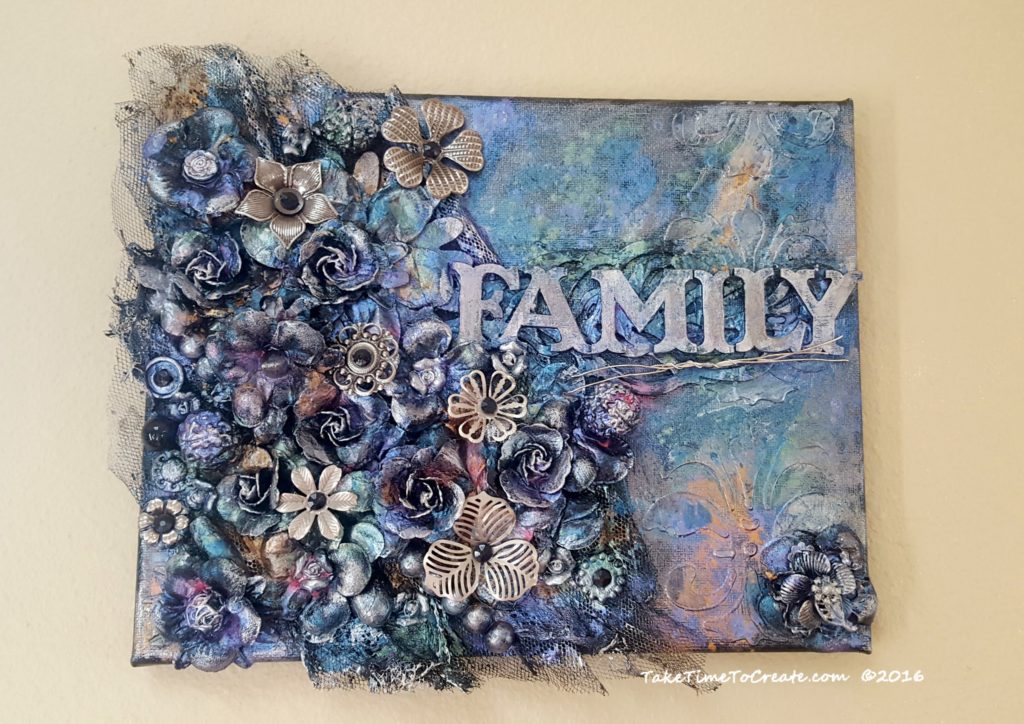
Today I have another mixed media tutorial. I love making mixed media art, it relaxes me and soothes my soul. This is another Finnibair inspired canvas. I love her work, she inspires me so much and I learn a ton from her techniques.

family-mixed-media

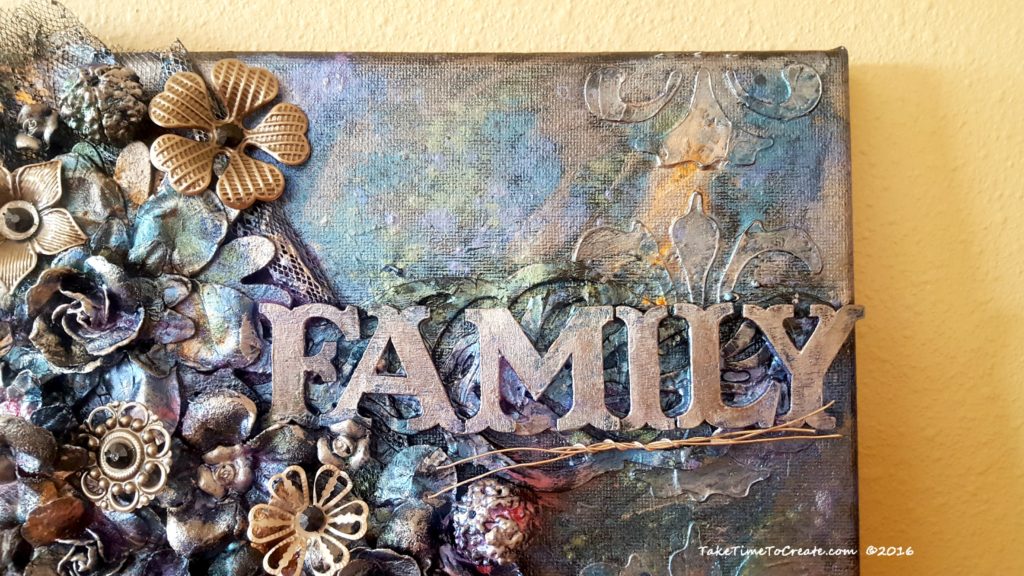
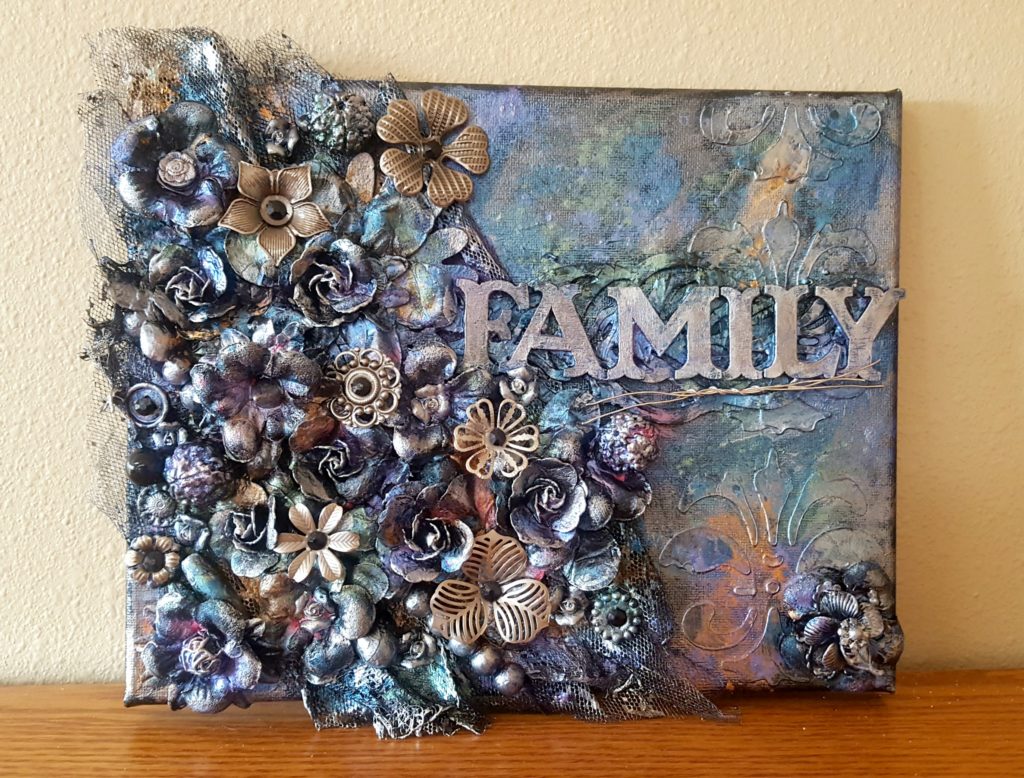
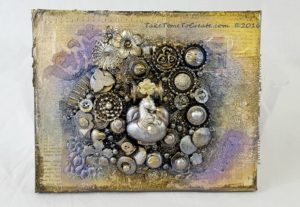
This canvas celebrates family. Family is so important and I wanted that to be the focus of this canvas.

I have made other mixed media canvas and you can visit them here:

Frozen Mixed Media

Dragon Mixed Media

Angel Mixed Media

Materials:

  • Canvas, black gesso, brushes
  • Mica powder, spray bottles, stencils, modeling paste, acrylic paint, spray clear coat
  • Flowers, letters, beads, cheese cloth and anything else you want to put on your canvas.

Instructions:

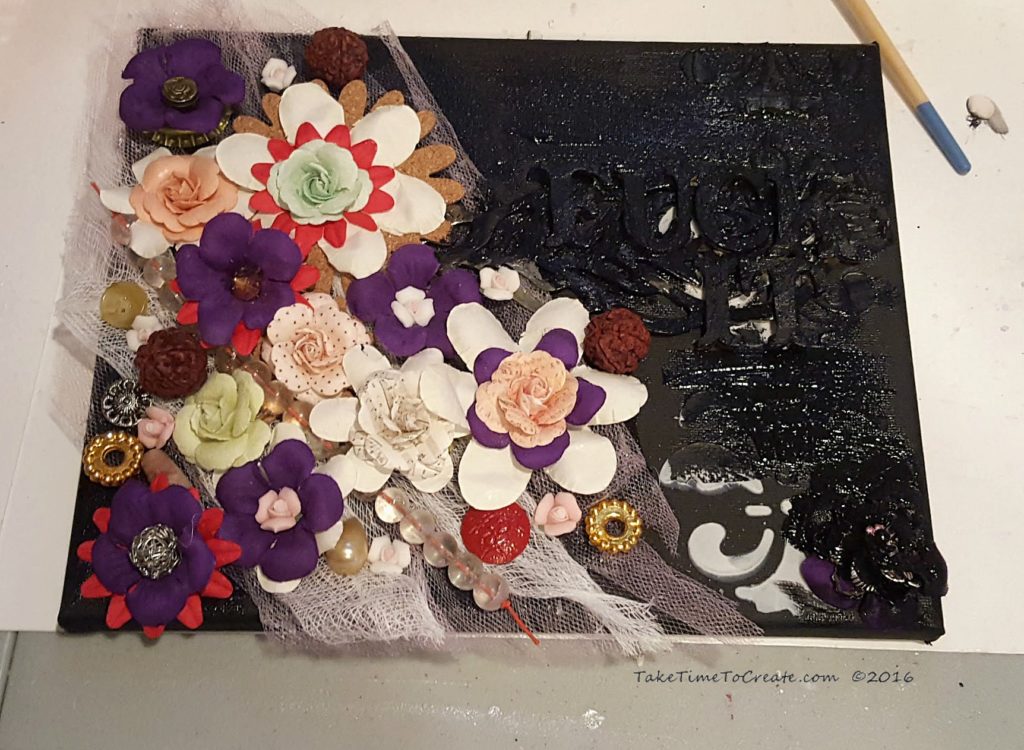
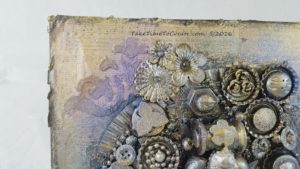
First you add all  your flowers and letters and doo-dad on a canvas. I put black gesso on my canvas before I started. Then I went to town. Add stencils, cheese cloth, flowers, letters, beads, buttons, and broken jewelry. Anything to add interest and texture. I didn’t really care about the colors, just texture because I knew it would all be covered up.

layer-the-pieces-on-the-canvas

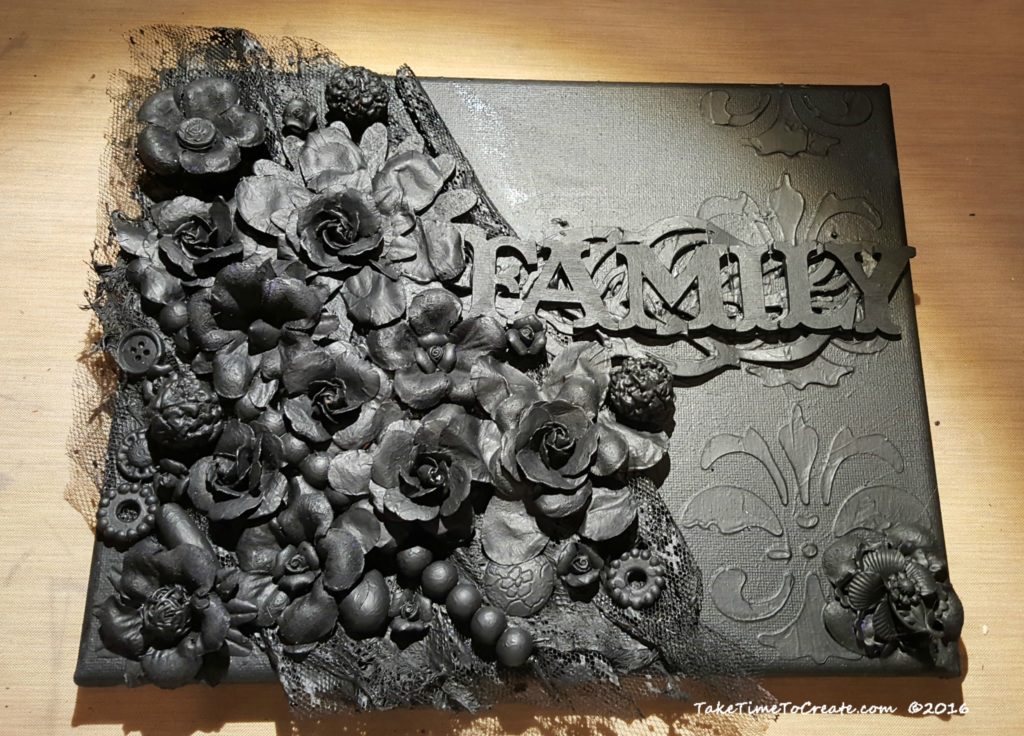
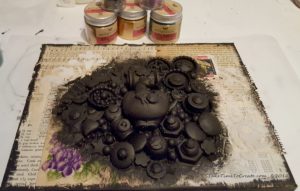
Once you have everything secured with modeling paste then cover it all with black gesso. Cover all the ins and outs and little spots,  you want it all black with nothing showing. This will take a while, but it is worth it to take your time and do it right.

add-black-gesso-to-everything

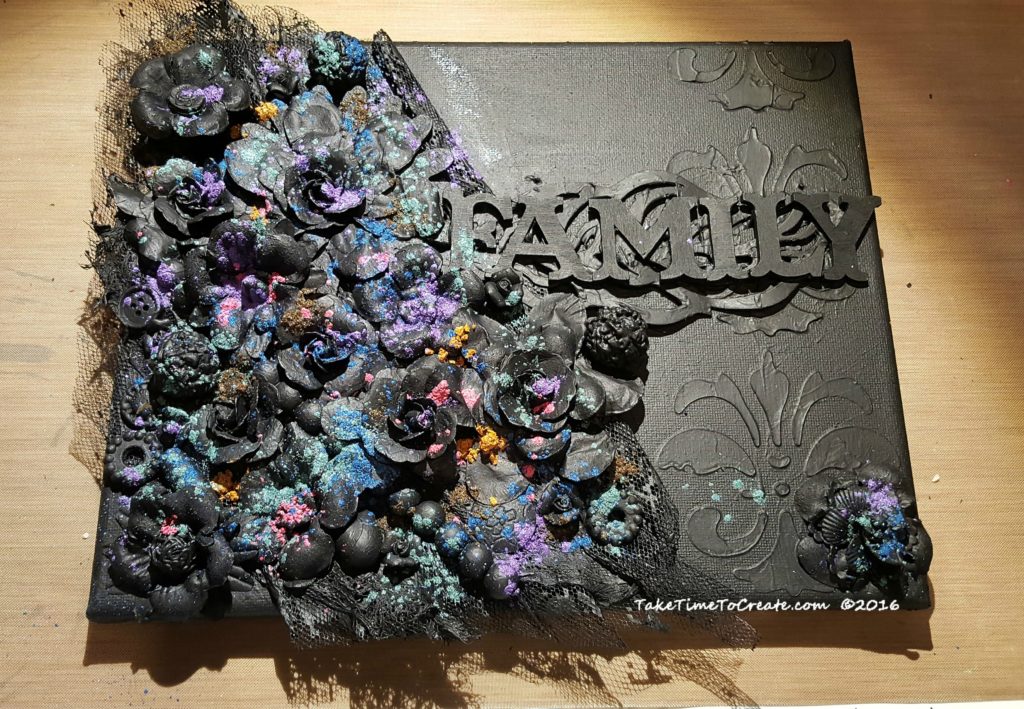
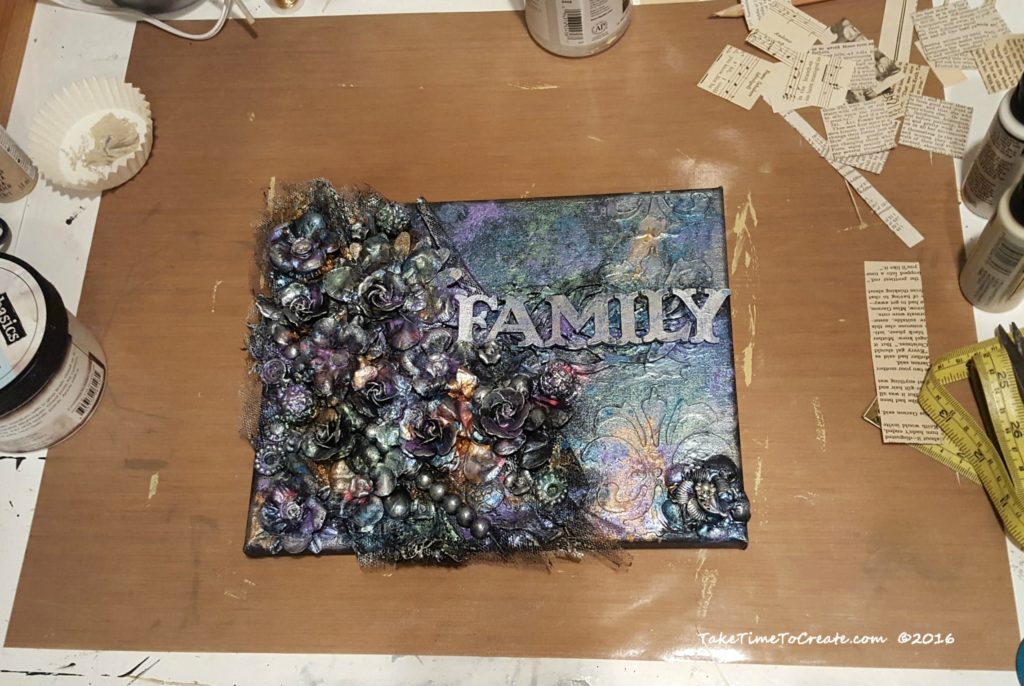
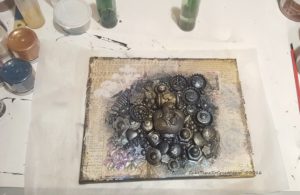
Once it is all dried it is time for the fun part. I added piles of mica powder all over the canvas. Then I took a spray bottle and sprayed water to spread the mica powder and create a shimmery, metallic look.  I did this a few times and once I was done with how it looked I dry brushed acrylic paint on the canvas. I just highlighted the tips of the flowers and the Family letters, The dry brushing was just to add some more detail to the canvas.

add-mica-powder-to-canvas

spray-the-mica-powder

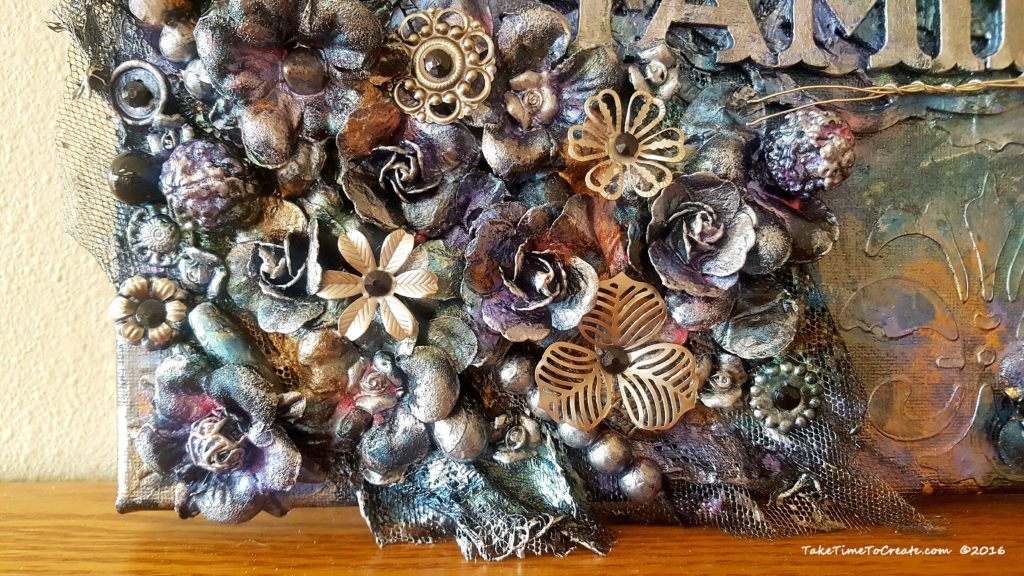
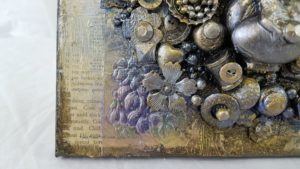
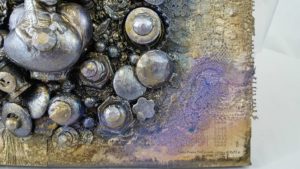
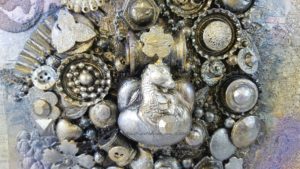
After the paints dried I added some metal flowers to add detail. It was the missing piece to bring it all together.

family-up-close

up-close-detail

I really like how it turned out, what do you think? These are so much fun, I can’t wait to show you the next mixed media project I am working on.

family-canvas-mixed-media

Make a Basket Out of Wine Corks

Make a Basket Out of Wine Corks

Hello Everyone!

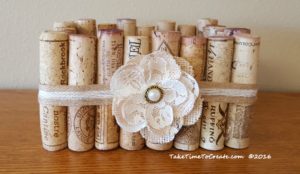
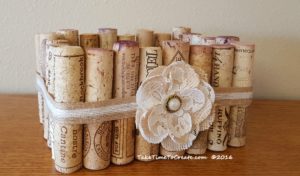
The question of the day is what to do with left over wine corks? Disclaimer: I did not drink all of this wine to make this craft, lol. I got a big box of wine corks from eBay for really cheap! I just love all the crafts people are doing on Pinterest with the corks so I thought I would try it out.

diy-basket-out-of-wine-corks

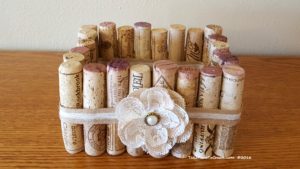
This is a really simple craft that probably won’t take more than 30 min to complete. This basket is perfect for just your desk or table. It is a really cute way to store just about anything.

finished-diy-wine-cork-basket

Instructions:

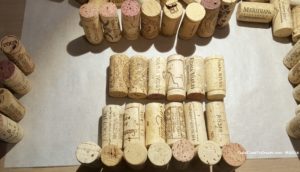
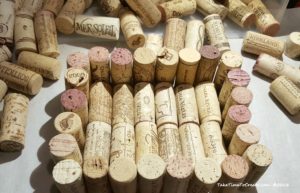
Gather your corks and start to assemble them. Try to get them all about the same size, it will make the basket look better.

start-gluing-the-corks-together

Then start hot gluing them together. Hold the pieces together for a few seconds to make sure they stick, but the hot glue should be strong enough to hold it together.

collect-your-wine-corks

I did 2 rows of 5 for the bottom of the basket and 24 vertical corks for the sides. And I stacked the sides 2 corks tall.

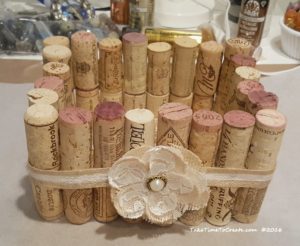
Once I was gluing all the corks together I thought it looked a little plain so I added a ribbon and a flower to jazz it up.

add-ribbon-and-flower

So what have you made with wine corks?    Next I think I will make a trivet and a cork board for my office. Stay tuned to the tutorials.

finish-basket

wine-cork-basket-by-take-time-to-create

The post Make a Basket Out of Wine Corks appeared first on Take Time To Create.

DIY Halloween Erasers

Hello Everyone!

Update: Check it out this post has been added to Fun Family Crafts!!!

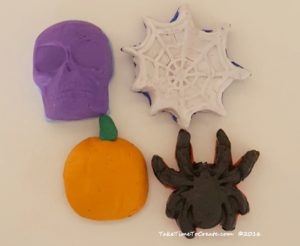
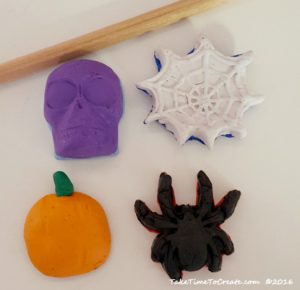
One of the best ways to spruce up your desk is to add some custom DIY erasers.  They are so easy to do and they look so cute on your desk at work or school. They also make perfect gifts, or they would be tons of fun to make at a party.

diy-halloween-erasers

Materials:

There are affiliate links below

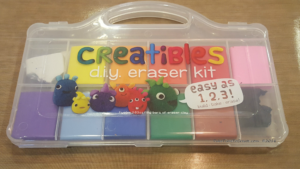
  • Eraser Clay (I found this one on line at Amazon, but there are different brands, so pick one that works for you)

ceatibles-diy-eraser-kit

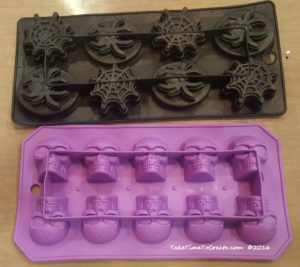
  • Molds (I used ice cube trays from the Dollar Store, or you can free form your designs)

mold-trays-for-eraser

  • Oven

Instructions:

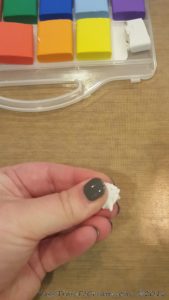
The first thing you do is knead your clay. You want to warm it up and make it pliable and easy to work with.

knead-the-eraser-clay

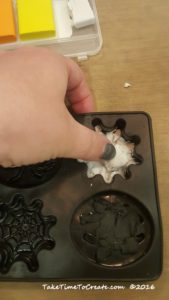
Once the clay is easy to work with then press it into a mold you like. ( I used a mold because shaping things out of clay is not the easiest thing for me. Molds just made the process a lot easier) You can make almost anything out of the clay. It is really easy to work with.

press-clay-into-mold

Once you have your design pop it out of the mold. I just put a little on the bottom of the mold then I popped it out and added a layer on the bottom of the design to smooth out the bottom. You can also add enough clay to fill the whole mold. It does make a larger eraser, but it looks really cool. You can layer colors or mix them to make a new color. There are so many possibilites.

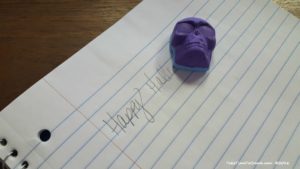
diy-erasers

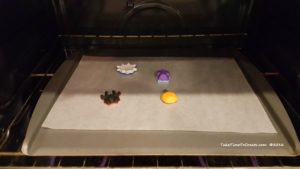
Bake the erasers according to the directions and let them fully cool before using.

bake-according-to-directions

They actually work. When I first got this product I thought they might be a little gimmicky and not work well, but I was pleasantly mistaken they actually work really well!

diy-erasers-actually-work

They turned out so cute I think I might need to make more for every holiday!


halloween-erasers

The Post DIY Halloween Erasers appeared first on Take Time To Create.


DIY Painted Halloween Village

Hello Everyone!

Halloween is fast approaching, and of course I get it in my head that I want to do some new Halloween decor.  At least this year I am getting it done before Halloween and not after, haha.

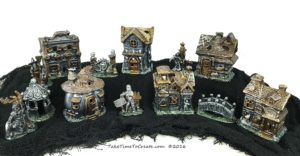
I saw a Halloween Village at the Dollar Store and thought it would be perfect to paint for Halloween

finished-village

Materials:

  • Ceramic houses (I found mine at the Dollar Store, but there are a lot of options out there. You could even use Christmas houses)
  • Metallic Paint
  • Gesso
  • Brushes, Stucco, Beads

Instructions:

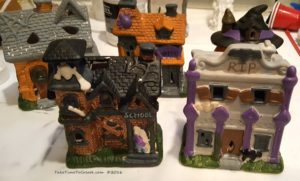
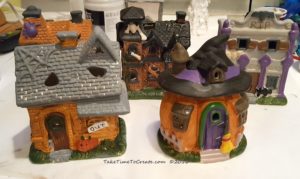
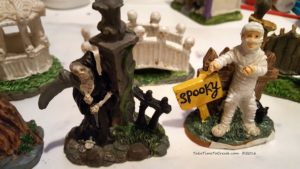
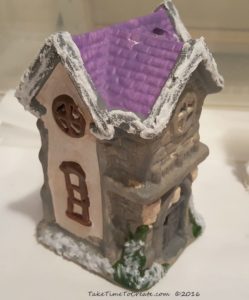
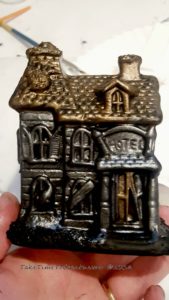
When I saw these houses I thought that they were very cute, but the colors were not great. I didn’t think that they went together very well and the figurines were terrible.

before-house-2

before-houses

before-up-close

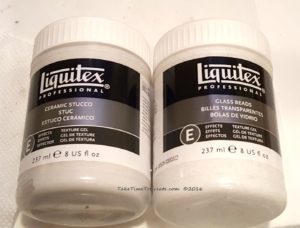
Before the painting fun I had to prep the houses. I cleaned them then added a layer of Stucco to the roofs and anywhere there needed to be a rough detail. Then I added some beads to the grass area.


stucco-and-beads

add-stucco-and-micro-beads

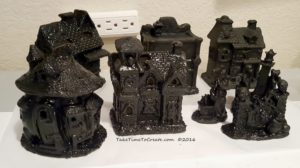
After the texture was dry I added a layer of black gesso. This gave me a blank canvas to work on. I did have to go back and touch up areas that I missed.

add-gesso

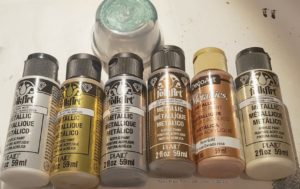
After the gesso was dry it was time for the fun painting! I used metallic acrylic paint and I mixed some Mica Powder with soft gloss gel for the green. I just dry brushed the colors onto the housed, adding and blending as I went. Once I was happy with the look I went on to the next house, until I was finished with the project.

paint-colors

keep-painting

start-painting

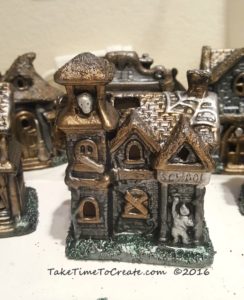
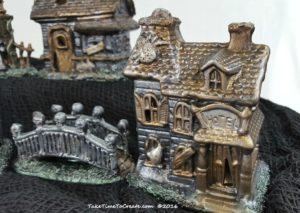
Here is an up close picture of the detail of one of the houses and the bridge.

up-close-detail

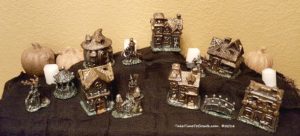
And here it is on display in my home. I really liked this project, it was fun to watch the housed change right before my eyes. Good thing I bought more houses from the Dollar Store, now I can create even more villages, haha

finished-houses-in-my-home


Dragon Mixed Media Canvas

Hello Everyone!

I am loving mixed media! It is quickly becoming one of my favorite forms of crafting. I love finding objects and combining them to create art.
This project is a Finnabair inspired mixed media. She is wonderful and her projects inspire me to create new things and expand my horizon. And I find that the more mixed media projects I do the better they turn out. It is fun to see how different my techniques is since I started.

This time I did a Dragon themed collage. I found the really cute ceramic dragon and built the piece around that.  Here is how I made this collage.

mixed-media-dragon

Materials:

  • Canvas
  • Found objects, papers, rhinestones, microbeads, stencils
  • Papers, stencils
  • Soft Gloss Gel, 3D Gel, Mica Powders, paint brushes, gesso

Instructions:

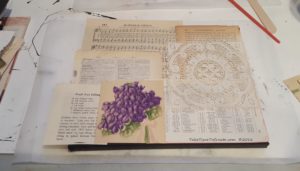
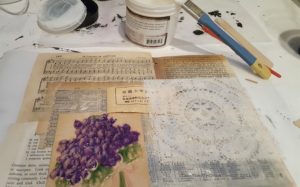
I had these really great old papers and doilies that I used as a base. The papers are a little fragile, but they make and interesting base.

base-layout

I glued the papers down with soft gloss gel and I added a top coat of soft gloss gel to protect the paper. The fragile, old papers did end up bubbling a tiny bit, but I think that adds to the character of the piece. The papers were just really thin and the gel soaked through and caused tiny wrinkles.  Let it dry before going on.

add-soft-gloss-gel

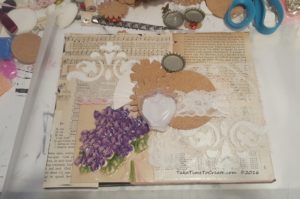
Next start arranging a layer on the canvas. I used a plastic heart and some lace and cork at this stage. I also used a stencil in the corners and added micro beads to the wet paste to add texture and interest.

start-adding-layers

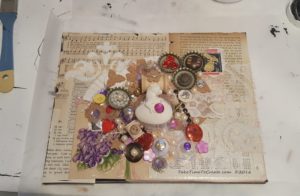
Keep adding layers to create interest and details.

keep-layering

Once I was happy with the arrangement I used black gesso on the collage in the middle and I edged the canvas in black gesso. I faded the gesso out from the center to blend into the canvas.

add-black-gesso

Next I started painiting. I added mica poswers to water to make a mist that I srayed in areas. But mostly I dry brushed the paint on the canvas. I mixed mica powders with soft gloss gel to create a paint.

start-painting

Just dry brush paint all around, hightlighting high points and emphasing different points of interest.

detail

more-detail

top-detail

Mixed Media is tons of fun and I can’t wait to complete my next project.

detail-of-mixed-media-dragon

Tonight I am taking an embroidery class so I will share what I learn and have some new projects for you in the coming weeks.
Related Posts

Mixed Media Angel

Another Mixed Media Angel

Frozen Mixed Media Canvas

Another Mixed Media Angel

*I am so sorry if you got this email twice. This is just one more speed bump I am trying to get over with my blog. Hopefully next week will be better. Thank you for your understanding and patience!*

Hello Everyone!

I am back! Thank you all so much for your patience with my long absence. It was never my intention to go silent for a month! I was trying to upgrade my blog to better serve you and in the process I broke it. In fact, it was so bad that tech support was baffled. They had no idea what I did and how they could fix it! (even my mom agreed that it is something that would only happen to me, haha) Anyway I am back online, and over the course of the next few weeks I will be working on cleaning up the blog and making it more used friendly. But for now I am back and I will be posting new projects weekly. I have a ton of ideas for Fall and Halloween so be on the look out of those projects in October.

If my blog ever goes down again you can keep up with me on Instagram

Let’s get into the latest project. I did another mixed media angel. I showed you how to make a mixed media angel that was black and gold. You can see it again here.

mixed-media-angel-1

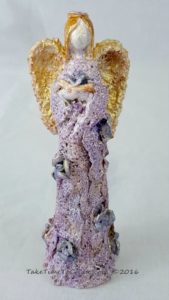
For this angel I went with lighter colors and I like the way it turned out.

Materials:

  • Angel
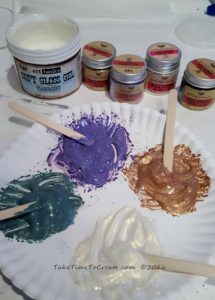
  • White Gesso, soft gloss gel, Mica Powder, brushes
  • Ribbon, roses, wire and other embellishments

Instructions:

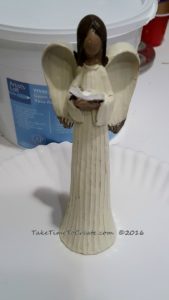
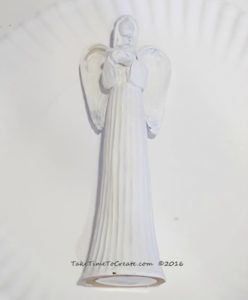
~ Make sure the angel is clean and dry,  then add a layer or 2 of gesso to get a good base for painting.

mixed-media-angel     mixed-media-angel-gesso

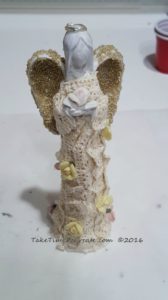
~ Start to add embellishments. Just like the previous angel I mixed micro bead with soft gloss gel for texture on the wings. Then I added ribbon for the dress, I just adhered it with 3D paste. Then I added some roses for interest and a wire halo and then I was done with the texture for the angel.
mixed-media-angel-with-embellishments

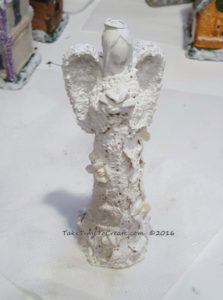
~ Once she was dry I added more gesso. I added a few layers to make sure she was all covered and ready for the paint.

mixed-media-angel-gesso-embellishements

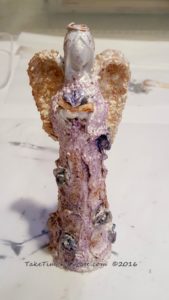
~ Now time for the fun part, adding paint! I mixed Soft Gloss Gel with Mica Powders to make my own paint and then I applied it to the angel. I did some dry brushing and some heavier paining. I just kept at it until I was done.

starting-to-paint-mixed-media-angel     paint

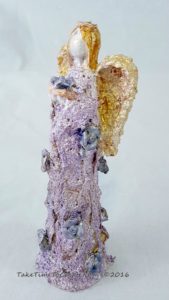
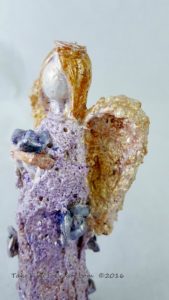
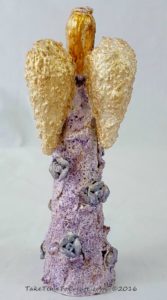
When I was happy with the final result I added a clear protective coat of spray paint. Then I let her dry and now she is ready to be displayed. I am having a blast with these mixed media projects! What should I do next?

mixed-media-angel-2     mixed-media-angel-3     mixed-media-angel-4

Related Posts  

Mixed Media Angel

Frozen Mixed Media

DIY Star Wars No Sew Tablet Cover

Hello Everyone!

Have you ever wandered around a fabric store and see some fabric that just jumps out at you and demands that you buy it? No, is that just me?

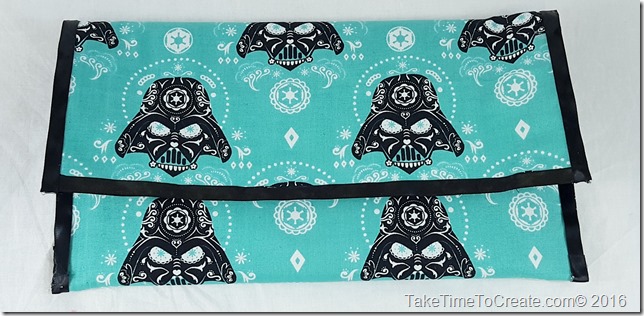
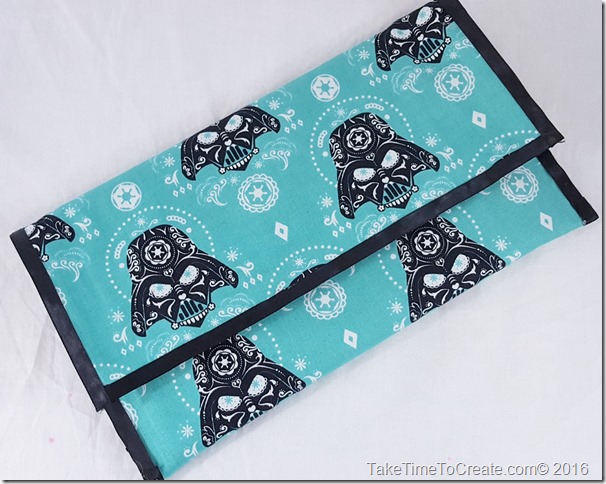
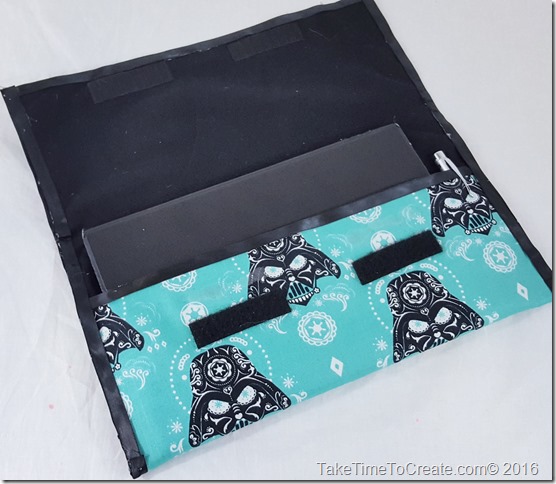
Well that is what happened with this Star Wars fabric, it demanded to go home with me and to be made into something awesome. I think I did the fabric justice by making a no sew tablet cover.

DIY Star Wars No Sew Tablet Cover

Materials:

~ Fabric I used this awesome Darth Vader fabric for the outside and I used sweatshirt fabric for the inside to help protect my tablet and provide a little cushion

~ Ribbon

~ Hot Glue and Velcro

Instructions:

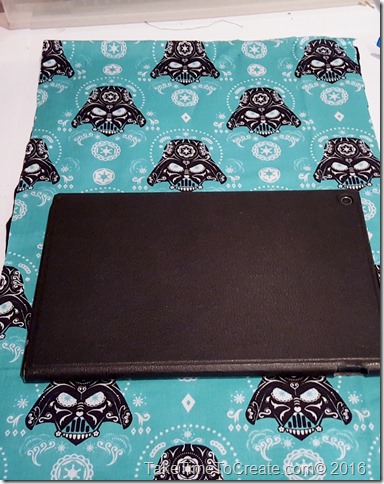
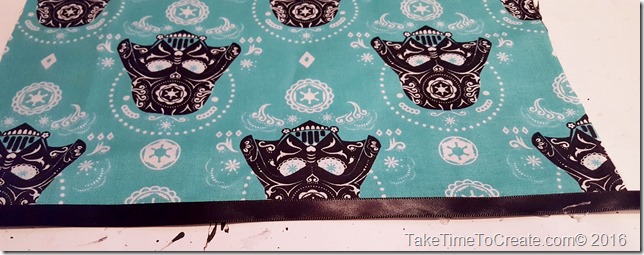
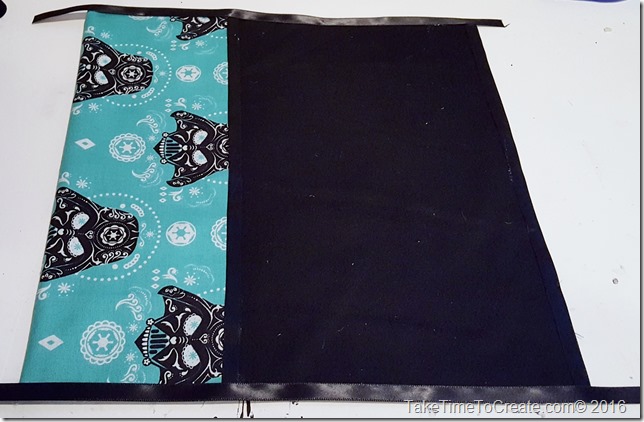
~ I laid out the 2 fabrics with wrong sides together and cut out how much I needed. There wasn’t any measuring just make sure you have a little room on the sides and enough on the length to create a flap. I left a little extra on the side (but not too much) so I had somewhere to put my stylus pen.DIY Star Wars No Sew Tablet Cover

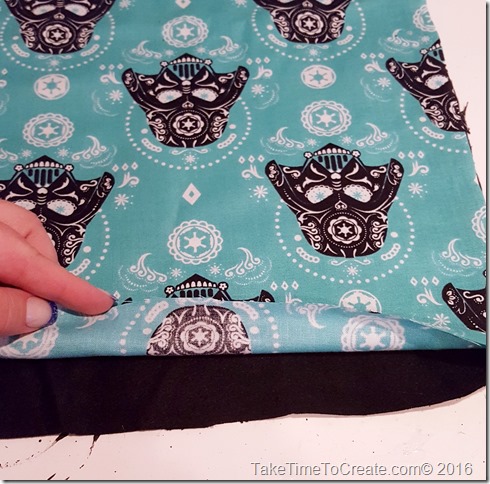
~ Hot glue the fabric together around the edges. I did a little at a time and used a popsicle stick to help smooth out the edges with out burning my fingers.

DIY Star Wars No Sew Tablet Cover

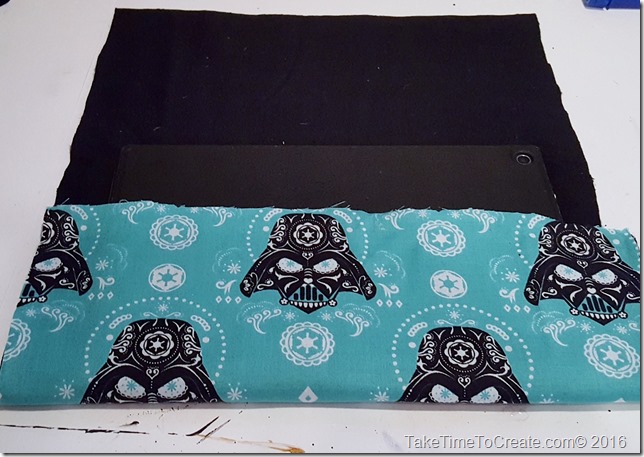
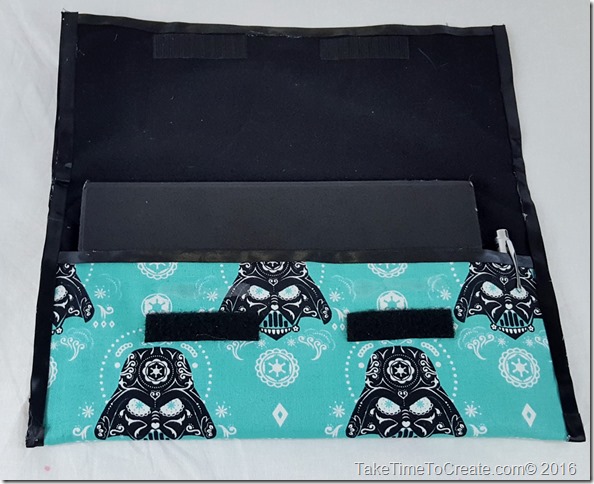
~Once you have the edges glued then fold up the fabric, make sure you have your tablet to measure what you want the pocket to end. Then glue the edges together.

DIY Star Wars No Sew Tablet Cover

~ Then hot glue ribbon around the edges. My ribbon was not wide enough to wrap around the edge of the fabric so I glue some on the front and the back of the fabric. Glue ribbon every where that you see a raw edge.

DIY Star Wars No Sew Tablet Cover

DIY Star Wars No Sew Tablet Cover

~ Then glue on Velcro to the flap to close your cover and you are done.

DIY Star Wars No Sew Tablet Cover

I am in love with the fabric, I think I need to go back and get more to make a circle skirt.

In a upcoming post I will show you how to make a sew version of a tablet cover.


DIY Star Wars No Sew Tablet Cover

DIY Star Wars No Sew Tablet Cover

TBT Handmade dollhouse from my childhood

Hello everyone!

Come with me as I take a small walk down memory lane.

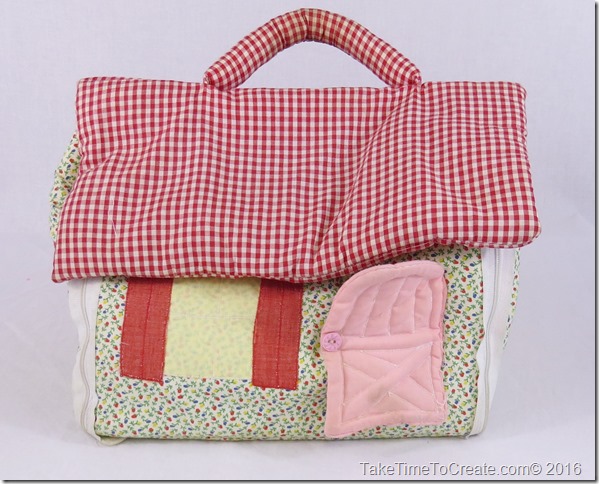
Don’t you just love finding things from your childhood? Because I do! When my sister was in town the other day she helped my mom with some cleaning and when ever there is cleaning there are discoveries to be made. The great discovery of the day (at least to me) was when  my sister found this doll house that my mom made for me when I was a child. There were some other crafting discoveries made that day that I will share with you on another day.

TBT Handmade dollhouse

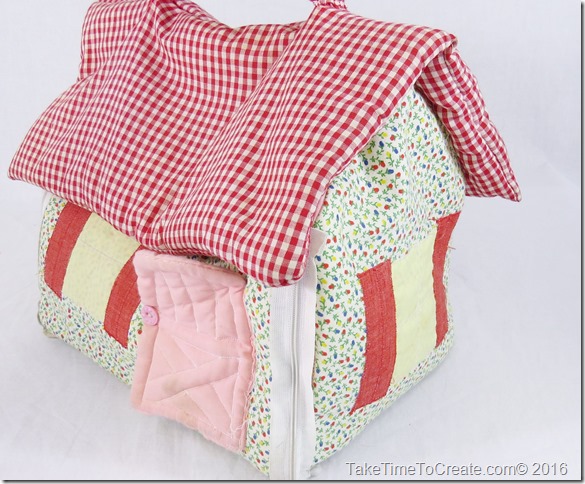
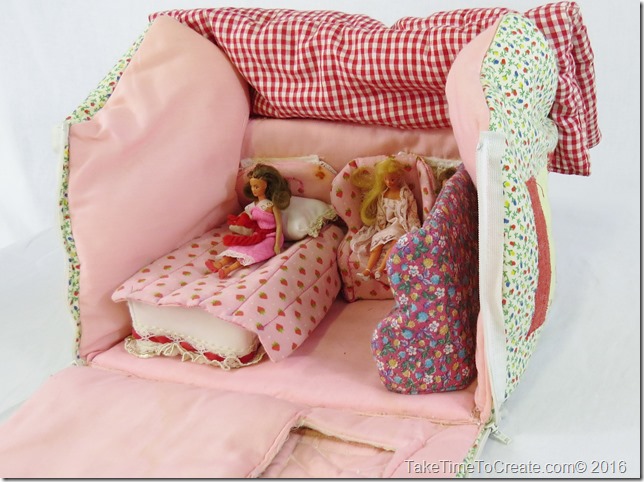
I loved this doll house! My mom made this from a pattern for my small dolls, I think they were called Glamour Dolls. I took this with me when we went to Utah to see family and I played with it all the time at home.  You can tell that it was well loved by how dirty it is (I could blame it on it being in storage for so long, but that is not were all the dirt came from…)

TBT Handmade dollhouse

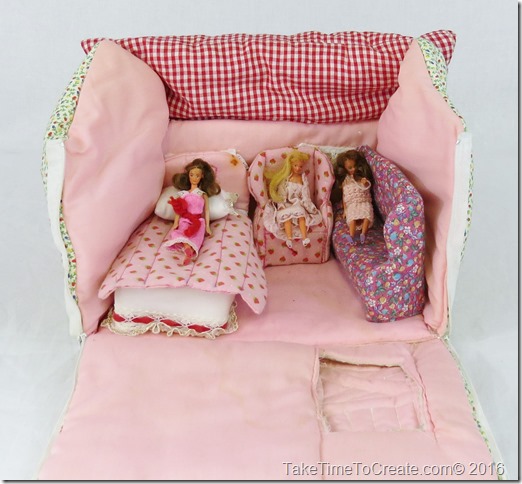
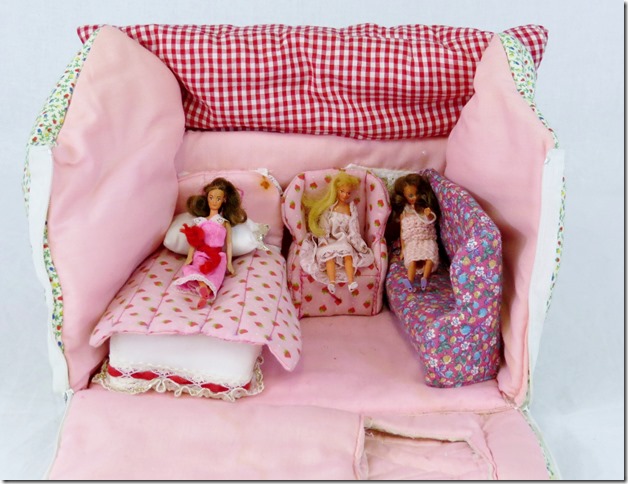
The dolls’ hair is a little crazy, and again I can’t blame that all on the storage. I was rough on dolls’ hair, I loved to cut  and dye and style my dolls’ hair. By the time I was done with them they looked fabulous, haha! And because I was my mom’s favorite child (haha) she even made clothes for my tiny dolls (which I am sure there were not easy to make). I am not quite sure why my dolls are all in sleeping clothes, maybe it is because pajamas are my favorite clothes…

TBT Handmade dollhouse


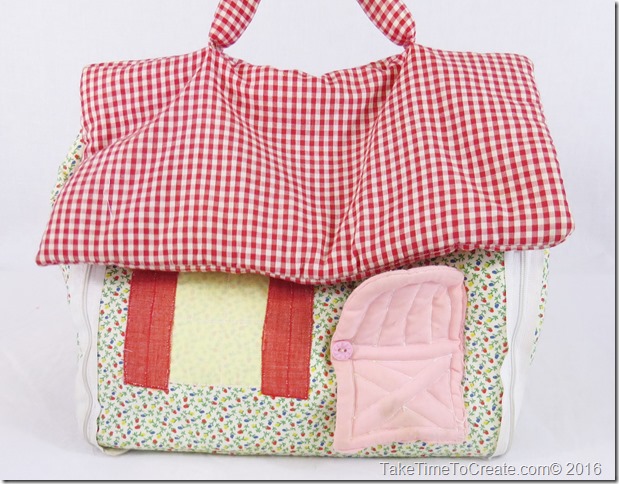
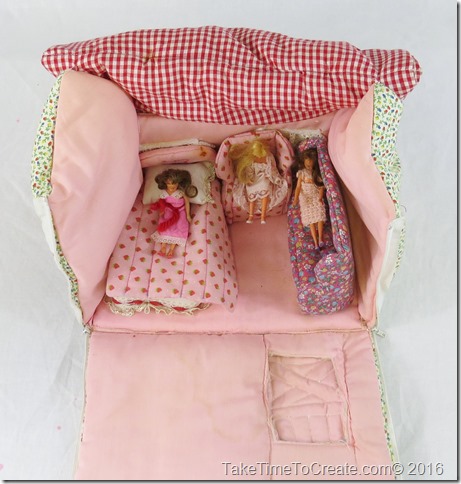
This doll house was great! The sides zip up and down and the roof is Velcroed on so everything is self contained. My mom made it with plastic canvas on the inside which helped it hold its structure, but over time the plastic has begun to disintegrate so the house is no longer holding its shape. But that is ok, I think it still looks cute. The inside has a bed, couch, and chair. The furniture is easy to move around, but this arrangement was how I liked it best. The detail that my mom put into this house is wonderful, there are ruffles around the bed and the pillow even has ruffles, you can’t see it but the inside of the windows have lace curtains on them, there is detailing on the front door and there are shutters on the window. Now that I am older I can really appreciate the time and hard work my mom spent on making this doll house.

TBT Handmade dollhouse


I remember playing with this for hours and my My Little Ponies would come by and play with the girls and my Barbie’s would stop by as well (I am sure that my Barbie’s felt like they were visiting a Hobbit house, but they came by any way) I played and pretended with this house for hours and it was so exciting to see it again.

IMG_0119

TBT Handmade dollhouse

TBT Handmade dollhouse

Thank you for taking this trip with me down memory lane. What toy did you have from your childhood that you played with all the time?

« Older posts Newer posts »

© 2025 Take Time To Create

Theme by Anders NorenUp ↑

Follow

Get the latest posts delivered to your mailbox:

%d bloggers like this: