Christmas Mason Jars

Hello Everyone and Merry Christmas!

Do you remember the Fall Mason Jars I made a while back? Here is the link incase you missed it: Fall Mason Jars

Christmas mason jar

Well I updated them for Christmas just by making a new flowery top.

Christmas mason jar

Here is how I did it;

Materials:

~Flowers

Christmas mason jar

~Mason Jar lid

Christmas mason jar

~Hot Glue

~Ribbon

Christmas mason jar


Instructions:

~ Remove the old lid and save it for next year

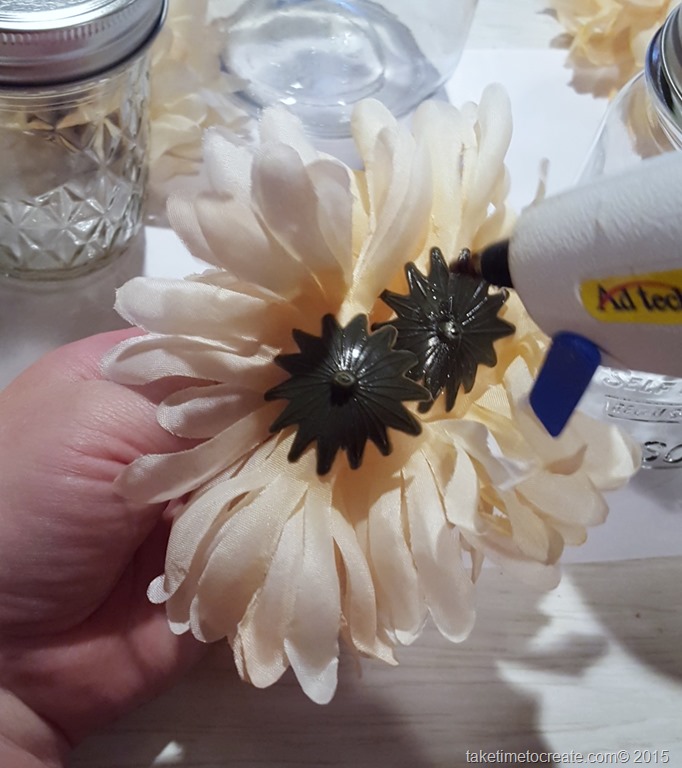
~ Take a new lid and glue on flowers. For Christmas I used Poinsettias that I found at the Dollar Store

Christmas mason jarChristmas mason jar

Glue ribbon around the edge

Christmas mason jar

Fill with Candy and you are done. I didn’t use any window clings this time because I thought the red and green candies were enough.

Christmas mason jar

Christmas mason jar

Christmas mason jar

I am loving how easy it is to make these jars and how easy it is to store just the lids. And my boys love the candy in the jars Smile

A Rhinestone Cast! Guest Blog by Kathy Sigda

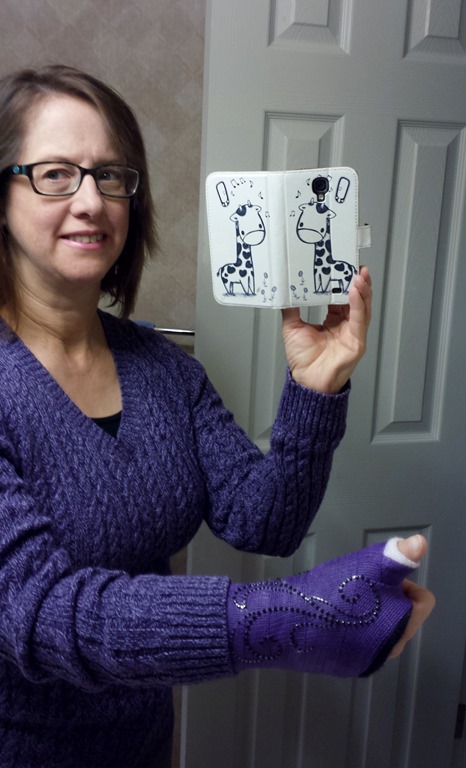
Kathy is my good friend and over Thanksgiving she fractured her arm Sad smile Not a good way to start the holidays, but she found a way to make her cast fabulous!


20150805_081746         20150806_095929

Here we are at Disneyland this summer! Best trip ever, and if you look in the background you can see the awesome face my son is making. Smile 


Here is how she went about blinging out her cast


A plain cast on my left arm just was not working for me, it was really cramping my style, even though I got to pick out the color and it was purple. Why the cast? Well, here’s the real story, although people keep telling me to just say that I was fighting off a bunch of ninjas. I was shoveling our driveway the day after Thanksgiving, in preparation to move the car so I could get to the attic to bring down the Christmas decorations. There was only about an inch of snow, but it was a little slick so I went inside to put my boots on so that I wouldn’t slip! Well that didn’t work out very well, I slid on the ice, caught myself with my left arm, and broke my wrist! A trip to the ER instead of a trip to the attic, and the Christmas decorations would have to wait another week.

Staring at my purple cast, I thought to myself, “This cast is pretty ugly. How can I make it better? What Would Linda Do?” (Linda being a dear friend of mine and the owner of this blog). Then a mutual friend of Linda’s and mine suggested rhinestones! What a great idea!

Here is a picture of the purple cast, plain and boring.

20151210_162256

Although Linda has a lifetime supply of rhinestones, I don’t have quite that many. I decided to go shopping! Found a nice set of designs at Hobby Lobby (in the scrapbook aisle), and it was on sale! Jackpot! I paid $3.50 for this.

20151210_162315

It was a simple process to peel and stick one of the rhinestone designs onto the cast. It adhered quite nicely to the cast material. I’m sure my friend Linda would take the time to glue each rhinestone on with E-6000 glue, but I decided to try this and see if it will stay. If not, there are still three more designs in the pack!

20151210_162522     20151210_162538 


I am a little concerned about what will happen while I sleep, so I thought I would cover it up with some Glad Press-n-Seal. I have learned this stuff is amazing for cast care, you can cover the cast with it and take a shower! It sticks to just about everything, I am hoping it will not stick to the rhinestones but will just protect them and then will peel off easily in the morning. We’ll see.


20151210_194512

The blinged-out cast, covered with a layer of press-n-seal

20151210_194529

Update: The next morning, it still looks great!


20151210_200127

20151211_074546(1)


I am so glad that it worked and that Kathy has her bling on as she is healing. BTW love the giraffe cell phone case! Get better soon!

Easy DIY Scarf Holder

I know I am way late to the scarf train, but now that I am aboard I am all about scarfs! I love how you can take a basic outfit and dress it up with a simple scarf, and they make your wardrobe so much more versatile!

Well now that I have accumulated a fair number of scarfs I ran in to the problem of where to store them. I wanted the in a location that I could see them so I didn’t forget about them in the morning. Also I wanted the scarfs to hang so they didn’t get too wrinkly (less ironing, which is always a good thing)

So we can up with the solution of finding a way to hang them on the back of the closet door. Please excuse any mess you see in my closet, organization is an ongoing problem in there.

Easy DIY Scarf Holder

This is a fast and easy way to hang your scarfs

Materials:

~ Dowel Rod

Easy DIY Scarf Holder

~ Adhesive hooks (I used 3M Command hooks)

~ Level (for hanging)

~ Duck Tape (Used this great purple Prism color)

Easy DIY Scarf HolderEasy DIY Scarf Holder

Instructions:

~ cut your dowel to length. I wanted 2 rows, so I just cut them the length I needed. We had a saw at home, but the home improvement store can cut it for you if needed.

~ I was worried about the wood snagging my scarfs so I decided to wrap it in Duck tape. It also has the added benefit of being purple and sparkly.

Easy DIY Scarf Holder

~ Attach your hooks to your door, or where ever you want your scarf holder. (My fabulous husband was nice enough to help me hang it up and make sure it was level)

Easy DIY Scarf Holder

Easy DIY Scarf Holder

~ Add the dowel rods

Easy DIY Scarf Holder

~ Add your scarfs and you are done!

Easy DIY Scarf Holder


It was that easy!

Gallery Wall

Today I thought I would take a moment and show you my gallery walls that are in my house. I love to have photos of my family and our favorite vacation spots on our walls in our house. Since we don’t have a ton of wall space we needed to be creative in how we display our pictures. So we set up two gallery walls. One in a 3 x 3 grid and looks a little modern with our black and white pictures. The other is a little more free flow. I will show you both and how we put them together.

gallery walls

gallery walls

Black and White Grid

This was a fun  way to show our favorite vacation spots. We love to travel and we have tons of pictures from our travels, so what better way to show where we have been than with a gallery wall. The frames are 12 x 12 black frames I got at Aaron Brothers, but I think you can get them pretty much anywhere, including online.  I had our photos printed at Walmart in black and white in and  8×10 size. I added a blurred boarder around the edges. When I got the photos I glued them on to a 12 x12 piece of card stock and framed the photo. We then hung them in a 3 x 3 grid pattern. Very easy to do and it is a nice way to show case you travel photos.

Here is a close up of the photos

gallery wall

If you want to see how we painted our couch you can see this blog post.


gallery walls

Gallery Wall

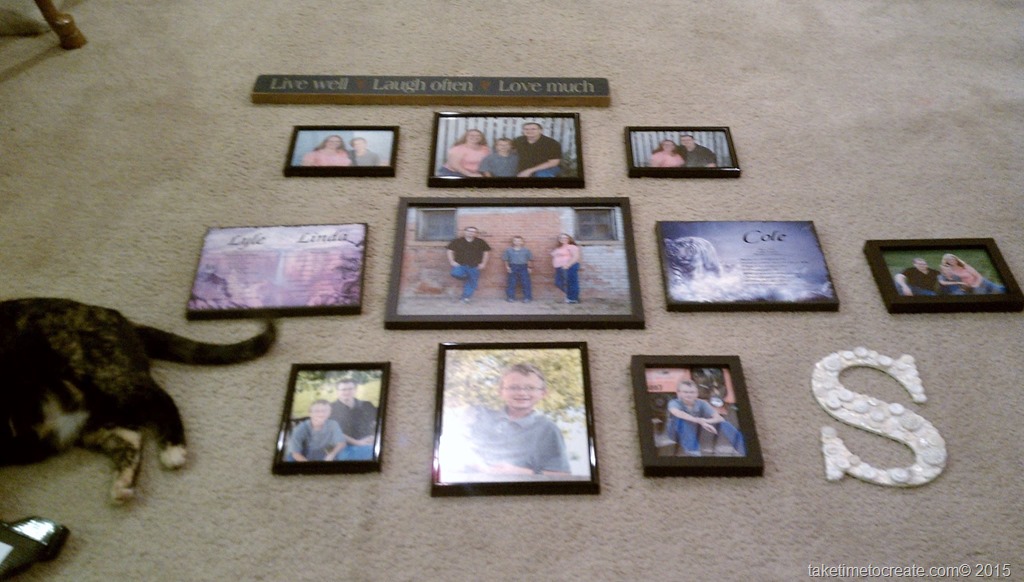
The other wall was a little bit less defined. Going up our stairs we thought it would be fun to show our family pictures and other things that mean a lot us. First we laid it out on the floor (and yes that is Starlight “helping”). I am so sorry for the blurry pictures, these are just terrible…

gallery walls

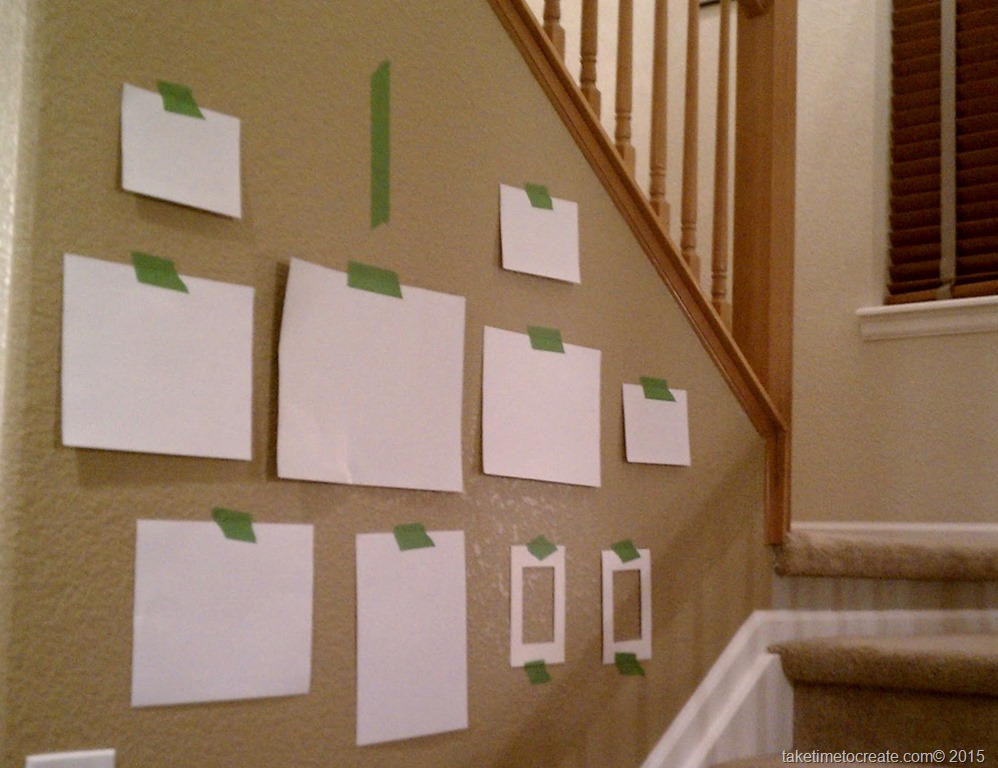
Anyway we laid out that pattern and when we found a pleasing layout we took papers in the sizes of the frames and laid it out on the actual wall so we could get a good idea of placement. Once we were happy we pounded in nails and hung up everything.

gallery walls

On this wall we have our family pictures, a favorite saying (Live well, laugh often, love much) a letter S that I put buttons on (the how to blog post is here) and a beautiful hand pained tile we got in the Bahamas. And we have prints with what our names mean. It is a wonderful grouping of things we love.

gallery walls

gallery walls


What do you think of our gallery? How do you hang pictures in your home?

DIY Magic Towel Wall Art

I am loving the magic towels. The images are so fun and colorful. The Batman ones really stood out for me so I decided that I needed some wall hanging for our Fandom Basement.

Our basement is where we celebrate all fandoms! You can go back to this post and see how I made the Tardis Door. Oh and do you like my hand painted Deathly Hallows symbol and Captain America shield? Just a few details to the Fandom Basement. We love just about all the fandoms…

DIY Magic Towel wall art

This wall art is easy and fairly inexpensive. 

Here is what I did for this wall art.


Materials:

DIY Magic Towel wall art

~ Magic Towels (I got mine at the dollar store)

~ Iron

~ Foam board (I got mine at the dollar store)

~ Craft Glue (I used Aleene’s)

~ Ruler or straight edge for a cutting guide

~ Exacto knife or rotary blade.

~ Ribbon

~ Ticky Tac, or some way to hang it.


Instructions

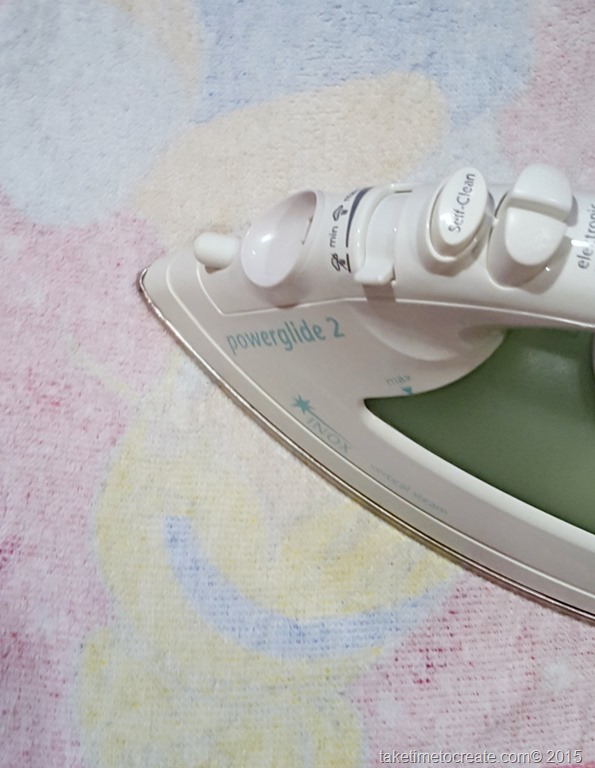
~ I washed my towels first. Once they are thoroughly cleaned I ironed them nice and flat. Then they were good to go!

DIY Magic Towel wall art

~ I stacked them on top of each other so that when I I cut the towels they were the same size. I used a ruler for a guide to make sure it was straight.

DIY Magic Towel wall art     DIY Magic Towel wall art


~ Once it was all cut I spread craft glue on the foam board. Then I placed the towel on the board

DIY Magic Towel wall art     DIY Magic Towel wall art

~ After the towel was secured to the foam board I trimmed the edges so that it looked good.

DIY Magic Towel wall art


~ After it was cut out I trimmed the top edge with ribbon. This was a good way to hide the frayed edges. 

DIY Magic Towel wall art

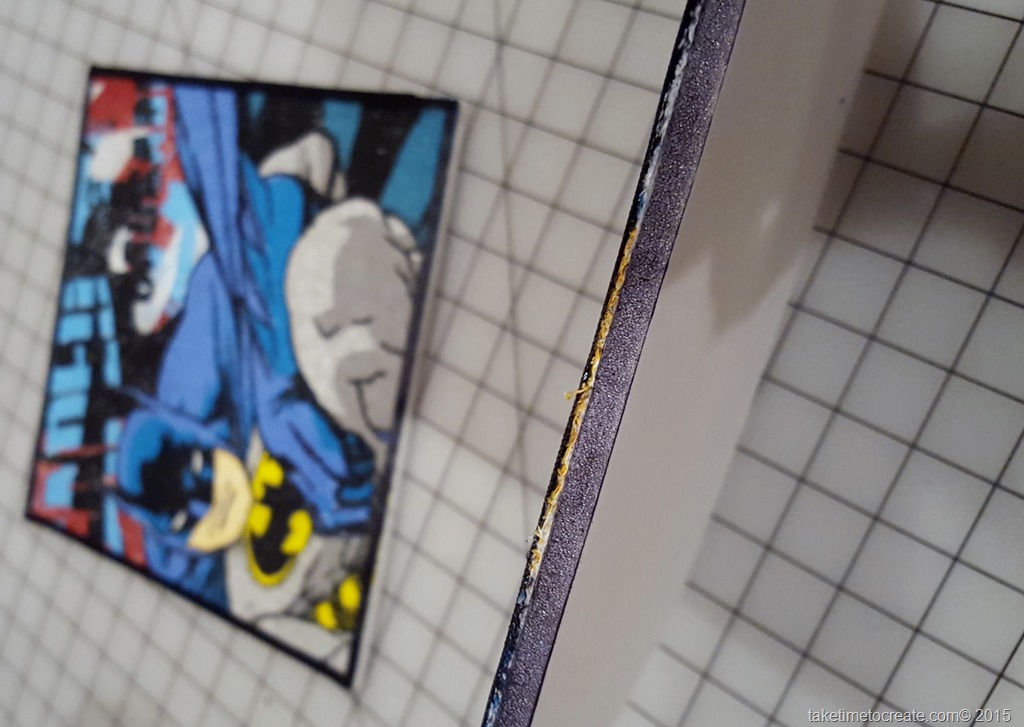
~Then I noticed that the white foam edges that were showing did not look very good, but I was out of ribbon so I did the next best thing and colored the edges with a Sharpie.

DIY Magic Towel wall art


~ Before hanging up let it dry completely. I would place books on top so that it stays flat. I did not do this step and my art curled a little bit and so I had to flatten it after it was dry.


~Then hang it up. I used Ticky Tac, but you can use just about anything you want.


DIY Magic Towel wall art

DIY Magic Towel wall art

Not bad for just a few dollars. These would looks great in a kids room or bathroom and when they get tired of it it is easy to change out.


This time I mounted it on foam board, but next time I am going to try and frame the towel, or stretch it on a 12×12 canvas. So many options, I just hope I have enough wall space.


That is it! What do you make with your towels?  I would love to see the art you create.
I am tired

I will give you all fair warning that this post will contain swear words. What a way to start this blog post. So if you don’t want to read those naughty words then stop right now. If you don’t have a problem then let’s continue on.

I am tired of the BS

I don’t mean for this to be a complaining post, I did want to share what I was going through and how I handled it.

Like I said, I am tired. What I mean by that is, I am tired of all the bullshit that is going around. Whether it is from family, friend, coworkers, customers, or vendors I am tired of all the bs. I hear a lot of complaints without solutions, whining without anyone doing anything about it. People just like to carry their bs around and spread it all over the place, and I am tired of it. I don’t mean to be a “complain-a-saurus” so I am surrounding myself with people who are not spreading the BS, but people who are trying to make the world a better place.

tired of the bs

I have been calling people out on their bs, which might not leave me with many friends, but that is ok.

tired of the bul

By now you are probably wondering what this is all about, and how  does it relate to creating and crafting. Well, I will tell you. I was talking about how tired I am of the BS to my husband and he jokingly suggested that I stitch that up some way and display it. I thought that was a fantastic idea! So I decided to make a cross stitch pattern with my new saying. I have never made a pattern before and I have to say it was a lot of fun.  I know it is not perfect, but it is my first try. If you have any suggestions on making patterns I would love the help.

I decided this was not complaining it is taking a problem and making something from it.tired of the bullshit

For this pattern I just used an  Open Office grid template and made a grid in the spreadsheets and put and X where I wanted a stitch. Pretty easy to create.  I am not sure I will actually make in the colors I picked, but it was fun to play around with the colors.

I am attaching a pdf of the patterns on the blog so that you can print one up and make a cute decoration with the saying “I am tired of the bullshit”. I made 3 versions, so make the one you like best and be sure to share it with us when you are done. I am planning on making one as soon as I am done with some other projects.

Thank you for listening to my rant. I love my readers, you guys are the best and I truly appreciate you. I will try not to do this too much. But I am glad that even with my frustration I was able to create something new.And while I was making the pattern I couldn’t stop laughing. I giggled and laughed the entire time, and to me that is the best part of the whole experience.

And that is what this is all about, taking a deep breath, and creating something new.

I am tired of the BS

tired of the BS

tired of the Bull

tired of the bullshit

Wake Up And Be Awesome

Wake up and be awesome is my motto. Everyday you have a choice of what you want to be and awesome is my answer. It is not always easy, but I do try.

So what better way to show my love for awesomeness than to make a wall hanging? It is fun to look at first thing in the morning and they day is always better when you start off with a smile.

wake up and be awesome diy project

Materials:

~old painting that you are willing to cover up. I found mine at Goodwill

~ paint (I am using acrylic paint that I found at the craft store)

wake up and be awesome diy project

~ Alphabet stickers, I was looking for big stickers and I found mine at Target near the poster board section

~ Rhinestone (of course I need rhinestones! I think this is a prerequisite for all my crafts Smile)
~ Glue to glue on the rhinestones (I am using Aleene’s Jewel-it glue)

wake up and be awesome diy project

~ Foam paint brush


Instructions:

~ Take your old painting and wipe clean. A damp paper towel should do the trick. I found this painting at Goodwill. It is not an actual painting but a print on canvas. The style doesn’t match my décor but the colors do. So I thought it would be perfect for this project.

wake up and be awesome diy project

~ Gather your supplies

wake up and be awesome diy project

~ I cut out the letters and laid them out to make sure everything fit.

wake up and be awesome diy project

~ Stick the letters on the canvas. Really press them down to make sure no paint seeps under the letter

wake up and be awesome diy projectwake up and be awesome diy project

~ Start painting.  Cover the entire canvas. Take your time and make sure it is all covered and looks good.

wake up and be awesome diy projectwake up and be awesome diy project

~ Before the paint completely dries take the letters off and throw them away. Check for sections where the paint might have seeped under the letter and clean it up. I used a Q-tip to make the letters look crisp.

wake up and be awesome diy project

I am not sure how anyone gets anything done without a little cat help. Smile It seems like every time I start a project Starlight has to be in the middle of it. But she makes it more fun.

wake up and be awesome diy project

~ Then I started adding rhinestones. I think everything is better with a little sparkle. I just added a few to the left edge of the each letter in the word Awesome. I think it added just the right amount of sparkle.

wake up and be awesome diy project

~Hang it on you wall (mine is in our bedroom) and get ready to wake up and be Awesome!

wake up and be awesome diy project

DIY Mason Jars for the Fall

Mason jars are the best. What is not to love, they are the perfect storage container for just about anything. Also, when I get a jar from my mom there is a good chance that it might already be filled with yummy jelly or jam or salsa or something else equally as good. And that makes the jar that much better.

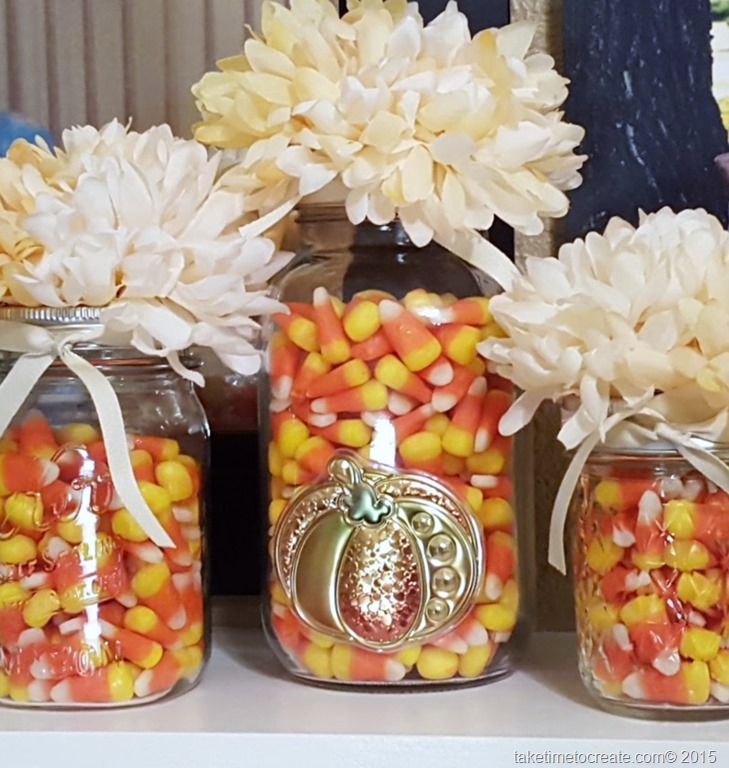
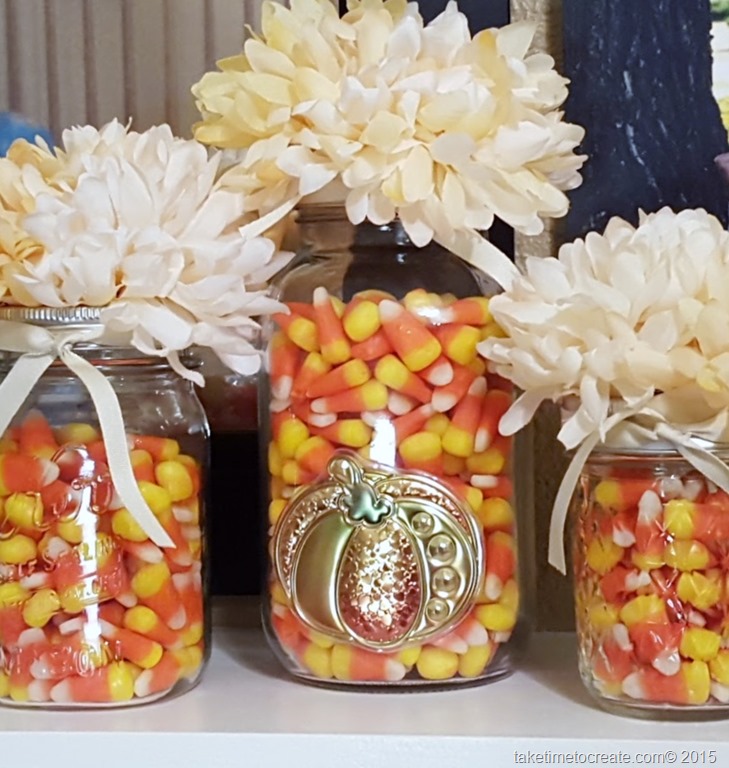
But for this DIY I am using empty jars that will be filled with candy corn. For us the candy corn season is a major event. And yes, we celebrate the candy corn season very enthusiastically, from beginning to end.


DIY Mason Jars for the fall

I decided to make a festive mason jar that can hold our yummy candy corn and look cute at the same time. Also, we live in a very small house and any decorations need to be small, or very versatile. These mason jars are easy to switch out with the various seasons. In Dec I will show you my Christmas mason jars. So lets get to the tutorial.

Materials:

  • Mason jar. I pick up some at the dollar store and used ones from my mom. Any jars will do as long as they have the lids with them.

DIY Mason Jars for the fall

  • Fake flowers, I picked mums for the fall, but any will do

DIY Mason Jars for the fall

  • Hot glue
  • Ribbon
  • Window clings. Here are the ones that I found at the dollar store, I love how it looks fall and festive, with out being over the top.

DIY Mason Jars for the fall

  • Candy Corn, or any candy you want to fill your jar with

Instructions:

~ First cut off the stems to your fake flowers. You still want the green part under the flower to hold everything together. I used 3 flowers per jar, but depending on your flowers you might use more or less on your jar.

DIY Mason Jars for the fall

~ Using hot glue, glue the flowers to the top of the jar.

20151017_174131DIY Mason Jars for the fall

DIY Mason Jars for the fall

~ using hot glue, glue your ribbon to the ring of the jar. by only gluing things to the jar lid and the ring and not the jar you are able to switch out the lids (rather than switching out the entire jar) for different holidays.

DIY Mason Jars for the fallDIY Mason Jars for the fallDIY Mason Jars for the fall

~ add a window cling to the jar for more festivity. Window clings are non permanent and reusable making them perfect for this project.

DIY Mason Jars for the fall

~ Add your favorite candy and enjoy! That is it! Enjoy  this easy DIY for fall!

If you want to know how I made the lanterns you can go to this blog post.

And if you want to know how we made the fireplace mantle you can go to this blog post.

DIY Mason Jars for the fall

Guest blogger- Kim teaches us how to transform old costume jewelry.

Not long after I started this blog I mentioned it to my friends and family that I had a blog and if anyone wanted to be a guest blogger to just let me know and I would feature them. Well I wasn’t surprised that my oldest sister was the first to offer.

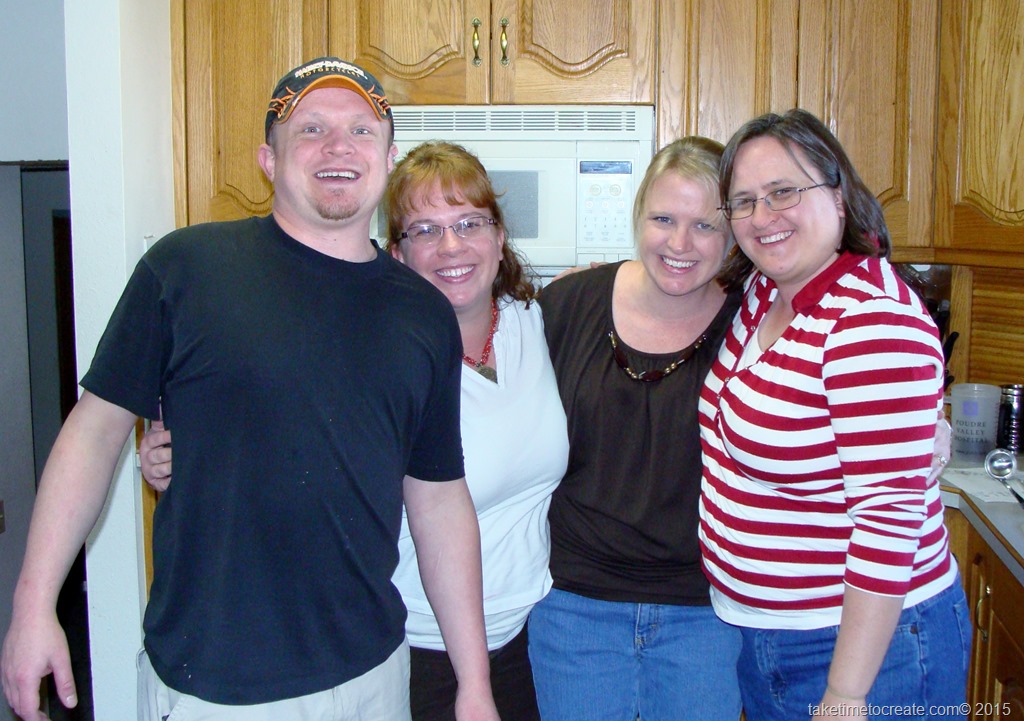
Here is a picture of me and all 3 of my siblings.

taketimetocreate.com(Sam, Linda, Valerie, and Kim)

I can’t believe that this picture is 4 or 5 years old (yikes, it is time for us all together and take some new pictures. My hair hasn’t been red in years…),but you work with what you got and this is it. That is the problem when everyone lives all over the country, it is hard for all of us to be in the same city at the same time.  And when we do get together we don’t think to get the camera out and take pictures. I think this has just become one of my new priorities, get new family pictures.

But before I go into the tutorial I thought I would give you a little background about my family. When I was typing this blog post I realized that I haven’t spent much time talking about my family, other than my husband and son. I have 2 older sisters and a younger brother. So that puts me in the middle of the kids. It was fun having so many siblings growing up, but sometimes I got lost in the mix. I am sure that anyone with lots of siblings feels the same way.  Today’s guest post is from my oldest sister, Kim.  She is about 7 years older than me and I always looked up to her. She now lives in Arizona so it is hard to get together, but when we do see each other we always have fun! Kim has a wonderful talent making jewelry. Whether it is her own creation or taking something and reimagining it. I love seeing what she comes up with just some beads and wire.

Here is the beautiful bracelet that she made me soon after my son was born.  It is silver and garnet (his birthstone) and gorgeous and and it fits perfectly and every time I wear it I get tons of complements.

taketimetocreate.com

In today’s guest post I will show you the awesome jewelry that Kim made from old costume jewelry that she inherited from our Great Grand Aunt Nancy.

Kim’s Guest Blog Post!

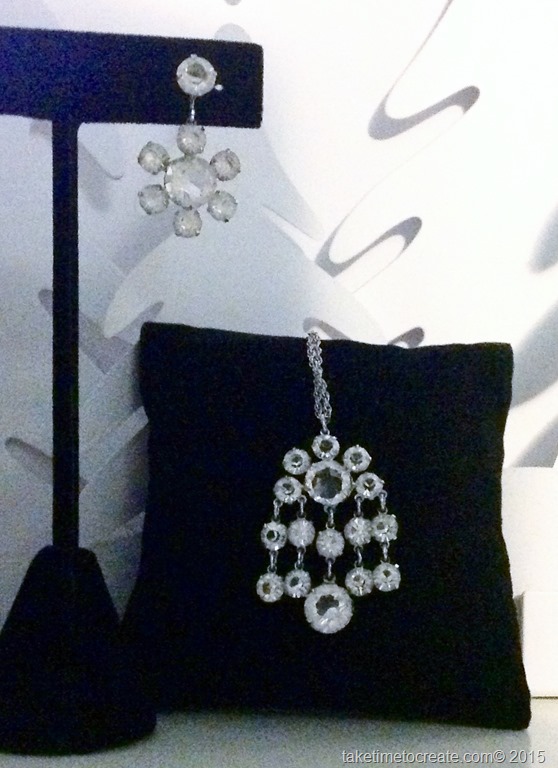
Ever find that fantastic old piece of jewelry but you cannot wear it in the condition you found it in. This happened end to me. My sisters and I were helping our mom go through her jewelry and found that she had our Great Grand Aunt Nancy’s jewelry box and I found this pendant and earrings and I cannot resist some good sparkle.  (Sorry took this picture after I had taken one earring apart)

reimagining old costume jewelry
The pendant was easy just a longer chain. Aunt Nancy was 4’8″ and a petit dancer. I am not.
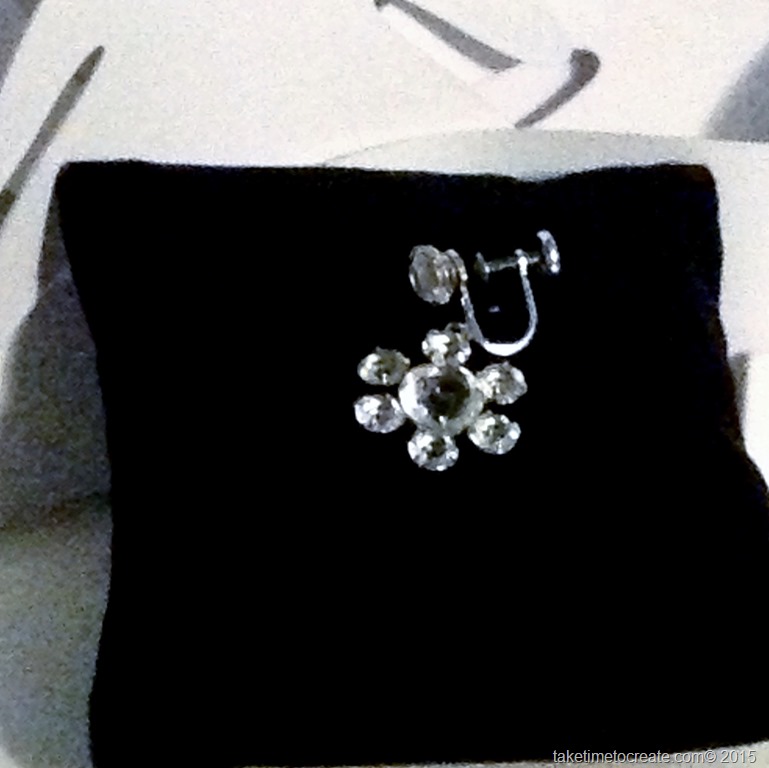
Then the screw on clip earrings were next.

reimagining old costume jewelry

I removed the dangle. The key is to examine the loop and find the one that has the break. Then twist the ring open. Most of the time in these cases the ring with the break is found on the clip side and the dangle is whole.

When working with old jewelry be sure you check the integrity of the ring. If it is showing significant wear then it may need additional repairs before continuing. (If I find one that needs repair I will show this in a future posting)
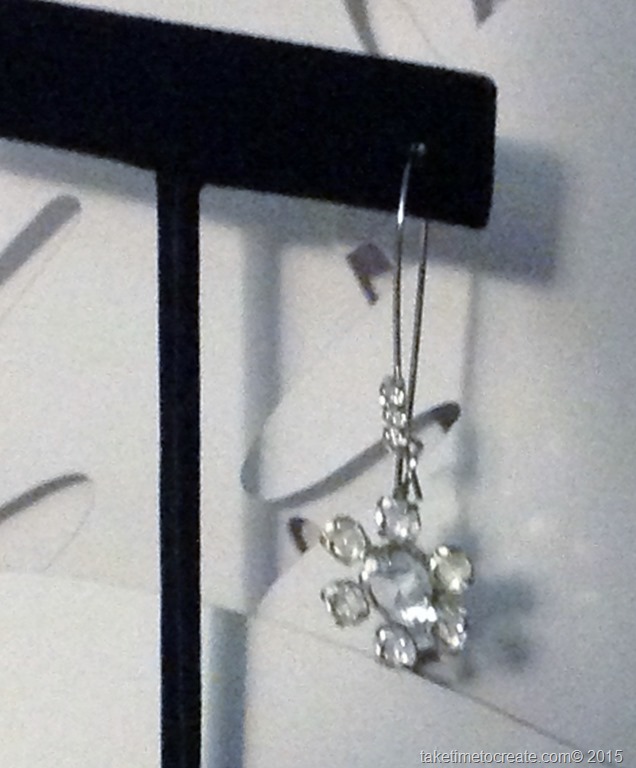
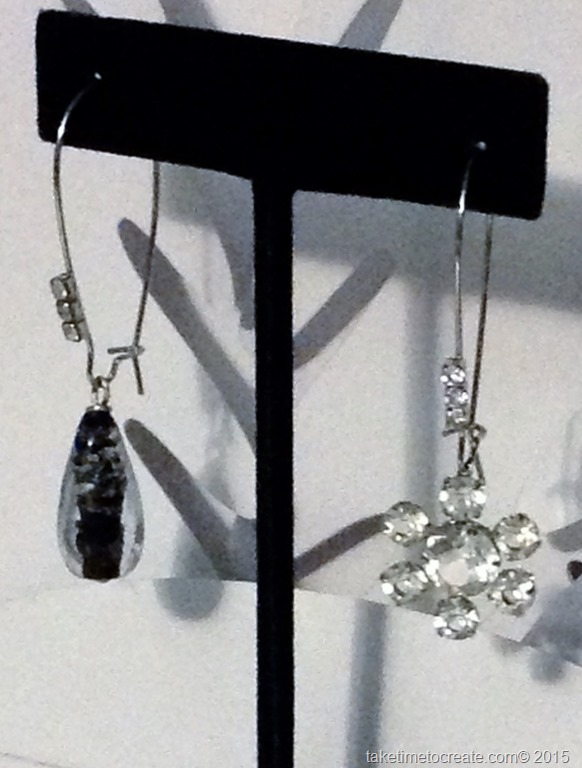
I then added the dangle to an ear wire. By using a modern long ear wire I was able to update the look without compromising the original charm.

reimagining old costume jewelryreimagining old costume jewelry
I found these ear wires at Hobby Lobby but they can be found at any number of craft and bead stores or online. I liked these because the “diamonds” on the ear wire complement the crystals in the dangles.

I also love that the dangles are so easy to remove because then I can make a bunch of different dangles and change them out.
Have fun with old charm and modern looks.

Thanks for sharing Kim, the earrings and necklace turned out beautifully! I can’t wait to see what she comes up with next!

DIY Cinderella draw string bag

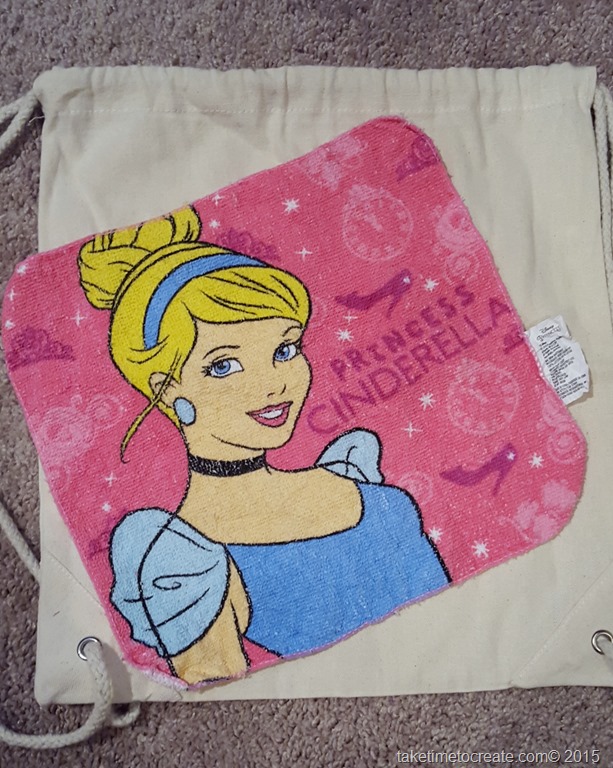
Last weekend while I was at the dollar store I saw these magic towels. I had seen them before and I thought they looked neat, but I don’t like using them as actual towels. They are thin and scratchy so I have never purchased them. When I saw them this weekend my crafty, creative juices started flowing. So I bought a few or 15. Whatever. I am sure I will find uses for them.

Here are some of the awesome magic towels I picked up. So many choices! I can’t wait to get my crafting on!

diy Cinderella magic towel drawstring bag

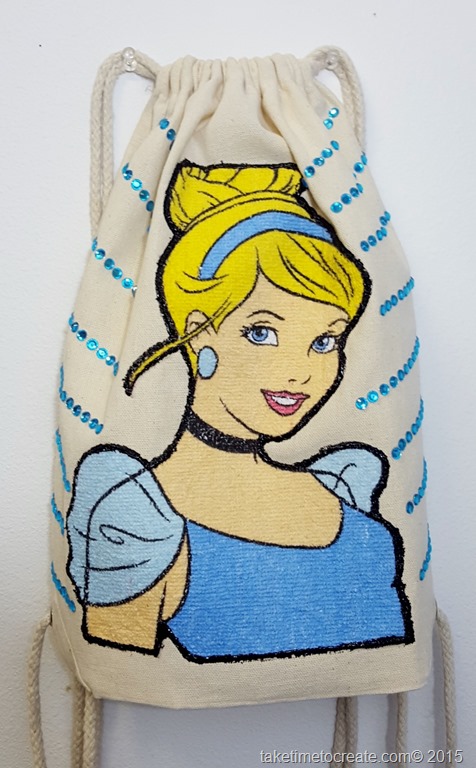
For this project I thought I would decorate a plain drawstring bag. I have to say that everything is better with sparkles and Cinderella!

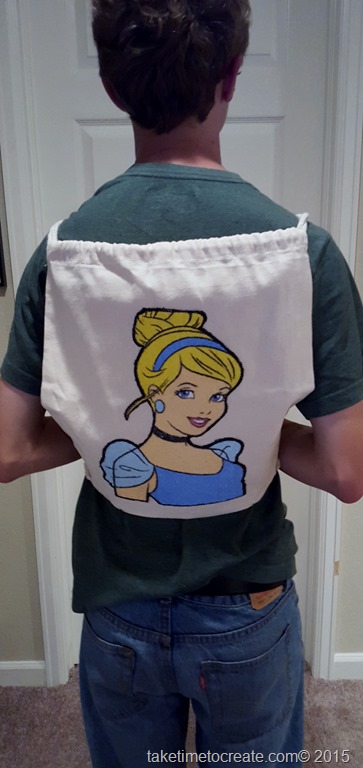
My son is so patient and tolerant modeling my new bag. He didn’t even protest when I asked him to model my bag. He makes my heart sing Red heart

diy Cinderella magic towel drawstring bag

This is pretty easy to do and you can use any magic towel to customize it to  you heart’s content.

Materials:

~ magic towel (prewashed and ironed. You want to make sure it is flat and ready to use)

diy Cinderella magic towel drawstring bag

~ Wonder under or any iron on fusible web. ( I just used what I had on hand)

diy Cinderella magic towel drawstring bag

~ Fabric Paint

~ Scissors

~ rhinestones

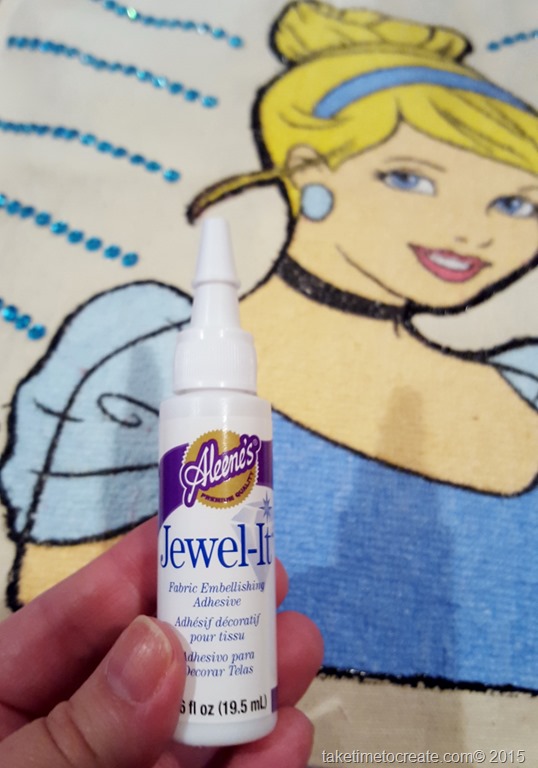
~ Rhinestone glue. ( I used Aleene’s Jewel it)

 diy Cinderella magic towel drawstring bag

Instructions:

1. Wash and dry and iron your magic towel. That gets it ready for its transformation.

2. Iron your drawstring bag. I got my bag at JoAnns, but I am sure you can find them just about anywhere.

diy Cinderella magic towel drawstring bag

3. Iron your fusible web on to the back of the towel.

4. Carefully cut out Cinderella.

diy Cinderella magic towel drawstring bag

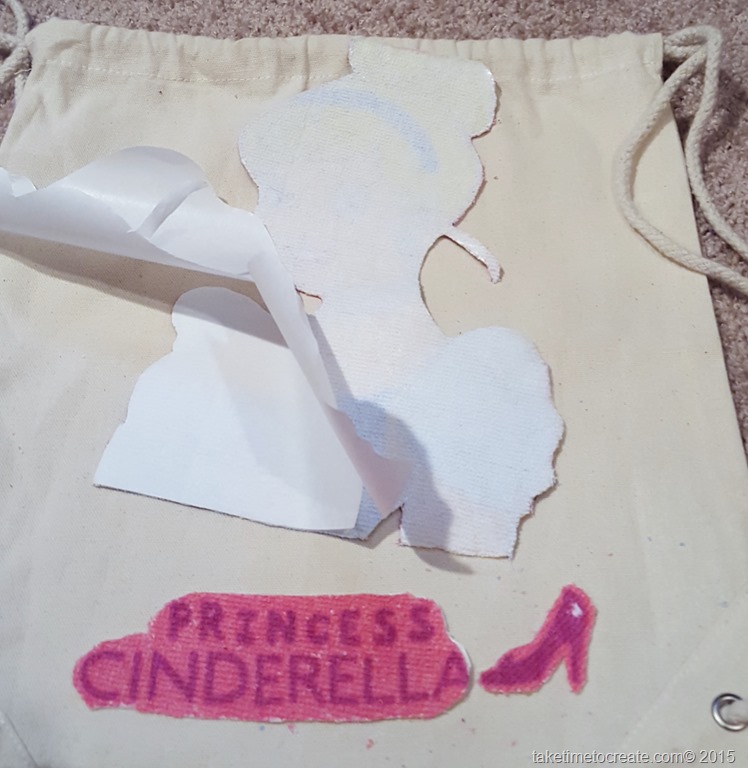
5. Peel the backing off. You can see the Cinderella wording and shoe, but I decided not to use them.

diy Cinderella magic towel drawstring bag

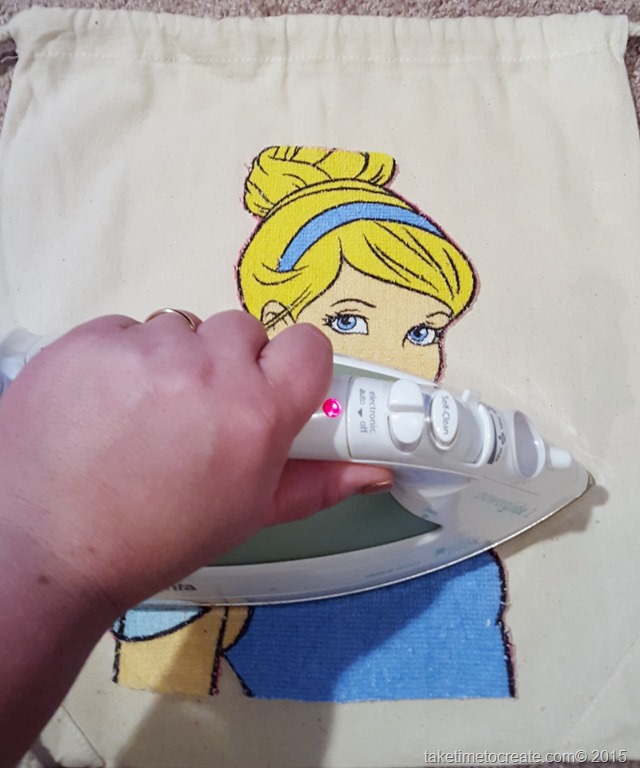
6. Iron Cinderella to the bag.

diy Cinderella magic towel drawstring bag

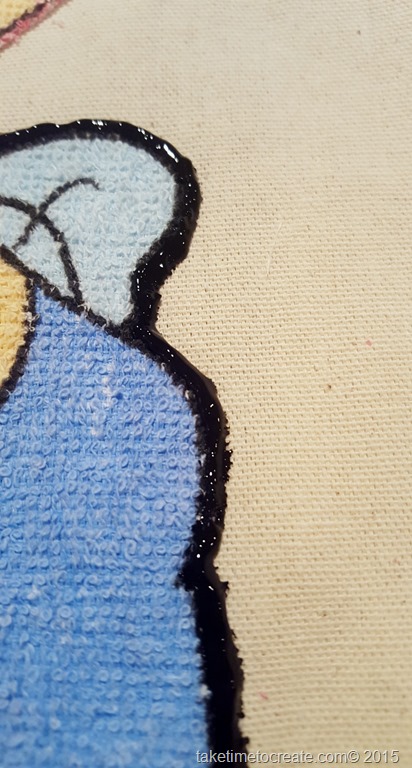
7. When Cinderella is cool start going around the edge with fabric paint. I found that I had to make a thicker line than I usually do because of how thick the towel is. I wanted to make sure the towel won’t unravel and that Cinderella stayed in place.

20151003_115737_001      diy Cinderella magic towel drawstring bag

 diy Cinderella magic towel drawstring bag

diy Cinderella magic towel drawstring bag

Once that was done I had Cole try on the bag and I decided that it didn’t have enough sparkle. I am sure you surprised that I didn’t think it had enough sparkles, right?

diy Cinderella magic towel drawstring bag

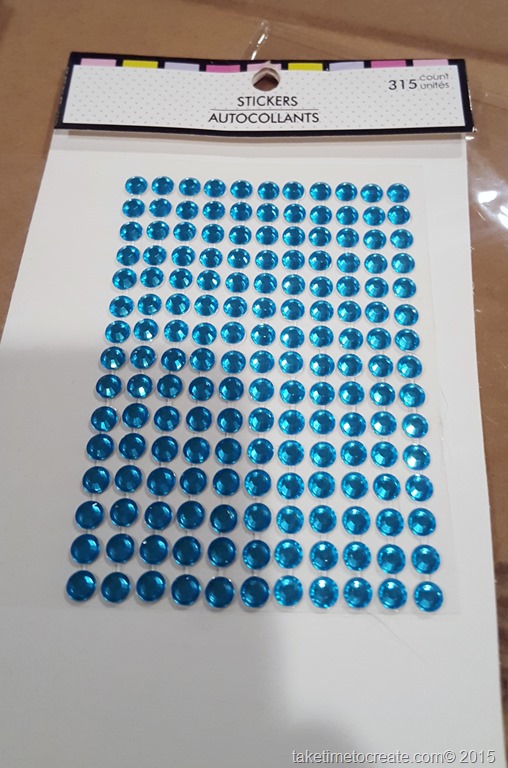
8. I had these packets of rhinestones that I found at the dollar store that I thought would work perfectly. They are connected together in strips, which worked perfectly.

diy Cinderella magic towel drawstring bag

9. I laid the strips out in a pattern that I liked

diy Cinderella magic towel drawstring bag

10. Once I got it how I liked I glued the rhinestones down. This is to make sure the rhinestones stay on the bag.

11. let dry over night and then you are ready to rock an awesome Cinderella bag. Doesn’t Cole look great rocking the bag? He is a great sport.


diy Cinderella magic towel drawstring bag

diy Cinderella magic towel drawstring bag

diy Cinderella magic towel drawstring bag