Month: September 2015

DIY Tangled T-shirt

Any trip to Disneyland requires  new t-shirts, right? I will use any excuse to make a Disney shirt!

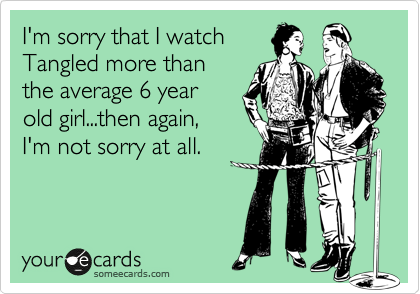
I love Tangled, it is one my favorite movies. This meme describes me perfectly.


So what better way to show my love than to make a Tangled t-shirt.  Here I am wearing my shirt at California Adventure. You can barely make out my Steampunk Mickey ears. I will be doing a tutorial on those in the the next few weeks or so!

DIY Tangled t shirt

Materials

~ Pre washed t shirt

~ Tangled sun stencil. I got mine off the Disney Family Fun website (link here)

~ Fabric Paint

~ Freezer paper

~ Exacto knife

~ Cardboard

~ Iron on transfer paper


Instructions

1. Cut around the sun you want to make into a stencil for your t-shirt

DIY Tangled t shirt

2. Tape your sun to your freezer paper (I forgot to take picture of this step, so please as me questions if I am unclear) Cut out your sun like a stencil and then you will iron your freezer paper to your shirt. Place the shiny side down and cover with a cloth and iron the stencil into place.


3. Start filling in the sun with fabric paint. Protect the back of your shirt with cardboard. The glittery the better.

DIY Tangled t shirt

4. Let this dry over night. While this is drying you can move on to the next step.

DIY Tangled t shirt

4. Find a Flynn Rider wanted poster online. There are tons out there so find one that you like and will work for you


5. Print on iron on transfer paper


6. Iron the wanted poster according to the directions.

DIY Tangled t shirt

7. Let it cool completely and then you can rock your new shirt! 

Here are some pictures of the front of the shirt

DIY Tangled t shirt       DIY Tangled t shirt

And here is a picture of the back. It is surprisingly hard to take a picture of the back of your shirt. Smile


DIY Tangled t shirt

My son and I on a ride at California Adventure

DIY Tangled t shirt

Annnnnnd he is done with the selfies, can you tell Smile Ah teenage boys, they are fun!

But at least you can see the Steampunk Mickey ears better.

DIY Tangled t shirt

DIY Mickey Messenger Bag

When we went to Disneyland I decided that I “needed”  a new bag to hold my wallet and essentials. I didn’t want it too big, just big enough to carry what I needed for the day. Of course I decided that I needed this bag the day before we left. And of course I wanted to use a product that I have never used before. Nothing can go wrong with this scenario, right?? wrong! All kinds of things happened and and few tries later I ended up with a new bag. It only took me 3 times as long, but it did get done Smile 

DIY Disney Mickey messenger Bag


I will give you the instructions on how you should do it  and I will even tell you what not to do, haha!

Materials:

~ messenger bag

~ stencil of what you want to create

~ Graphite paper

~ rhinestones

~ fabric paint

~ E-6000 glue

~ Silver Sharpie


Instructions:

1. Pick out the messenger bag you want to decorate. I found this black on at Hobby Lobby, and I used a coupon so it wasn’t too expensive. Much cheaper than anything I would find at Disney in their stores Smile . It worked very well, except with all the decoration the flap was a little heavy and when I snapped it the flap would fold weird. So I just never snapped the flap and let it hang, and that worked out just fine.


messenager bag     messenager bag

2. Print out what you what to put on your bag, I found a Mickey head silhouette and the quote. I downloaded a free Disney font and typed the quote in a word processing program and printed it at home. (here is the first problem I had. Instead of the stencil I cut out the Mickey shaped with  glitter iron on transfer paper. then I tried to iron it onto the bag.  It didn’t iron on well and was pealing up. I decided to try again, so I picked off the first one and made a new Mickey head and ironed it on again. Once again it did not work. So I picked off what I could and went on to plan B.  I am going to have to figure out what I did wrong. Do you guys have any thought or suggestions?)

3. Place your stencil and quote on the bag.

lay out stencil and quote


4. Cut out some graphite, big enough to put under the quote. Trace the quote onto the bag and the graphite paper will transfer the quote onto the bag. The graphite paper I had was hard to read, but manageable

Graphite paper     Lay out quote

5. Trace the words with a silver Sharpie. I traced it about 3 times. A fabric marker would work as well.

trace quote with sharpie

6. I used Stickles in 2 colors to fill in the stencil. This is another example of a project not working as well as I thought. Stickles are not really good for fabric. We all know this, but if you remember I was doing this the night before we left so I had to use what I had on hand and that was Stickles. I put 2 coats of Stickles on then put a coat of E-6000 glue over the top to seal it in. It worked ok and held up for the week, but I think it would have been better with fabric paint.

lay out stencil

7. Once your Mickey is on and your quote is good to go then add Rhinestones all over. Originally I planned on the bag with no rhinestones, but it was a little too plain for my tastes and I added the sparkle.


posing with the bag

That is it. It held up all week with only a few rhinestones falling off, but that is not bad considering all the problems I had along the way.

What ideas do you have for a bag?

What problems have you had with your crafting projects and how did you fix them?

© 2024 Take Time To Create

Theme by Anders NorenUp ↑

Follow

Get the latest posts delivered to your mailbox:

%d bloggers like this: