DIY Magic Towel Wall Art

I am loving the magic towels. The images are so fun and colorful. The Batman ones really stood out for me so I decided that I needed some wall hanging for our Fandom Basement.

Our basement is where we celebrate all fandoms! You can go back to this post and see how I made the Tardis Door. Oh and do you like my hand painted Deathly Hallows symbol and Captain America shield? Just a few details to the Fandom Basement. We love just about all the fandoms…

DIY Magic Towel wall art

This wall art is easy and fairly inexpensive. 

Here is what I did for this wall art.


Materials:

DIY Magic Towel wall art

~ Magic Towels (I got mine at the dollar store)

~ Iron

~ Foam board (I got mine at the dollar store)

~ Craft Glue (I used Aleene’s)

~ Ruler or straight edge for a cutting guide

~ Exacto knife or rotary blade.

~ Ribbon

~ Ticky Tac, or some way to hang it.


Instructions

~ I washed my towels first. Once they are thoroughly cleaned I ironed them nice and flat. Then they were good to go!

DIY Magic Towel wall art

~ I stacked them on top of each other so that when I I cut the towels they were the same size. I used a ruler for a guide to make sure it was straight.

DIY Magic Towel wall art     DIY Magic Towel wall art


~ Once it was all cut I spread craft glue on the foam board. Then I placed the towel on the board

DIY Magic Towel wall art     DIY Magic Towel wall art

~ After the towel was secured to the foam board I trimmed the edges so that it looked good.

DIY Magic Towel wall art


~ After it was cut out I trimmed the top edge with ribbon. This was a good way to hide the frayed edges. 

DIY Magic Towel wall art

~Then I noticed that the white foam edges that were showing did not look very good, but I was out of ribbon so I did the next best thing and colored the edges with a Sharpie.
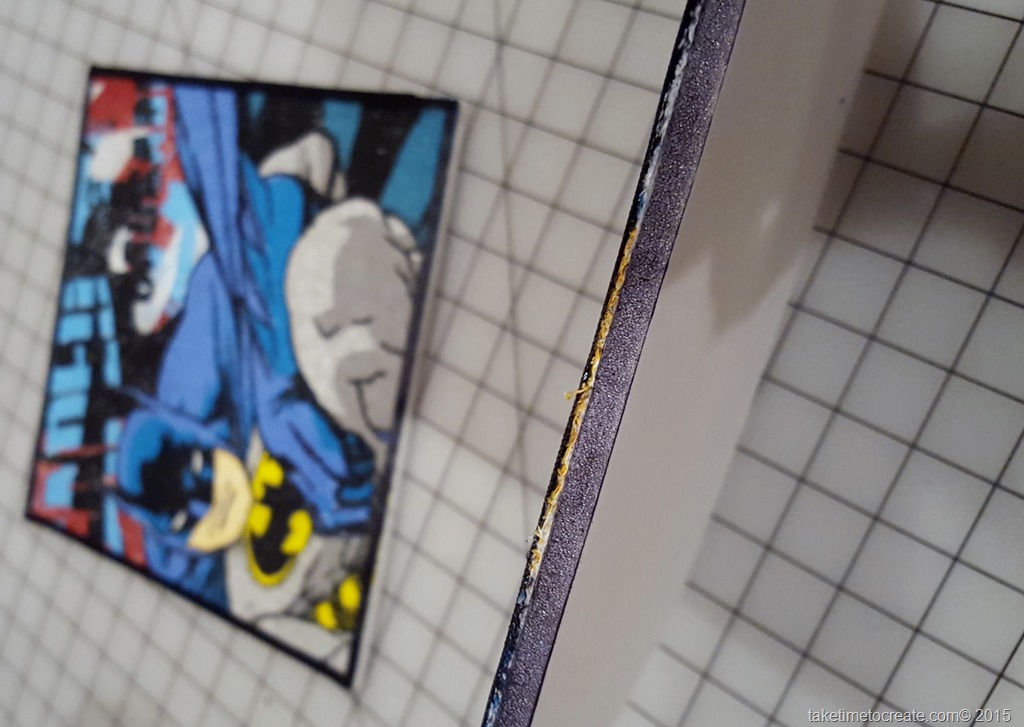
DIY Magic Towel wall art


~ Before hanging up let it dry completely. I would place books on top so that it stays flat. I did not do this step and my art curled a little bit and so I had to flatten it after it was dry.


~Then hang it up. I used Ticky Tac, but you can use just about anything you want.


DIY Magic Towel wall art

DIY Magic Towel wall art

Not bad for just a few dollars. These would looks great in a kids room or bathroom and when they get tired of it it is easy to change out.


This time I mounted it on foam board, but next time I am going to try and frame the towel, or stretch it on a 12×12 canvas. So many options, I just hope I have enough wall space.


That is it! What do you make with your towels?  I would love to see the art you create.

Wake Up And Be Awesome

Wake up and be awesome is my motto. Everyday you have a choice of what you want to be and awesome is my answer. It is not always easy, but I do try.

So what better way to show my love for awesomeness than to make a wall hanging? It is fun to look at first thing in the morning and they day is always better when you start off with a smile.

wake up and be awesome diy project

Materials:

~old painting that you are willing to cover up. I found mine at Goodwill

~ paint (I am using acrylic paint that I found at the craft store)

wake up and be awesome diy project

~ Alphabet stickers, I was looking for big stickers and I found mine at Target near the poster board section

~ Rhinestone (of course I need rhinestones! I think this is a prerequisite for all my crafts Smile)

~ Glue to glue on the rhinestones (I am using Aleene’s Jewel-it glue)

wake up and be awesome diy project

~ Foam paint brush


Instructions:

~ Take your old painting and wipe clean. A damp paper towel should do the trick. I found this painting at Goodwill. It is not an actual painting but a print on canvas. The style doesn’t match my décor but the colors do. So I thought it would be perfect for this project.

wake up and be awesome diy project

~ Gather your supplies

wake up and be awesome diy project

~ I cut out the letters and laid them out to make sure everything fit.

wake up and be awesome diy project

~ Stick the letters on the canvas. Really press them down to make sure no paint seeps under the letter

wake up and be awesome diy projectwake up and be awesome diy project

~ Start painting.  Cover the entire canvas. Take your time and make sure it is all covered and looks good.

wake up and be awesome diy projectwake up and be awesome diy project

~ Before the paint completely dries take the letters off and throw them away. Check for sections where the paint might have seeped under the letter and clean it up. I used a Q-tip to make the letters look crisp.

wake up and be awesome diy project

I am not sure how anyone gets anything done without a little cat help. Smile It seems like every time I start a project Starlight has to be in the middle of it. But she makes it more fun.

wake up and be awesome diy project

~ Then I started adding rhinestones. I think everything is better with a little sparkle. I just added a few to the left edge of the each letter in the word Awesome. I think it added just the right amount of sparkle.

wake up and be awesome diy project

~Hang it on you wall (mine is in our bedroom) and get ready to wake up and be Awesome!

wake up and be awesome diy project