DIY Coloring Page Holder

I have a confession, I love to color. In fact I have been coloring long before it became the popular thing to do. I have always found it a great way to relieve stress and relax me. So when adult coloring books starting becoming popular I was literally giddy with so much happiness! So many possibilities and options! But, they are more expensive than the kids coloring books I usually found in the dollar store. So I started to look online and print them out at home. You can find tons of free coloring pages online, it is almost overwhelming. But with all these pages I needed a way to contain them, a cute holder of some sort.

Here is what I came up with.

20160204_174227

DIY Coloring Page Holder

I found this folder at the dollar store and while it works just fine all plain and boring, I just couldn’t leave it like that. (surprised?) Next to the folder was the really cute sparkly tape. Perfect for the folder.

Materials:

~Tape and file folder

20151106_184219

Sparkly tape

20151106_184133

Folder from Dollar Store

~Coloring pages or coloring book and crayons

I just placed the awesome tape around the edges and that was it. Nice and easy and it made the folder so much cuter.

20151106_184506

Front of Folder

Just fill with coloring pages that you printed or that wonderful coloring book that you have been working on. Keep your crayons in the folder as well and you are good to go.

20160204_174142

Fill with Coloring Pages and Crayons

So do you love coloring as much as I do? Don’t you think this would make a great gift?

Have you embraced the new trend or are you passing on this trend?

20160204_174227

Front of Folder

20160204_174304

Back side of folder

Jazzing Up a Simple T-shirt

Jazzing Up a Simple T-shirt

Continuing with another DIY for my birthday dinner I will show you what I did to jazz up a simple t-shirt from Old Navy. I had this plain black shirt in my closet that I never wore. I have a lot of plain black shirts, but this one never called out to me choosing my outfit for the day. So I decided it was time to spruce it up with some lace. A very easy DIY that turned a boring shirt into something that I wear all the time.

diy lace shirt

Here is how you do it:

Materials:

~ pre-washed t-shirt (you want make sure it is washed first in case there is shrinkage) I got mine from Old Navy on clearance

jazz up a plain t shirt with lace

~ lace

~ needle and thread, or sewing machine or glue

fabric glue

Instructions:

~ I wanted to try gluing the lace, I have never used this glue so I thought I would give it a try. I just glued the lace to the bottom of the shirt. The glue hold well and did wash well, but it took longer than sewing that is because I had to do it in sections and wait for each section to dry before I could move on to the next one.

glue lace to shirt

~ Since my lace does not stretch I decided to start and stop the lace at the seams on the bottom, that is so there is stretch and movement. I am not sure this was necessary, but it worked for this shirt. There is a small gap on the sides of the shirt, but it look intentional.

~ I sewed the lace to the sleeves, this was easier and faster than gluing. Just take the lace and sew a straight seam around the sleeve. This shirt is more like a tank top so the lace only covers a small part of my shoulder.

sew lace to shirt

I am loving how this turned out and I have worn it a few times since I make it. It can be dressed up for an evening out or dressed down for something more casual.

Easy diy add lace to a t shirt

I think I have a few more shirts in my closet that might need a little TLC.

diy lacy shirt

DIY Altered Necklace I wore to my Birthday Dinner

Hi All!

I am happy to be back in the swing of things and I am starting today off with a DIY necklace. I showed you this necklace last week, it is the one I wore to my birthday dinner with my hubby. It is just a simple alteration to make it more my style.

I think the results work for me, what do you think?

Linda getting ready for her birthday dinner

Here is how I did it.

Materials:

~ Necklace

~ Needle Nose pliers

~ Jump Rings or extra chain length

~ Metal Clippers


Instructions

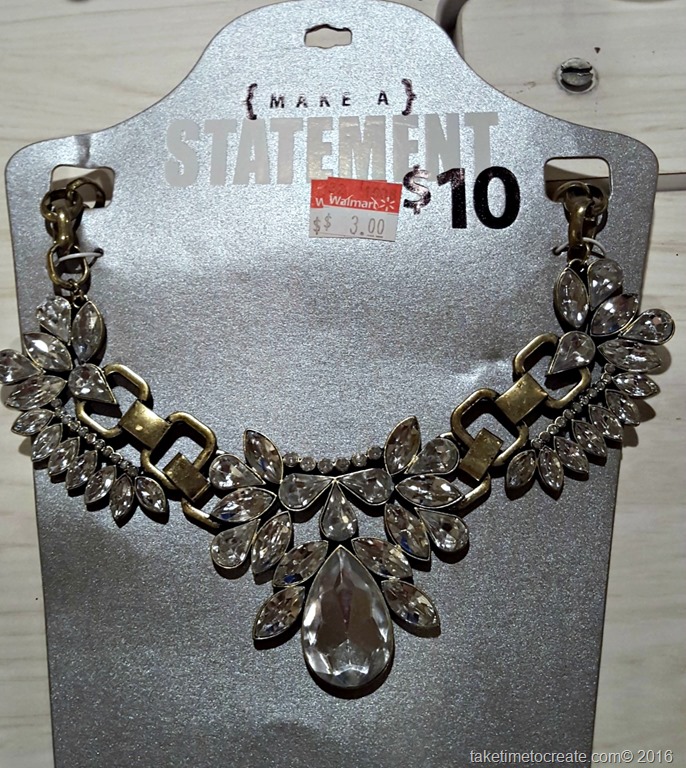
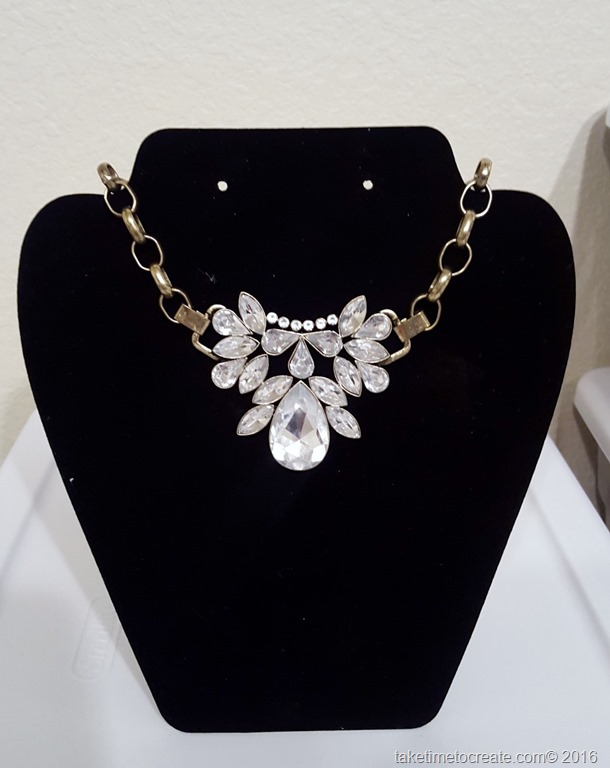
~ I found this necklace at Wal-Mart on clearance. Yikes, it was a little much for me. I am not very tall (as in I  reach 5’1” if I stretch Smile  ) so when I wear  a necklace that is too big for me it looks like I am weighed down. For someone of my height more is not always better Smile

~ Take your necklace and cut off the parts you don’t want. I am saving them for another project.

alltered necklace

~ After I took off the parts I didn’t like I found that that the necklace was a little short, so I added a length of chain so that it fit me.

~ When you cut off the unnecessary pieces, save what you can  you might need it for later. I reused the metal clips holding the two pieces together.

Altered necklace cutting instructions


altered necklace reattached instructions

And that is it! Simple alteration to make the necklace into a necklace that I will wear all the time.

20160103_160703

Happy New Year!

Happy New Year!

New Years Day is always a fun one for me. Not only is it a start to a new year, but it is my birthday. I find it is nice to reflect on the year that has passed, but it is fun to wonder and speculate about the upcoming year.

This blog has been so much fun and I can’t wait to see where it goes next year! You guys are the best, I thoroughly enjoy all the comments and suggestions you give me. You guys make me want to create more, you inspire me.

I have big plans for the blog this year. I want to do 2 projects a week (ambitious I know, but I think I can make it happen most of the time) and I will feature new and old products so you guys can see what I use and what is out there for your projects.

It is going to be a fun year and I am excited that you will make the journey with me.

Linda

Here is a sneak peak of next week’s projects. I wore this outfit for my birthday dinner with my hubby. I am wearing an altered necklace and I added lace to my shirt. I will show you how next week.

20160101_150243

DIY Shirt and altered necklace

20160101_150441

DIY Shirt and altered necklace

DIY Shirt and altered necklace


Continue reading →

A Rhinestone Cast! Guest Blog by Kathy Sigda

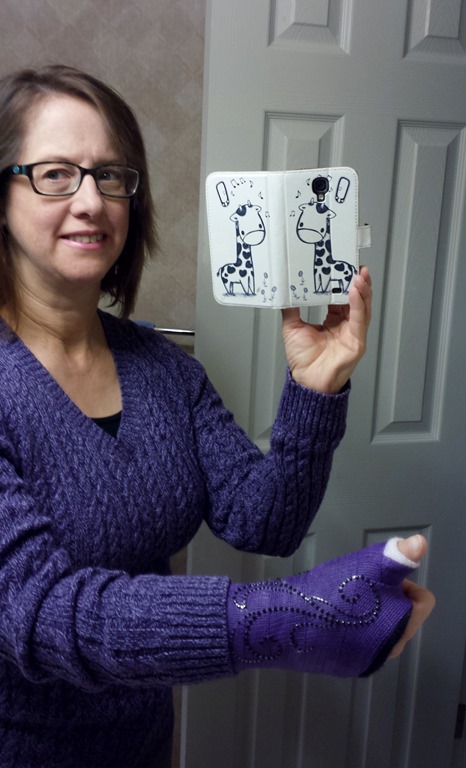
Kathy is my good friend and over Thanksgiving she fractured her arm Sad smile Not a good way to start the holidays, but she found a way to make her cast fabulous!


20150805_081746         20150806_095929

Here we are at Disneyland this summer! Best trip ever, and if you look in the background you can see the awesome face my son is making. Smile 


Here is how she went about blinging out her cast


A plain cast on my left arm just was not working for me, it was really cramping my style, even though I got to pick out the color and it was purple. Why the cast? Well, here’s the real story, although people keep telling me to just say that I was fighting off a bunch of ninjas. I was shoveling our driveway the day after Thanksgiving, in preparation to move the car so I could get to the attic to bring down the Christmas decorations. There was only about an inch of snow, but it was a little slick so I went inside to put my boots on so that I wouldn’t slip! Well that didn’t work out very well, I slid on the ice, caught myself with my left arm, and broke my wrist! A trip to the ER instead of a trip to the attic, and the Christmas decorations would have to wait another week.

Staring at my purple cast, I thought to myself, “This cast is pretty ugly. How can I make it better? What Would Linda Do?” (Linda being a dear friend of mine and the owner of this blog). Then a mutual friend of Linda’s and mine suggested rhinestones! What a great idea!

Here is a picture of the purple cast, plain and boring.

20151210_162256

Although Linda has a lifetime supply of rhinestones, I don’t have quite that many. I decided to go shopping! Found a nice set of designs at Hobby Lobby (in the scrapbook aisle), and it was on sale! Jackpot! I paid $3.50 for this.

20151210_162315

It was a simple process to peel and stick one of the rhinestone designs onto the cast. It adhered quite nicely to the cast material. I’m sure my friend Linda would take the time to glue each rhinestone on with E-6000 glue, but I decided to try this and see if it will stay. If not, there are still three more designs in the pack!

20151210_162522     20151210_162538 


I am a little concerned about what will happen while I sleep, so I thought I would cover it up with some Glad Press-n-Seal. I have learned this stuff is amazing for cast care, you can cover the cast with it and take a shower! It sticks to just about everything, I am hoping it will not stick to the rhinestones but will just protect them and then will peel off easily in the morning. We’ll see.


20151210_194512

The blinged-out cast, covered with a layer of press-n-seal

20151210_194529

Update: The next morning, it still looks great!


20151210_200127

20151211_074546(1)


I am so glad that it worked and that Kathy has her bling on as she is healing. BTW love the giraffe cell phone case! Get better soon!

I am tired

I will give you all fair warning that this post will contain swear words. What a way to start this blog post. So if you don’t want to read those naughty words then stop right now. If you don’t have a problem then let’s continue on.

I am tired of the BS

I don’t mean for this to be a complaining post, I did want to share what I was going through and how I handled it.

Like I said, I am tired. What I mean by that is, I am tired of all the bullshit that is going around. Whether it is from family, friend, coworkers, customers, or vendors I am tired of all the bs. I hear a lot of complaints without solutions, whining without anyone doing anything about it. People just like to carry their bs around and spread it all over the place, and I am tired of it. I don’t mean to be a “complain-a-saurus” so I am surrounding myself with people who are not spreading the BS, but people who are trying to make the world a better place.

tired of the bs

I have been calling people out on their bs, which might not leave me with many friends, but that is ok.

tired of the bul

By now you are probably wondering what this is all about, and how  does it relate to creating and crafting. Well, I will tell you. I was talking about how tired I am of the BS to my husband and he jokingly suggested that I stitch that up some way and display it. I thought that was a fantastic idea! So I decided to make a cross stitch pattern with my new saying. I have never made a pattern before and I have to say it was a lot of fun.  I know it is not perfect, but it is my first try. If you have any suggestions on making patterns I would love the help.

I decided this was not complaining it is taking a problem and making something from it.tired of the bullshit

For this pattern I just used an  Open Office grid template and made a grid in the spreadsheets and put and X where I wanted a stitch. Pretty easy to create.  I am not sure I will actually make in the colors I picked, but it was fun to play around with the colors.

I am attaching a pdf of the patterns on the blog so that you can print one up and make a cute decoration with the saying “I am tired of the bullshit”. I made 3 versions, so make the one you like best and be sure to share it with us when you are done. I am planning on making one as soon as I am done with some other projects.

Thank you for listening to my rant. I love my readers, you guys are the best and I truly appreciate you. I will try not to do this too much. But I am glad that even with my frustration I was able to create something new.And while I was making the pattern I couldn’t stop laughing. I giggled and laughed the entire time, and to me that is the best part of the whole experience.

And that is what this is all about, taking a deep breath, and creating something new.

I am tired of the BS

tired of the BS

tired of the Bull

tired of the bullshit

Guest blogger- Kim teaches us how to transform old costume jewelry.

Not long after I started this blog I mentioned it to my friends and family that I had a blog and if anyone wanted to be a guest blogger to just let me know and I would feature them. Well I wasn’t surprised that my oldest sister was the first to offer.

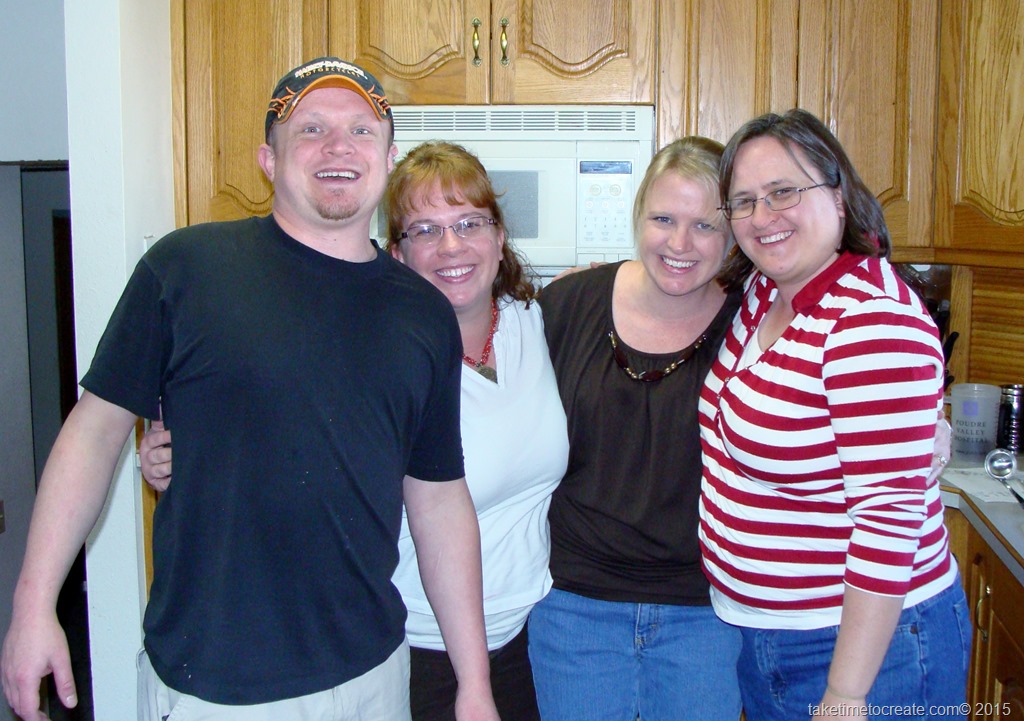
Here is a picture of me and all 3 of my siblings.

taketimetocreate.com(Sam, Linda, Valerie, and Kim)

I can’t believe that this picture is 4 or 5 years old (yikes, it is time for us all together and take some new pictures. My hair hasn’t been red in years…),but you work with what you got and this is it. That is the problem when everyone lives all over the country, it is hard for all of us to be in the same city at the same time.  And when we do get together we don’t think to get the camera out and take pictures. I think this has just become one of my new priorities, get new family pictures.

But before I go into the tutorial I thought I would give you a little background about my family. When I was typing this blog post I realized that I haven’t spent much time talking about my family, other than my husband and son. I have 2 older sisters and a younger brother. So that puts me in the middle of the kids. It was fun having so many siblings growing up, but sometimes I got lost in the mix. I am sure that anyone with lots of siblings feels the same way.  Today’s guest post is from my oldest sister, Kim.  She is about 7 years older than me and I always looked up to her. She now lives in Arizona so it is hard to get together, but when we do see each other we always have fun! Kim has a wonderful talent making jewelry. Whether it is her own creation or taking something and reimagining it. I love seeing what she comes up with just some beads and wire.

Here is the beautiful bracelet that she made me soon after my son was born.  It is silver and garnet (his birthstone) and gorgeous and and it fits perfectly and every time I wear it I get tons of complements.

taketimetocreate.com

In today’s guest post I will show you the awesome jewelry that Kim made from old costume jewelry that she inherited from our Great Grand Aunt Nancy.

Kim’s Guest Blog Post!

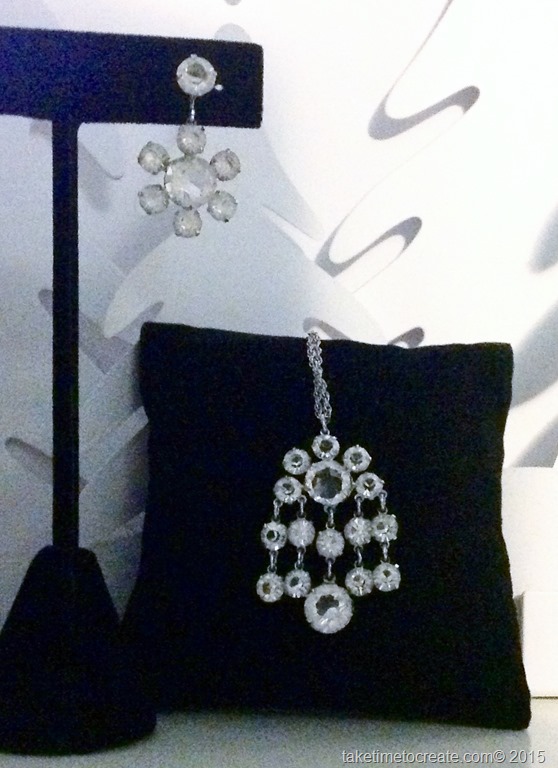
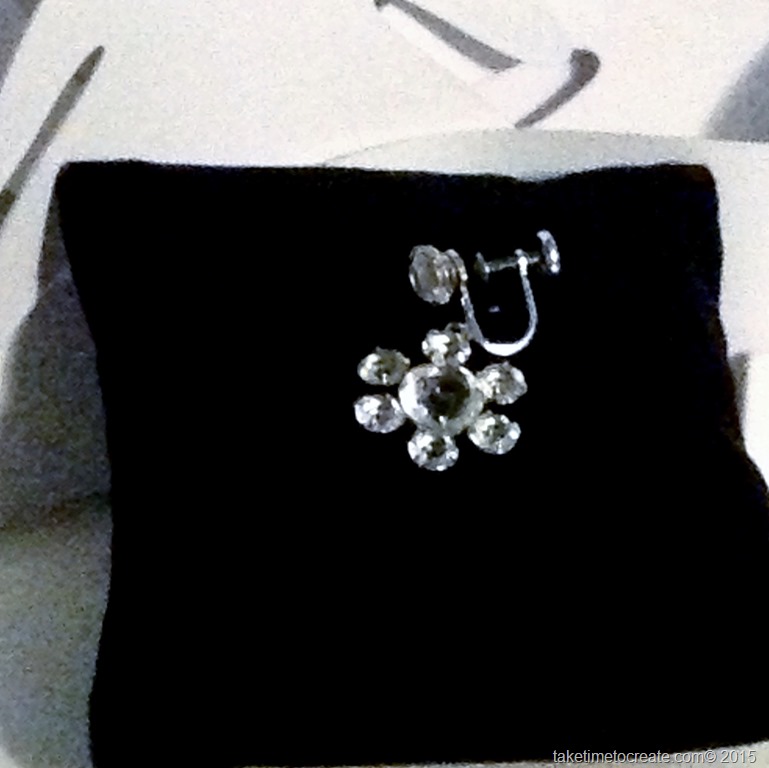
Ever find that fantastic old piece of jewelry but you cannot wear it in the condition you found it in. This happened end to me. My sisters and I were helping our mom go through her jewelry and found that she had our Great Grand Aunt Nancy’s jewelry box and I found this pendant and earrings and I cannot resist some good sparkle.  (Sorry took this picture after I had taken one earring apart)

reimagining old costume jewelry
The pendant was easy just a longer chain. Aunt Nancy was 4’8″ and a petit dancer. I am not.
Then the screw on clip earrings were next.

reimagining old costume jewelry

I removed the dangle. The key is to examine the loop and find the one that has the break. Then twist the ring open. Most of the time in these cases the ring with the break is found on the clip side and the dangle is whole.

When working with old jewelry be sure you check the integrity of the ring. If it is showing significant wear then it may need additional repairs before continuing. (If I find one that needs repair I will show this in a future posting)
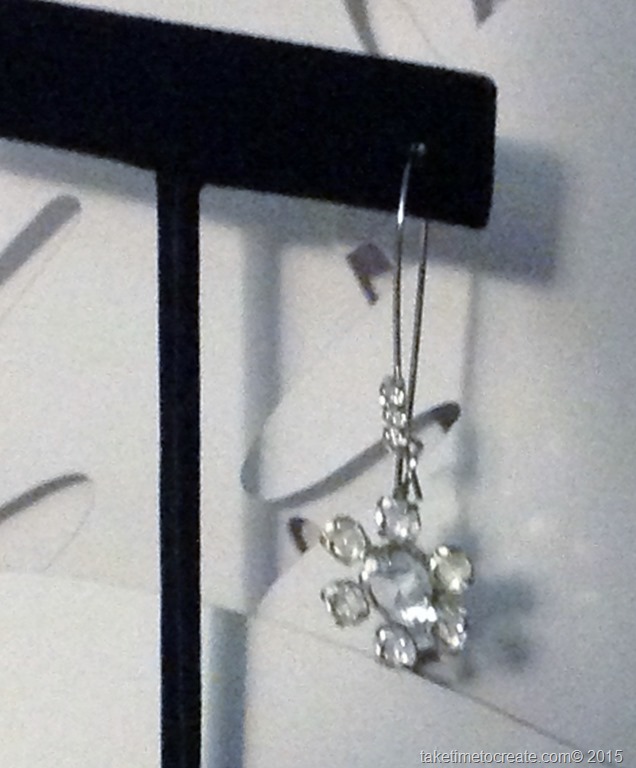
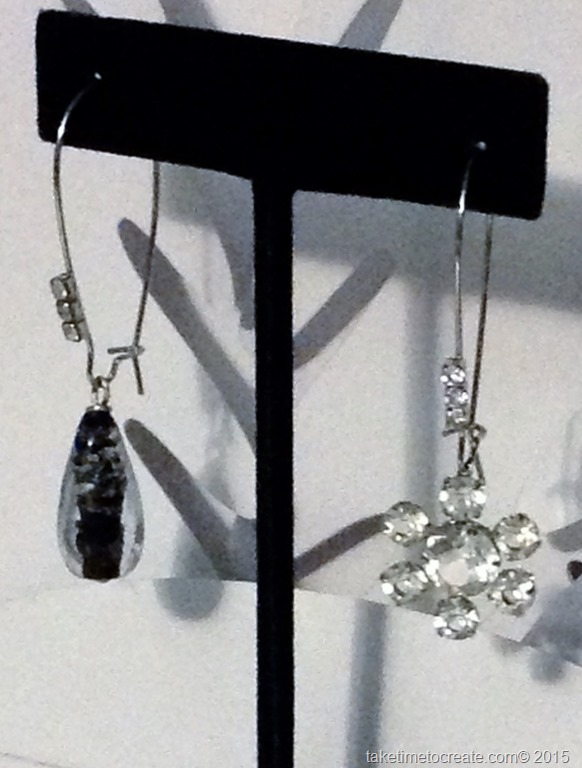
I then added the dangle to an ear wire. By using a modern long ear wire I was able to update the look without compromising the original charm.

reimagining old costume jewelryreimagining old costume jewelry
I found these ear wires at Hobby Lobby but they can be found at any number of craft and bead stores or online. I liked these because the “diamonds” on the ear wire complement the crystals in the dangles.

I also love that the dangles are so easy to remove because then I can make a bunch of different dangles and change them out.
Have fun with old charm and modern looks.

Thanks for sharing Kim, the earrings and necklace turned out beautifully! I can’t wait to see what she comes up with next!

Update your handbags, purses, and clutches!

So I bought these really cheap handbags. It came in a set of 3 bags. There was a clutch, cross body bag and a handbag. They are fine on their own, but a little boring, so I decided to fix that.

With a little help from my clearance statement necklaces that I found at Walmart and a little glue I was able to update my purses and create a whole new look.

Here is the clutch. Love.

create a new look by updating your purse

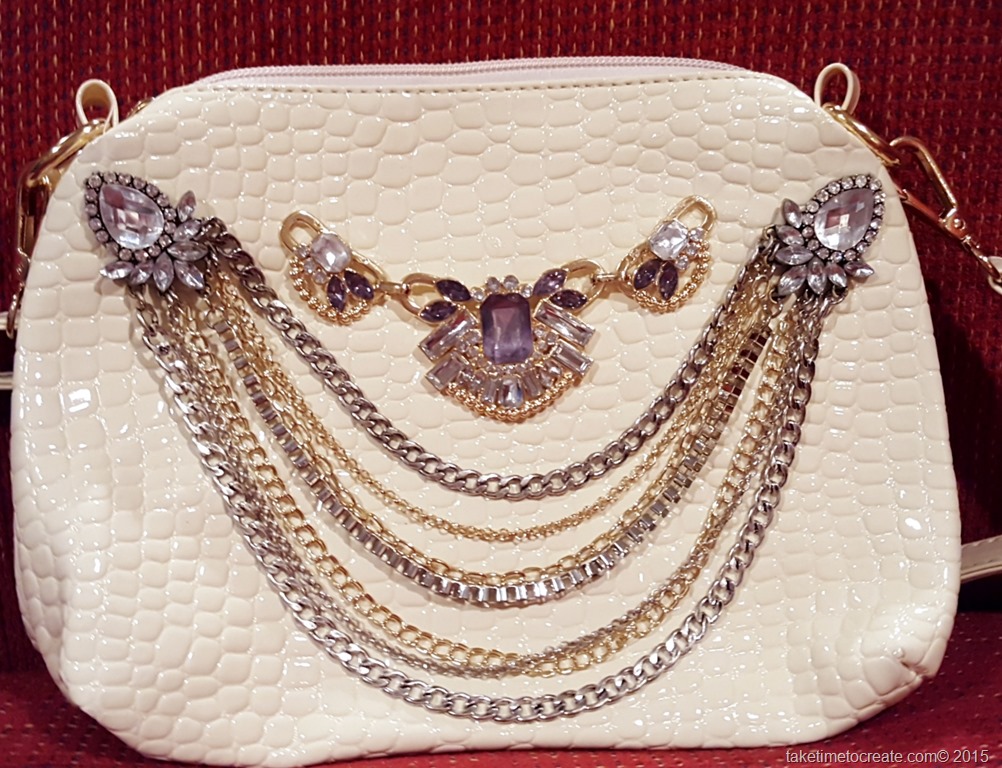
Here is the cross body bag. So cute!

create a new look by updating your purse

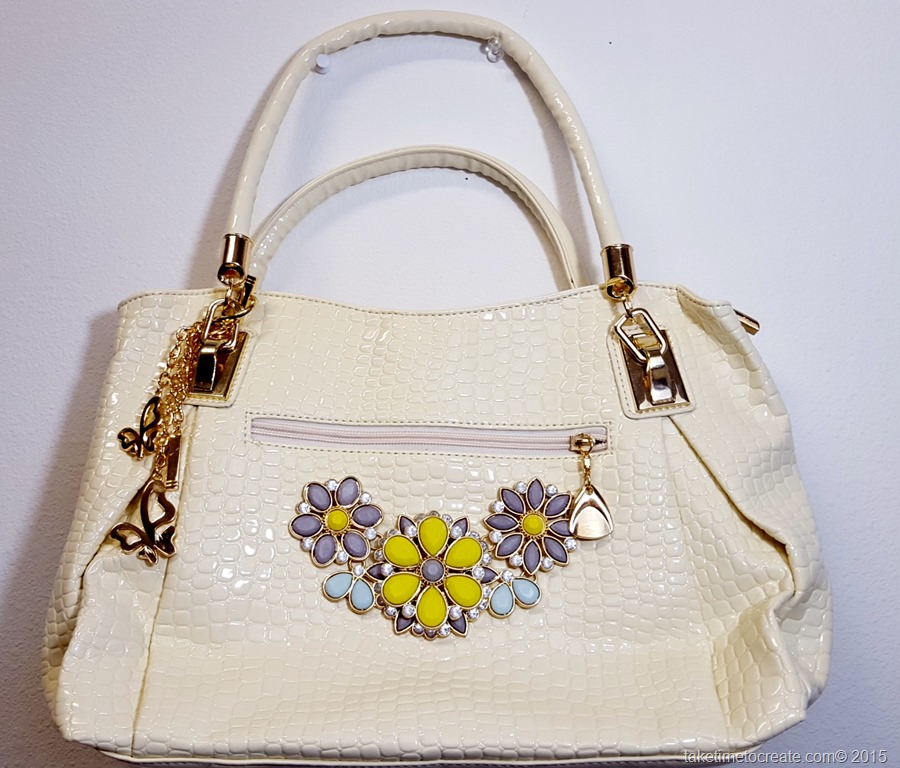
And here is the handbag. Perfect!

create a new look by updating your purse


It is easy to do, here is what you need

Materials:

~ handbag or purse that needs a little updating

~ glue that will work on metal (I used Aleene’s jewelry and metal glue)

~ Statement necklaces that you can take apart or jewelry or bling that you want to add to your purse.


Clutch instructions:

Here is the clutch looking all boring and sad because it didn’t have any embellishments on it.

create a new look by updating your purse


Whoa! Too many embellishments! This statement necklace is certainly making a statement. I am not sure what that statement is, but it is making it. I decided to take it apart and only use 1 rose. I will use the rest in another project.

create a new look by updating your purse

Much better. I think it looks great! BTW, don’t you love my red couch as a background color Smile I think it adds awesomeness to the pictures.

create a new look by updating your purse


Cross body bag instructions:

Once again a sad, boring cross body bag.

create a new look by updating your purse

I added this necklace to the bag. Much better, I think. If you can’t find a necklace like this on it is easy to make with a jewel and different lengths of chain.

create a new look by updating your purse

I think it looks ok, but I think it can look better.

create a new look by updating your purse

Ah yes, this is it! If you can believe it I think it was looking a little plain towards the top

create a new look by updating your purse

Hooray! This is what I am talking about! Perfect!

create a new look by updating your purse


Handbag instructions:

Boring handbag.

create a new look by updating your purse

Add a cute flower statement necklace

create a new look by updating your purse

And tada you have a new hand bag!

create a new look by updating your purse

As  you can see this project is pretty easy, but it adds so much to your purses and handbags. Just make sure you glue on everything really well and let it dry completely before you use it.

Paint Your Couch!? Say What?

I know what you are going to say, that is crazy! Painting your couch! There are better ways to update your couch. I will agree there might be better ways, but this is a great solution for my dingy, old couch that needed an update.

Paint your furniture

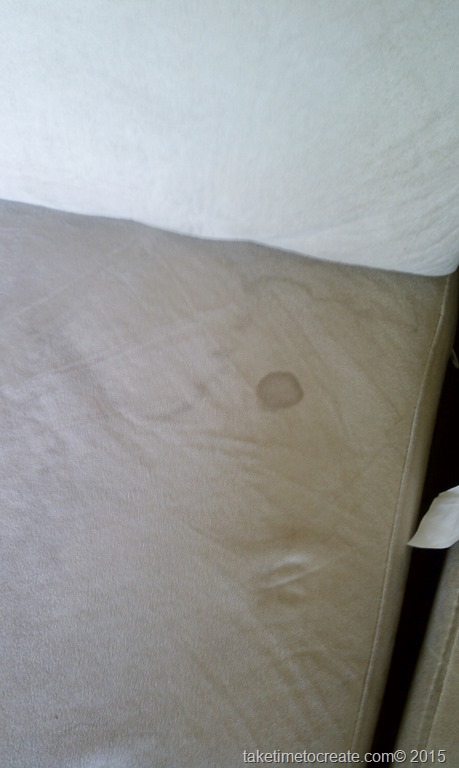
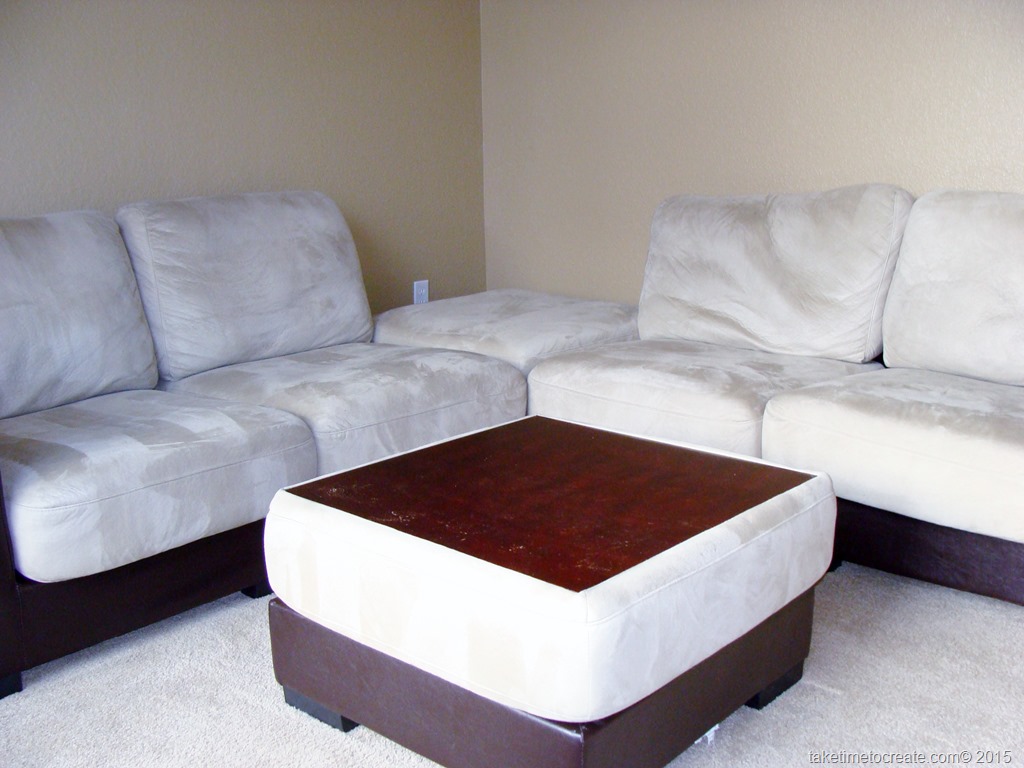
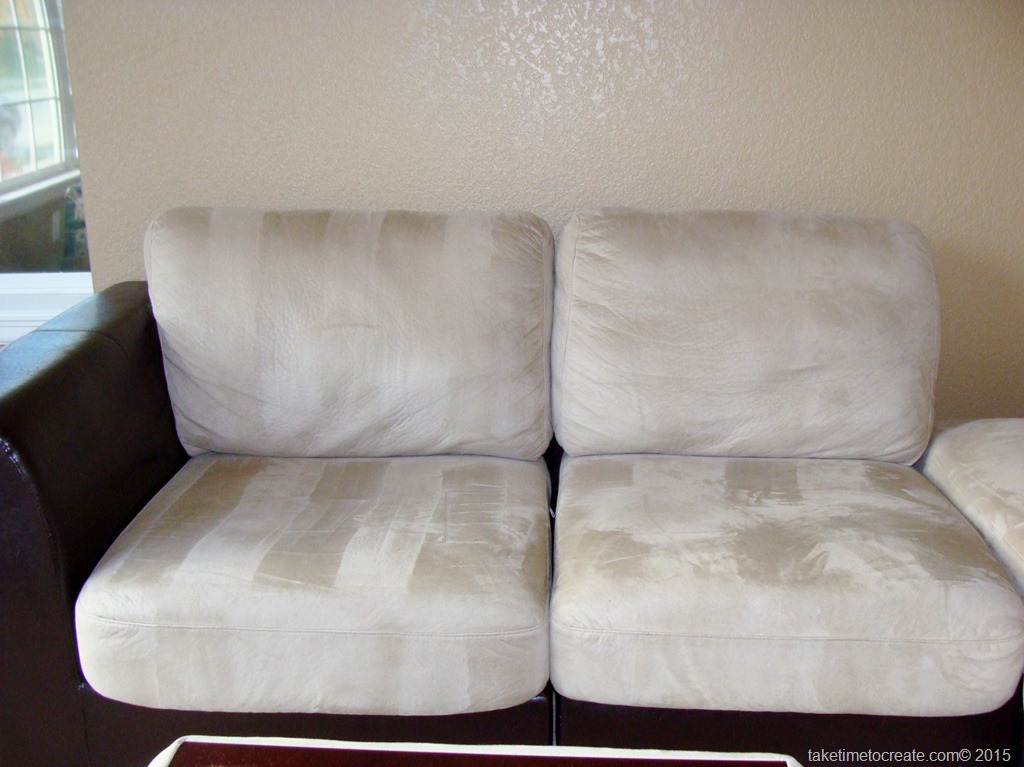
This couch is great, it has individual sections that can be moved if needed, and the ottomans can have the soft footstool side facing up or a hard table surface facing up. It is very versatile and we have enjoyed it for many years. The downside is that the couch is made of a light colored micro fiber that stains easily. over the years the couch has become a collection of stains. I have tried to remove them, but after awhile nothing would work. So I had the option of recovering the cushions or to paint them. I decided on painting because I thought it would be easier.

See stains (I am actually embarrassed to show you guys this stain, and I just couldn’t bring myself to showing you the bigger ones.) And this was just a small one…

Paint your furniture

Overall it was pretty easy, but time consuming.

Here is how I did it if you are interested in doing the same with your furniture.

Materials:

~ Fabric Spray paint. I used Simply Spray Fabric Paint in Sage green. For my couch I used 12 bottles, which was about $120. Not the cheapest solution, but cheaper than recovering all the cushions but cheaper than buying a new couch. I bought my paint from Amazon.

~ Furniture that you want to paint.

~ Plastic covering for your work area, and room for your items to dry

~ Rubber gloves


Some notes:

Before I evens started I watched a ton of YouTube videos on how to do this and I read all the instructions and I looked over the company website. I took my time getting to know the product and how to use it. Before doing this yourself I would recommend doing your own research and practicing before you do your entire couch.

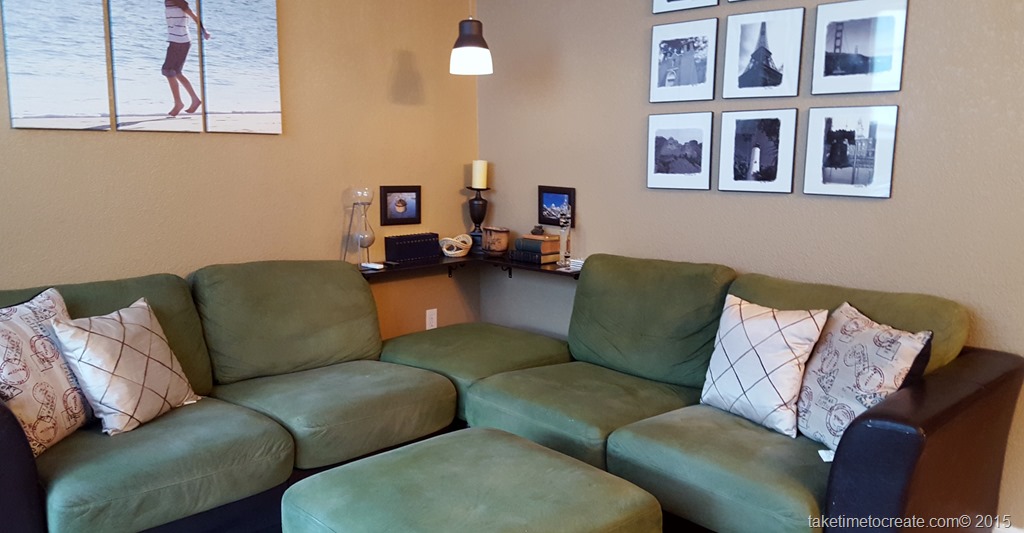
You can see here that our couch was a very light beige color. It blended in with the walls and the floor and it was very boring. Not to mention dirty. I thought the green would make it more interesting and make our living room more inviting rather than bland. Lyle was skeptical, but he was on board with my experiment.

Here is a picture of beige town that was our living room.

Paint your furniture

I will tell  you that you should do it all at once rather than space it out over a few years….

Yes you read that correctly, I did this project over the span of 2 years. I am sure you all have had a project that you started and didn’t get back to for a while, well this project was one that took me a whole to get back to. I started it one weekend and got half of the couch done. I didn’t have any pictures of it because I was embarrassed that I didn’t finish in a timely manner  Smile  well eventually I decided to finish the project. Lyle was very patient and didn’t nag me toooooo much about the unfinished couch in our living room. But I did go back and finish. That is why the colors are a little different from cushion to cushion. The 2 year time span is evident. My technique changed a bit and some fading happened. Oh well, it is done and we are happy with the final result so that is all that matters.


Instructions:

1. Clean your furniture. You want to make sure you have a clean slate so the paint will adhere to the cushion.

Paint your furniture

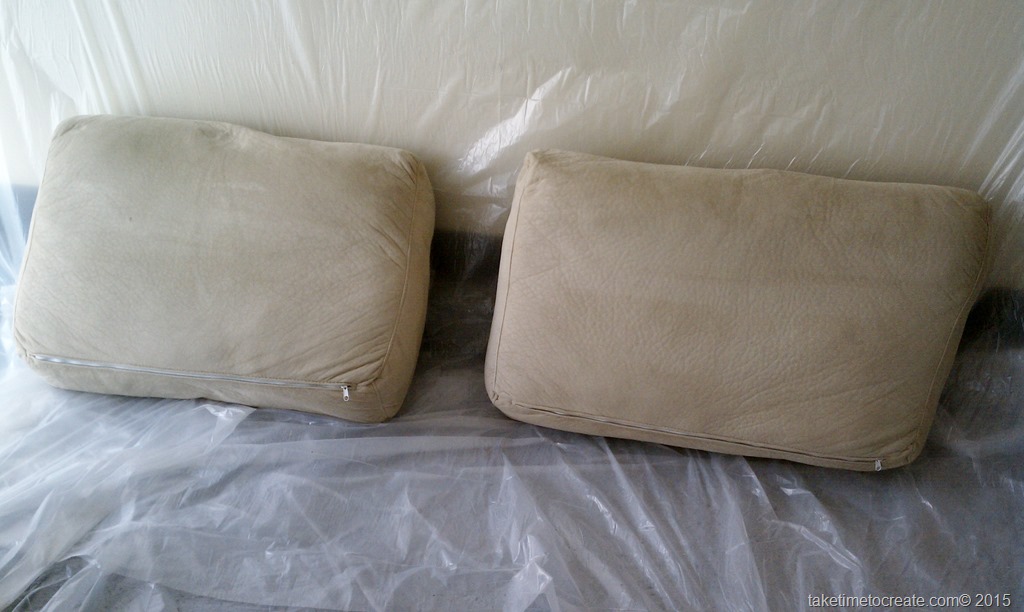
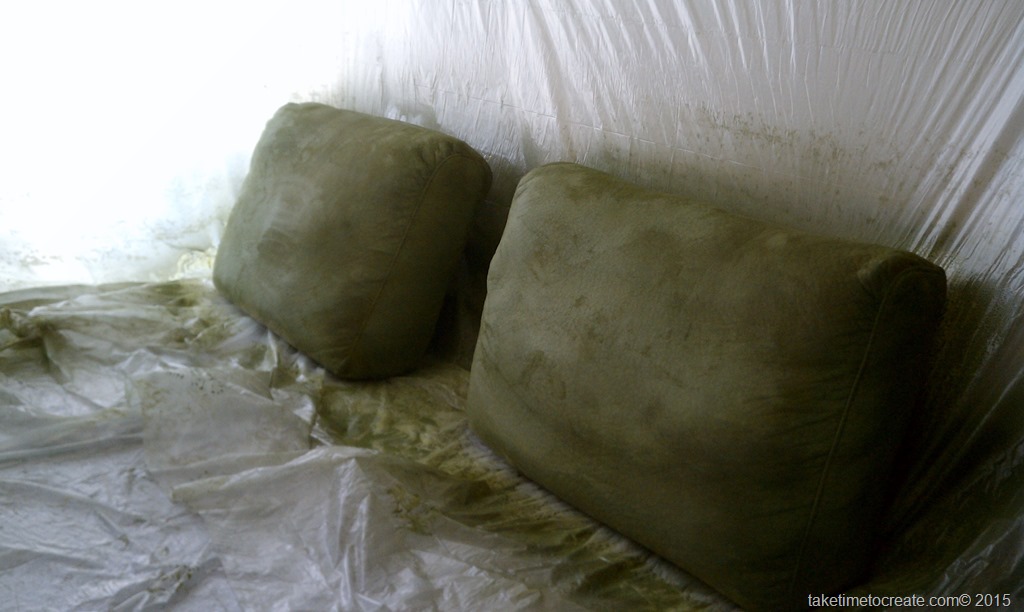
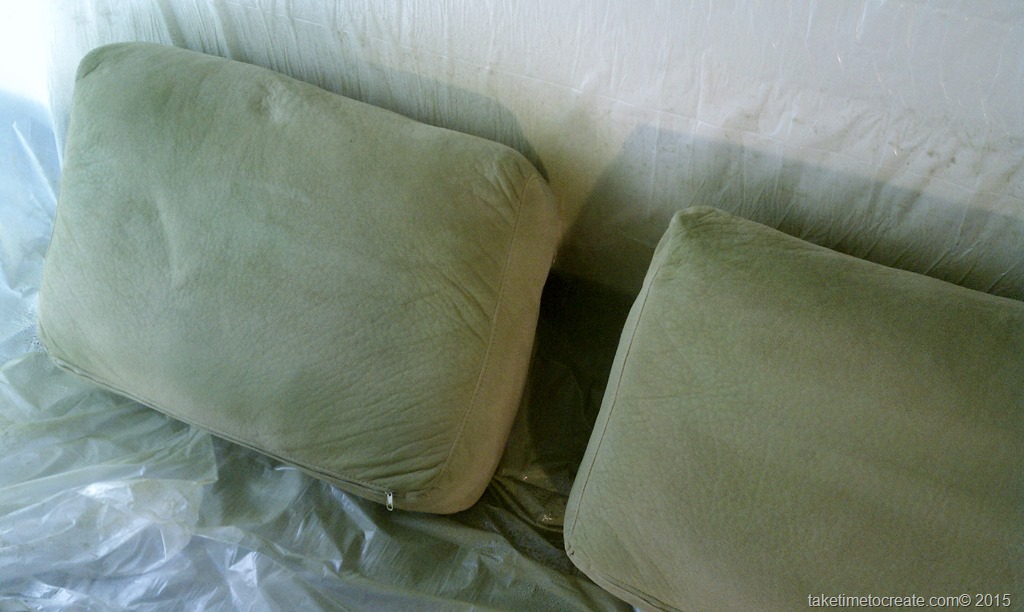
2. Take your cushions to your work area. We put plastic all over in our garage so that I could work in there. The cushions could dry without being outside where dirt and leaves would blow on to the wet paint. And if it started to rain I could close the garage door and keep the cushions dry.


Paint your furniture

3.Put your gloves on. Spray a light coat on the cushion, then rub the paint into the fabric. I did this and I think it coated better.

Paint your furniture     Paint your furniture      Paint your furniture

4. Let it dry and spray and rub again. I did 3 coats, that seemed to get the best coverage. After the first 2 coats you will think to yourself “What on earth have I done? This looks like crap!” But hang in there, by the third coat everything looked better.

5. Let the whole thing dry over night then put it back on your couch.


Paint your furniture


Enjoy your “new” couch.  This project has been completely finished for over a year now and I can honestly say I still love the final result. The paint has stayed on the couch and doesn’t rub off on your clothes (this was a concern of Lyle’s) and it still looks good. At first the fabric was a little stiff and not as soft as it was before the paint, but over time the paint loosens up and the fabric becomes softer. It won’t ever be as soft as the original micro fiber, but it is getting better.

So, is painting your couch something you might do? What else do you think I should paint?

Most Popular Pin From Blog and and easy DIY for your calculator


Most Popular Pin

You get a two for one today!

I wanted to share with you on Throw Back Thursday one my most popular pins on Pinterest from my blog. I love seeing what is popular. But this is a fun one that I still love.

Drumroll please……


The most popular pin is the

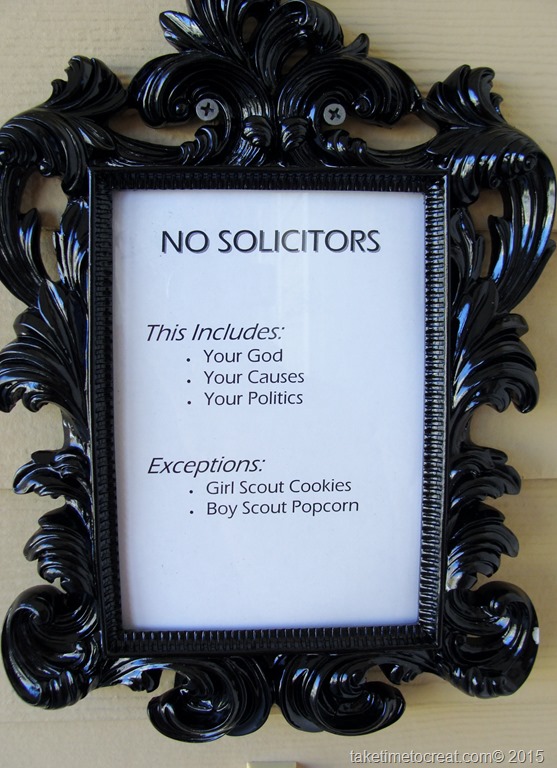
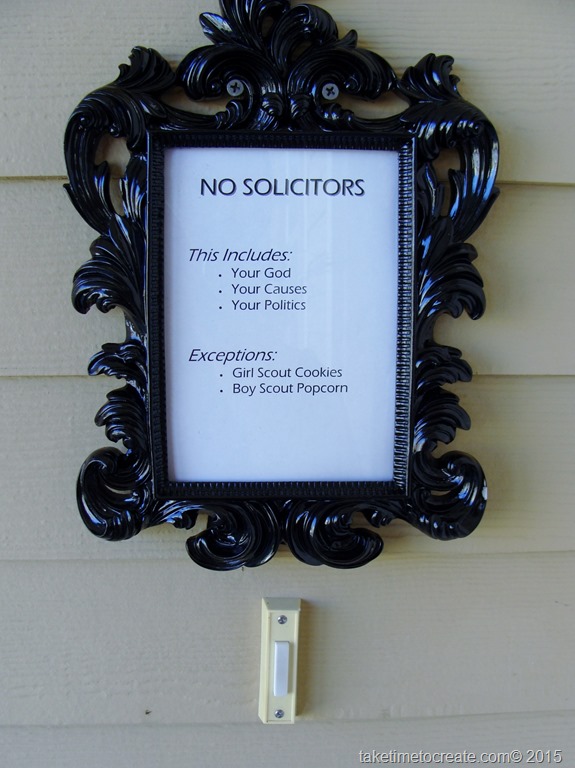
No Soliciting sign!

no soliciting sign    no soliciting sign

Just a simple print out framed in a cute frame I got from Hobby Lobby and that is it.

It always amuses me when the pizza guy wants to take a picture of the sign. It usually works and it has held up well over the years. Keep on pinning, I love to see what you guys pin. If you want to follow me or any of my boards on Pinterest you can follow me at https://www.pinterest.com/linsam/

Now I can’t just leave you with that throw back, I need to show you a DIY as well


DIY Rhinestone Calculator

I was wandering around Hobby Lobby the other day and I saw a very cute pink rhinestone calculator. I loved it, but I thought to myself that “Hey! you have a calculator and rhinestones, why don’t you make it yourself instead of buying a new one?” So that is what I did.

Rhinestone Calculator

It was easy to do and the side benefit is that no one takes it off my desk anymore Smile and if they do take it, it is easy to find and for me to take it back.

Materials:

~ calculator (mine was an old one that I have had forever. ) Since my calculator is tan I went with tan colored rhinestones that I had at my house. I wanted this to be a cheap DIY with materials that I had on hand. Maybe not as cute as the pink one I saw, but cute anyway.

~ Rhinestones (I got my package from the dollar store.)

~ E-6000 (of course, I think I am a little obsessed with this glue….)

~ Something to clean the calculator

~ sandpaper or something to rough up the surface.

Rhinestone Calculator

Instructions:

This is a very straight forward project.  Just sand, clean, and glue. So here we go:

1. I sanded my calculator because I thought it would be easier with a sight rougher surface. Just a light sanding will do.

Rhinestone Calculator

2. Clean. I used a wipe and cleaned every crook and nanny, I don’t think my calculator had been this clean since I bought it.

Rhinestone Calculator

3. Start gluing. I used these awesome syringes that I bought from Amazon (here is the link) You don’t to use the syringe, but I find it makes it easier and more precise to apply the glue. This is especially important when you are trying to glue tiny rhinestones.

I know you can still see the blue Texas Instruments logo and model number, but that is ok for me, it really doesn’t bother me. But if it bothers you then I would use smaller rhinestones and try and fill it in more. Or you could paint over the blue part to match the rest of the calculator before you added the rhinestones, then it wouldn’t be as noticeable. Lots of options for what ever look you are going for.

Rhinestone Calculator   Rhinestone Calculator


4. Let dry before using.

Rhinestone Calculator

That is it. I am well on my way to blinging up my entire desk. I wonder what should be next on my list. Suggestions?

Rhinestone Calculator    Rhinestone Calculator

What office supplies have you enhanced?