Category: Clothing

DIY Watermelon Bag

Hello everyone!

This post contains affiliate links

One of my favorite summer treats is watermelon! I am convinced that it is the perfect food, sweet, juicy, messy, and pink, lol.

So I decided to make my very own watermelon bag to wear and show the world my love of watermelons.
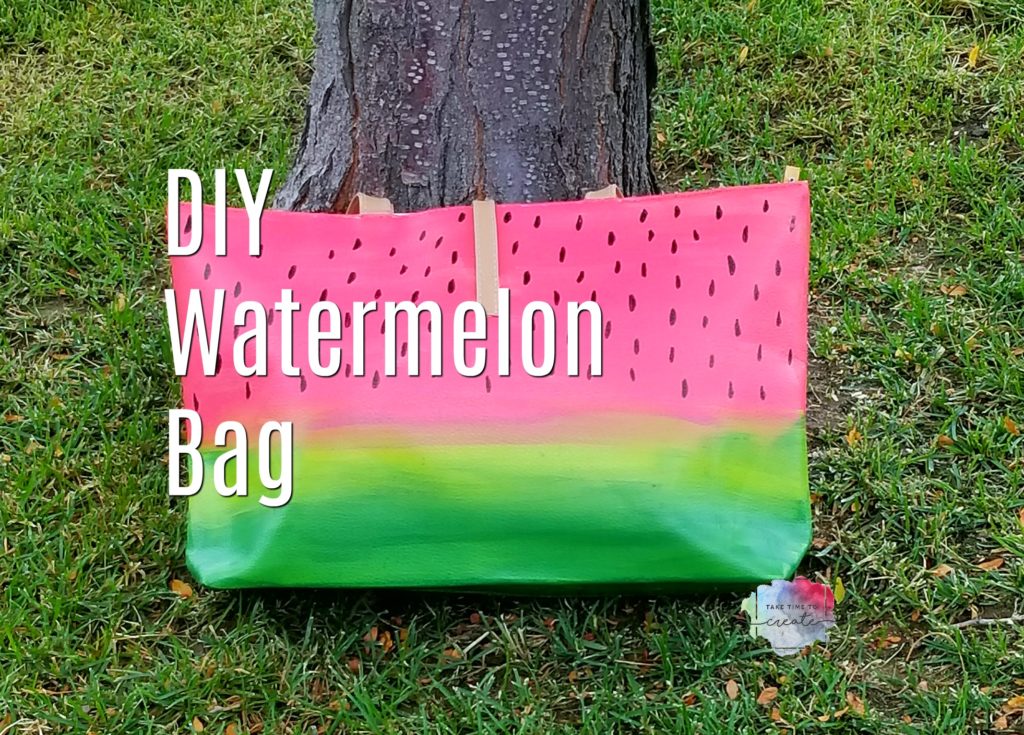
diy watermelon bag

Materials:

  • Bag- I got mine from Sammy dress about a year ago, but here is a similar one on Amazon: Bag
  • Paint- I used Folk art acrylic paint, but any acrylic paint should do the trick: Paint
  • Paint pen- for drawing the seeds: paint pen


Instructions:

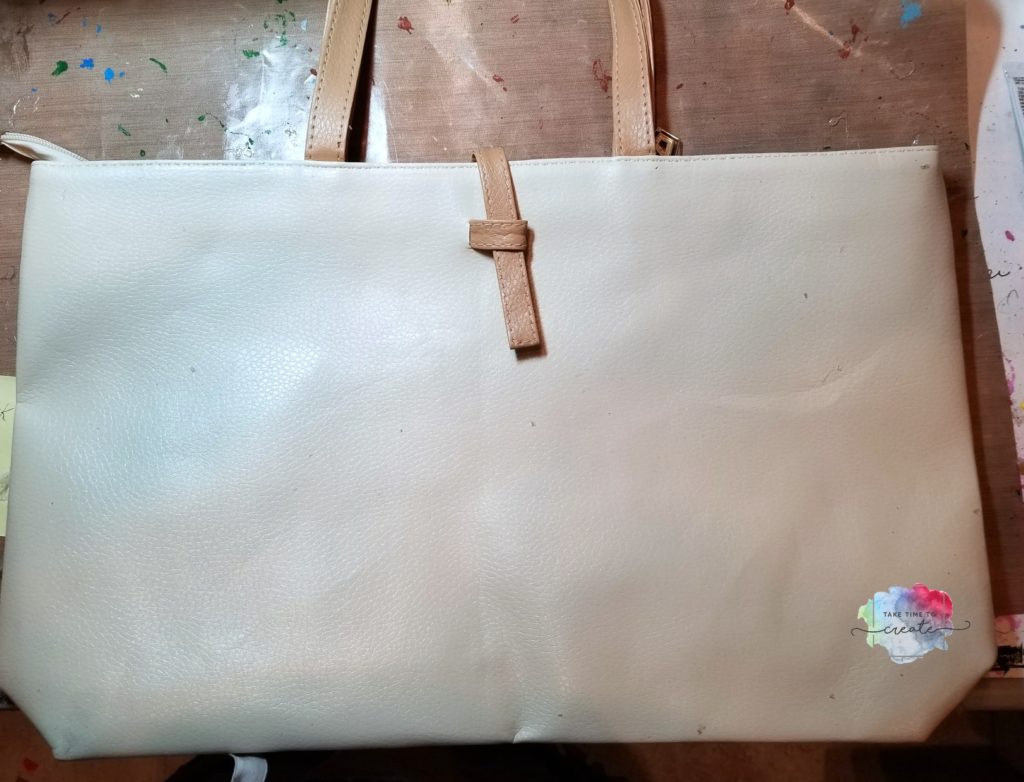
Here is the bag before any painting. It is a good bag and just fine the way it is, but I was determined to have a watermelon bag, lol.
diy watermelon bag

I found these 3 great colors from Folk Art in Pink Melon, Citrus Green and Classic Green. I thought they were the perfect watermelon color!diy watermelon bag
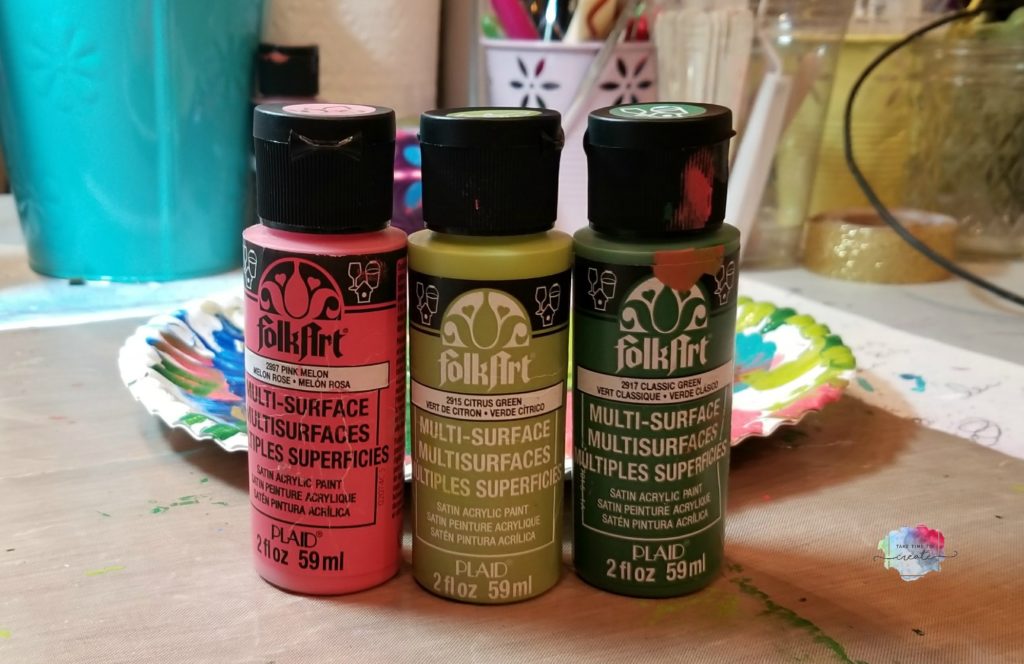
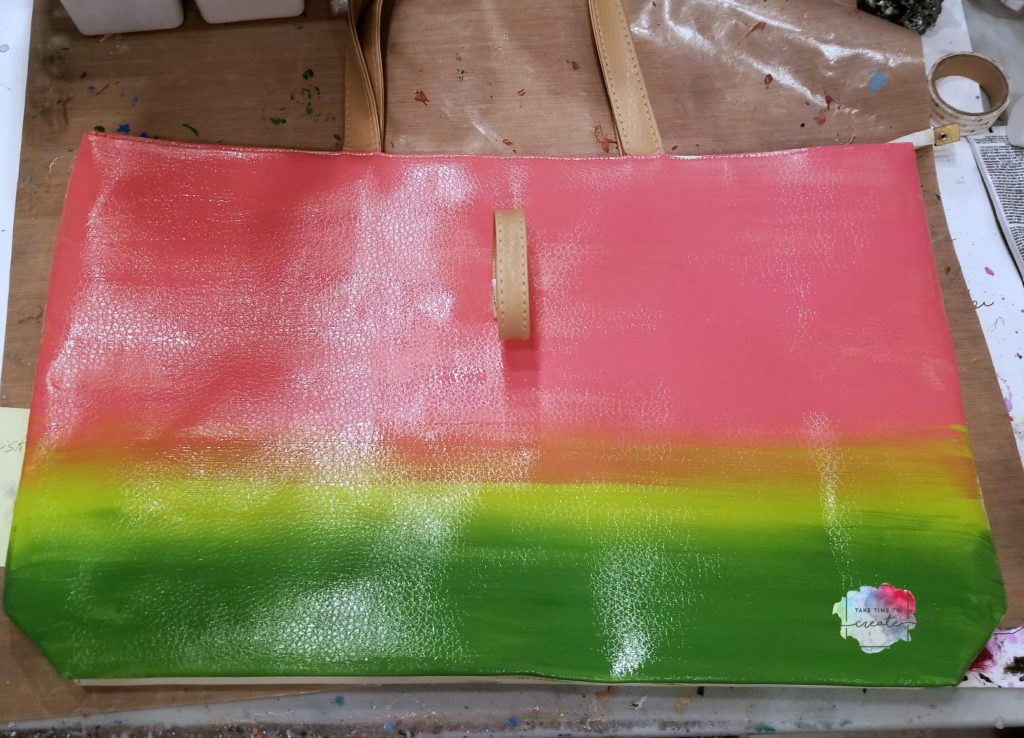
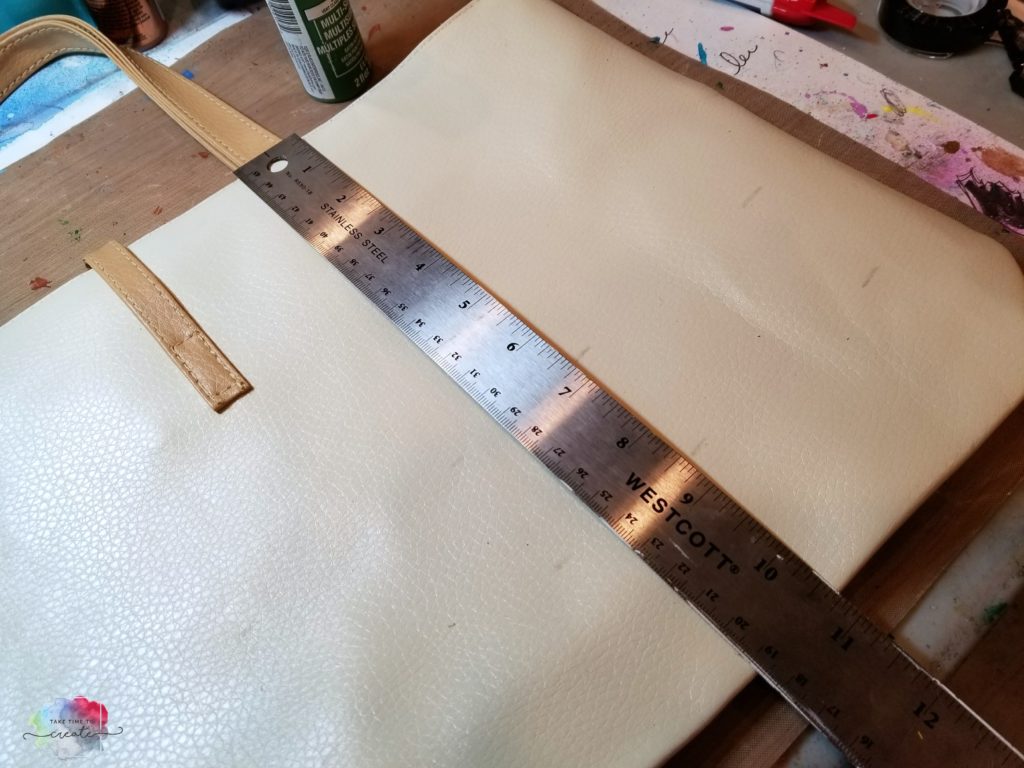
but before you start to paint measure your bag. You to make sure that you have about 2/3 of be bag in pink and the rest in green. But this is just a guess, use your eye to make a good judgement as to how much of each color.

diy watermelon bag

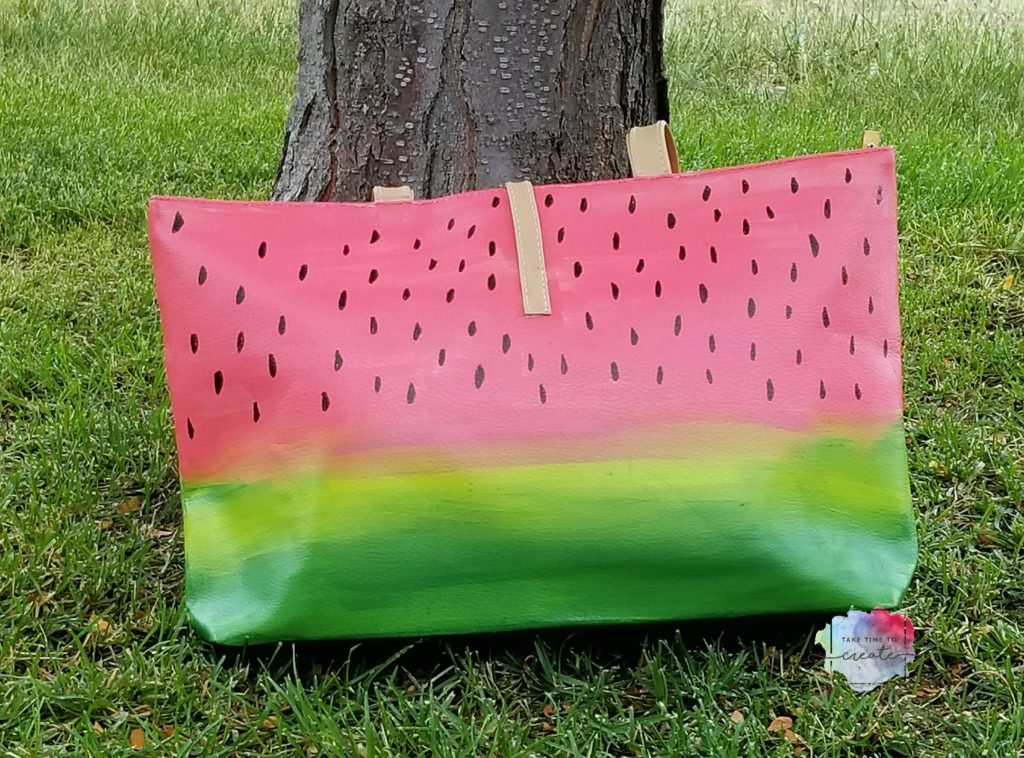
Then start painting. I started with the pink then went on to the greens. I painted in broad strokes and left the strokes in each of the colors as I painted. I didn’t want it too blended, I was going for a casual vibe. You can always blend more if that is  your style.
diy watermelon bag

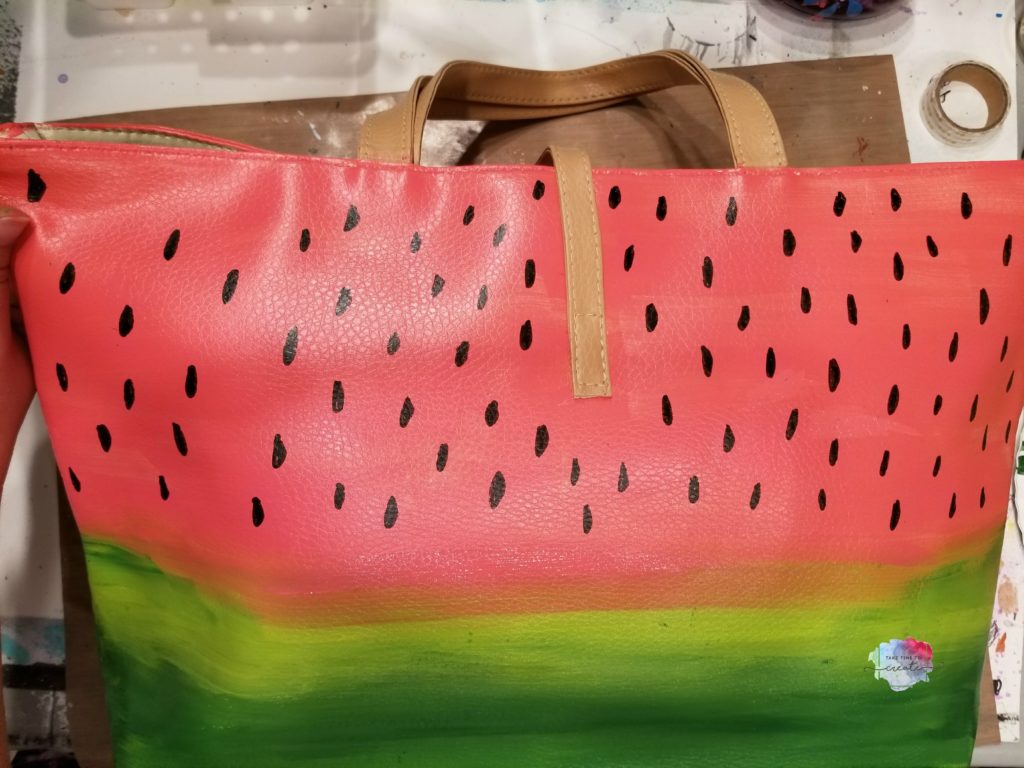
You can leave it with out the seeds, but I thought the bag needed them. I just painted them on using a paint pen.
diy watermelon bag

I am loving how it turned out! What fruit bags are you going to make this summer?

diy watermelon bag


The post DIY Watermelon Bag appeared first on Take Time To Create.


Decorate Your Flip Flops

Hello Everyone!

This post contains affiliate links

Don’t you just love summer?  Long days, swimming, and flip flops. And you all know how much I love to decorate things and make them my own.

Today’s tutorial is on decorating your flip flops!

You can check out the You Tube video here:

This is an easy diy that you can do with friends or kids, or you can make them all for your self, lol

Materials

  • Flip Flops (here is a link to get them from the Dollar Store) but you can get them almost anywhere
  • Glue (I used this Loctite plastic glue. You can get it here: Glue)
  • Flowers, pom poms, stickles, feathers, or anything else you want to attach to your flip flops.

Instructions

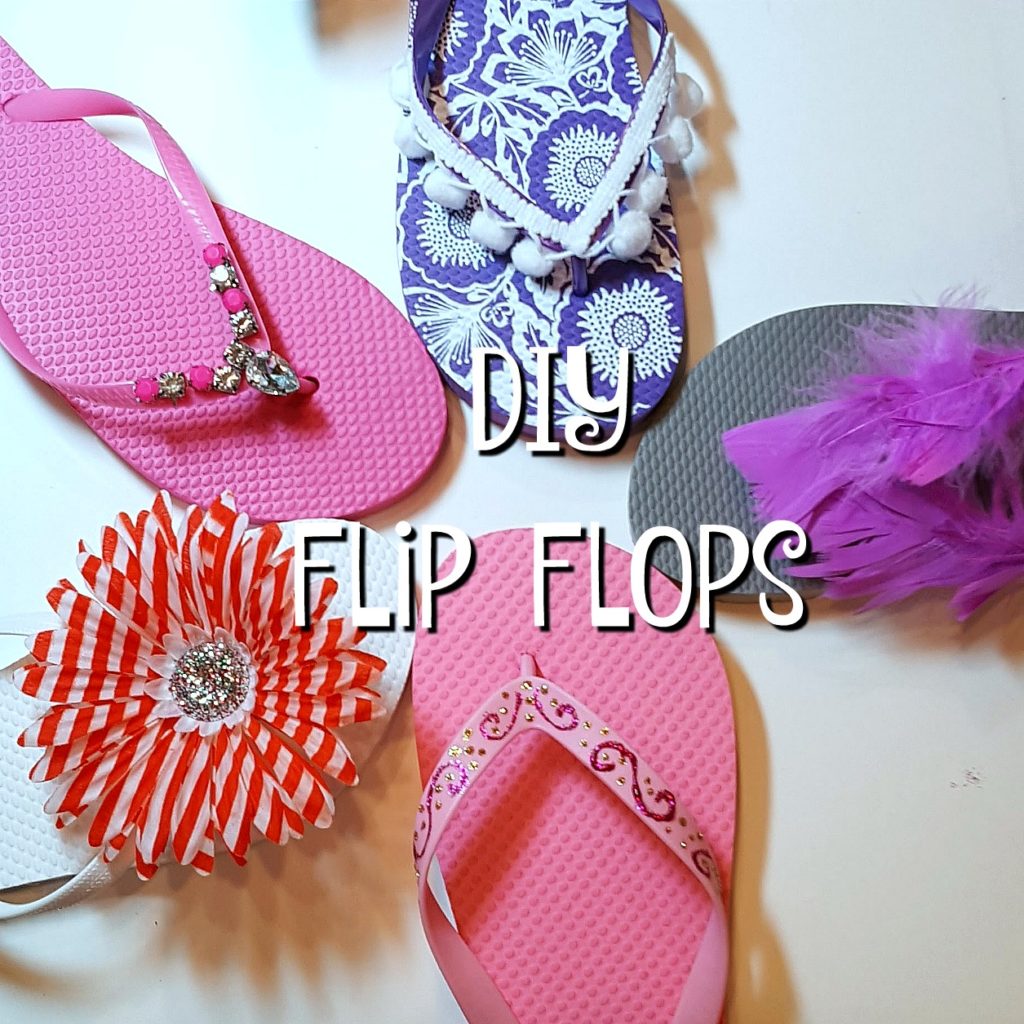
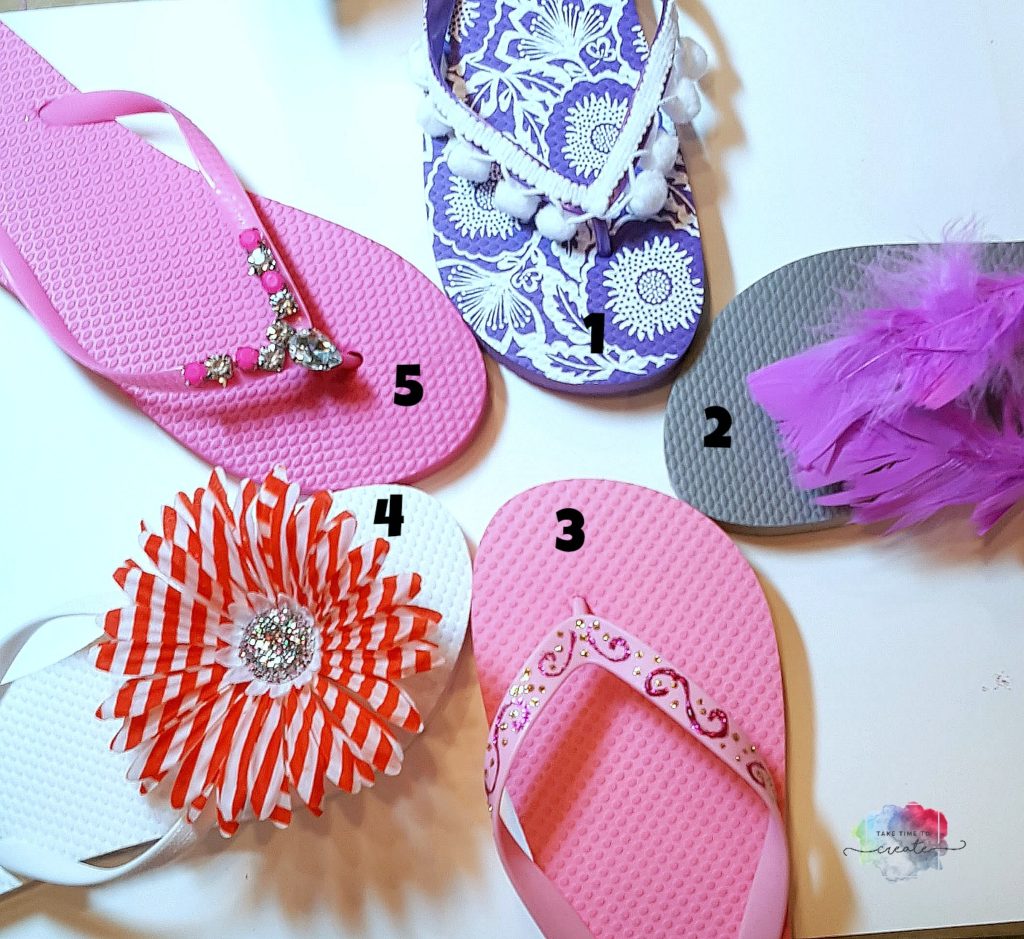
As you can see in this pic I have the flip flops numbered. I did a terrible job of taking pics while was filming, lol, but I think you can get the idea of what I did from the pic. I used the loctite plastic glue on all the flip flops.

diy flip flops

Flip Flop #1

I did want to take away from the pretty design, just enhance it. So for his pair I just glued on some pom-pom trim.

Flip Flop #2

Feathers! This is such a cute, boho idea. Just glue one a pile of feathers, I got mine from the dollar store, but you can get them from almost any craft store.

Flip Flop #3

This is a fun free form design using stickles. Just draw your design and let it dry and you have a fantastic pair of flip flops

Flip Flop #4

Take a large flower and glue it to the top of the shoe. To help keep the flower in place while it was drying I used some clothes pins to keep it in place.

Flip Flop #5

For this pair I disassembled an old statement necklace and glued the pieces on to the flip flop. Just make sure you rough up the metal so it sticks to the plastic.

There you go, 5 different ideas on decorating your flip flops.

What other things do you used to decorate your flip flops?

diy flip flops

The post Decorate Your Flip Flops appeared first on Take Time To Create.
 

Create a Purse from an old VHS Tape

Create a Purse from an old VHS Tape

What do you do with all those old VHS tapes? Why you create a purse! Perfect way to add some interest to your outfit!

Hello Everyone!

I am almost embarrassed to admit, but I still have a lot of VHS tapes laying around my house. I hate to toss them, but I have no way of playing them (I don’t even own a VHS player…) So what do I with this pile of tapes? I decided to create a purse!

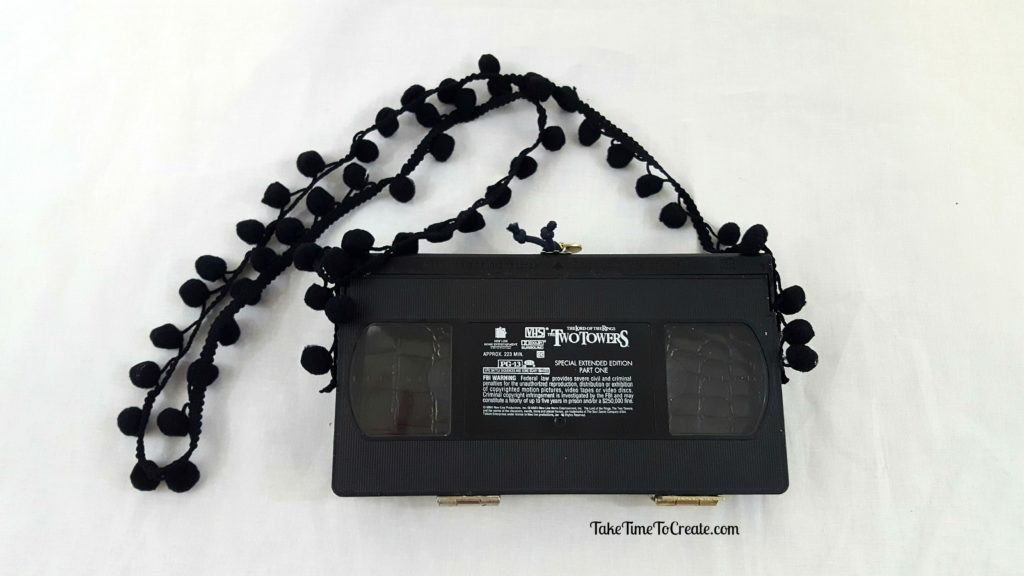
I will admit that is project did not turn out exactly how I envisioned it. But it did turn out cute and the next one will be better! In the instructions I will tell you what I did and how I will make it better next time, that way you can create it at home with out all my struggles, lol

create a diy vhs purse

Materials:

  • VHS tape
  • screw driver
  • cutters
  • fabric, buttons, trim
  • super glue

Instructions:

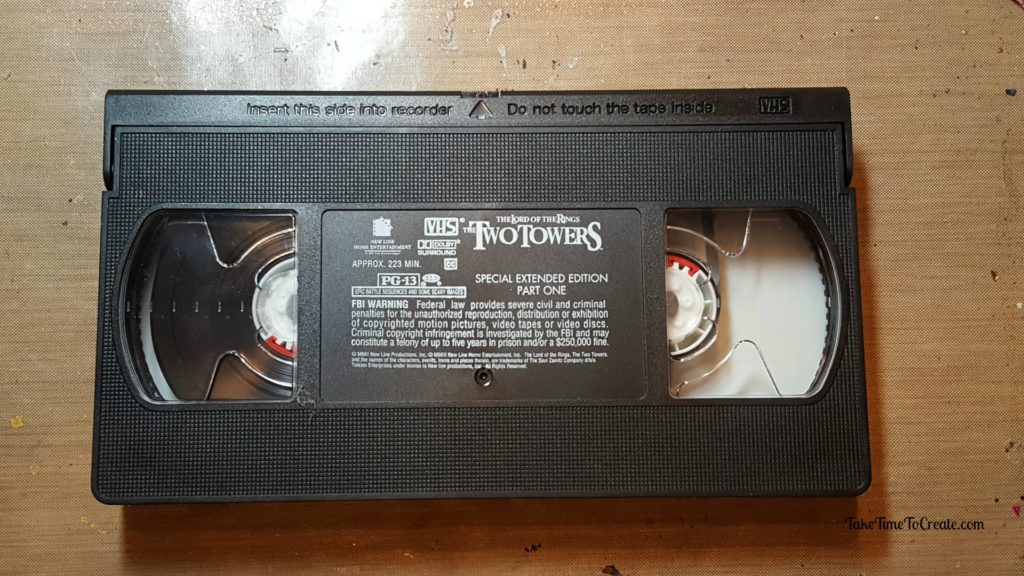
create a diy vhs purse

First you find an old VHS tape. If you no longer have one in your stash you can find them at thrift stores, or ask around I am sure someone has one somewhere.

create a diy vhs purse

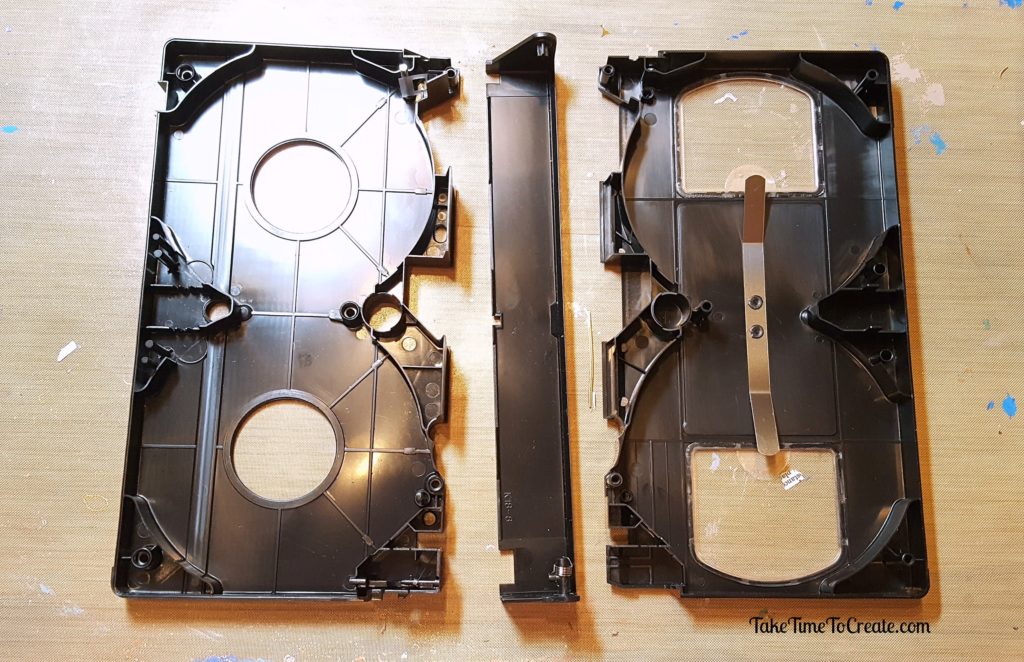
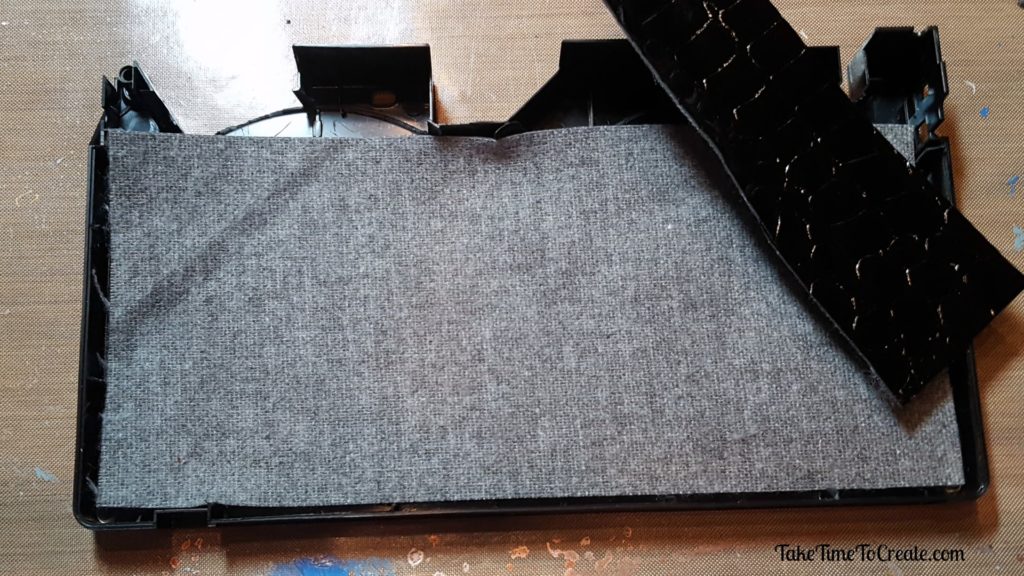
This is the fun part. Unscrew all the screws and open the tape. Take out the innards and safe them, they will work great for a mixed media project. Next you want to cut off the plastic bits that are sticking up. This is one area that I messed up, I cut too much off the bottom and it doesn’t seal (there is a tiny hole in the bottom. Just be careful and you should be good.

Then I glued some faux leather fabric on one side, in hindsight I probably should have glued it to both sides, but I wanted to see the clear windows still. I think I can make this a little better next time.

create a diy vhs purse

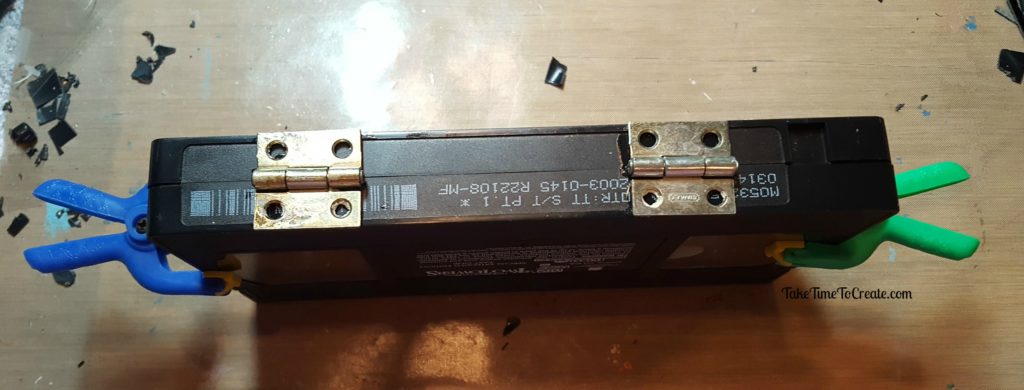
Glue hinges so that you can open and close your purse. Try not to glue your fingers to the tape, lol (I may or may not have done the, lol) Also try not to glue the hinge shut, it takes a lot of careful prying if you happen to glue the hinge (once again I may or may not have done the, lol)

create a diy vhs purse

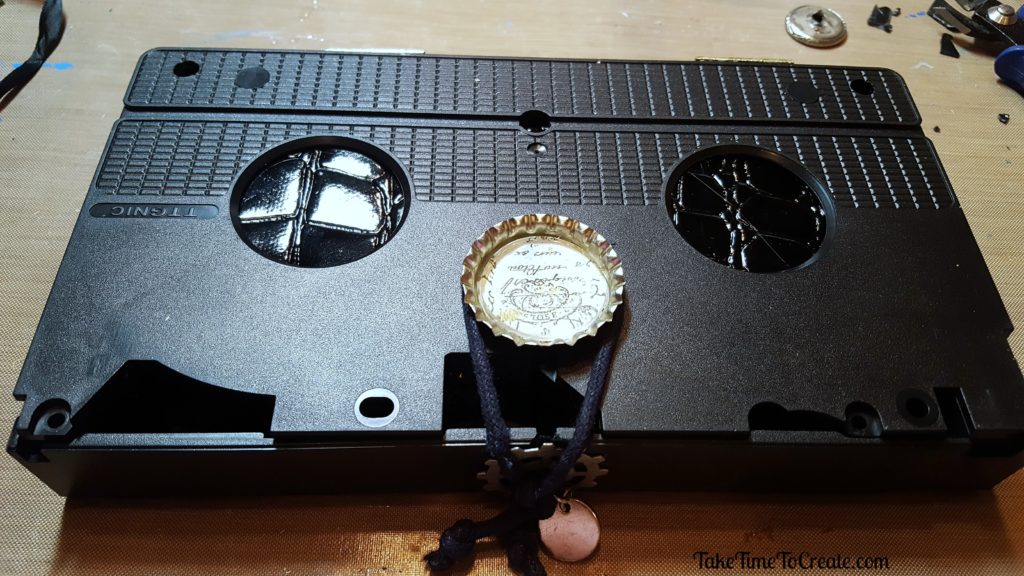
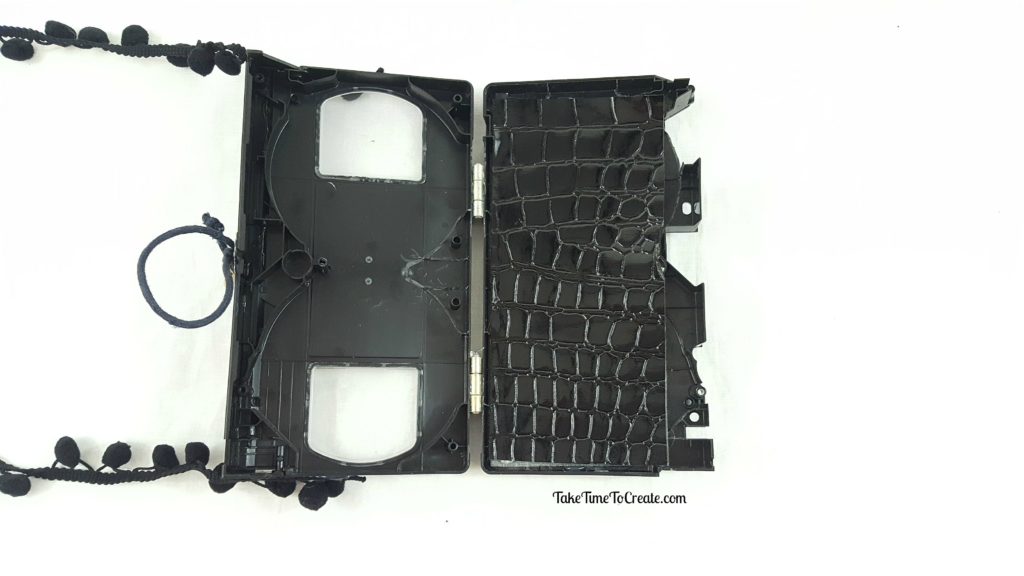
Then I added a decorated bottle cap and some string to secure the purse closed. Next time I will use elastic, but this works. Also next time I will add fabric to the sides so the tape doesn’t lay flat when open, it will help keep everything contained. Add a strap, I wanted mine to look a little funky so I added pom-pom trim.

create a diy vhs purse

create a diy vhs purse

Overall I am happy with how this turned out, and I am excited to make improvements to version 2.  What are you doing to up cycle your VHS tapes?

The post Create a Purse from an old VHS Tape appeared first on Take Time To Create


DIY Straw Flower Hat

DIY Straw Flower Hat

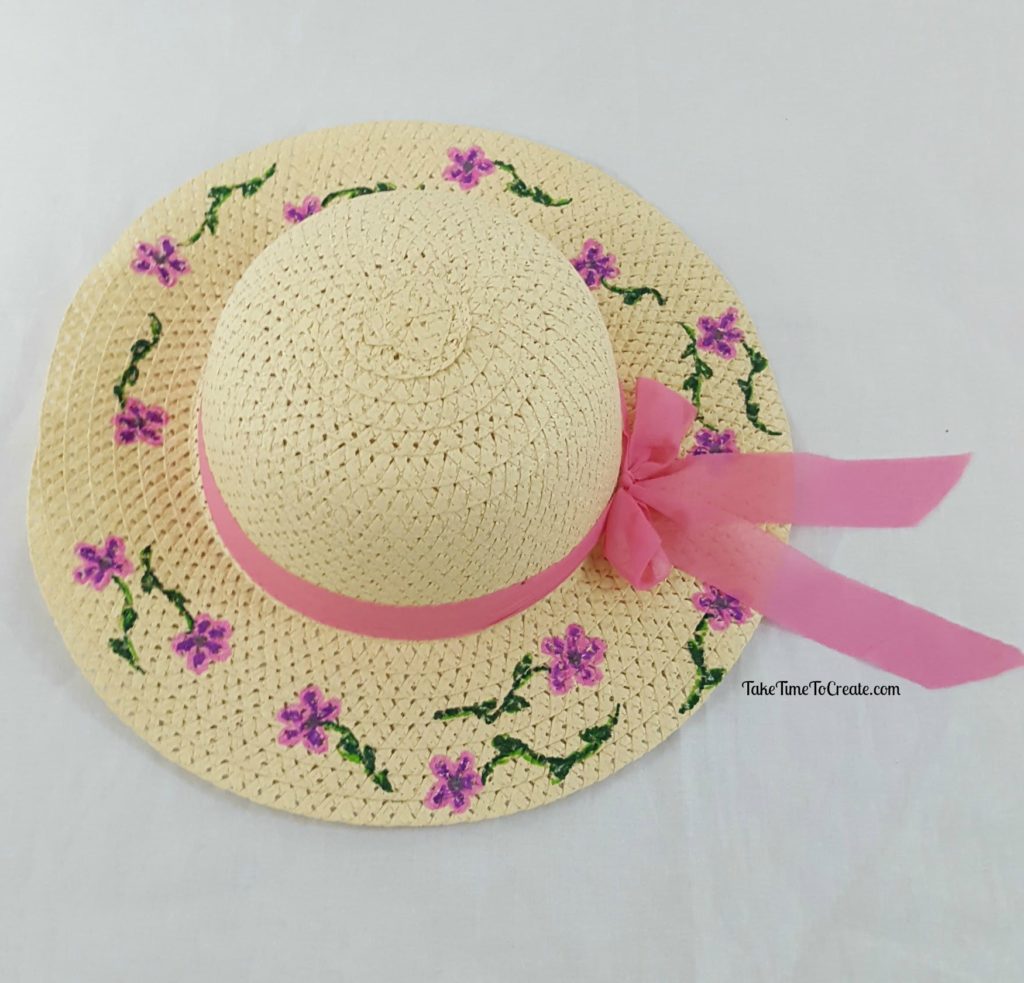
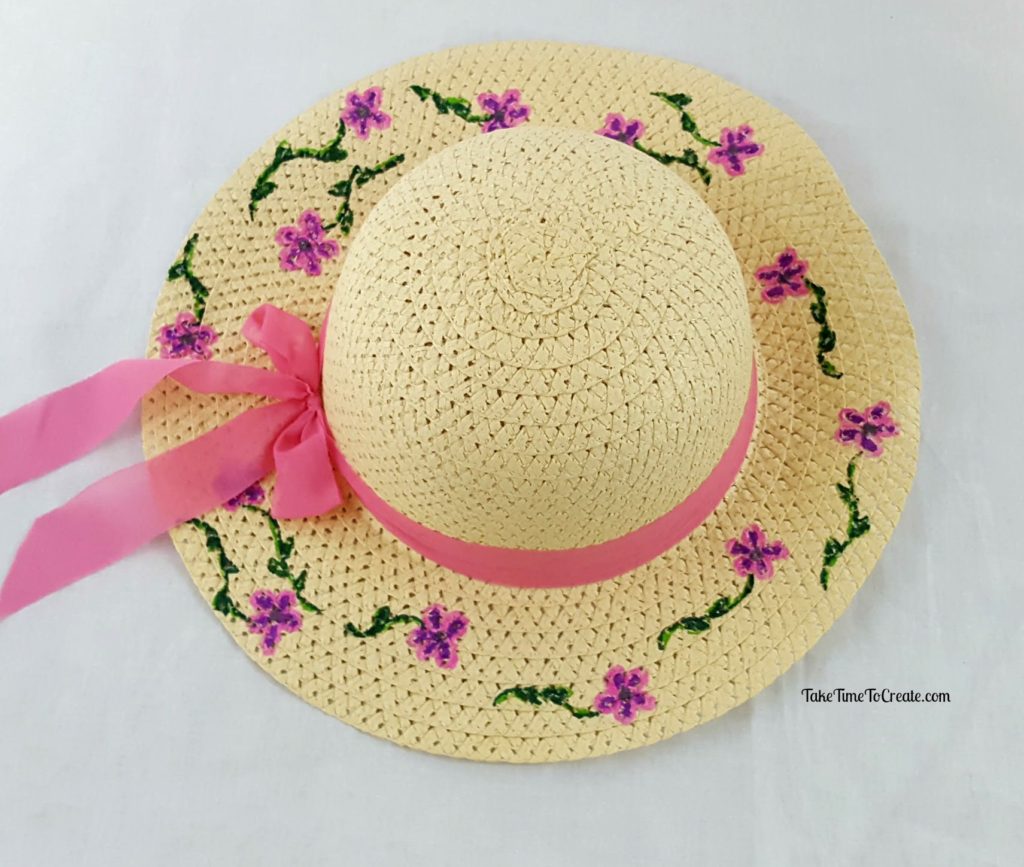
With spring approaching a new straw hat is what everyone needs. And with a few markers you can personalize the hat and add just the right amount of flair.

Hello Everyone!

It has been a while since I did a Dollar Store project and an accessory project, so I thought I would combine the 2 into 1 project.

I have a terrible case of Spring Fever and when I saw these cute straw hats at the Dollar Store I knew I had to get one and decorate it.

diy straw flower hat


The project is simple enough and can be completed in under an hour.

Materials:

Instructions:

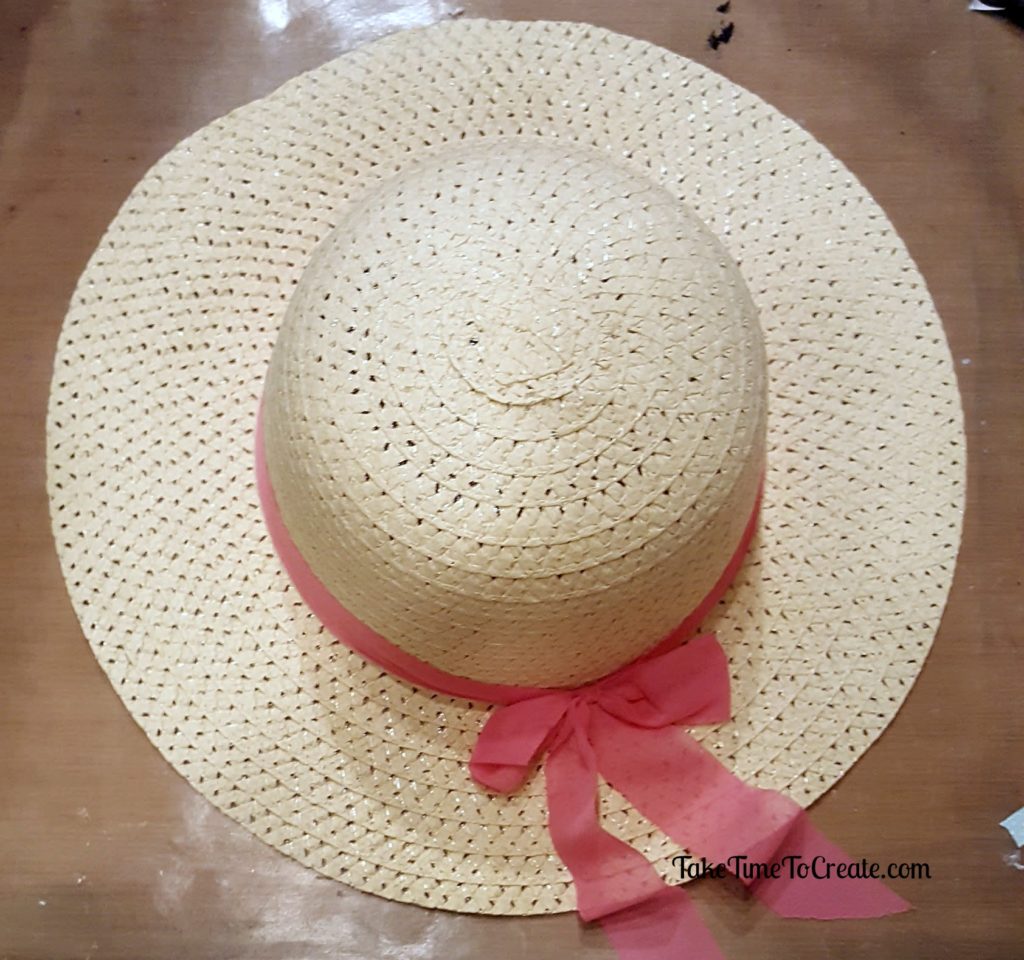
Find a super cute straw hat that you are willing to draw on.
diy straw flower hat


I didn’t want to spend a ton of money, so I thought a dollar was perfect. I also wanted to make this an easy project that could be completed quickly. And I accomplished that as well.

diy straw flower hat


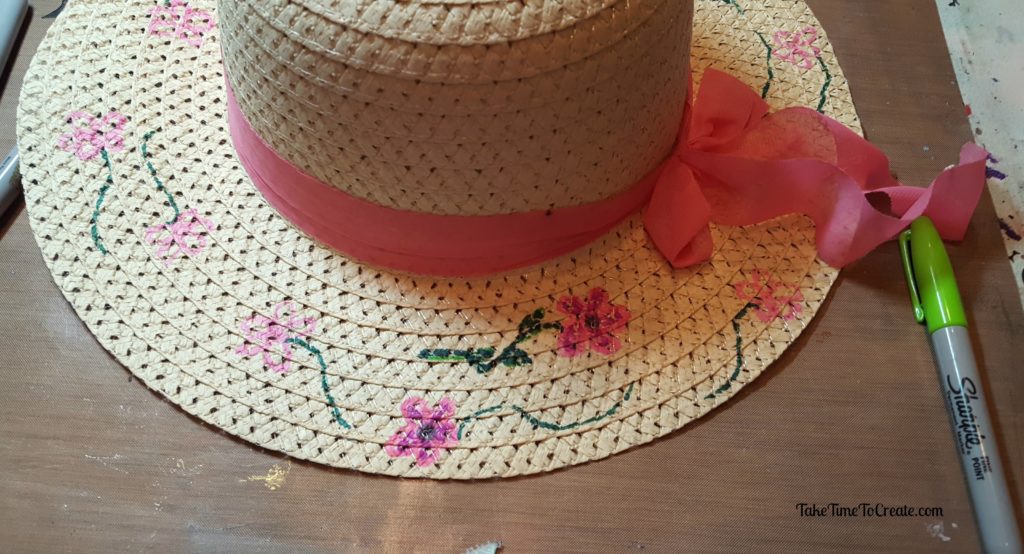
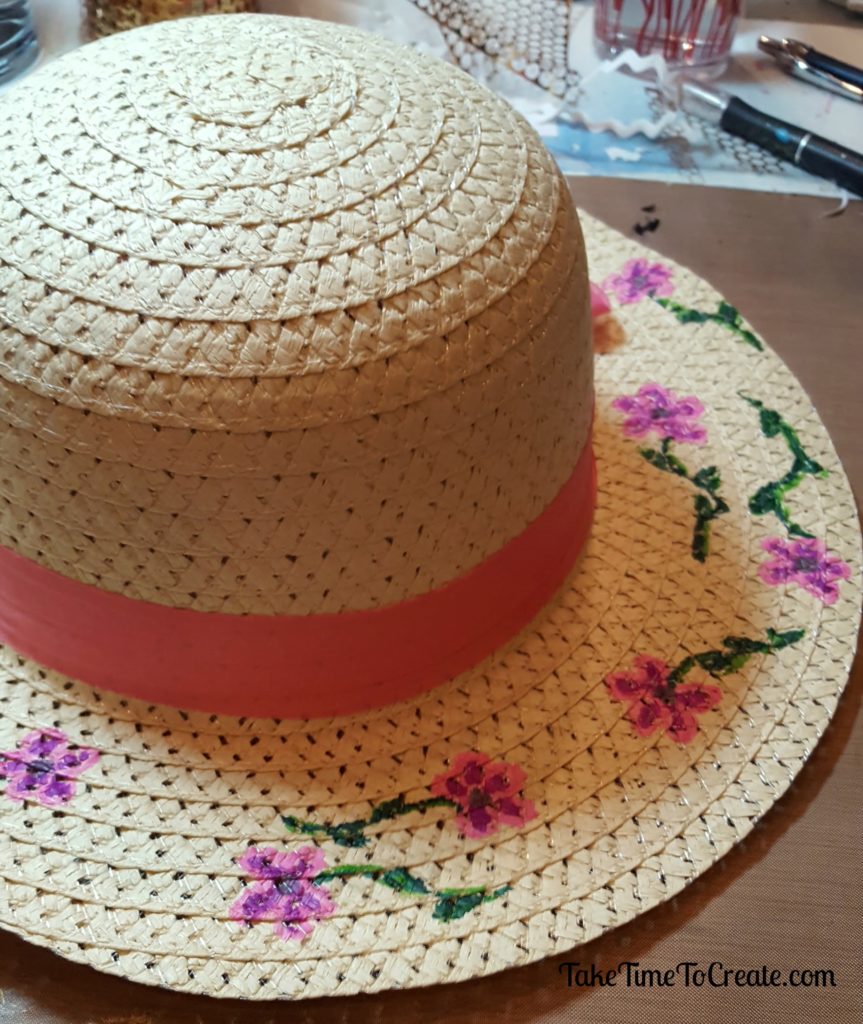
Find a design that you want to draw and go to town. I thought pretty pink flowers were perfect for spring.

diy straw flower hat


Straw is a little harder to work on, but not impossible, just take your time and you will be fine. Pick a design that doesn’t have a lot of detail or it will get muddy on the hat.

This would be a great project with a group or for a girls weekend or with kids.

How are you handling your Spring Fever?

This post contains affiliate links

The post DIY Straw Flower Hat appeared first on Take Time To Create.
DIY Harry Potter Drawstring Backpack

DIY Harry Potter Drawstring Backpack

A trip to Universal Studios isn’t complete with out this DIY Harry Potter Drawstring Backpack!

Hello Everyone!

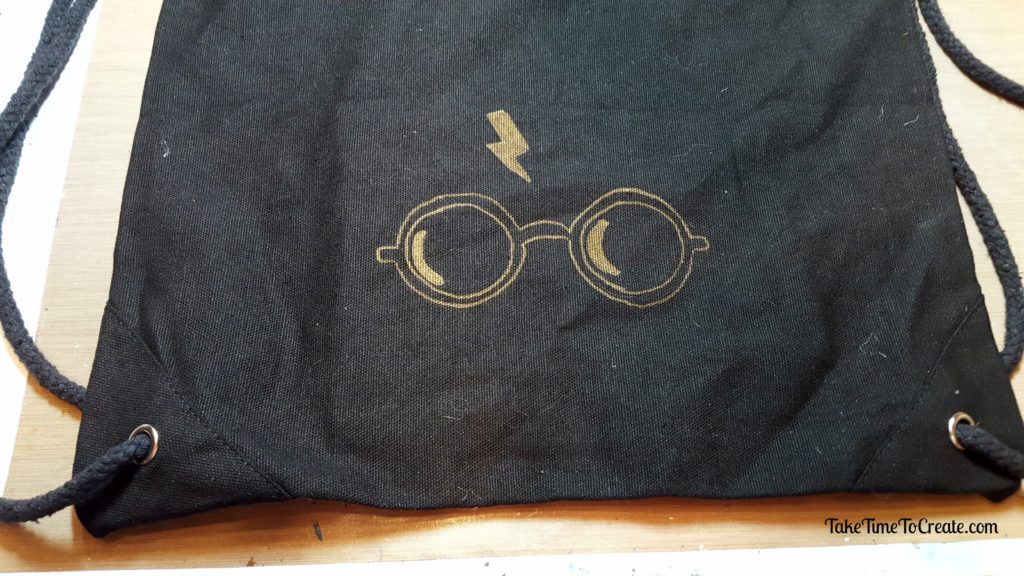
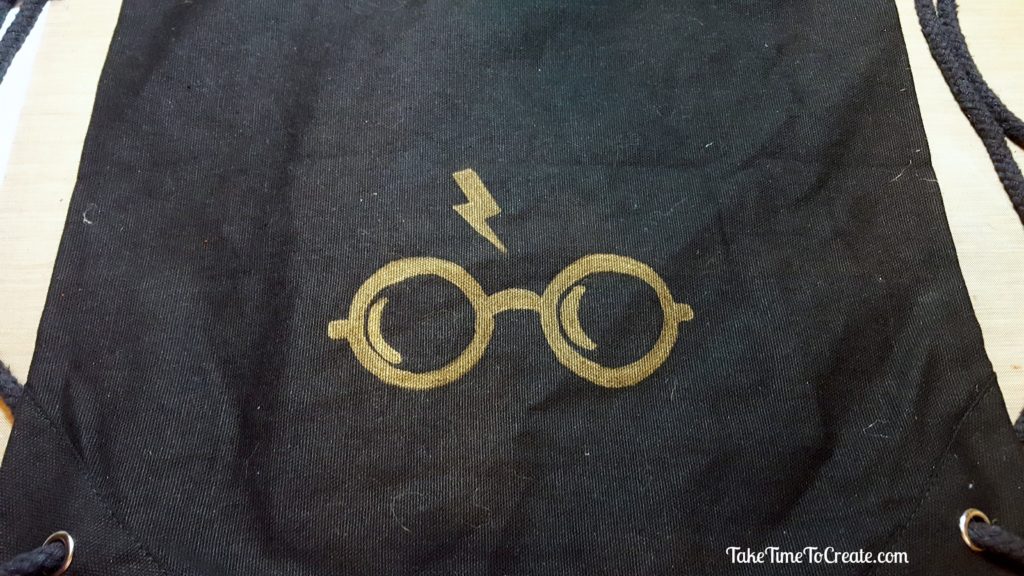
Next month we will have the opportunity to go to Universal Studios Hollywood!!!  I am so excited! In great anticipation I decided to make a Harry Potter drawstring backpack that will be perfect to carry my wallet, camera, and sunglasses.  I decided to use this simple design that I found on the internet. Everyone know what book this is in reference to without being to obvious, lol

I have made drawstring backpacks before, you can see that post here: Cinderella backpack

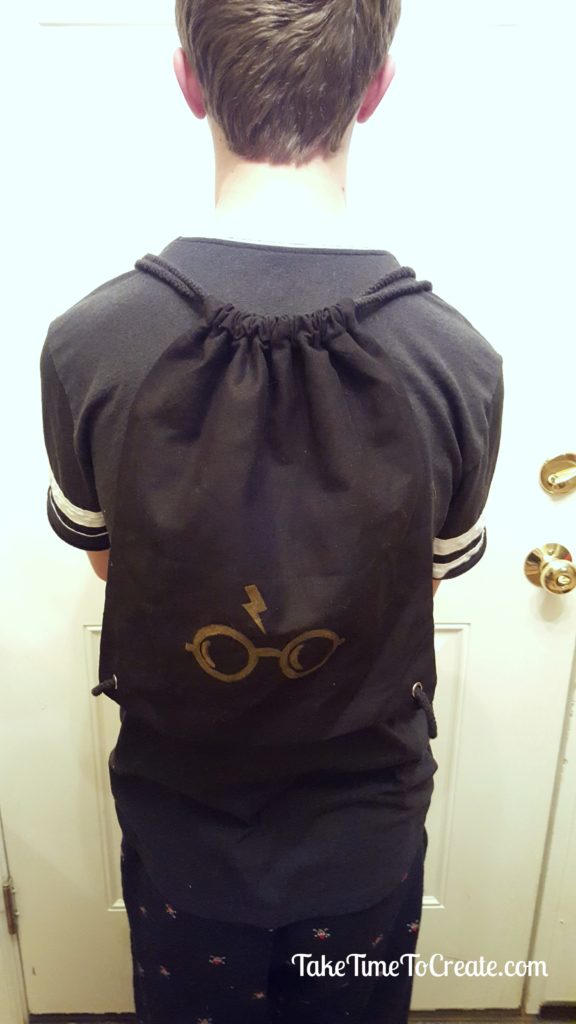
My son is such a good sport being my model, lol.


diy harry potter drawstring backpack

Materials:

  • backpack (you can find a similar one here: bag)
  • Gold Sharpie (you can find it here: sharpie)
  • Graphite paper (you can find it here: paper)
  • Clip art from internet

Instructions:

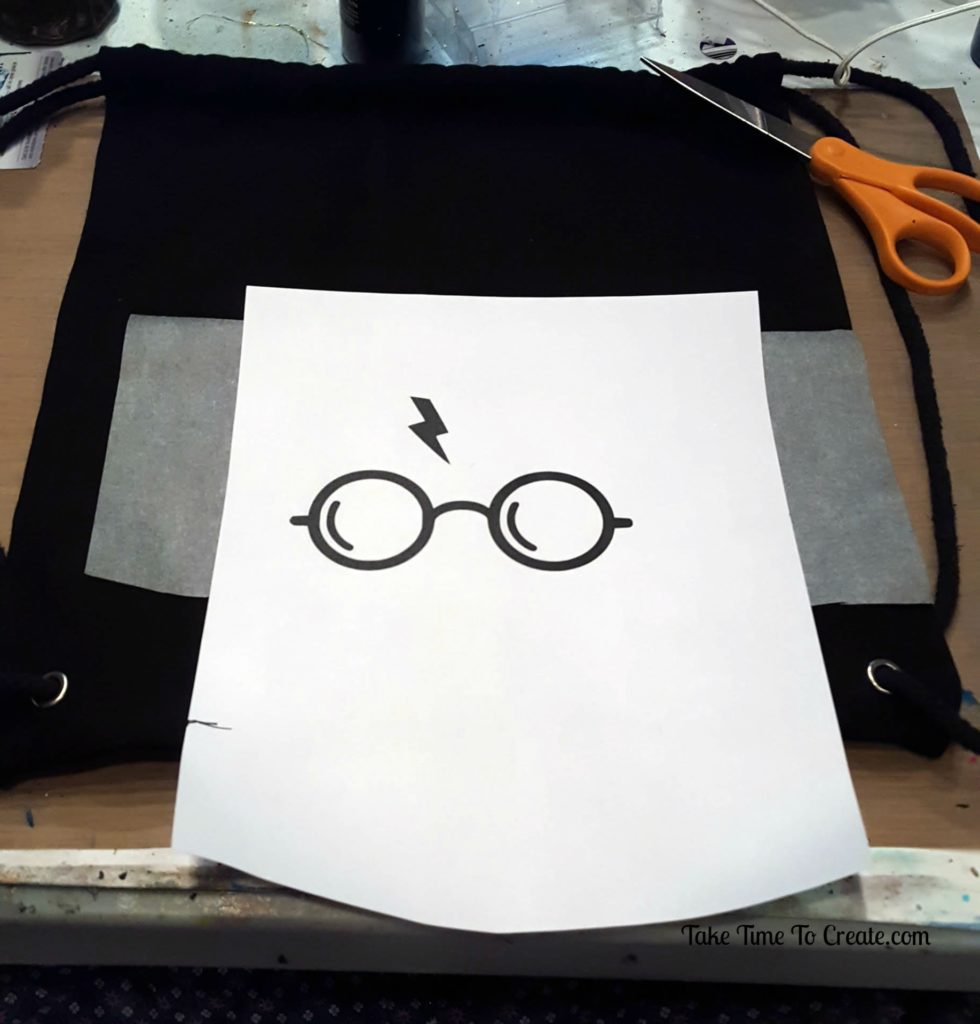
The first thing you do is find an image that you would like to trace (just about any image will do) and print it in the size you need.

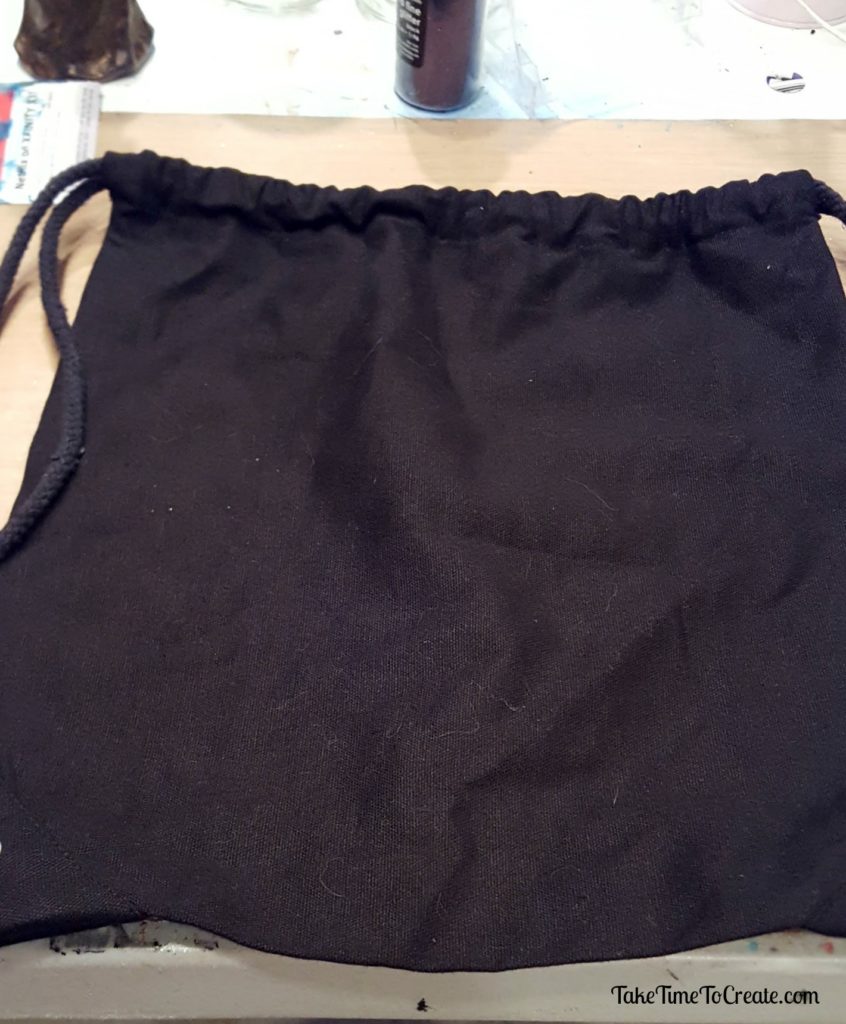
Spread out your bag and decide where you want your design.


diy harry potter drawstring backpack

Place the graphite paper on the bag then place the image over the graphite. Trace the image with a pencil so that the image will show up on the bag. Press hard and do over it a few times if needed.

diy harry potter drawstring backpack

Once you like the image take the papers off and set them aside.

Put a piece of cardboard in the bag to prevent the sharpie from bleeding to the other side

Now it is time to start drawing the image with a sharpie.

diy harry potter drawstring backpack

Fill it all in  and clean up the edges. Now you are ready to rock your new bag, and you don’t have to wait to wear it at Universal, this is a bag that can be worn all the time!


diy harry potter drawstring backpack

The post DIY Harry Potter Drawstring Backpack appeared first on Take Time To Create.
This post contains affiliate links, thank you for your support!

Make Yarn Out of an Old T-shirt

Hello Everyone!

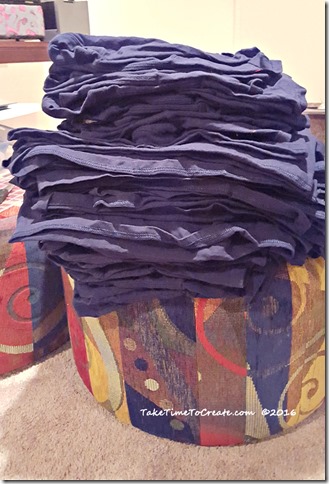
I hope your years is getting off to a great start. I am pretty excited because I have started on a project that I have been wanting to get started on for a long time. I got this huge stack of old t-shirts that had the wrong logo on them (this pic is only part of what I got). And since the shirts can’t be sold my friend gave them to me to make into yarn. This is not a new technique, but it is new to me and I am pretty excited in how it turned out. It is a perfect activity to do while I am watching TV. I am only part way through the stack, but eventually I will be done and then I am going to make rugs out of the yarn. Great way to upcycle old t-shirts and make something new.
stack of shirts

I didn’t connect the balls of yarn to make one big ball because I am not sure if I am going to braid the rug or crochet it. (if I crochet the rug I will need to combine the yarn, if I braid it then I will need to sew together the strips.) Either way when I do the rug I will be sure to do a  tutorial for you guys.

Here is how you turn in old t-shirt into yarn.

Materials

~Old T-shirt (make sure it is washed, if it is new this will take the sizing out and if it is from a thrift store it will make sure it is clean)

~ Scissors

~ ruler if you want, I didn’t use one but a ruler might make it easier to cut the strips.

Instructions

~ Lay the clean shirt on a flat surface. As you can see from the pics I am working on the floor, but that is just my preference. Make sure the shirt is flat and as smooth as possible.

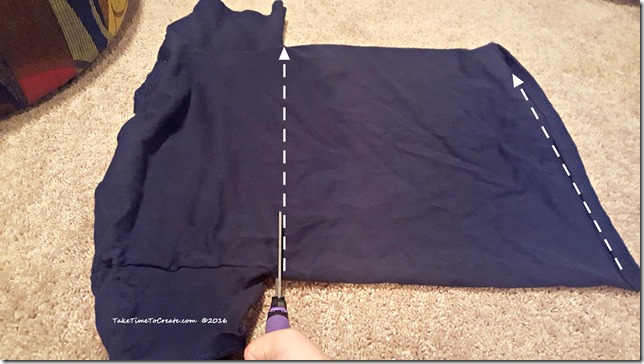
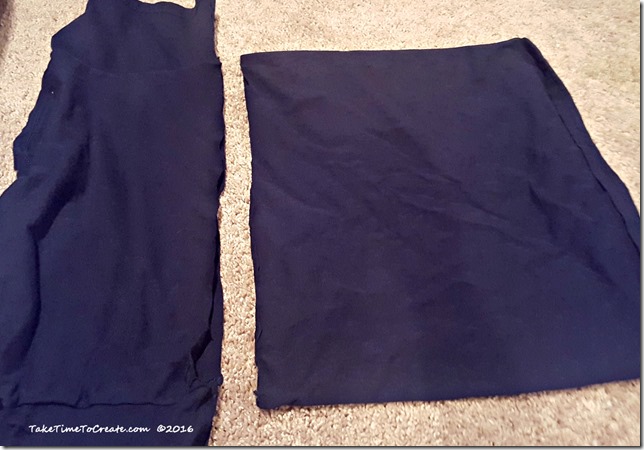
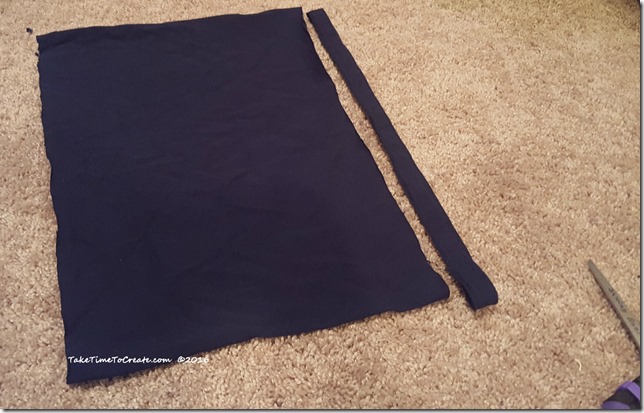
~Cut the top off right under the sleeves. (I am keeping this top part, not sure what I am going to do with them but I just can’t throw it away) Then Cut off the bottom hem. (I threw that part away)


Cut top and bottom off

top cut offbottom cut off

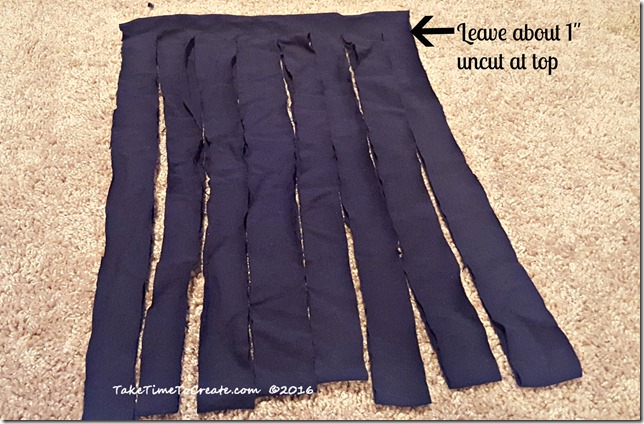
~ Then you want to cut the remaining shirt into strips. I cut mine about 1-1.5” wide.

***This is Important! Make sure you don’t cut all the way to the top! You will need this uncut area to make the yarn into one continuous length.

cut into strips

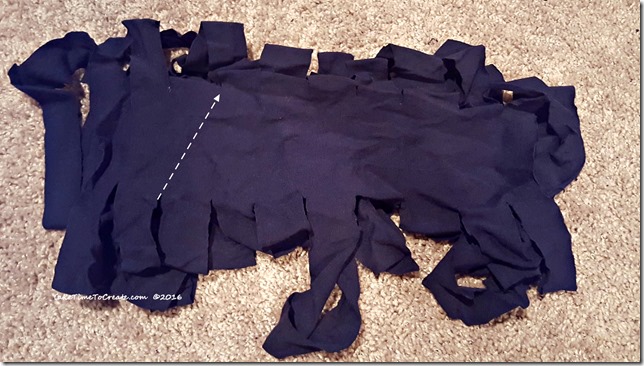
angeled cuts to make 

(This is what the top looks like with the uncut areas. You will cut it at an angle to make the strips, starting at the right end)

~ For this part refer to the pics, and please let me know if you have any questions.

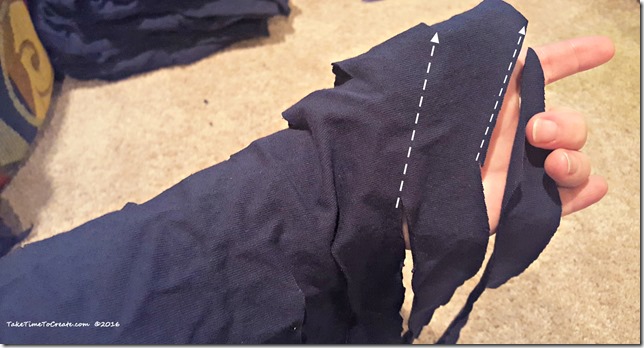
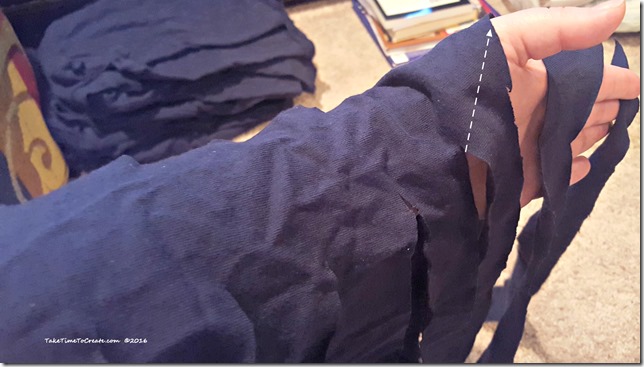
To make the yarn cut off starting at the last strip and make an angle cut to the edge. Then cut the rest of the strips in an angle until you get to the end. I place the shirt on my arm and make the cuts on there, that just helps me keep track of were I need to go next.


cutting t shirt yarnwhere to cut for t shirt yarn

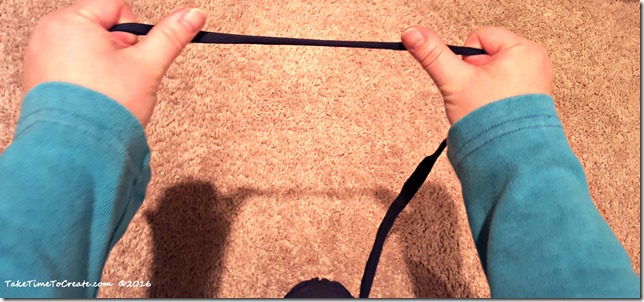
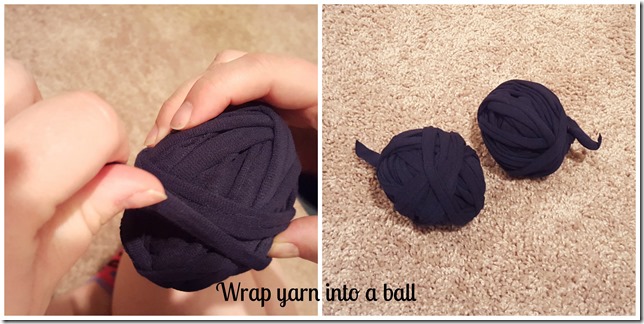
~ Once you have cut the entire shirt you should have on long length of T-shirt Yarn. Then gently stretch the yarn and then wrap it into a ball. I made individual balls because I am not sure if I want to combine them into one length or not, but this way I am keeping it all nice and neat until I am ready to use it.

stretch yarnwrap yarn

I know this may seem a little confusing, but I am here if you have any questions. Have any of you made t-shirt yarn before? I would love to some tips and tricks to make it better and or easier.

Jazzing Up a Simple T-shirt

Jazzing Up a Simple T-shirt

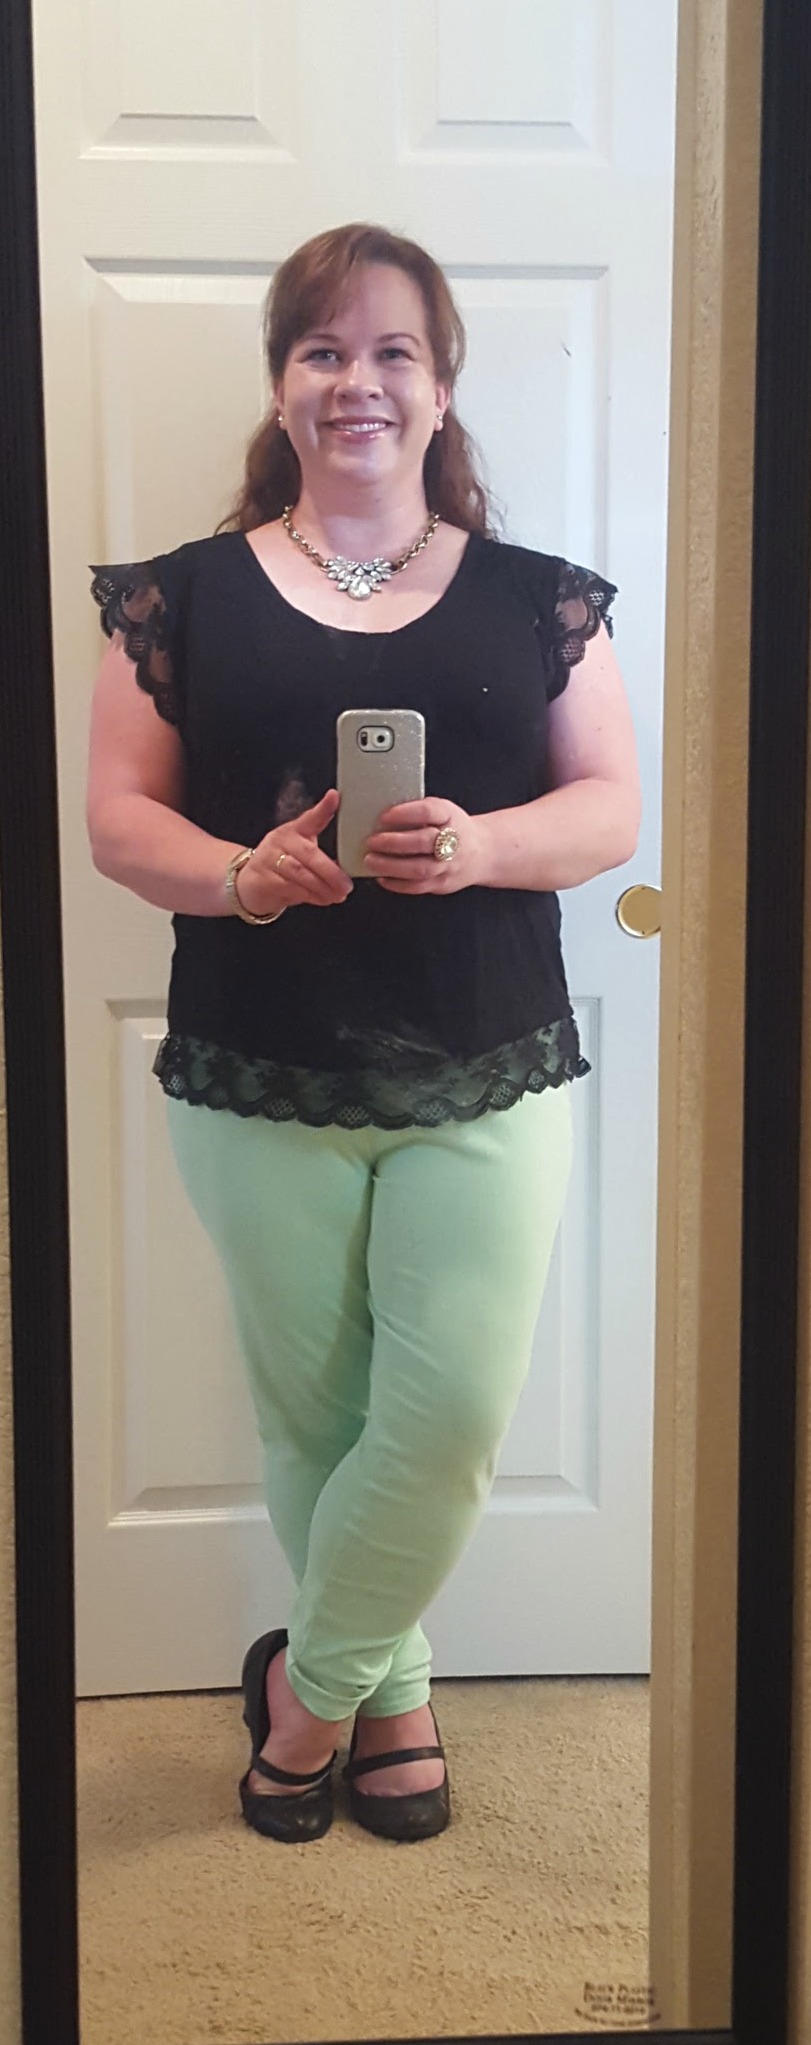
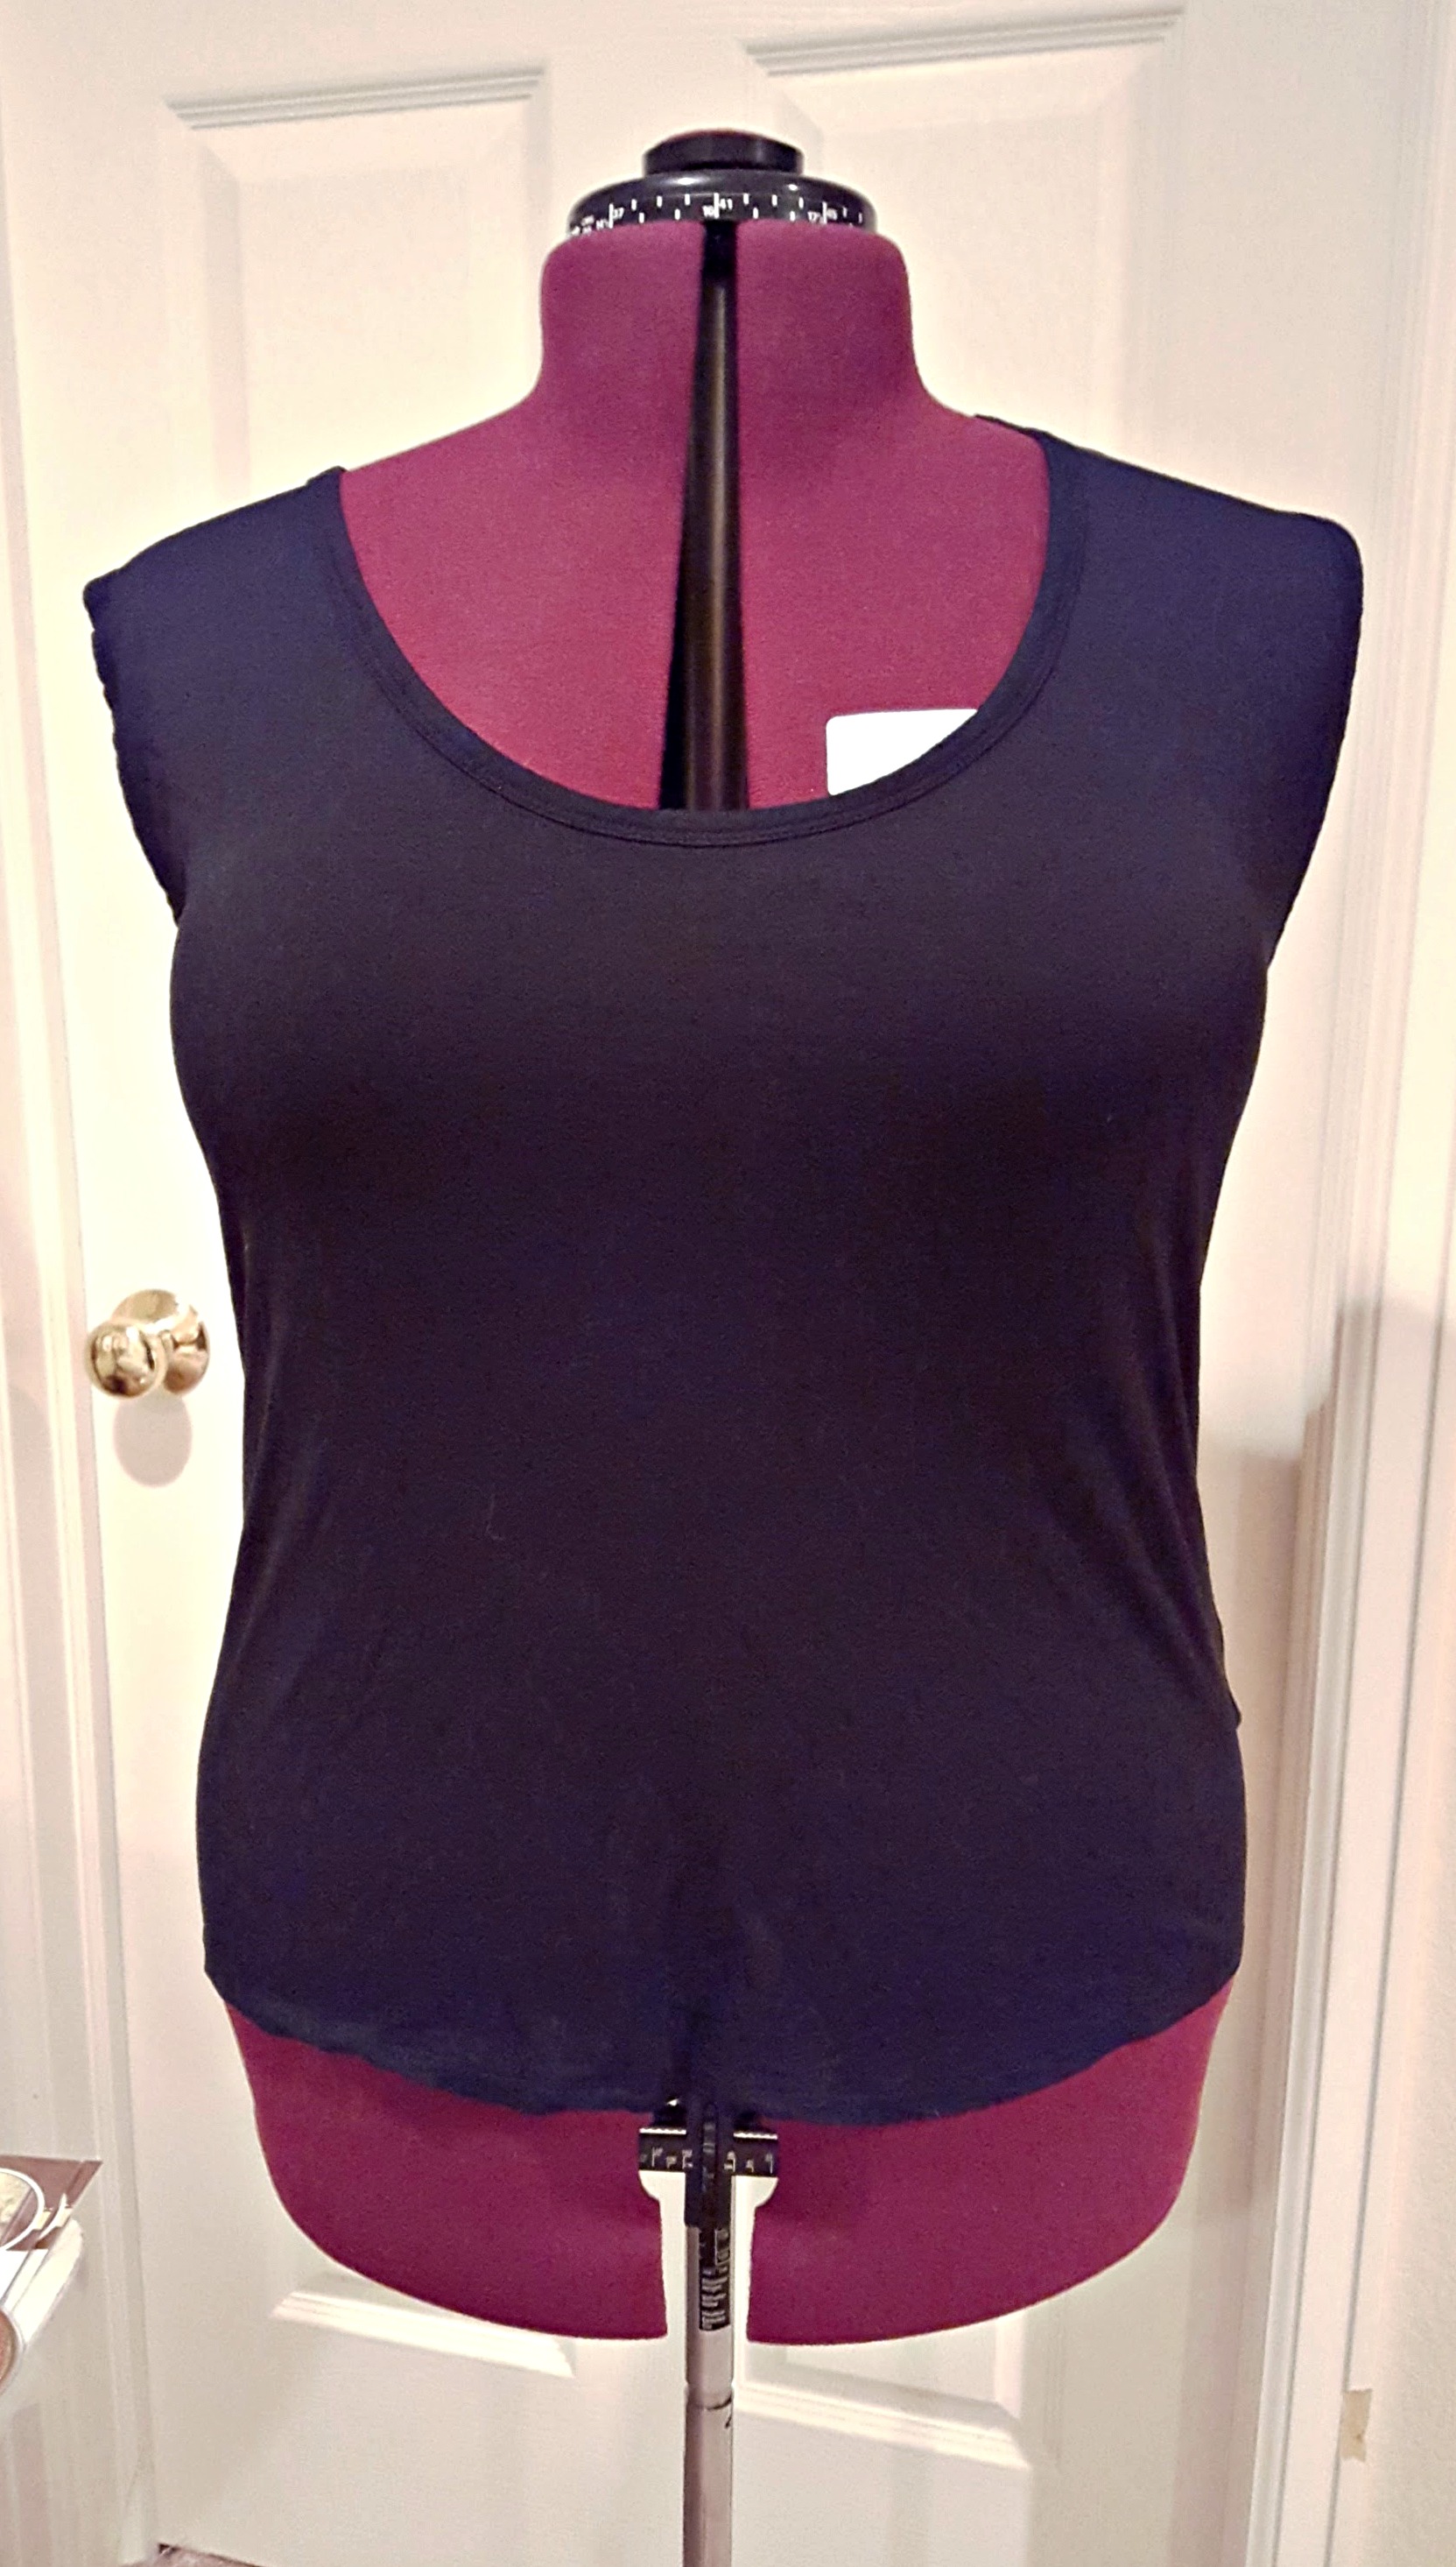
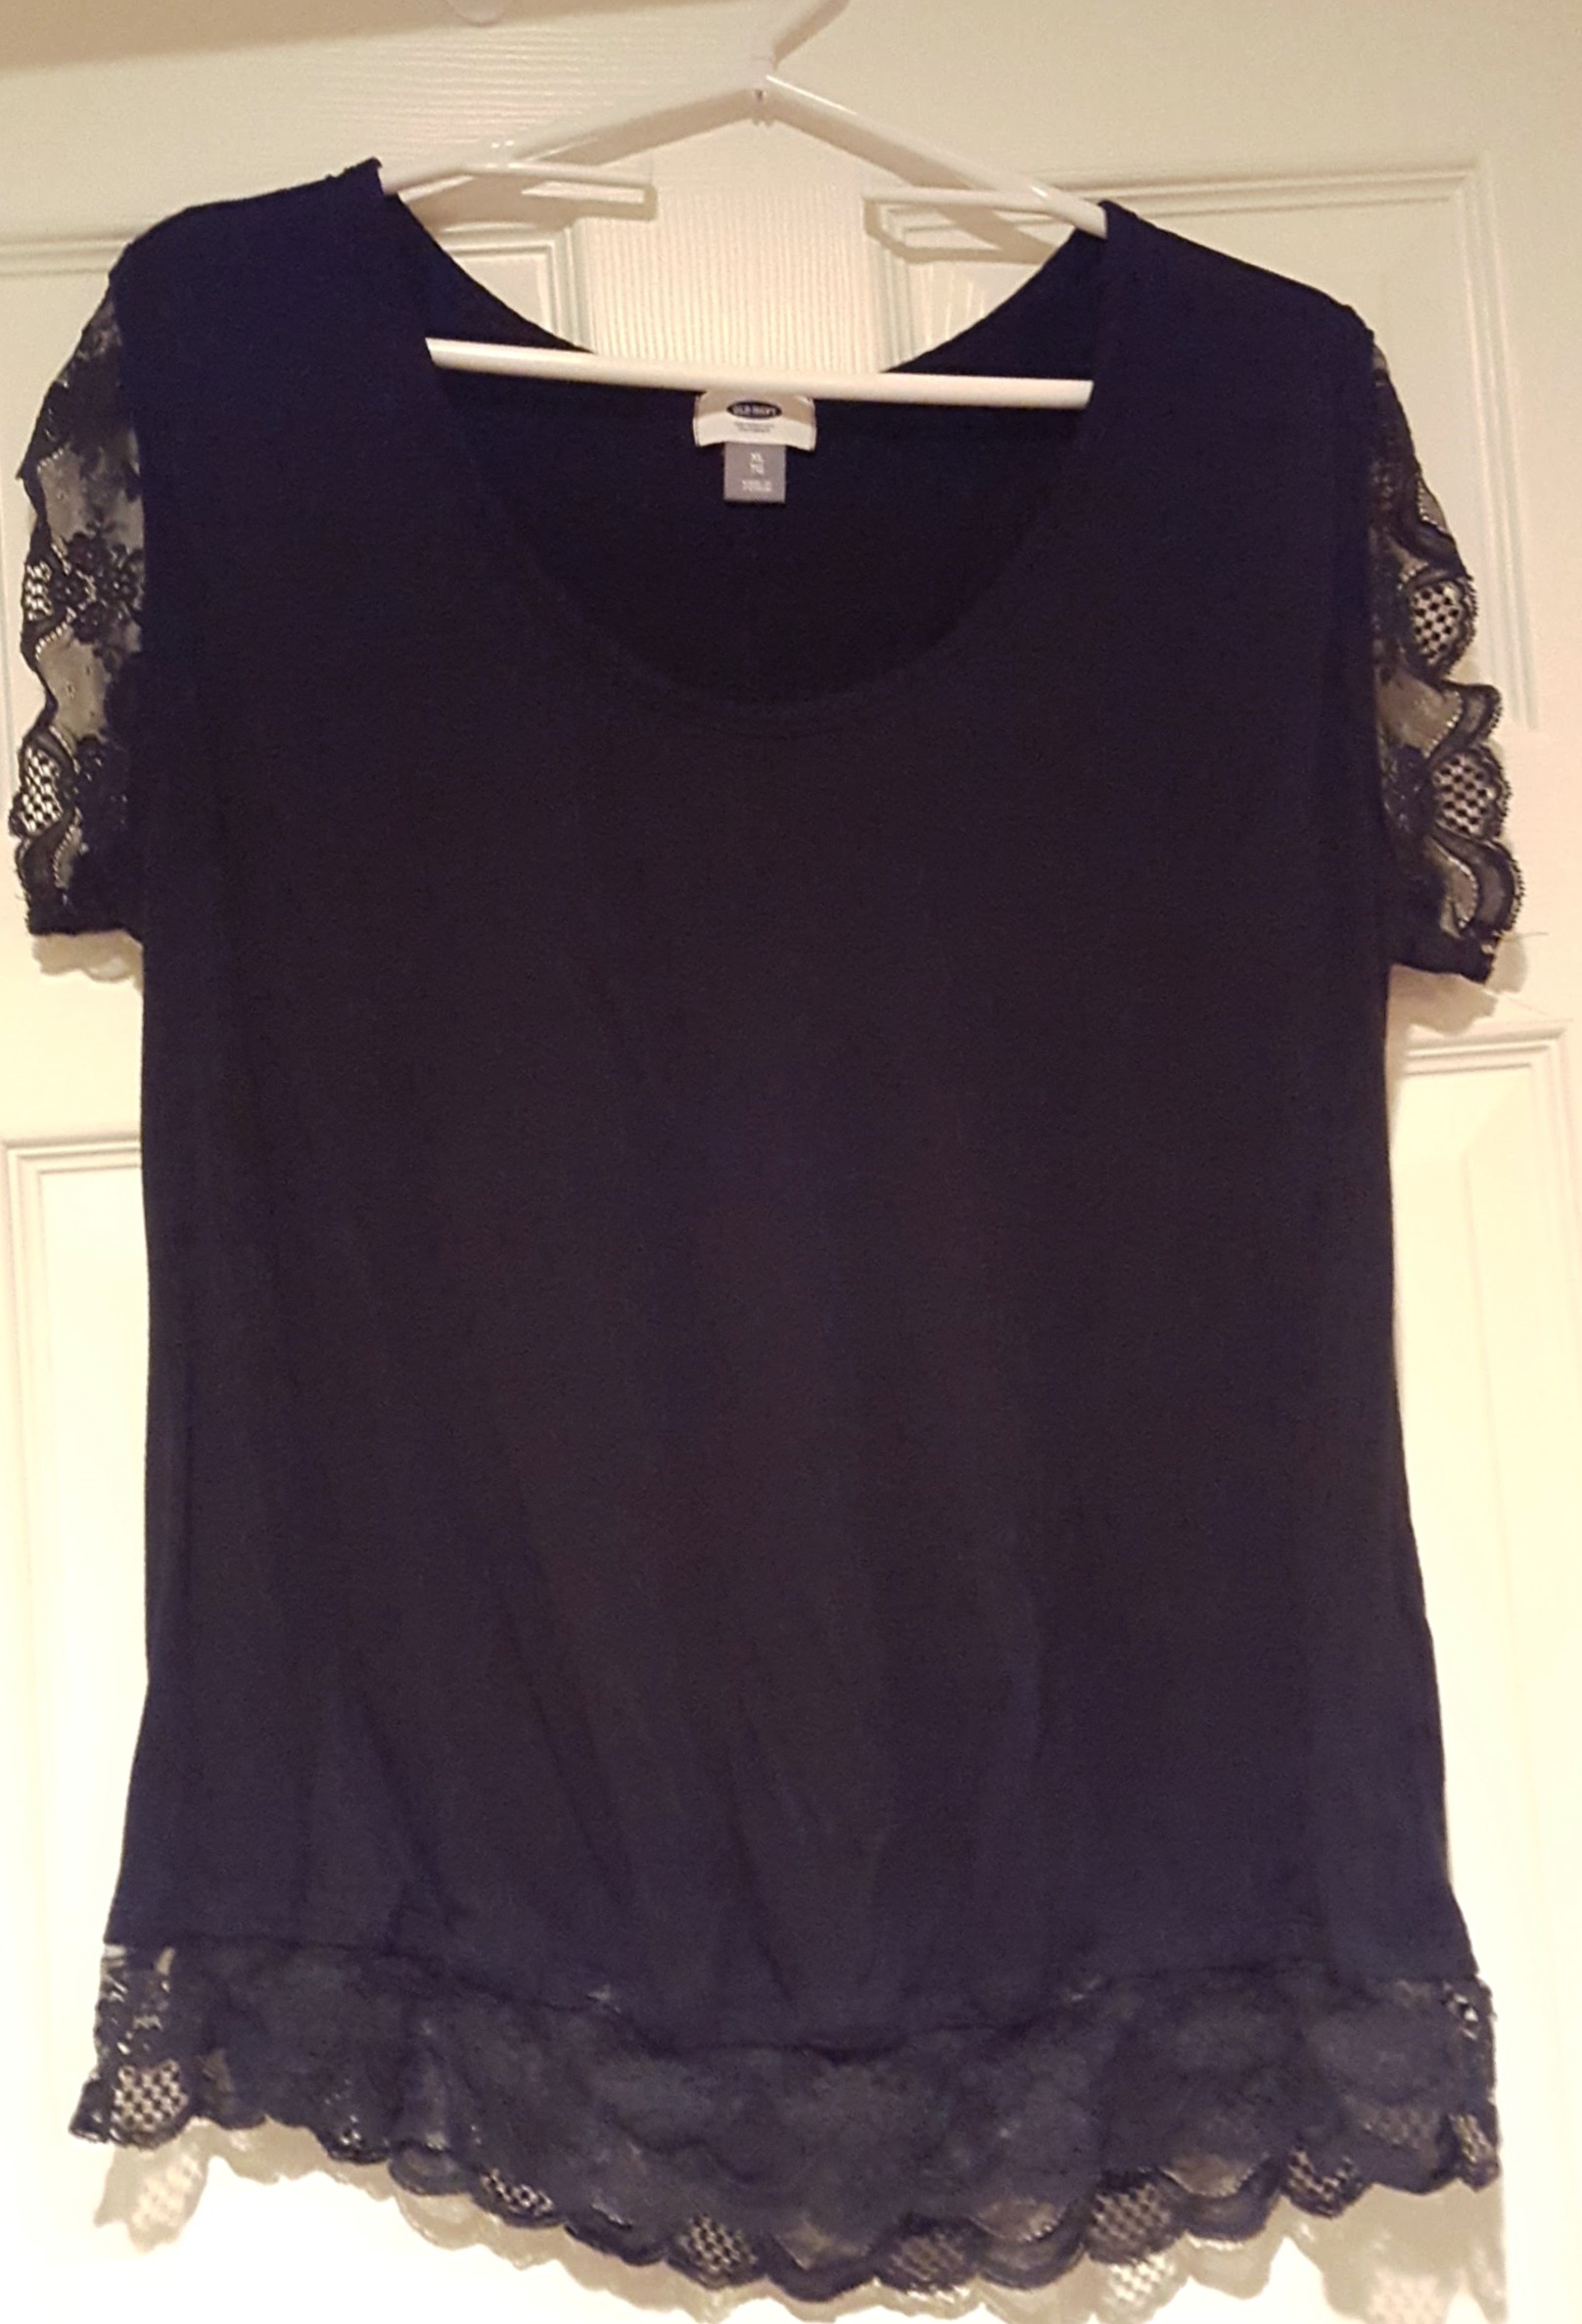
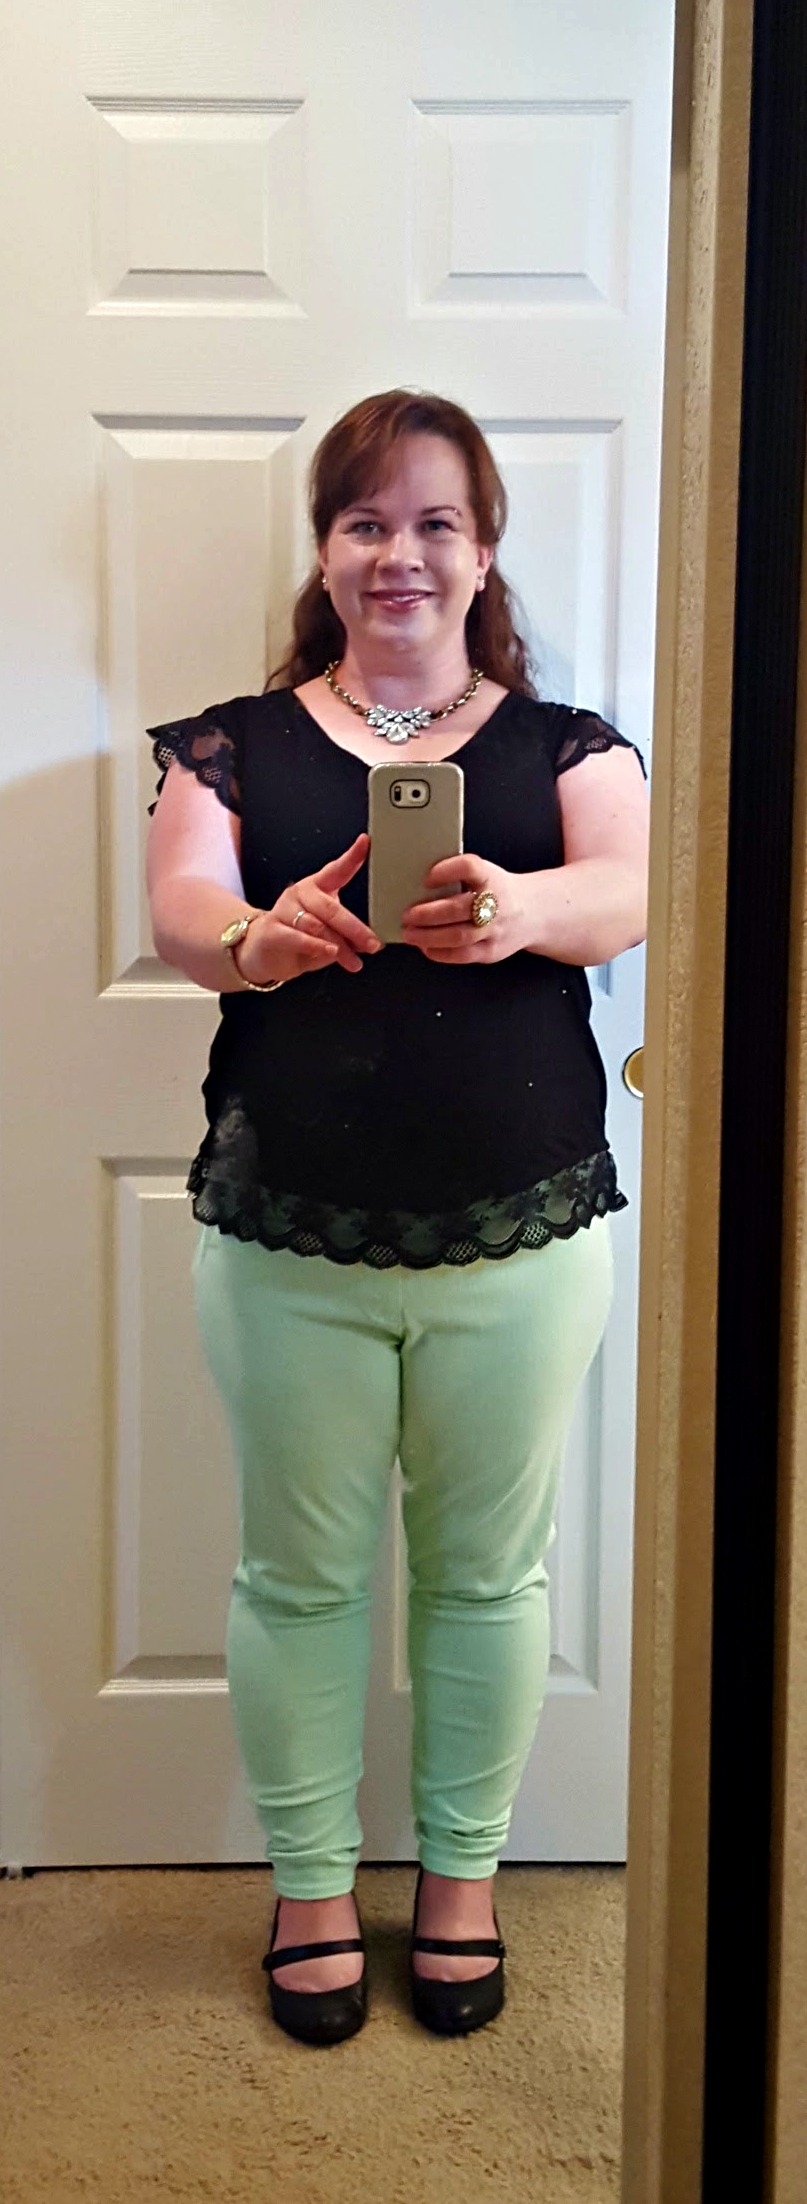
Continuing with another DIY for my birthday dinner I will show you what I did to jazz up a simple t-shirt from Old Navy. I had this plain black shirt in my closet that I never wore. I have a lot of plain black shirts, but this one never called out to me choosing my outfit for the day. So I decided it was time to spruce it up with some lace. A very easy DIY that turned a boring shirt into something that I wear all the time.

diy lace shirt

Here is how you do it:

Materials:

~ pre-washed t-shirt (you want make sure it is washed first in case there is shrinkage) I got mine from Old Navy on clearance

jazz up a plain t shirt with lace

~ lace

~ needle and thread, or sewing machine or glue

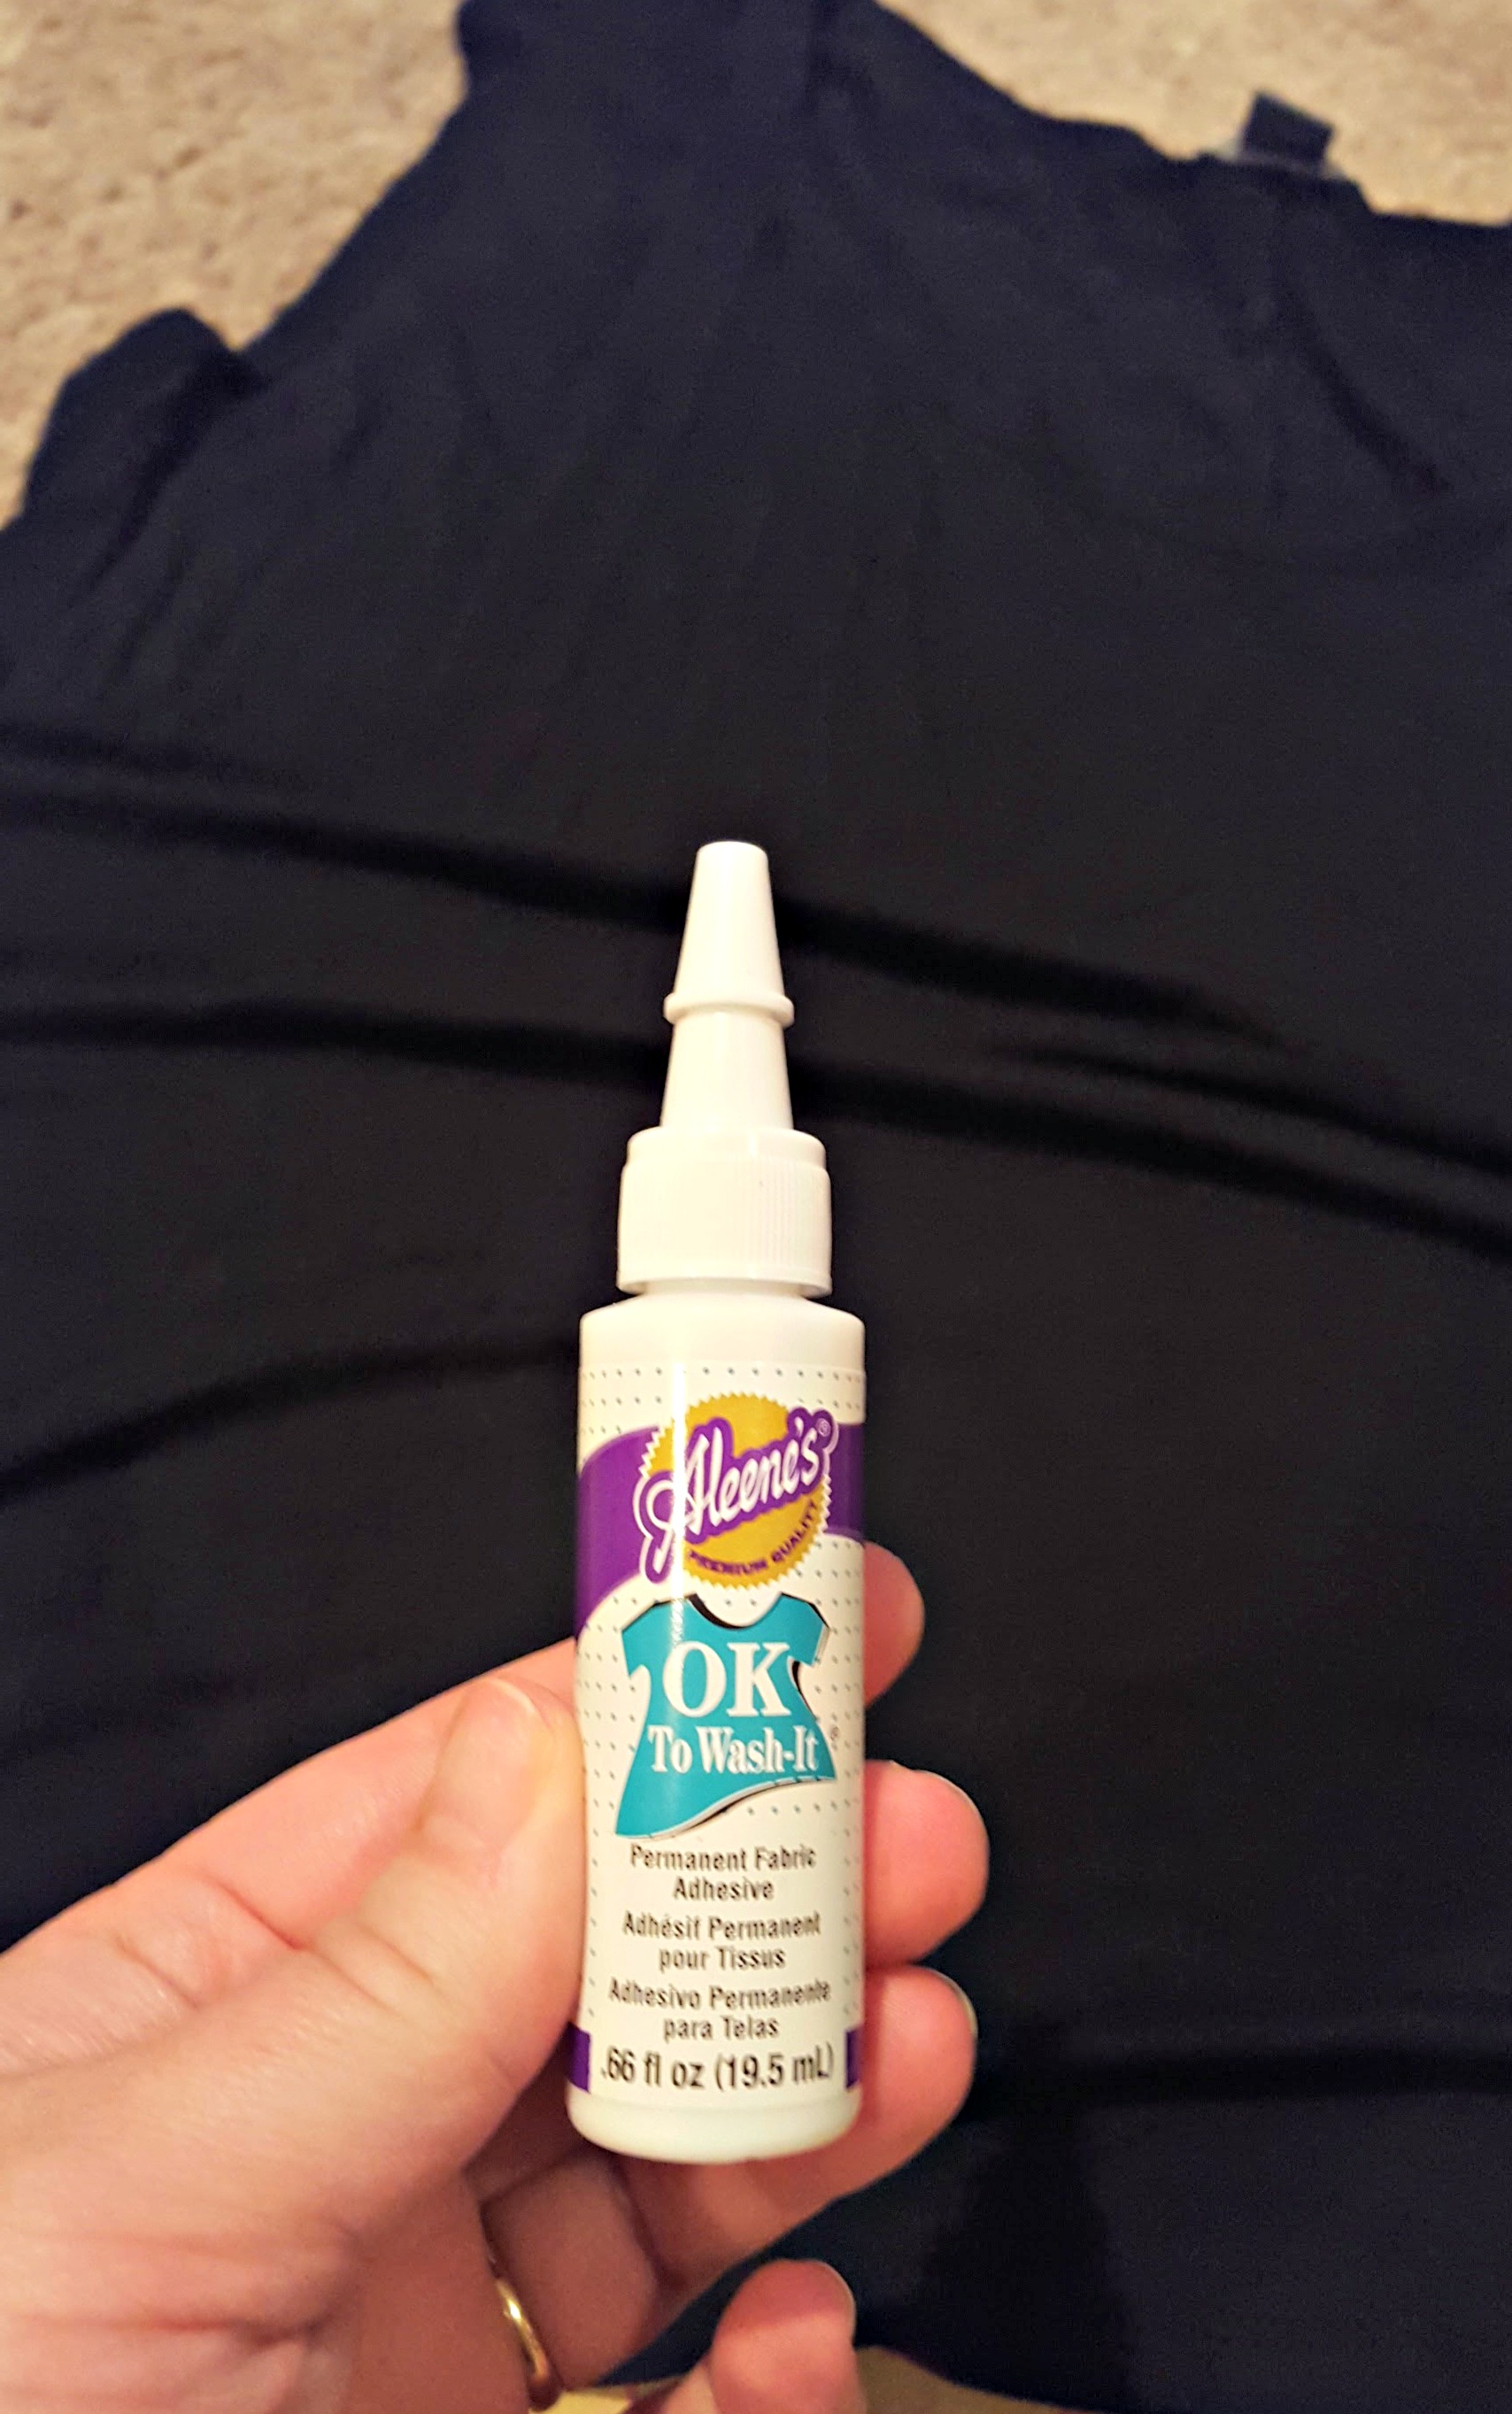
fabric glue

Instructions:

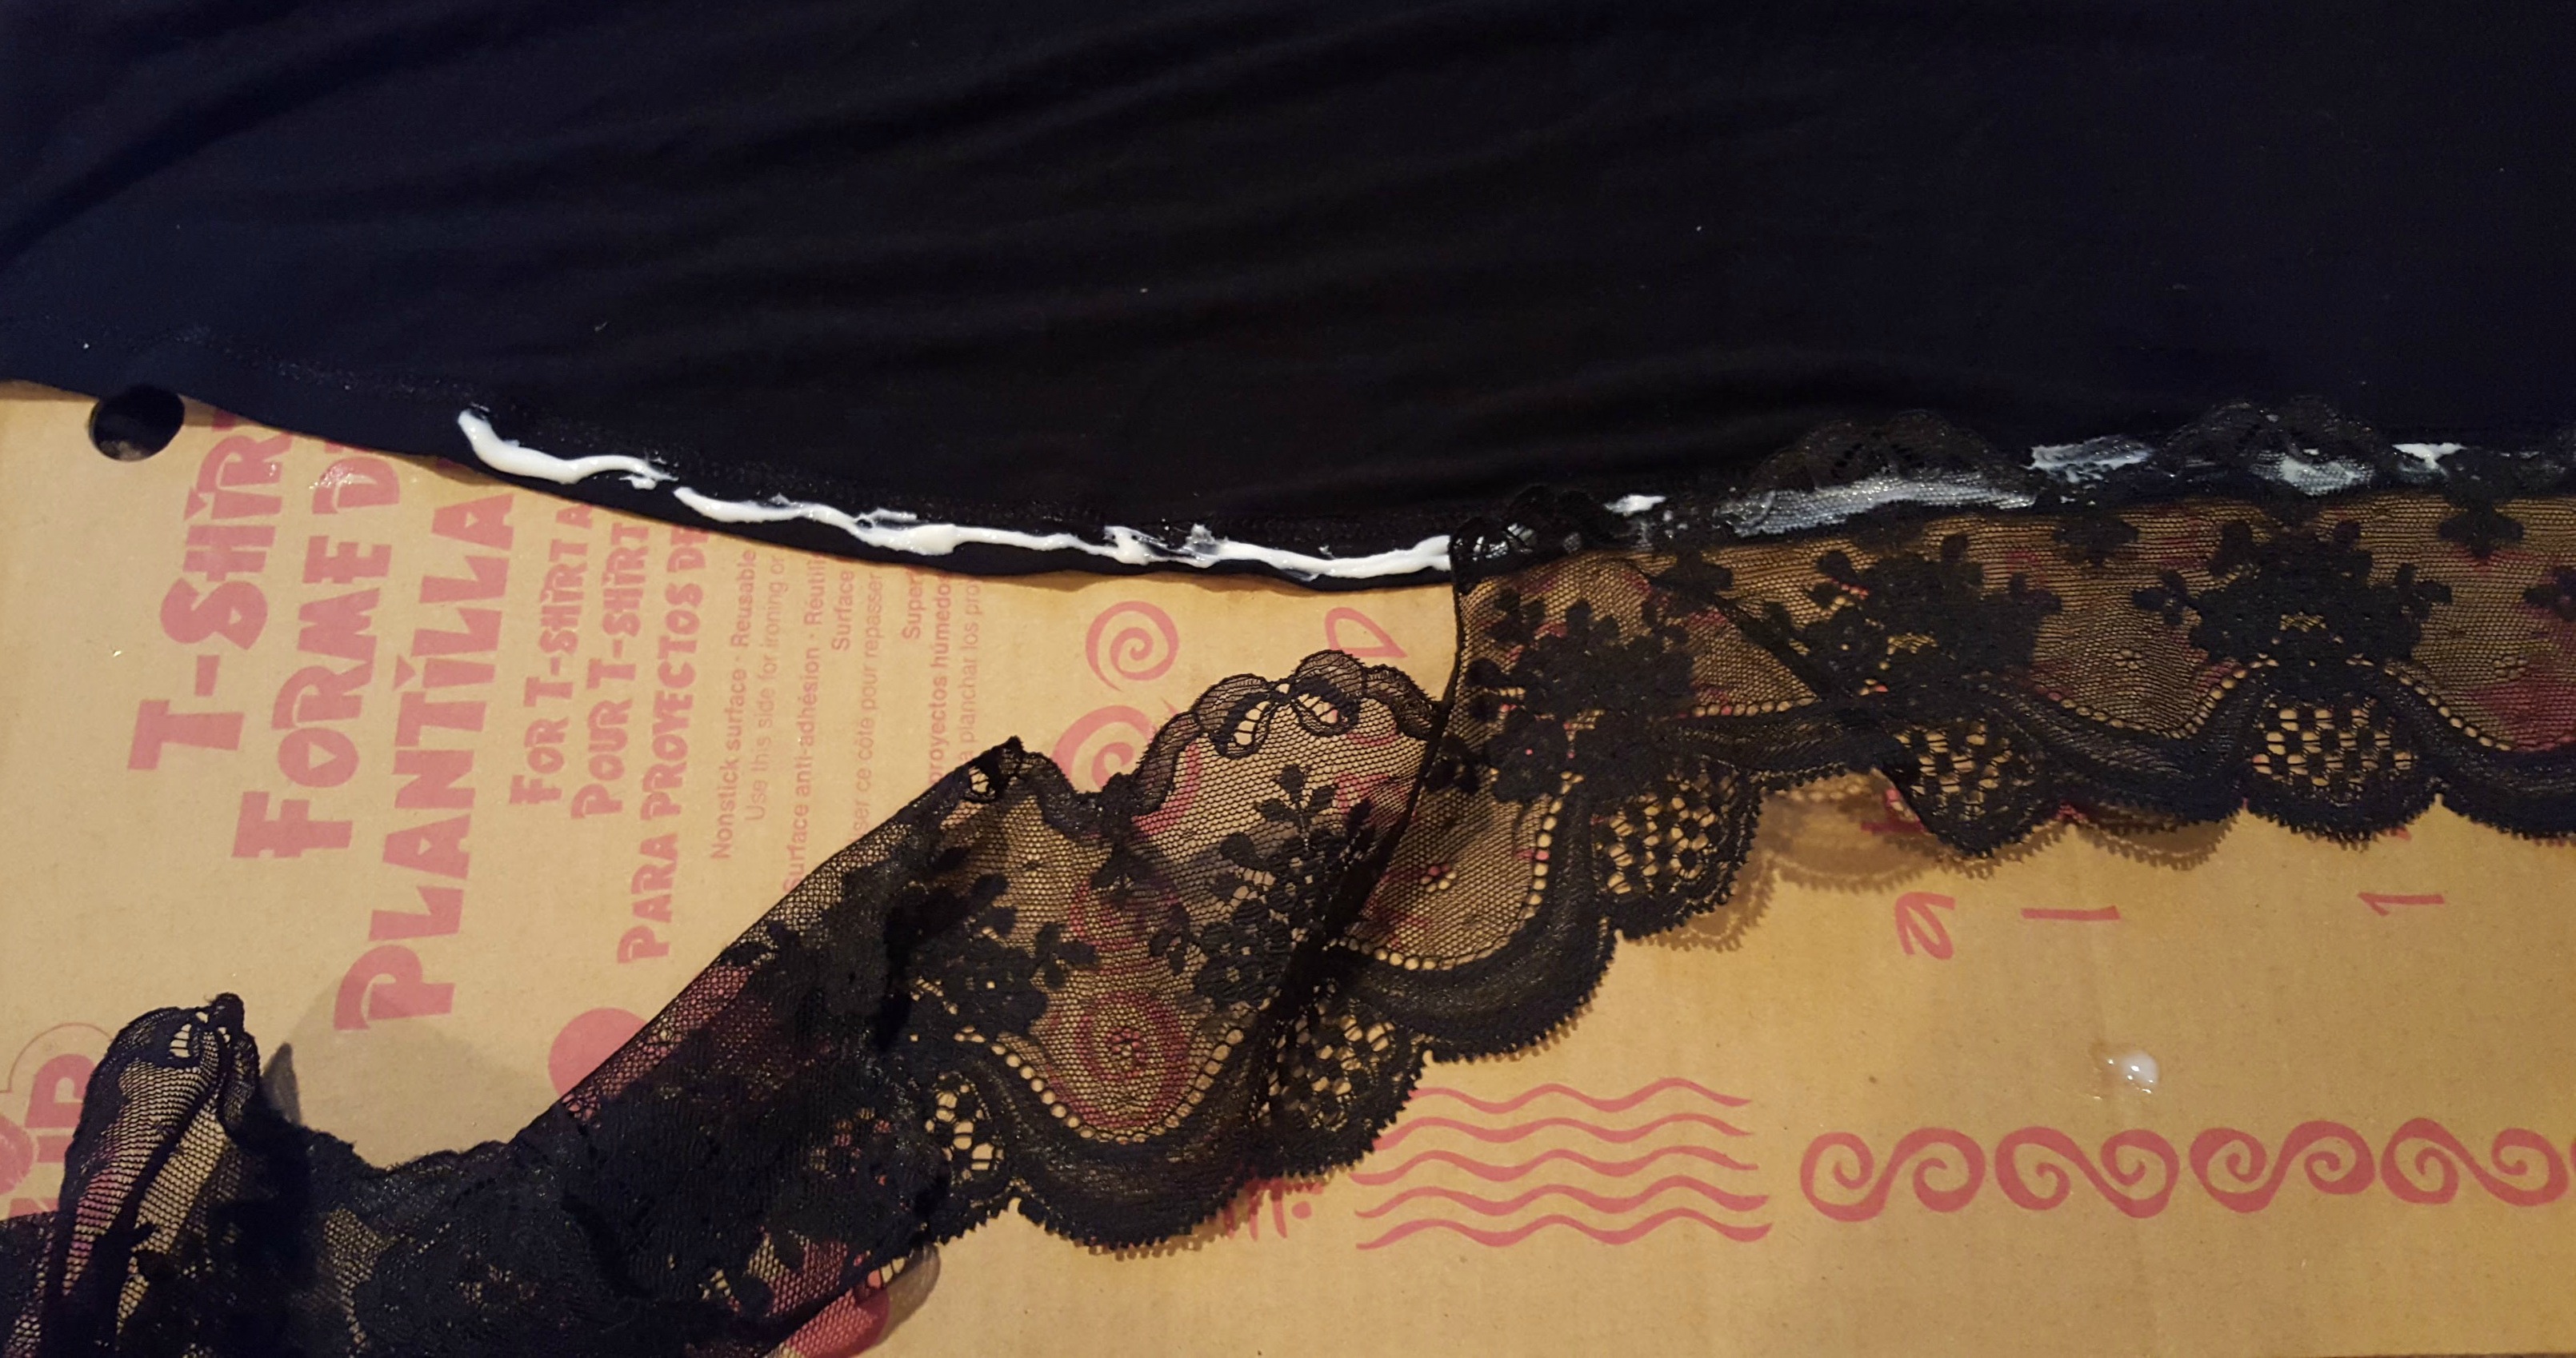
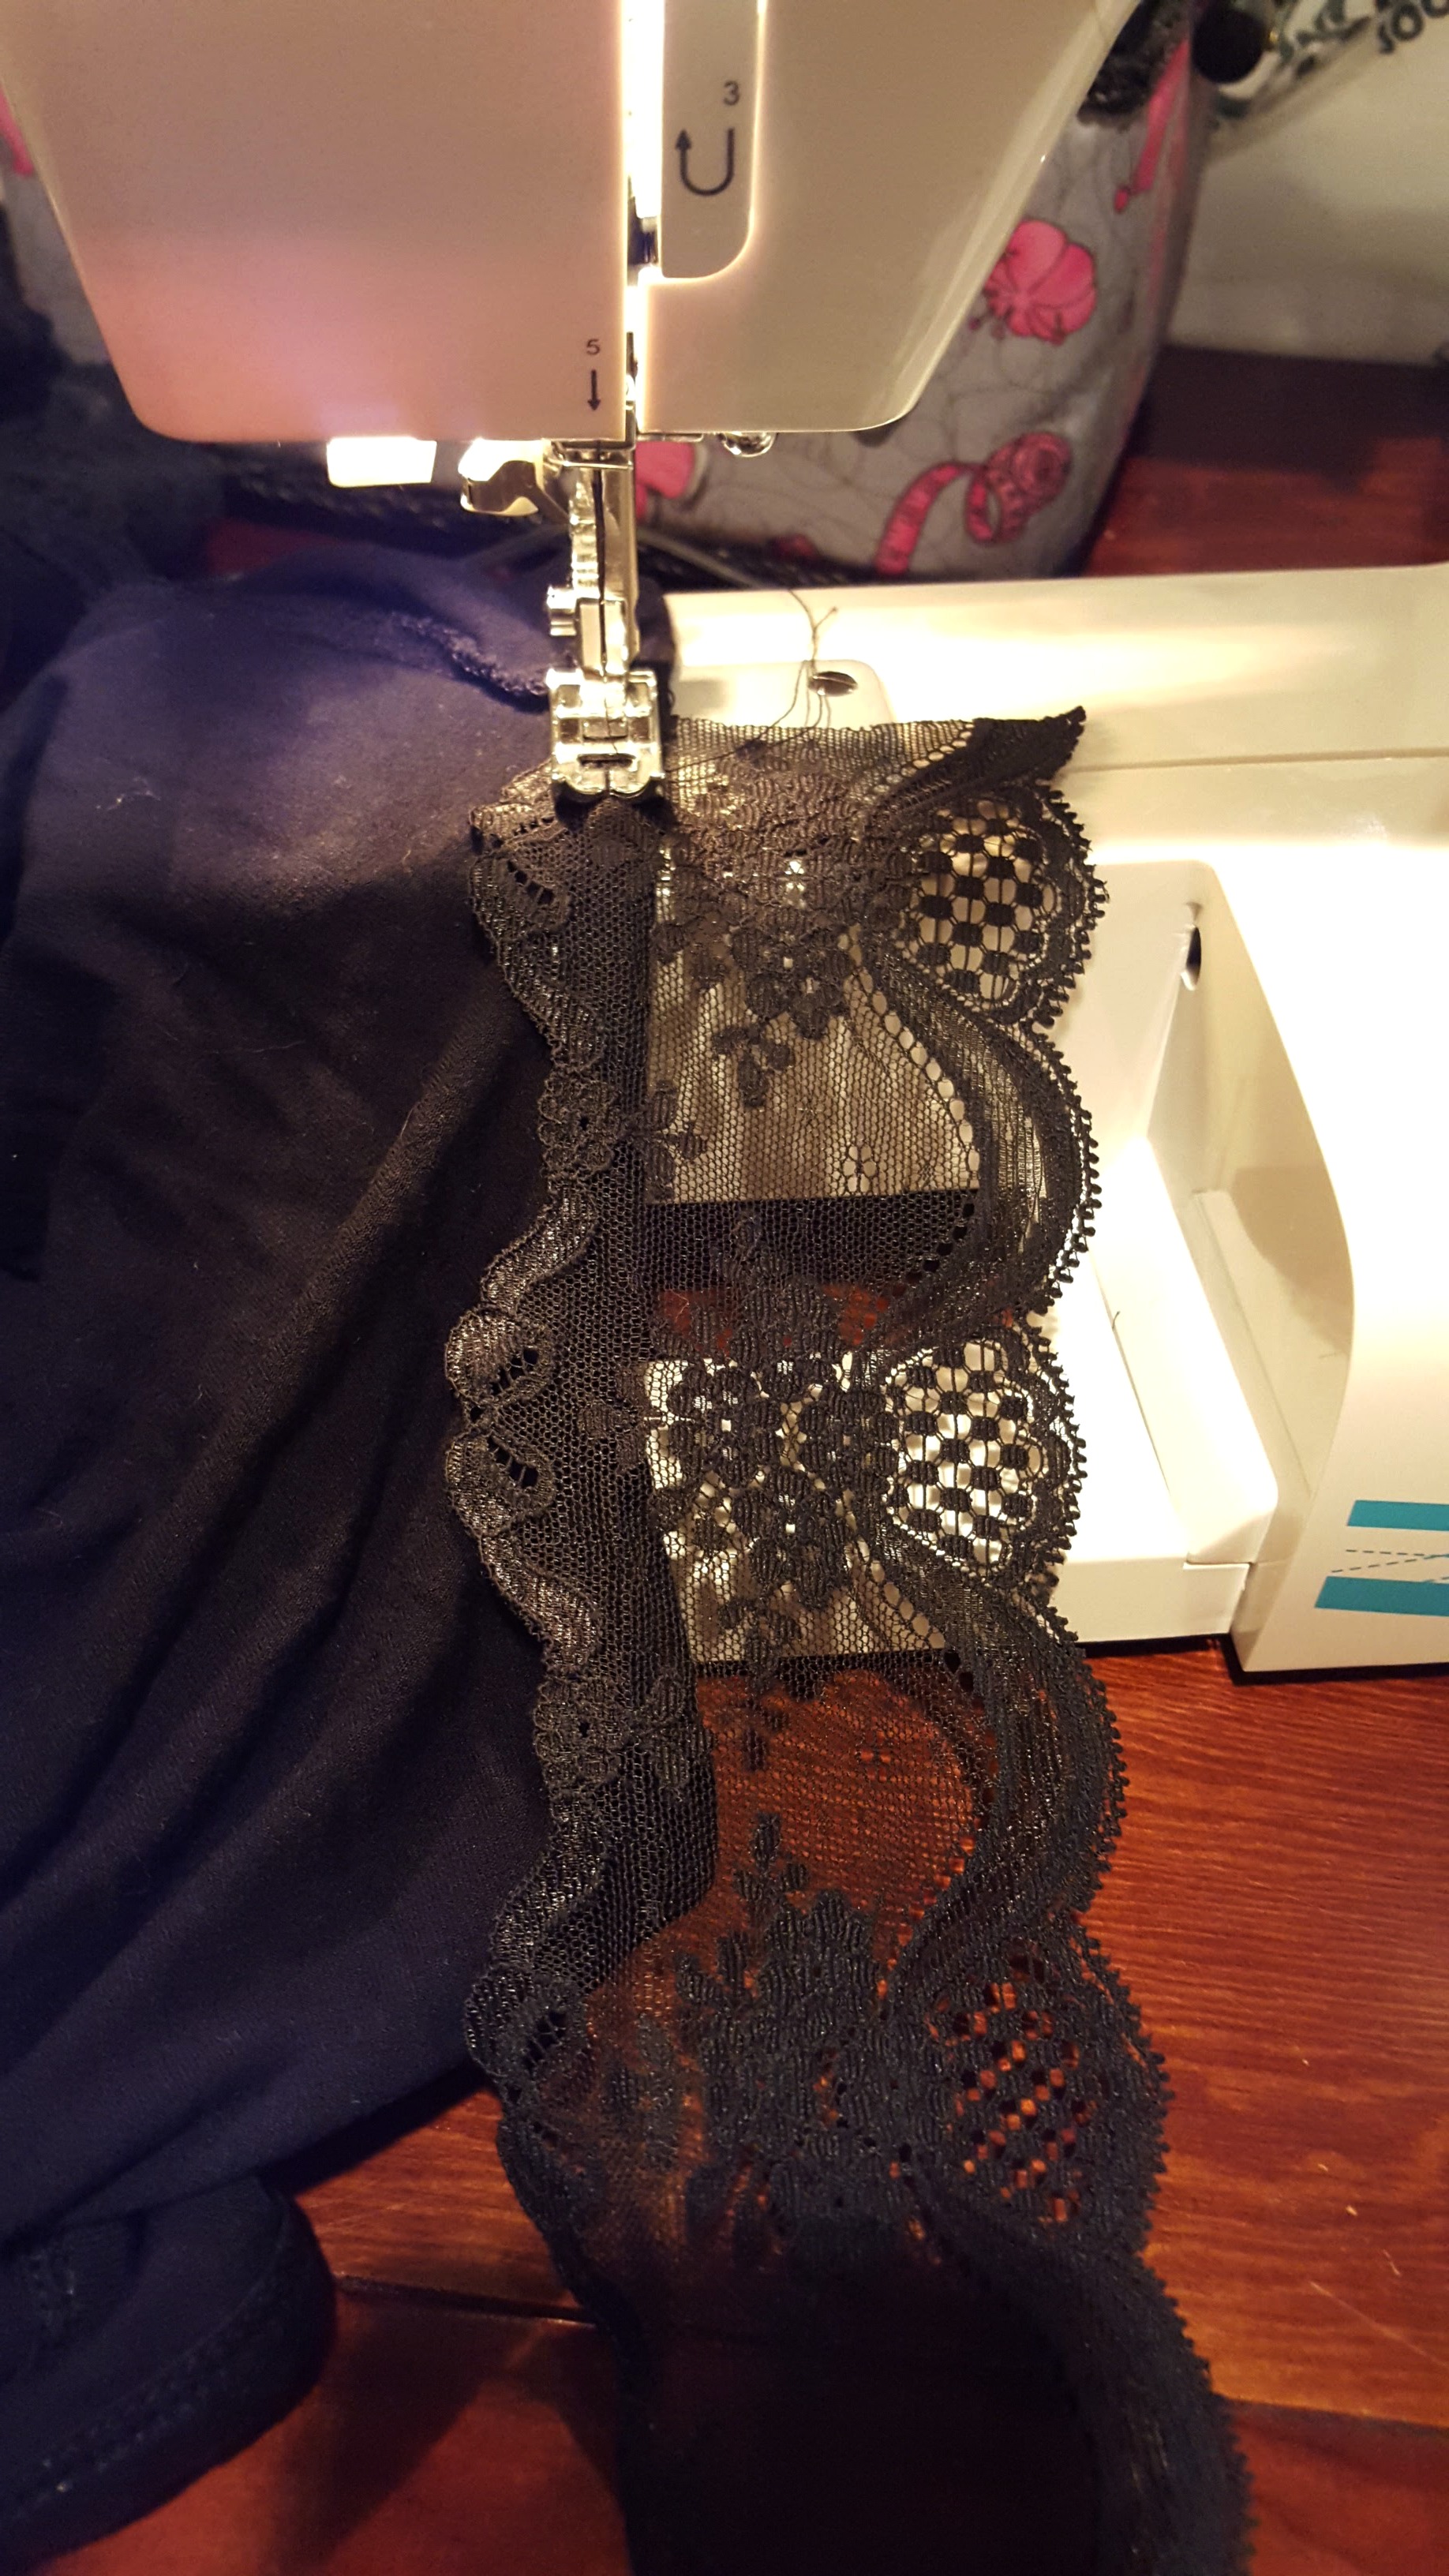
~ I wanted to try gluing the lace, I have never used this glue so I thought I would give it a try. I just glued the lace to the bottom of the shirt. The glue hold well and did wash well, but it took longer than sewing that is because I had to do it in sections and wait for each section to dry before I could move on to the next one.

glue lace to shirt

~ Since my lace does not stretch I decided to start and stop the lace at the seams on the bottom, that is so there is stretch and movement. I am not sure this was necessary, but it worked for this shirt. There is a small gap on the sides of the shirt, but it look intentional.

~ I sewed the lace to the sleeves, this was easier and faster than gluing. Just take the lace and sew a straight seam around the sleeve. This shirt is more like a tank top so the lace only covers a small part of my shoulder.

sew lace to shirt

I am loving how this turned out and I have worn it a few times since I make it. It can be dressed up for an evening out or dressed down for something more casual.

Easy diy add lace to a t shirt

I think I have a few more shirts in my closet that might need a little TLC.

diy lacy shirt

Turn a plain cadet hat into something that will turn heads

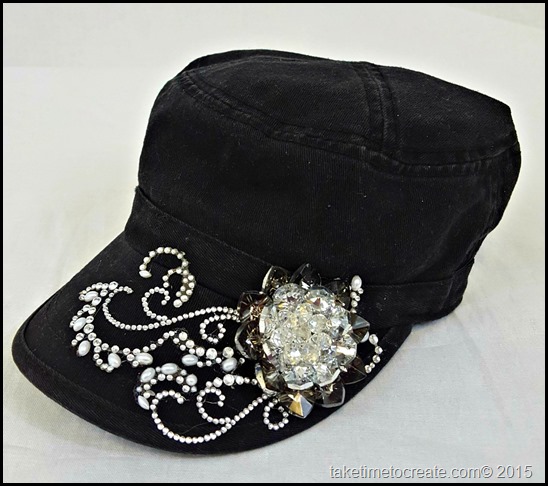
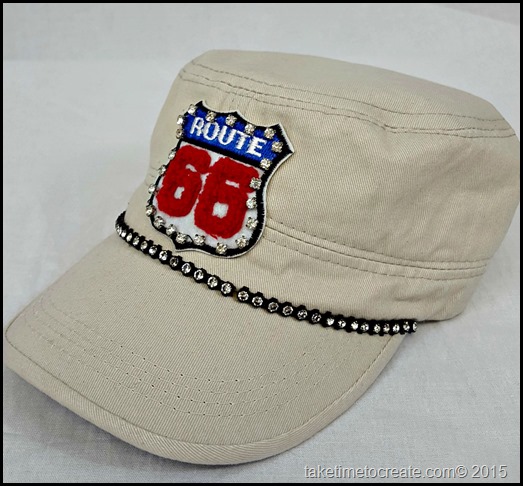
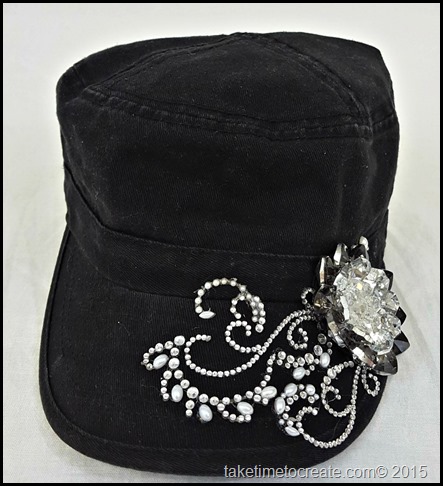
As you all know by now I can’t leave well enough alone. I had these two cadet hats that were fine plain, but not I knew that I could make them better with just a few items.

black cadet hat side view     route 66 cadet hat side


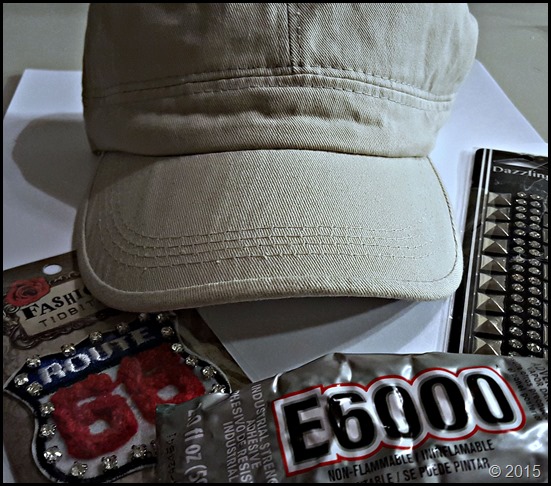
Materials:

~ Hat, almost any hat will do

~ Bling, whatever you want to decorate your hat with

~ E-6000 glue

~ scissors


Instructions:

Black Hat:

1. Plan out your design. This is important so you can make sure you have room for your wonderful design

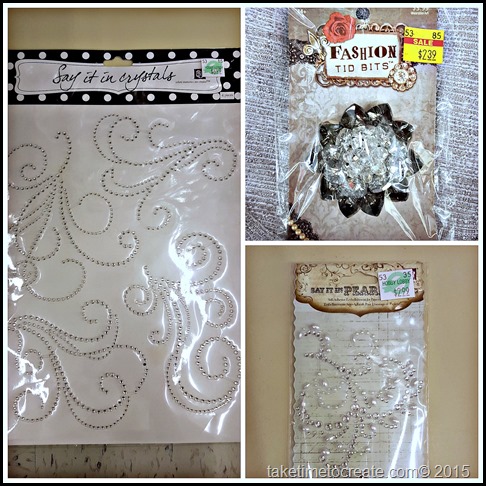
~ The black hat I used pieces from Hobby Lobby. The big flower is a Fashion Tid Bit and the swirls are from the scrapbook section. I forgot to take pictures while I was working so I went back to Hobby Lobby and took pictures after the fact. That is why you can still see the price tag in the picture.

~ I just cut the swirls out and shaped them to get the look I was going for. I didn’t use the whole package, which is good because that means there is more for me use on a different project!

crystals

black cadet hat

2. Glue the design down with E-6000. Even though the swirls have adhesive on them I sill glued them so they would stick really good.

3. Wait 24 hours before wearing to make sure the glue is nice and dry.


Tan hat:

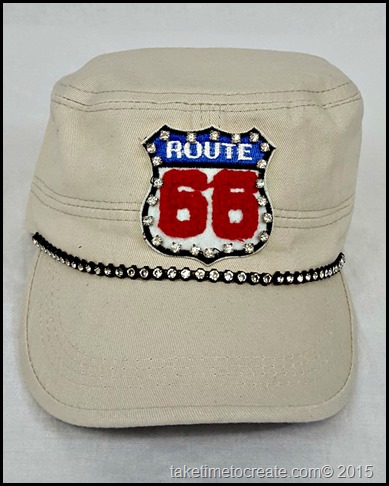
1. Plan the design

route 66 cadet hat

2. Glue the row of rhinestones on near the brim of the hat. I had to cut one of the rhinestone rows to make sure it fit.

3. Glue the patch on the center of the hat.


route 66 cadet hat front

4. Wait 24 hours before wearing to make sure the glue is nice and dry.


Here I am wearing the black hat before I went to Disneyland for the day (so please excuse the lighting Smile ). It held up great, the glue held perfectly and nothing has fallen off yet!

20150803_061422


And here I am wearing it at the Hoover Dam with my son.

It is always a lot more fun to wear things you make, do you think? What are your ideas for a new hat?


20150802_105153

© 2024 Take Time To Create

Theme by Anders NorenUp ↑

Follow

Get the latest posts delivered to your mailbox:

%d bloggers like this: