Easy DIY Mickey Button Earrings!

20150630_130943These are super simple, and are easy enough to make a bunch or have your kiddos help.

So simple to make

Materials:

2 larger buttons

4 smaller coordinating buttons

earring backs

hot glue

20150630_131343 20150630_131335

All you do is find some buttons that go together and glue them in a Mickey shape. (This is my favorite part, I love digging through buttons. It reminds me of when I was a little girl, my mom was always sewing something for us and we were always digging through her buttons)

Then glue it on an earring back. Wear them with pride!

See easy, right

I think I will need to make more in all the colors of the rainbow and make a bigger one for a necklace.

2015-06-30 12.41.59

Disney Bottle cap Jewelry

I love going to Disney, I think I have mentioned it once or twice:)

20150611_070727

So every time I go I make new things to take with me. Well, we are headed to Disneyland in a few weeks so I decided I needed new jewelry. These are so easy to make.

Materials

Bottle caps (I found a bunch on Amazon)

Bottle caps prints (I just Googled for free images, but you can purchase some really cool images from Etsy). After I found my prints I just printed them up on my little photo printers so that the images were glossy. You can send them out to print or print them on you home printer. If you use regular paper in an ink jet printer I would coat the top with mod podge or some kind of sealer.

Circle punch about the same size as your image, or if you are steady you can free hand cut out the image

glue, I hot glued the image to the bottle cap and used e6000 to glue the cap to the jewelry. But you can use what works for you.

Directions:

This is so simple:

  1. print images
  2. cut out images
  3. glue to bottle cap
  4. coat image if needed (I didn’t with the photo paper)
  5. glue the bottle cap to your ring or
  6. punch hole in the top of the bottle cap and add a jump ring for a necklace or add a hook earring for earrings or glue a pin back on for a pin. The options are endless!

That is it, pretty easy right? Now you have really cool custom jewelry to wear at Disney, or all the time.

Here are some I completed. I can’t wait to wear them at Disney!

IMG_4619 IMG_4616 IMG_4579 IMG_4554

Steampunk Disney Magic Band

We went to Walt Disney World in January so we got to try out the new Magic Bands. This was my first time using them, and overall I was impressed. But I couldn’t just leave it plain, oh no! I needed to decorate it!

I decided on a Steampunk tribute to Beauty and the Beast.

Here is the finished Magic Band! I have to say, I really love how it turned out!

20150611_070832

Finished Magic Band

IMG_4536

Top of finished magic band

I think it turned out pretty cool. Unfortunately there are no pictures of me during the creation processes, but I do have the finished product. I wore it every day for a week and it held up great. I was gentle with it, but not overly so. I only had 1 piece fall off and I just replace it that night. I brought with me a small bottle of E6000 and some spare pieces for just such an occasion.

Material needed

  1. E6000
  2. Steampunk pieces ( I found mine in the jewelry section at Michael’s)
  3. Watch face (I found mine on Etsy)
  4. Rhinestones (again, Michael’s to the rescue).
  5. Nail polish and top coat
  6. Empty water bottle to hold Magic Band while you are working

Here is what I did to decorate the Magic Band

  1. I cut the band down to size so it fit me.
  2. I put the band around a water bottle so that I could work on it.
  3. I painted the band with nail polish in 2 colors. I can’t remember what the colors were but one was a Sally Hansen and the other was an OPI. I used several coats to get the color I wanted. The inside part is a different color from the outside edge.
  4. Then I put a few layers of top coat of nail polish on.
  5. Then I started gluing on the pieces with E6000. I started with a few pieces and then started adding a few more. I wanted a layered look that had a lot going on, but not too much…
  6. I went over the top of the rhinestones with top coat so that they would stay down. This did take away from the shine, but they stuck better.
  7. As you decorate make sure you don’t cover your Mickey head, it won’t work if you do (believe me, originally I did have something covering the Mickey and it didn’t work so I had to take my repair kit out and fix it…)
  8. I added a watch face to my Magic Band. I wore it on my left wrist, right where I wear my watch and I didn’t want to have to wear both, so I added a watch to my Magic Band. It worked great! The watch stayed on perfectly and worked the whole time!

I think that is everything I did. Let me know if you have questions and I will be happy to answer. I would love to see your versions of your Magic Bands!

Here are a few more pictures from all different angles. I wore it with the Mickey facing out and the watch face on the inside so I could see it.

IMG_4535

the side of the magic band that faces out, opposite of the watch face

IMG_4529

Side of the magic band that faces inside, with the watch facing me

IMG_4537 IMG_4533 IMG_4530 IMG_4527

Ladies Hankie clutch for my large crochet hooks

20150531_072655 I have just started crocheting. It is becoming one of my favorite hobbies, and even though I just started crocheting only a few month ago I seemed to have collected a lot of hooks. I have a crochet hook zippered pouch by Boye, but there are no slots for the larger hooks. So I figured I would make a clutch type bag to hold my hooks. As I was wondering around the flea markets I found these old hankies that had crocheted edges and I knew I found my fabric for my clutch! It was very simple to make. Here is what you need: 2 hankies, similar in size Fusible interfacing Needle and thread or sewing machine Velcro or button or snap Directions: _20150606_181325 Iron both hankies really well. They need to be flat.20150530_172835 Sew Velcro to the inside hankie. Fuse Fusible interfacing to the wrong side of the inside hankie according to the directions on your interfacing package. I don’t think it really matters what interfacing you use, you just need something to help the hankies keep their shape. (I am sure there are people out there who have preferences and I would love to know more about it if anyone would like to share. I am new to sewing as well as crocheting) _20150606_181354 Once the interfacing is on sew the hankies together along the border. My hankies did not fit perfectly, but I made due and did the best I could. I have the larger hankie on the outside and just stitched around. _20150606_181701 Fold the hankies in thirds and see how it all lines up. Sew the Velcro to the outside of the clutch lining up with the other

Velcro.

_20150606_181252 _20150606_181234

Sew the 2 sides of the clutch to make the pocket. And now you are done! Congrats on creating your new clutch for crochet hooks or whatever else you want to put in it. I would love for you to share your versions of the hankie clutch.20150531_072624

Welcome!

Welcome to my new blog. I will be transitioning things over from my previous blog, TheSampsonHome.blogspot.com, because I realized that I wanted to share more than just my home projects, I wanted to share everything I create. I invite you to follow along with me as I try new things, some successfully and some not so much, and as I do things I have been doing for many years. It is all about creating, whether it is photographs, needle art, scrapbooking, sewing, clay, or even cooking. I love trying to do new things, and I will try almost anything once. So I say welcome, come and play and join me on my journey, I am very excited for you to join me!

DIY TARDIS Door!

I will admit I am a Whovian! I have loved Doctor Who since I was a child and I think I will love it to my dying day. Thanks to the reboot I introduced The Doctor to my son, and to my relief he loves it! So, I decided to paint the door to the bathroom in the basement like the TARDIS door.
This was a fairly simple project. First I took the door off the hinges and took it outside to paint. I chose the color Brilliant Blue paint and primer in a semi gloss finish by Olymic. I got the paint from my local Lowes. Then I painted and painted and painted. There are tons of tutorial about how to paint doors all over the internet, so if you need help I would Google. It was pretty straight forward but it did take 3 coats of paint to get the deep blue I was looking for.
 Here is my door before I started. Pretty boring! Just a plain 6 panel door. But it will be better soon!
If it looks terrible after the first and second coats, don’t worry the third coat will help smooth it out and make it look great. You might have to do touch ups in a few place, but overall 3 coats should do it.

See pretty bad, but it will get better!

Let it fully dry before you hang

Between coats I spray painted my hardware the Rustoleum Oil Rubbed Bronze color. Just clean them with a TSP cleaner, lightly sand, wipe off then paint away. We are painting all our hardware to update it from the shiny brass color.

Once the door was hung I applied decals (the windows and police box sign are decals) I didn’t think I could paint them, so I found some great ones on Etsy. Here is a link to the seller https://www.etsy.com/shop/Walkingdeadpromotion

We love our TARDIS door, what do you think?

DIY Outdoor Ottomans

Since it is spring I wanted to spruce up my front porch. So I started looking around for outdoor ottomans. This is where the problem started, the store bought ones are expensive! $40-$60 each! So, I got to thinking… I think I can make these on my own. I had a couple of rules, they had to stand up the outdoor weather, and it has to double as a chair for additional seating. I went online and looked around for something I liked, I couldn’t find exactly what I was looking for, but it gave me a good start.

Before I explain what I did, here is picture of the finished ottomans. I think they turned out great, what do you think?

To start I found these great planters at Target. They were $20 each, so that is the most expensive part of the project.  I bought 2 for my porch. They are made of a sturdy plastic with thick walls, so it should hold up.

The rest of the project I used left over material, except the fabric. So my total for each ottoman was about $25. I am sure you can find cheaper planters, but I liked these well enough to pay $20

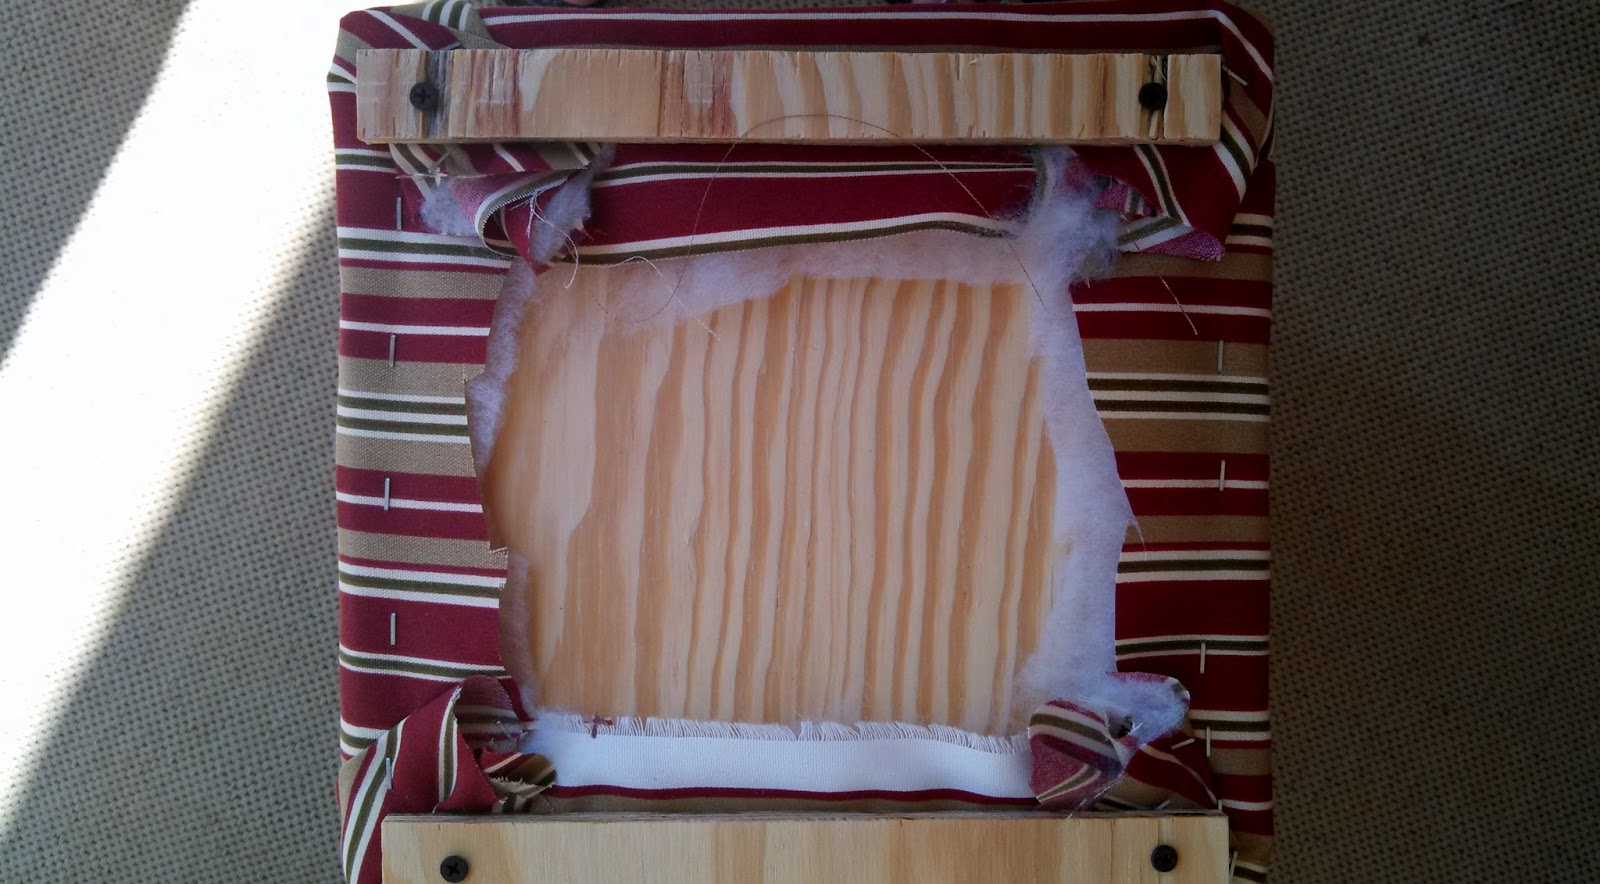
Then I had my husband cut 2 pieces of left over plywood to the shape and size of the openings to the planters. Then I took leftover foam, batting, and new outdoor fabric to wrap and staple the cushion. Just layer the fabric on bottom, then the batting, then the foam and last the plywood, pull tight and staple together. I found the fabric at JoAnne’s and it was on sale, so that made it even better 🙂

All stapled!

 Top view

 Then I had my husband cut 2 boards for each cushion and screwed them into the cushion. This is to help hold it in place so the cushion won’t come off when you put your feet up.

 That’s it, not much to this project! We love how it turned out, and there even storage in the planter, just take the top off and there is hidden storage!

Then I got ambitious and made pillows out of the leftover fabric, so now everything matches.

 Here is a pic of our porch with our lanterns that we hung. Here is the post for that project: Porch Lanterns
We love our porch so much now that we spend most evenings out there.

What do you think? Did you decorate your porch? Send pics, I would love to see them!

Entryway Closet Makeover

Whew, it is finally done! Our entryway closet is now a mudroom! I call it a mudroom, but it could be called a nook, landing area, entryway closet. Mudroom may not be the technical term, but it works for us.

Before we dive into what we did and why, here is a pic of the finished mudroom! We are in love with it! It works perfectly for us and it makes our home feel more open welcoming!

I got the idea from a  pin on Pinterest, it is a wonderful example of turning a closet into a beautiful nook.  House of Smiths did a fabulous job of transforming their entryway closet into a wonderful, functional entry way nook! It was love at first sight! Here is how theirs turned out:

 
Fantastic, right? Well I had my work cut out for me.  My DH was not as enthusiastic, but he was on board. Our closet is right next to a bathroom and the stairs. Everyone in the house would just throw their coats on the newel post rather than open the closet door and hang up their coat (including me). So I thought hooks and a bench and baskets would be a great solution. Warning, this will be a long post, so hang in there 🙂
Before I get into how we did everything here is a photo of the before and after:

As you can see, we had a standard, small entry way closet. In fact, it was so small that a hanger couldn’t even fit, when the door closed the hangers would turn sideways. We had to work around the bathroom the right of the closet and the wall ended to the left. (no room for expansion to the left because it would interfere with the kitchen) So we had to work with what we had.
Here are some more before pics:
 
What a horrible mess! Everything was jammed packed!
After emptying out the closet, we took the doors off and took the trim off. We saved it to use for later.

 Then we cut out the door frame and expanded the closet to the studs on each side, making it as wide as possible for out small space. Then we cut up, towards the ceiling. We gave ourselves almost 2 more feet of vertical space!

Then came the drywall work. I will be honest, that is not a favorite for me or DH, but we pushed through. We dry walled the new top of the closet and the edges. Then mud, sand, and texture. You know the drill…

Then we added the trim. I failed on the picture taking at this point. We were working on this for a few weekends and I just forgot to take more pics. Sorry. But I will try and explain what we did. 
First: we added bead board to the entire closet. Top to bottom
Second: we added trim to the edges. We used the trim from the original closet.  But what you say, we expanded the closet and made it taller, how did you get it it fit? Great question, we had some other door trim from a different project we worked on. So we put 2 door trims together and made one really great mudroom. 
Third: We added a decorative trim to the top. You can see it in the after pics
Forth: We added 2 top shelves, they are 12″ deep and a seat that is 24″ deep.
Fifth: After everything was installed it was time to prime and paint. ( I love this part, because it means we are almost done) One coat of primer and 2 coats of paint and we were done. I also painted the wall around the mudroom. The white color is Kwal Aspen White and the wall color is Glidden Warm Caramel .

 Ok, we aren’t exactly done here, but I was too excited to wait, I had to put some jackets on the hooks.  We added hooks and baskets, but no cushion yet. And as you can see the thermometer and door bell are not quite right. We had to adjust them during construction, but as you can see in the final pic they are put back where they belong.

 Before we can finish, I had to make a cushion. Since I don’t sew, I did the staple method. Fabric, then foam then a board and staple it all together.  I found the fabric at JoAnnes, but I am not sure what it is called. But I love the colors and it works perfectly in our entry.

 The finished mudroom! We are in love with it! The hooks are working out great, no more coats on the newel post 🙂 We decided not to put baskets on the ground, instead we put a shoe tray on the floor.


 What do you think? Are you doing a closet makeover as well. I would love to see your closet!

Lessons learned:
1. Projects like this will always take longer than you originally planned
2. Be flexible. You may have to change things mid project.
3. Patience with painting bead board. In order for it to look right you have to paint in all the grooves, so have patience.

Update:
After receiving a comment about the bench I thought I would add some pictures on how the bench was built.

 This is a close up of the bench. You can see that there is a 1×4 board supporting the front of the bench.

Here a pic of the under side of the bench. You can see that we added a 1×4 board along the sides and that is what the bench rests on. Then DH added additional 1×4 going lengthwise for support. The boards were attached with “L” brackets.  Hope this help, let me know if you have any other questions!

Porch Lanterns

Here is my inspiration, from Pottery Barn! Isn’t this just beautiful.

So I decided to try my hand at a lantern filled porch!

Here is my version:

We wanted a simpler, more refined look, but warm and inviting. Also, we didn’t want it too nautical looking, so we changed it up a little bit. and, our view isn’t as nice as the Pottery Barn version, but I guess you work with what you got.

I found lanterns online at: Wholesale Mart.com
I bought 12 so I would have plenty for my porch.  Then we spaced the lanterns and hung them with chains. Now, in our area we can get some strong winds, so we added fishing line horizontally through all the chains. Hopefully that will keep everything in place… I will keep you updated on if that works or not.

Here it is at night. Isn’t it pretty? We love how it turned out. 
BTW, we added battery powered candles (with remotes!) to make it easier to turn on and enjoy. 
 

 What do you think?
Do you have hanging lanterns that you would like to share? I would love to see them!

Lesson learned:
1. plan on weather. I didn’t plan on the wind until we had everything up. Luckliy we had a good soluiotn, but it could have been bad.
2. Inspiration is everywhere. Even though my final version is not like the inspiration, it works for us and without the inspiration we wouldn’t have even thought of doing this…

Candle holder- Goodwill find

It has been a while since I updated the blog…. Sorry

Anyway, I thought I would show off this candle holder that I made by revamping a Goodwill find. As I told my husband, it’s the leaves. Just get rid of the leaves and then it will be great. He wasn’t convinced, so I had to show him.

Here is a before and after pic of the candle holder. It was easy to do, all I had to do is get past the leaves. 🙂

I saw this candle holder at Goodwill and I think it was $4 and since it was 50% off I got it for $2. It was a greenish color and very smooth and it is heavy. As I was looking at it I discovered that the leaves unscrew! Hooray!

 This is what it looks like with out the leaves, improvement here we come!

Then I found a candle plate (if that is even what they are called) at Target. It is a flat base that you put candles on. Anyway, I thought it would be perfect for the holder. I just super glued it to the top in where the leaves were. 


Once I had it all glued together and dry I spray painted it all with Rustoleum oil rubbed bronze (my favorite spray paint color) and put it on my corner shelf (which I love! My husband made it for me, and I will show you how in a different post). In the end, once I was done, my husband did see what I was going for and he was impressed. He really likes it now. 

What do you think? Have you found something at Goodwill or a garage sale that you made into some thing new?
Lesson learned:
Trust your gut, even if your husband can’t see the final vision, do it anyway and surprise him.