Tag: Mickey ears

DIY Halloween Floral Mickey Mouse Ears

Hello Everyone!

DIY Halloween Floral Mickey Mouse Ears! What more do you need for a trip to Disney World?

As many of you already know, I love Disney! It is my happy place and I love being able to go. In Oct I will be crocheting with the Crochet Crowd at Disney World! I am so excited!

As I get ready for this awesome adventure I decided I needed new Mickey Mouse ears! I like to make a pair for each day I am there, so get ready to see more ears, lol.

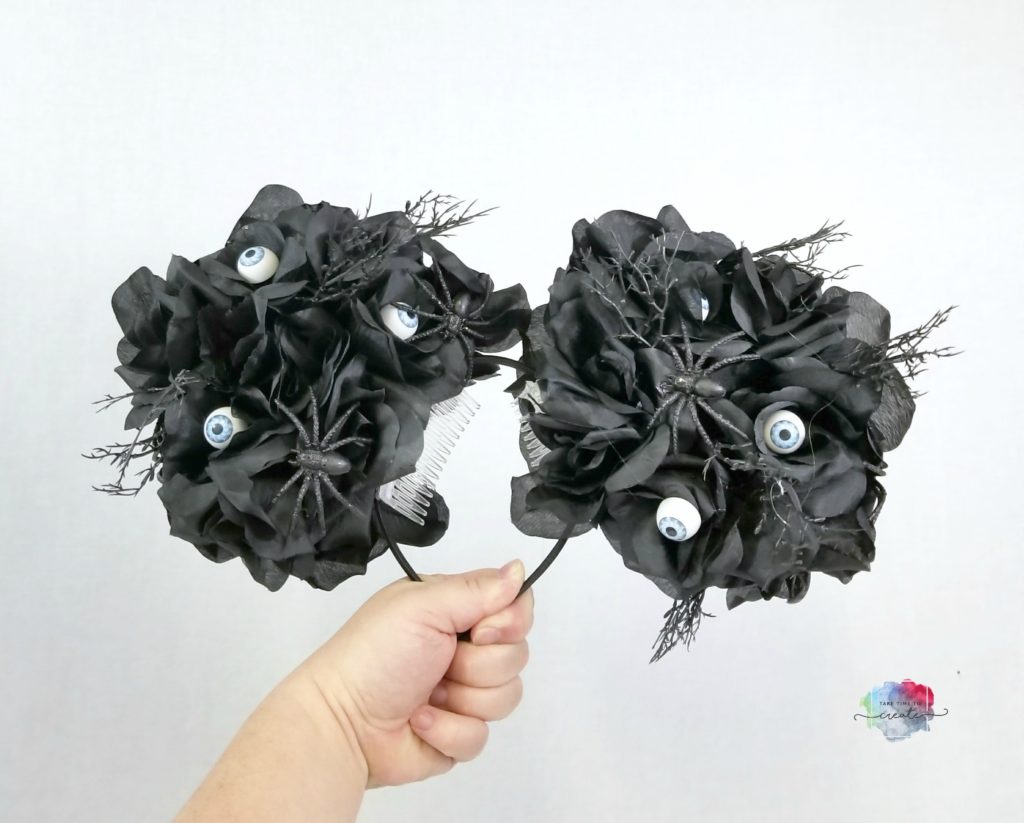
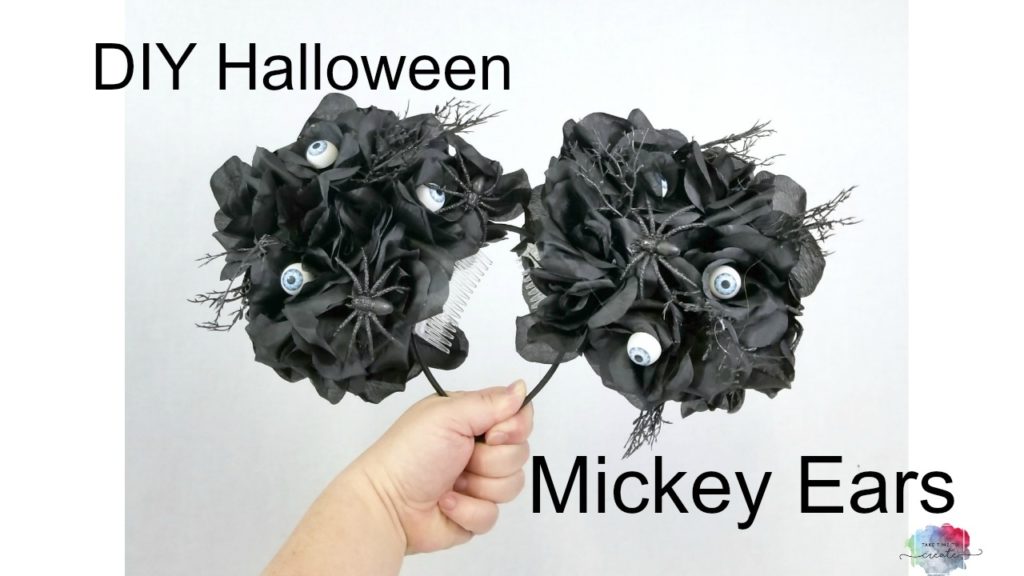
This first pair uses black eyeball roses from the dollar store. They are so cute and since I will be there during Halloween,  these ears will be perfect!

DIY Halloween Mickey Mouse Ears

This is a pretty easy project, which is great because I will need to make a few, lol

Materials:

  • Headband (I found a pack on eBay)
  • Thick foam
  • Felt
  • Hot Glue
  • Roses
  • Combs
  • Ribbon
  • Mickey Ear Template (I found mine here: Template)

Instructions:

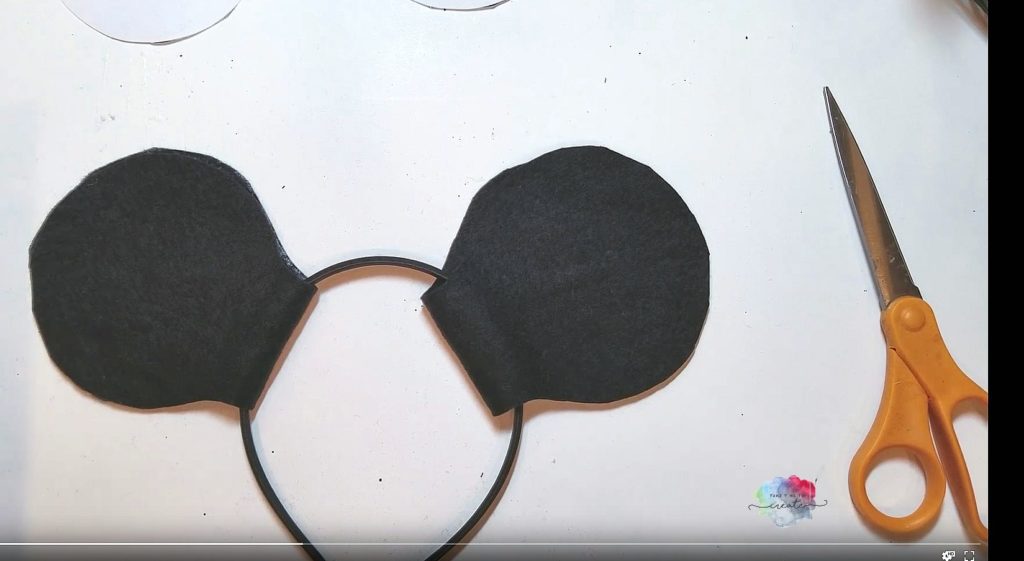
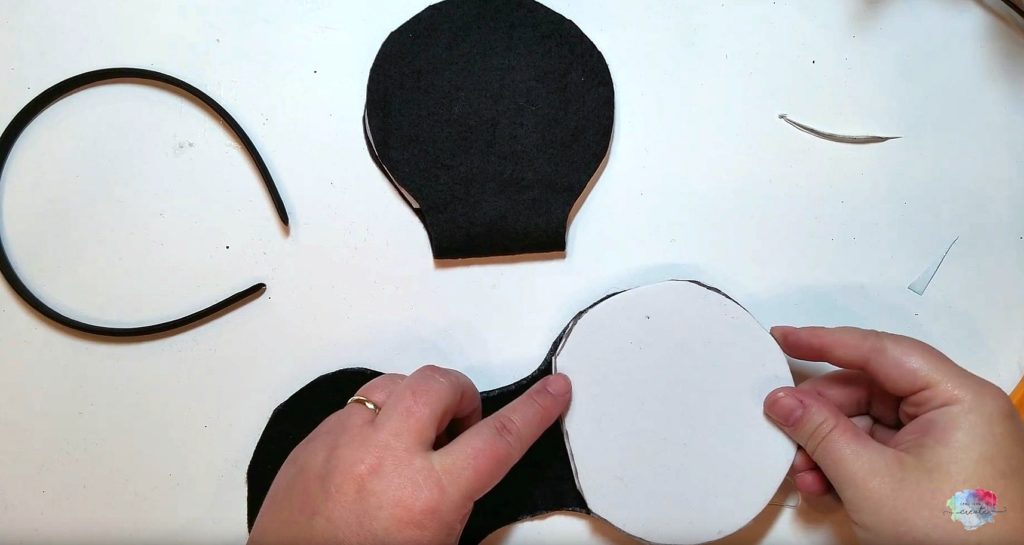
Cut out your template, save it when you are done in case you want to make more ears

DIY Halloween Mickey Mouse Ears

Cut some felt in the shape of your ear template.

DIY Halloween Mickey Mouse Ears

To help thicken up your ears add some thick foam to the center of your ears. The flowers need a little help stabilizing.

DIY Halloween Mickey Mouse Ears

Hot glue your foam and felt to your headband. Be mindful of the placement, you don’t want your ears too close together and not too far apart. Then I added ribbon along the edge to cover up the foam.

Now it time for the fun part, hot glue your roses on to your ears. I used 6 bundles of roses from the dollar store. (4 were ones with eyeballs and 2 were just plain black roses) Go to town filling you ears with roses. I do the front and backs when I make ears, I think they turn out nicer that way. Add spiders and any other spooky element you want.

I did add some hair combs to the headband to help keep it on my head. They are not heavy, but the combs help them stay on your head.

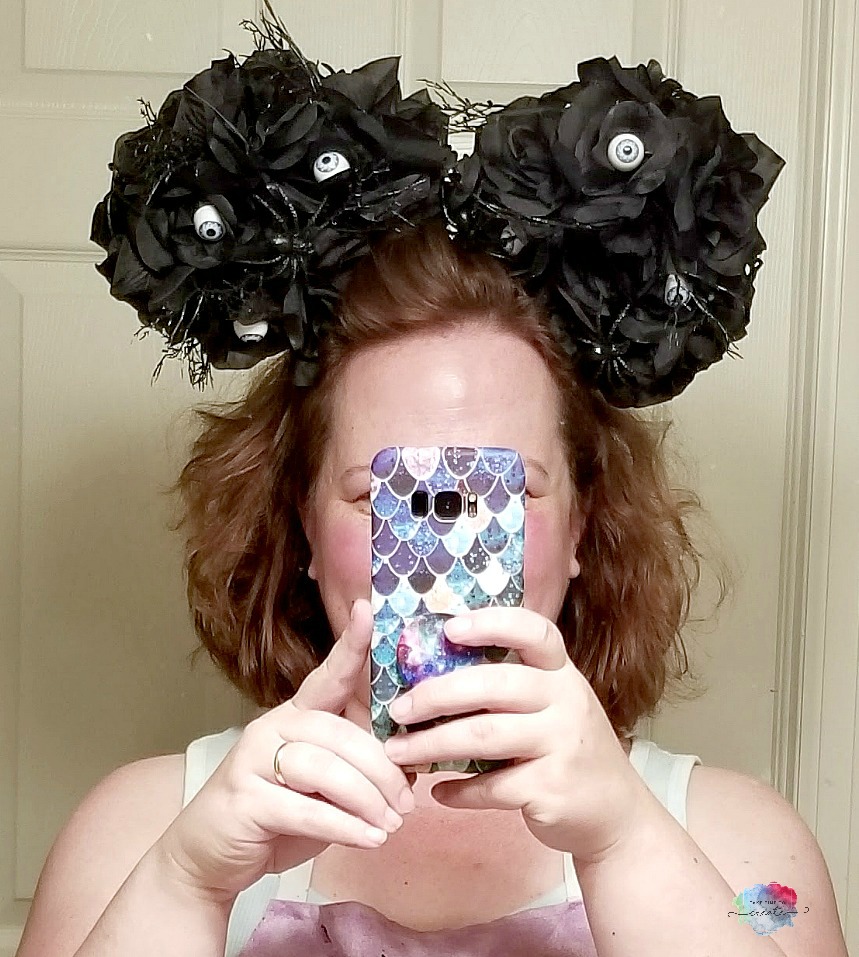
Now you are ready to rock your new ears! This is a big, bold look that will be perfect for Disney!


DIY Halloween Mickey Mouse Ears

The post DIY Halloween Floral Mickey Mouse Ears appeared first on Take Time To Create.

DIY glow in the dark Minnie Ears

Well I did a post on Glow in the dark Mickey Ears that I made for my boys. So I decided to make a set of Minnie ears for me. These are even easier than the Mickey ears!

20150725_135544


Here I am wearing them in my backyard during the day so you can see that they still look great in the day time.

Material

1. Headband

2. bow ( I used a premade bow, but you can make your own)

3. Glow in the dark bracelets

4. Electrical tape

5. Hot glue


Instructions:

1. Take the bracelet connector and tape it using electrical tape to the headband. I used electrical tape because it is black and blends in better. I did try to glue the connector, but it did not stay at all. So tape was the way to go.


IMG_4613     IMG_4611

2. Hot glue the bow to the head band

3. Crack the bracelet and connect it to the headband and then you are done! Easy as that!

IMG_4605


Now you have easy DIY glow in the dark ears that didn’t break the bank!

DIY Glow in the Dark Mickey Ears

To really enhance your Disney Experience Glow in the Dark ears are a must. I just wasn’t willing to pay a ton of money for the ears. And, my husband only wanted to wear his ball cap that he already owned because he is cheap and didn’t want to spend the money for a new hat and he loves how it fits him (at least it is a Disney one.)  So I decided to create my own glow it the dark ears with a hat he already owned. It worked so well I made them for the whole family. I made a Minnie Ears for me, I will do a post on those later.

IMG_20150125_180333_956 My son is such a good sport, even though he is a teenager, he wore his Mickey ears all week! Red heart


By using a ball cap and some safety pins and glow in the the dark bracelets you can create an interchangeable glow in the dark hat.

We would put a new bracelet at night and enjoy the evening festivities then in the morning we would leave the bracelets in the hat even thought they didn’t glow anymore. Then in the evening we would throw the bracelet away and put a new one so we would be ready to glow the night away.

This is so easy, and the best part is when you get home you take off the safety pins and  your cap is back to normal


Materials:

1. Hat

2. Safety Pins

3. Felt

4. Glue (I just used hot glue)

5. Glow in the dark bracelets (here are some from Amazon) I got mine from the dollar store, 20 for a dollar!! Necklaces were too big so


Instructions:

1. Get a hat you would like to add ears to.

2. I used 2 safety pins and glued them to a small piece of felt. Make sure you don’t glue the safety pin closed, I learned this from personal experience.

3. Glue the bracelet connector piece to the felt. This part will stay and you just change out the bracelet part.

IMG_4623   IMG_4624   IMG_4628     IMG_4630

4. Pin the safety pins to the hat. This took me a couple of tries to get the right placement. And the ears tended to flop around until someone was wearing it.

5. Crack the bracelet to activate the glow and insert it into the connector.

IMG_4592   IMG_4594

6. Wear your hat with pride and love that you are glowing for just a few pennies!

IMG_20150125_180403_069 Wearing the hats in the daytime

IMG_20150130_195101_813 Wearing the hats at night.

We got tons of complements on our hats, day and night!

I would love to see your hats that you create!

© 2024 Take Time To Create

Theme by Anders NorenUp ↑

Follow

Get the latest posts delivered to your mailbox:

%d bloggers like this: