Tag: diy card

Summer Greeting Cards

Hello Everyone!

I just love the summer! Bright colors, warm weather, and sunshine! So when I saw the Bo Bunny Summer Mood Collections I knew I had to  make some summer greeting cards!

This post is sponsored by Scrapbookcollections.com, a one stop shop for an entire Scrapbook Collection! Perfect way to get everything you need all in one place.

Recently I have become pen pals with my sisters and I really like to make handmade cards to send them. Writing each other has helped us learn more about each other as adults and I have really been enjoying it!

You can create both of these cards with everything in the kit, you will just need to add a blank card, and adhesive.

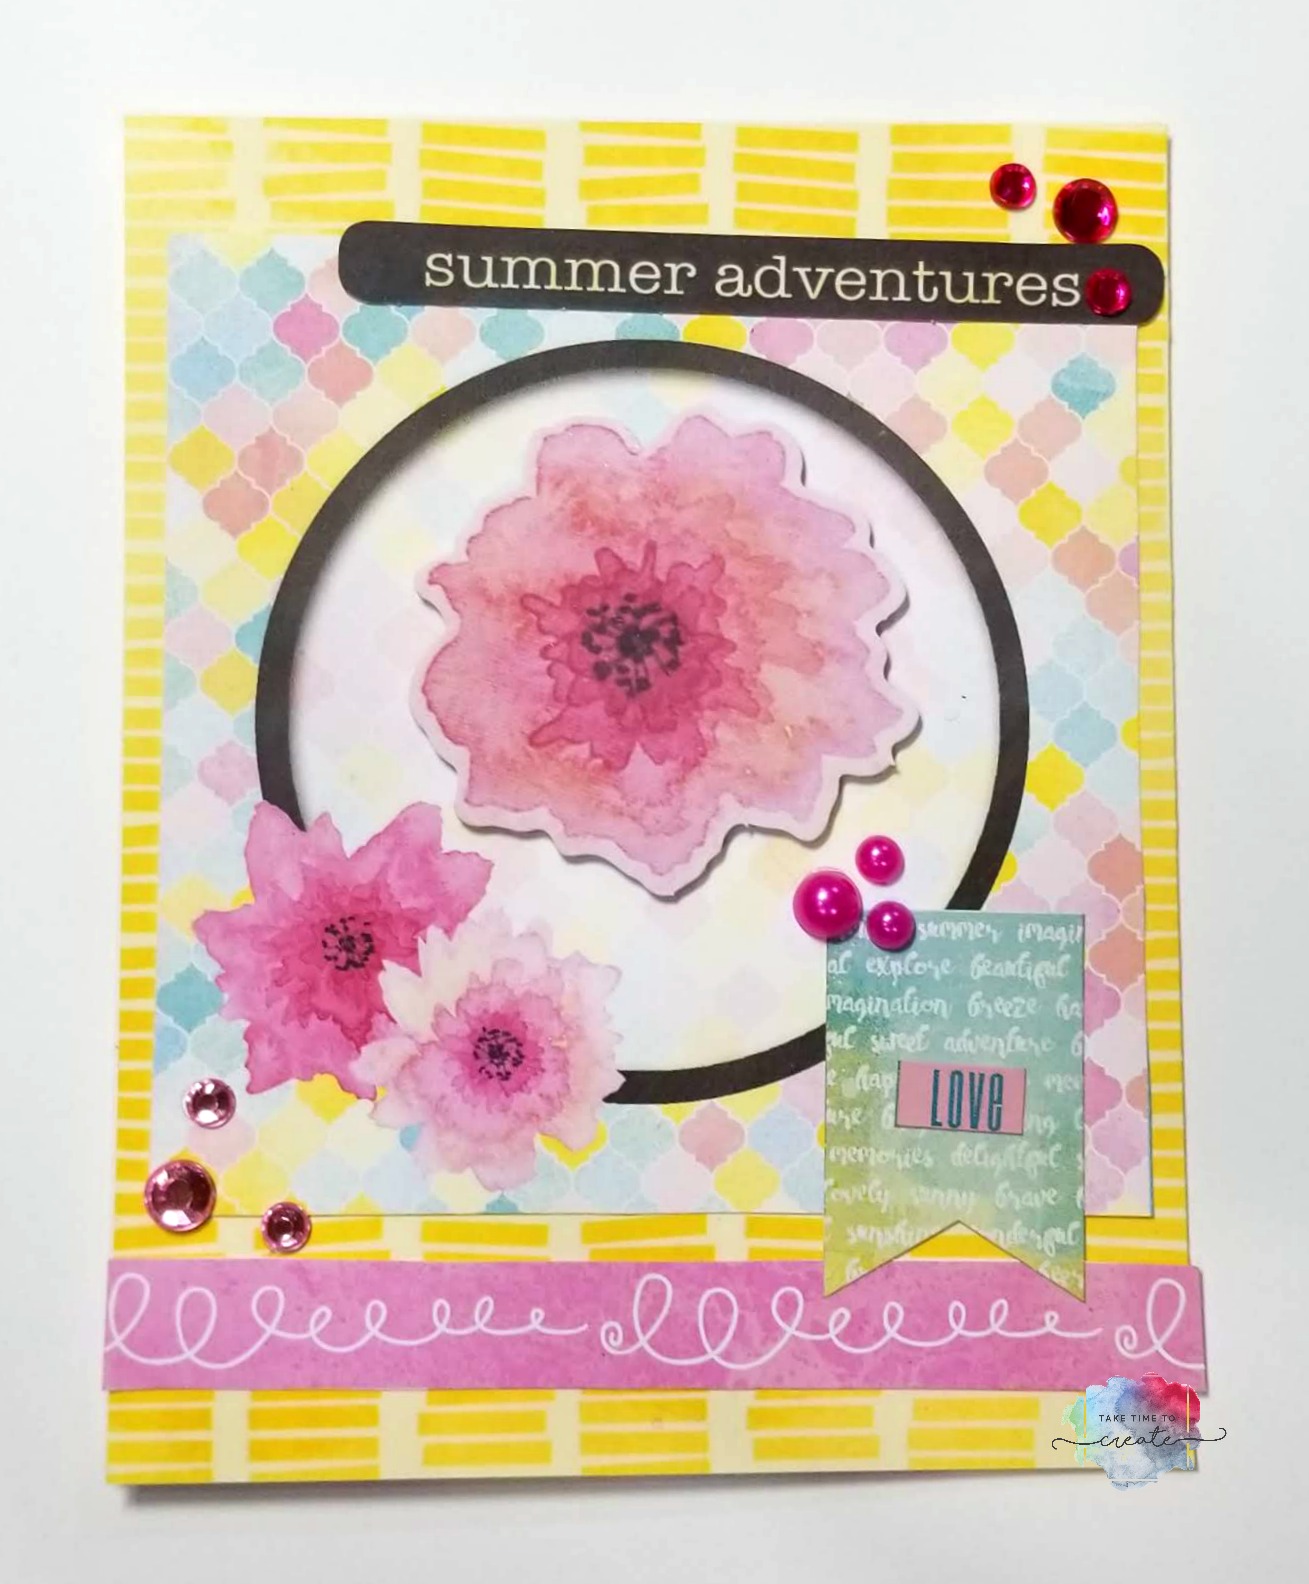
This first card I used the bright yellow paper for the background then added the pretty circle cut out in the middle.

I added accents and rhinestones to jazz it up and the flower in the middle is raised just a little bit with foam tape. You don’t want to add too many embellishments if the card is going through the mail, you don’t want it to arrive damaged.

summer greeting card

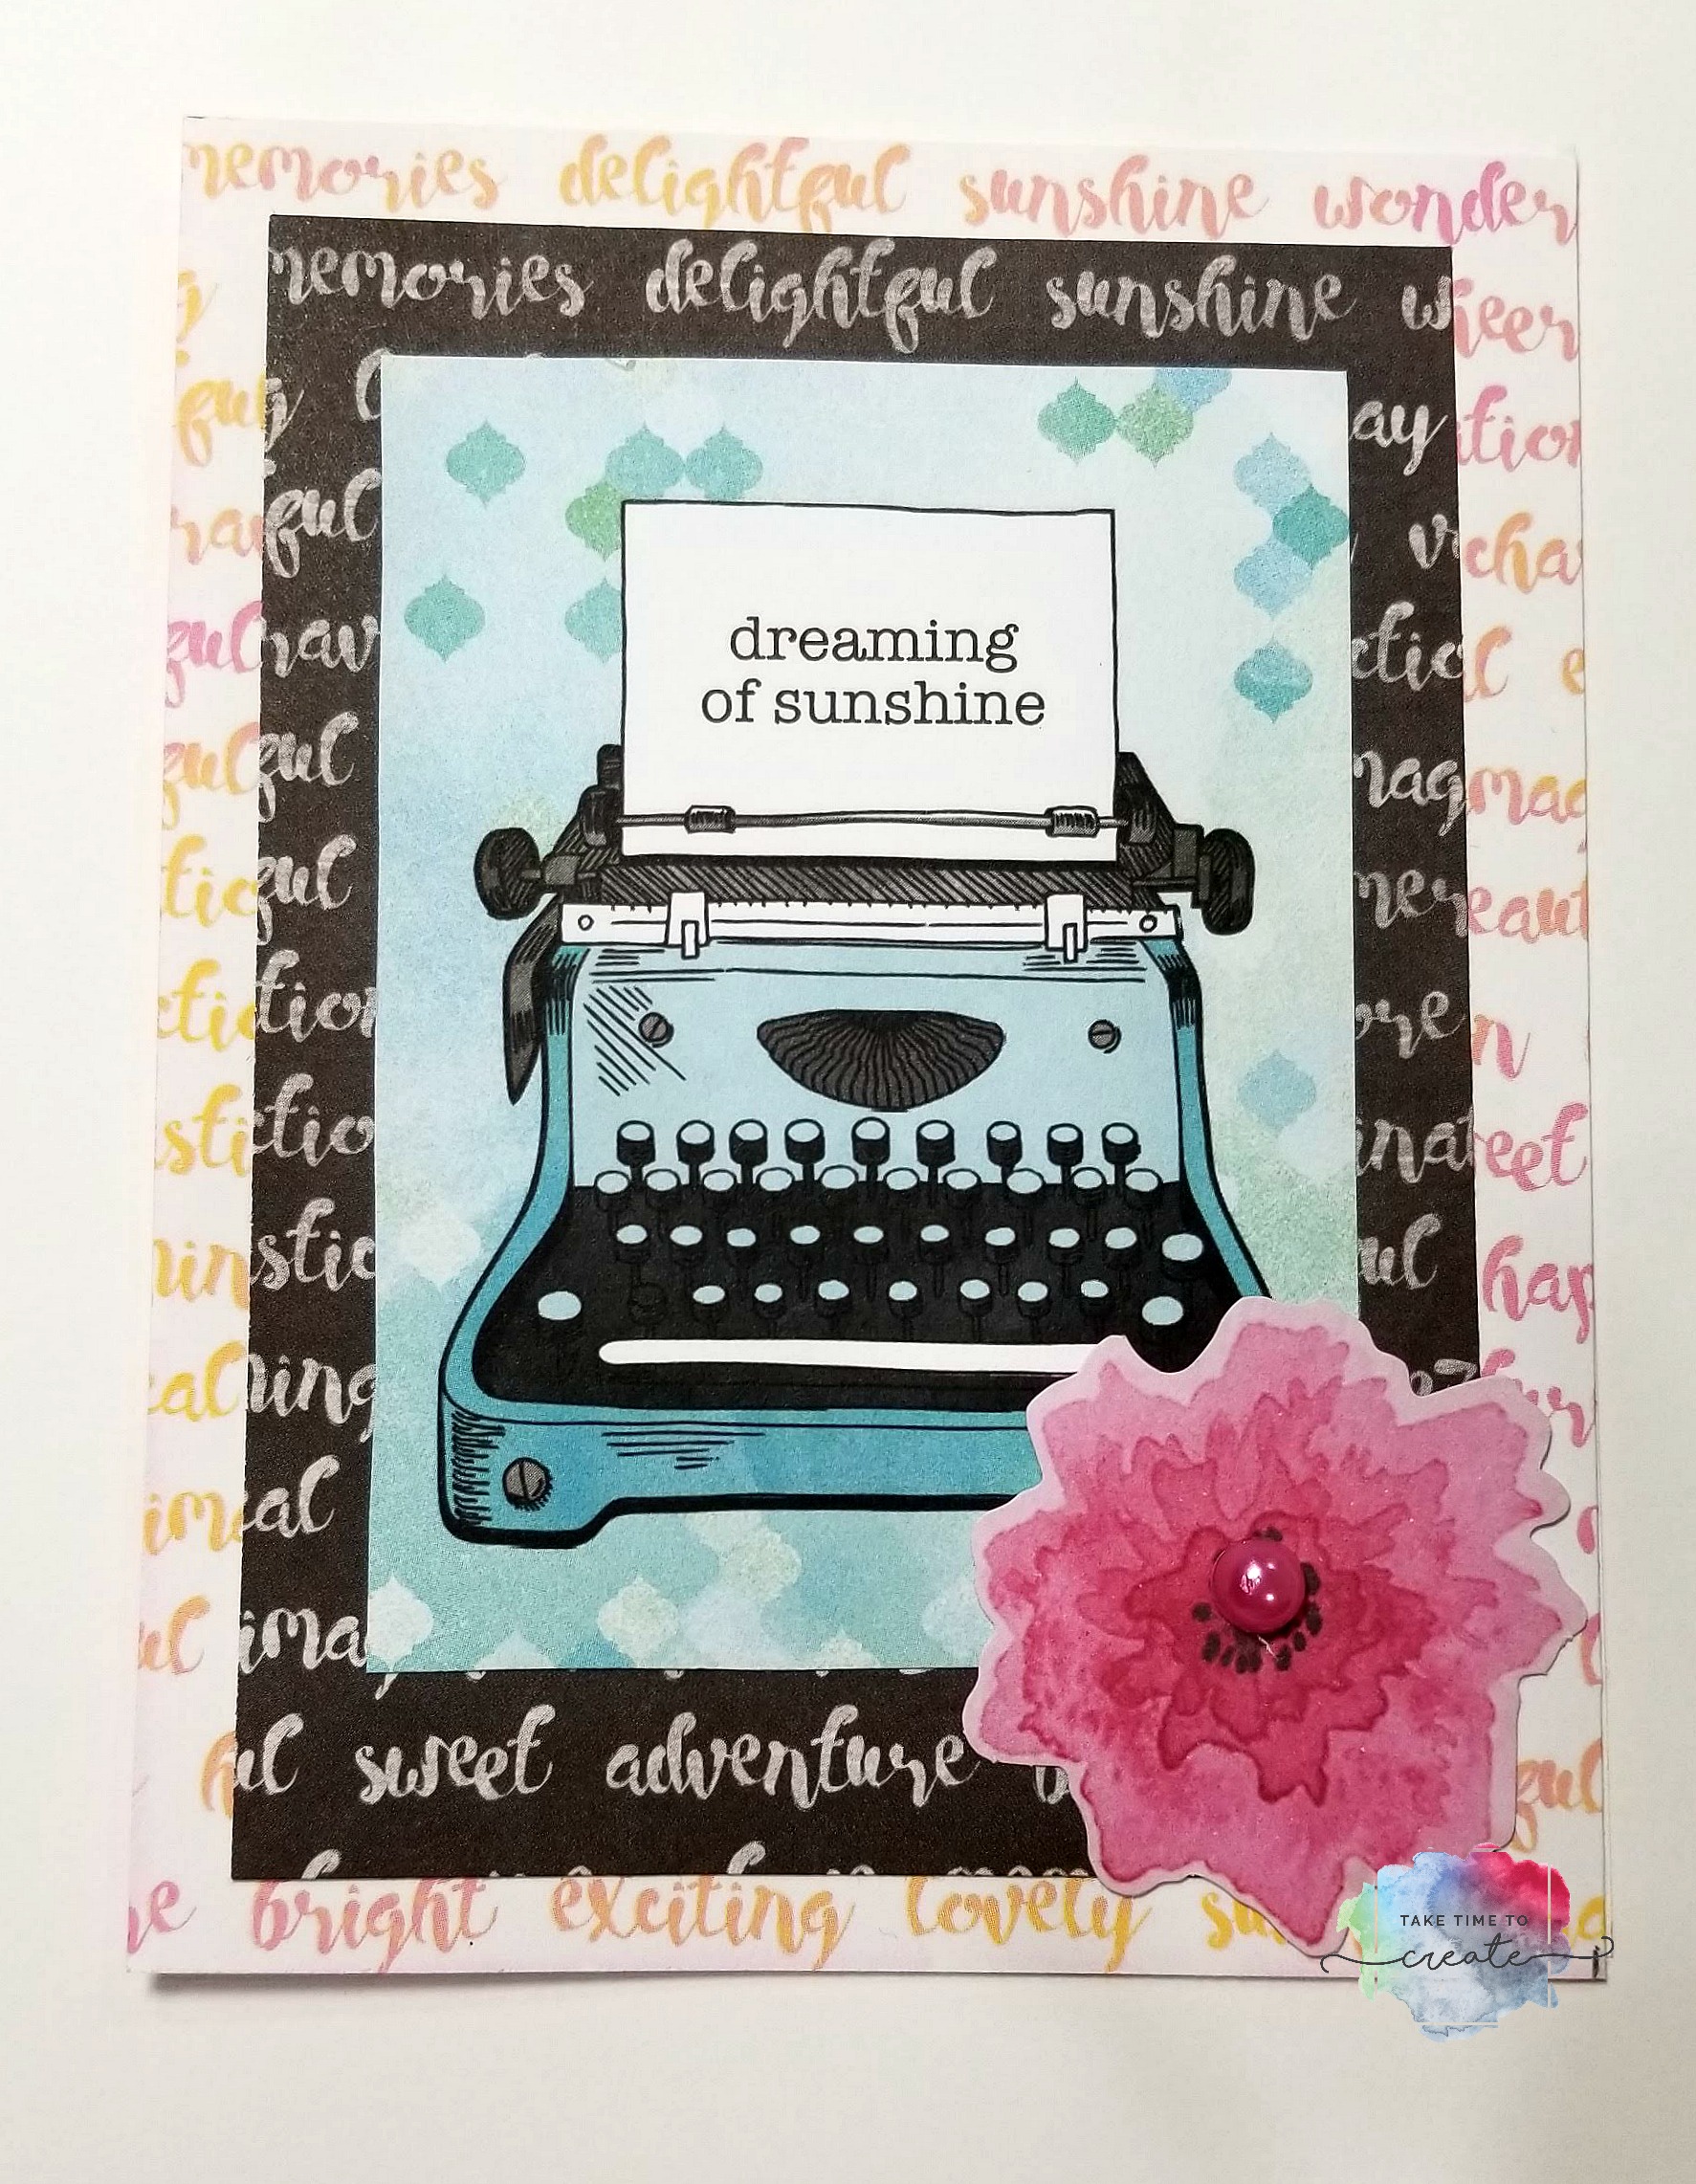
This second card is not featured in the video, it is a bonus for my blog readers.

I took 2 different paper backgrounds and layered them together, then I added the typewriter from the Noteworthy pack. Then I added the flower to the corner. This is a perfect card to send to friends or family for almost any occasion.

summer greeting card

I think both cards turned out really cute and I am excited to send them to my sisters. And I am excited to create even more creations from this adorable scrapbook kit!

Use the code taketimesummer for a discount at Scrapbookcollections.com!

summer greeting card

The post Summer Greeting Cards appeared first on Take Time to Create.


Easy DIY Thank You Cards

Hello Everyone!

Thank you cards are something we all need to have and these easy DIY cards are perfect for almost any occasion. And since I am obsessed with watercolors, these are right up my alley 🙂

These would be great gifts for new homeowners, newly weds, or graduates.


Materials (Affiliate Links):

  • Water Color Postcards: http://amzn.to/2EmGb2S
  • Van Gogh Water Colors: http://amzn.to/2GaSfRs
  • Dylusions Ink: http://amzn.to/2suEniH
  • Washi Tape
  • Thank you stamp

Instructions:

This first card is super easy and looks really cute. All you do is spritz the watercolor card with water and then lightly spray 2 different Dylusions ink sprays.  Move the card to blend the colors in the middle, then add some washi tape at the bottom and stamp Thank You in the middle and you are done! Quick and easy and they look great!

Watercolor thank you cards

This next card is also super fun and easy to make. Which is great because you can make a lot of them ahead of time and have them ready! For this one take a wet paint brush and paint with water in a blob type shape. Then add some watercolors into the blob, you can mix the 2 in the middle and blend them together. Add splashes and a stamped Thank You to the middle and some washi tape on the bottom. Now you have another Thank you card for your stash.

Watercolor thank you cards

This last card takes a little longer, but it is worth it. All you do is watercolor the sky, starting with the lightest color and work your way darker.  Blend carefully, you don’t want to create mud.  Once the sky is dry it is time to paint the mountains. I just used black acrylic paint to make the mountains and then I lightly drew in the trees with the same paint. Now you have a cute sunset card that is perfect for all occasions.

Watercolor thank you cards


Watercolor thank you cards

There you have it, 3 easy watercolor Thank You cards.

The post Easy DIY Thank You Cards appeared first on Take Time To Create.

Christmas Card Using Yupo Paper

Hello Everyone!

I love making handmade cards for the holidays, I think they add the perfect touch and a little something extra special for the recipient. I have a quick tutorial for a Christmas Card using Yupo Paper.

The video might be the easiest way to see the process, but I will do my best to describe the process.

Materials (affilliate links):

  • Yupo Paper: http://amzn.to/2l5MkYt
  • Prismacolor Markers: http://amzn.to/2krq5YX
  • Christmas paper (not the one I used, but it will work): http://amzn.to/2l39qii
  • Snowflake embossing folder (not the same one I used, but it will work): http://amzn.to/2kqPVwj 
  • Christmas tree die cut (not the same one I used, but it will work):  http://amzn.to/2AdU90U
  • Stickles: http://amzn.to/2iT3qVg
  • Rubbing alcohol

Instructions:

Start with Yupo Paper, what is that you ask? It is a wonderful synthetic paper that is perfect for alcohol markers and watercolors.

I am in love with synthetic paper, so be on the the look out for more tutorials using it.

For the blue background scribble blue alcohol markers all over

Christmas Card using Yupo Paper

Then you take a pipet and alcohol and drop it all around. This will blend the colors and create a really wonderful effect. Play around with it and use more or less alcohol and try different colors.

Christmas Card using Yupo Paper

Let this completely dry before using the embossing folder. I let it air dry over night, but you can use a heat gun if you are careful not to melt the paper, lol.

Once the background is dry use the embossing folder to create a snow flake background.

Cut out the trees using a die cut.

Christmas Card using Yupo Paper

To assemble the card layer a coordinating background paper, then add the embossed, blue Yupo Paper, add the trees (I used foam tape for dimension), stamp the sentiment, and then I added stickles to the trees for detail.

That is it, a wonderful, handmade card that is perfect for everyone on your list.

Christmas Card using Yupo Paper

The post Christmas Card Using Yupo Paper appeared first on Take Time To Create.

© 2024 Take Time To Create

Theme by Anders NorenUp ↑

Follow

Get the latest posts delivered to your mailbox:

%d bloggers like this: